By Jock Elliott, KB2GOM
Bob Colegrove inspired this, with his excellent post “Pressing Buttons. Twirling Knobs and Throwing Switches.” If you haven’t read it, go do so now.
And it was our Maximum Leader, Thomas, who some time ago was asked “What’s the best shortwave radio?” His response (if I recall correctly): “The one you enjoy using.” That’s worth taking to heart. It doesn’t matter if you have the highest, techiest, super zoot receiver or SDR with the best lab numbers, if you don’t enjoy using it, how much will you really use it?
Given my age and my radio experience, my belief is that a real radio has a knob or button or switch for just about every function and a real tuning knob that doesn’t snap, crackle or pop as it changes between tuning increments.
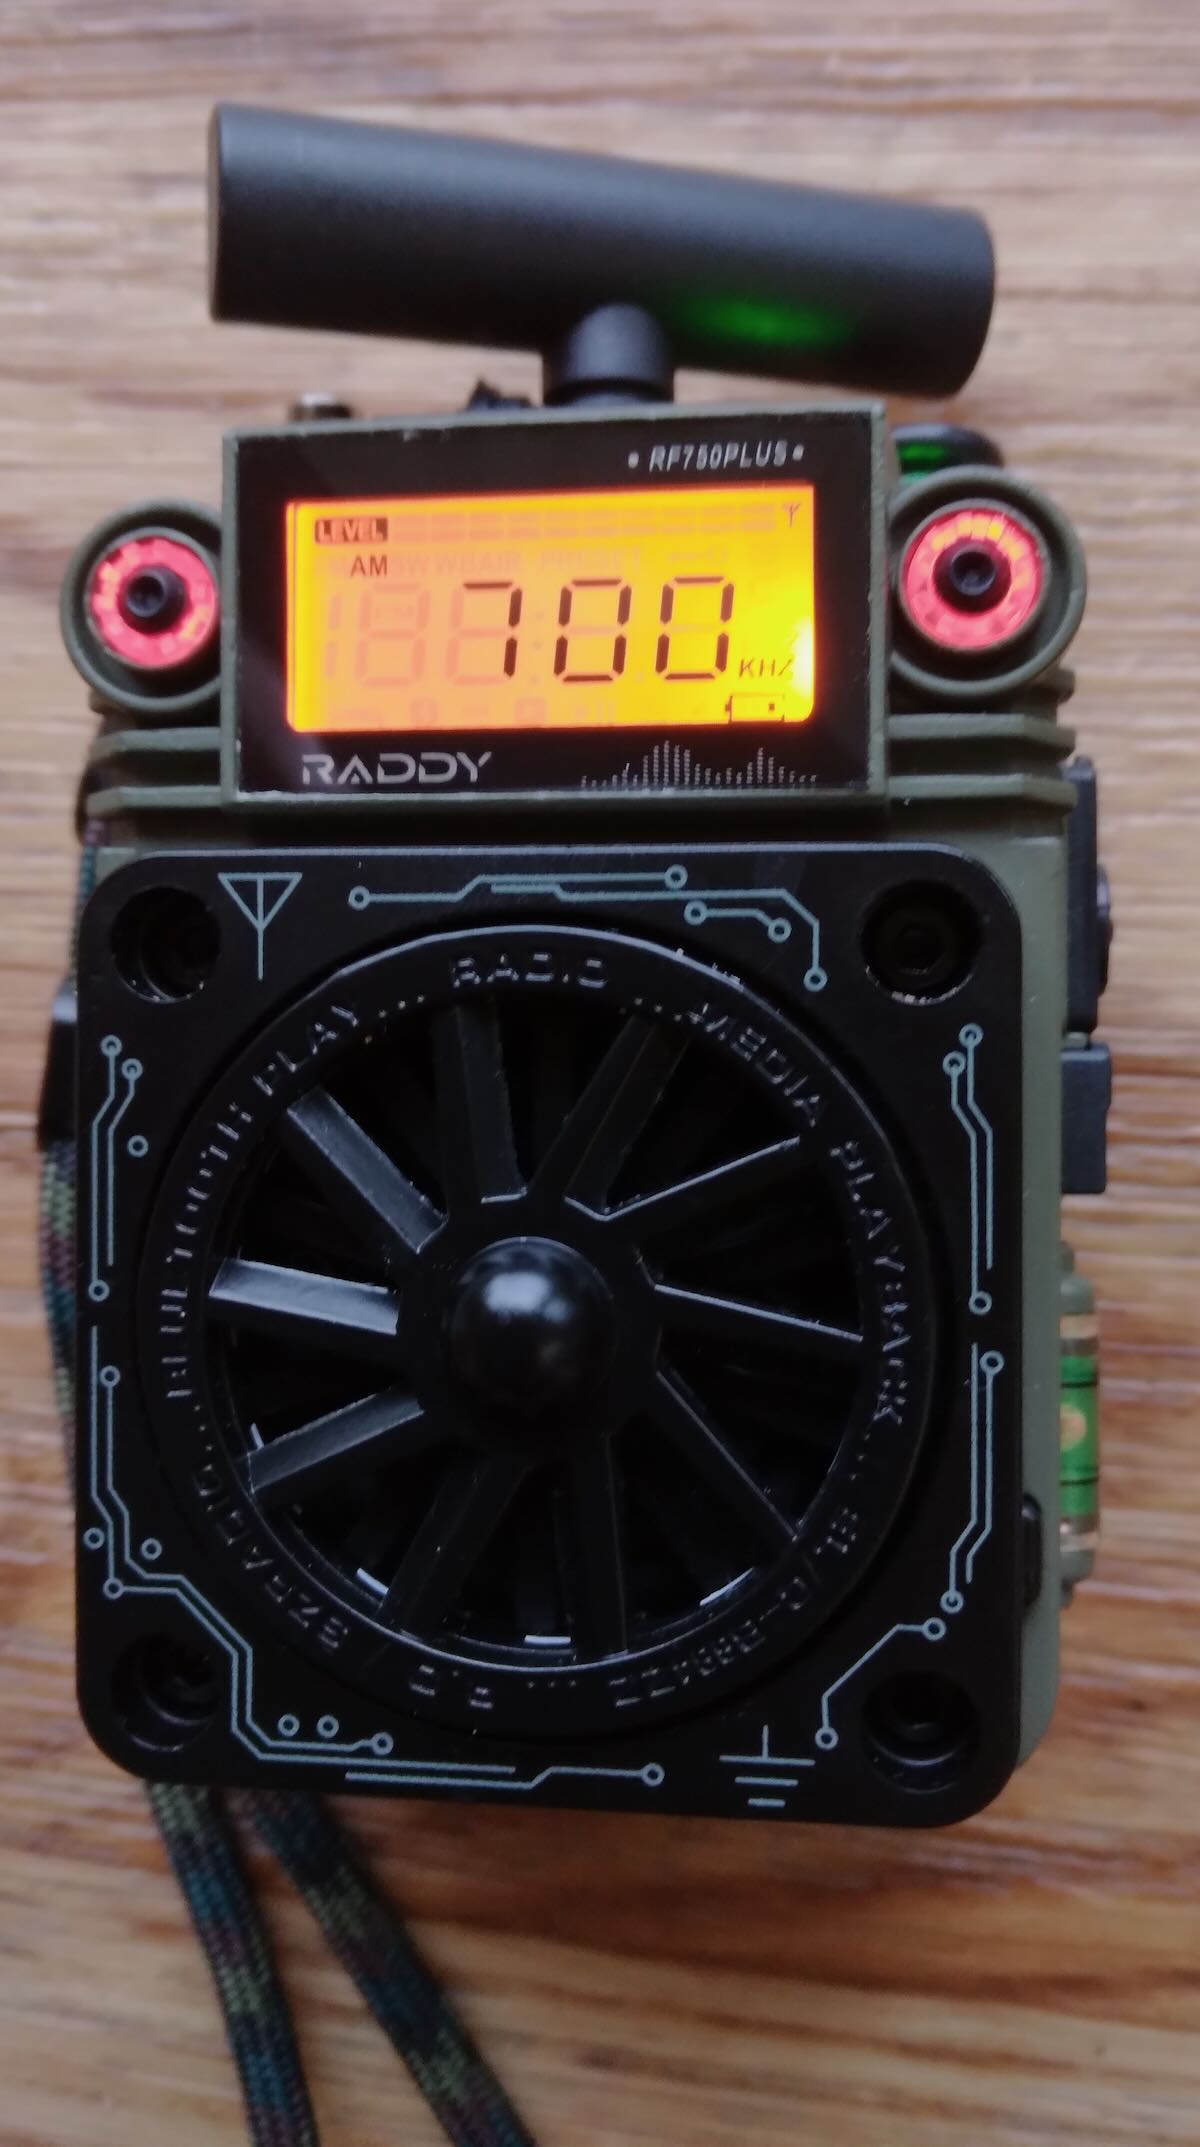
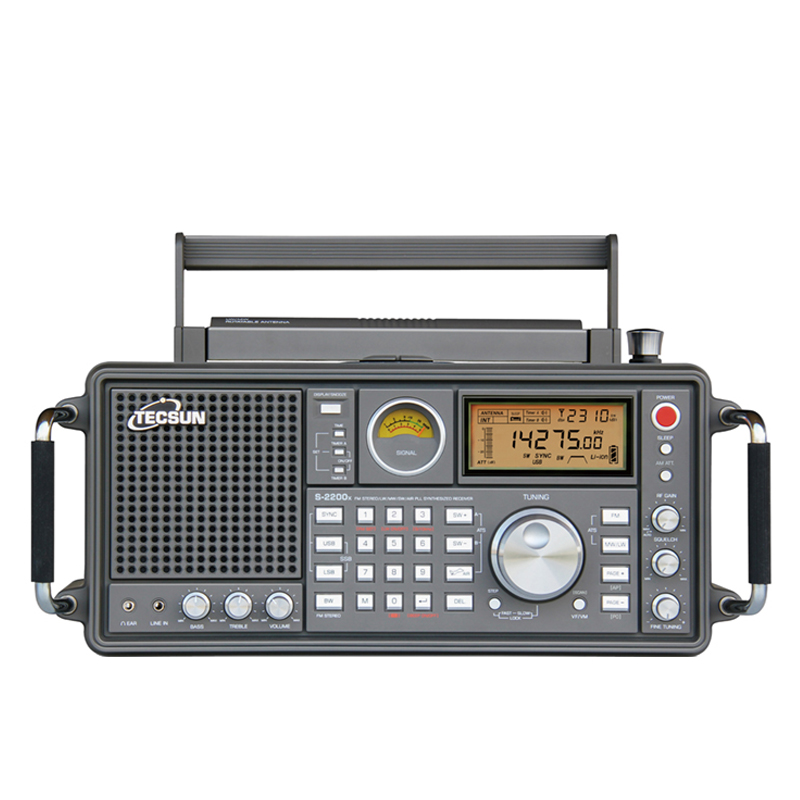
The photos show the Tecsun S-2200X is studded with knobs and buttons, enough to satisfy an old retrocrank, but how would it perform? Dan Robinson had already reviewed it here. I respect his reviews, but I had to see for myself. With some trepidation I ordered the Tecsun S-2200X.
It arrived a couple of days ago. First impression: it’s a large radio – measuring approx. 15 inches wide, 7 inches tall, and 5 inches deep. It can run off 4 D batteries or 2 18650 rechargeable batteries, so technically it is a portable, but you’ll probably want something like a gym bag or backpack to transport it.
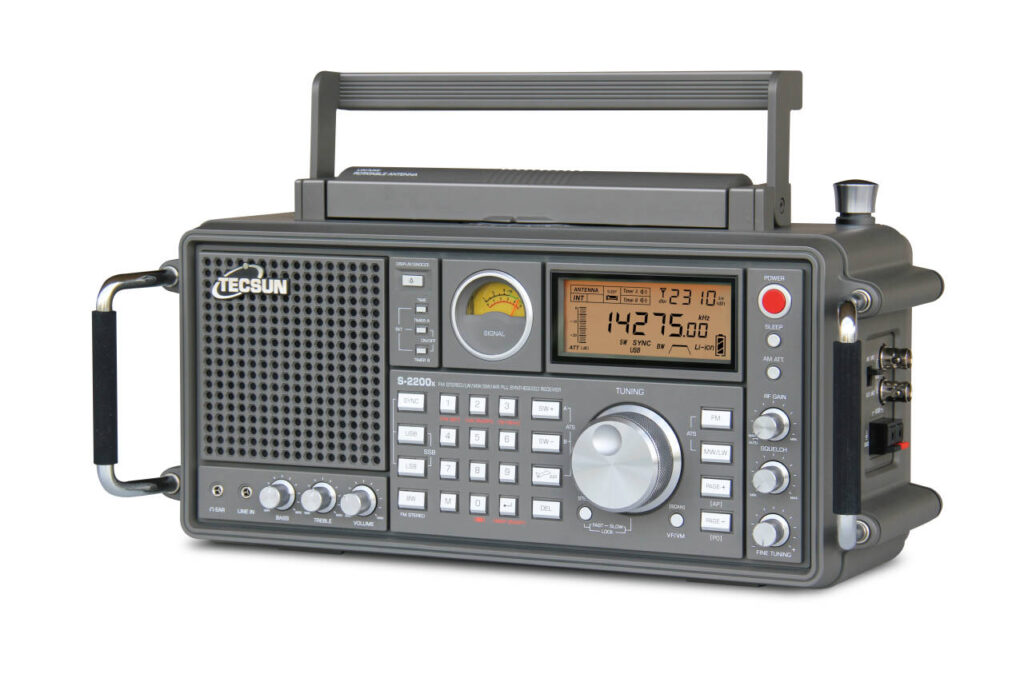
The fit and finish are pleasing, what you would expect from a radio in this price range. The front panel is studded with (if I am counting correctly) 33 buttons for activating various functions, 7 knurled metal knobs, a lighted analog signal strength meter, and a 3.5 inch by 1.5 inch (approx..) lighted liquid crystal display that serves as information central for the S-2200X.
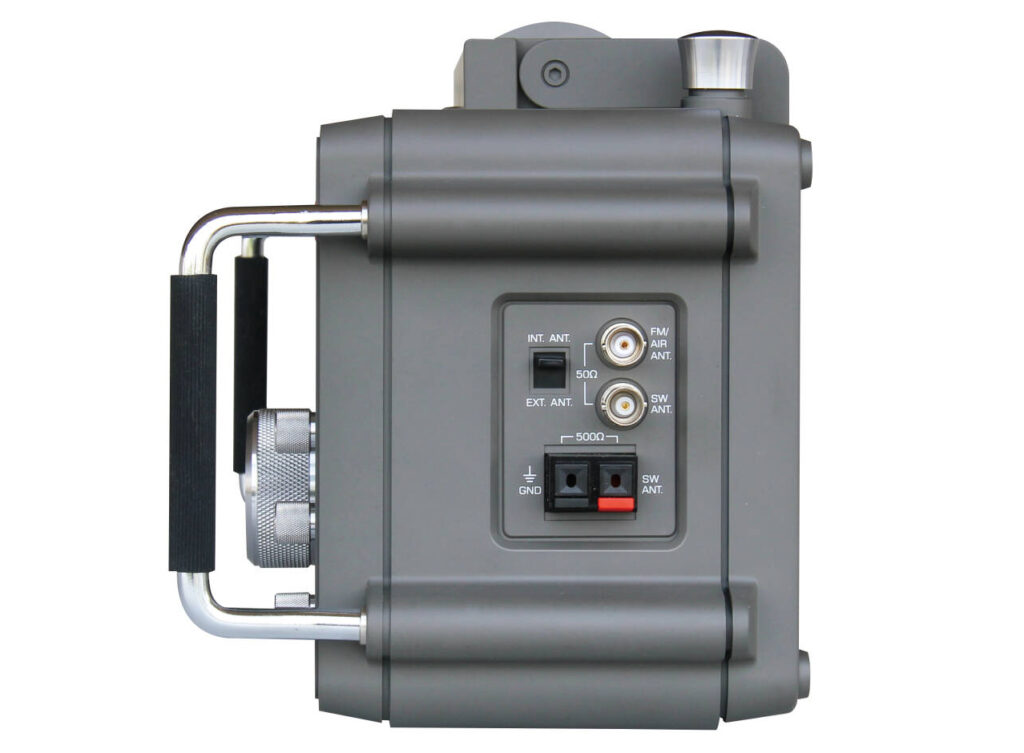
On the right side are two BNC antenna connectors (one for FM and airband, the other for shortwave), a pair of clips for attaching a shortwave wire antenna, and a switch for selecting between internal and external antennas.
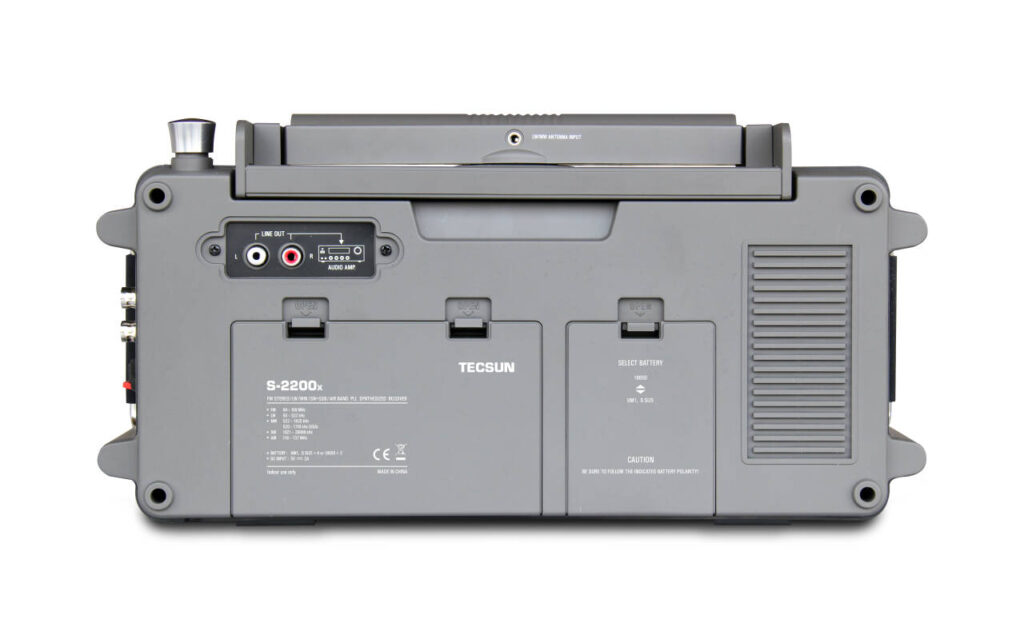
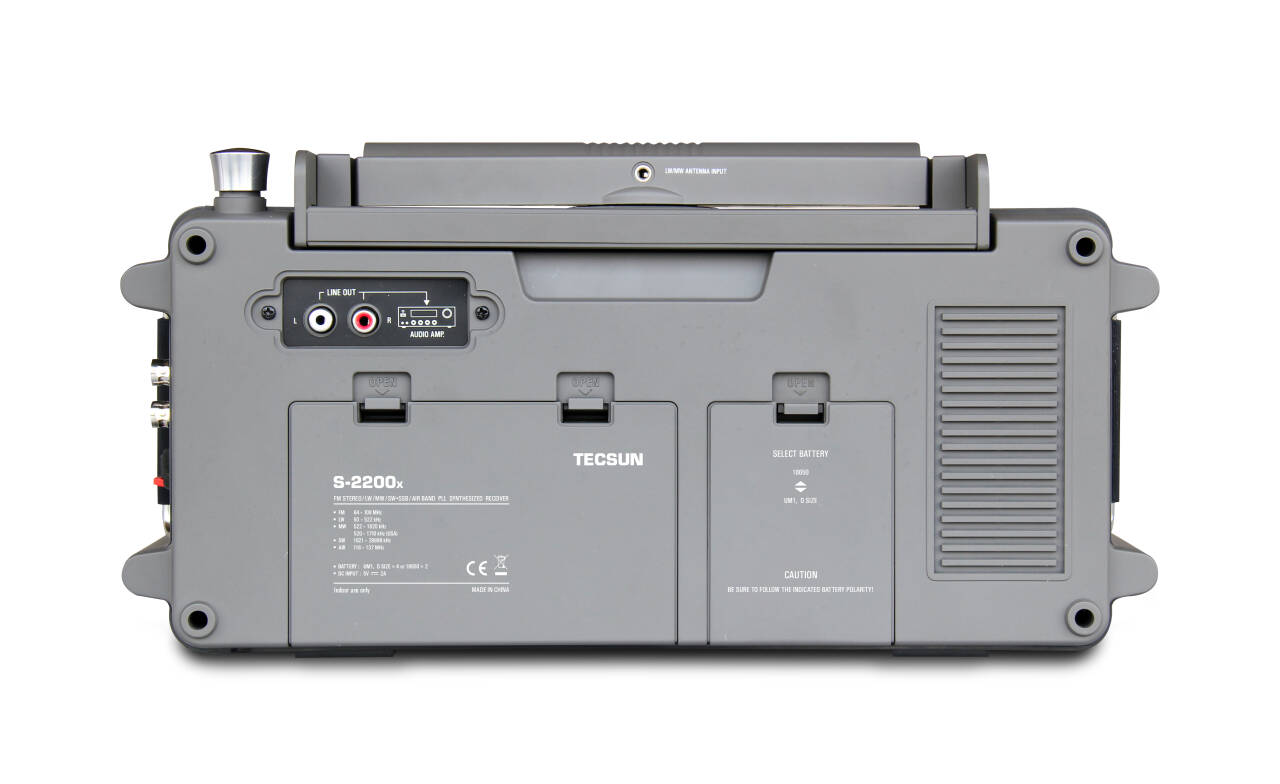
On the back are two hatches for installing batteries and inside one of the hatches, a switch for choosing between powering the receiver with D cells or the 18650 batteries. Also on the back, stereo line-out sockets.
On top, there are a retractable carry handle, a rotatable LW/MW antenna with a connector on the backside for an external LW/MW antenna, and a pull-up telescoping whip antenna for SW, FM, and air band.
On the left side is a port for plugging in the charging cable for the 18650 batteries.
Ease of Use
The S-2200X is straightforward to operate for basic operations (Memory operations will require consulting the well-written manual). On either side of the tuning knob are buttons for selecting FM, MW/LW, SW and Air bands, as well as selecting memory pages. Prolonged pressing of certain band buttons will activate Auto Tuning Storage of frequencies in that band, and these buttons are clearly labeled.
For shortwave, there are two buttons: SW+ and SW-, and, if you are in AM mode, these are used for incrementing between shortwave bands. However, if you are in either upper or lower sideband mode, these buttons will increment between amateur radio HF bands.
Below, and to the right of the tuning knob is a small button for switching between memory mode and frequency mode. A long press of this button will activate scanning of whatever band or memory page is active. To the lower left of the tuning knob is a button for changing tuning steps.
Below the signal strength meter is a 12-button keypad, and to the left of this are buttons for selecting synchronous detection, USB, LSB, and bandwidths. Volume and tone controls are knobs below the speaker grill.
As they used to say in the old sports car magazines: “The controls fall readily to hand.” If your goal is to pop in some batteries and start using the S-2200X right away, I found it easy to do. I particularly enjoyed the smooth tuning – both mechanical and audio – provided by the large, dimpled, tuning knob. On the unit I purchased, the tuning knob, though solidly mounted, wobbles a tiny bit.
Performance
The S-2200X acquits itself well. FM is top notch and the stereo audio is pleasing through headphones, which I routinely use to listen.
The MW performance was also satisfying, and I enjoyed using the rotatable LW/MW antenna to peak signals . . . it works! I tried plugging a Terk AM Advantage loop antenna into the jack on the backside of the rotatable antenna and found no discernable improvement in signal. To be fair, if you want the ultimate in MW DX performance, there are “hotter” MW receivers available, but I was not disappointed. I did not test LW performance.
Airband performance was average. An ATS scan of airband found five active frequencies in my area, and there is the ability to scan stored memories, stopping at each one for about five seconds.
On SW, the S-2200X delivers satisfying performance through its telescoping whip antenna. Using time stations as standards for testing, and switching between the whip and a 45-foot indoor wire loop antenna, the signal strength meter showed signals received on the whip often equaled or were only slightly less strong than those from the loop. Note well: if you conduct this experiment for yourself, there is a noticeable – perhaps one second – delay in the signal strength meter reacting to the change in antennas. If you are a SW program listener, there are a variety of bandwidths and tone controls to fine tune the signal to your liking. I tried using the synchronous detection, and it sharpened the audio but introduced a pulsing quality to the signal that I did not like.
Most of my HF listening concentrates on single-sideband voice signals: the HF ham bands, Coast Guard weather forecasts, aeronautical voice communications, and the like. Here the S-2200X also delivers satisfying performance with impressive sensitivity on the whip antenna, a variety of bandwidths to choose from, and a fine tuning knob for dialing in the signal.
Noise Control
Now here is where the S-2200X got really interesting.
Not long ago, I became aware of a technique used by some of the experienced old hands. They would tune up on an SSB signal, then reduce the RF gain to remove as much noise as possible while preserving an intelligible signal. It made listening much more enjoyable and less fatiguing.
I tried this on my Icom IC-706 MkIIG and found that it was indeed an effective technique, but I wanted a radio I could park bedside so I could listen SSB signals on headphones while the Better Half drifts off to sleep. The Icom requires a separate power supply and an external antenna, and that seemed impractical for a bedside radio. Further, none of my portables have RF gain control.
The S-2200X does have a gain control. Here’s what the manual has to say about it: “When listening to longwave, medium wave, or shortwave, use the RF Gain control knob to adjust the gain for signals of different strengths and obtain the best reception.” I tried it on a SSB signal and it reduced the noise a little, but not nearly as much as the Icom IC-706.
Then I idly tried the squelch knob below the RF gain knob, and – tah dah! – substantial noise reduction, rendering the signal much more pleasant in my ears. The manual says: “Using the squelch control knob may reduce or suppress background noise when listening to LW, MW, SW, and airband.” As they say in the informercials: it really, really works!
Yes, but is the S-2200X really better than the other Tecsun radios that have similar basic circuitry but don’t have RF gain or squelch controls? The short answer is a definitive YES. Doing A/B comparison with my Tecsun PL-880, I found the two radios sounded about the same on a noisy band. But when I activated the RF gain and squelch controls on the S-2200X, it demonstrated a substantial advantage in “listenability” over the PL-880 with no RF gain or squelch controls.
Bottom line: based on my usage so far, I can heartily recommend the Tecsun S-2200X, particularly if you are interested in using it as a communications receiver for monitoring ham and utilities SSB signals.
Check out the Tecsun S-2200x at Anon-Co.

 by Paul Jamet
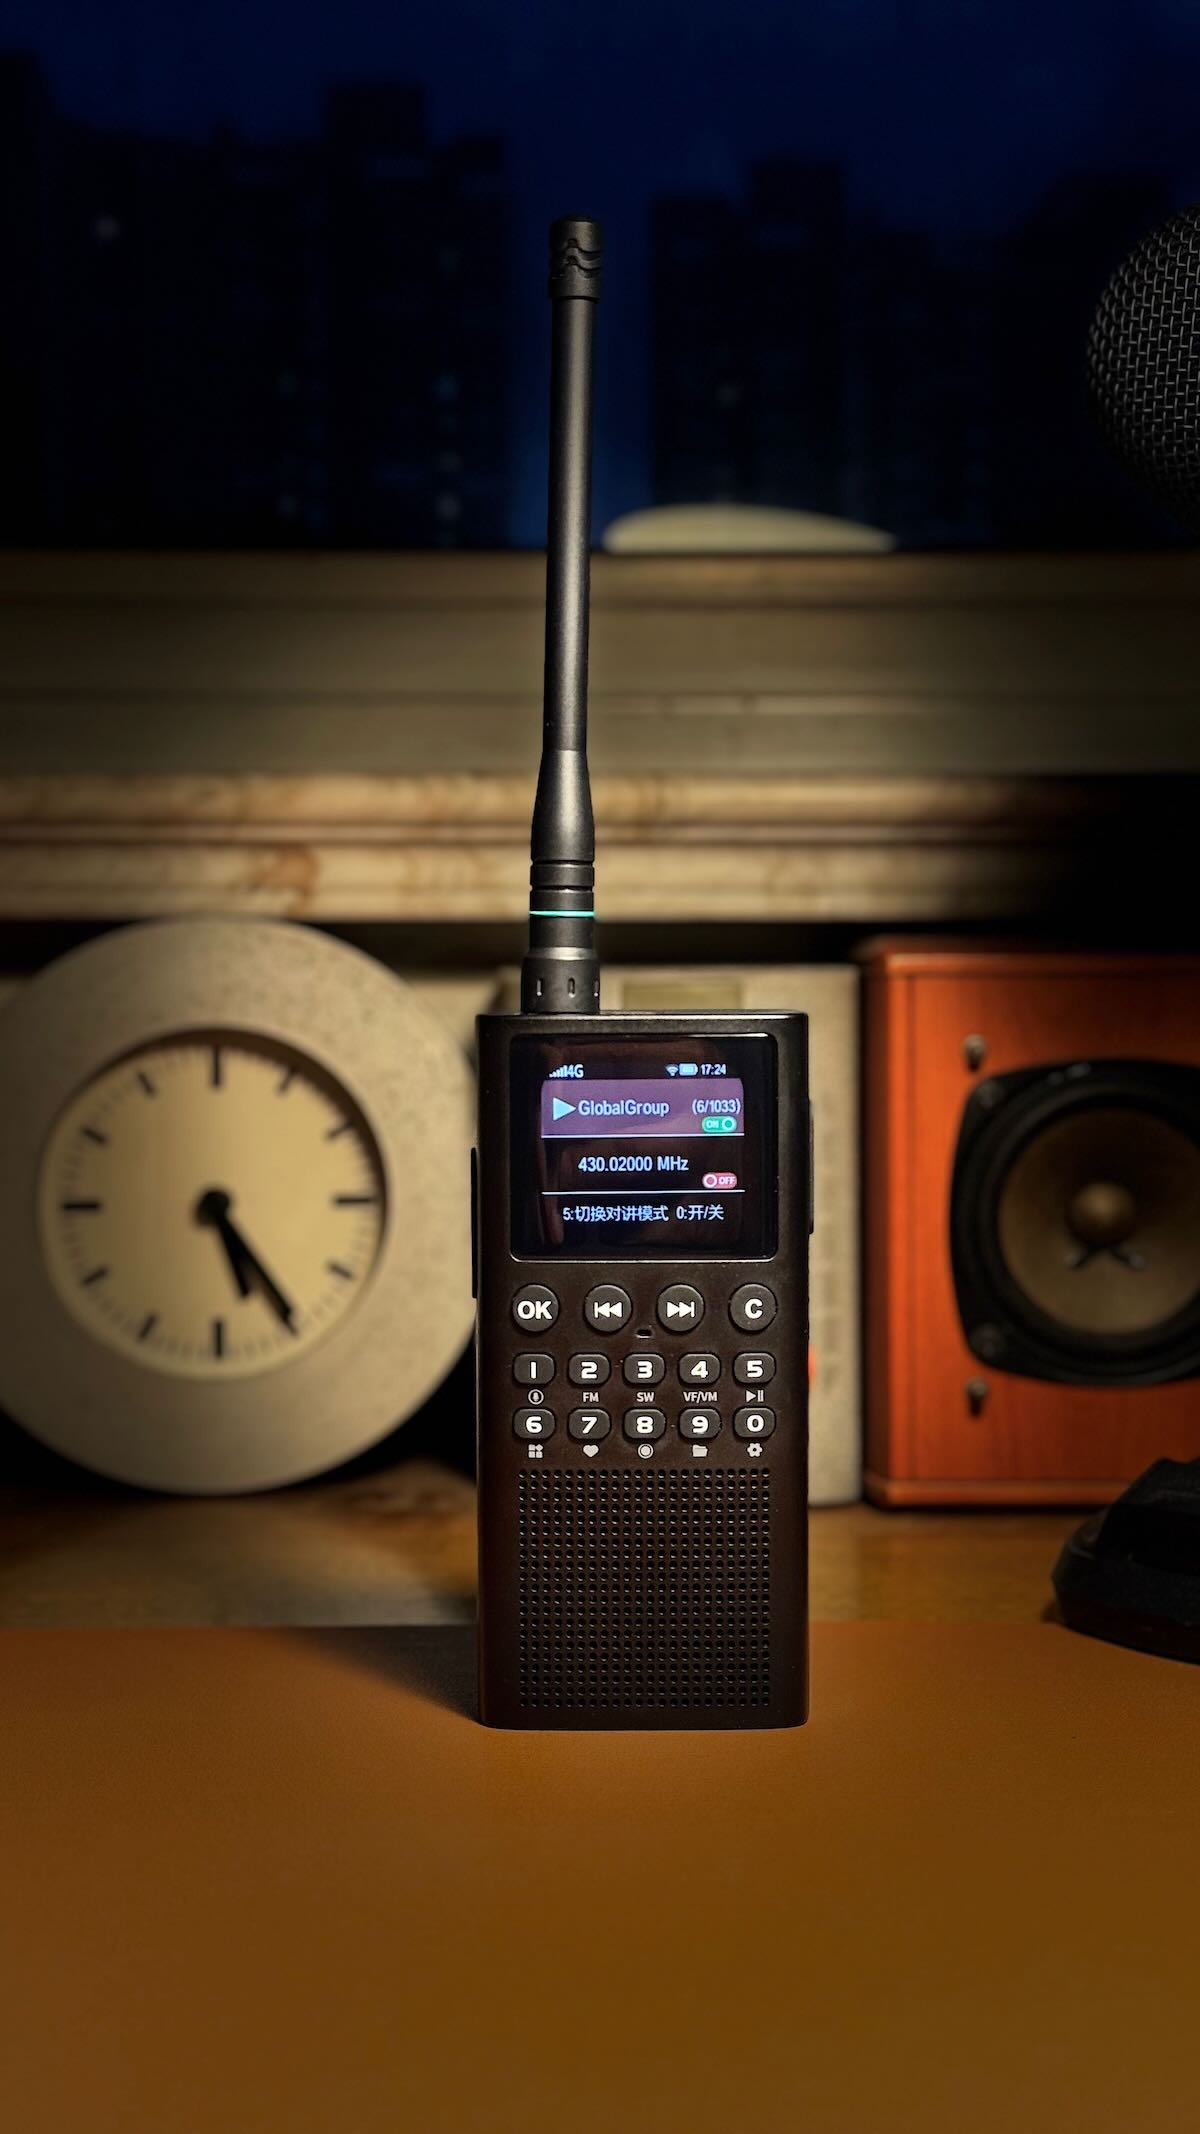
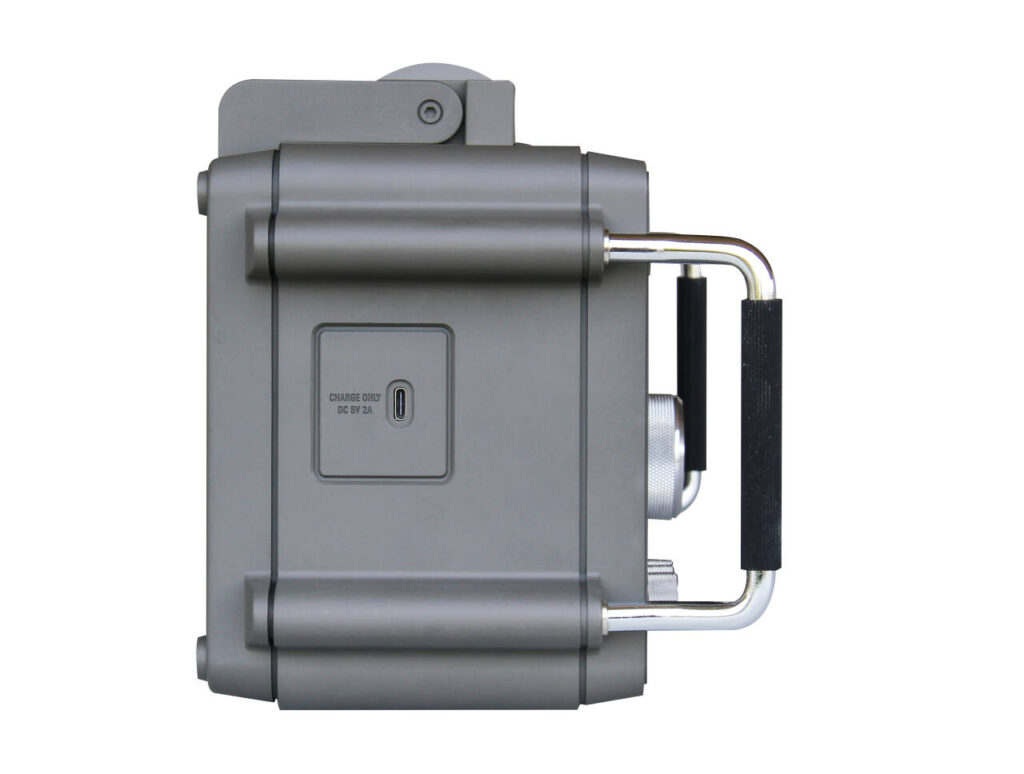
 Among all these available models, I chose — as a radio listener, especially when I’m traveling — the RADTEL RT-880G. My choice is explained mainly by its antenna connectors (SMA-Female and SMA-Male), its large color display, its GPS module, its thousand memory channels, and the possibility of simultaneously monitoring three VHF/UHF frequencies. This device is highly customizable, but its user manual would deserve to be much more detailed and explicit.
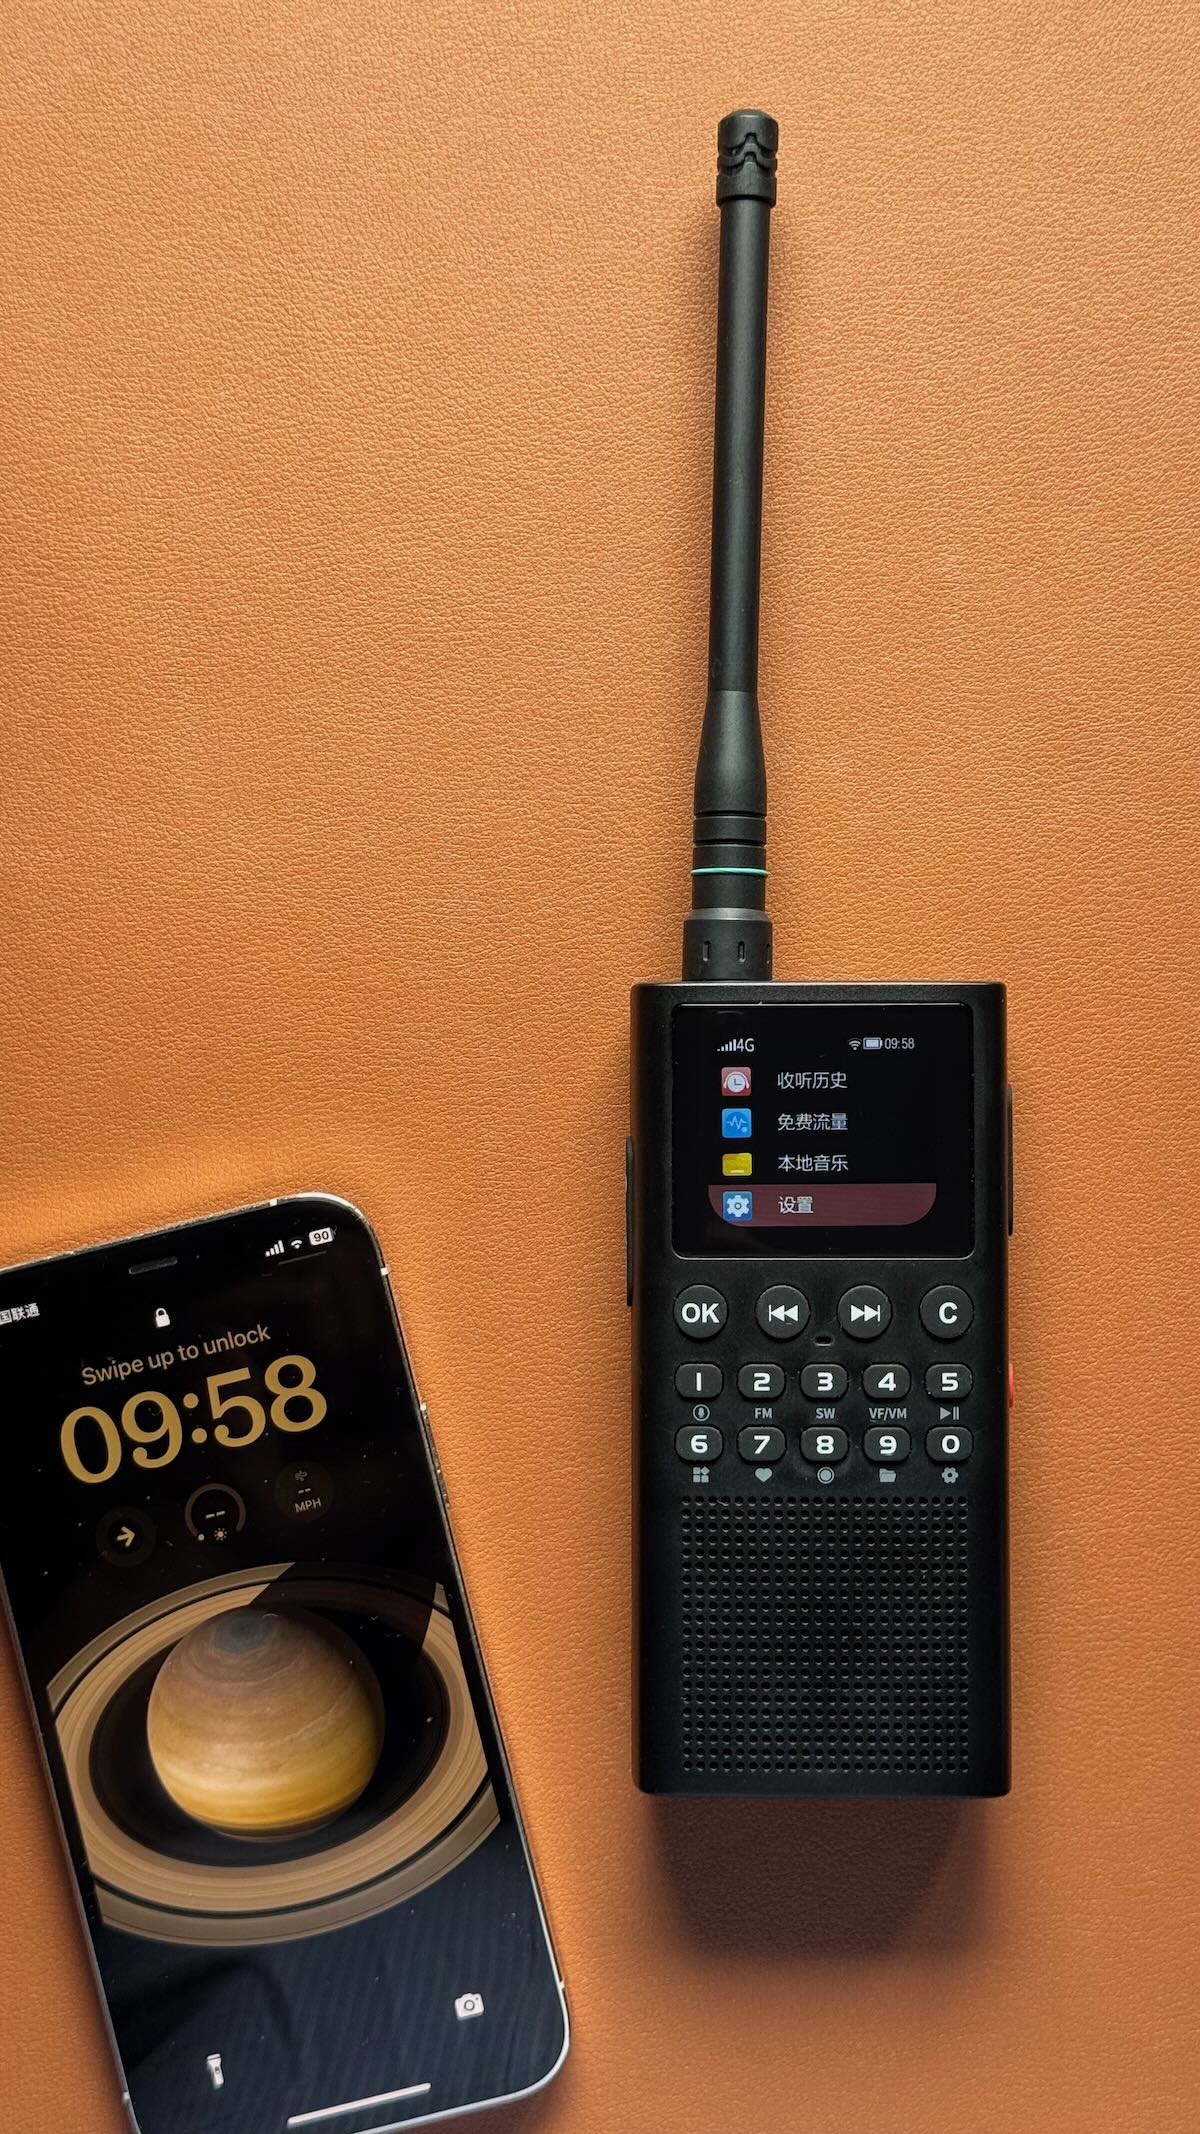
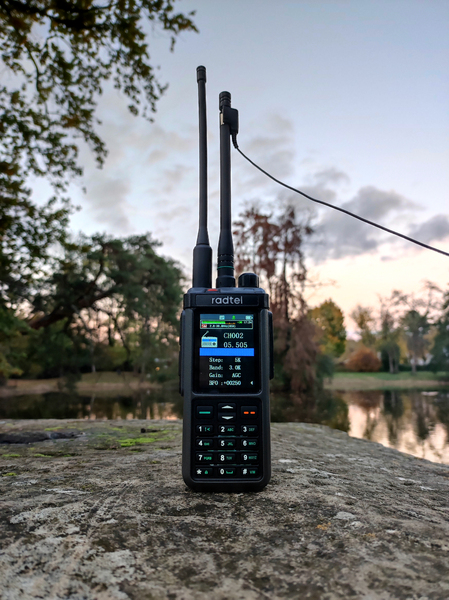
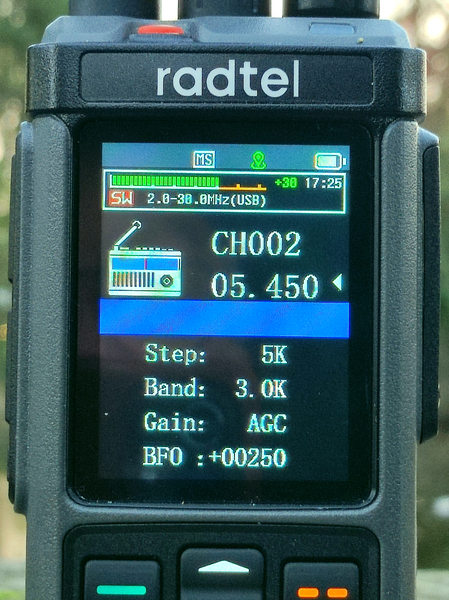 However, for easier transport, I simply chose this small telescopic SMA-Male antenna, 48 cm long (weight: 20 g): to which it is possible to clip a wire antenna, such as the SONY AN-71, which can prove very useful.
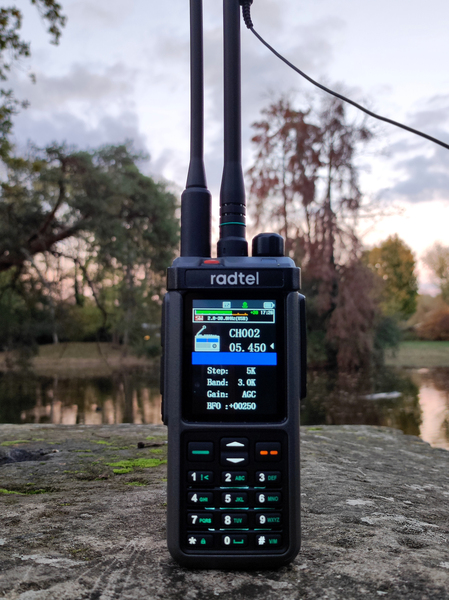 I also used an antenna normally intended for CB, the ABBREE 27 MHz telescopic antenna (130 cm), admittedly heavier (weight: 78 g) and bulkier, but which gives very good results for the HF band.