Tag Archives: Cheap SDRs

Build an SDR station and balcony antenna farm for less than 150 Euros

UPDATE 11 May 2020: We recently learned that the MSI.SDR software defined radio dongle in the following post and tutorial is a clone of the SDRplay RSP1 SDR. We did not realize this when the post was published. Grayhat had done research prior to purchase and believed it not to be a clone, but only using the same chipset as the RSP1 (hence the compatibility with SDRuno). We have confirmed that it is indeed a clone now via SDRplay (clear here to read more via the excellent RTL-SDR blog). What follows isn’t an SDR review. Indeed, Grahat’s post has little to do with the receiver and much, much more to do with building proper antennas! We’ve removed links to the MSI.SDR and would encourage you to invest in the excellent SDRplay RSP1a instead (click here to read our RSP1a review). Thank you for understanding!
Many thanks to SWLing Post contributor, Grayhat, who shares the following guest post. He lives in Italy and has been in lock-down since the beginning of the pandemic. He pitched the idea of building an entire SDR setup from scratch–receiver and antennas–for less than 150 Euros (roughly $163 USD). I thought it was a brilliant idea and I believe he thoroughly enjoyed the challenge of sourcing the components and building a mini antenna farm on his balcony while in quarantine:


From Zero to SDR

by Grayhat

What follows doesn’t pretend to be some kind of “definitive guide” or “last word”, on the contrary, it’s aimed at people who have little or no experience with SDR but want to try putting together a decent station without paying an arm and a leg.

The idea of writing this came to me after reading a number of messages and discussions on various online groups/forums, in a lot of cases, someone bought an SDR (usually the ones coming with a telescopic whip antenna), and after connecting it was expecting it “just to work” or, better said, pretending that the SDR connected to that whip (usually placed on a table right near the computer) could receive ANY POSSIBLE signal, including transmissions coming from the “dark side of the moon.” 🙂 Those folks got scared by the fact that the SDR “didn’t work” and decided to give up; now, this short “guide”  should allow anyone to setup what’s needed to have a working SDR

My self-imposed limitations for this project/experiment were the following:

  1. The whole setup shouldn’t cost more than 150 Euros so that, if after trying the SDR one doesn’t like it, (s)he won’t have paid $$$, otherwise, if (s)he decides to keep it, the resulting station will allow for further expansion/improvement
  2. The available space was considered to be that of an apartment, that is, no large field to put up huge wire antennas or to raise towers, the limit was the one of a balcony (in my home) that is 8 meters (max antenna length) by 3 meters (available height) by 2 meters (balcony width)
  3. The whole setup should be simple and straightforward, no need to solder components or to build special types of antennas
  4. Given the current Covid-19 sheltering, most components should be available online, while for others one may arrange with whatever is locally available (e.g. duct tape)

With the above limitations in mind, I took pencil, paper and rubber eraser (high-tech instruments, indeed) and started writing down a list of the needed stuff, after some writing, wiping and second thought, I came out with the following list, available on Amazon:

Bill of materials

The above includes all the needed stuff to put together a number of wire antennas (random wire, random dipole, loop…) the coax to connect the SDR, a balun to match the coax to the antenna and the accessory parts needed to put up the antenna. The selected SDR isn’t the common “RTL SDR” type, not that they don’t work, but their 8 bit ADC is far from being a good performer, so I decided to pick a different SDR which offers a 12 bits ADC and which also “presents itself” to the system as an SDRplay RSP1.

[Please note: we’ve since learned from SDRplay that the MSI.SDR is indeed a clone of the SDRplay RSP1. Here’s a post from the RTL-SDR blog confirming this. We recommend purchasing the RSP1a as a better alternative.]

Anyhow; all I can say is that after some tests, the MSI.SDR is a quite good unit and offers quite a lot of bangs for the buck, so I believe it may be a good unit for people willing to get their feet wet with SDRs

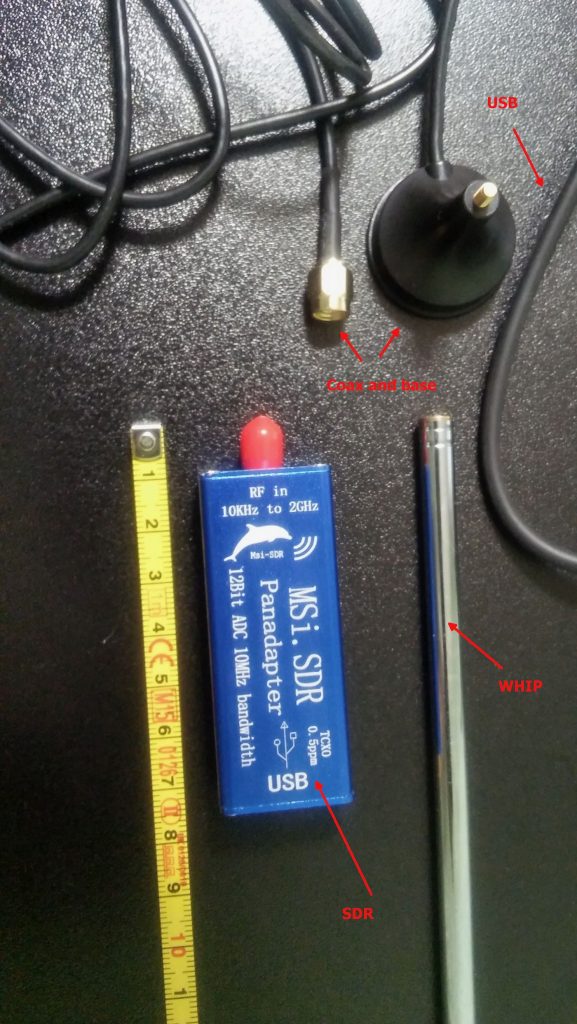
The above being said, here’s a pic of the MSI.SDR unit with the included stuff:

The unit is very small and the box has two connectors, an SMA for the antenna and a micro-USB (like the ones used in cellphones) for the USB cable which is used to both power and control it; the other bits are the telescopic whip antenna (around 98cm fully extended) with a magnetic base and a short run of coax, and the USB cable.

Once I got the SDR I decided to give the included whip antenna a try… well, to be clear, while it will allow you to pick up some strong local FM stations and maybe a bit else, it will only be useful to test if the SDR unit is working (before putting together our antenna), so don’t expect to receive much with that whip, yet… don’t throw it away, it may become useful (more later).

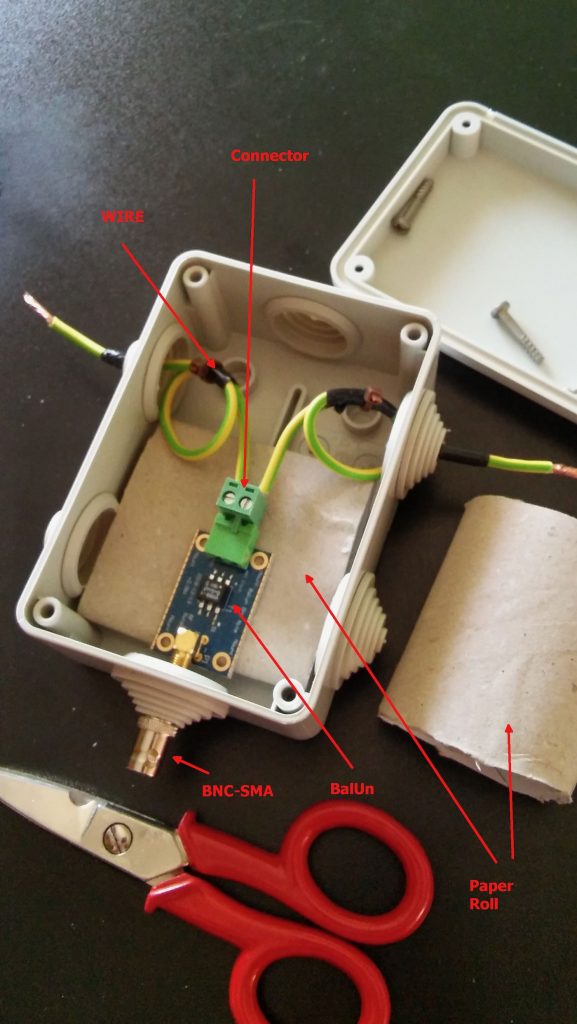
The other important piece is the BalUn. I picked a NooElec “Nine to One” v2, since I’ve used their v1 model and I’ve found it to work well, I decided to pick the newest model which has a better antenna wire connector.  The BalUn, which is in effect a so-called “transformer balun” is really small and the junction box I bought is much bigger, but it isn’t a problem. All in all, the box may host a preamplifier in the future, but for the moment it’s fine for the balun. The following pic shows the balun “installed” inside the junction box:

The scissors are there to give you an idea of the sizes; to put together the whole thing, I started by preparing two pieces of wire (the 2.5mm one),  made a turn with each wire and locked them with a nylon cable tier. Those turns will prevent the wire from sliding out and putting a strain on the balun connector.  I did that since I didn’t have plastic washers at hand, otherwise you may just slide two plastic washers (or proper diameter) over the wires and use two nylon tiers to lock them. In either case, the idea is that the “loops” or the washers won’t slide through the box holes and will support that (little bit of) strain caused by the wire connection.

Next, I stripped some of the insulation from the ends and connected the wires to one of the balun connectors (I chose the one in the pic since I believe it’s the most suitable for this setup), at that point I continued cutting the smaller “ring” of the box insulation caps (the two at top and the bottom one). Then I placed a piece of carboard roll (from a kitchen-paper roll) at the bottom to serve as a support (you can see it below the balun). At that point, I slid the balun SMA connector through the bottom hole and used the SMA to BNC adapter to hold it, done so I slid the two wires (connected to the green wire connector) through the side hole and then inserted the connector into the balun. I then placed the other piece of paper roll above the balun and closed the box with its cap. As a note, to properly close it, start by inserting the screw into the cap holes till end, so that they’ll extrude from the bottom, then place the cap over the box and tighten the screws–you may need to use some force to properly tighten it.

Notice that the wire shown in the pic are SHORT, later on I replaced them with longer wires (outside the box) to be able to better connect the balun box to the antenna, but the remainder of the build is the same.

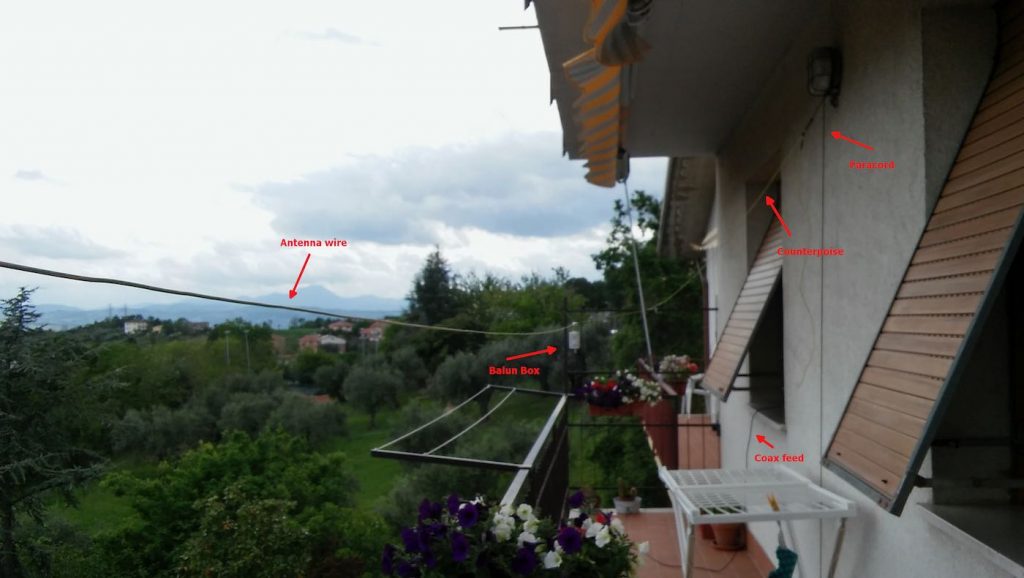
Now that I had my “balun box” ready, I measured the antenna wire and, using the paracord and some nylon tiers, I installed it. I also installed the “counterpoise” wire. For the latter, at first I tried just connecting the remainder of wire to the “gnd” of the balun, leaving the spool laying on the floor, but later on I decided to hang up the counterpoise and the final result was the following:

Click to enlarge

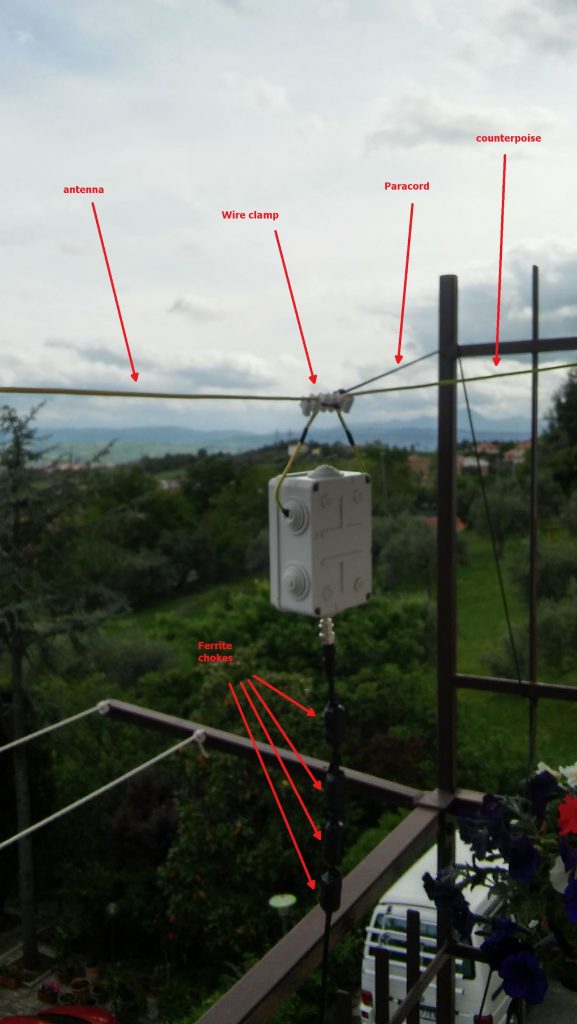
Not a work of art, but then since I was experimenting, I decided not to add PTFE and tape to allow me to quickly rearrange the antenna to run other configurations, yet, the whole setup worked quite well and stood fine to some wind and rain, the picture below shows the balun box with the antenna/counterpoise wires and the coax with the snap-on ferrite chokes.

Click to enlarge

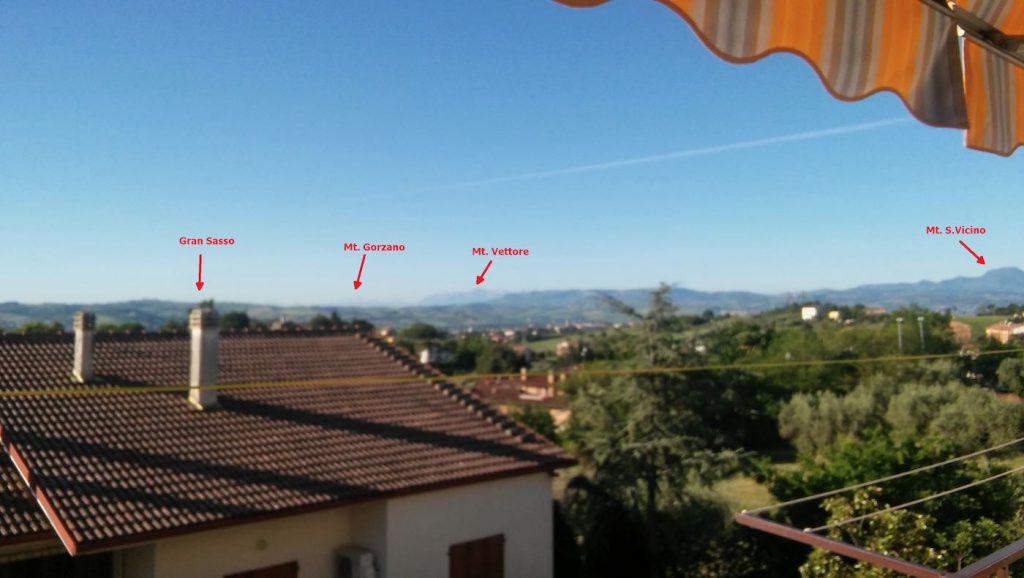
Notice that to avoid putting strain on the balun wires, I used a wire clamp I had in my junkbox–the clamp is then tied to the paracord using a nylon tier and the paracord holds the assembly and keeps the antenna wire in position. The ferrite chokes aren’t properly seated, and I’m planning to remove and re-place them, but for the moment they’re okay. The balcony faces to south/south-west so the antenna has a free horizon of about 270 degrees ranging from the Adriatic coast to the Appennines (Mt. S.Vicino can be seen behind the paracord)–not bad. Here’s another pic showing the horizon to West, just to give you an idea:

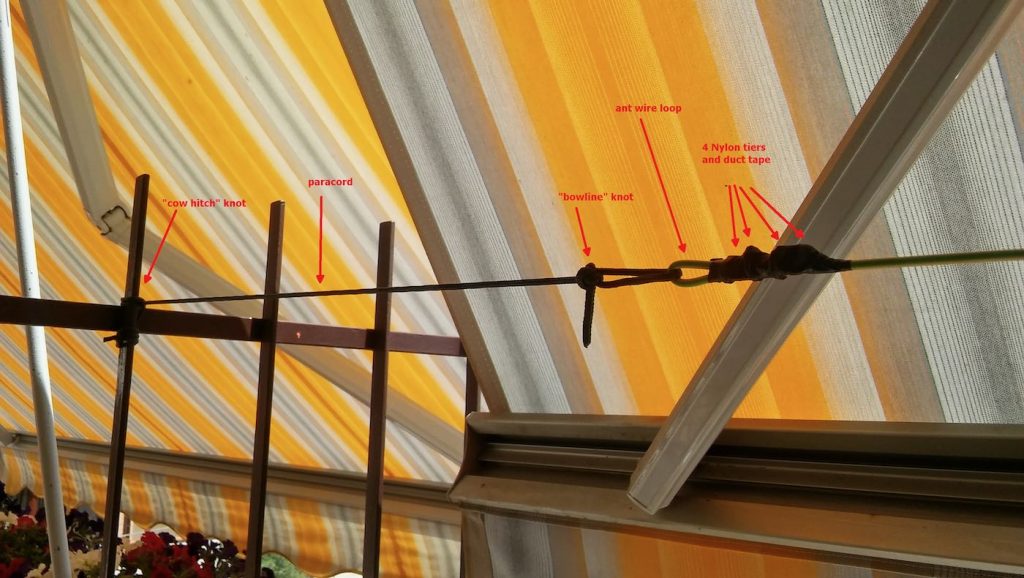
Getting back to the antenna installation, the other end of the antenna wire is tied to the opposite side of the balcony as shown below (let aside the tent/awning, I raise them when using the SDR, also, the bowline knot isn’t correct, I’ll need to tie that again):

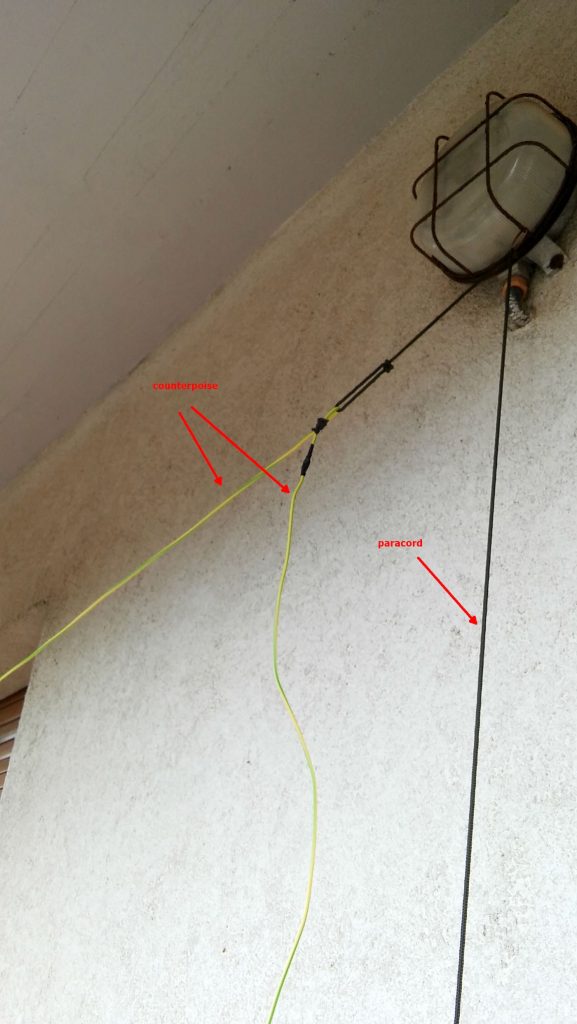
The counterpoise instead is supported by a lamp I’ve on the terrace, here’s it’s setup:

The “paracord” goes down to a plastic bottle filled with a water/chlorine mixture which serves to keep it in place. The remainder of the wire is just hanging down for about 1.5 meters (the counterpoise is shorter than the antenna wire, it’s about 2/3 of its length).

Ok, time to put the antenna and SDR to test, so I brought the coax inside home, connected the other SMA to BNC adapter to the SDR and connected the coax going to the antenna. Note that 15 meters of coax is enough for me, but if one wants a length of up to 25 mt, it won’t be a problem.

I already installed the SDR software, in my case since the unit identifies itself as an “SDR1” I downloaded the SDRPlay “SDRuno” software https://sdrplay.com/windl2.php and since I was at it I also downloaded the PDF manual https://www.sdrplay.com/downloads/ and the “CookBook” http://www.nn4f.com/SDRuno-cookbook.pdf and I heartly recommend reading and digesting them before starting the whole thing (while you wait for all the stuff to be delivered). An important note is that you MUST install the SDRuno software BEFORE connecting the SDR since that way, the SDRuno setup will install the proper drivers and you won’t have issues.

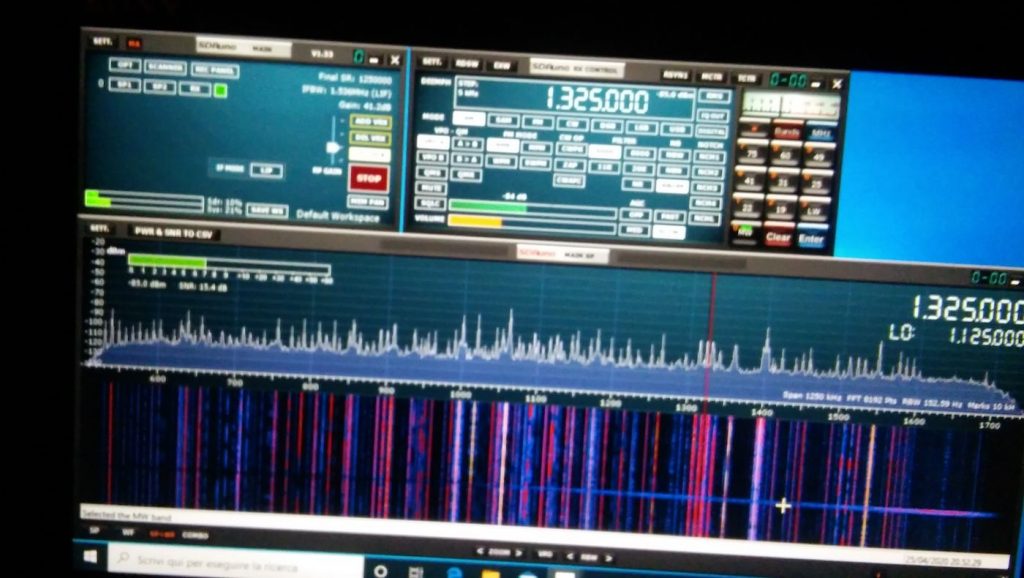
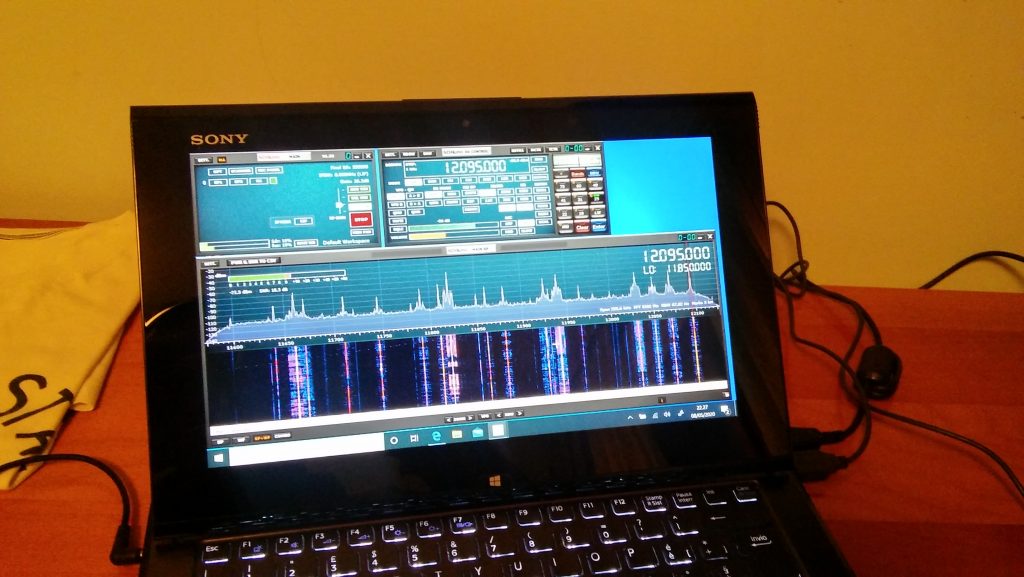
Anyhow, I connected the coax to the SDR and then it was time to fire up the whole thing and give it a spin; so I powered up the laptop (technically, a “transformable” laptop/tablet), started SDRuno, opened the “RX control” and “Main Spectrum” windows and then clicked the “play” button, clicked the “broadcast” band, and the “MW” one and got this:

Not exceptional maybe, but not bad, either; in particular if one considers that it’s from a quite short piece of wire which isn’t exactly placed in an ideal position.

Deutsche Welle

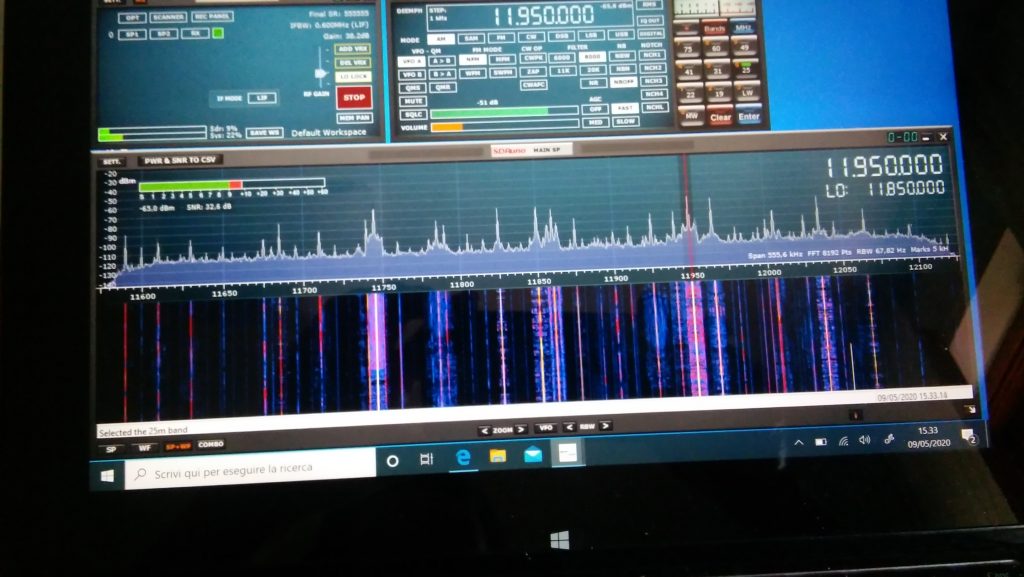
So I went on and explored the bands a bit. On ham bands the SDR picked up signals from the whole mediterranean basin (Cyprus, Lebanon, Spain and then some) and from north too (Russia, Germany, Denmark); then depending on time, I was able to clearly receive broadcasts from China, South America, Africa and more ham QSOs from a lot of places.

BBC Ascension Island 5/9+ and just a bit of QSB

I must admit I didn’ record the callsigns or stations identifiers (“guilty” your honor–!) but I was more focused on testing the SDR and antenna than running a “DX session” at any rate.  On the BCB bands I picked up WWV, BBC,  VoA, China Radio International, Radio Free Asia, Radio Romania and a bunch of others from Middle East, Asia, Africa and South America. While on the ham bands, I was able to pick up some quite interesting QSOs and then… well, I went hunting for higher frequencies signals!

I got Police, Ambulances, Air control…so even if that “piece of wire” isn’t optimized for VHF/UHF it seems to be working decently there too. By the way, when changing bands you may (and probably will) need to adjust the gain control, but that will be almost the only thing needed to pull in signals

At the end of the day, I can say that I’m quite pleased with the performance offered by this simple and cheap setup. For less than 150 euros you have everything you need, not just the SDR.

Sure, the setup may be improved, but then again you’ll have all of the basic parts, so you won’t need too much. For example, if you live in a really noisy environment, it would be a good idea to use a loop antenna. You would only need a “cross shaped” support (PVC pipes or wood will do). You could quickly put together the SRL (Small Receiving Loop) designed by Matt Roberts (KK5JY) http://www.kk5jy.net/rx-loop/ the balun will be the SAME (yes, no need to wind whatsoever!) so building it will just be a matter of assembling a cross shaped support for the wire (which we already have because it’s the same used for the wire antenna) and you’ll have it. While I already tried the SRL, I didn’t build one to test with this SDR, but I’ll probably do that as soon as SWMBO will start complaining about those “wires on the balcony.”

Also, at the beginning I wrote “more later” when writing about the telescopic whip included with the SDR. Here’s the idea–it requires soldering, so if you don’t want that, skip this: remove the adhesive sheet on the bottom of the antenna base to expose the bottom cap and then remove (extract) the bottom cap. You’ll see a magnetic ring and a “bell shaped” piece of metal (the “ground” for the whip). In the middle of the “bell” there will be the antenna connector which is soldered to the coax wire with a nut holding the connector (and the “bell”) in place. De-solder the coax, unscrew the antenna connector and extract it, at that point you’ll have the telescopic whip and its connector, now you may use them to build the active “whip” antenna described here:

http://www.techlib.com/electronics/antennas.html#Improved%20Active%20Antenna

Notice that it is NOT the “usual” active whip–the circuitry and idea behind it is totally different–yet it works fine and will serve you from VLF (not kidding) up to around 100MHz. It might be a good companion for the SDR. It won’t be as quiet as the loop, yet it may be a valid “all rounder.”

To conclude, I believe that the setup described above is something anyone can afford. You don’t need to be an engineer or to have special knowledge or abilities–it’s just a matter of putting together some bits and pieces.

Obviously, this setup doesn’t require a large space and offers good performance across the bands. Plus it’s so easy to improve since the 12bit SDR is a good starting point

All the best everyone and STAY HOME, STAY SAFE !


Thank you so much, Grayhat!

I love the fact that you invested (however modestly) in a proper antenna setup to better serve you rather than relying on the basic whip antenna that comes with the SDR. You’re right: too often, we invest a receiver, yet invest no money or time into building an appropriate antenna.  The antenna is the most important component in a proper radio setup and those included telescoping whip antennas simply don’t perform well on the HF bands.

Based on our correspondence, I know you had fun piecing together this little system using a simple bill of materials and items you had on hand during the Covid-19 quarantine. Thank you for sharing it here with your SWLing Post community! 

Spread the radio love

SDR Primer Part 2: Exploring the world of SDRs for $200 or less

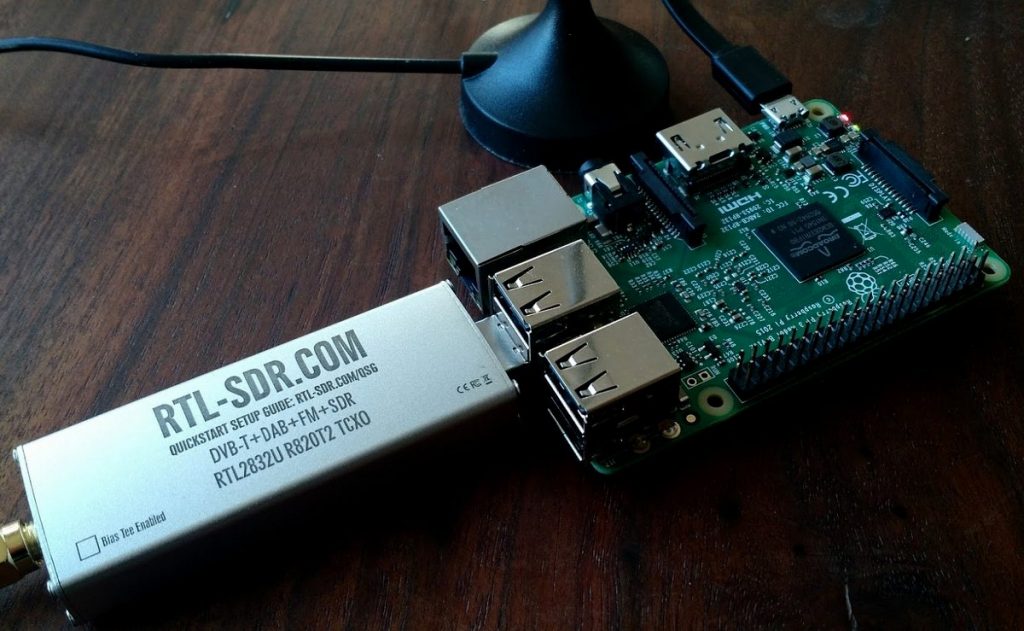
The $22 RTL-SDR paired with a Raspberry Pi and employed as an ADS-B receiver/feeder.

The following article originally appeared in the July 2018 issue of The Spectrum Monitor magazine:


Welcome back to the world of SDRs

Last month we covered Part One of our three-part primer on software-defined radios (SDRs). While last month’s Part One focused on the nomenclature and components of a functioning SDR system, Part Two will take a look at some affordable SDR station options that will propel you into the world of SDRs for less than $200 US. We’ll cover Part Three in November, and we’ll dive a little deeper into the rabbit hole and cover higher-end SDRs and ham radio transceivers with embedded SDRs.

SDRs are affordable

Photo by Kody Gautier

If there’s one thing I’d like you to take away from this part of our primer, it’s that SDRs are truly affordable. For less than the price of a typical full-featured shortwave portable, you can own an SDR that covers almost all of the listening spectrum, and that does so with excellent performance characteristics.

We’re lucky to live in a time of phenomenal radio innovation. When I first jumped into the world of SDRs, the least expensive SDR that covered any of the bands below 20 MHz was about $500. That was only a few years ago, in 2010 or so.

Yet in the past three years, affordable SDRs have become the dominant radio product on the market.  And these modestly-priced products have made the barrier of entry into the SDR world crumble overnight.

Today, even a $100 SDR has more features, more frequency range, and more functionality than a $1000 SDR from just a decade ago.  Times have changed dramatically; indeed, the pace of innovation in this craft is simply amazing.

Before we begin looking at some choice sub-$200 SDRs, I’d just like to direct your attention to the first part of our SDR Primer (click here to read). Specifically, I’d like you to note one element I discussed in that article:  the vital importance identifying your goals as an SDR owner. In other words, how do you plan to use your SDR? If you’re only seeking an SDR to listen to local ham radio repeaters, track cubesat satellites, or gather ADS-B information from aircraft, a $25 SDR will more than suffice. If you wish to use the SDR as a transceiver panadapter, or you wish to chase weak signal DX on the HF bands, then I’d suggest you invest a bit more.

I’d also like to remind you, as I noted in the previous article, that this primer will be limited in the SDRs I highlight. The reason for this is simple:  there now exists a vast ocean of SDRs on the market (just search eBay for “SDR” and you’ll quickly see what I mean) so all models simply can’t be included in this introductory foray. I’ll be focusing here on several SDRs that cover the HF spectrum and above. I’ll also focus on SDRs with which I have personal experience, and which I consider to be “enthusiast” grade among a healthy community of users. Of course, this part of the primer will only include HF-capable receivers that cost a total of $200 or less.

Let’s take a look at what’s on the market in order of price, starting with the most affordable.

$10-$25: The RTL-SDR dongle

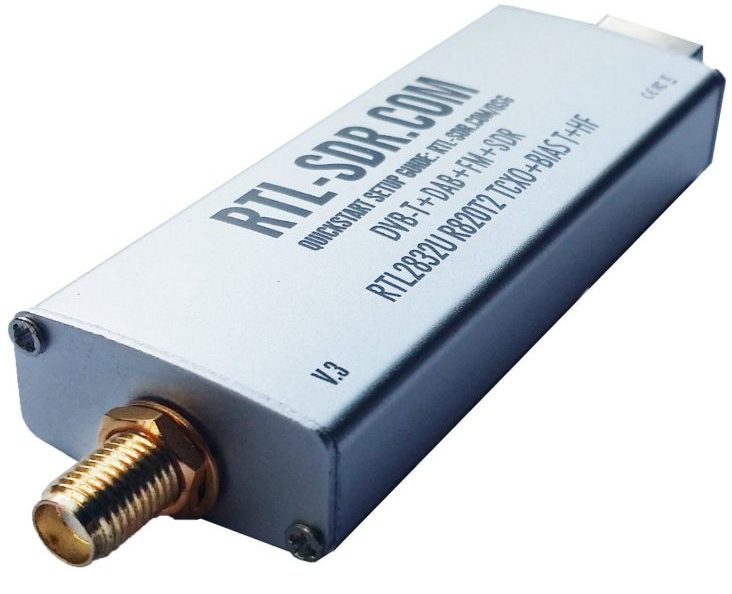
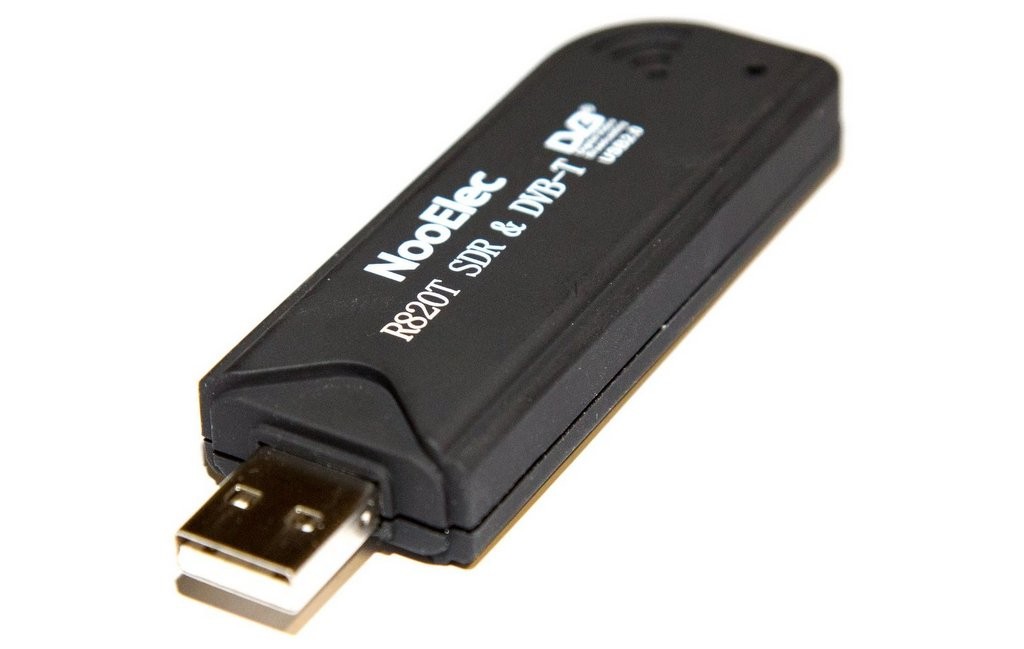
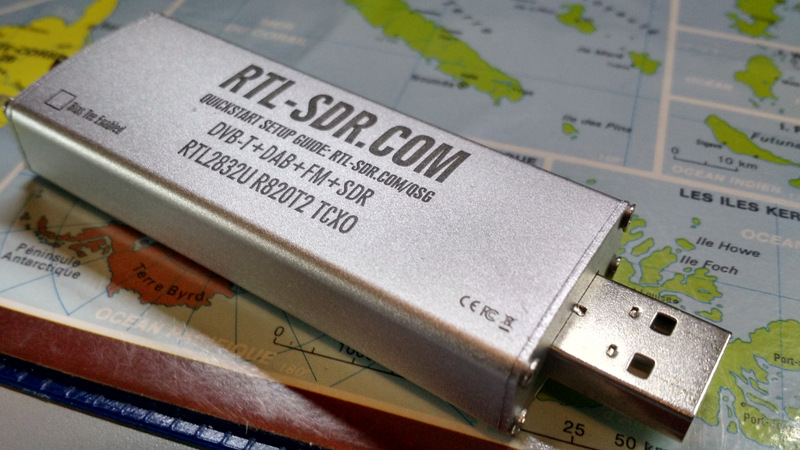
No doubt, many of you reading this primer have purchased an RTL-SDR dongle. Over the years, I’ve owned three or four of them and have even purchased them for friends. These dongles originally appeared on the market many years ago as mass-produced DVB-T TV tuner dongles based on the RTL2832U chipset. Very soon, users discovered that with just a little hacking, the dongle was capable of much, much more than its original intended purpose.

The dongle resembles a USB memory stick. On one end, you’ll find a standard USB connector.  On the other, you’ll find an antenna port, typically SMA, to which one connects an antenna. Although it goes without saying, here’s a friendly reminder: make sure you’re choosing an antenna to match the frequency range you’re exploring!

I’ve seen this older model of RTL-SDR being sold for $9 at Hamvention.

Early RTL-SDR dongles couldn’t cover the HF bands or lower, but many models can now cover a gapless 500 kHz all the way to 1.75 GHz.

So, what can you do with an RTL-SDR dongle?  In short, quite a lot! Here are a few of this simple device’s many applications and uses in our hobby.  It can:

  • become a police radio scanner
  • monitor aircraft and ATC communications
  • track aircraft with ADS-B decoding and read ACARS short messages
  • scan trunking radio conversations.
  • decode unencrypted digital voice transmissions such as P25/DMR/D-STAR.
  • track maritime boat positions like a radar with AIS decoding.
  • track and receive weather balloon data
  • connect to VHF amateur radio
  • decode APRS packets
  • receive and decode GPS signals
  • utilize its rtl-sdr as a spectrum analyzer
  • receive NOAA weather satellite images
  • and so much more––! This list is not fully comprehensive by any means.  Check out this list of projects at RTL-SDR.com.

And, of course, you can listen to any signals between 500 kHz up to 1.75 GHz––essentially, most of the radio listening landscape.

Is $25 still a little high for your budget? RTL-SDR dongles can be found for as low as $10 US, shipped, on eBay. While the cheapest of these dongles may suffice for some radio applications, I’m partial to the dongle produced by RTL-SDR.com, since they’re built in a tough metal enclosure, have thermal pad cooling, as well as extra ESD protection. Amazon has an RTL-SDR.com dongle starter package with antenna options for about $26. That’s, what, the price of three hamburgers? Two orders of fish and chips? And worth it.

Many third-party SDR applications support the RTL-SDR dongle, but my favorite is SDR# (click here to download).

So, the major pros of this little SDR are 1) obviously, the price; 2) many, many uses; and 3) the fact that it’s the most popular SDR on the market, with a massive online user base.

What about negatives? Well, to be frank––aside from the dongle’s budget-busting versatility––the fact is that “you pay for what you get.” You’re investing just $10-$27 in this receiver, so don’t expect exceptional performance especially on anything lower than 50 MHz. On HF, for example, the RTL-SDR could easily overload unless you employ external filtering.

Indeed, I’ve never used the RTL-SDR for HF DXing, but I currently have three dongles in service 24/7:  two as ADS-B receivers, and one as a receiver for the LiveATC network. And these work hard. Indeed, It’s a workhorse of a device!

I suggest you grab an RTL-SDR and use it as an accessible step into the world of SDRs, and as an affordable single-purpose tool to unlock the RF spectrum!

Click here to check out the RTL-SDR blog SDR dongle via Amazon (affiliate link).

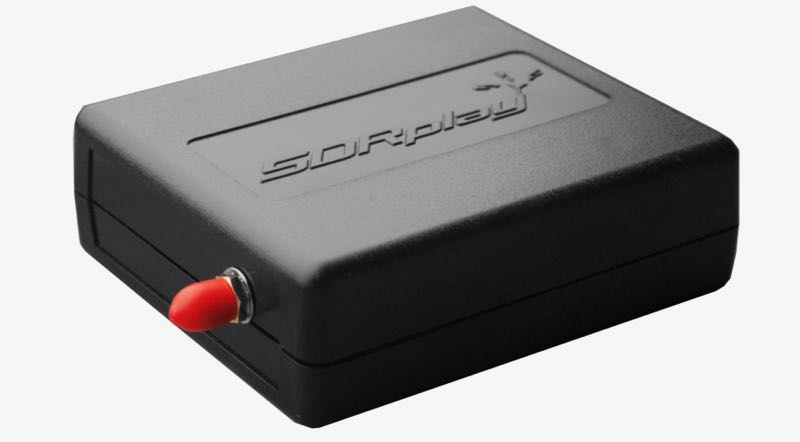
$99: The SDRplay RSP1A

When you invest a modest $99 US (or $120 shipped), and purchase the RSP1A, you take a major step forward in the SDR world.

UK-based SDRplay is an SDR designer and manufacturer that focuses on enthusiast-grade, budget wideband SDRs. SDRplay designs and manufactures all of their SDRs in the United Kingdom, and over the past few years, they’ve developed a robust user community, extensive documentation, and, in my humble opinion, some of the best tutorial videos on the market.

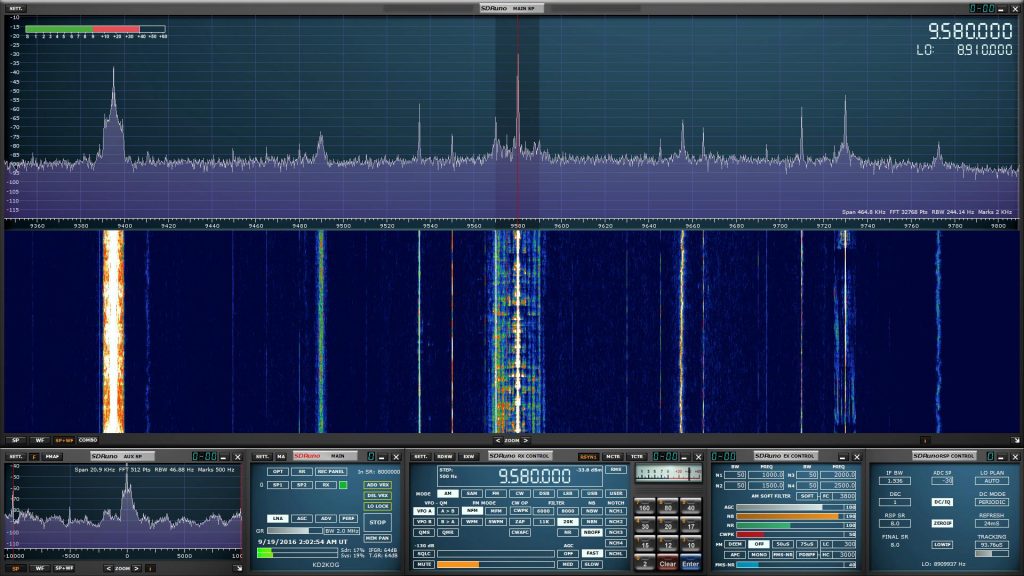
SDRuno windows can be arranged a number of ways on your monitor.

Although the RSP series SDRs are supported by most third-party SDR applications, SDRplay has their own app: SDRuno. Moreover, SDRuno is a full-featured, customizable application that takes advantages of all of this SDR’s performance potential and features. I should mention that installing the RSP1A and SDRuno is a pure plug-and-play experience:  just download and install the application, plug in the RSP1A to your computer, wait for the USB driver to automatically install, then start SDRuno. Simplicity itself.

While the RSP1A is SDRplay’s entry-level wideband SDR, it nonetheless plays like a pro receiver and truly pushes the envelope of performance-for-price, and for other SDR manufacturers, sets the bar quite high. The RSP1A is a wideband receiver that covers from 1 kHz all the way to 2 GHz; equally pleasing the longwave DXer, HF hound, tropo-scatter hunter, and even radio astronomer. This affordable SDR really covers the spectrum, quite literally. Not only does the RSP1A cover a vast frequency range, but its working bandwidth can be an impressive 10 MHz wide and via SDRuno, the RSP1A will support up to 16 individual receivers in any 10 MHz slice of spectrum. All this for $99? Seriously? I assure you, yes.

Think of the RSP1A as the sporty-but-affordable compact car of the SDR world. It delivers performance well above its comparatively modest price, and is fun to operate. In terms of DX, it gets you from point A to point B very comfortably, and is a capable receiver which will help you work even weak signals––and very reasonably!
If you’re looking to explore the world of SDRs, would like a capable receiver with great LW/MW/HF reception to do it with, but also want to keep your budget in check, you simply can’t go wrong with the RSP1A.

Check out the RSP1A via:

$167 US (125 GBP): FUNcube Dongle Pro+

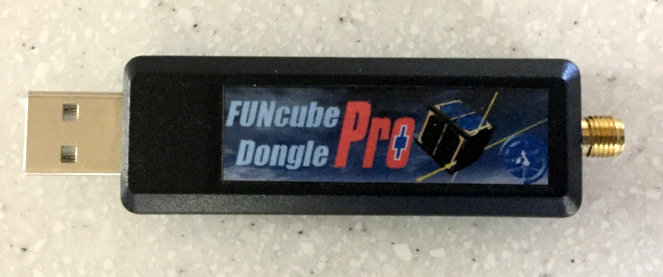
Many years ago when I ventured into the world of SDRs, one of the only affordable SDRs which covered the HF bands was the FUNcube Dongle Pro+.

The Funcube Dongle Pro+, which resembles the RTL-SDR “stick” type dongle, was originally designed as a ground receiver for the FUNcube Satellite (cubesat) project initially made possible by AMSAT-UK and the Radio Communications Foundation (RCF). The original Funcube dongle did not cover any frequencies below 64 MHz, but the Funcube Dongle Pro+ added coverage from 150 kHz to 1.9 GHz with a gap between 240 MHz and 420 MHz.

In full disclosure, I’ve never owned a FUNcube Dongle Pro+, but I have used them on several occasions. I believe you would find that it is prone to overloading if you use a longwire antenna that’s not isolated from the dongle. In other words, during such use it seems to be subject to internally-generated noise. In my experience, the Pro+ worked best when hooked up to an external antenna fed by a proper coaxial cable.

To be clear, with the advent of SDRplay and AirSpy SDRs, the FUNcube Dongle Pro+ is no longer the budget SDR I would most readily recommend.

Still, the Pro+ is a very compact dongle that has a great history, and around 2012 really pushed the performance-for-price envelope. It still has many dedicated fans. No doubt, this product has had a huge influence on all of the sub $200 SDRs currently on the market, thus we owe it a debt of gratitude.

Click here to check out the FUNcube Dongle Pro+.

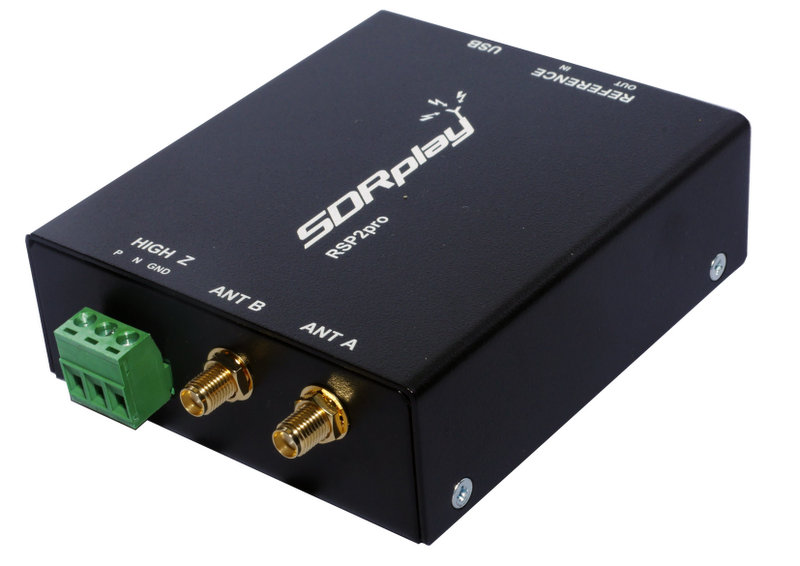
$169 US: SDRplay RSP2 & RSP2 Pro ($199):

The SDRplay RSP2 Pro

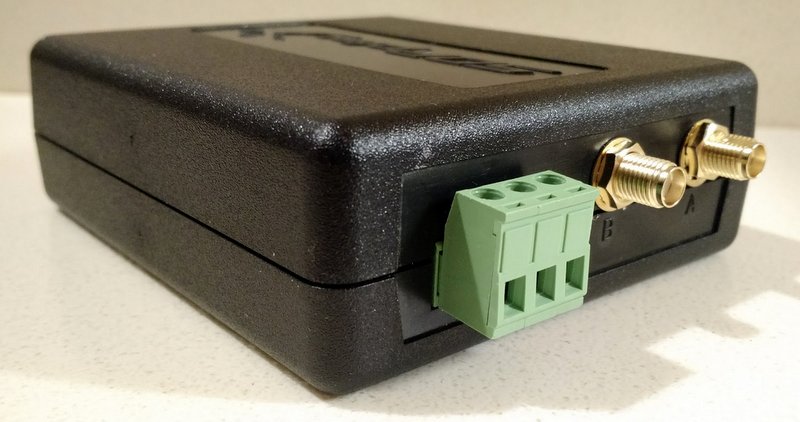
In 2016, after the remarkable success of the original RSP, SDRplay introduced the RSP2 and RSP2 Pro SDRs. The RSP2 is housed in an RF-shielded robust plastic case and the RSP2 Pro is enclosed in a rugged black painted steel case. In terms of receivers and features, the RSP2 and RSP2 Pro are otherwise identical

The RSP2 and RSP2 Pro provide excellent performance, three software-selectable antenna inputs, and clocking features, all of which lend it to amateur radio, industrial, scientific, and educational applications; it is a sweet SDR for $169 or $199 (Pro version). I know of no other SDRs with this set of features at this price point.

The RSP2 series has the same frequency coverage as the RSP1A. Of course, to most of us, the big upgrade from the SDRplay RSP1A is the RSP2’s multiple antenna ports:  2 x 50-Ohms and one High-Z port for lower frequencies.

The SDRplay RSP2 with plastic enclosure.

As with all of SDRplay’s SDRs, their own application, SDRuno, will support up to 16 individual receivers in any 10 MHz slice of spectrum.

Bottom line? Since the RSP2 has multiple antenna ports––and two antenna options for HF frequencies and below–the RSP2 is my choice sub-$200 SDR to use as a transceiver panadapter. (Spoiler alert: you’ll also want to check out our summary of the recently released $279 RSPduo from SDRplay in this review or in Part 3 of our primer before pulling the trigger on the purchase of an RSP2 or, especially, an RSP2 Pro!)

Check out the RSP2 via:

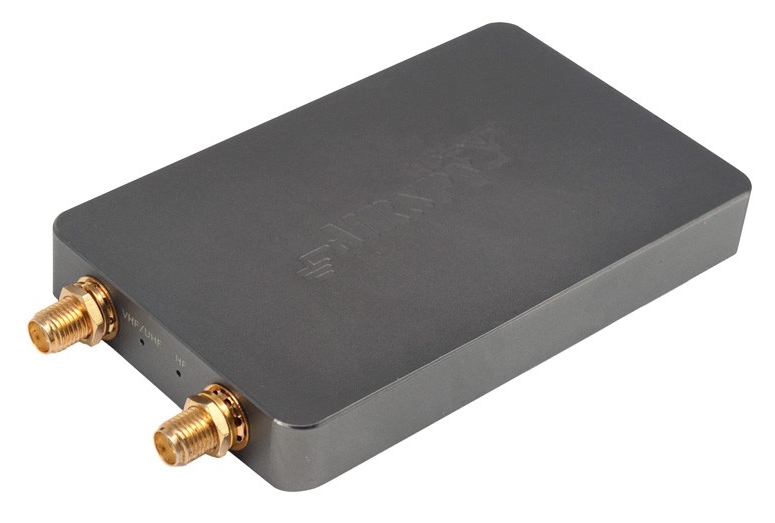
$199 US: AirSpy HF+

Sometimes big surprises come in small packages. That pretty much sums up the imminently pocketable AirSpy HF+ SDR.

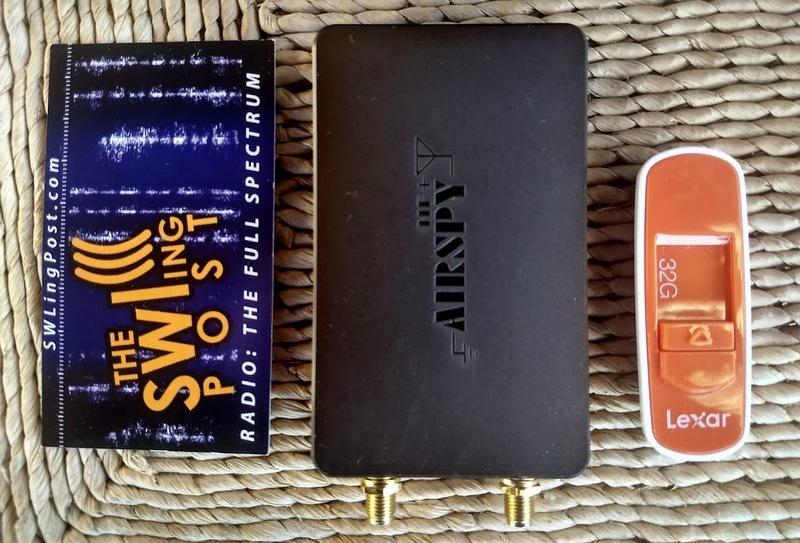
The HF+ has the footprint of a typical business card, and is about as thick as a smartphone. Despite this, it’s a heavy little receiver––no doubt due to its metal alloy case/enclosure.

AirSpy’s HF+ was introduced late 2017. Don’t be surprised by its footprint which is similar to a standard business card to its left, this SDR is performance-packed!

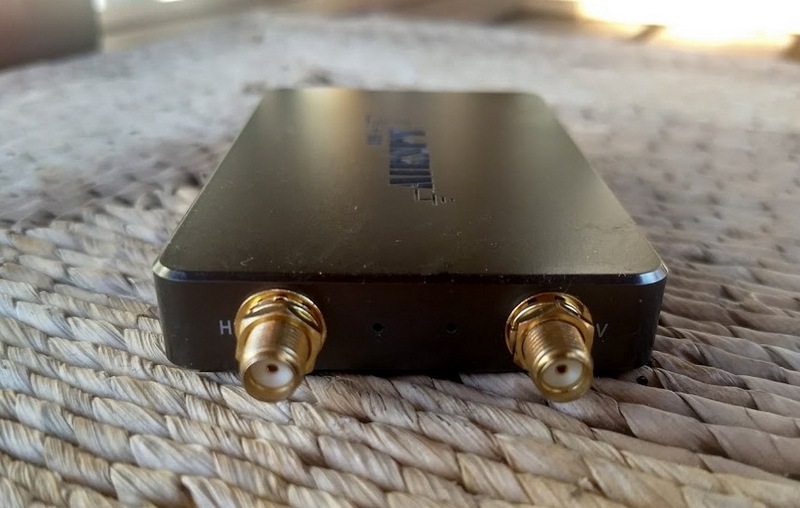
Not to dwell on its size, but other than my RTL-SDR dongle, it’s by far the smallest SDR I’ve ever tested. Yet it sports two SMA antenna inputs: one for HF, one for VHF.

The HF port is labeled as “H” and the VHF port as “V”

When I first put it on the air, my expectations were low.  But I quickly discovered that the HF+ belies its size, and is truly one of the hottest sub $500 receivers on the market! Its HF performance is nothing short of phenomenal.

The HF+ is not a wideband receiver like the FunCube Dongle Pro+ or RSP series by SDRplay. Rather, the HF+ covers between 9 kHz to 31 MHz and from 60 to 260 MHz only; while this is a relatively small portion of the spectrum when compared with its competitors, this was a strategic choice by AirSpy. As AirSpy’s president, Youssef Touil, told me,“The main purpose of the HF+ is [to have] the best possible performance on HF at an affordable price.”

Mission accomplished.  Like other SDRs, the HF+ uses high dynamic range ADCs and front-ends but enhances the receiver’s frequency agility by using high-performance passive mixers with a robust polyphase harmonic rejection structure.  The HF+ was designed for a high dynamic range, thus it is the best sub-$200 I’ve tested for strong signal handling capability on the HF bands.

You can very easily experiment and customize the HF+ as well; easy access to the R3 position on the circuit board allows you to make one of several published modifications. “During the early phases of the design,” Yousef explains, “R3 was a placeholder for a 0 ohms resistor that allows experimenters to customize the input impedance.” He goes on to provide in-depth clarification about these mods:

“For example:

  • A 300 pF capacitor will naturally filter the LW/MW bands for better performance in the HAM bands
  • A 10µH inductor would allow the use of electrically short antennas (E-Field probes) for MW and LW
  • A short (or high value capacitor) would get you the nominal 50 ohms impedance over the entire band, but then it’s the responsibility of the user to make sure his antenna has the right gain at the right band
  • A custom filter can also be inserted between the SMA and the tuner block if so desired.”

Since the introduction of the HF+, it has been my recommended sub-$200 receiver for HF enthusiasts. If you want to explore frequencies higher than 260 MHz, you’ll have to look elsewhere. Also, note that longwave reception is not the HF+’s strong suit––although modifications to R3 and future firmware upgrades might help with this! Additionally, the HF+’s working bandwidth is 660 kHz; quite narrow, when compared with the RSP series, which can be widened to 10 MHz.

AirSpy also designed the free application SDR# to take full advantage of their receivers’ features and performance.

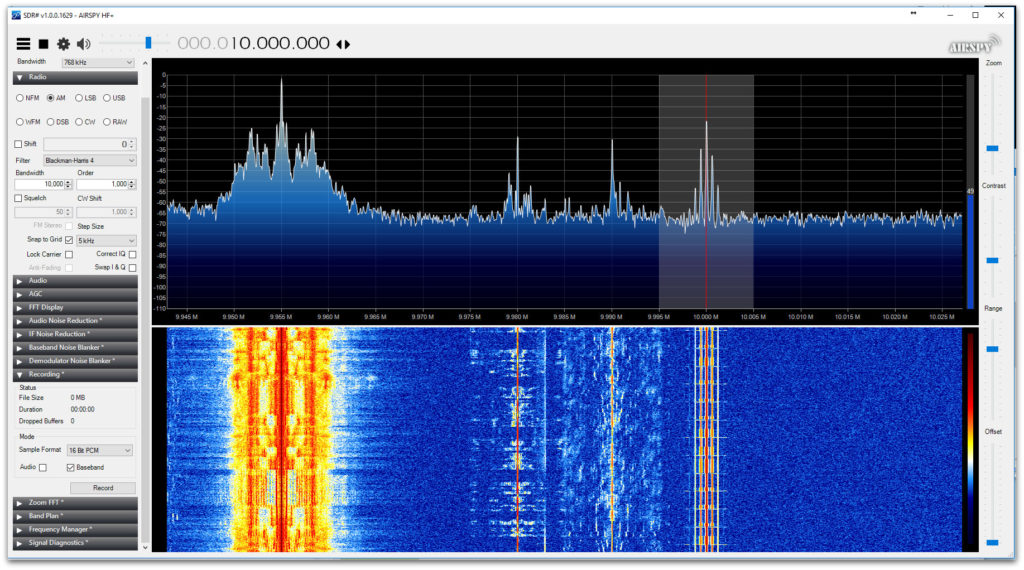
The AirSpy application (a.k.a. SDR#)

Installing the HF+ and getting it on the air is pure plug-and-play. While SDR# is a powerful and fluid SDR application, I actually use SDR Console more often, as it supports most of my other SDRs as well, and offers advanced virtual receiver and recording functionality.

If you’re an HF guy like me, the HF+ will be a welcome addition to your receiver arsenal. It’s a steal at $200.

Click here for a full list of AirSpy distributors.

Conclusion

If you haven’t gathered this already, it’s simply a brilliant time to be a budget-minded radio enthusiast. Only a few years ago, there were few, if any, enthusiast-grade sub-$200 SDR options on the market.  Now there are quite a number, and their performance characteristics are likely to impress even the hardest-core weak-signal DXer.

Still, some hams and SW listeners reading this article will no doubt live in a tougher RF environment where built-in hardware filters are requisite to prevent your receiver from overloading. Or perhaps you desire truly uncompromising benchmark performance from your SDR. If either is the case, you may need to invest a little more of your radio funds in an SDR to get exactly what you want…and that’s exactly where I’ll take you November in the final Part Three of this SDR primer series.  Stay tuned!

Stay tuned for more in Part Three (November). I’ll add links here after publication.

Do you enjoy the SWLing Post?

Please consider supporting us via Patreon or our Coffee Fund!

Your support makes articles like this one possible. Thank you!

Spread the radio love

Mike’s overview and review of the $40 Soft66RTL3 SDR by Kazunori Miura (JA7TDO)

RTL3

Many thanks to SWLing Post contributor, Mike Ladd, for the following guest post and overview of setting up and using the Soft66RTL3 SDR:


Soft66RTL3 SDR: A low cost…Good performer direct from Japan

by Mike Ladd

Much has changed in the last 8 years in the world of SDR radios. Fast forward to 2016 and just about everyone in the hobby has heard the buzz word “SDR radio”. When SDRs first came out to the market they were all aimed at HF listening and you had two types to pick from. The first being soundcard based and the second being direct sampling. The price gap between the two were several hundred dollars. The more expensive being direct sampling. As the hobby progressed, so did the technology and the prices started to shift dramatically.

You can now purchase a TV dongle for $10.00 and turn it into a SDR. The Soft66RTL3 is basically a TV dongle but with a lot more features.

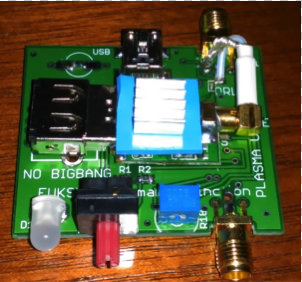
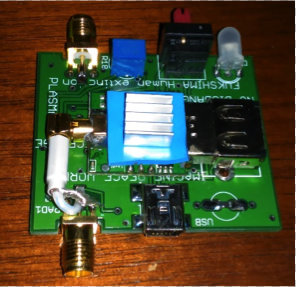
The Soft66RTL3 comes from an engineer who is no stranger to the world of SDRS. Kazunori Miura (JA7TDO) has been designing and selling many models of SDRS over the internet and shipping them direct from Japan for about 7 years. The Soft66RTL3 is his latest of model hot off his bench. This SDR is a dual input RTL-SDR with a built in 50 MHz upconverter along with 4 user selectable band pass filters that greatly increase your signal to noise ratio in the HF bands.

Soft66RTL3-board-001 Soft66RTL3-Board 2 Soft66RTL3-board

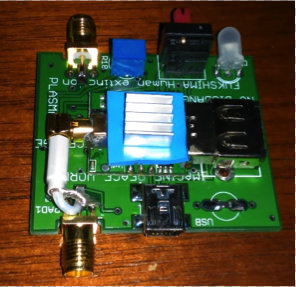
The frequency range of the RTL3 is from DC to Daylight (0.4 kHz to 1.7 GHz). Miura also addressed a heat issue with the previous version (RTL2) by adding a thermal pad and heatsink. RTL dongles are notoriously unstable due to overheating. In theory, the thermal pad should add frequency stability and keep drift to a minimal.

RTL3-TrimmerPot

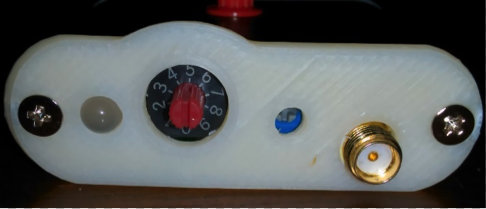
The last feature of the RTL3 is the input gain trimmer pot (see image above). The trimmer pot is for the HF side of the SDR and is already set before it’s shipped from Japan. If you would like to reduce or increase it the trimmer pot is easily accessible. I would suggest leaving it as is.

The RTL3 is broken down into two sections: the HF input side and the VHF/UHF input side.

Soft66RTL3-encoder

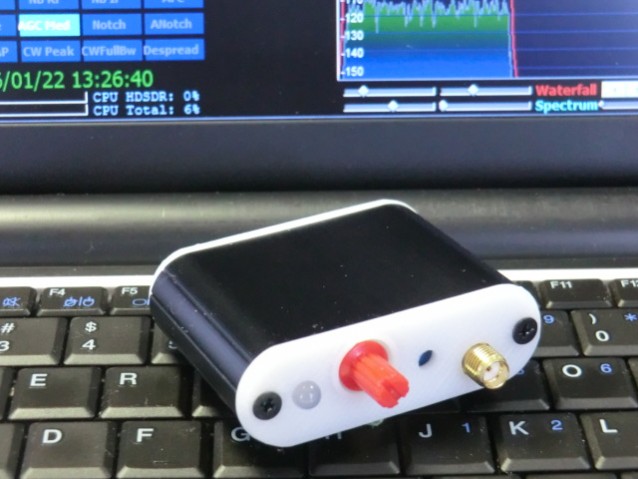
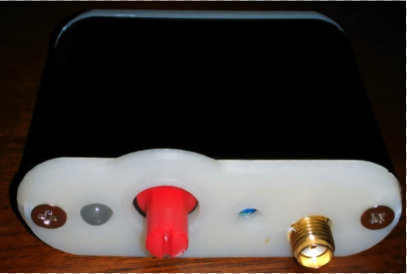
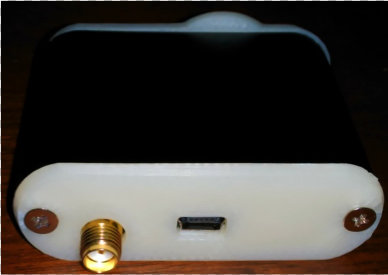
The HF side of the SDR (above) has a red rotary encoder and trimmer pot port. The VHF/UHF side (below) has the USB Mini-B connection.

Soft66RTL3-back

Both sides of the RTL3 terminate to a SMA-Male connection and Power comes from a single USB Mini-B cable.

Soft66RTL3-BandPassFilter

Band pass filter selection

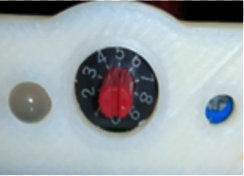
If you look at the rotary encoder (red cap cover) you will see a small notch window. The 12 o’clock position is #5 on the encoder dial. One click clockwise will take you to switch position #6 and one click counterclockwise will take you to #4. You should pull the red cap cover off to have a look and get your bearings.

The band pass filter selection is as follows:

  • #4 enables BPF 0.4 to 1.2MHz
  • #5 enables BPF 1.2MHz to 5MHz
  • #6 enables BPF 5MHz to 15MHz
  • #7 enables BPF 15MHz to 30MHz
  • #8 or #9 enables the VHF UHF side of the SDR

All other positions will bypass the filtering section on the HF side of the SDR.

Installation

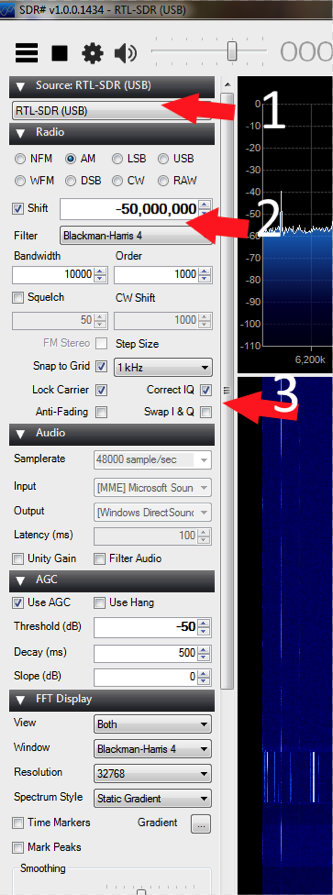
If you already have a RTL-SDR on your system then all you need to do is swap it out with the RTL3 and change the offset of -50,000,000 in HDSDR or SDR# to listen to the HF side of the RTL3–but if this is your first SDR we will need to install 2 items: the front end app and the driver.

I will assume your system is Win-7 or better and we will be using SDR# as our program of choice to drive the RTL3. The RTL3 runs just fine in HDSDR and SDR-Console, but by choosing SDR# it will reduce our setup time considerably.

ScreenShot-SDR

  1. Plug in the RTL3
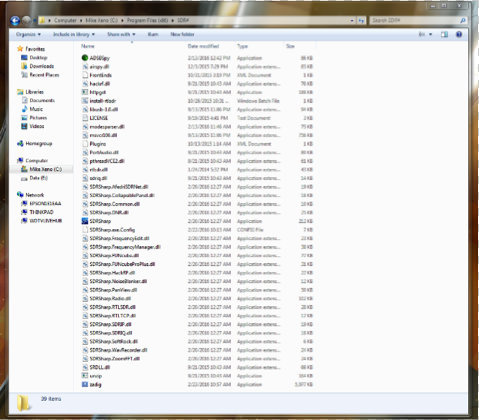
  2. Make a folder on your desktop and name it SDR#
  3. Download the latest version SDR# from www.airspy.com and copy the contents of the zip file to your newly created SDR# folder
  4. Inside of your SDR# folder, double click on install-rtlsdr
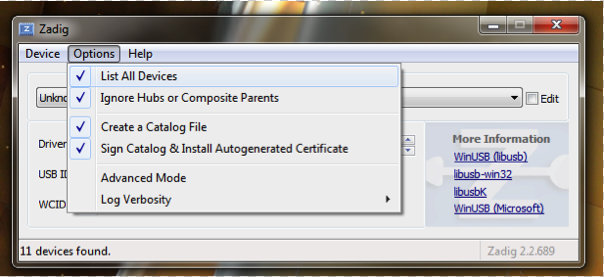
  5. After the batch completes, double click on the “zadig.exe” inside your SDR# folder

screengrab

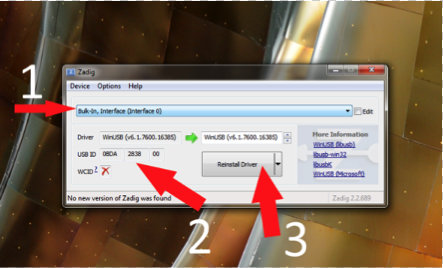
When you run the “zadig.exe” make sure you select “list all devices” as shown above.

ScreenGrab-Window

The next 3 steps are:

  1. Select “Bulk-In Interface” (Interface 0)
  2. Make sure the proper USB device is selected (2838)
  3. Click “install driver”

The RTL3 is now ready to be used and no further setup is required.

For a more detailed installation I would visit RTL-SDR.COM for a complete setup instructions: http://www.rtl-sdr.com/rtl-sdr-quick-start-guide

I will assume you did not have any issues setting up the ZADIG driver and now move on to using the RTL3 inside of SDR#. I will show you real world conditions that are not from any scientific standpoint.

Antenna wise, for the HF side I will be using a G5RV mini and for the VHF/UHF side I will be using a Scanntenna ST-2.

You can now launch SDR# and check the following settings (see image below).

SDRSharp-Settings

For the VHF/UHF side of the RTL3 you will want the rotary encoder on position #9. You want the cutout in the encoder cap showing the 5 o’clock position.

Summary

I have been using this SDR for a little over 3 months. Out of all the low cost SDR’S on the market, this one gives you the most bang-for-your-buck and it is a great entry level SDR with some “Pro” features.

Pros:

  • Low Price
  • HF VHF/UHF in one package
  • Works with any app that supports the RTL-SDR front end
  • 4 user selectable band pass filters for HF
  • Highly sensitive user controlled input RF amp
  • Small & very compact metal case
  • Dual input SMA jacks
  • ESD protection diode

Cons

  • Some intermod in the 460-470 MHz range
  • Inputs are on opposite sides of the SDR body

The Soft66RTL3 price is $40.00 US shipped–click here to order.


Mike, thank you so much for this excellent overview of the Soft66RTL3!  I’m especially appreciative of the time you’ve taken to explain the installation process–for many, this is one of the more difficult RTL-SDR learning curves.

I’m very tempted to check this out for myself–I love the fact that this little SDR has bandpass filters.

Post Readers: I suspect Mike will monitor the comments in this post, so feel free to ask questions. Make sure to check out Mike’s website, where you’ll find more articles about software defined radios.

Spread the radio love

Using the RTL2832U $20 SDR for HF & trunk-tracker scanning?

DE_DVB_T_1In response to our post on inexpensive SDRs based on the RTL2832U, Jeff Benedict writes:

Here’s a website that has a lot of info on cheap SDR gear.  They have a write-up on an external board which adds HF capabilities.  I have one but haven’t done anything with it yet.

http://www.hamradioscience.com

Jeff  KB7AIL  CN88

Thanks, Jeff! Has anyone tried HF with any success? I’m curious how well this über-cheap receiver will cope with adjacent signals and blowtorch stations within the HF spectrum.

Meanwhile Neil, blogger on Fofio, commented:

I have an RTL-SDR system up and running.  I have done 2 demonstrations for my local Ham Radio club.  One on the basic setup and use of the dongle, using both SDR# and HDSDR.  The other presentation showed the remote receiver capability using a Raspberry Pi as the receiver with the dongle attached and a remote SDR# computer decoding the stream over a network connection.  Once I compensate for some minor frequency discrepancies it’s a pretty good receiver.  The only issue I have noticed with mine (one of the early E4000-based models) is a tendency to overload in the presence of a strong signal.  We have a pretty powerful 2 Meter repeater less than a 1/4 mile from our home, and when it’s active it causes some strange results with the RTL-SDR setup.

I have yet to try one of the HF converters they make for these.  I hope to do that soon.

Another project I was reading about today that I may try out is using 2 of the dongles at once to create a trunk-tracker scanner.

Wow! Two $20 USB SDRs and a little PC magic could yield a trunking scanner? I want to hear more about this. Trunking scanners tend to be both expensive and complicated. If a web-updated database could be downloaded and used to control this sort of rig, the possibilities would be most impressive!

Neil, keep us informed!

Spread the radio love

A very inexpensive Software Defined Radio based on the RTL2832U

DE_DVB_T_1Many thanks to Benn (AK4AV) for passing along this article from the IEEE which describes how a $20 USB digital TV antenna tuner can be transformed into an impressive, flexible software defined radio:

http://spectrum.ieee.org/geek-life/hands-on/a-40-softwaredefined-radio

The article incldes the following embedded video from the IEEE:

Here is another informative video via YouTube:

This year at the SWL Winterfest we had a presentation on the topic of $20 SDRs configured like those above. Some scanner enthusiasts had used them to receive satellite and many other VHF/UHF communications. I’ve heard of some devices being nearly plug-and-play easy to install and configure; others may take some minor tweaking. All of the SDR applications and drivers are either open source or free.

This page contains a wealth of information on the topic of RTL2832U based SDRs–it makes for a great starting point.

If you have experimented with thRTL2832U USB SDR, please comment below.

Spread the radio love