
Many thanks to SWLing Post contributor, Mario Filippi (N2HUN) for the following review:
The AOR AR-3000A Wideband Receiver
by Mario Filippi, N2HUN
(All photos below by author)
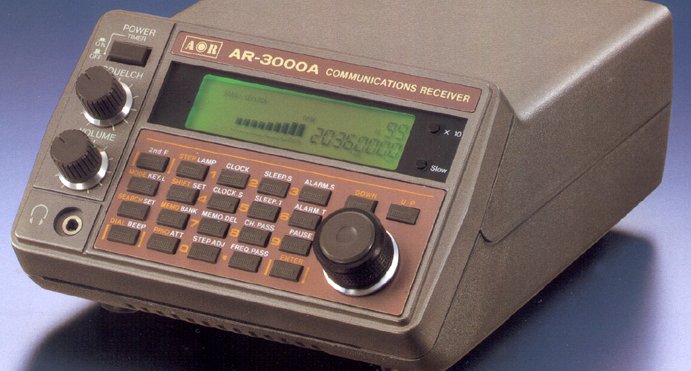
The AOR AR-3000A is a wideband communications receiver, made in Japan, covering 100KHz – 2.036 GHz with all popular modes including AM, NFM, WFM, CW, USB and LSB. The AR-3000A was produced in the early ‘90’s at the price of $1063 and came with a telescoping back-of-set antenna, wall-wart power supply, and well written 57 page manual.
AOR is a long time reputable manufacturer of radios and electronic equipment that continues on today producing high quality equipment. While the AR-3000A can be considered a tabletop unit, it is quite small, measuring only 8” x 5” x 3.5”. The AR-3000A has a total of 400 memory channels, with four “Banks” (Banks A- D) each holding up to 100 channels. Each stored channel holds all the necessary parameters such as frequency, mode, attenuator, and step size. An optional mounting bracket for mobile operation was available along with an optional DC cord for those wanting to use it as a scanner for public safety monitoring. It does not run on internal batteries though.
What I like about this radio is it’s wide coverage and it functions as my main longwave/shortwave receiver in addition to a scanner for monitoring local VHF/UHF public safety bands.
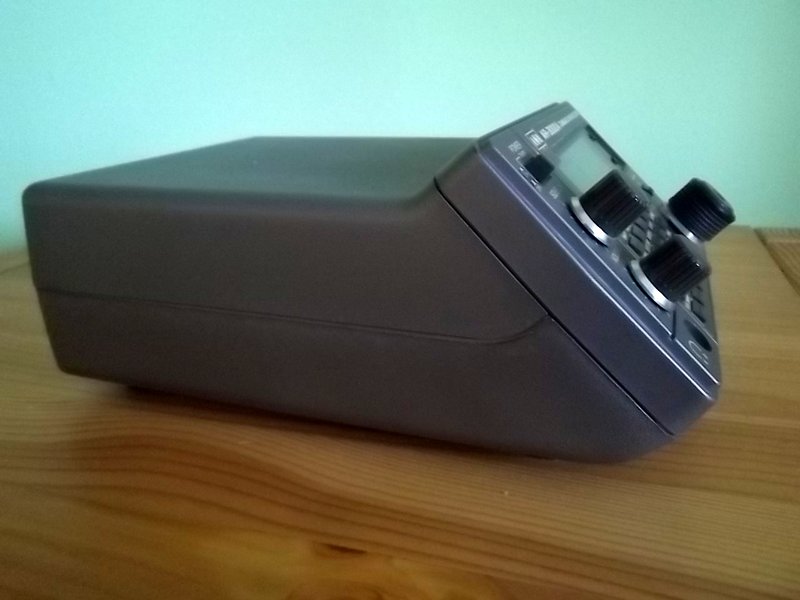
As desktops go, this one has an unusual shape. While the unit is horizontally shaped for the most part, the front panel is angled slightly upward to make the controls easier to read. However, it took a while to get used to the small print on the panel and LCD so if you wear glasses, definitely don them because you’ll need ‘em. As a matter of fact I’m contemplating purchasing a pair of those magnifying eyeglasses to see (pun intended) if they’ll help (hi hi!).
These units come up for auction on Ebay and on ham classifieds at a much reduced price, most in remarkably good shape for a quarter-century old receiver.
A recent survey of Ebay auctions show they run from about $183 – $350; over several hundred dollars less than the original price. I chose to purchase one from a ham classified website at a higher price but it was well worth it. When it comes to high price tag items I tend to scout out the ham ads first. The seller was a friendly, honest ham who was a great communicator so the deal went smoothly. He included the computer control cable and even replaced the backup memory CR2032 battery, something every buyer should consider when purchasing vintage units.
For advertisements of vintage AOR products check back issues of Monitoring Times at: www.americanradiohistory.com . This site is an excellent resource for old time radio, TV, broadcasting and miscellaneous electronics publications and contains a mind boggling array of books and periodicals from the past.
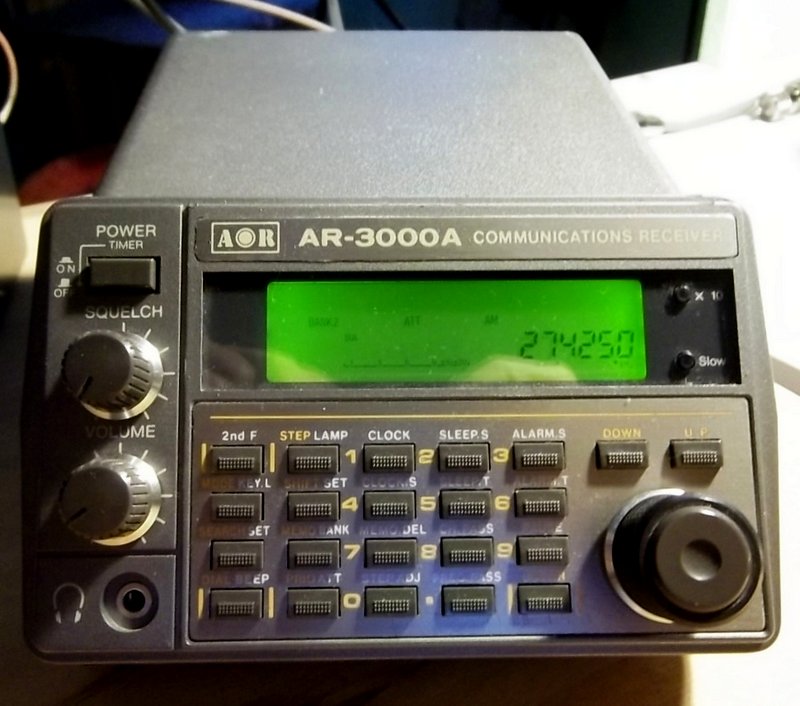
The front panel is laid out quite well, with soft touch pads in the center allowing easy parameter entry, a tuning knob on lower right, and my favorite, a manual squelch knob. Most of the touch pads have a secondary function which appears in white lettering while primary functions are in yellow. If you’d rather not spin the VFO dial, which is quite small (0.75” diameter) there are up/down arrow keys to accomplish that function. The knob spins smoothly with no obvious détente.
Front panel (sorry about the camera shutter ghost!)
The rear of the unit has several connections: BNC antenna, 12V input, DIN socket for a recorder, external speaker, RS232C for computer remote control, and On/Off switch for computer/manual control. Back in the day you could purchase ScanCat Gold software for about $95.00 that would allow computer control of the unit. I am in the process of finding any existing software that will allow that and it’s not easy to come by, but that is not a priority.
Oh and where is the speaker you might ask? On the underside of the unit.
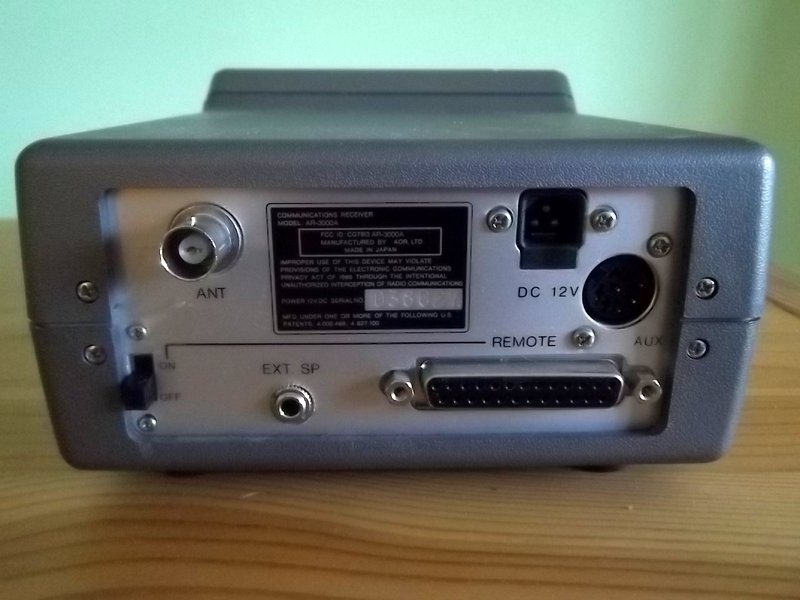
Plenty of rear connections.
This unit was purchased to save space at my desk as it’s quite small and serves as my main source of longwave, medium wave, shortwave, and VHF/UHF reception. For HF it’s hooked to an S9 43 foot vertical antenna with many (50+) radials. S9 Antennas unfortunately is no longer in business, but when the company had just started up I purchased the 43 footer for ham use. It’s lightweight, made completely of fiberglass, and has been up several years with no problems.
S9 antennas was eventually sold and the antennas were available from LDG Electronics last time I looked. If you check out their pictures at http://www.ldgelectronics.com/c/252/products/12/62/3 you’ll see my house on the left sporting the S9v43 footer. By the way, when I bought the AR-3000A, the seller stated that ”it’s a great radio as long as you don’t connect too big of an antenna to it”(hi hi!). Yes, I found it tends to suffer from overload with my large antenna, but the 3000A has a useful built-in attenuator
As a wideband receiver the AR-3000A fits my needs perfectly. For LW it receives aeronautical beacons as far away as Quebec and New Brunswick, Canada. NAVTEX transmissions on 518 KHz are easily decoded using a SignaLinkUSB and YAND software.
As for HF, I’m mainly a utility listener and have a bank of memory channels for WWV (2.5, 5, 10, 15,20 MHz), WLO (8.471MHz), CB channels, Volmet stations, USCG facsimile frequencies, W1AW on 3.581 for code practice, a slew of RTTY station frequencies, the 10m FM band repeater frequencies, Radio Habana Cuba, 4XZ (great for code practice), WLO maritime weather broadcasts, and several channels for different ham band frequencies of interest.
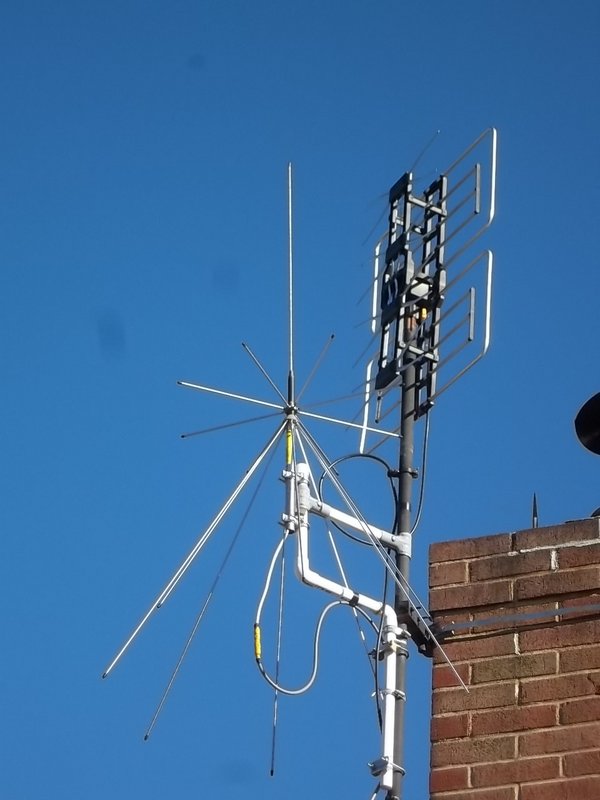
Radio Shack discone offset –mounted on TV antenna mast.
For scanning, obviously the 3000A can’t compete with modern scanners. It was a different era back then. So, no trunking, no CTCSS tones, and the scanning speed slow compared to today’s standards, but it does have the usual features like channel lockout, scan delay, priority channel, step adjustment, search mode and does cover the military aeronautical band.
As a basic scanner for monitoring local state/local first responders, aeronautical (ATIS, ACARS) channels, NOAA satellites, NOAA weather channels, my local repeater, GMRS, FRS, taxis, railroads, etc., it is a very satisfactory performer. I can even hear the NY City Transit police from my location in W. New Jersey which is a pretty good distance, ATIS from LaGuardia and Philadelphia airports, and taxis in the Philly area, all while using a Radio Shack discone on the chimney.
For a more in-depth review of the AR-3000A by Bob Parnass, check the November 2000 issue of Monitoring Times magazine. Universal Radio has a great archive of discontinued radios so check them also at www.universal-radio.com. User reviews can be found on www.eham.net, that’s one of my favorite feedback sites. There’s also an AR-3000A Yahoo users group that’s a great resource. If you want to see videos of the rig in action then search on YouTube as there’s a good number available. In conclusion, I’m very satisfied with the AR-3000A, it’s exactly what I was looking for and is an integral part of radio receiver history.
If any other AR-3000A owners are out there, let’s hear from you. Thanks and 73’s!
Many thanks for this excellent review, Mario. I always thought the AOR AR-3000A was a cool little receiver. When it was being produced, the price was way beyond my means as a college student. At the time, though, it had to be the most compact, best performing, wideband receiver on the market!
If any Post readers can help Mario find a solution for computer control of the AR-3000A, please comment!
Thanks again, Mario–we look forward to your next contribution!
Just watched the documentary “20 Days in Mariupol”(Ukraine) on PBS-TV’s Frontline program. About 35 minutes in, you will see this receiver tuned to the last local broadcast station still on the air at the time.
Yo vendo uno sin usar
Would it be possible to ‘computer control’ my AOR AR 3000A with a software package built for software designed (USB plug in) radios such as DSD or DSD+? I’m on Windows 10 Pro. What sort of a hardware connector would I need?
A bit late to the article (Sorry guys!) but for history’s sake….
the only software available to control the old AoR radios such as the 3000A (and A+) , 5000 / 5000+3 and the 8000 will be legacy 16 bit windows software.
These will not run on a “current” Windows 10 PC (even 32 bit) as a service pack update “borked” NTVDM.EXE that they depend upon. I built a Windows 7 pro 32 bit PC for my AOR ladies and happy to report no issues.
As for DSD / DSD plus – they are decoding packages not control packages (well….FMPx controls an SDR but not an AOR radio) . Yes you “can” modify the 3000A to work with DSD / DSD+ but an extra capacitor as well as a 10K resistor is required to block DC – otherwise you will find decodes difficult and the rx audio will go “bassy”
Tools needed for the job:
1 – A USB to Serial Port Adaptor. I bought this – https://www.amazon.com/gp/product/B000067RWK/
2 – A pair of Needle Nose Pliers
3 – Free Putty Software – Download PuTTY: latest release (0.74)
The physical adaptor is very badly deigned because the metal end pieces don’t screw off, and as is, the pins will not fit into the holes of the interface on the back of the AOR 3000 because the AOR’s 25 pin interface has the same end pieces and they hit each other which physically blocks the pins from fitting into the holes. I tried unscrewing the the end pieces from the AOR, but they hold it in place, so I had to reattach them.
Step 1 – Use the pliers to detach the metal end pieces. Whoever’s reading this probably has better technique than I, but If I was able to pull them off without ripping the entire metal plate off, then you should be able to do it as well.
Try skipping step 2 first. The PC may just set it up with plug and play automatically.
Step 2 – Install the drivers for the adaptor. The adaptor came with a CD. If anybody doesn’t have a player and can’t find the drivers online, let me know and I’ll upload them somewhere. Reboot, even if not prompted to.
Step 3 – Configure the port settings and make note of the virtual COM port number that was assigned. Launch the device manager. You will need administrative credentials if you aren’t logged in as a local administrator. Expand Ports (COM & LPT) – Double-Click on Prolific
USB-to Serial Comm Port. If you aren’t an admin, click on “change settings” and enter the admin credentials. If you are an admin, just
double-click on port settings. Set Data bits to 8, parity to none, and stop bits to 2. Flow control appears to be irrelevant, as I can get
Putty to control the radio with all of the different options. You will have to figure out the Bits per second by trial and error. The AOR
3000 manual specifies 4800, but my unit needed to be set at 9600. The AOR 3000 can be opened and tweaked and it appears that the
previous owner set the baud rate to 9600. Once you are able to get Putty to open the COM port with the same settings as the virtual
port, you will know the settings are correct.
Step 4 – Connect the adaptor to the AOR 25 pin interface and the USB end to to an available USB port and power on the radio. If you are out
of USB ports, buy a powered hub. I love these – https://www.amazon.com/gp/product/B07G8CMR18/ I have no brand affiliation, but
whatever you do, buy a powered hub.
Step 5 – Launch and configure Putty. The default install location will be “C:\Program Files\PuTTY\putty.exe. Select a Serial session and change
the defaults to match your port defaults. Select session, Serial. Give it a name. Save. Load – Open. For future Putty Sessions –
Load – Open. If you want to see the welcome screen, power up the radio after Putty opens the port.
How to control the radio from within Putty:
Directly input the frequency followed by the ‘Enter” Key, such as 105.9, or .610. To change the modes:
WFM : the “w” key followed by ‘Enter.”
NFM : the “n” key, followed by “Enter.”
AM : the “a” key, followed by “Enter.”
USB: the “u” key, followed by “Enter.”
CW : the “c” key, followed by ‘Enter.”
Some more info regarding serial port control. I found the manual online:
https://www.qsl.net/ta2ei/cihaz/ar3000a/AOR_AR3000A%20%20User%20Manual.pdf
Pages 48-51 have all the details. A lot more than just setting the frequency and mode can be controlled with serial port commands.
I had an AR2500 they were not user friendly, It seems I was always reading the instruction manual on how do receive a desired signal, and it takes a lot of finger pokes on the display pad. There is an RS232 port for remote operation, that too was rocket science to use. A far cry from the intuitive turn on the audio and turn the tuning knob to the desired frequency and listen. I liked my HX-140 better.