The following article originally appeared in the October 2018 issue of The Spectrum Monitor magazine:
Welcome back to the world of SDRs once again
In September we began of our three-part Primer on Software-Defined Radios (SDRs). Part One (September) focused on the nomenclature and components of a functioning SDR system; Part Two (October) took a look at some affordable SDR station options that will propel you into the world of SDRs for less than $200 US. This month, in Part Three––our final installation––we’ll dive a little deeper into the SDR rabbit hole, and investigate higher-end SDRs as well as ham radio transceivers with embedded SDRs.
Investing in SDR hardware
As we mentioned in Part 2 of our primer, gaining entry into the world of SDRs can be quite affordable. With merely $200 or less, you can fully explore the radio spectrum with an SDR that has truly excellent performance characteristics.
So, why would you pay more?
Let’s consider this. If, say, you happen to live in an RF-dense environment, such as a busy city, if you live near strong broadcaster(s), and/or if you’re a DXer who’s seeking benchmark performance, then you might wish to devote a little more of your cash to your SDR hardware.
When you pay more for an SDR, the additional cost is typically going toward the hardware rather than the software. Indeed, my favorite SDR (software) applications are absolutely free, and pair with a number of benchmark SDRs. But good hardware is vital to performance. The lineup of SDRs––that is, the receiver hardware––discussed below typically has better filtering, preselectors, shielding, and receiver architecture focused on HF performance. They also tend to offer a more robust front end, lower noise floor, and better dynamic range. All of this, of course, results in better performance overall. Some of these SDRs also offer unique specialty features, like built-in web servers.
The following SDRs are carefully hand selected, and in my view, represent a balance between price and performance. And again, this is by no means a comprehensive list; it’s simply a selection of what you’ll find currently available on the SDR market.
So, without further ado, we’ll begin our discussion with “black box” SDRs, then move on to SDR transceivers and transceivers with embedded SDRs.
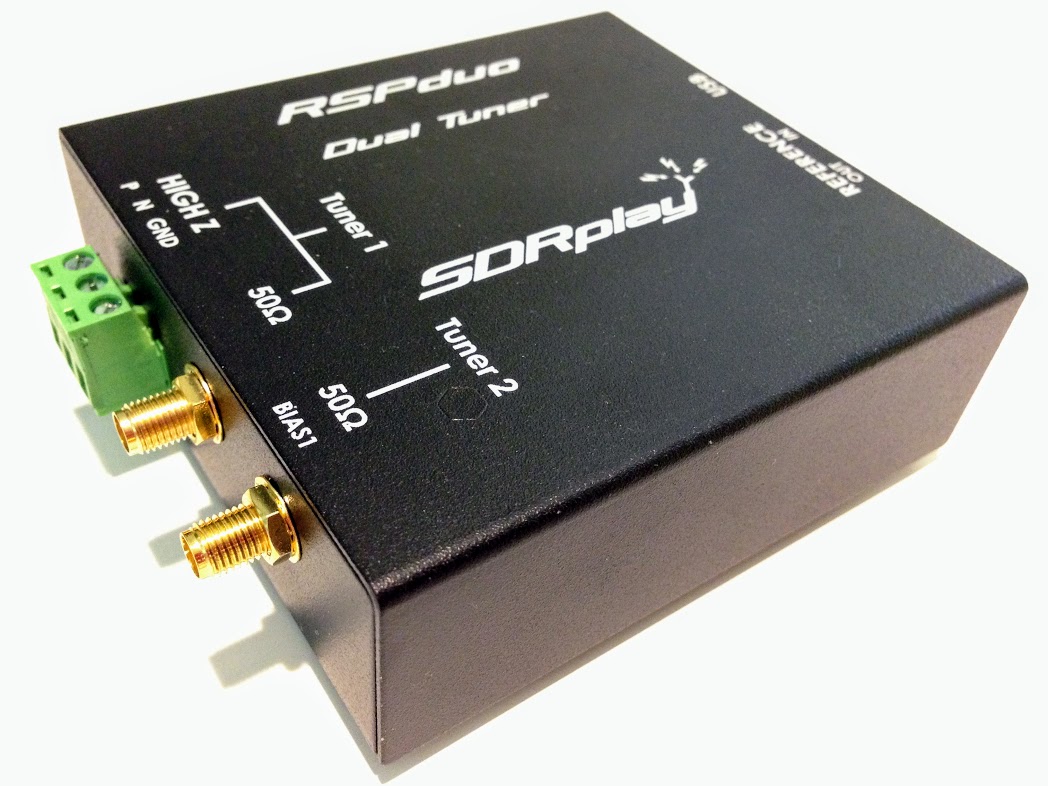
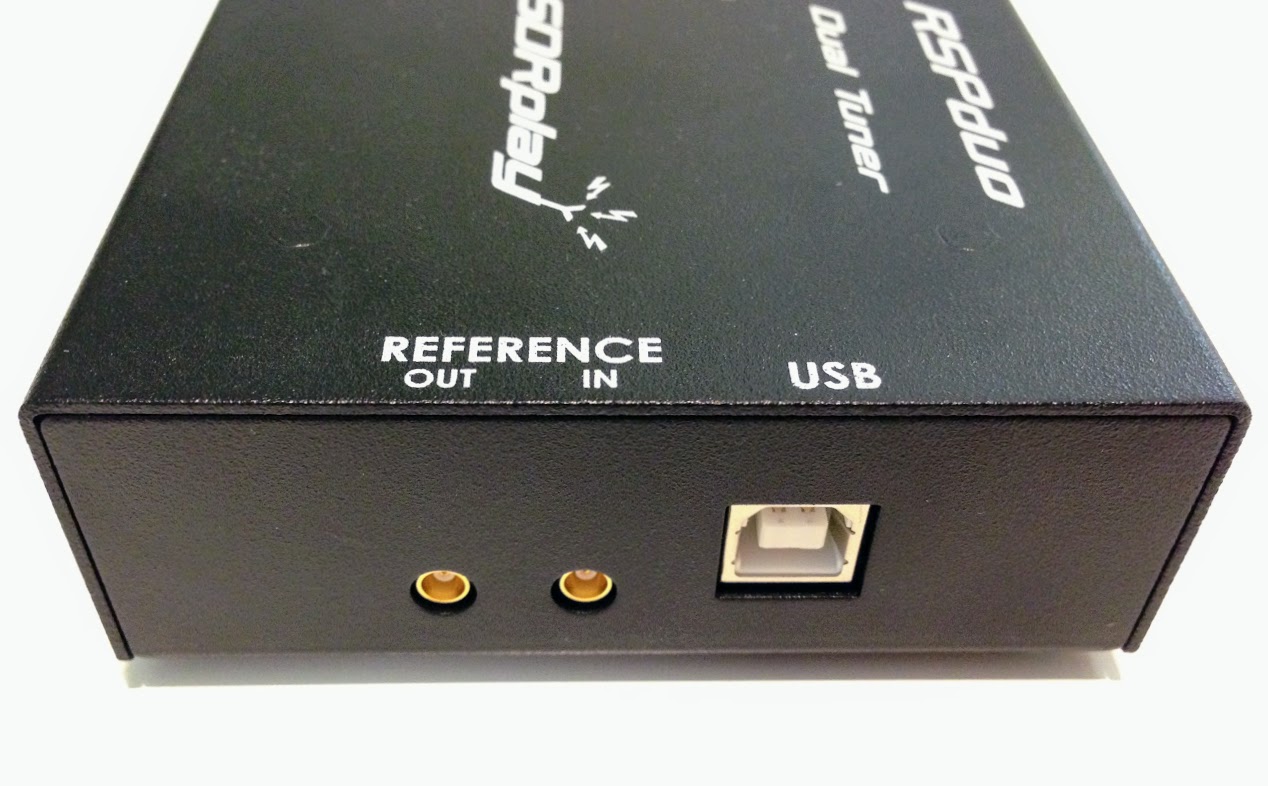
SDRplay RSPduo

The SDRplay RSPduo
In May of this year (2018), the UK-based SDR designer and manufacturer SDRplay released their latest receiver: the SDRplay RSPduo.
What sets this little black box apart from the competition is just what its name implies: the duo is a dual tuner SDR. In other words, it’s two independent SDRs rolled into one.
Being the price leader in the world of SDRs, SDRplay retails the RSPduo for $279.95. And, I must add, it’s a true bargain for a feature-packed 14-bit high-performance device.
The RSPduo’s tuners can operate individually, anywhere between 1kHz and 2GHz, with up to 10MHz of working bandwidth. You could also set up the RSPduo so that both tuners can operate simultaneously, again between 1kHz and 2GHz, with up to 2MHz of bandwidth per tuner. The RSPduo has a high-stability reference along with external clocking features which makes this SDR an affordable option for industrial, scientific, as well as educational applications. It’s housed in a quality steel enclosure.
SDRplay’s development team is already working on new features such as true diversity reception, which will be included as a free upgrade to their popular SDRuno proprietary application.
To be clear, there is no other sub-$300 SDR on the market that currently has true dual-tuner functionality. Thus, the RSPduo is a good value, in my opinion––and an inexpensive upgrade to a proper dual-receiver SDR––so if this is something you’d like to add to your shack, go ahead! Bite the bullet, and acquire an RSPduo. Likely you won’t regret it.
Check out the RSPduo via:
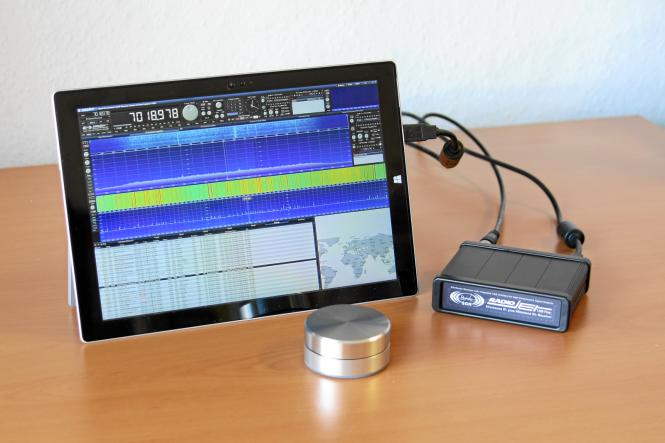
KiwiSDR
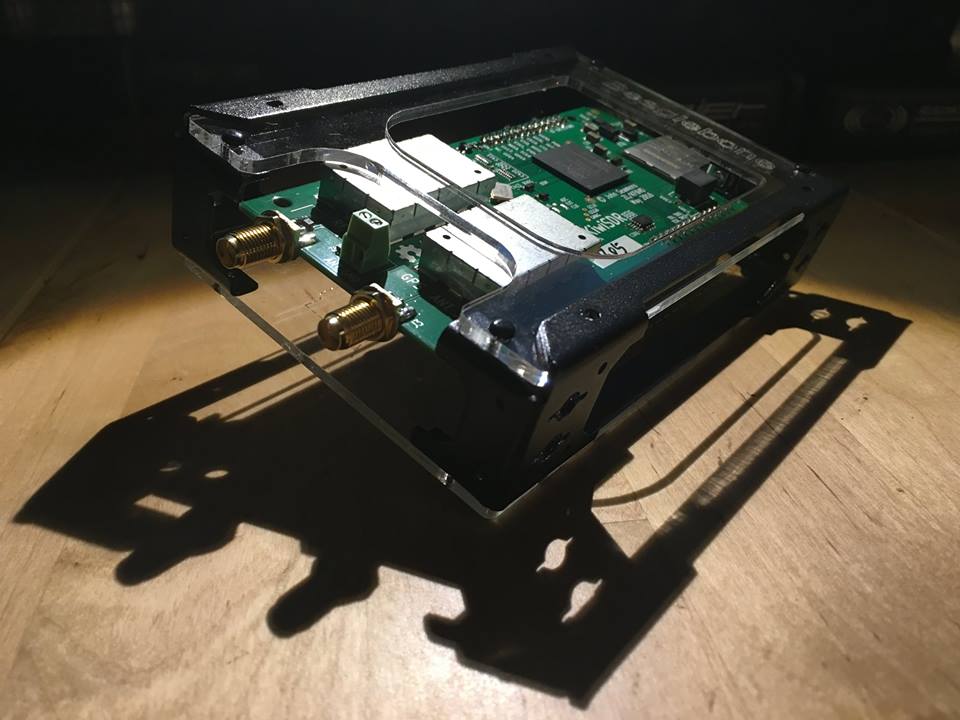
Photo by Mark Fahey
Like the RSPduo, the KiwiSDR has a unique feature that makes it stand out among the other receivers mentioned here: it is designed to be fully controlled via a web-browser-based SDR application. Not only can you use your KiwiSDR locally, but you can share it with the world via the KiwiSDR network. You can configure the KiwiSDR to allow up to eight simultaneous guest users, assuming only that you have access to the modest amount of Internet bandwidth this requires.
The KiwiSDR ships as a simple modular kit, and requires no special tools to assemble: the SDR is a custom circuit board (known as a “cape”) that you connect to BeagleBone Green or BeagleBone Black mini computer. (Click here to learn more about the BeagleBone).
The KiwiSDR is available in two versions: the SDR cape, alone, and a more complete version which includes the SDR cape, BeagleBone computer, enclosure, and GPS antenna. Both versions include all SDR software loaded on a micro-SD card.
Although the KiwiSDR might sound like an experimenter’s receiver since it requires a degree of assembly and configuration––at least, a bit more so than the other units I review here––it’s actually fairly simple to assemble, install, and put on the air. In fact, the only challenge that you might face is that of setting up your router for global access to your KiwiSDR. It does require either a static IP address or (more commonly) an IP address forwarding service. Check out the support documentation in advance to make sure your Internet connection will work.
The KiwiSDR covers from 10 kHz to 30 MHz, thus is not a wideband receiver like the SDRduo. Like the SDRs that follow, it focuses its performance on HF and lower bands.
I find it incredible that for just $299 US, you can purchase the full KiwiSDR kit––one that includes everything you need to put your SDR on the air and online. Because of this, I believe the KiwiSDR has become the dominant web SDR platform currently on the market. Perhaps this remarkable fact overshadows the fact that the KiwiSDR is also a superb performer, touting a brilliant dynamic range as well as overall excellent sensitivity and selectivity.
As my friend and fellow radio listener Mark Fahey, an early adopter of the KiwiSDR, is quick to point out, the KIwiSDR is unique in that it doesn’t connect to a PC or other computer to operate. It’s a stand-alone: just connect an antenna, DC supply, and network cable, then you’re ready to go. All of the “work” is delivered by the piggyback BeagleBone CPU.
What’s not to love? While the web-based SDR application is full-featured, it does lack spectrum recording and some other advanced controls. This is due to the relatively modest processing power of the onboard CPU. That said, The KiwiSDR application does contain features/functionality via extensions that are fairly impressive.
Additionally, when updates are rolled out for the KiwiSDr application, these take effect globally. Only recently, for example, audio recording and amazing TDoA (Time Distance of Arrival) functionality were added.
Oh, and one more thing before we move on: the KiwiSDR is the only SDR I know that is exclusively controlled by a web-based SDR application for both the online guest and the local user/owner. There is no separate downloadable application. Thus, whether you’re using your own local KiwiSDR or an online SDR, the user experience is exactly the same. It’s seamless and user-friendly…just as it should be.
Want to try the KiwiSDR before purchasing? Easy! You can browse and select any one of two hundred KiwiSDRs online on SDR.hu.
Check out the KiwiSDR via:
ELAD FDM-S2/FDM-S3
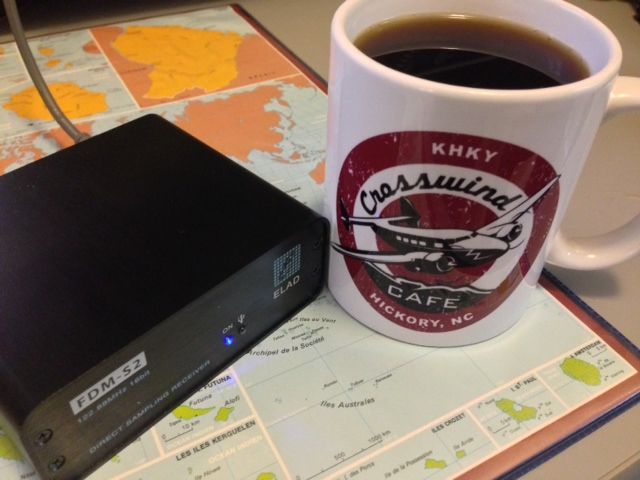
Italian-based SDR manufacturer, ELAD, has built a solid reputation over the years for truly pushing the SDR performance envelope in the $500-$1000 market.
I have owned their Elad FDM-S2 for four years now (check out my full review in the November 2014 issue of The Spectrum Monitor). The FDM-S2 continues to impress and to hold its own among more recent competitors––a true indication of excellent engineering and hardware.
The FDM-S2’s frequency coverage is 9 kHz-52 MHz, 74-108 MHz, and 135-160 MHz. I should note here that besides being a great HF and mediumwave performer, the FDM-S2 is an FM DXer’s choice receiver; FM performance on this rig is just superb.
ELAD supports all of their SDRs with their own proprietary application which, of course, is designed to take full advantage of the SDR’s available performance. The ELAD application is feature-packed and even includes built-in DRM decoding. Interestingly, it will allow the FDM-S2 to be used as two completely independent tuners in “double DDC mode”––the working bandwidth of each tuner, in this case, is 384 kHz, and each can be placed within one of the FDM-S2’s input ranges.
In truth, I like pairing my FDM-S2 with the excellent (and free) SDR Console SDR application; I prefer its user interface and recording functionality over the ELAD application.
If you live in an RF-dense area, you might consider one of ELADs external pre-selection filter systems to keep the FDM-S2 from overloading in the presence of very strong signals.
The FDM-S2 is currently priced at $529 US.
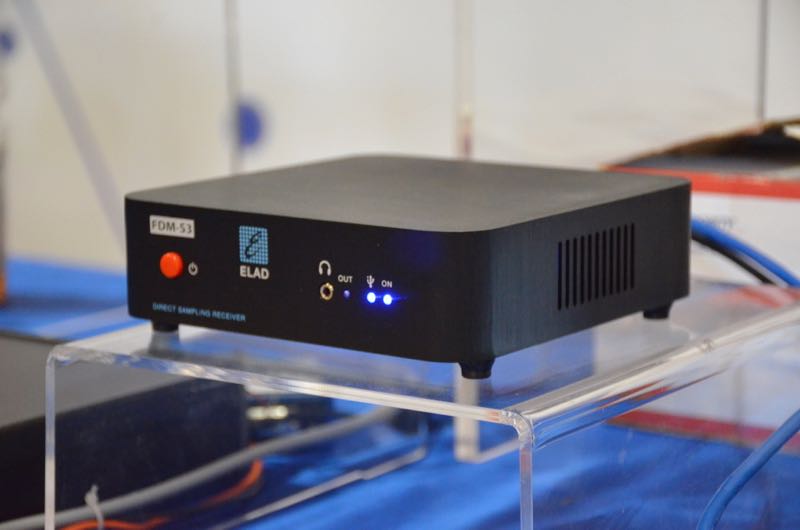
Photo of the new ELAD FDM-S3 from the 2018 Hamvention
Note that ELAD will soon be releasing the newest addition to their product line: the FDM-S3. I know very little about the FDM-S3, but I do know ELAD is promising groundbreaking performance and dynamic range, setting a new benchmark for the $1000 price bracket. We do know the FDM-S3’s processing bandwidth is an impressive 24.576 MHz––wide enough to include the entire FM broadcast band!
I’m not sure if FM DXers will be able to take advantage of spectrum recording at a 24 MHz bandwidth, because I suspect it could push 24GB of data per minute. The FDM-S3 may well keep up, but I’m not sure the typical computer hardware can handle that kind of data transfer…it may be likened to, in radio terms, drinking from the proverbial fire hose!
However: ELAD will be sending me a loaner FDM-S3 to review in the coming months, so stay tuned for more on this DXer’s dream rig!
The current FDM-S3 price, by the way, is 949.90 EUR.
WinRadio Excalibur
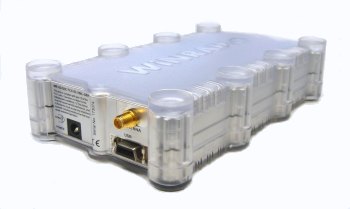
The WinRadio Excalibur
My first foray into the world of benchmark SDRs was made with the Australian-made WinRadio WR-G31DDC Excalibur. And although this SDR has been on the market for the better part of a decade, it still outperforms many of its competitors.The Excalibur’s frequency range is 9 kHz to 49.995 MHz, providing absolutely stellar performance across the spectrum.
It’s a favorite SDR in my radio shack, despite the fact that it can only be fully controlled by WinRadio’s own proprietary SDR application (at least, I know of no other compatible applications). On the plus side, the WinRadio application is one of my favorites.
The application’s file size is extremely compact––only a 9MB download. The user interface is logical, ergonomic, and responsive. Other than SDR Console, it has some of the best recording functionality available today.
I’ve logged more airtime with the Excalibur than with any other SDR I own, mainly because of its superb overall performance, responsive application, and recording functionality. I use the Excalibur as a benchmark for receiver evaluations and find that very few can match its solid performance.
The WinRadio Excalibur can be purchased through a number of distributors worldwide for about $950.
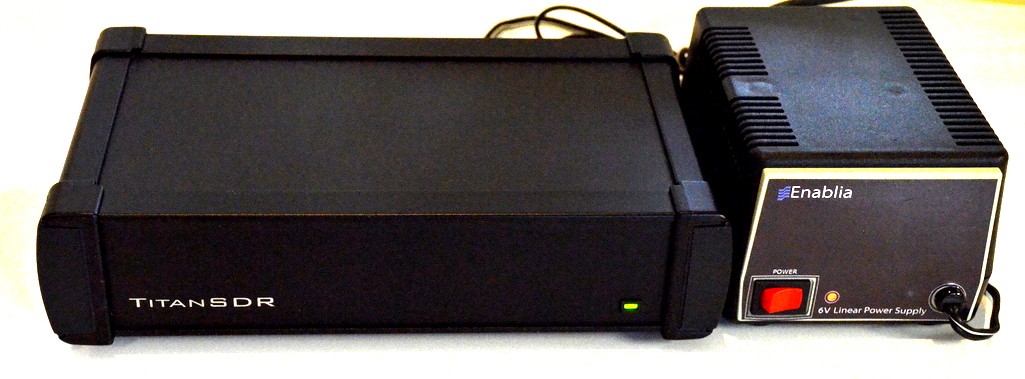
Enablia TitanSDR Pro
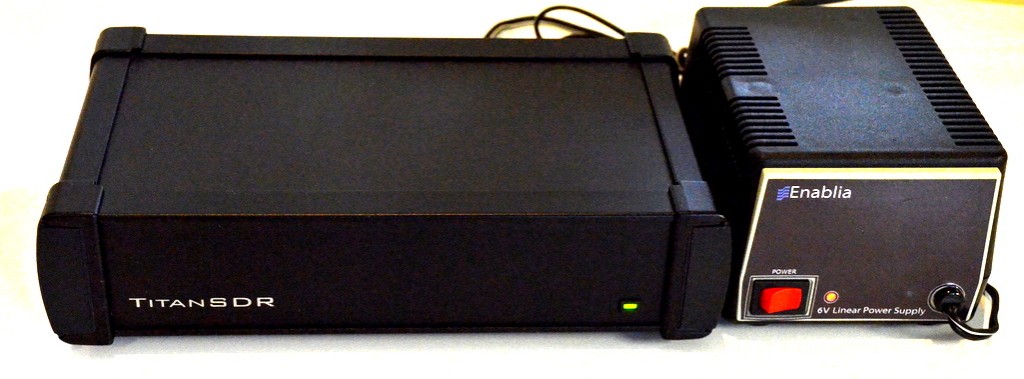
The Enablia Titan SDR Pro is an outlier product in our SDR Primer series, in that it retails in excess of $2,000. However, it’s the highest performing SDR I’ve ever tested. Serious weak-signal DXers will likely be quite pleased with this rig.
And speaking as a radio archivist, the Titan has the most powerful set of audio and spectrum recording features I’ve used, to date. Selectable spectrum recordings can be made from within the wide working bandwidth, and it can run up to four fully-independent SDR receivers, simultaneously.
The Titan comes with 16 frequency preselectors onboard, and a 9 kHz to 32 MHz frequency coverage. Its front end is simply bullet-proof, and thus could be operated in a demanding RF environment.
The TitanSDR ships with a brilliant proprietary application. It’s designed to make managing the Titan’s multiple virtual receivers and four independent SDR receivers as straightforward (and easy!) as possible. As I said in my review, Enablia engineers quite successfully accomplished this. The only downside is that only the TitanSDR application can run only the TitanSDR; no other third-party apps work with it. In addition, when making spectrum recordings, the file format is unique and the header information is actually stored in a separate file. This means when you are transferring a set of spectrum recordings, the header file must also be accounted for.
Of course, there is the daunting price tag of the TitanSDR, which makes it clear that this was a receiver designed for government and commercial use, in particular, for signal intelligence. Thus it’s likely no surprise that the basic version of the TitanSDR retails for 1380 EUR, the TitanSDR Pro for an even heftier 1970 EUR.
To be fair, there are not many readers who would consider the TitanSDR Pro, but I thought it worth mentioning as it demonstrates a clear case of hardware becoming an innovation’s primary focus.
Enablia’s website is quite basic, so I would recommend you contact them directly to ask for a price quote if you’re interested in one of their TitanSDRs.
Other SDRs
The SDRs above represent merely a small slice of SDR market availability. There are several other notable manufacturers and SDRs worth considering, thus worth noting.
The Bonito Radiojet 1309 Plus
Germany-based Bonito manufactures a number of SDRs, antennas and components that are highly regarded among DXers. Bonito’s “hybrid” SDRs pack a lot of performance yet require very little in terms of computer resources. Their latest SDR, the Bonito RadioJet 1309 Plus covers 0.02 MHz to 1600 MHz with a spectrum display that can be widened to 3.2 MHz. I have not personally evaluated the RadioJet 1309 Plus, but I did review an early version of the RadioJet (the 1102S) that lacked the additional IQ-receiver of the 1309. I found it an impressively sensitive and selective receiver with excellent audio characteristics. Click here to read that review.

The RFspace Cloud-IQ
RF Space has been manufacturing SDRs longer than many other manufacturers, and the company offers a number of products, including the SDR-IQ, the NetSDR+, the Cloud-IQ, and––soon to come––the CloudSDR.
In Part 2 of our primer, we mentioned the AirSpy HF+ which packs impressive HF performance. Airspy also manufactures the Airspy R2 and Spyverter R2–this $218 US combination produces a compact SDR package with excellent dynamic range and superb frequency stability.
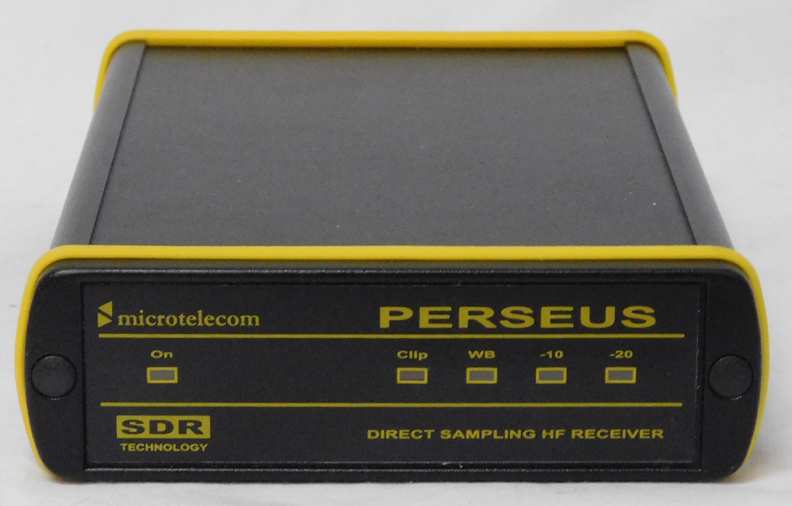
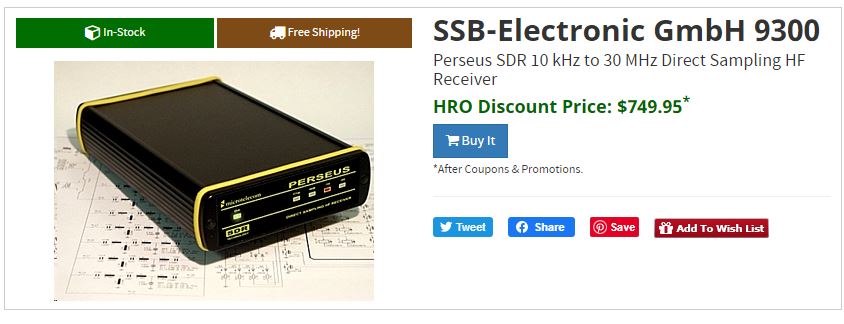
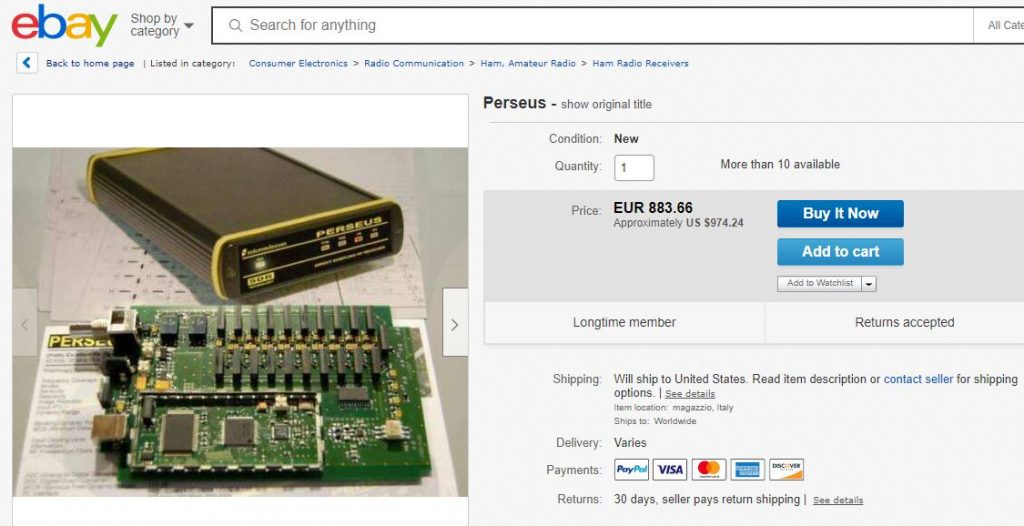
I’m also fond of the classic Microtelecom Perseus SDR, which I’ve seen sold used for approximately $700 US. WinRadio, too, offers higher-end SDRs with a wider frequency range and working bandwidth than the Excalibur––so if your budget allows, you might consider these.
Regardless, keep in mind that if you want to use your monetary resources efficiently, there is no need to splurge for higher-end SDRs unless your use and application demands increased performance. Before you pull the trigger to buy such a rig, I would simply take into consideration the unit’s frequency range, working bandwidth, and performance characteristics, as well as taking the time to read plenty of user reviews. This increases the odds that you’ll get just what you want.
SDR Transceivers
So far, I’ve only mentioned SDR receivers in this primer, but there is a healthy selection of “black box” type SDR transceivers on the market, as well. By “black box,” I mean the transceiver itself (all of the hardware) housed in a box––with, of course, the relevant ports for antennas, data, power, mics, CW keys, and a number of peripherals. These SDRs almost always require a computer for operation, although lately manufacturers are beginning to offer optional touch-screen front panels which can bypass the need for external computer operation.
Unlike the world of tabletop radios, where it might be less expensive to invest in a general coverage transceiver rather than a dedicated receiver, SDR transceivers almost always cost more than an equivalent SDR receiver.
Also note that SDR transceiver applications do not always include audio and spectrum recording functions. In addition, their working bandwidth might be more narrow that other receive-only SDRs, although they may offer more virtual receivers and spectrum “slices.”
Finally, SDR transceiver applications tend to be proprietary; when you purchase the transceiver, you’re also likely receiving the only SDR application that will interface with it. Hypothetically, if you purchase an SDR transceiver and the company that produced it goes under, you might have issues when the application is no longer updated with operating system upgrades and iterations. The lesson here is that I believe you should try to stick with the healthiest companies and those with solid, large user bases. This increases the likelihood that the application will be supported in the future.
Low-cost, low power SDRs for the experimenter
We’ll start with the least expensive SDR transceivers designed with the experimenter in mind, that can, with a little adaptation, also be employed by ham radio operators as very low-power transceivers.
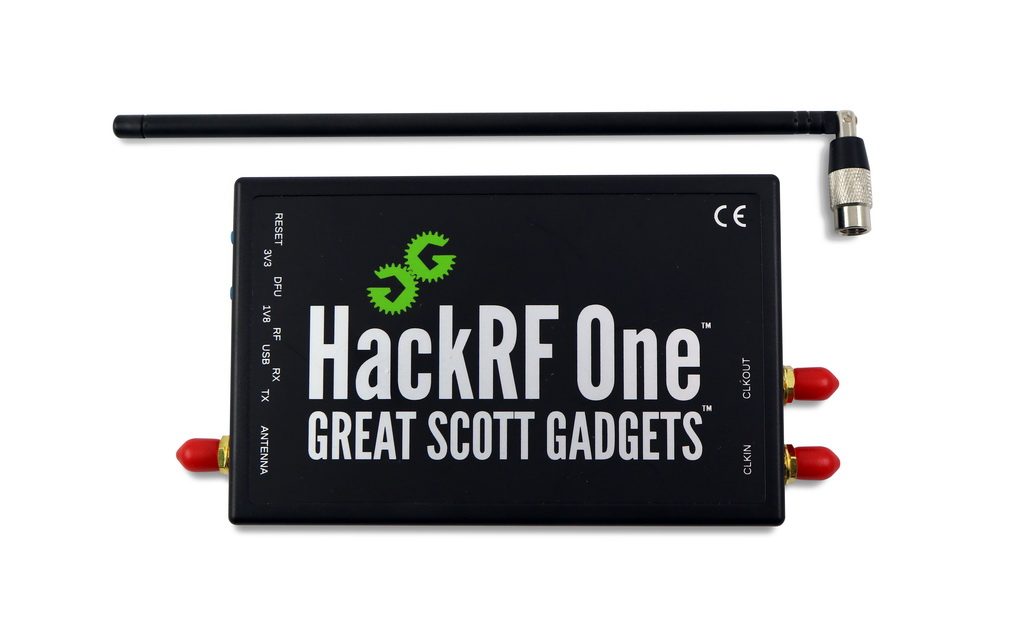
The HackRF One ($299) by Great Scott Gadgets is an excellent SDR. It has an incredibly wide frequency range (1 MHz to 6 GHz), and can transmit anywhere from 3 mW to 30 mW depending on the frequency. That’s flea power, true, but if your goal is to experiment in your local surroundings, it’s typically more than enough output. The HackRF is open-source and sports a large user community that have employed it in dozens of applications. The HackRF was one of the first SDRs to really give experimenters a full tool set to manipulate the world of wireless.
Check out the HackRF One via:

The LimeSDR board
The LimeSDR ($299) is another crowd-funded project that has been incredibly popular. Like the HackRF, it is a low-cost, open-source SDR platform that can be used to support just about any type of wireless communication standard. What makes the LimeSDR unique is that it is integrated with a Snappy Ubuntu Core, which means users can simply install applications from an app store to increase functionality. As LimeSDR states, their platform “gives students, inventors, and developers an intelligent and flexible device for manipulating wireless signals, so they can learn, experiment, and develop with freedom from limited functionality and expensive proprietary devices.
Again, only consider the HackRF of LimeSDR if your main goal is to experiment with the world of wireless. If you’re looking for a full-featured SDR transceiver intended for ham radio, read on.
Ham Radio SDR Transceivers

The Flex Radio booth at the 2018 Hamvention.
Without a doubt, the dominant name in the world of US ham radio transceivers is Texas-based Flex Radio. Flex has been around since the very earliest days of SDR transceivers and has produced a wide variety of high-performance rigs. In recent years, their product development and production has focused on higher-end transceivers with the discerning DXer and contester in mind. Their signature series SDRs pack incredible performance, yet can be operated from modest PCs since most of the processing horsepower and hardware are all within the radio chassis. Flex has also developed a fully wireless touch-screen Maestro Control Console that can be used over a local network, or even the Internet, to seamlessly control a remotely-connected Flex SDR. Flex Radio SDRs can cost anywhere from $2,000 – $7,500 US.
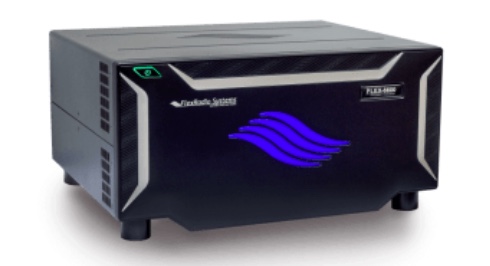
The Flex-6600
Gary Wise (W4EEY), my go-to guy for all things Flex Radio, also notes:
“One of Flex’s newest models, the Flex-6600, includes 7th Order Contest Band Bandpass Filters and dual Analog to Digital Converters. Which means that, using this radio, one can listen on one band while transmitting on another. Contesters call this ‘Single Operator Two Radio’ operation, and if you can do it successfully, it leads to big contest scores. Having this functionality in one box, without additional controllers and interfaces, is remarkable.”
Indeed.
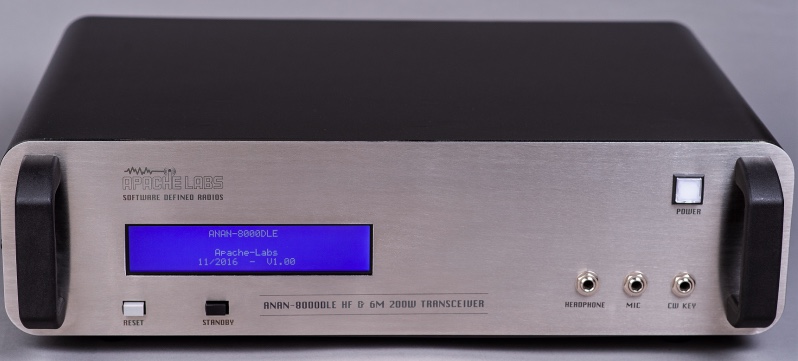
Two other SDR transceiver manufacturers with large user bases are the Sweden-based SunSDR and India-based Apache Labs. Both companies produce high-performance SDRs and, like Flex, set benchmarks in terms of transceiver performance. I will not comment at length about either company because I’ve not had the opportunity of personally testing their products, but I encourage you to search online reviews about their products.
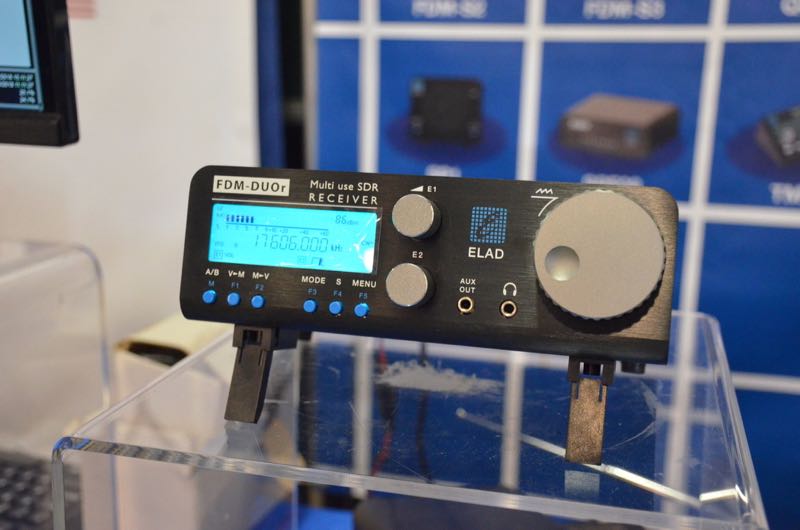
Tabletop SDR transceivers

The Elad FDM-DUO transceiver is both a stand-alone tabletop and fully-functioning SDR when paired with a PC.
There are a number of full-featured tabletop SDR transceivers on the market. One of the first SDR manufacturers to build a fully self-contained tabletop model with PC integration was ELAD, with their FDM-DUO QRP transceiver. Tabletop SDRs at the time of the FDM-DUO’s release were very limited in their functionality when connected to a PC. Some of them had stripped-down applications and lacked features like spectrum recording and multiple virtual receivers. The FDM-DUO, when connected to a PC running ELAD’s software, gives the user full control of the SDR. Indeed, the experience is identical to that of using the FDM-S2 mentioned above, however the DUO is also a transceiver. Since the DUO’s release, other SDR manufacturers have designed models with full SDR application integration.
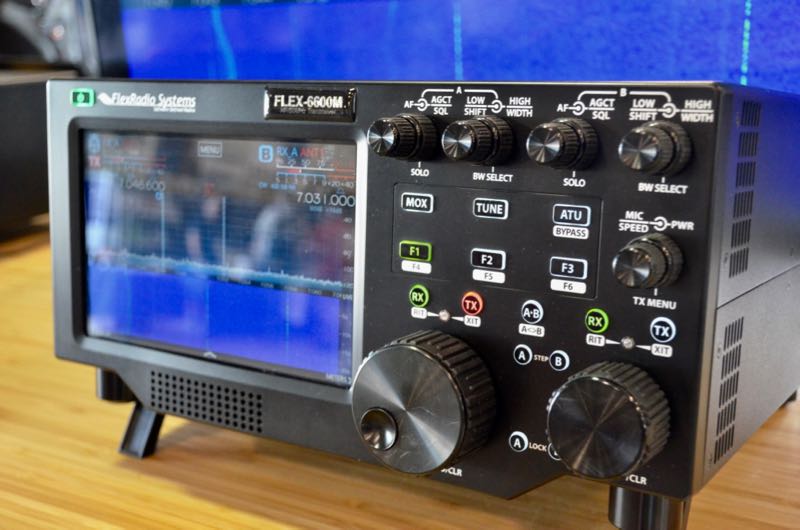
The Flex 6600M is a handsome standalone SDR transceiver.
Recently, Flex Radio introduced their Flex “M” Signature Series SDR Transceiver. These tabletop SDRs can be configured with most of the SDR receivers Flex currently produces. Their displays are impressive and useful; indeed, the spectrum waterfall resolution and size is one of the best I’ve seen on a tabletop transceiver. The front panel is large and sports a number of controls, the design harkening back to large contest-grade transceivers like the Ten-Tec OMNI VII and Orion series.
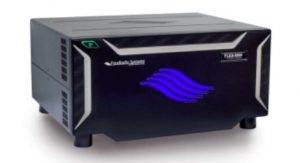
The SunSDR MB1 at the 2018 Hamvention.
This year at the Hamvention in Xenia, OH, I had a chance to check out the SunSDR MB1. Like the Flex M series, the MB1 sports a comprehensive front panel and an amazing assortment of connections on the back panel. As I took a tour of this radio––and it really did require a tour, it’s so densely feature-packed––I was most impressed by the thought that went into this stand-alone SDR transceiver. I love the front panel display, graphics, and overall ergonomics. I understand it will also deliver benchmark performance; indeed with prices starting at a steep $7,000 US, I would expect nothing less!
SDR transceiver summary
As we’ve pointed out in this part of our primer, pure SDR transceivers are a product for radio operators willing to invest more financially in order to take advantage of the advanced functionality and performance a true SDR can provide. At present there are surprisingly few players in the pure SDR transceiver market; this is a product category ripe for expansion. And as more manufacturers get into the game, I believe competition will direct prices into even more affordable territory.
Transceivers based upon SDR technology
The final category we’ll discuss is transceivers based upon SDR technology. It’s a sign of the times, indicating the direction that all enthusiast-grade transceivers and receivers are likely heading.
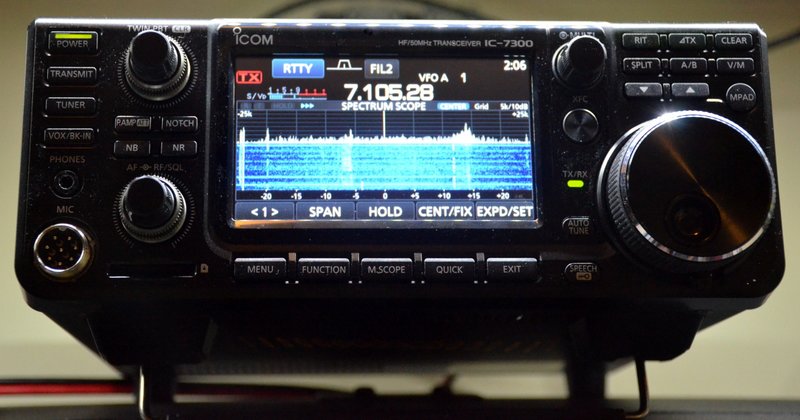
The Icom IC-7300 transceiver
Because the fact is, whether or not you feel inclined to embrace SDRs in your radio world, you may be surprised that you already have: for many years now, radio manufacturers have built their transceivers and receivers on SDR and I/Q quadrature down-sampling technology. All of the transceivers introduced in the past few years that sport on-board spectrum displays––like the Icom-IC7300, Icom IC-7610, and the new Yaesu FT-DX101D––are, of course, based on SDR technology.
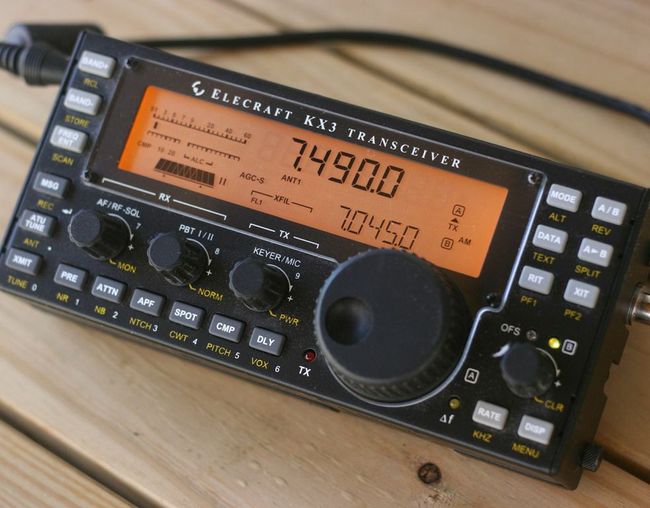
Many others, like the Elecraft KX3 and KX2, which look much more like a traditional radio, are also based on SDR architecture. Indeed, almost all of the major manufacturers implement SDR technology in their current product lines. Manufacturers have caught on, learning how to leverage SDR technology in a way that maximizes receiver performance while keeping the overall price more affordable than comparably-performing legacy radios of former days.
Yet while these radios are SDRs at their core, they often are limited in their functionality when connected to a PC; most can be completely controlled by a PC and many can even export their I/Q data, but usually they won’t offer the working bandwidth and the advanced functionality of a true SDR transceiver.
Conclusion

If I’ve piqued your curiosity about the world of SDRs, and have yet to add one to your shack, I would encourage you to invest in an SDR receiver––at the very least, in one of the affordable rigs mentioned in Part 2 of this series.
Speaking for myself, I was once a “knobs and buttons” radio operator who thought I’d never want to control a radio through a computer and monitor. But when I hesitantly invested in my first SDR, I found it eye-opening––not to mention somewhat democratizing, in that it sets all radio listeners on the same level, as the spectrum becomes visually understandable, and thus accessible, to all who encounter it. I found that if you love to listen, also being able to look at your audio, especially when editing or archiving, but any time you’re tuning around through the spectrum, just clarifies and enhances your overall radio experience. I soon became hooked…and have never looked back.
Now, I can assure you, I’ll never again be without an SDR. The ability to visualize our radio spectrum via SDR’s virtual window is truly illuminative. What’s more, I’d even venture to speculate that you may share in finding the experience, if you’ll forgive the colloquialism, pretty darn cool.
Do you enjoy the SWLing Post?
Please consider supporting us via Patreon or our Coffee Fund!
Your support makes articles like this one possible. Thank you!