Tag Archives: POTA

Social DXing: Looking back at one very radio-active year

One year ago, I posted an article about making the most of social distancing as the world started locking down due to the rapid spread of Covid-19. Here in March 2021, the news is looking much better: vaccines are being distributed at a record pace across the globe and number of cases and deaths are mostly on the decline.

Looking back

As I look back at the Social DX Bucket List I made last year, I’m happy to see that I actually accomplished about 64% of the goals I listed. I knew some of those goals would take well over a year to achieve (the QRP EME one especially).

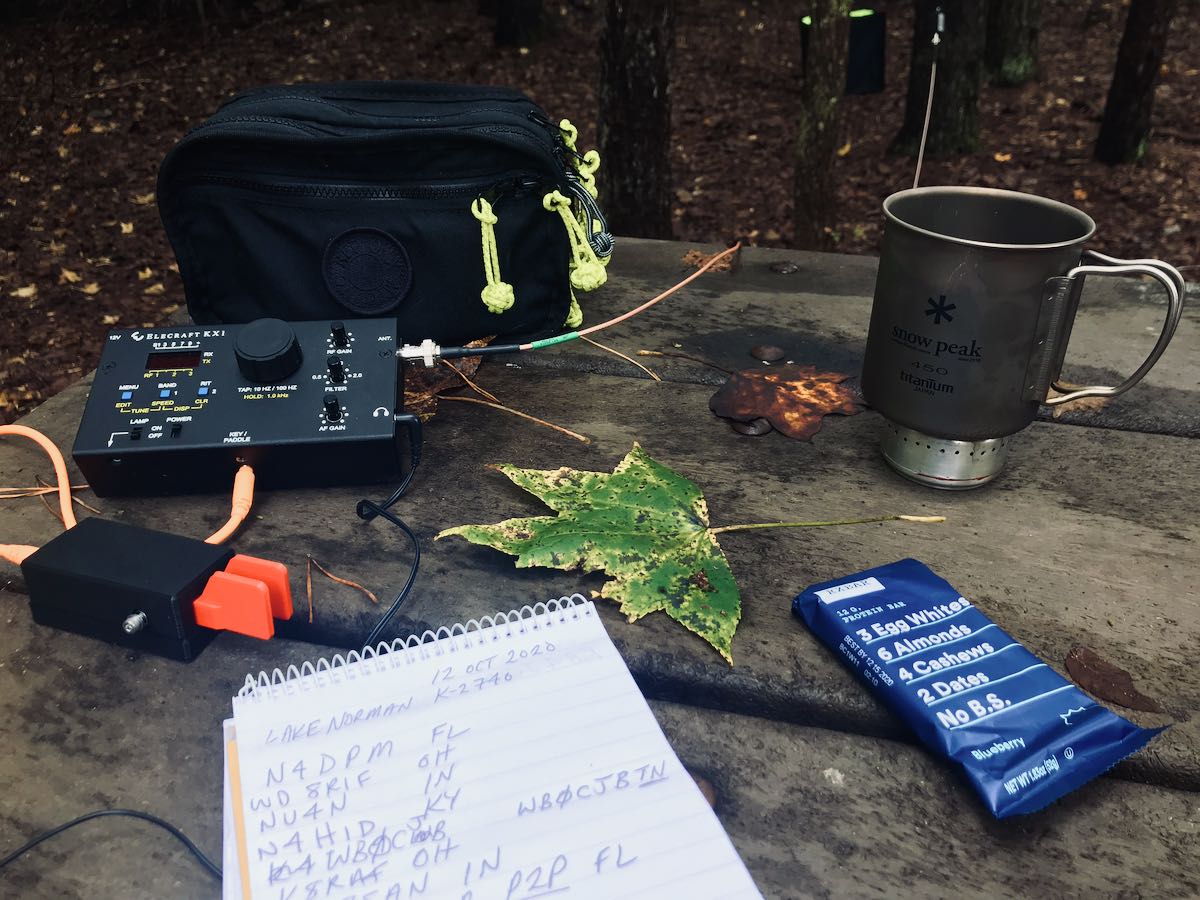
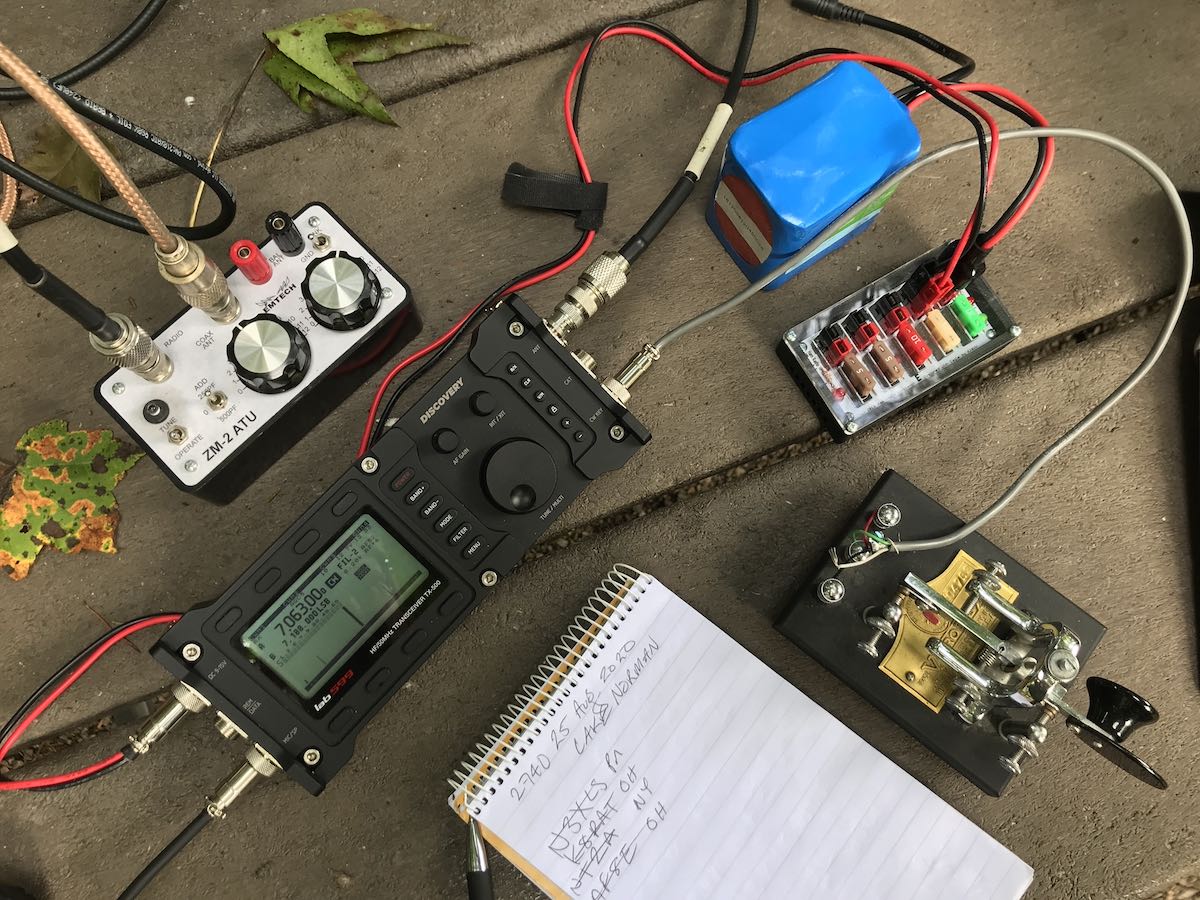
In particular, I’m chuffed that I braved up and started doing Parks On the Air (POTA) and Summits On The Air (SOTA) activations in CW (Morse Code). That was a huge step for me and I’ll freely admit: I was nervous about it. But in July 2020, I managed to do my first CW activation and since then it has become my choice mode of operating in the field. CW is such a simple mode and so efficient–plus it gives me a sense of connection with the roots of radio communications.

I also accomplished a few things I never set out to do:

Not a typical radio year for me

In a “normal” year, I do way more SWLing than I do ham radio activity.

Last year, I started doing caregiving for my parents in my hometown–I’m typically there 2-3 days a week. While I’ve done shortwave listening and even a little MW DXing in my hometown, I typically don’t have a lot of time, especially in the evening hours. I just want to hit the sack early. QRM is also debilitating there and while I’d like to install a permanent Loop On Ground antenna to mitigate the noise (you heard that right, Andrea!) I’m not entirely sure I’d even have the dedicated listening time to justify it. When I’m there, I like to spend quality time with my folks.

In general, I’ve had much less free time. Indeed, if you’ve written to me via email, you’ll know this based on how long it’s taken me to reply. It can take several weeks especially if the reply requires a detailed response (which many do).

En route to, and on the way back from my hometown, I’ve found that doing park and summit activations has been very rewarding. Last year, I believe I completed a total of 82 park activations.

POTA has given me an excuse to explore public lands I’ve never visited before. Plus, I love nothing more than taking radios to the field–both receivers and transceivers.

Hamming and SWLing

At the end of the day, I’m an SWL and a ham radio operator. I find the two activities complimentary.

Side note: As I mentioned in my Winter SWL Fest presentation this year, it saddens me when I receive angry emails from readers after I post items that are ham radio related. We’ve upwards of 7,000-10,000 daily readers on the SWLing Post and the number of complaints are a teeny, tiny fraction of our readership. I only receive messages like this about once a month and they typically say something akin to “I don’t like the ham radio stuff, so if you don’t stop posting it, I’m leaving!” (FYI: That’s a real quote taken from the last one I received in January). I can only assume that at some point in the past, a ham radio operator has been a jerk to this and other radio enthusiasts. It’s a shame, too. I hate seeing the negative impact of one loud troll compared with the encouragement and support of much better people. All of my ham radio friends are not only supportive of SWLing, but almost all got their start in radio via the shortwaves. I’m certainly a case in point.

I love all things radio and I believe the SWLing Post is a reflection of that. If it offends you, then it might make sense to surf somewhere else.

Now where was I? Oh yeah…

POTA and SOTA outings have helped to satisfy some of my travel cravings as well. I miss going to radio conventions, hamfests, and especially traveling internationally with my family. We are a family who love national parks, forests, and other wildlife areas. Having an excuse to explore public lands we haven’t visited before has been amazing fun.

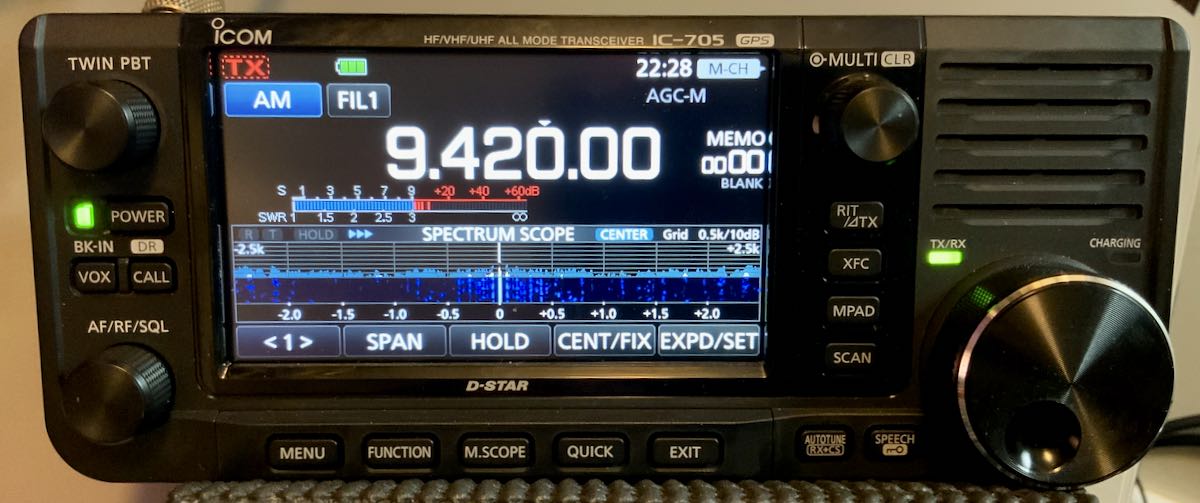
After POTA activations, I’ll often do a little SWLing since I already have an external antenna up and it’s typically connected to a good general coverage transceiver in a spot with zero RFI or QRM. I’ve especially enjoyed my DXing sessions with the superb Icom IC-705.

Listening habits

One indicator that I did less radio listening last year was the low number of recordings I made. I checked my audio folder recently and saw that I only made a couple dozen recordings–most were staple broadcasters, not rare or special DX.

At the end of the day, I realize that when I do SWLing sessions I like to have dedicated time–at least an hour or two–with headphones on, losing myself on the radio dial.  I simply haven’t had many opportunities this past year to make that a reality.

That’s okay, though. The great thing about the shortwaves is that they’re always there, patiently waiting for us to dive back in!

Looking forward

I’m really not sure what’s in store for me this year, but I know it’ll involve a lot of radio time and that pleases me to no end. I’ve made a few fun goals, but my hope is that, by the end of the year, I may even be able to do some proper travel–maybe even take a flight!

I do know this: I have an even more profound appreciation for my radio enthusiasm as I realize it’s the perfect space to travel and explore the world no matter how “locked down” things are. Based on feedback from readers and contributors to this site, I know I’m not the only one who feels this way.

How about you?

Did your radio activity change or pivot this past year? Did you have more or less time to hit the airwaves? Please comment!

Spread the radio love

A comprehensive review of the Mission RGO One general coverage 50 watt transceiver

The following review was first published in the November 2020 issue of The Spectrum Monitor magazine:


A review of the Mission RGO One ham radio transceiver

by Thomas (K4SWL / M0CYI)

Wow…I love this!

If I am perfectly frank, that would sum up my initial impression of the Mission RGO One.

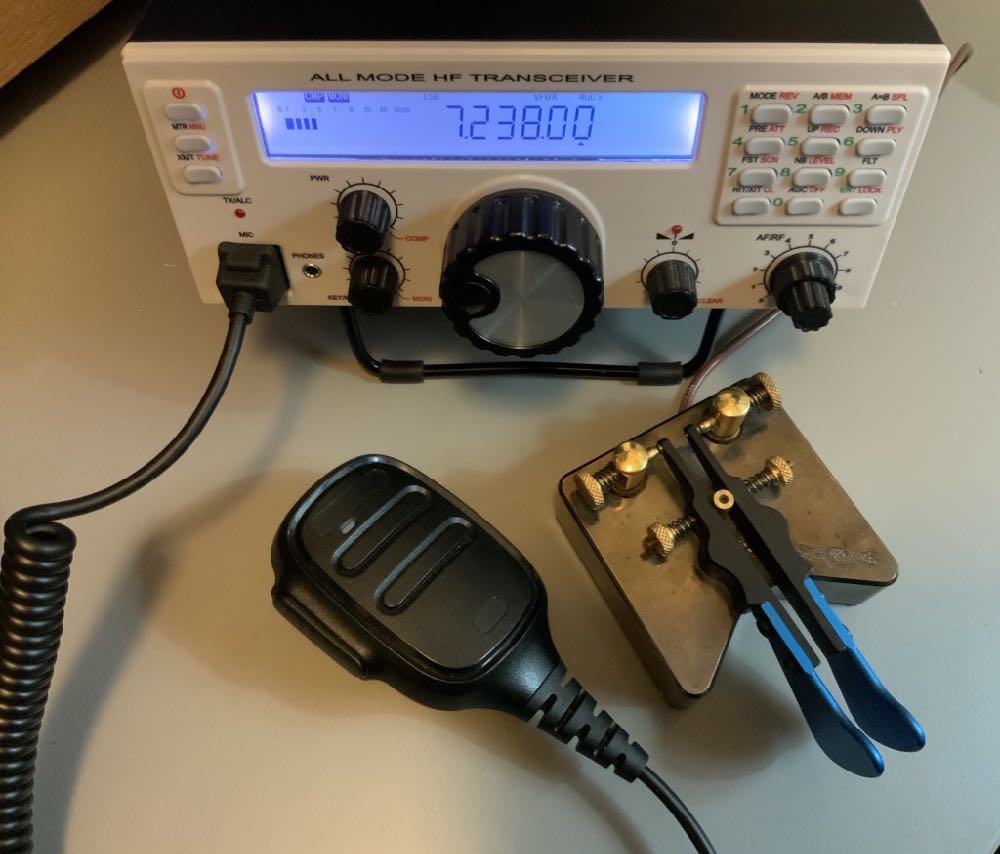
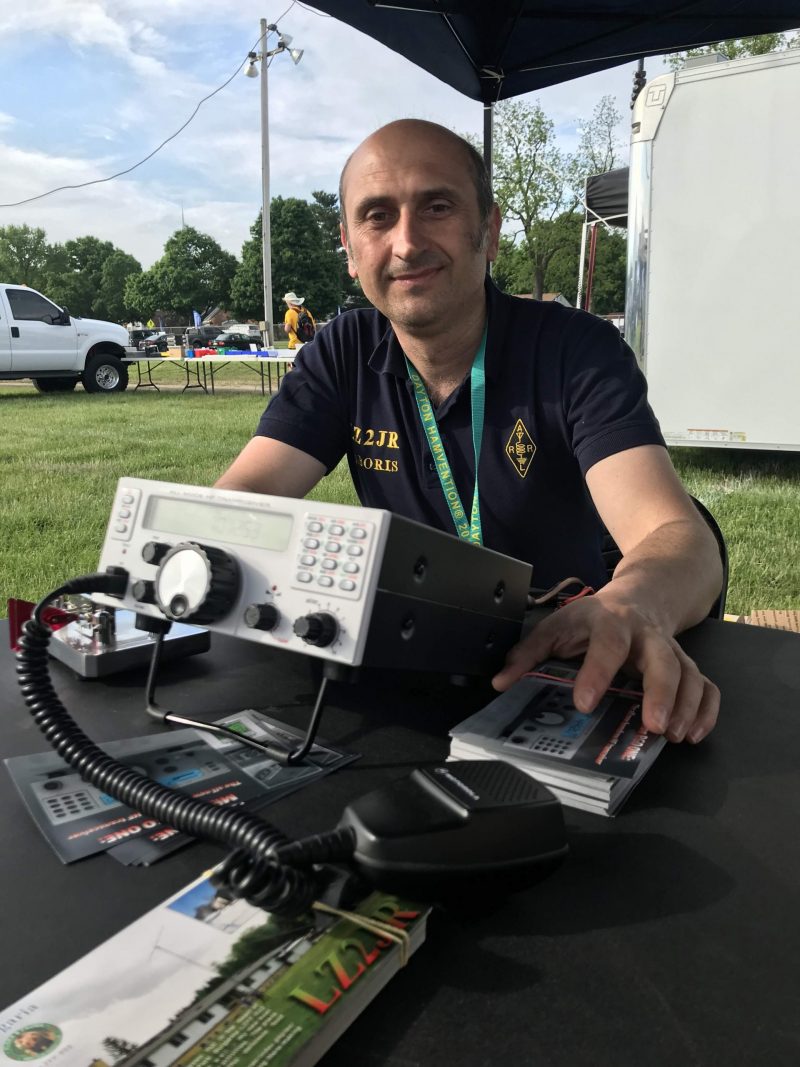
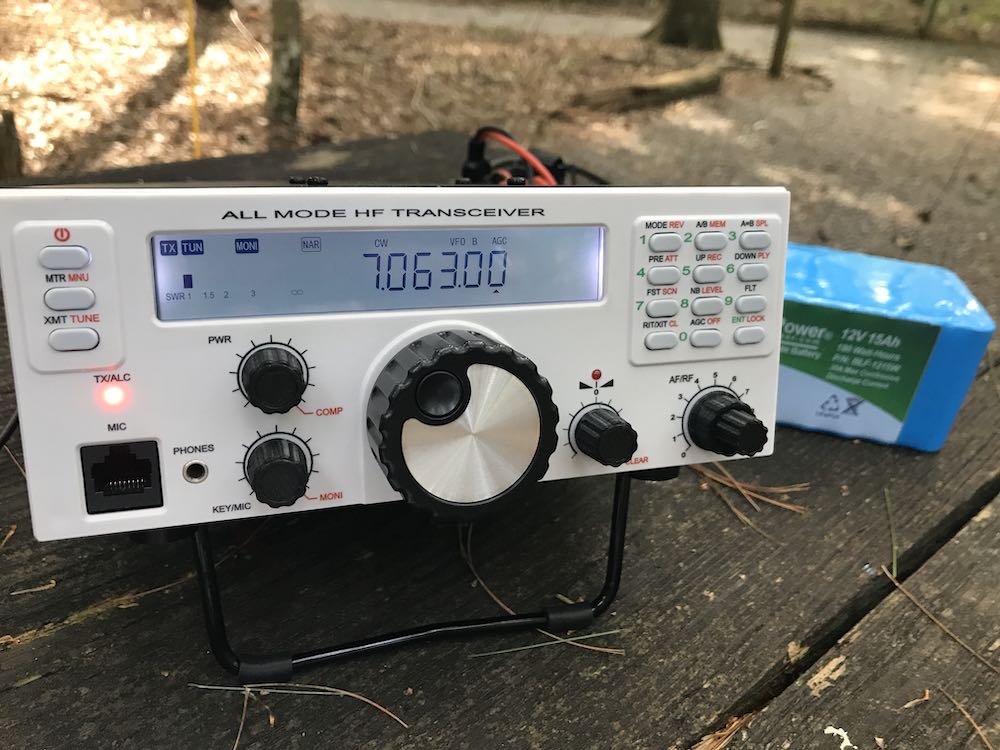
It was the 2018 Hamvention in Dayton, Ohio, and I had just met up with radio engineer Boris Sapundzhiev (LZ2JR) who was debuting the prototype of his 50-watt transceiver kit, the Mission RGO One. With its clean, functional design and simple front face, large weighted encoder, and enough tactile buttons and multi-function knobs to keep one’s most needed features within reach, the kit was certainly pushing all the right buttons for me.  Without a doubt, I was impressed from the start.

Boris (LZ2JR) the designer and engineer of the Mission RGO One.

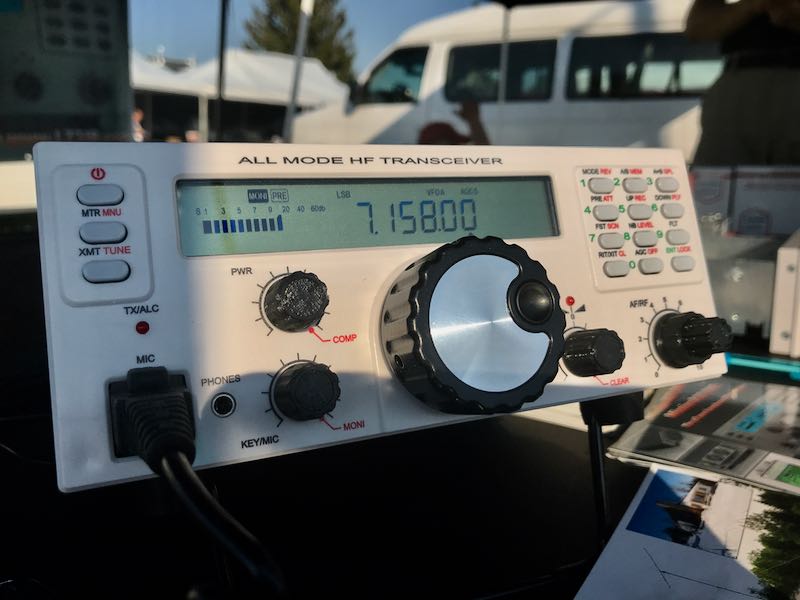
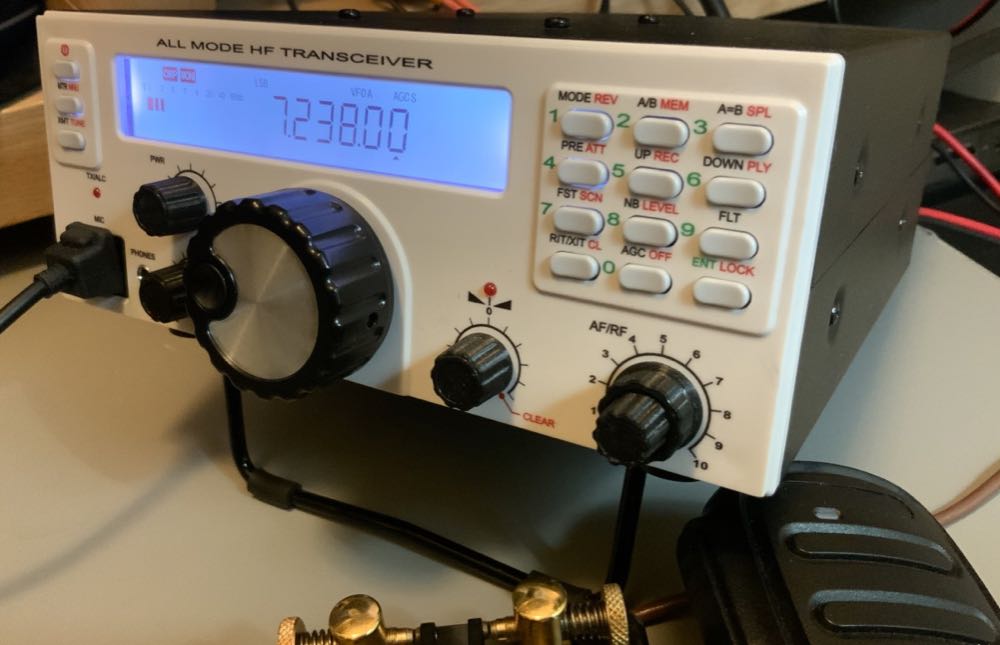
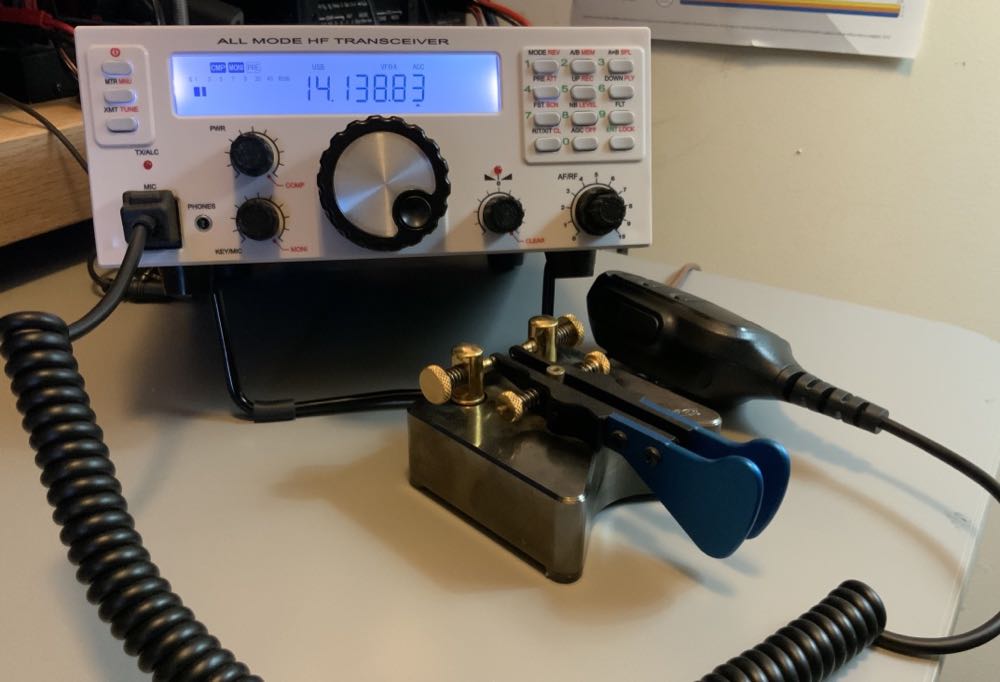
To my mind, the RGO One smacks of classic 1990s-era transceivers:  a traditional tabletop front-facing panel, a large fold-out bail, and a unfussy backlit LCD display that’s large enough to read in the field and viewable at any angle.

Perhaps it’s only because I can’t turn off the innate radio reviewer, that I was rapidly checking mental boxes in this first encounter with the RGO One.  Indeed, when I first set eyes on any new radio, I do skim through my mental “operations checklist” to see how difficult the rig might be to use at home and/or in the field. Specifically, I’m looking for the following controls:

  • Encoder
  • AF Gain
  • RF Gain
  • Mode switch
  • Power output adjustment
  • Tune/Xmit button
  • Preamp/Attenuator
  • VFO A/B
  • Split and A=B
  • Mic gain and keyer speed
  • RIT
  • Filters
  • Band switching and direct frequency entry
  • Key and encoder lock

Of course, these days it’s fairly rare that radios actually contain all of these functions without the user having to dig into layers of menus, multi-function controls, or touch-screen options to access them.

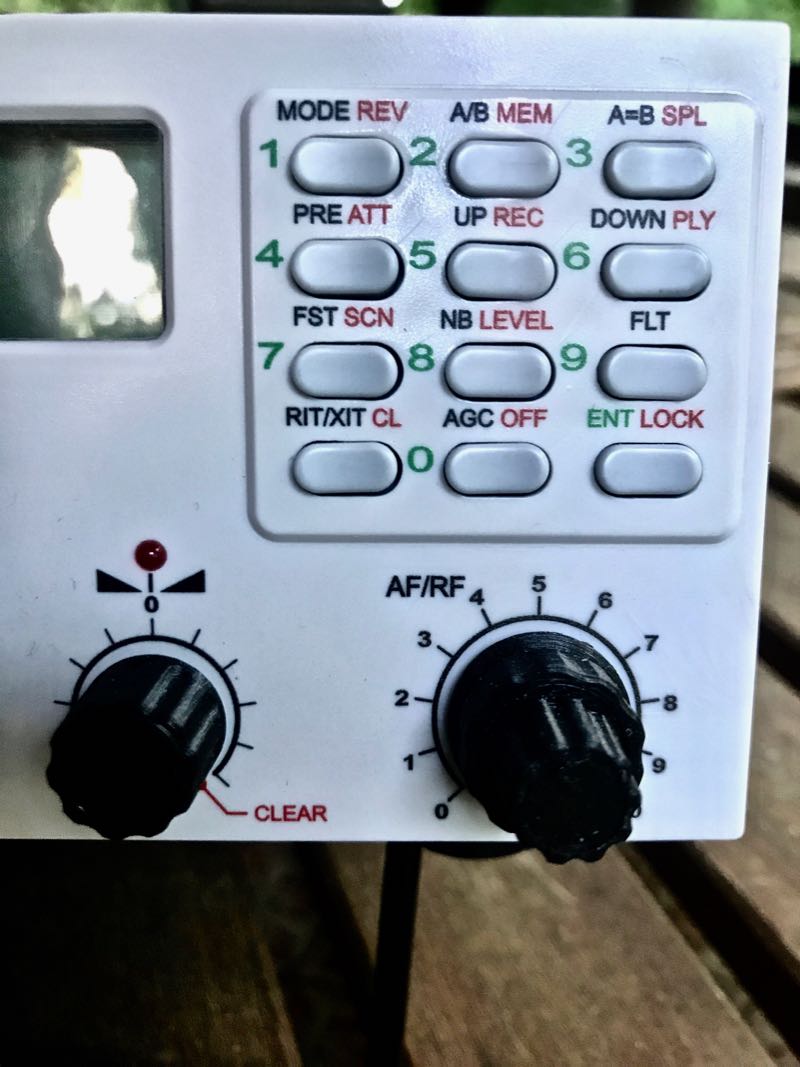
Remarkably enough, the Mission RGO One, despite simple design, manages to include all of these features on the front panel without the need of embedded menus. In contrast with some of the radios I’ve tested and evaluated over the past several years, I could tell by the layout alone that the Mission RGO One was developed by an active ham radio operator and DXer: the controls are that intuitive.

Alas, the tantalizing prototype on Boris’ table in the 2018 Hamvention flea market was for show only.

Boris promised that he’d have fully-functional models available at the 2019 Hamvention. Because of this, following that first meeting in 2018, I kept in touch with Boris; we arranged to meet again at the 2019 Hamvention so I could take a second, much closer look at the RGO One––especially since he intended to start shipping the first very limited, early-production-run rigs shortly afterward.

So…did Boris deliver?  And more importantly: did the RGO deliver––?  Let’s find out.

On The Air

Within hours of taking delivery of the prototype radio, I had it in the field activating parks.

It was May 2019 when Boris delivered on his promise, handing me a loaner prototype RGO One. He did so with the understanding that the prototype was still a little rough around the edges. I acknowledged this, thinking in terms of a late Beta-test model since he welcomed reports of any bugs or anomalies I encountered and was fully prepared to address them.

After taking the initial RGO One to the field, I did note a few bugs, but nothing major.  All of my field notes were then sent to Boris and turned into action items.

Then, in July of 2020, Boris sent me a fully-upgraded Mission RGO One with the new internal ATU and optional adjustable filter. This radio represented the “fully-grown” production model, and in preparation to put it through its paces, I returned the prototype.

Although there are planned hardware upgrade options and, of course, firmware upgrades, the RGO One has now reached full maturity as a transceiver.

However, it was one thing to have ham-friendly ergonomic controls. The real question was, how did the RGO One stack up against the competition? It was time to find out.  After all, this is the danger of a “love at first sight” radio encounter––it often leaves the door open for disappointment, and of this I was well aware.

What follows is my full review of this 2020 Mission RGO One transceiver. Let’s take a deep dive into this rig…

Features and specifications


What follows are some of the RGO One features and highlights as written in the product manual (PDF):

  • QRP/QRO output 5 – 50W [can actually be lowered to 0 watts out in 1 watt increments]
  • All-mode shortwave operation – coverage of all HAM HF bands (160m/60m optional)
  • High dynamic range receiver design, including high IP3 monolithic linear amplifiers in the front end, and diode ring RX mixer or H-mode first mixer (option)
  • Low-phase noise first LO – SI570 XO/VCXO chip
  • Full/semi (delay) QSK on CW; PTT/VOX operation on SSB. Strict RX/TX sequencing scheme with no “click” sounds
  • Down conversion superhet topology with popular 9MHz IF
  • Custom-made crystal filters for SSB and CW and variable crystal 4 pole filter – Johnson type 200…2000Hz
  • Fast-acting AGC (fast and slow) with 134kHz dedicated IF
  • Compact and lightweight body, only 5 lbs
  • Custom-made multicolor backlit FSTN LCD
  • Custom-molded front panel with ergonomic controls
  • Silent operation with no clicking relays inside – solid state GaAs PHEMT SPDT switches on RX (BPF and TX to RX switching) and ultrafast rectifying diodes (LPF)
  • Modular construction – Main board serves as a “chassis” also fits all the external connectors, daughter boards, plus inter-connections, and acts as a cable harness
  • Optional modules – Noise Blanker (NB), Audio Filter (AF), ATU, XVRTER, PC control via CAT protocol; USB UART – FTDI chipset
  • Double CPU circuitry control for front panel and main board – both field programmable via USB interface
  • Memory morse code keyer (Curtis A, CMOS B); 4 Memory locations 128 bytes each

Build quality

First impressions proved accurate in terms of construction.  I’m very pleased with the build quality of the Mission RGO One. Keep in mind, however, you might note from the photos that some items––like the volume and multifunction knobs––are 3D printed, and I’m not certain if they’ll ever have custom knobs manufactured.  But I really don’t even think this is necessary, as the 3D printed ones are very nice, indeed––moreover, should a replacement ever be needed, I love the idea I could simply print one myself!

The RGO One main optical encoder/tuning knob is just brilliant. It’s weighted properly for the right amount of “heft” while tuning. I’m very pleased with the overall feeling and quality. It’s substantial, yet silky-smooth in operation, just what I look for in a tuning knob.

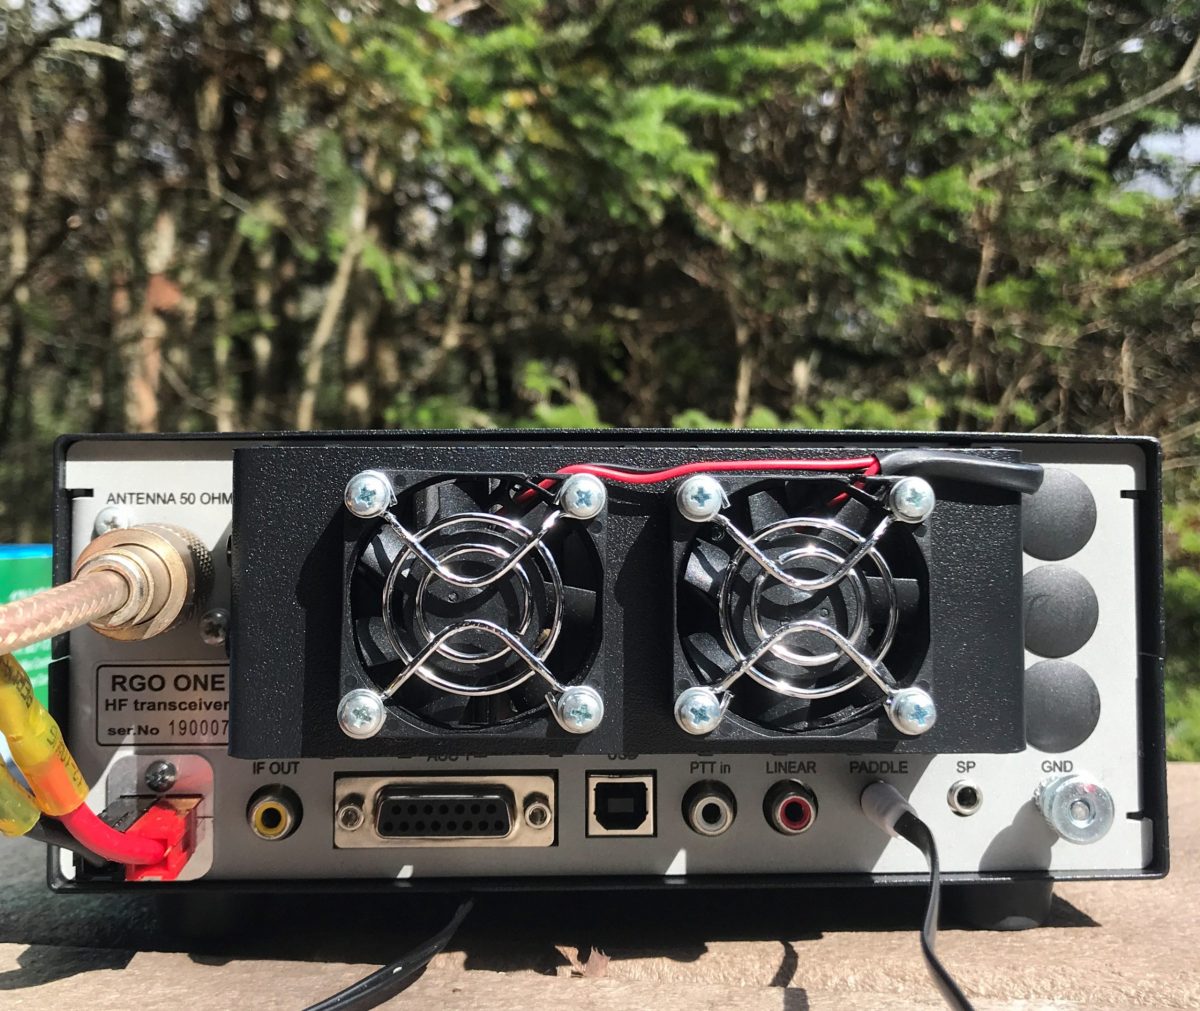
On the back of the unit, there is an externally-mounted heat sink with two small fans. These fans are quiet and efficient.

The chassis and bail are both top-shelf quality and should withstand years of field use. Just do keep in mind that like almost every other amateur transceiver currently on the market (save the recently reviewed lab599 Discovery TX-500), the chassis is neither water-proof nor weather-proof, so will require common-sense care to protect it from the elements.

Portability

The Mission RGO is relatively compact, lightweight (only 5 lbs without the ATU), and has a power output of up to 55 watts, even though the specs list just 50 watts. As a point of comparison, most other rigs in this class have a maximum output of 10 to 20 watts, and require an external amplifier for anything higher. The form factor is very similar to the Elecraft K2.

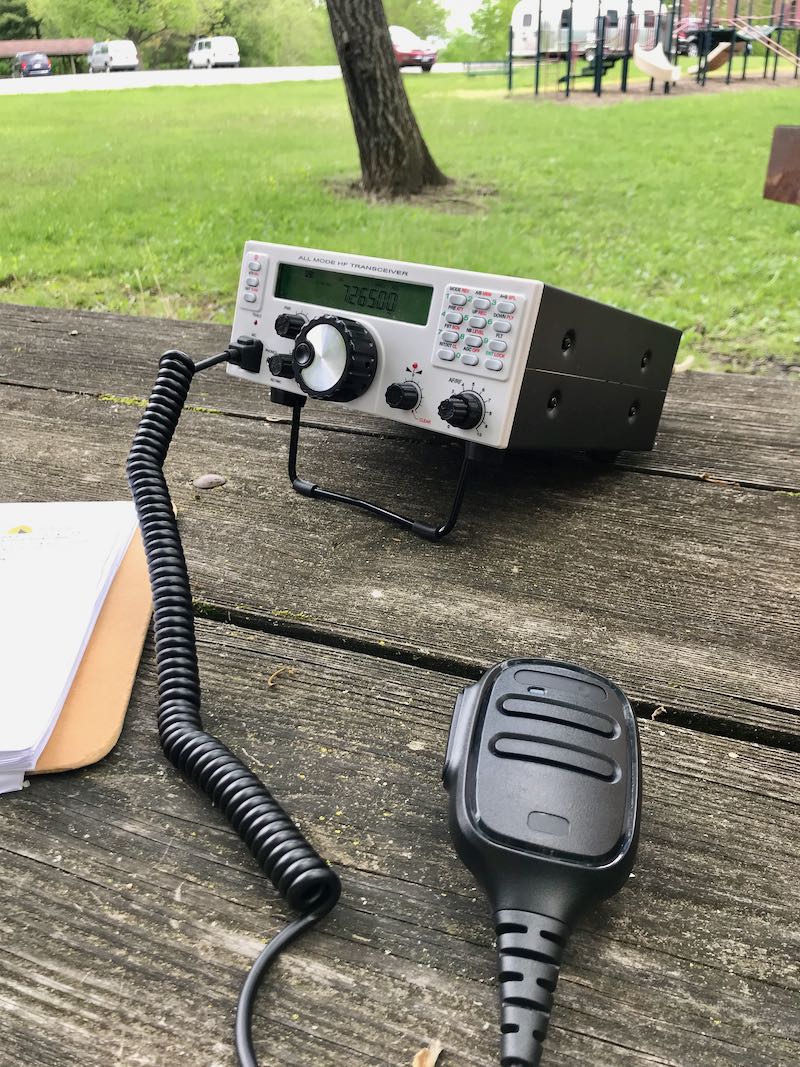
The light weight of the rig and the extra power makes the RGO One a capable and versatile field radio. Although the RGO One is configured like a desktop radio (with a front-facing panel), it’s still relatively compact and can easily be set up on a portable table, chair, or on the ground. Unlike field-portable rigs with top-mounted controls (think the Elecraft KX3 or KX2), obviously, it would be tough to do handheld or laptop operation.

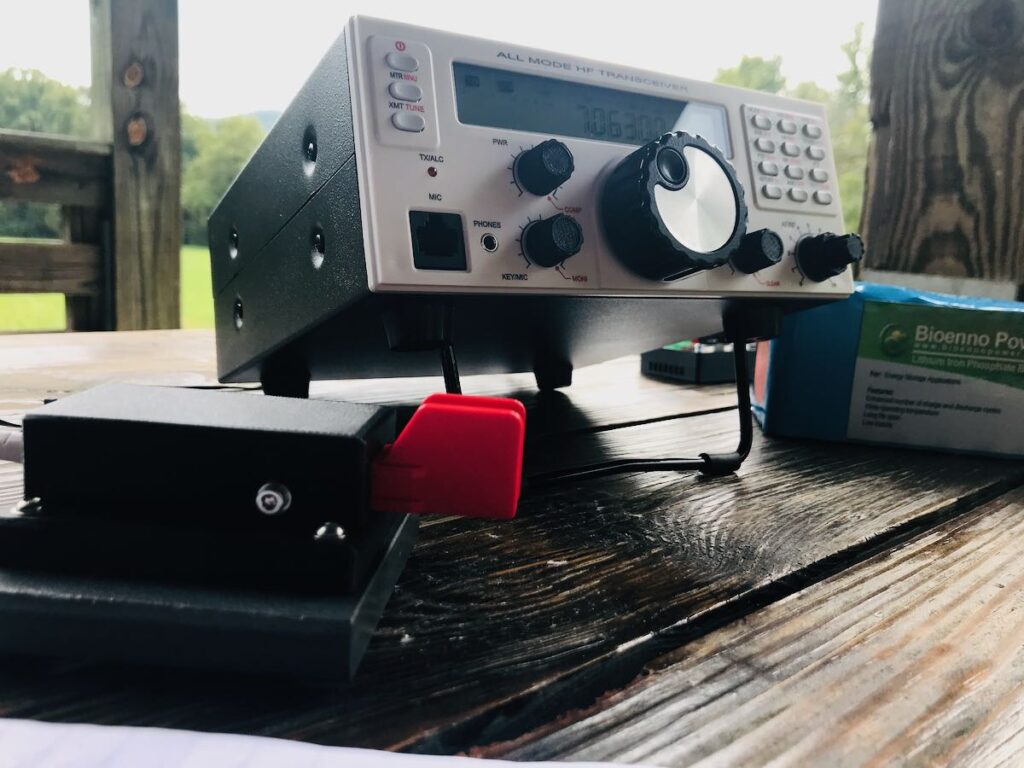
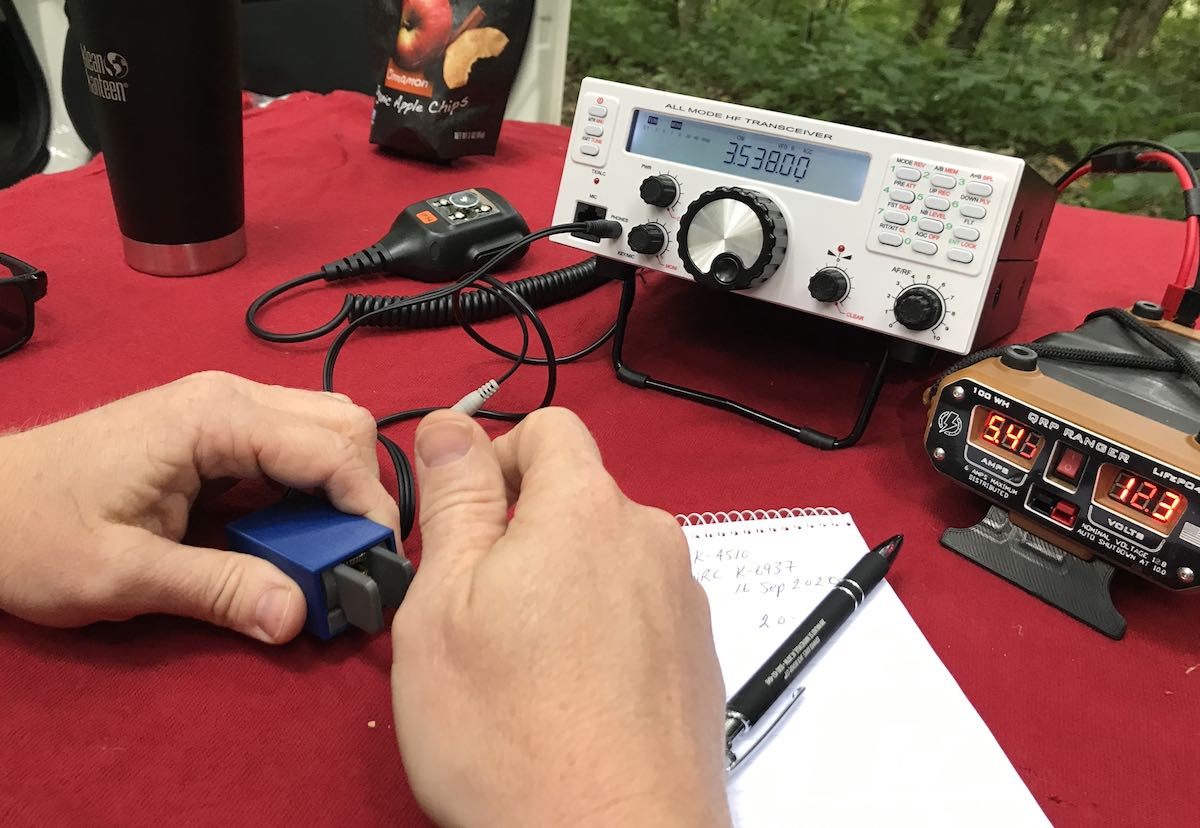
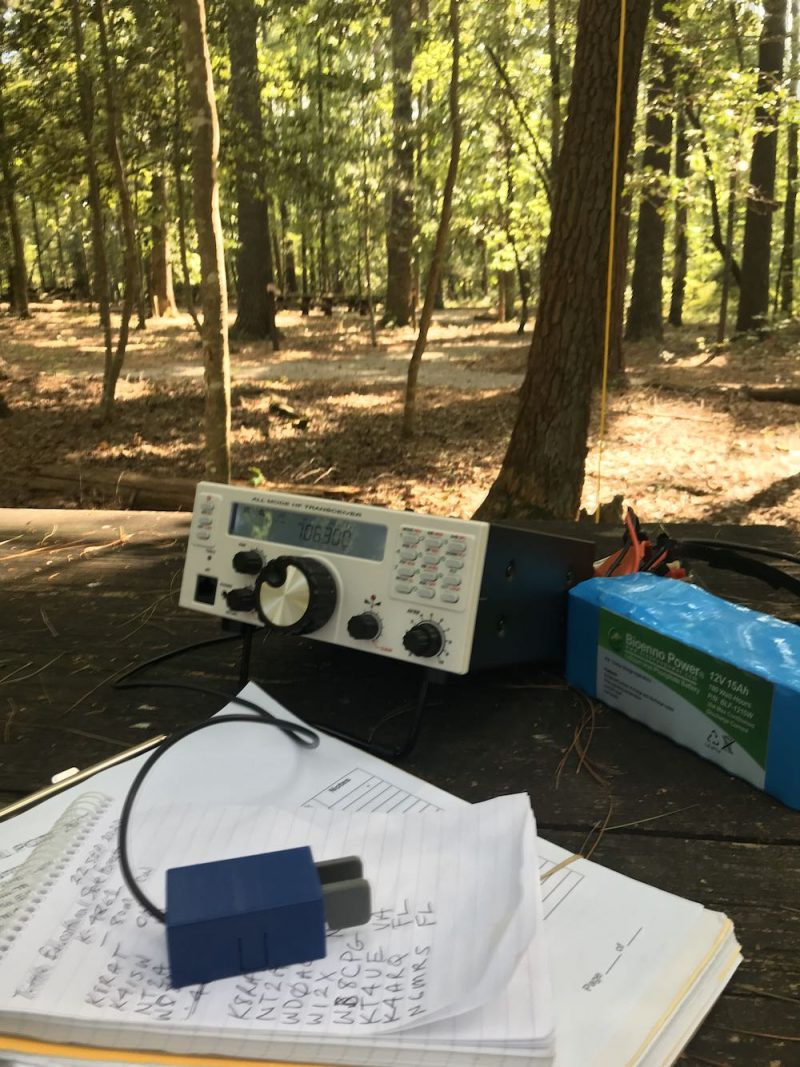
The RGO One should also play for a long time on battery power as the receive current drain is a respectable 0.65A with the receiver preamp on. It’s not as efficient as, say, an Elecraft KX3 or the new Icom IC-705, but keep in mind the RGO One can provide 50 watts of output power and has a proper, internally-mounted, amplified speaker. The popular 100 watt Yaesu FT-891, in comparison, has a current drain closer to 1.75 to 2.0 amps [update: actually the specifications indicate 2 Amps in receive, but user reports are less than half that amount].  I pair the RGO One with my larger 15 aH Bioenno LiFePo battery. When fully-charged, I can operate actively for hours upon hours without needing to recharge.

Mission RGO One Bioenno LiFePo

The Bioenno 15aH battery powers the Mission RGO One for hours at a time in the field.

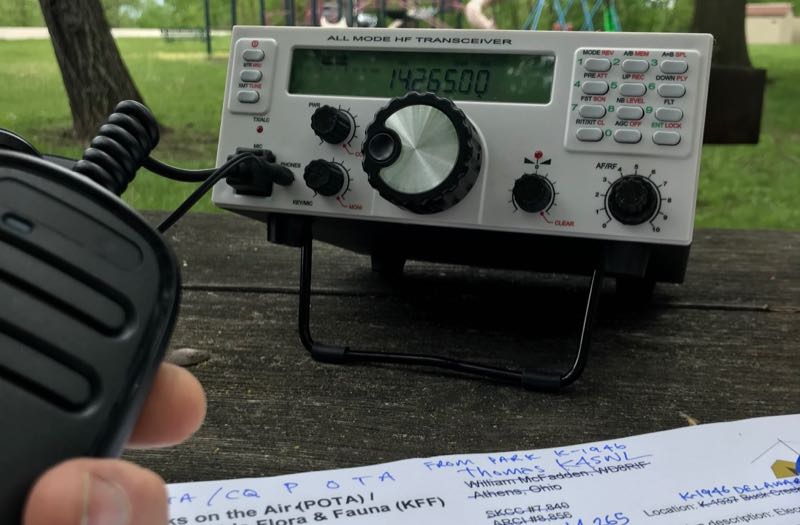
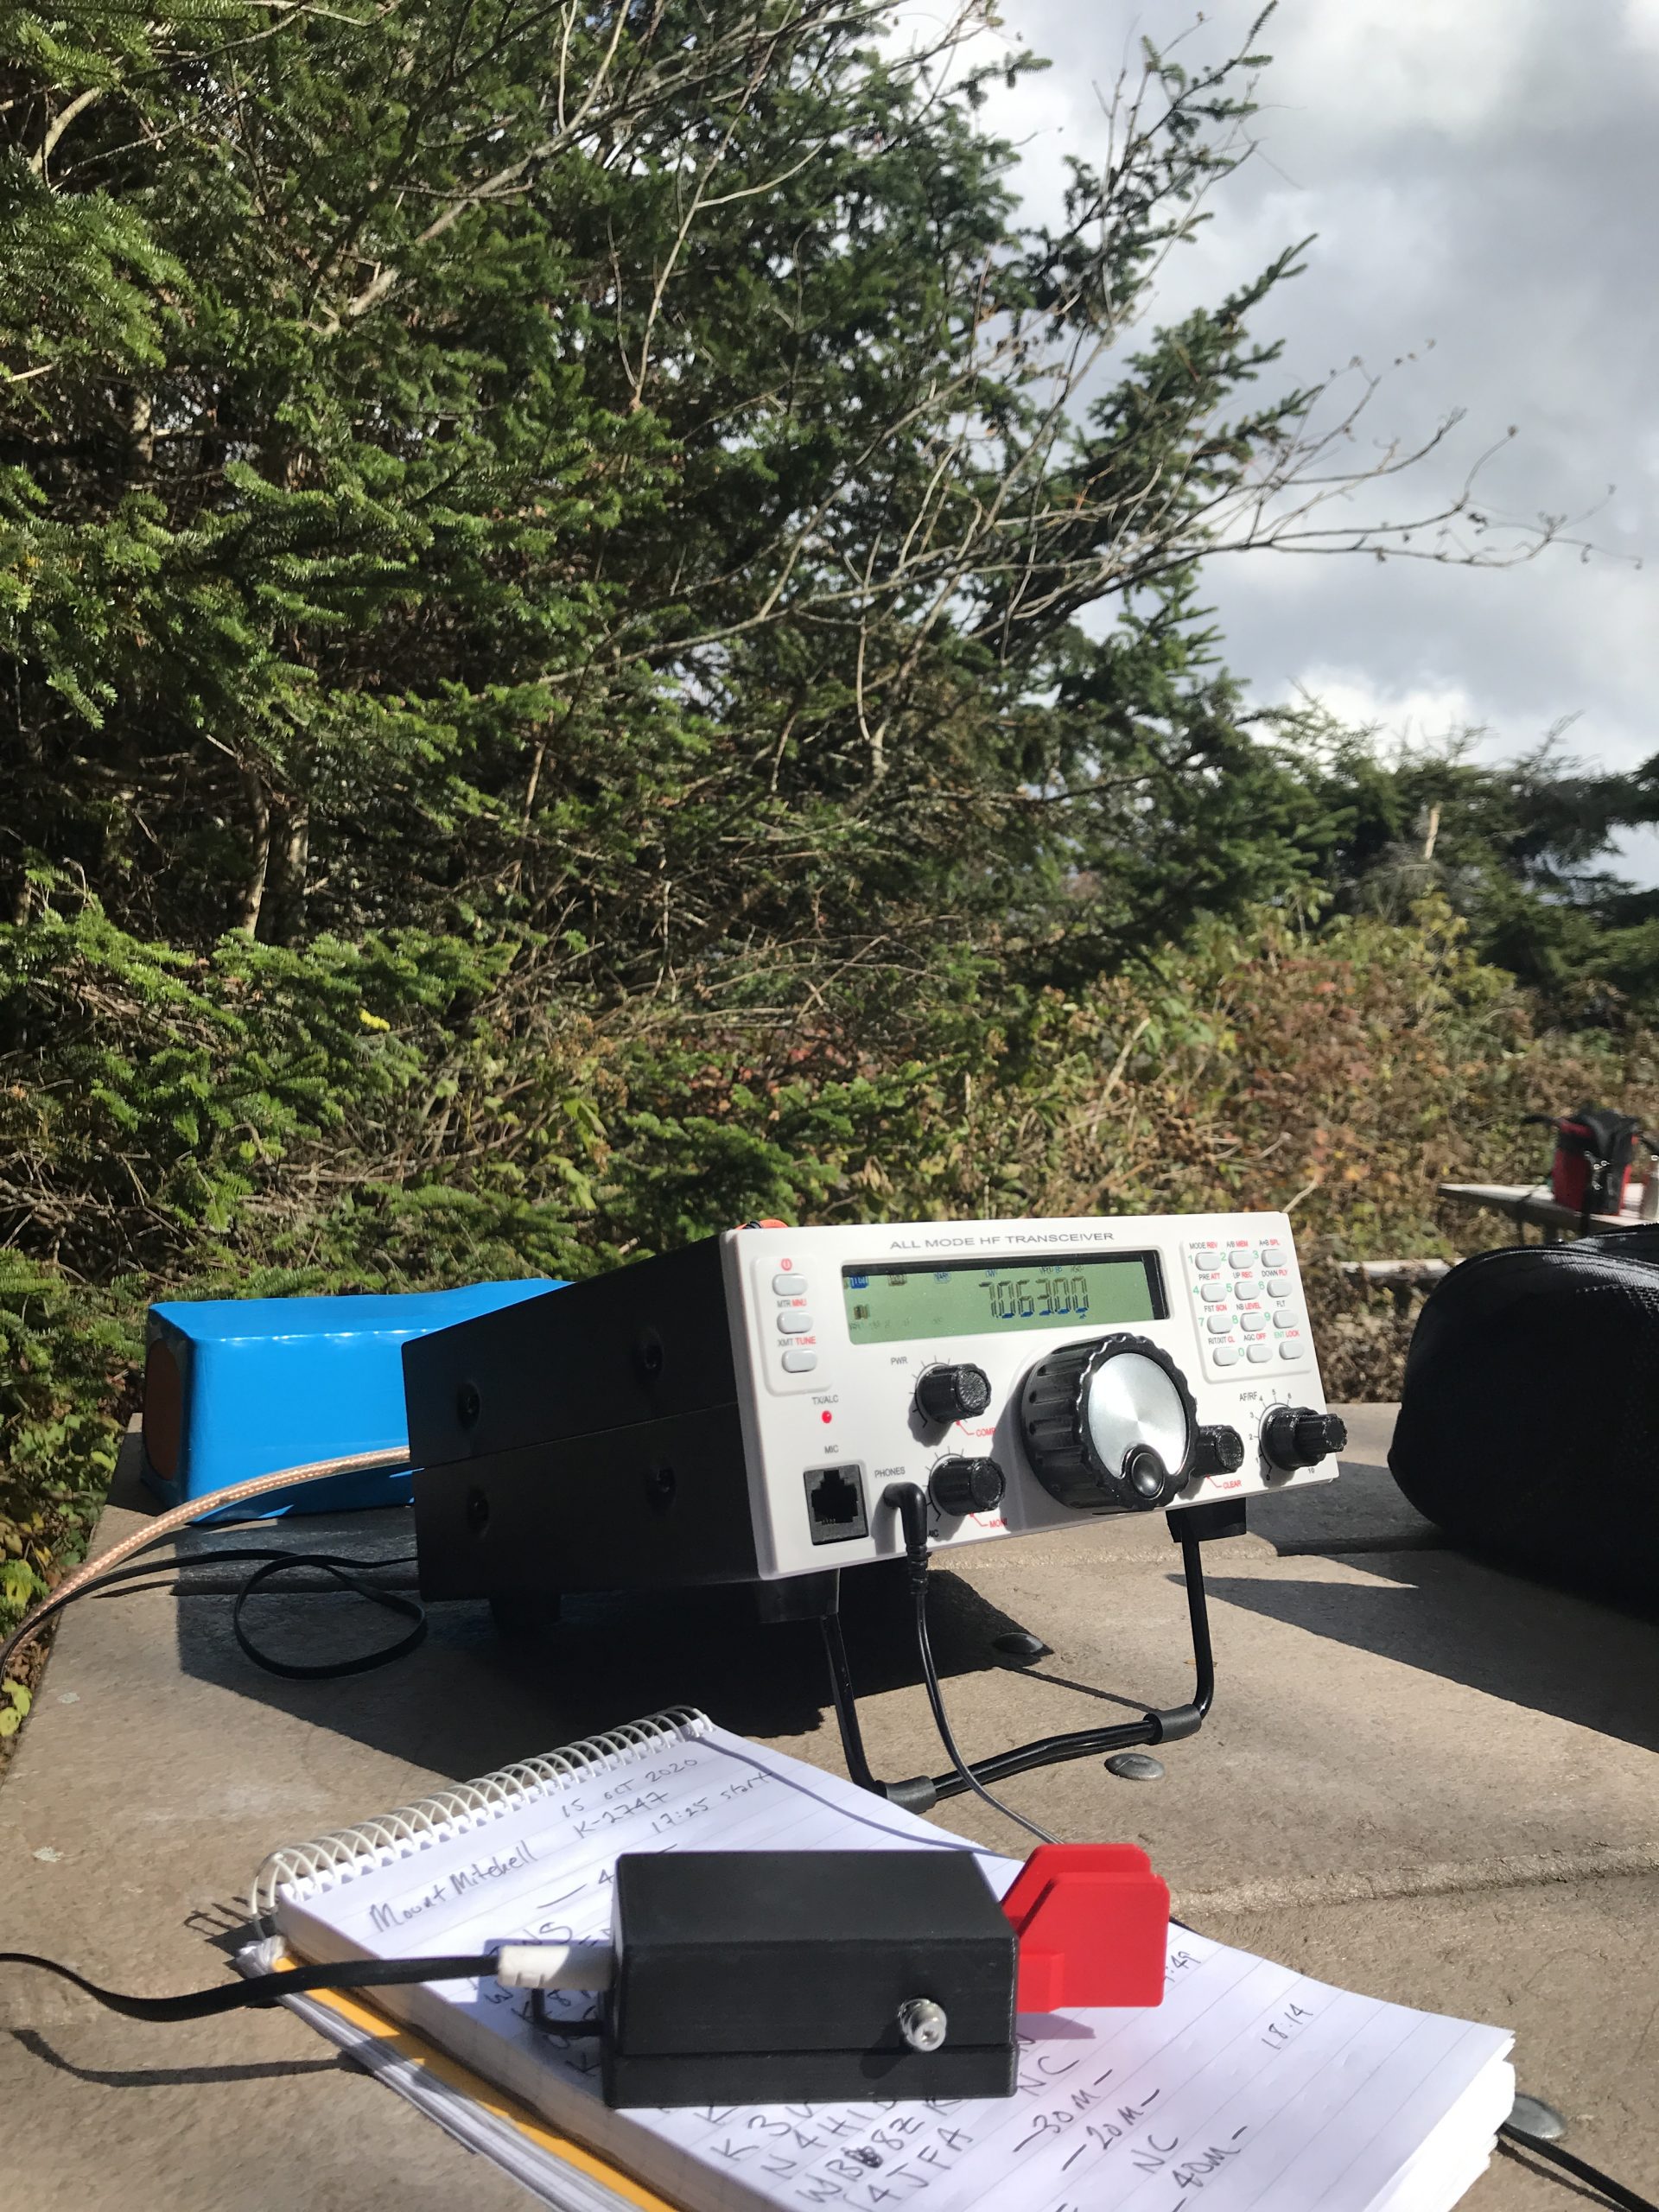
If it’s any indication of how much I wanted to take this rig to the field, when Boris handed me the prototype RGO One on Saturday at the 2019 Hamvention, I had it on the air that same day doing a Parks On The Air activation at an Ohio State Park.

Since then, I’ve easily taken the Mission RGO One on 30 or more park activations.

Performance

What’s most striking and obvious about the Mission RGO One’s receiver from the moment you turn it on is the low noise floor. It’s incredibly quiet. So much so that more than once, I’ve double checked to make sure RF gain hadn’t been accidentally altered as I started a field activation. I’d call CQ a few times, though, and when stations return they literally pop out of the ether. The RGO One currently has no digital noise reduction (DNR) but frankly, I don’t miss it like I might in other transceivers. Indeed, the RGO One is a radio I’ve reached for when the bands are noisy because the AGC and receiver seem to handle rough atmospheric conditions very well.

The RGO One’s built-in, top-mounted speaker provides ample audio levels for the shack, but in a noisy field environment, I wish it had a little more amplification. I’ve also used my Heil Pro headset and even inexpensive in-ear earphones connected to the front panel headphones jack in the field. The audio via headphones is excellent.

Let’s take a look at how well the RGO One performs by mode:

CW

First and foremost, CW operators will appreciate the RGO One’s silky-smooth full break-in QSK. The  RGO One employs clickless and quiet pin diode switching–a design feature I’ve become particularly fond of as traditional T/R relays can be noisy and distracting when not using headphones.

The RGO One also has a full compliment of adjustments for the CW operator including adjustable delay (default is 100ms), iambic mode, weight ratio, hand key/paddle, adjustable pitch, and sidetone volume.

The key jack is a standard three conductor 1/8” jack found on most modern transceivers. It’s located on the back of the radio.

My review unit has the optional variable width narrow filter which I highly recommend if operating in crowded conditions. I’ve used the RGO One on ARRL Field Day and found that it easily coped with crowded band conditions. Even after a few hours on the air, I had very little listener fatigue.

I also find that, as I mentioned earlier, CW signals just seem to “pop” out of the ether due to the low noise floor and excellent sensitivity/selectivity.

The RGO one also sports four CW keying memories where you can record your CQ, callsign, or even contest exchange. I’ve become incredibly reliant on memory keying to help facilitate my workflow in the field—while the radio is automatically sending my CQ or my regards and callsign to an station I’ve just worked, my hands are free to log the contact, adjust the radio, or even eat lunch!

Memory keying does require one long-press of the “6” button followed by either the “1,” “2,” “3,” or “4” button to play a message. Occasionally I won’t hold the 6 button long enough and accidentally move my frequency down one meter band since the 6 button is also the band “down” button. While it doesn’t happen often, it’s frustrating when it does but I think it could easily be fixed in the firmware as it’s really a timing issue.

SSB

Likewise, phone operators will be very pleased with the Mission RGO One. During all of my testing, I’ve only used the microphone supplied with the radio mainly because I don’t currently own another radio with an RJ-45 type microphone connector.

I do love the fact the microphone port is on the front panel of the radio—it’s very easy to connect and disconnect (in contract to the recently released Icom IC-705, for example). I’ve gotten excellent audio reports with the RGO One in SSB mode and have even monitored my own tests and QSOs via the KiwiSDR network.

Compression, gain, and VOX controls are easily accessible. One missing feature at present is a voice memory keyer. For field operators activating sites for the POTA, WWFF, or SOTA program, voice memory keying is huge as it saves your voice from calling “CQ” over the course of a few hours. I understand Boris does plan to implement voice memory keying in a future speech processor board.

AM Mode

Since the RGO One has general coverage receive and since I’m a shortwave broadcast listener, I was disappointed to find that there is presently no AM mode. Boris told me he does plan to add AM mode, “to be implemented in future versions of the IF/AF board only on RX.”

With that said, I can always zero-beat a broadcaster and use a wide SSB filter to listen to broadcasts which is more than I could do, for example, with my (ham band only) Elecraft K2.

At the end of the day, the RGO One is a high-performance, purpose-built ham radio transceiver, so the current lack of AM mode isn’t a deal-breaker for me, but I would love a wide AM filter on this rig.

ATU

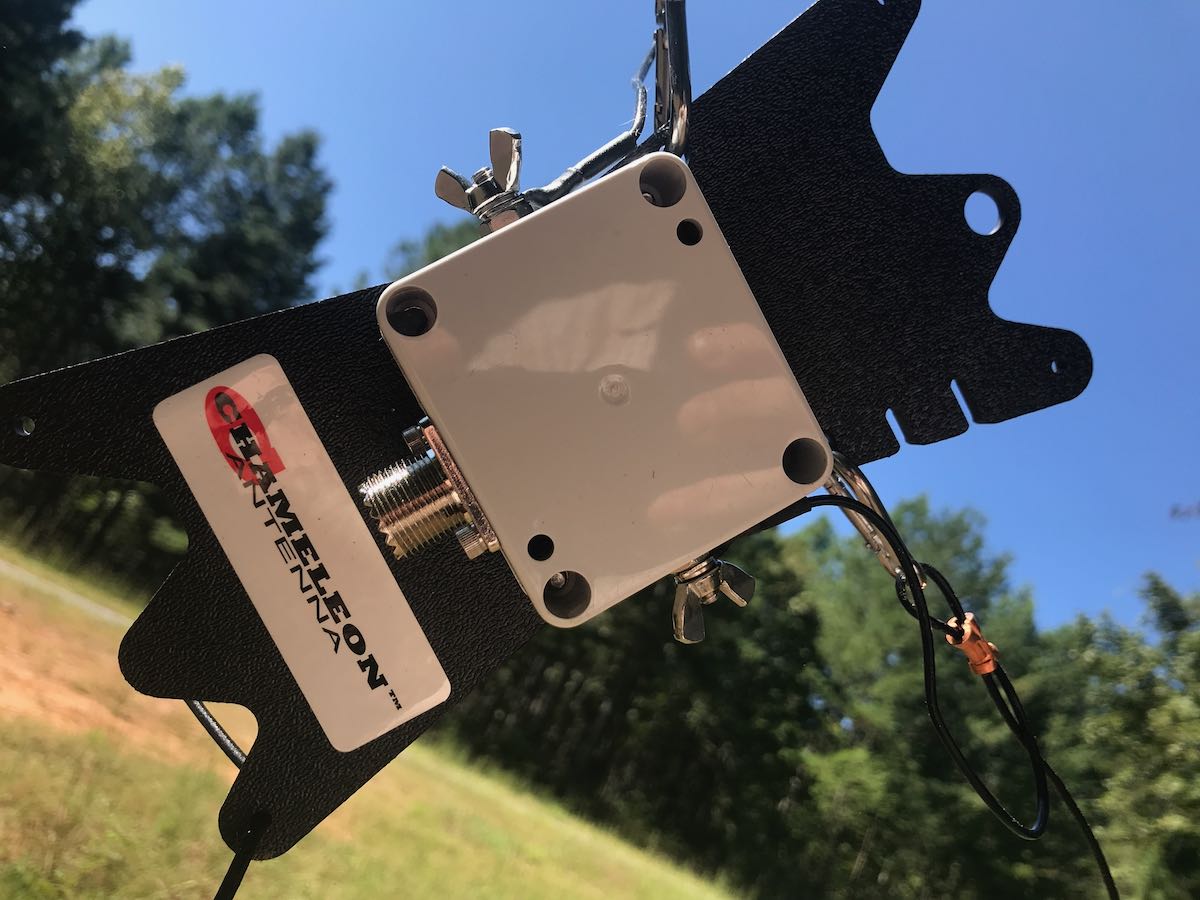
The 2020 review model I received has the internal automatic antenna tuner which I feel is a worthy upgrade/addition. In the field, I’ve paired the RGO One with my Chameleon CHA Emcomm III Portable random wire antenna which requires an ATU in order to find matches across the bands. The pairing has been a very successful one because the Emcomm III can handle up to 50 watts power output in CW and covers the entire HF band when emptying the RGO One ATU.


Even though it’s a minor thing, I also like the fact that the RGO One ATU operates so quietly, even though with the present firmware it takes longer than some of my other ATUs to find a match.

Power

One thing I’ve found very useful in the field and, no doubt others will as well is the power output. In many ways, the RGO feels like a larger QRP radio (think Ten-Tec Argonaut V or VI) but it’s actually able to pump out 55 watts (often five watts more than specified). In single sideband mode, this is a meaningful amount of power output compared to, say, 5 or 10 watts. When I activate a rare park, or an ATNO (All Time New One), I’ve been taking the RGO One more times than not in order to get the best signal possible and maximum amount of contacts. Running full power, the rig never feels warm—heat dissipation is superb—and the fans on the back of the heat sink are super quiet.

I actually feel like the 50 watts of output power gives the RGO One a market niche since it sports top-shelf performance as you might expect in the venerable Elecraft K2, for example, but  not being a 10 watt or 100 watt radio, rather something in between which saves a little weight and also the need for heftier heat dissipation.

Other unique features

The RGO One has some interesting features not found in similar radios.

For one, there are no less than ten color options for the custom backlit LCD display, along with adjustable contrast and backlighting intensity.

The RGO One team also documents how to access hidden admin menus for granular adjustments to transceiver parameters, but of course you’d want to adjust those with caution and note values prior to changing them. When you receive your RGO One, Boris includes a sheet with all default values to make stepping back much easier.

Hands-on philosophy

At the end of the day, the Mission RGO One is a kit that can eventually be purchased in kit form, or as a fully assembled transceiver. It’s modular: you can add and upgrade features as you wish. Some field operators, for example, may wish to omit the ATU to save a little extra weight or cost. I actually love this philosophy and I think it’s one that’s made Elecraft such a successful manufacturer.

The process of upgrading firmware is slightly more involved than you might find with, say, an Elecraft, Icom, or Yaesu product. It’s a two stage process where one upgrades both the front panel and the main board separately. I completed a firmware update only a few weeks prior to publication. It took me perhaps 15 minutes with my PC as I followed Boris’ step-by-step instructions (http://lz2jr.com/blog/index.php/rgo-one-firmware-update-procedure/).

There is also an active email discussion group for the Mission RGO One (https://groups.io/g/RGO-ONE/) where participants share experiences, modifications, and even any glitches or bugs that are discovered. This group is closely monitored by the RGO One team, so items are addressed very quickly. I highly recommend joining this discussion group if you see an RGO One in your future.

Also, I’ve gotten great customer support from Boris (LZ2JR) and have heard the same from group members. He’s very much open to critical customer feedback.

Summary

Mission RGO One POTA

Every radio has its pros and cons. When I begin a review of a radio, I take notes from the very beginning so that I don’t forget some of my initial impressions. Here is the list I formed over the time I’ve spent evaluating the 2020 production model Mission RGO One.

Pros:

  • Excellent sensitivity and selectivity
  • Very low noise floor
  • Excellent, clean audio (see con)
  • Silky-smooth QSK
  • Full compliment of CW and SSB features and adjustments
  • CW memory keyer
  • Superb ergonomics with no need to access embedded menus for common features
  • 50 watts output power with effective quiet heat dissipation
  • Lighter weight compared with comparable transceivers
  • Direct frequency entry
  • Standard Anderson Powerpole power port on rear panel

Cons:

  • No voice keyer memory (at time of posting, but is planned in upgrade)
  • No notch or auto notch filter (at time of posting, but is planned)
  • No 6 meter option
  • No AM mode (at time of posting, but is planned)
  • Firmware updates are a two stage process
  • Would like slightly more audio amplification while using internal speaker in noisy outdoor environments

Conclusion

If you can’t tell, I’m impressed with the Mission RGO One because it does exactly what it sets out to do.  The RGO One is designed for an operator who appreciates rock-solid performance with simple, intuitive ergonomics.

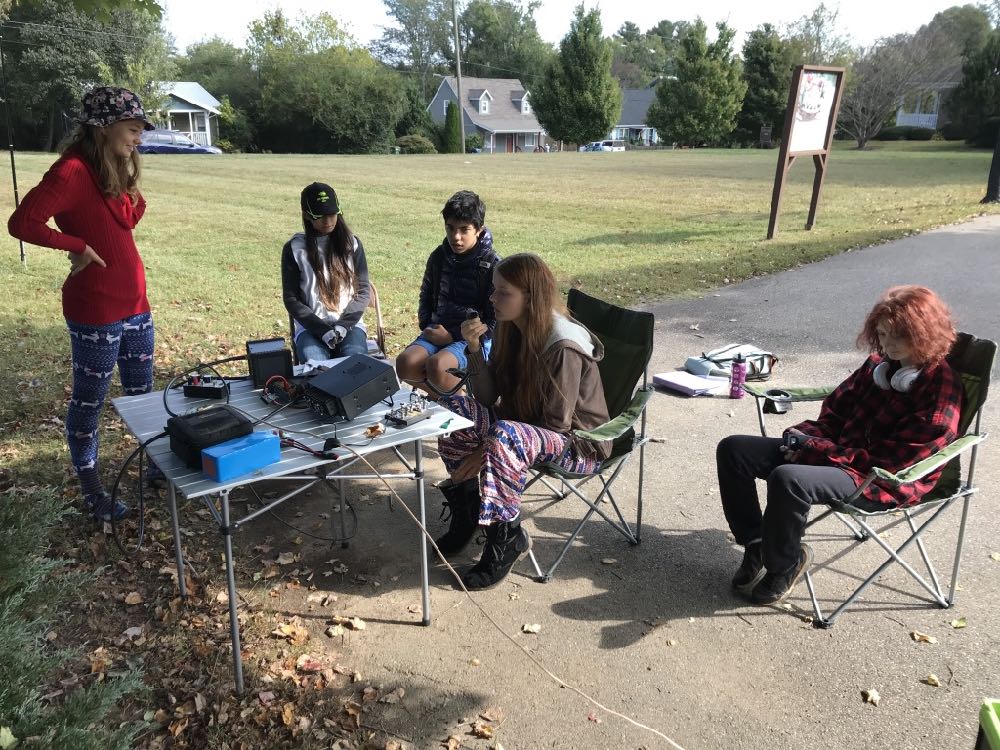
While teaching an amateur radio course to our homeschool cooperative high school students last year, I picked the RGO One as the best field radio for HF demonstrations.

I’ll never forget setting the (prototype) RGO One for the first time on a folding table outside the classroom under a large tree. I had the students erect both an end-fed resonant antenna and a simple 20 meter vertical. I picked the RGO one because all of the adjustments we had talked about in the classroom—AGC, Filters, A/B VFOs, Direct Frequency Entry, Pre Amp, Attenuation—are on the front panel and one button press away.

We hopped on the air with one of my students calling CQ single sideband on the 20 meter band.  Her very first contact was with a station in Slovenia—and she simply beamed with excitement. All of my female students that term passed their Technician exam by the end of the term.

The RGO One is a very inviting radio.

I’ve had the luxury of testing, evaluating, and working with everything from one of the first prototypes to the latest updated version of the RGO One. It’s rare that I’m able to evaluate a radio over such a long period of time.

Even with the very early, bare-bones prototype, I was impressed with this transceiver’s performance characteristics. I’m not the only one either. It’s almost become routine new discussion group members join prior to receiving their radio, then announces how blown away they are with its performance. Check out eHam reviews, too—at time of posting, it’s a solid five stars at time of posting.

The RGO One reminds me of simple, classic radios of the 1980s and 90s, but underneath, it’s packing state-of-the-art performance.

Is it perfect? No radio is perfect, but I must say that for what it offers, it really hits the sweet spot for this radio operator.  It’s a joy to use.

There are still features in the works that will either be implemented with future firmware updates, or with future boards. In terms of performance and appearance, it reminds me of the Ten-Tec Eagle and Elecraft K2—both benchmark rigs in my world. And like the Eagle and K2, the RGO One is happy in the field, at home, or even on a DXpedition. It’s a simple radio that beckons to be on the air.

If you’re interested in the Mission RGO One, check the following web page for the pre-order form and pricing list. The RGO One is produced in batches, so you’ll need to reserve your model.

Click here to view the Mission RGO One order page.

Spread the radio love

A little QRP radio magic this weekend

SWLing Post readers: I originally posted the following article on QRPer.com where I publish most of my ham radio field reports. It was the first full Parks On The Air activation with my recently re-acquired Elecraft KX1 transceiver and it was very memorable. I hope you enjoy:

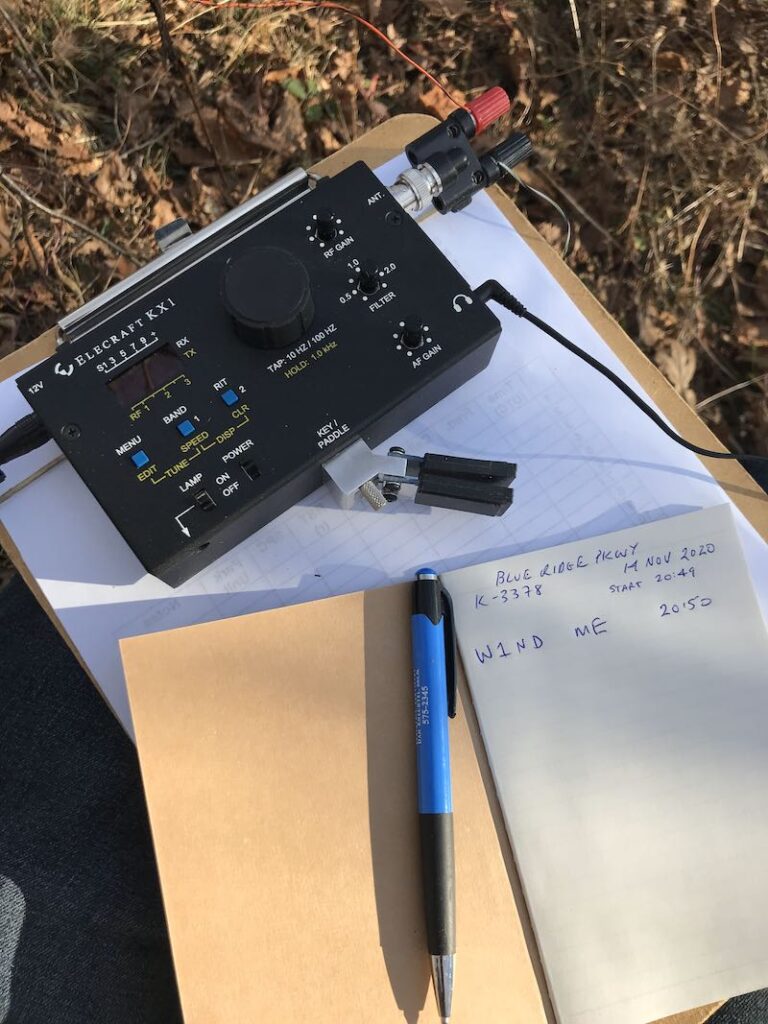
Yesterday [Saturday, November 14, 2020] my family decided to make an impromptu trip to one of our favorite spots on the Blue Ridge Parkway at Richland Balsam–the highest point on the BRP.

Of course, it was a good opportunity to fit in a Parks On The Air (POTA) activation, but I had also hoped to activate Richland Balsam for Summits On The Air (SOTA) simultaneously.

It being well beyond leaf-looking season, we had hoped the BRP would be relatively quiet, but we were wrong.

Trail heads were absolutely jam-packed and overflowing with visitors and hikers. We’ve noticed a sharp hiker uptick this year in western North Carolina due in no small part to the Covid-19 pandemic. People see hiking as a safe “social-distance” activity outdoors, but ironically, hiker density on our single-track trails is just through the roof.   One spends the bulk of a hike negotiating others on the trail.

The trail head to Richland Balsam was no exception. Typically, this time of year, we’d be the only people parked at the trail head but yesterday it was nearly parked full.

Being natives of western North Carolina, we know numerous side-trails and old logging/service roads along the parkway, so we picked one of our favorites very close to Richland Balsam.

We hiked to the summit of a nearby ridge line and I set up my POTA station with the “assistance” of Hazel who always seems to know how to get entangled in my antenna wires.

“I’m a helper dog!”

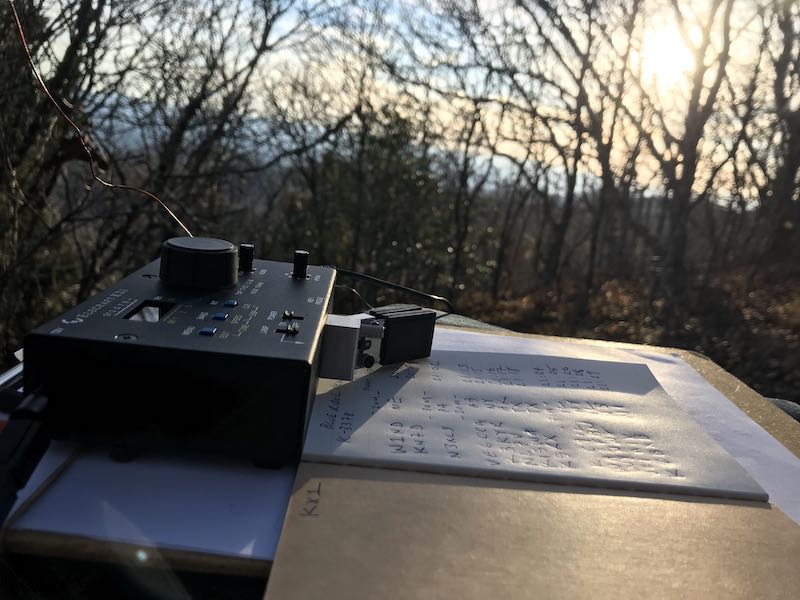
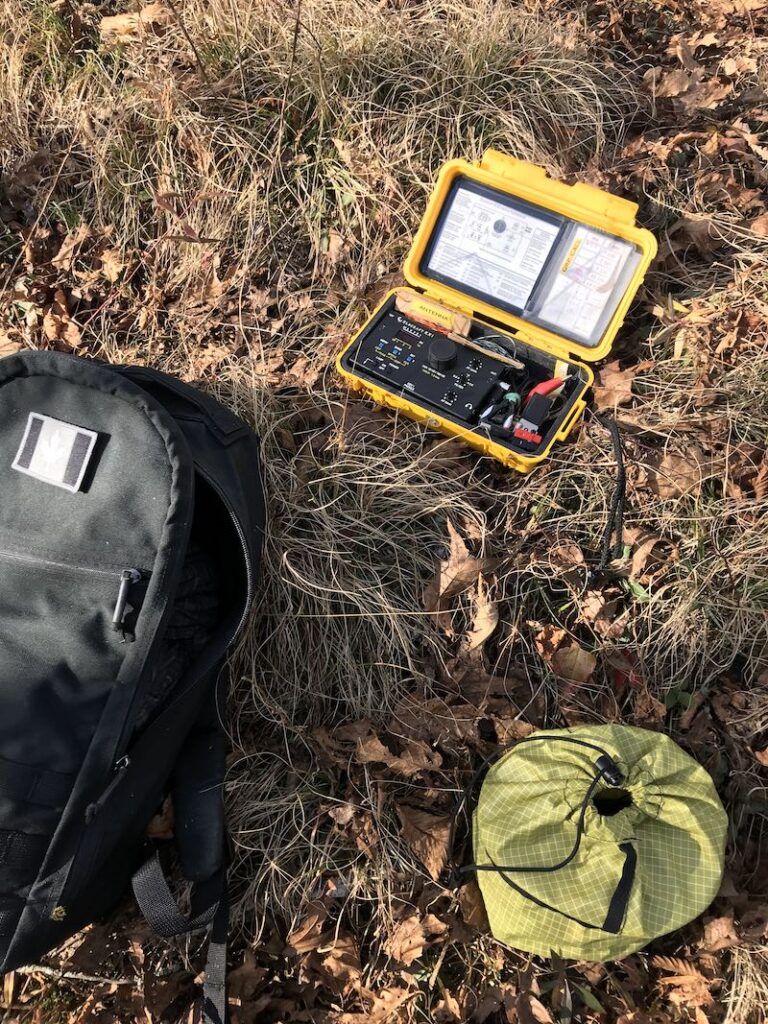
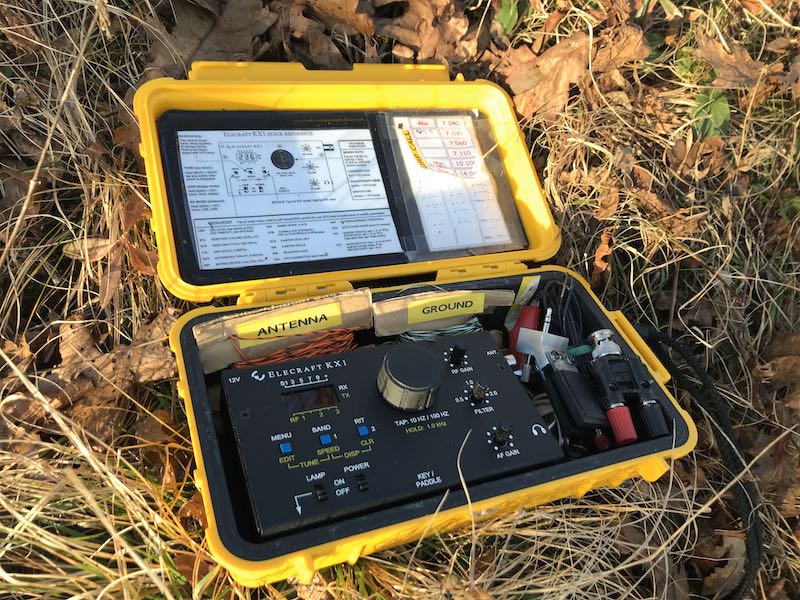
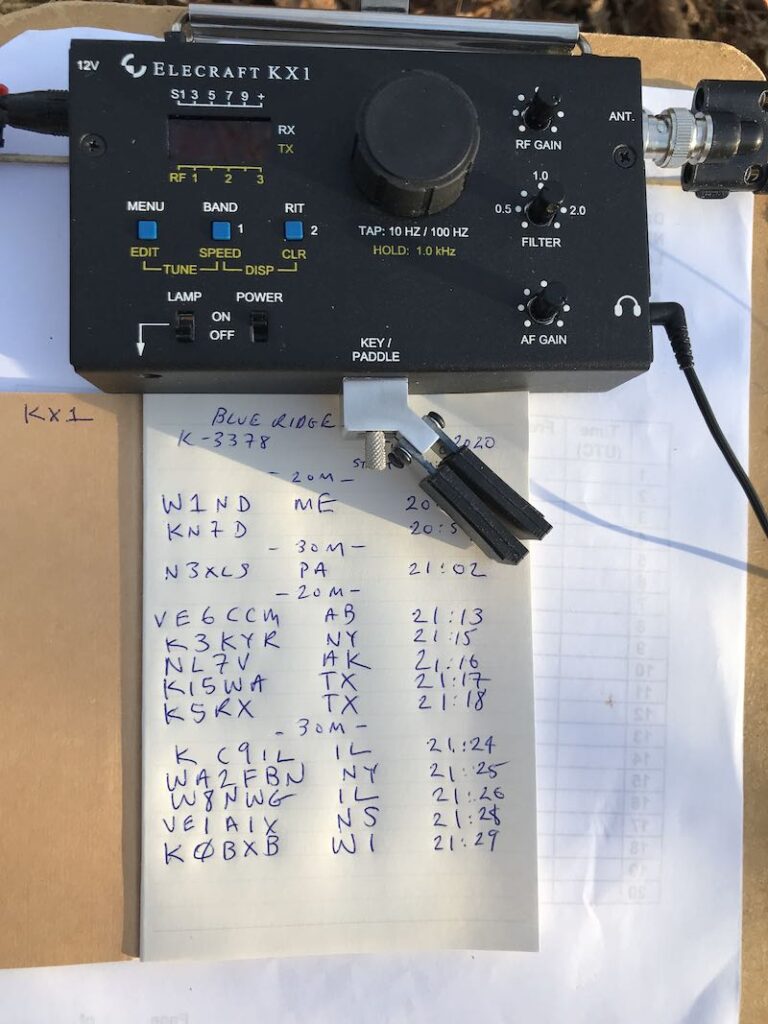
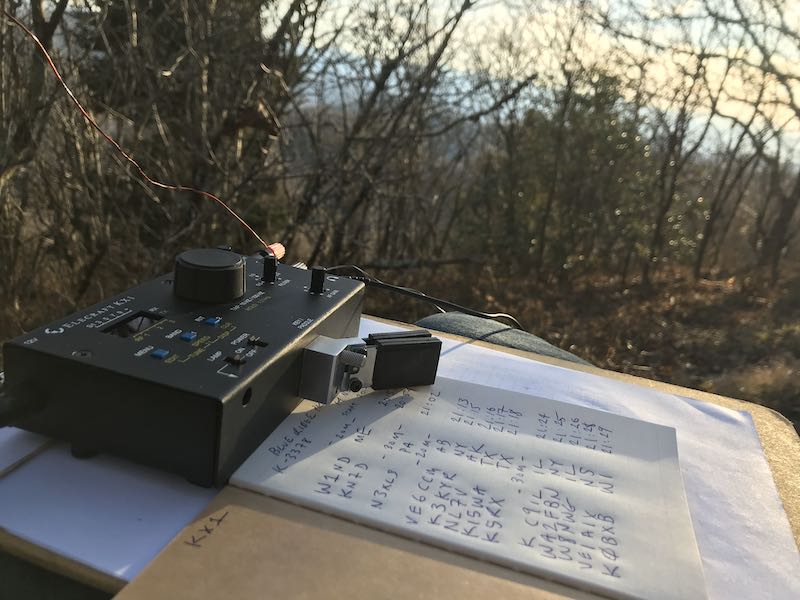
Taking a break from using the Icom IC-705, I brought my recently reacquired  KX1 field radio kit.

Gear:

I carried a minimal amount of gear on this outing knowing that there would be hiking involved. Everything easily fit in my GoRuck Bullet Ruck backpack (including the large arborist throw line) with room to spare.

I took a bit of a risk on this activation: I put faith in the wire antenna lengths supplied with my new-to-me Elecraft KX1 travel kit. I did not cut these wires myself, rather, they are the lengths a previous owner cut, wound, and labeled for the kit.

With my previous KX1, I knew the ATU was pretty darn good at finding matches for 40, 30, and 20 meters on short lengths of wire, so I threw caution to the wind and didn’t pack an additional antenna option (although I could have hiked back to the car where I had the CHA MPAS Lite–but that would have cut too much time from the activation).

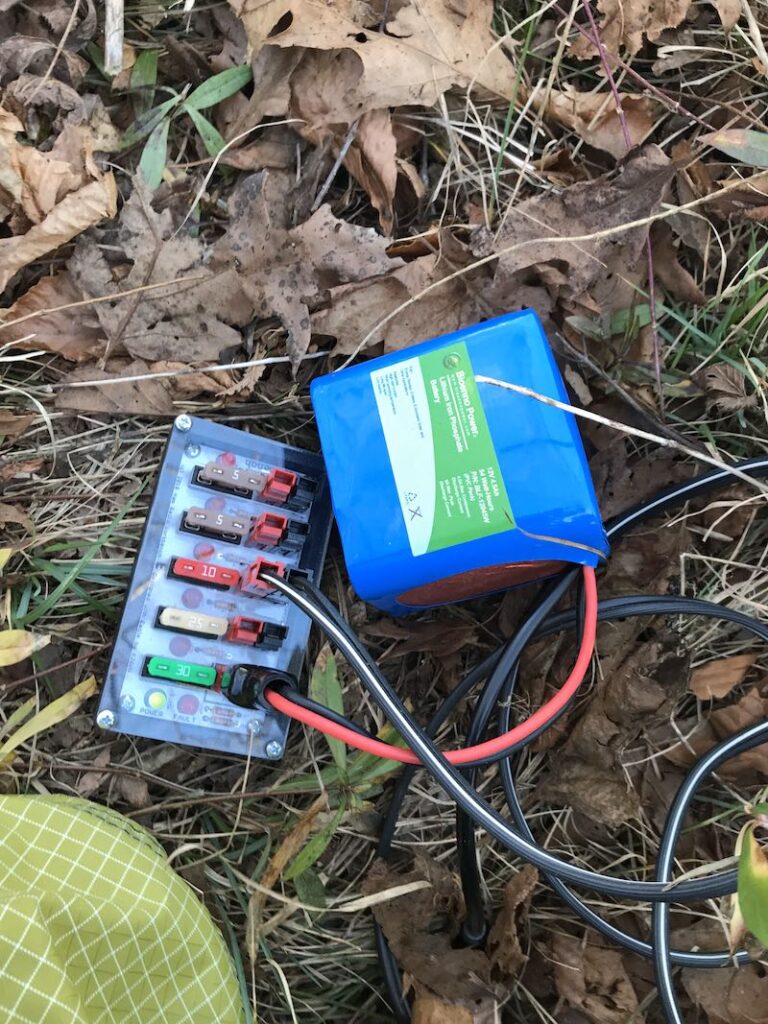
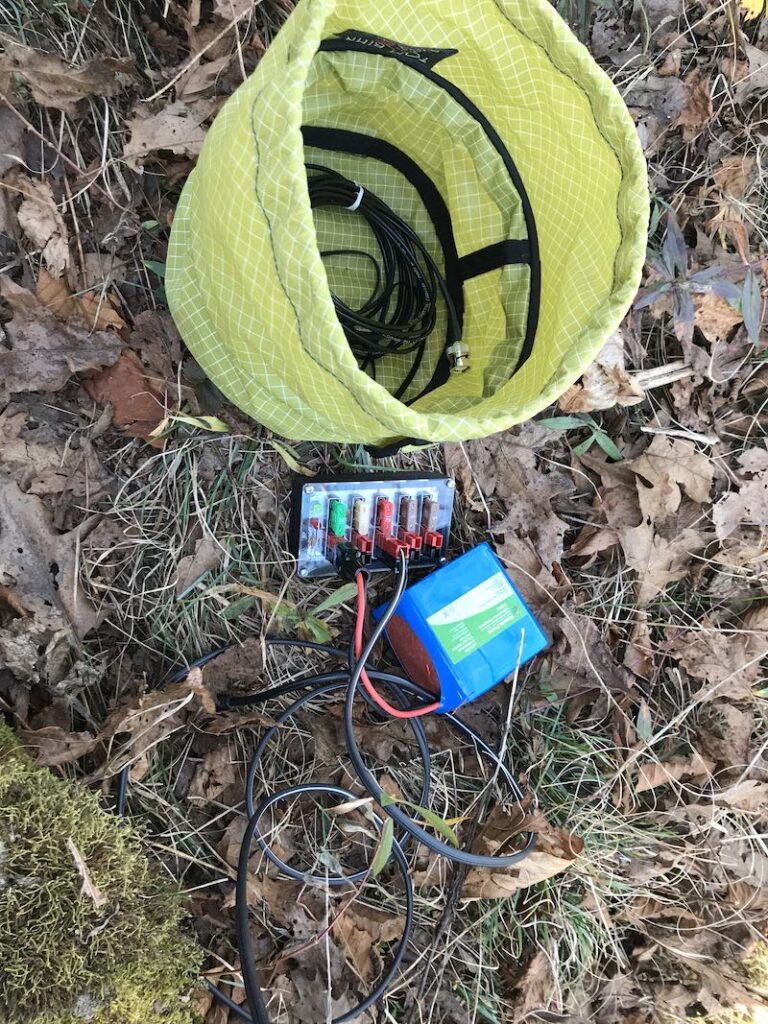
I didn’t use internal batteries in the KX1, rather, I opted for my Bioenno 6 aH LiFePo battery which could have easily powered the KX1 the entire day.

I deployed the antenna wire in a nearby (rather short) tree, laid the counterpoise on the ground, then tried tuning up on the 40 meter band.

No dice.

The ATU was able to achieve a 2.7:1 match, but I don’t like pushing QRP radios above a 2:1 match if I don’t have to. I felt the radiator wire was pretty short (although I’ve yet to measure it), so clipping it would only make it less resonant on 40 meters.

Instead, I moved up to the 20 meter band where I easily obtained a 1:1 match.

I started calling CQ POTA and within a couple of minutes snagged two stations–then things went quiet.

Since I was a bit pressed for time, I moved to the 30 meter band where, once again, I got a 1:1 match.

I quickly logged one more station (trusty N3XLS!) then nothing for 10 minutes.

Those minutes felt like an eternity since I really wanted to make this a quick activation. I knew, too, that propagation was fickle; my buddy Mike told me the Bz numbers had gone below negative two only an hour before the activation. I felt like being stuck on the higher bands would not be to my advantage.

Still, I moved back up to 20 meters and try calling again.

Then some radio magic happened…

Somehow, a propagation path to the north west opened up and the first op to answer my call was VE6CCA in Alberta. That was surprising! Then I worked K3KYR in New York immediately after.

It was the next operator’s call that almost made me fall off my rock: NL7V in North Pole, Alaska.

In all of my years doing QRP field activations, I’ve never had the fortune of putting a station from Alaska in the logs. Alaska is a tough catch on the best of days here in North Carolina–it’s much easier for me to work stations further away in Europe than in AK.

Of all days, I would have never anticipated it happening during this particular activation as I was using the most simple, cheap antenna possible: two thin random lengths of (likely discarded) wire.

People ask why I love radio? “Exhibit A”, friends!

After working NL7V I had a nice bunch of POTA hunters call me. I logged them as quickly as I could.

I eventually moved back to 30 meters to see if I could collect a couple more stations and easily added five more. I made one final CQ POTA call and when there was no answer, I quickly sent QRT de K4SWL and turned off the radio.

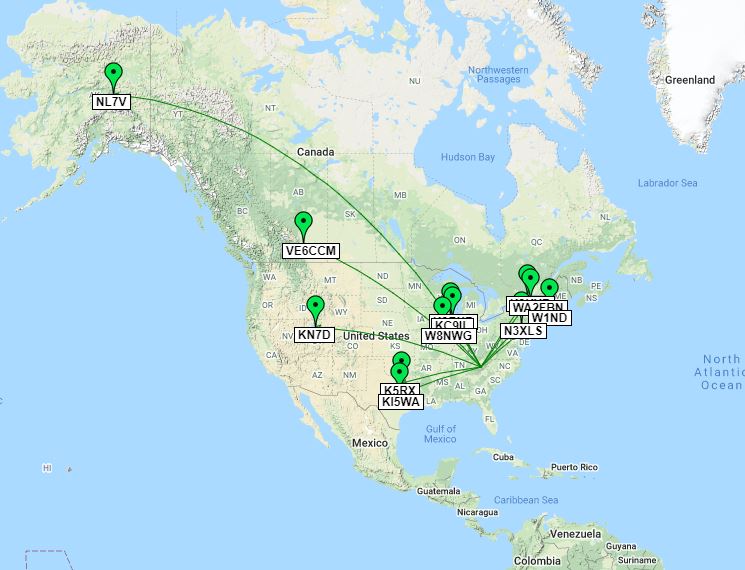
Here’s a map of my contacts from QSOmap.org:

I still can’t believe my three watts and a wire yielded a contact approximately 3,300 miles (5311 km) away as the crow flies.

This is what I love about field radio (and radio in general): although you do what you can to maximize the performance of your radio and your antenna, sometimes propagation gives you a boost when you least expect it. It’s this sense of wireless adventure and wonder that keeps me hooked!

Spread the radio love

Shortwave listening in the field with the Icom IC-705 transceiver

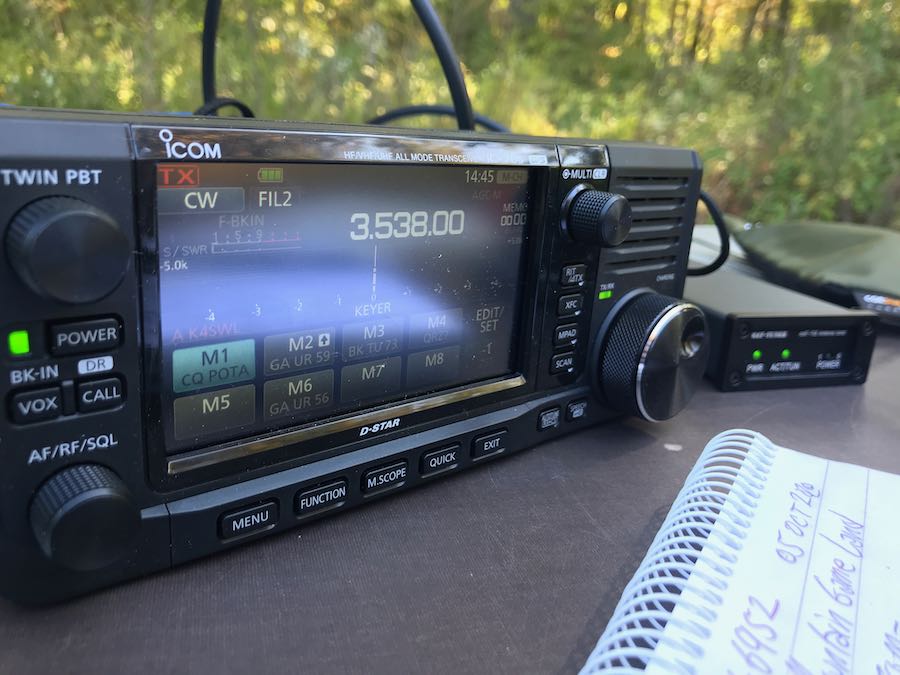
Yesterday, I took the new Icom IC-705 to the field for another Parks On the Air (POTA) activation. My goal at this particular activation was to make a couple of posts for QRPer.com: first, to test the new mAT-705 ATU on loan from Vibroplex, and secondly, make a short video about full break-in CW operation.

I also wanted to do a little shortwave listening after completing the activation. I had no idea what propagation would be like, but thought I’d tune around below the 20 meter band where the antenna was currently resonant.

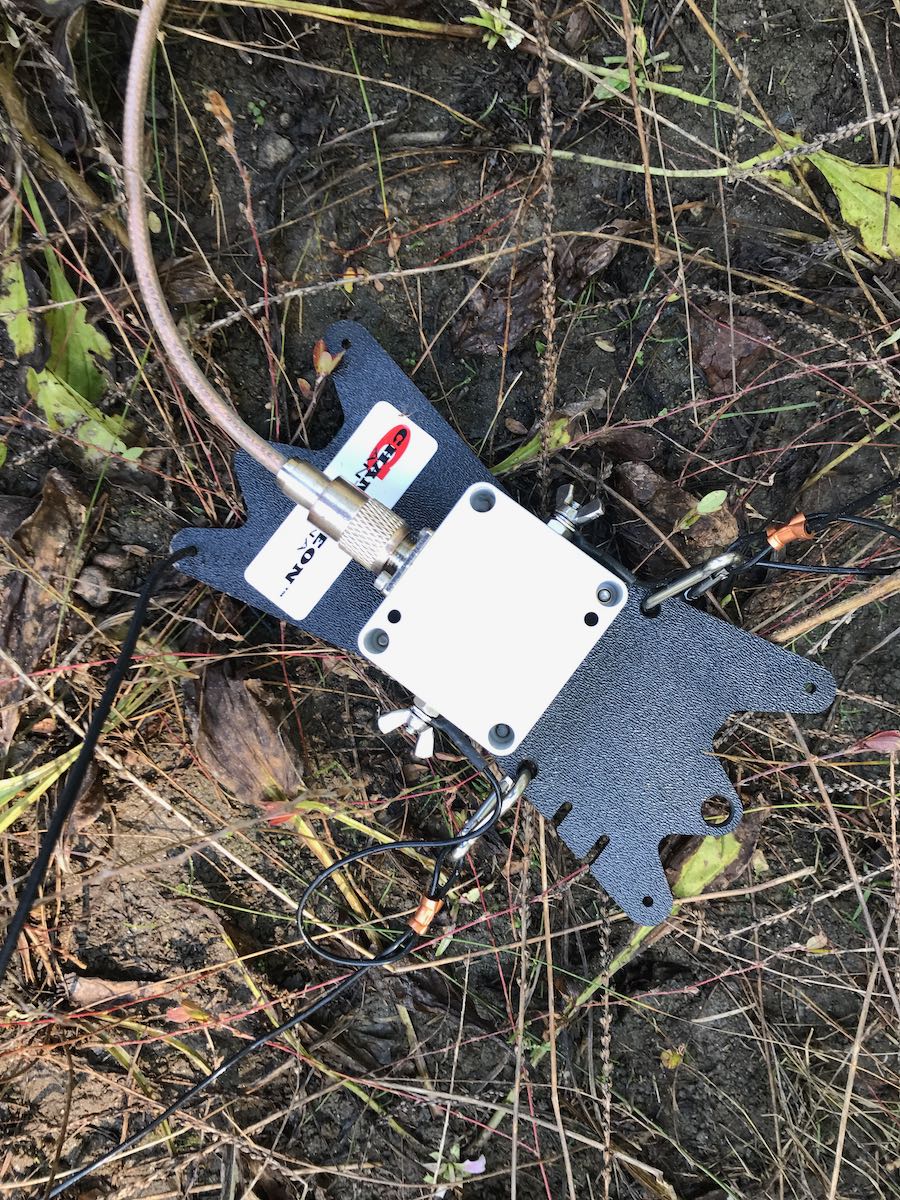
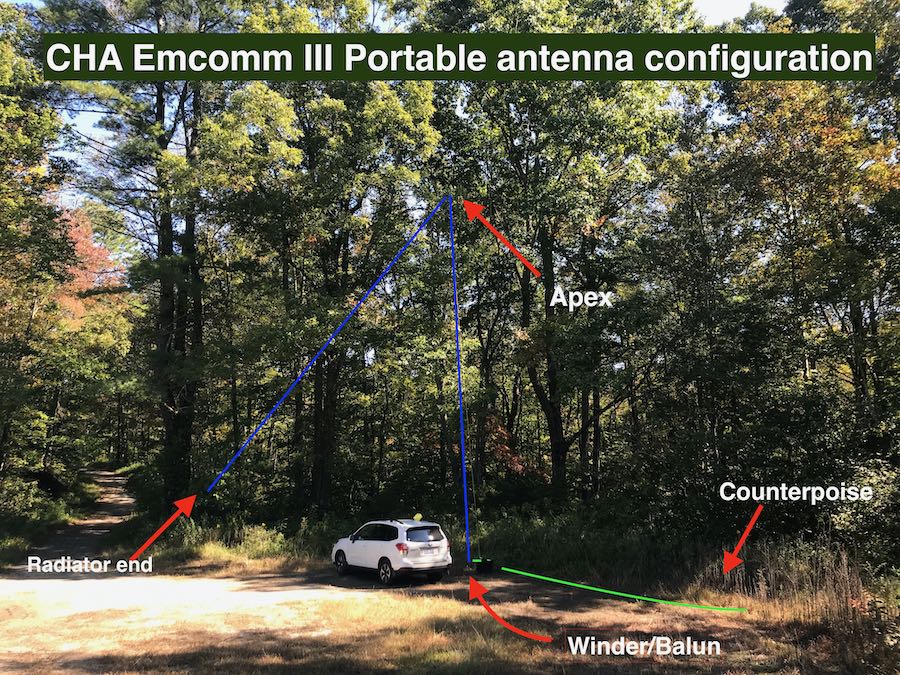
I deployed the CHA Emcomm III Portable random wire antenna which, I must say, is a superb shortwave listening antenna for the field.

Since you can’t see the antenna in the first photo below, I marked up the second one. The blue line represents the 73′ radiator, and the green line the counterpoise:
Here’s the short video I made around the 22 meter band:

I had planned to make a few audio recordings via the built-in digital recorder but I left my MicroSD card at home. No worries, though, as I plan to make some recordings for readers to compare in the coming days if time allows.

If you have any questions about the IC-705, feel free to ask in comments.

Spread the radio love

Assembling a new compact field radio kit in the Red Oxx Booty Boss

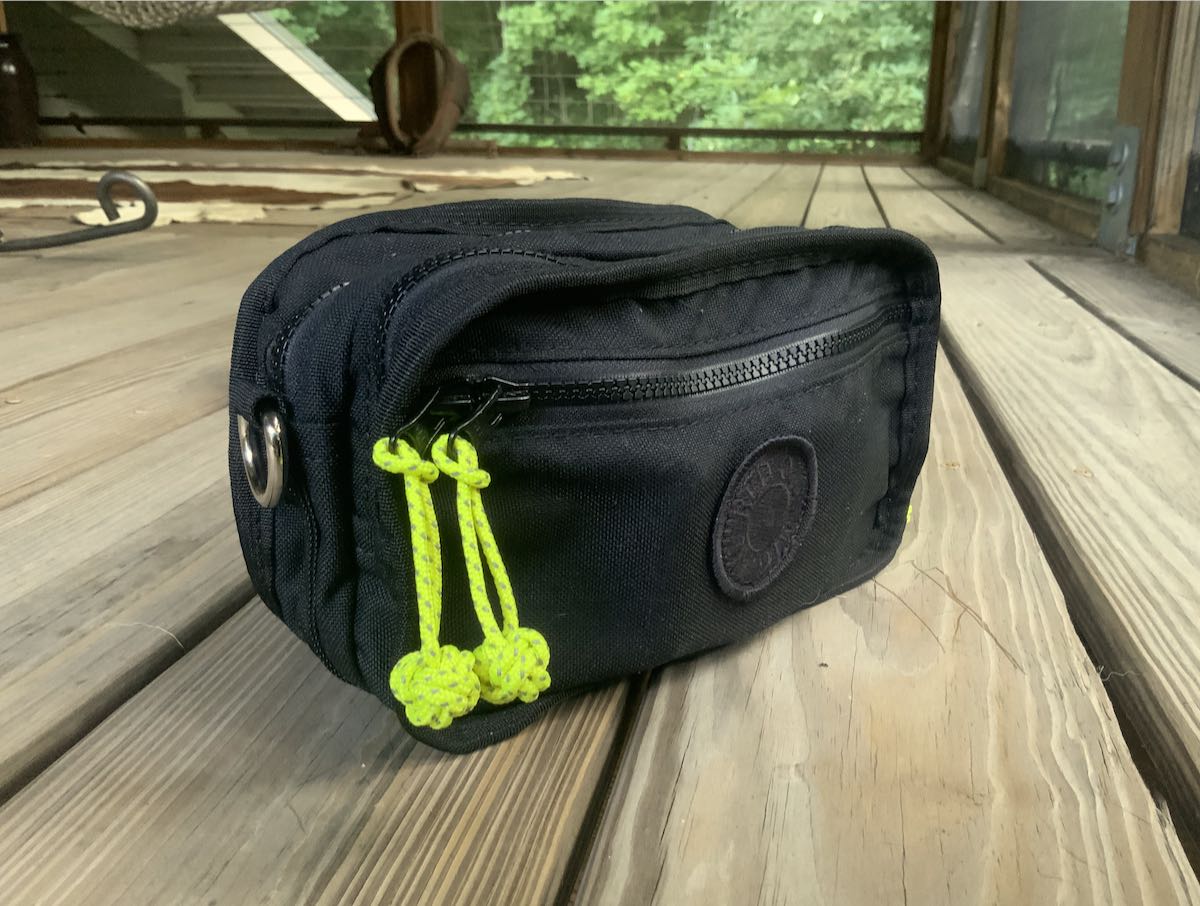
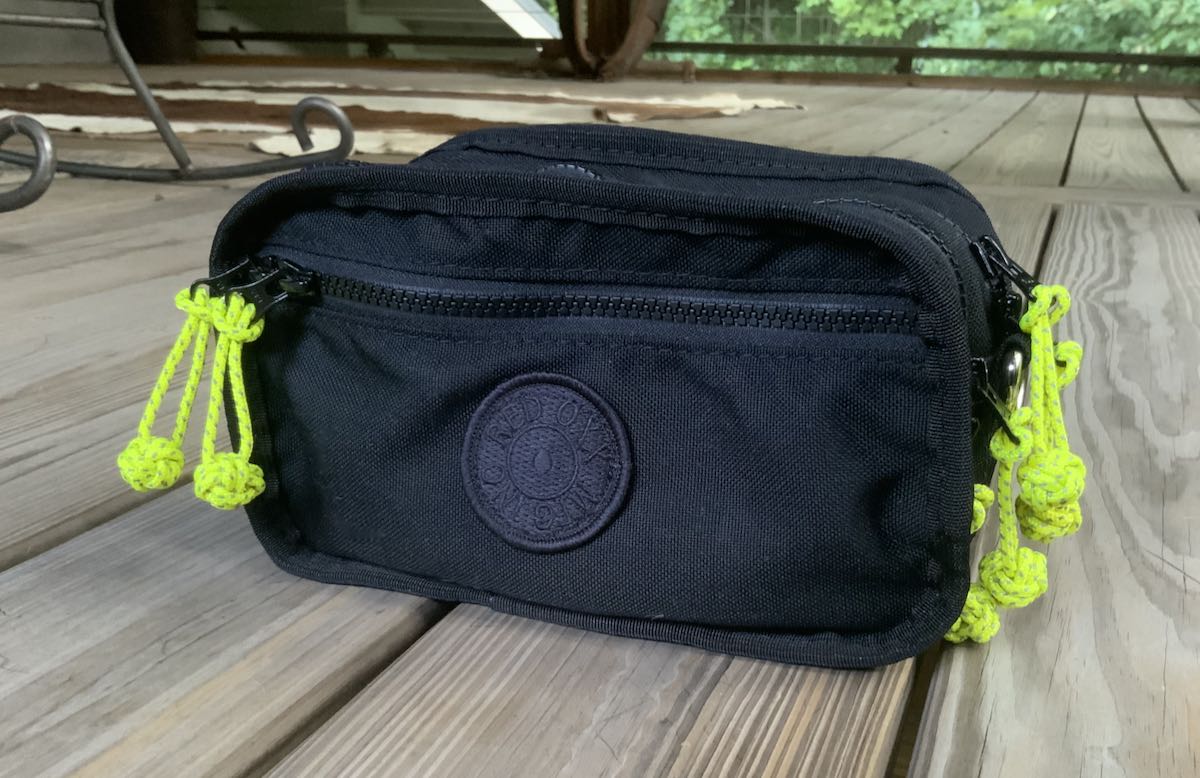
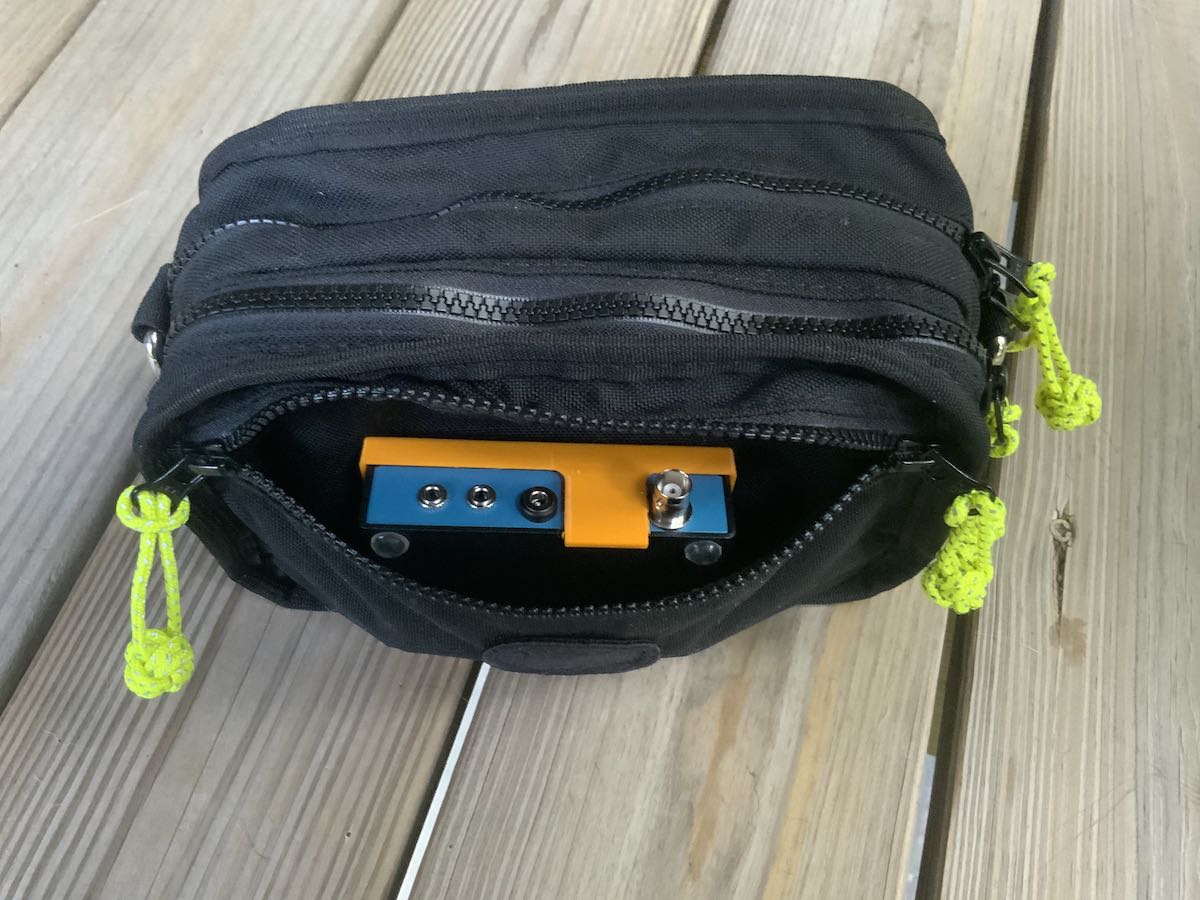
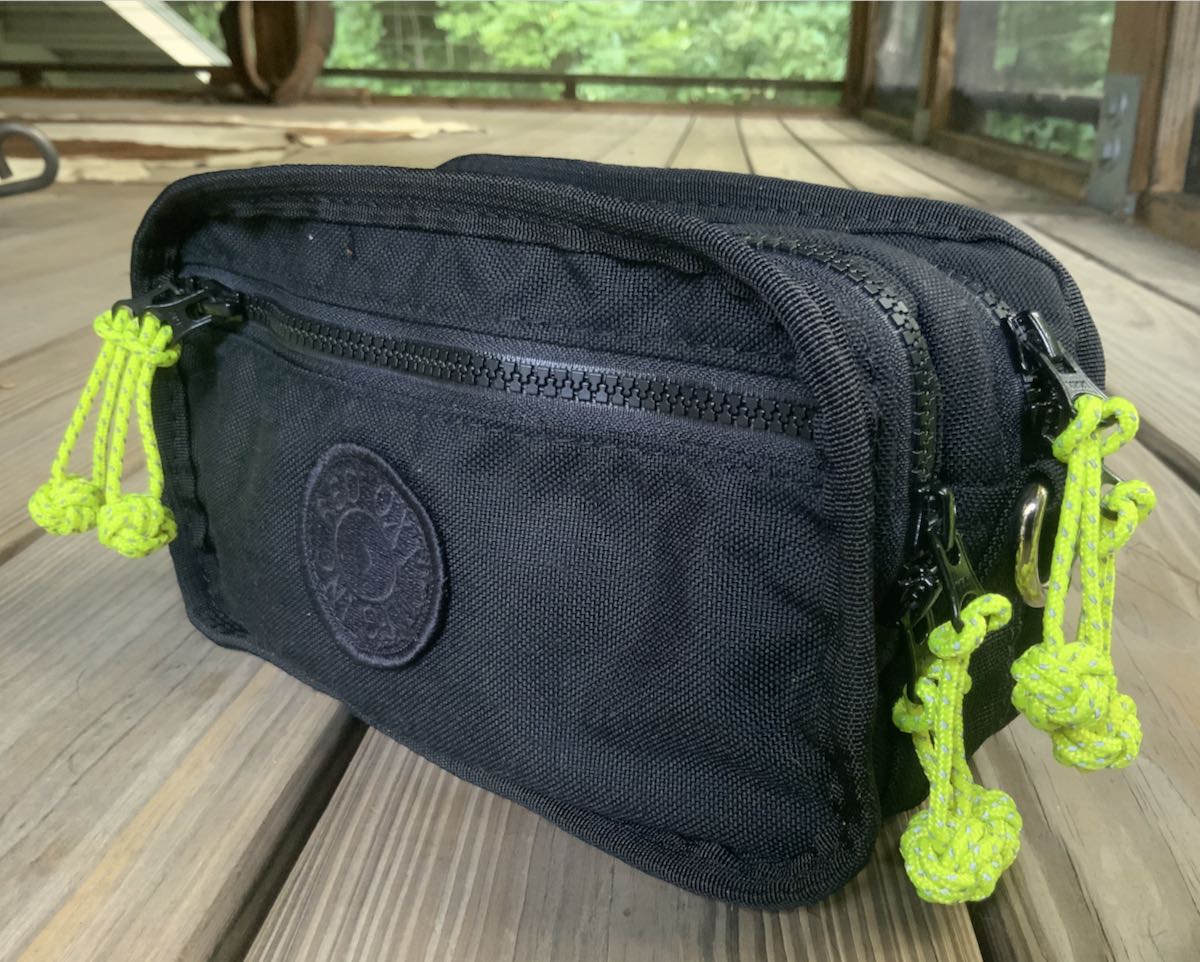
The Red Oxx Booty boss sporting my add-on reflective yellow monkey fist zipper pulls

If you’ve been reading the SWLing Post for long, you’ll have already sorted out that I’m both a radio geek and a pack geek.

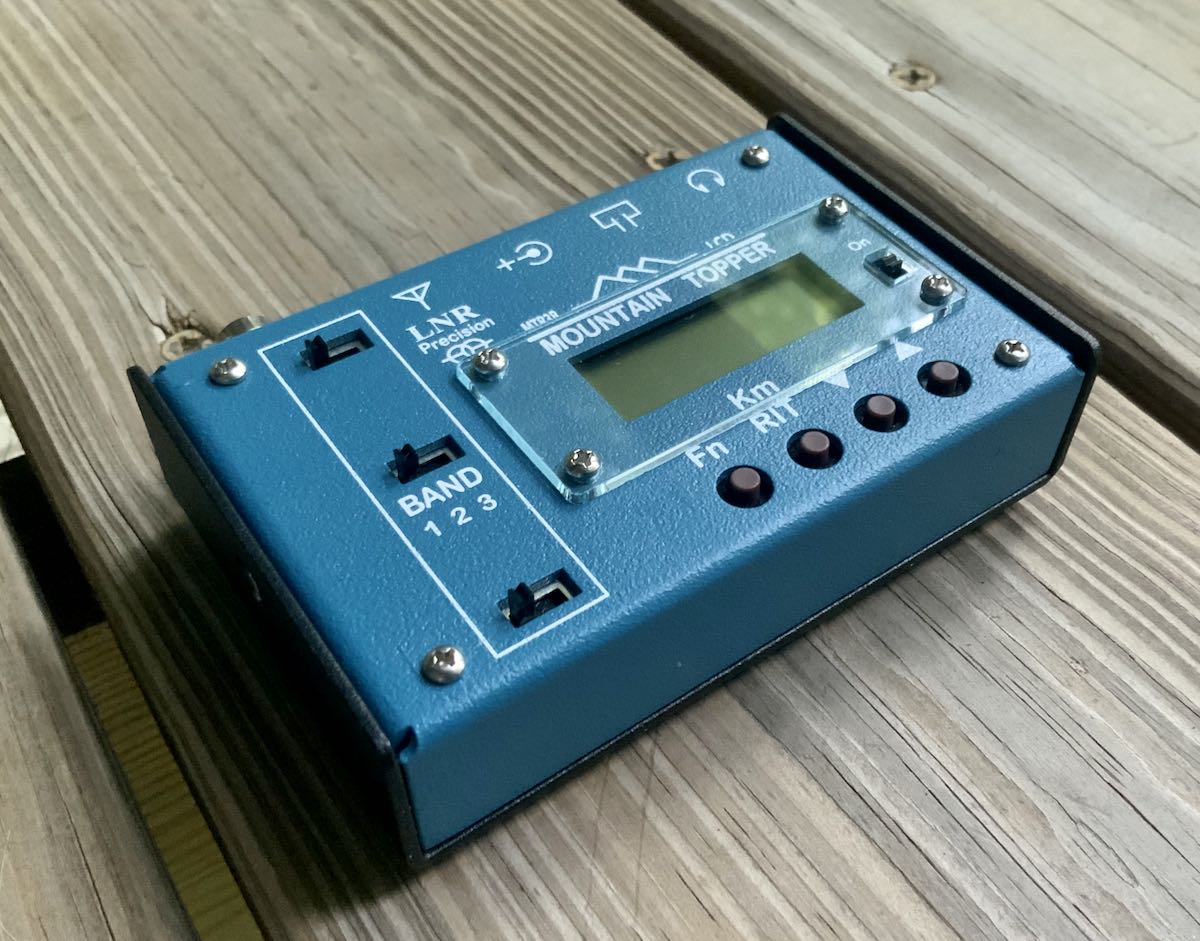
The LnR Precision MTR-3B transceiver

I recently purchased an LnR Precision MTR-3B QRP transceiver. I added it to my collection because the rig is so incredibly compact, it gives me the opportunity to keep a full HF radio kit in my EDC bag or packed away for one bag travels.

Now I’m building a full field kit for the MTR-3B in a Red Oxx Booty Boss pack I recently purchased specifically for this radio.

If you’re wondering why I’d build yet another field kit for the MTR-3B instead of simply using field supplies I already have, allow me to explain…

Field radio kit Golden Rule: Never borrow from one kit to feed another

I never violate this rule.  (Well, not anymore, at least.)

I don’t care if I’m building a kit around a portable shortwave receiver, an SDR, or a ham radio transceiver–my radio kits are completely self-contained and organized.

I’m actually plotting a whole series of posts about building portable radio kits and packs because I enjoy the process so much, but for now, I’ll keep my explanation short:

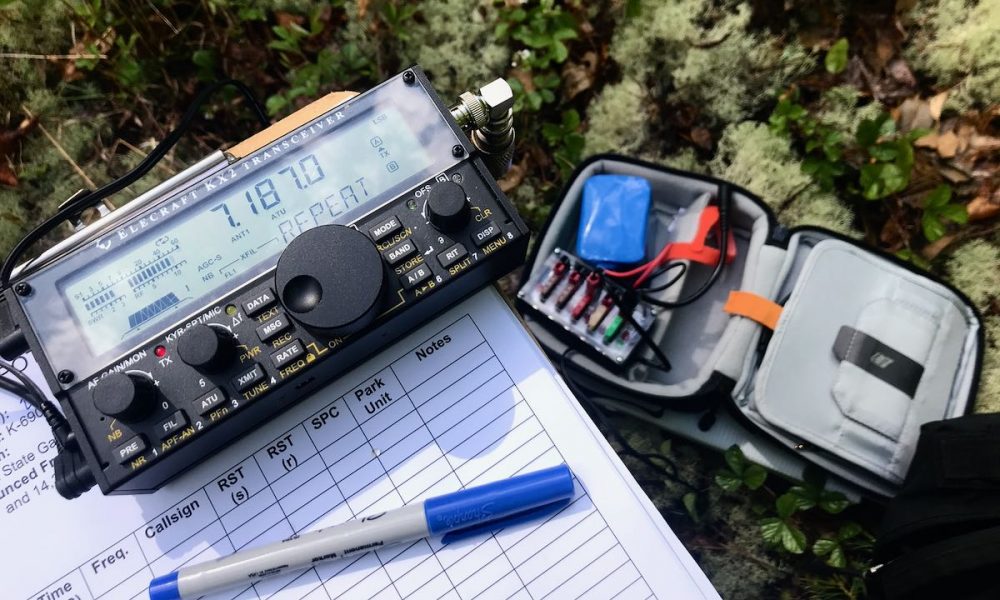
Because I have an active family life and can’t often prepare in advance for field radio time, my kits must be at-the-ready all the time. If we decide (as we are this morning) that we’re heading to a national park for a little hiking and a picnic, I know that when I grab my KX2 field kit, for example, I’ll have everything I need to do a Parks On The Air or Summits On The Air activation. I know my kit contains an antenna, all antenna accessories and hanging supplies, feed line, a fully-charged battery, microphone and/or CW (Morse Code) key/paddles, earphones/speaker, and a transceiver. It’ll also have the little bits we often forget like a pen, notepad, extra connectors/adapters, and even a few first aid supplies.

If you borrow from one radio kit to feed another, you’ll regret it later. I promise.

Case in point

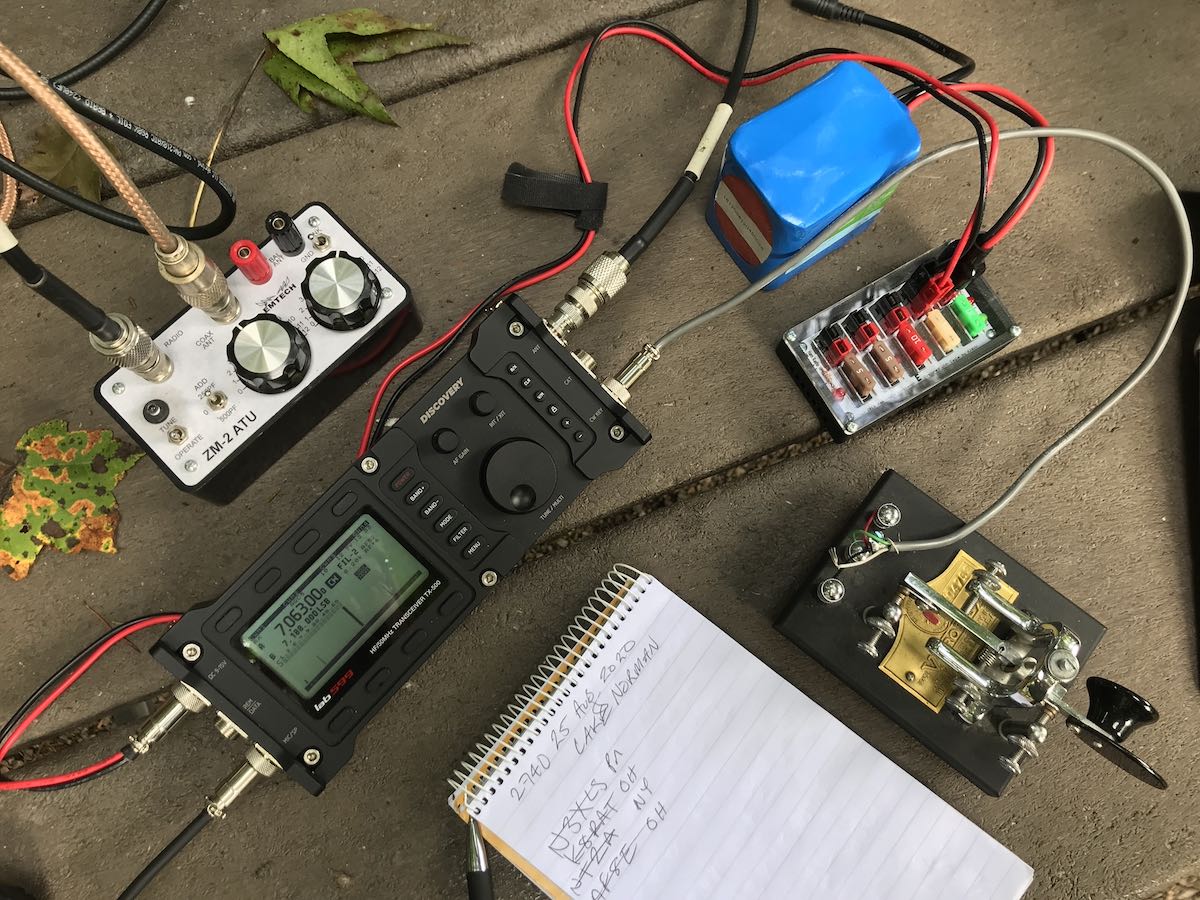
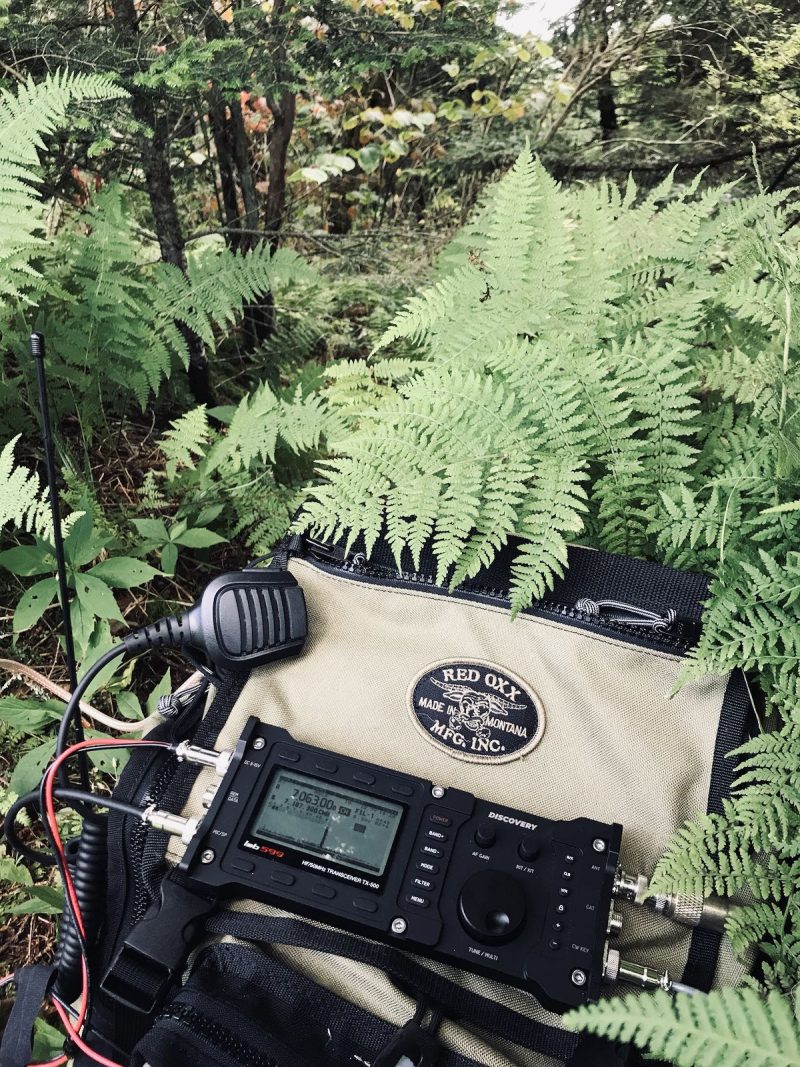
The lab599 Discovery TX500

Here at SWLing Post HQ, I review lots of radios and have a special affinity for field radios. Many times, I either obtain a radio as a loaner from the manufacturer (like the lab599 TX-500), or I purchase a radio with the intention of selling it after the review (as I will with the Xiegu G90). In either case, I don’t want to build a specific field kit for that radio because it’s really only visiting SWLing Post HQ.

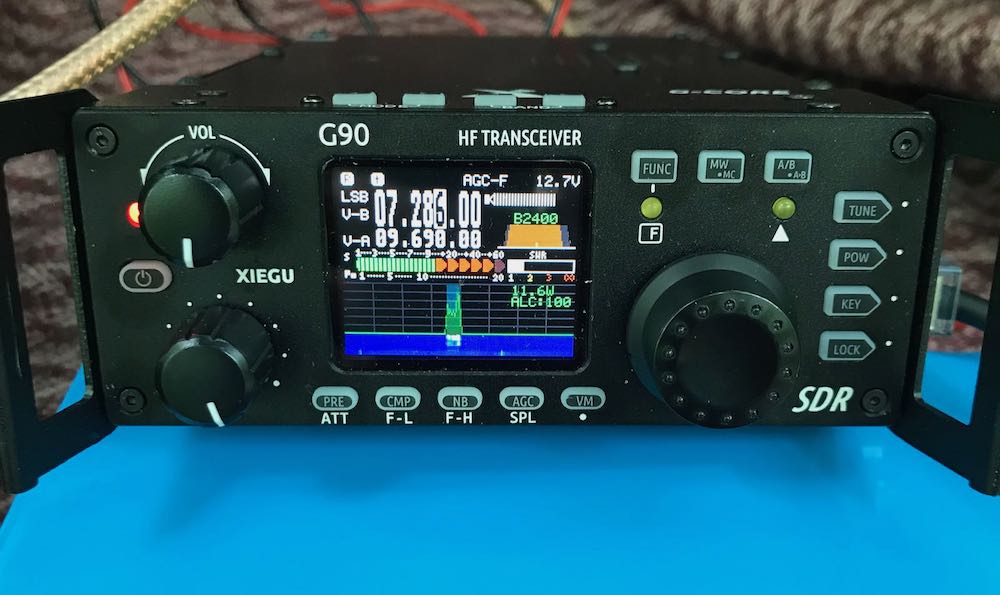
The Xiegu G90

When I first took the Xiegu G90 to the field, I felt confident I could simply throw together a quick field kit in one of my smaller backpacks. As I prepared for an impromptu POTA park activation, I discovered that I needed a coax feed line for the kit and the quick solution was to grab the one from my Elecraft KX2 field kit. Even though I knew that would be violating my Golden Rule–a rule I had adhered to for five years and counting–I did it because I was very pressed for time.  That activation went off without a hitch–a total success.

Fast-forward two days later and I had another opportunity to do a park activation, but this time I wanted to use my Elecraft KX2 because I knew I would need to hike into the site and I’d also have to both log and hold the transceiver on my clipboard while sitting on my folding stool. The KX2 is ideal for this as it’s compact and has top-mounted controls.

I hiked into DuPont forest, found an ideal site to play radio, starting deploying the antenna and quickly realized I forgot to put the feed line back in the KX2 kit. Doh! Without even a short piece of coax, I had no way to connect my KX2 to the antenna.

Fortunately, I happened to have a spare coax line back in the car and I also keep two extra BNC adapters in the KX2 kit. Still, I kicked myself as I hiked all the way back to the car. Had I only followed the Golden Rule that had served me so well!

In the end, it could have been worse. I still got to do my activation and hadn’t wasted a 2.5 hour round trip to the park.

You’d better believe the first thing I did when I got back home was to put the coax back in my KX2 field kit and my radio world order had been restored again.

Back to the pack!

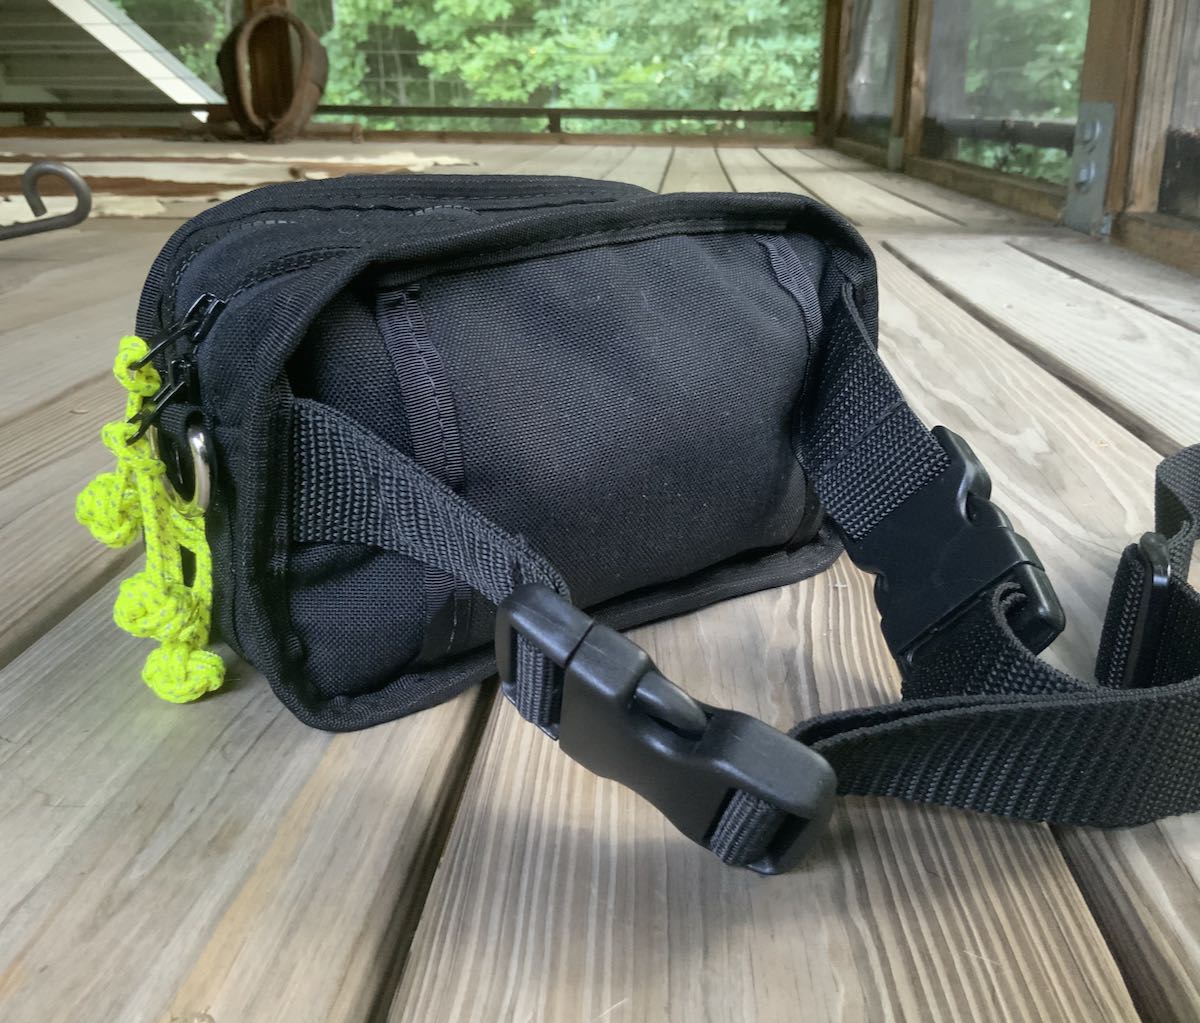
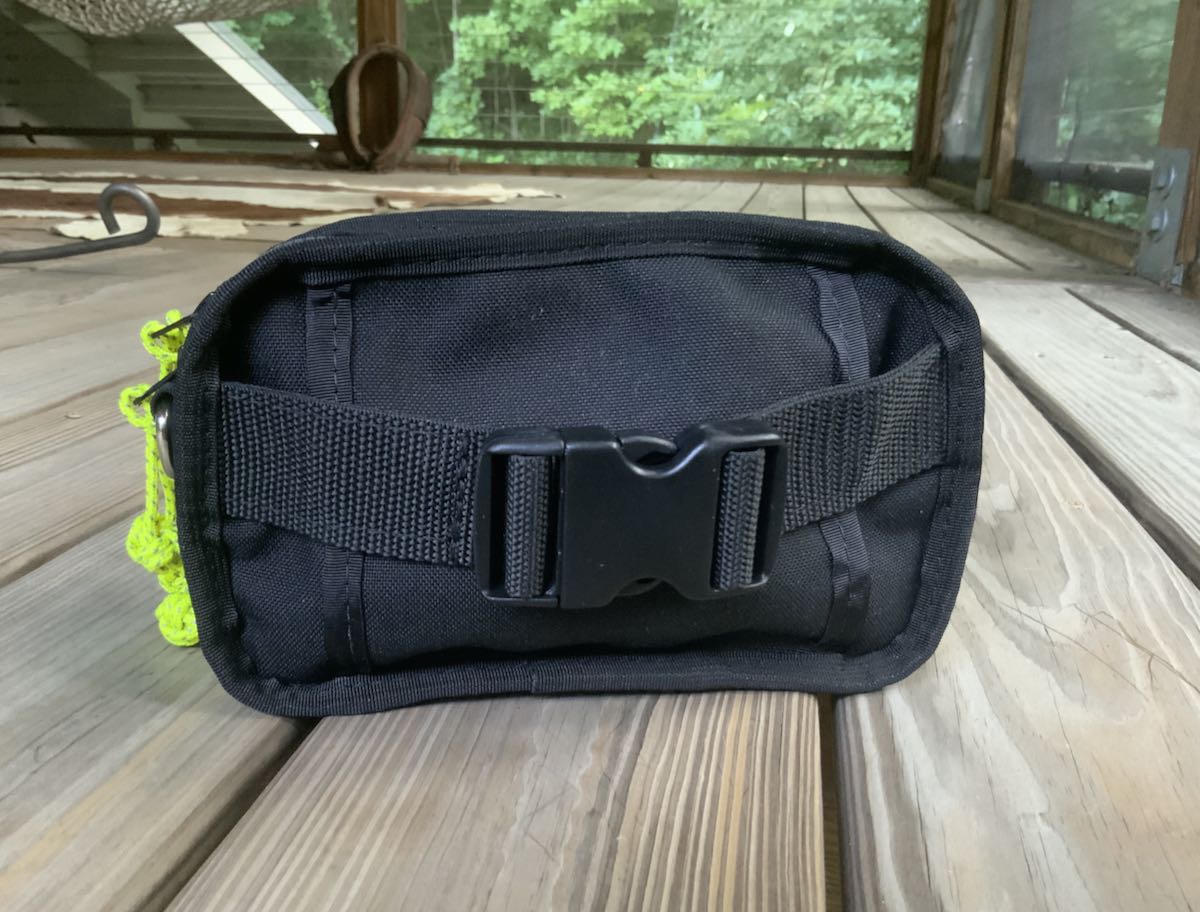
I picked the Red Oxx Booty Boss for the MTR-3B because 1.) it’s an ideal size for a super-compact field kit, 2.) it can be carried a number of ways (on back, sling, and over shoulder), 3.) with straps detached, it’s compact & easily fits in my EDC pack and 4.) I love Red Oxx gear and love supporting the company. When you buy a Red Oxx bag, you know it’ll outlast you…not the other way around.

I also ordered reflective monkey fist zipper pulls to replace the stock zipper pulls so that the pack would be easy to spot, for example, on a forest floor at twilight.

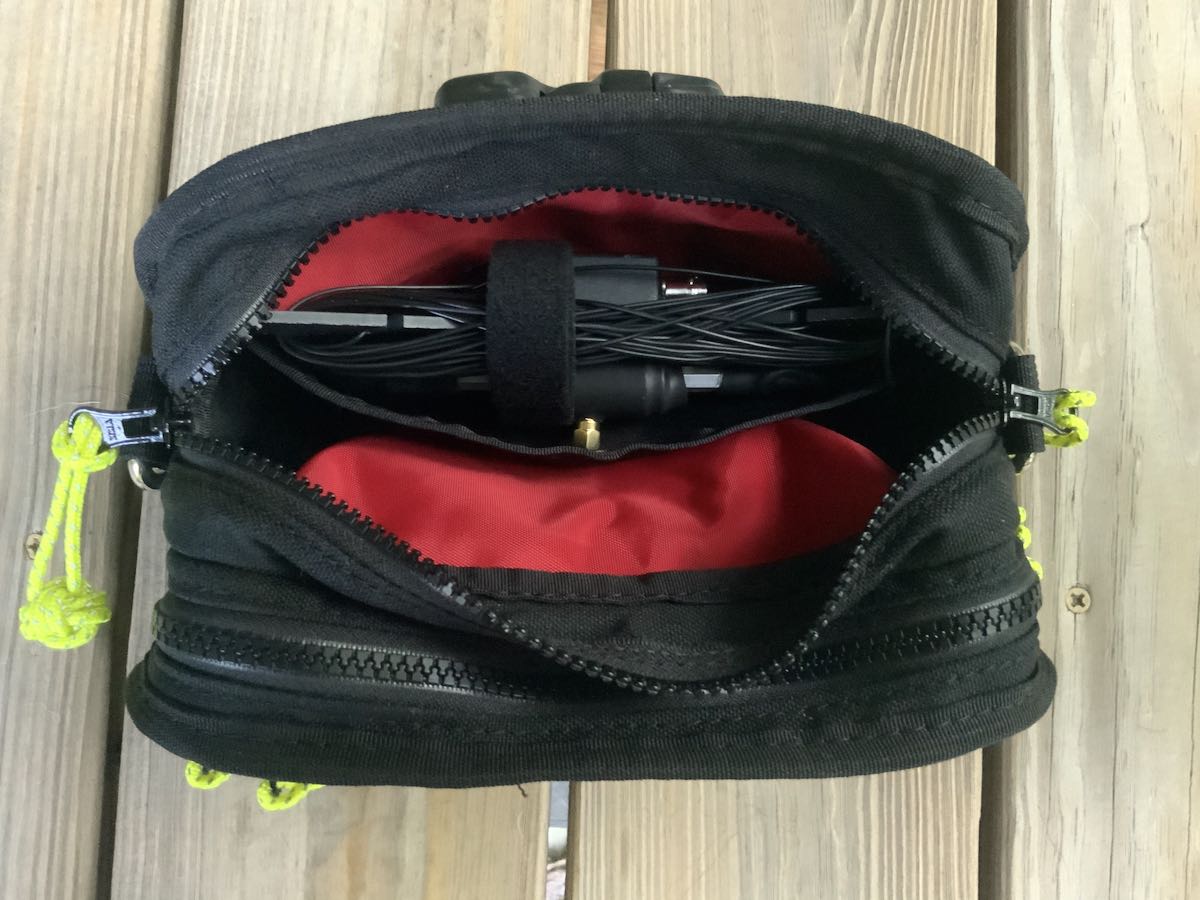
Here’s what I’m putting in the Booty Boss:

Here’s the amazing thing: without realizing it, everything in this kit save my earphones was designed and manufactured in the USA. The Booty Boss was made in Montana, the MTR-3B in North Carolina, the Vibroplex antenna in Tennessee, the ABR cable in Texas, the Bioenno battery pack in California. My 20 year old Sennheiser earphones were made in Germany.

I think that’s pretty darn cool and certainly bucks the trend!

Within a week, my battery and cable should arrive and the MTR-3B field kit will be ready for adventure.

I can’t wait!


Do you enjoy the SWLing Post?

Please consider supporting us via Patreon or our Coffee Fund!

Your support makes articles like this one possible. Thank you!

Spread the radio love

A review of the Xiegu G90 general coverage transceiver

The following review of the Xiegu G90 originally appeared in the August 2020 issue of The Spectrum Monitor magazine:


A comprehensive review of the Xiegu G90 general coverage transceiver

My coming of age in the world of radio was during the era of big US and Japanese radio manufacturers.  Icom, Kenwood, Yaesu, JRC, and Ten-Tec––these were the icons of my youth. And, I freely confess, I developed a partiality for their products.

So when incredibly inexpensive transceivers from manufacturers in China started showing up on the market a little over a decade ago, I was…well, skeptical. Very.  Many of these radios were a fraction of the cost we had been paying, and some models looked like direct copies of radios that were already on the market…but these copies were all-too-often second-rate either in features or performance.

Thus, as it was my policy to invest in quality products, I continued to put my money toward US, Japanese, and European legacy manufacturers that I felt would be here for the long haul in the amateur radio and SWL communities.

Had I become a bit of a radio snob? I admit it…maybe I had. But in truth, I was simply waiting for a quality Chinese-made radio to come along and change my viewpoint.

Times have changed

Recently, I compiled a list of general coverage QRP transceivers for the SWLing Post. My buddy Eric (WD8RIF) pointed out that I neglected to include any of the Chinese-made Xiegu brand transceivers, all of which offer general-coverage receiving.

I know a number of hams who use Xiegu (pronounced roughly “SHEH-goo”) brand portable transceivers for Parks On The Air (POTA) and Summits On The Air (SOTA) activations, and like them very well.  So I decided to waive my doubts and check out Xiegu’s transceivers. I found myself intrigued with one in particular: the G90.

The Xiegu G90
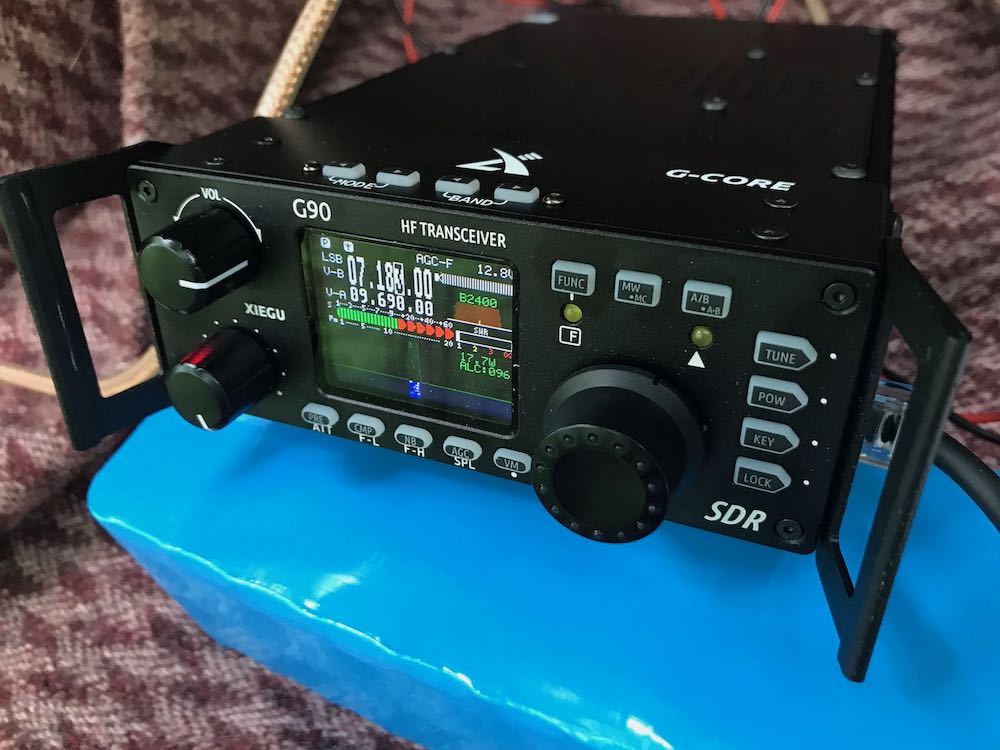
At time of publication, there are three Xiegu models widely available: the G1M, X5105, and the G90.

The GM1 ($260) is a compact, four-band 5-watt QRP transceiver, while the X5101 ($520) is a 160M-6M 5-watt Double Conversion Superheterodyne QRP transceiver. Both look promising, but the G90 is a 20-watt 160M-10M transceiver sporting a 24-bit 48 kb/s sampling analog-to-digital/digital-to-analog converter at just $450. That’s the one I chose to investigate.

I found both the G90 receiver specs and 20-watt-output power very appealing, especially considering the modest $450 price tag. But I found this receiver has other impressive features:

  • Detachable faceplate with included separation cable
  • Full-color backlit display with both spectrum and waterfall
  • Built-in side panel extensions to protect the front face and back of the radio
  • General coverage receiver (0.5~30MHz) in SSB/CW/AM
  • Built-in automatic antenna tuner (ATU)

About the only feature the G20 doesn’t include is an option for a built-in battery pack. Certainly not a deal-breaker by any means, since more often than not I use an external LiFePo battery for field-portable radio work.

I made up my mind to bite the bullet and purchase the G90. I was incredibly curious whether it could compete with my Elecraft KX3 and/or KX2, and I also wanted to explore the capabilities of its general coverage receiver for broadcast listening.

I placed an order with US distributor MFJ Enterprises for a total cost––including shipping––of $467.95.

Initial impressions
I tend to review ham radio transceivers around the time they hit the market. One of the unique advantages of being one of the first people to review a transceiver is that I really have no idea what to expect in terms of performance, other than perhaps what the manufacturer’s reputation has taught me over the years. And if the manufacturer is fairly new to me––? Then it’s truly a roll of the dice.

The G90, however, had been on the market for quite a few months, so I simply avoided reading any in-depth reviews so I could form my own opinions. With that said, I knew in advance that this radio is already well-loved by a very active and enthusiastic community of amateur radio operators. So I had only to make up my mind, myself. I got to work.

Form-factor
When I first removed the G90 from its box, I was struck by its weight, build quality, and size. First off, it’s a heavy little radio. The Xiegu site notes that the weight of the radio is about 2.2 lbs (1 kg), but perhaps due to its compact size, it felt heavier to me. Indeed, when I placed it on my postal scales, it came in closer to 3 lbs 10 oz. Still a very reasonable weight for a portable radio, but a bit heavier than described.
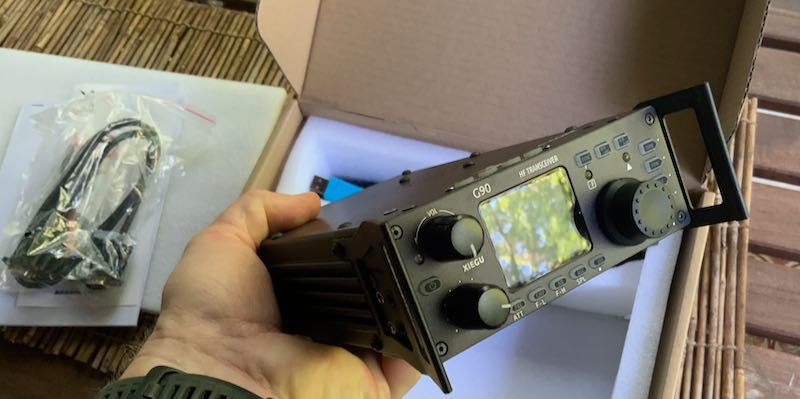
Speaking of size, the G90’s shape is pretty unique. Looking at the radio head-on, it’s reminiscent of most portable QRP transceivers (like the CommRadio CTX-10 or Yaesu FT-818, for example) meaning that the front face is compact. The depth of the radio, though (or length, depending on how you look at it), is about 8.3 inches––or nearly 10” if you include the side panels––equivalent to many of my 100 watt radios.

The build quality of the G90 is truly impressive. Holding it in your hand, you feel like you’ve acquired a quality piece of kit. The chassis is very durable, the buttons have a tactile response, and both the front and rear are protected by built-in side panels (typically side panels would be a third-party addition for most radios).

Audio

Audio from the internal speaker, which is mounted on the top of the radio, is loud and punchy, a desirable attribute for a field radio. Better yet, when you port the audio to an external amplified speaker (headphone jack is on the left side of the radio head), fidelity is quite good. The audio and noise floor, to my ear, is rougher than that of pricier QRP transceivers.

Display
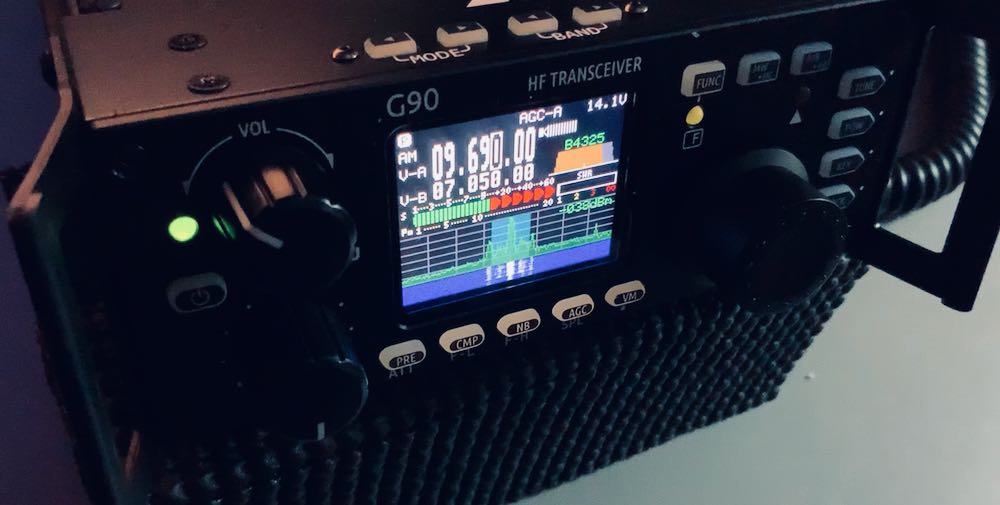
The color TFT LCD screen measures only 1.8,” one of the smallest I’ve ever tested on a radio, but Xiegu did an admirable job laying out the interface so that it’s easy to read at any viewing angle. If you wear reading glasses to read a book, you’ll need them to read this display––some of the numbers and labels are tiny, but very sharp, crisp, and high contrast. I’ve had no difficulty whatsoever reading the display in the field.

What’s more, the spectrum display and waterfall are responsive and in real-time––there’s no delay or averaging which I especially appreciate when chasing CW and SSB signals. Although at first blush one might think the spectrum and waterfall are just too small to be useful, that would be a mistake. I was guilty of this prejudice myself, and now find I rely on the spectrum display to help locate unused frequencies, spot someone calling CQ, and even identify the relative proximity of an adjacent signal. Truly a helpful feature.

Bail

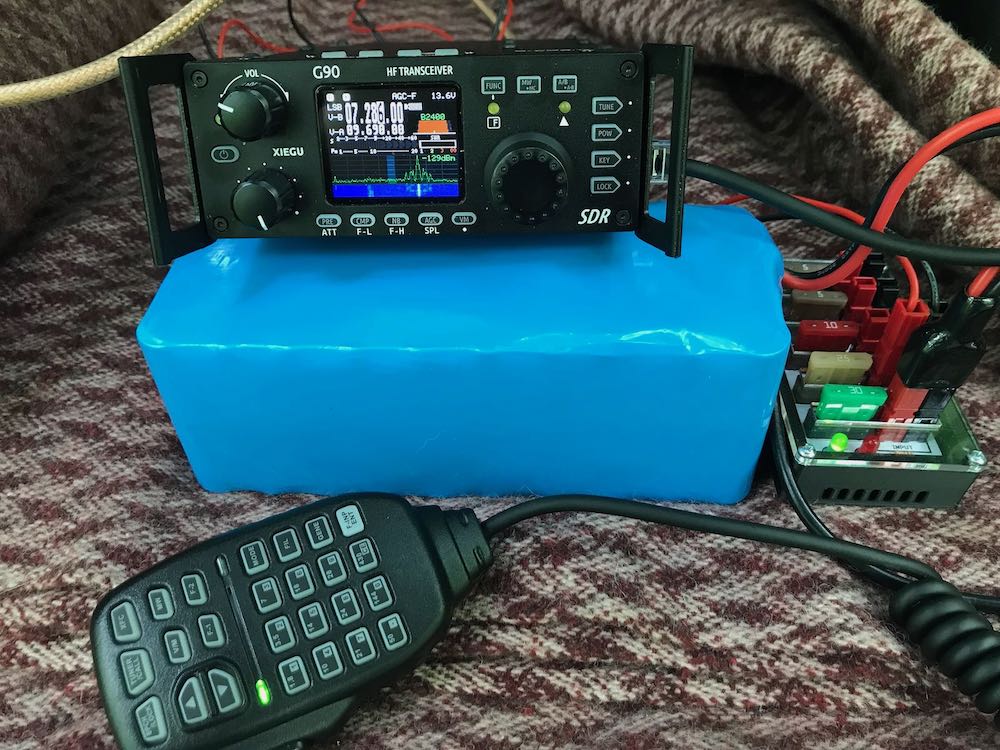
Unfortunately, there’s one very conspicuous omission on the part of the G90 designers: it has no bail nor feet of any sort to support the front of the radio and angle it for ergonomic operation. Herein lies my biggest criticism of this radio, because it truly needs something to prop up the front of the radio for comfortable operation, not to mention, to allow the bottom of the radio to dissipate heat effectively.

There are a number of third-party producers that will supply a bail for the G90, but many are clunky and expensive, and I feel an attached/integrated bail is always best.
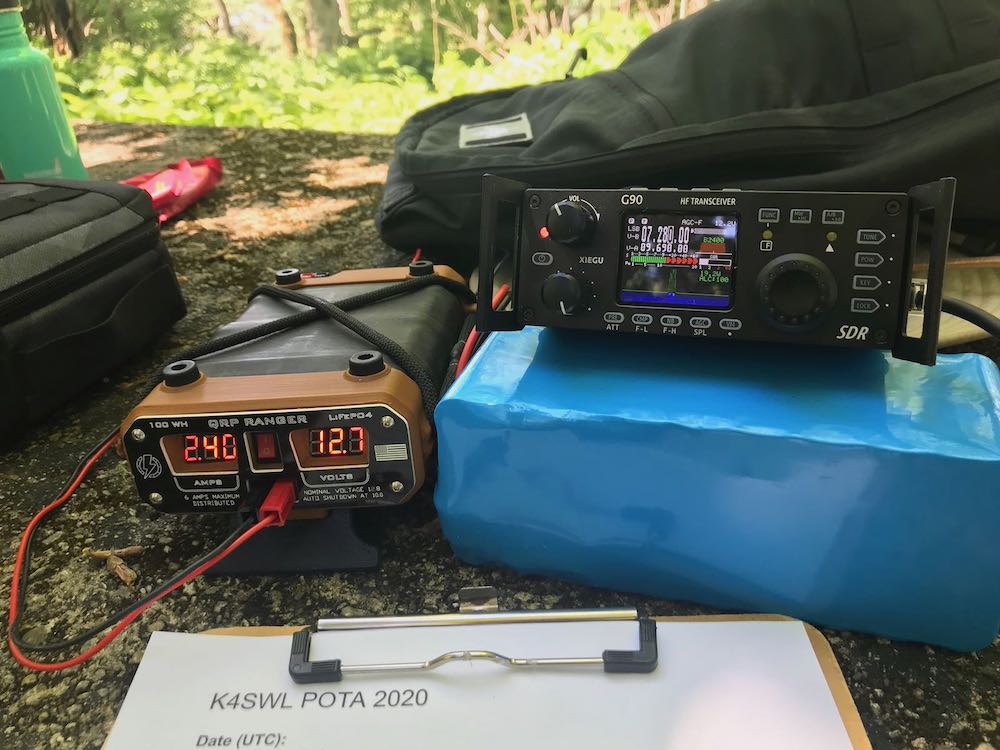
Ad hoc solutions to the fore: in the field, I simply prop the G90 on my
Bioenno 15 aH LiFePo battery; in the shack, I use a small support stand I purchased for my Elecraft KX3. Not as good as a purpose-made bail, but this works.

Microphone
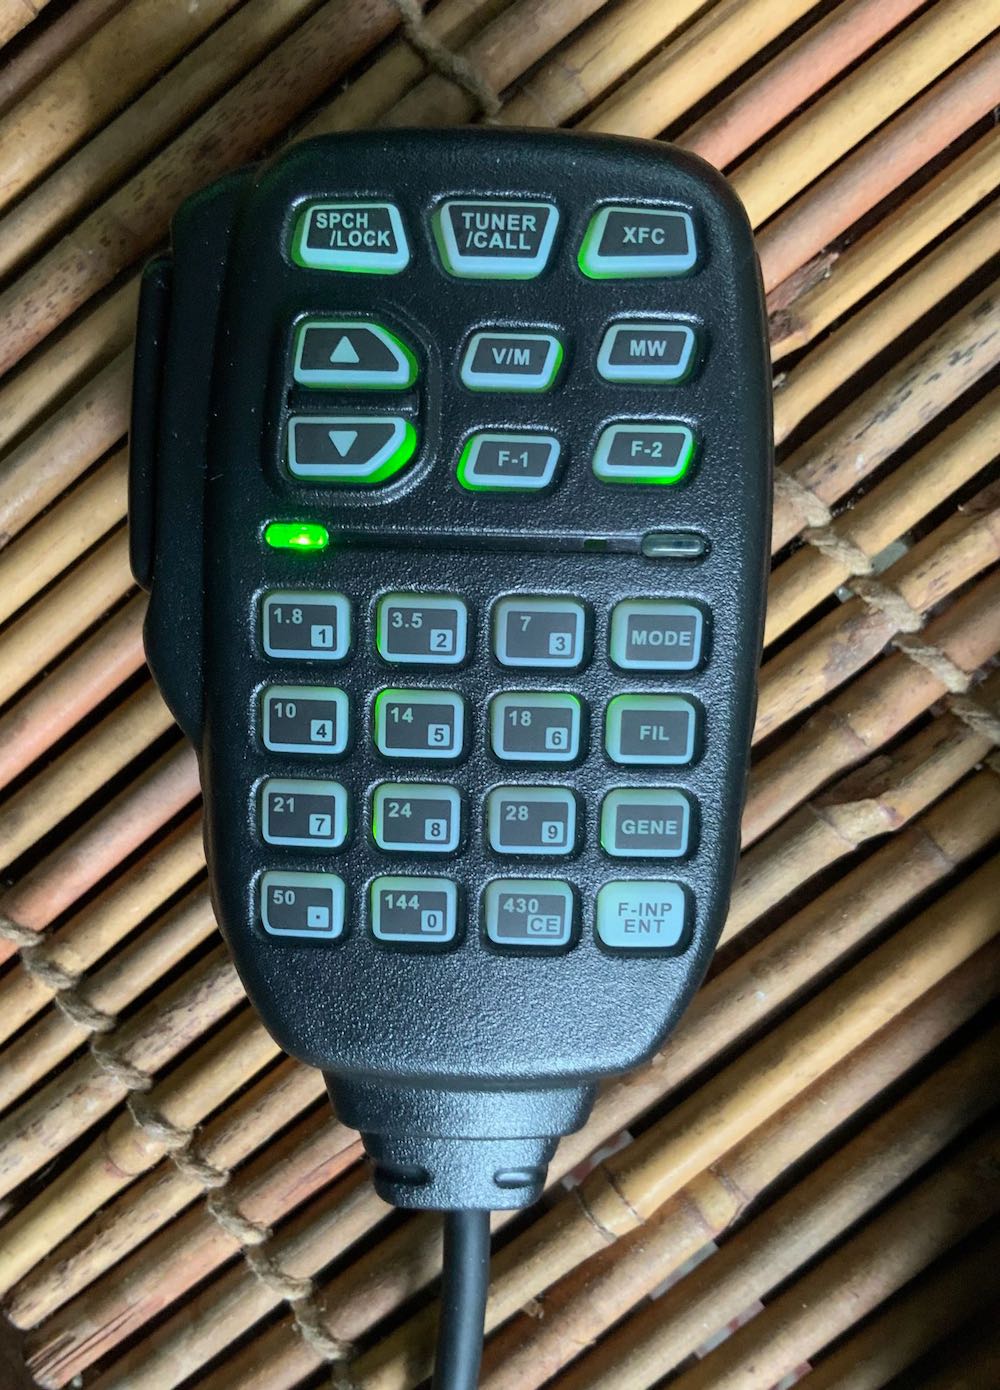
The microphone that accompanies the G90 is what you would expect from a mobile HF rig: almost all functions can be controlled by its backlit keypad. I have read a few reports of people dropping and breaking the supplied mic. Turns out, the Mic’s 8-Pin Modular Plug is configured like a number of Icom radio models, and a replacement mic can be purchased on Amazon for about $22.

Remote head
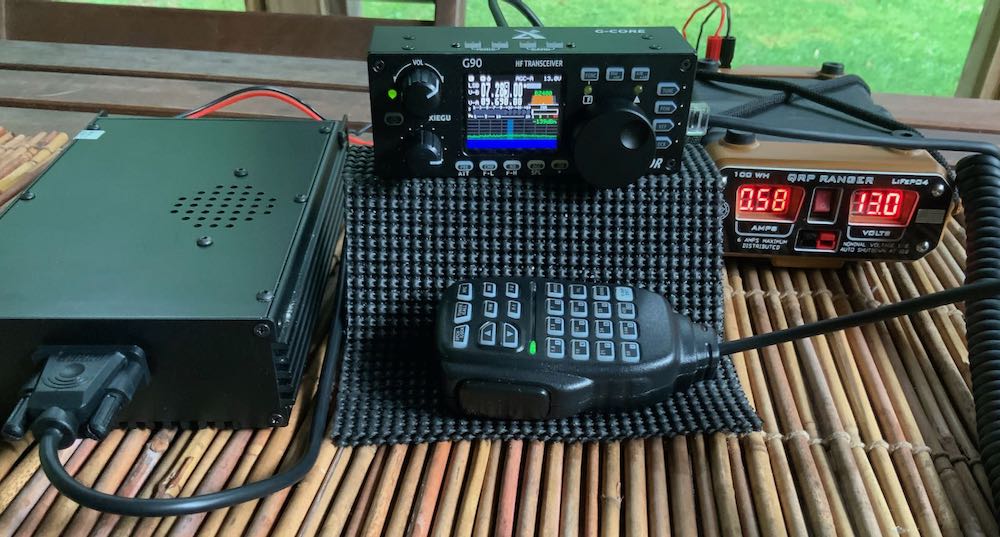
As mentioned earlier, the control head of the G90 can also be separated from the body for use in mobile applications such as a car, RV, or even in the shack. The real surprise here is that the separation cable is included in the package. I’m not sure I’ve ever owned a mobile radio that came with a separation cable––what a luxury! Great addition.

Internal ATU

Another surprise for a radio in this price class: the G90 has a built-in automatic antenna tuner (ATU). When I first made the decision to purchase and review the G90, I didn’t realize this, and in fact would have never guessed it to be a possibility in a $450 transceiver. What’s more, this ATU is one of the best I’ve ever used in the field: it’s quick to match, and seems to find a match with almost any setup. I almost wish Xiegu sold a stand-alone portable ATU so I could use it with my other radios that lack an internal ATU.

Power output

Unlike most of the portable transceivers on the market that have maximum output power of around 5-15 watts, the Xiegu G90 will pump out up to 20 watts. While 90% of all of my ham radio communications are accomplished at 10 watts or below, I’ve appreciated a little extra “juice” while operating in the field.
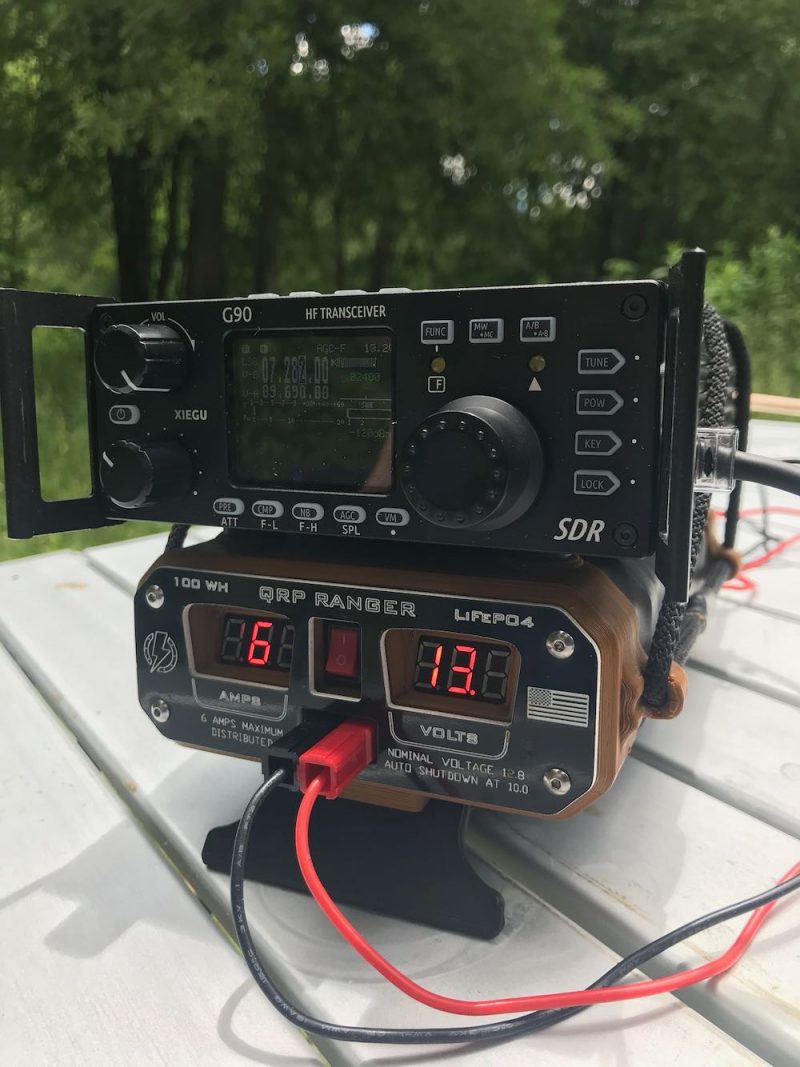
Note: due to the speed of my phone camera, not all of the LED segments of my battery pack are visible.

With all that’s packed into this transceiver, no wonder it’s a heavy little unit!

My conclusion here is that the G90 feels like a quality rig. But how does it perform? Let’s first take a look at how I evaluate the transceiver as a ham radio operator, then as a broadcast listener and SWL.

Ham Radio Operation
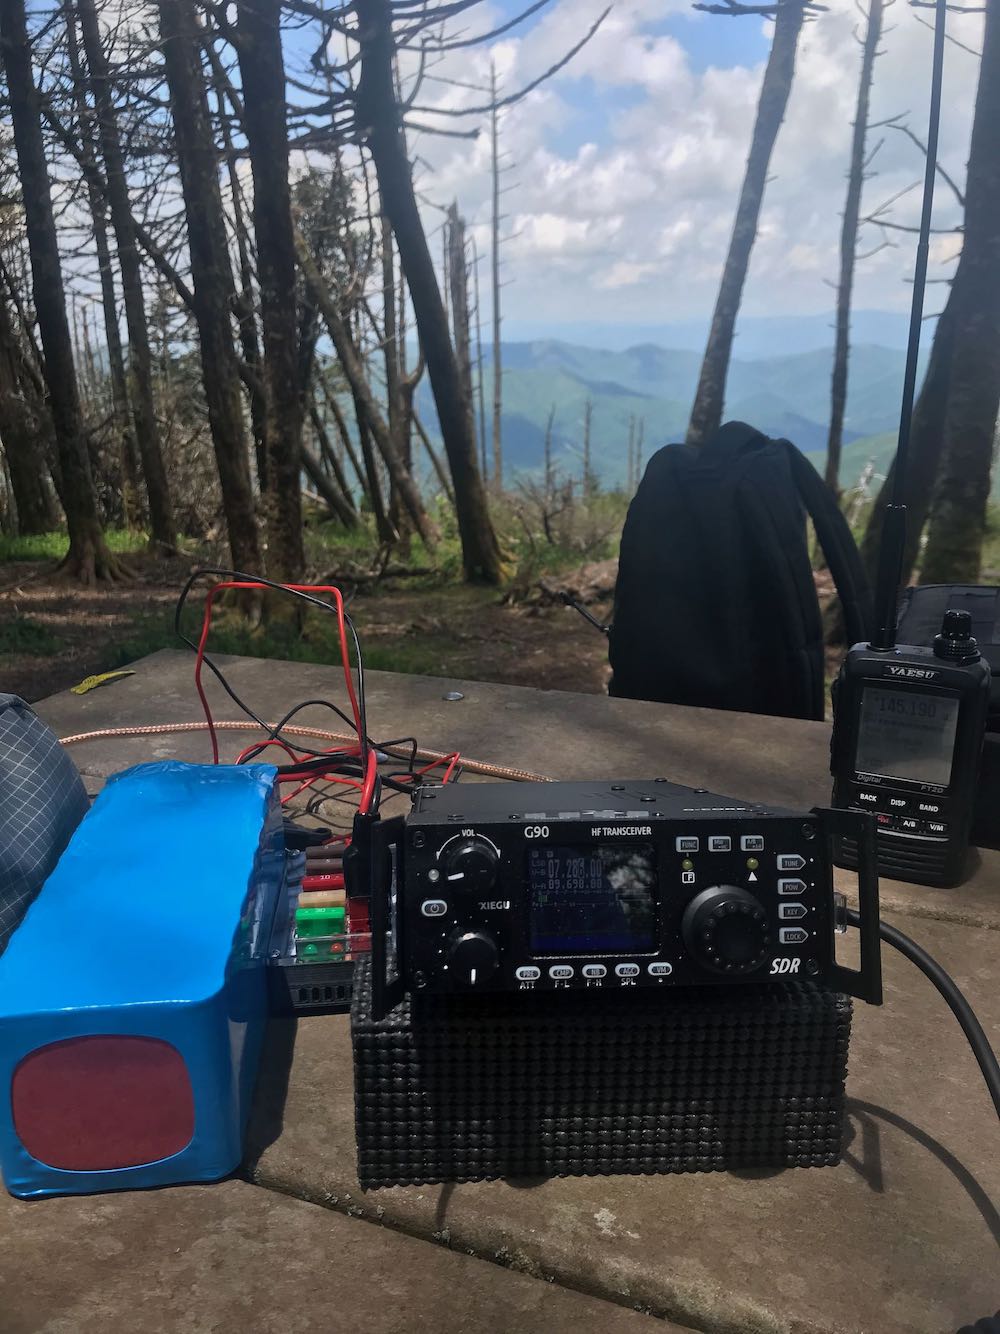
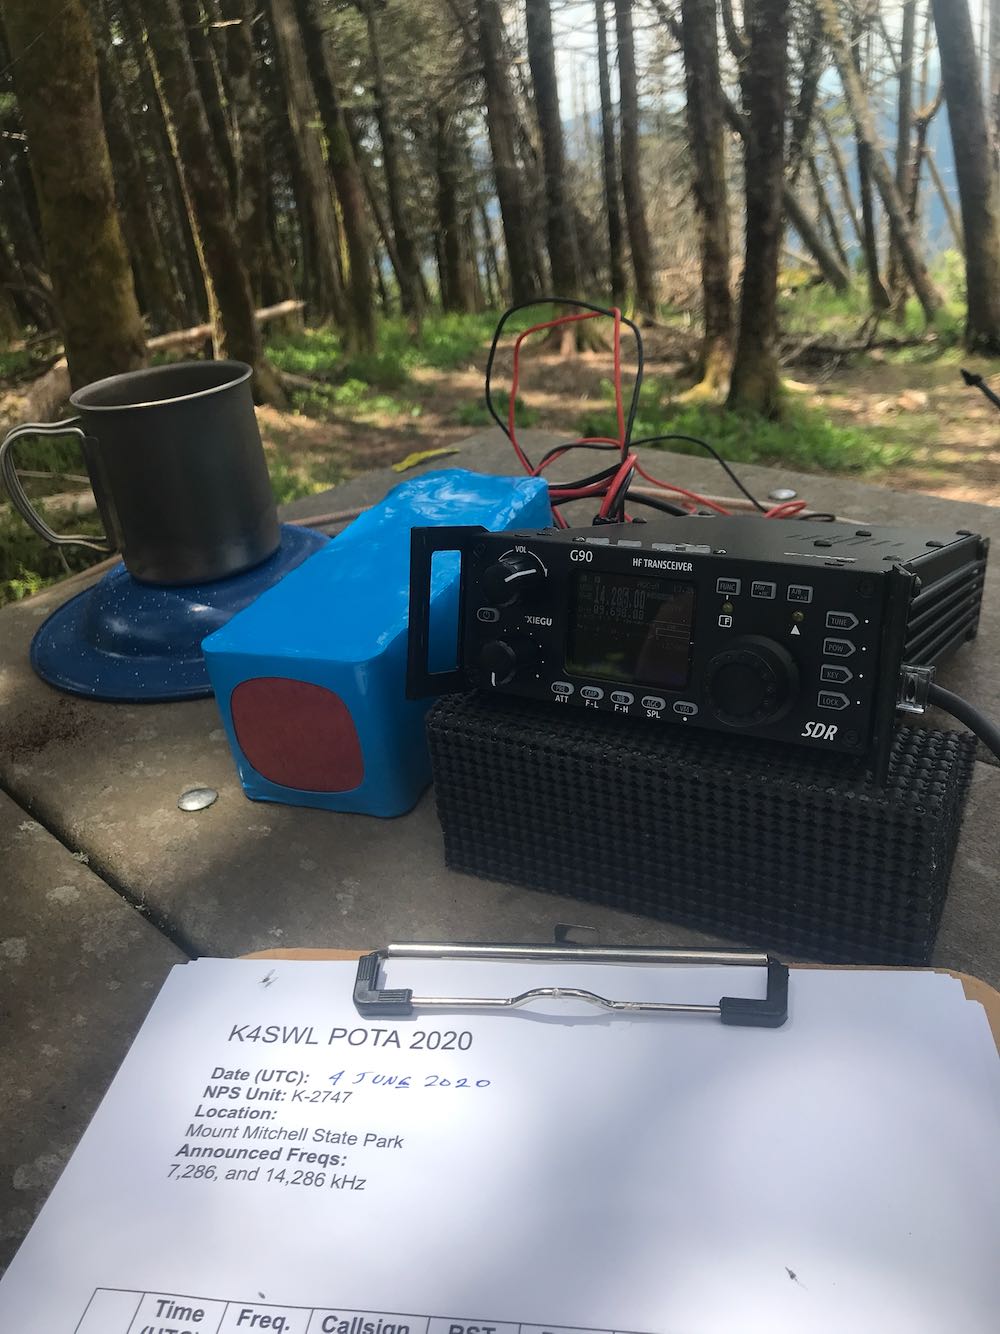
Over one month of operating the G90, most of that time has been in the field, as I’ve taken the radio along for a number of Parks On The Air (POTA) field activations. Although I’ll be commenting about the G90’s performance as a transceiver in general, keep in mind that I do so mainly through the eyes of a field operator.

Although I often dislike operating compact radios due to small buttons and complex embedded menus that supply knobs and buttons with multiple duties, I find operating the G90 surprisingly pleasant. All of the most important functions of the transceiver can be called up with one or two button presses. Obviously, a real ham radio operator played a part in designing the G90’s operation.

Tuning the G90 is a simple process. The main encoder, of course, allows you to tune up/down the band. By short-pressing the encoder knob, you can change between the hundreds, tens, ones, tenths, and one-hundredths of a kHz. In fact, it’s very simple to move around a band this way. The encoder action is defined by detents that you feel as you rotate the knob. Normally I’m not a fan of detents on a radio’s main encoder knob, but since this one is so small, I think I actually prefer it as a means to control the spinning action. There is no brake adjustment.
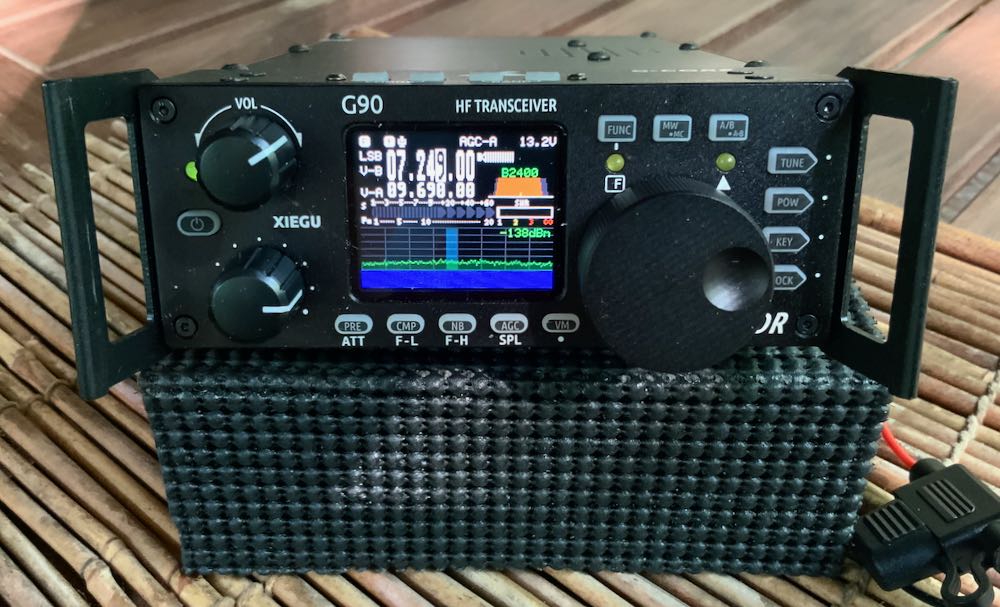
Upgraded G90 Encoder

The supplied encoder knob is made of plastic and has dimples on the front to give your finger a bit of grip as you tune up or down. Upon the recommendation of a friend, I purchased a third-party dimpled aluminum knob to replace it––a major upgrade for a modest $8 investment!

Changing between bands and modes is very simple with the G90. There are dedicated band and mode up/down buttons on top of the radio’s front panel much like those on the venerable Yaesu FT-817 and 818 series. The G90 defaults to ham radio band allocations, but there is a menu setting that allows you to also include broadcast bands between band changes. Nice touch.

There is a dedicated AF gain control on the front of the radio. After receiving the radio, I was disappointed by the lack of an RF gain control, something I use a lot during noisy band conditions. Fortunately, Xiegu included an RF Gain control in one of the latest firmware updates: to access it, simply press and hold the AGC button, then make adjustments to the RF Gain percentage with the main encoder. The G90 defaults to a 50% setting. While I’m not really sure what this setting means, I do find the RF gain control quite effective, even though it doesn’t respond like a legacy receiver’s RF gain control.

The Xiegu G90 has a simple and effective variable-filter control: simply press the FUNC button then the CMP button, and use the encoder to adjust the low end of the filter.  To adjust the high end, press the FUNC and NB button in the same way. I love the fact that the filter can be adjusted from both the high and low ends, and that it’s variable instead of set at predetermined fixed widths such as “wide” and “narrow.”  All mode filters are adjusted in this fashion.

CW Mode

The G90 is a capable CW transceiver and should please the CW operator. The keyer speed, ratio, auto modes, and paddle setup are all accessible from the KEY function button. By pressing the FUNC and Key buttons, you can access the CW volume and tone parameters. The G90 also allows you to turn on a QSK function and adjust the hang time. The G90’s version of QSK isn’t the full-break-in variety you might find in, say, the Elecraft KX series radios. Meaning, while the hang time is very short, if sending at high speed you won’t be able to hear another station break in between your characters. You will note a slight relay click. With that said, I find the QSK mode to be quite effective for my use because I’m not really a “full-break-in” kind of operator.
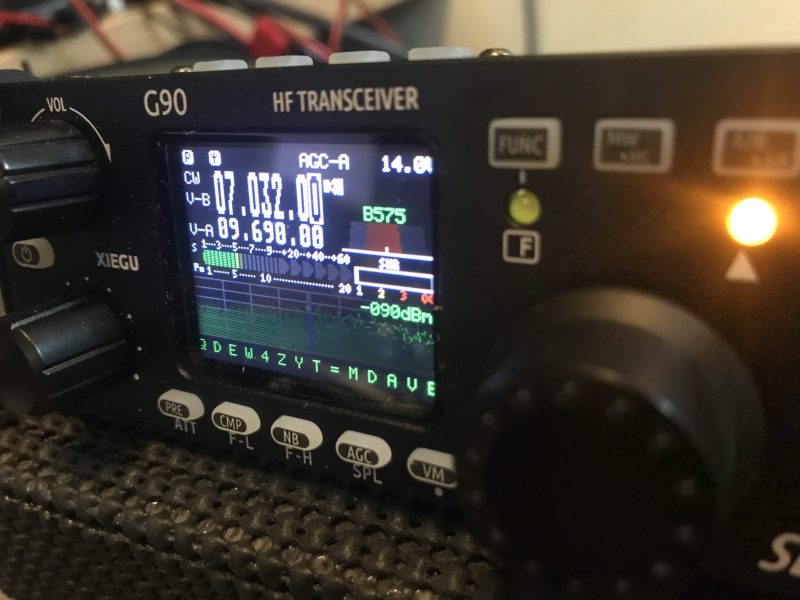
The yellow CW tune LED on the front of the G90. Some might find it distracting if engaged.

Speaking of CW, the G90 features a CW tune feature that indicates when you’ve locked onto a CW signal: a yellow LED will flash as CW is received. While I find this feature a bit distracting, I’m sure some operators will appreciate it. In addition, the G90 features a CW reader that will decode CW when a station is properly tuned in and isolated from others.
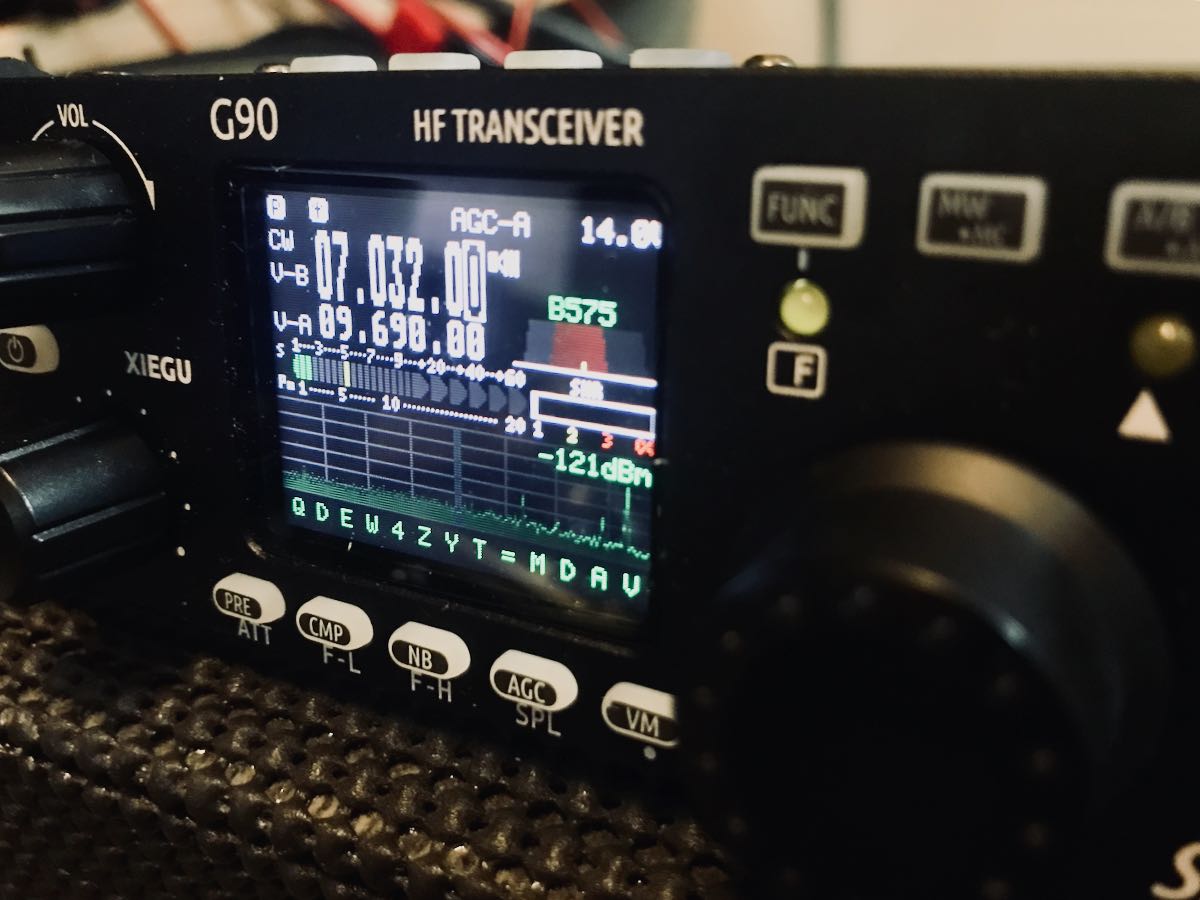
Note the CW decode at the bottom of the display.

In the field, this feature has helped me confirm call signs––but like most transceiver CW readers, it’s not always accurate, especially if the CW operator on the other end uses a hand key or bug. Still: a welcome feature.

SSB mode
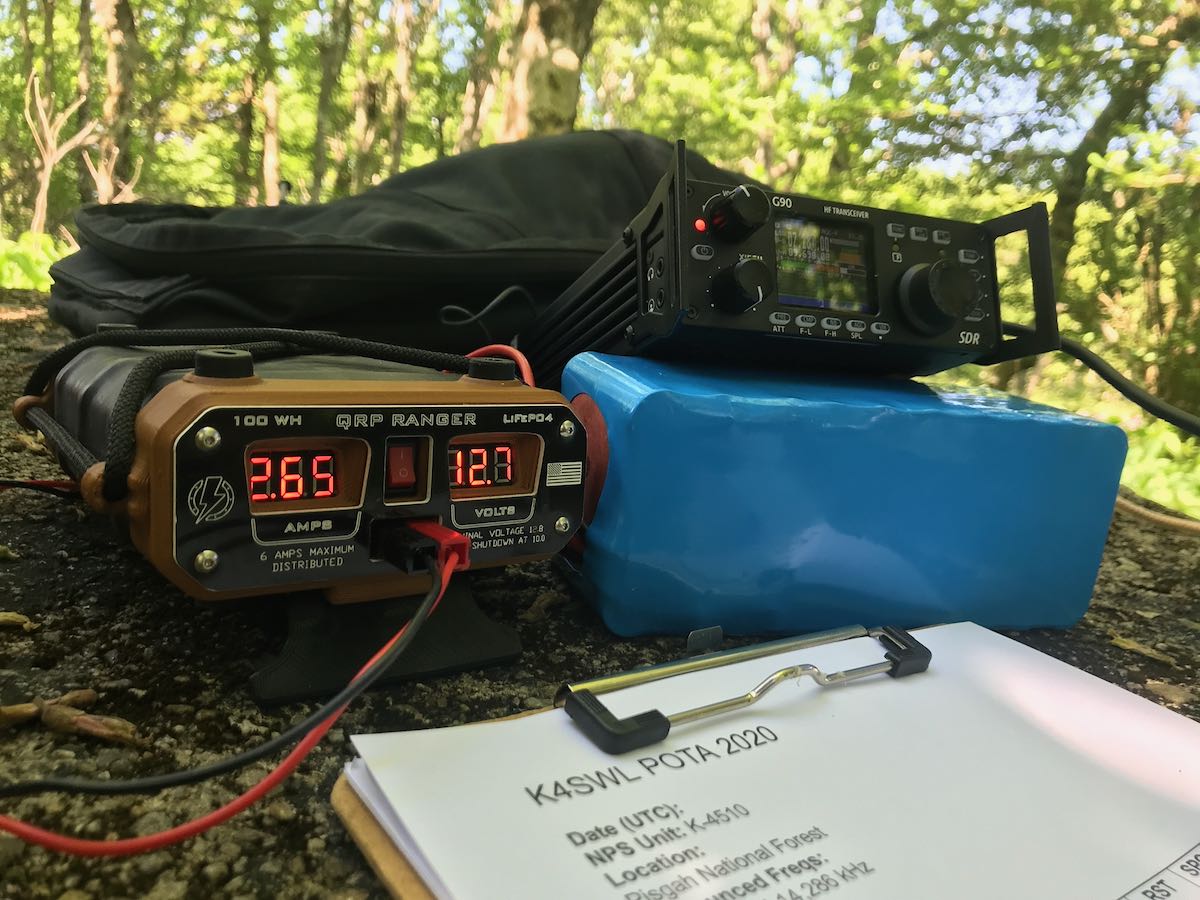
Most of my operating time on the G90 has been in SSB mode, and I’ve been very pleased with the radio’s performance in this mode. The G90 allows you to adjust the mic gain and enable compression. I’ve gotten excellent audio reports from the numerous SSB contacts I’ve made on the G90.

I should note here that although I feel you get much more radio than you pay for with the G90, I do wish it had a voice keyer. Especially when I’m activating a park via POTA, I call CQ a lot. With my Elecraft KX3 and KX2, for example, I set the voice keyer to “beacon” mode which allows me to pre-record a CQ and have it playback the message on a loop with a few seconds in between to allow me to recognize anyone replying to my call.  I rely so heavily on this feature for SSB park activations, just to save my voice, I know the G90 can never displace my Elecraft field radios. Again, I wouldn’t expect such a feature in this price class, but it would make for a near ideal field radio.

Digital modes

One thing that surprised me about the G90––especially since it is an SDR––is that operating digital modes is less “native” than I would have expected. Many modern SDR transceivers make setting up for modes like FT8 relatively easy with both CAT control and often the radio itself is identified as a sound card, thus no external interface is needed. When I decided to try running FT8 on the G90, I was discouraged by the fact that setup is much more like that of a legacy radio. Indeed, many users have had communication issues with popular software packages.

Since I wanted to test the G90 as a field radio and since I do very little FT8 in the field, I simply omitted testing this functionality. I have read that many operators have, of course, been able to successfully use the G90 for digital modes, but be prepared to read through the G90 email discussion group (see link at end of article) for best practices.

Update: SWLing Post contributor, David White, brings up one fine point about the G90’s VOX control. “I use that feature for TX control when running any of the digital modes with the laptop audio in/out going through the rear AUX connection.” Thanks for pointing this out, David. VOX control really facilitates using digital modes because the radio can detect audio comping from the computer and engage transmit without having to use CAT control of any sort.

Receiver Performance

Overall, I’m favorably impressed with the G90’s receiver. Both sensitivity and selectivity are above par, especially for a radio in this price class. The G90’s noise floor is acceptable, though not as low as that of my Elecraft radios. I do find that with the G90, I often need to ride the RF gain control in our noisy summer band conditions. I find that by adjusting the RF Gain and selecting the most effective AGC setting, I’m able to achieve an excellent signal-to-noise ratio. I find the G90 audio a bit fatiguing when I’m operating for long periods of time–at least, compared to some of my other transceivers.

In a nutshell: the G90 packs a lot of performance in an affordable radio, especially if you’re willing to tailor the filter settings, AGC, and RF gain to best accommodate the conditions.

Field notes

I’ve been very pleased with how long I can operate on battery power with the G90. Even with the display backlit set to 80% and with the volume set to high, I found that the maximum amperage the G90 would consume was about 0.60 amps. While I wouldn’t consider that benchmark, it is respectable.

I also like the G90’s built-in antenna analyzer. By pressing and holding the POW button, the G90 will display a graph showing the SWR figures across your specified frequency range. A brilliant and handy feature in the field! It’s important to note, though, that during the test the radio is transmitting a little RF so don’t try it with a receive-only antenna.

I do find that the G90’s body gets pretty warm–downright hot–when activating a park. It’s no wonder, really, because I often end up calling CQ at five second intervals over the course of 60-90 minutes on average.  That’s demanding a lot of a fanless radio, thus it gets very warm to the touch. Still, while I never had any overheating issues, I’ve also never operated the radio in direct sunlight for extended periods of time and I’ve always propped up the radio so that air can flow underneath the chassis. Again, if for no other reason than to dissipate heat, Xiegu should have incorporated a bail or folding feet. As much as I love the front and back panel extension, I would have chosen a bail over these.

Broadcast listening

While broadcast listening is often an afterthought for most ham radio operators, it never is for me. I like to travel lightly and I like my QRP transceiver to double-duty as a tool for SWLing.

From day one, I have spent a great deal of time with the G90 across the broadcast bands.

Shortwave

One of the main reasons I decided to review the Xiegu G90 is because I found so little information out there about how well the general coverage receiver worked for HF broadcast listening.  The G90 has a frequency range of 0.5-30 MHz (SSB, CW, and AM).

But I couldn’t find a specification showing the maximum width of the AM filter. In a few display photos with the AM filter width was indicated as 5.4 kHz––if this was so, I concluded, it was fairly workable if not particularly wide. However, only moments after opening the box and putting the G90 on the air, I tuned to the Voice of Greece (9,420 kHz) and learned how to change the AM bandwidth.  I was very pleased to find that in AM mode, that indicated filter width is only half the actual width: this means the G90’s AM filter can actually be widened to 10.8 kHz––brilliant!

In short, I’ve been very pleased using the G90 for shortwave broadcast listening; it has exceeded my expectations. I find that in terms of both sensitivity and selectivity, it offers performance on par with a dedicated receiver.

For an idea of how the G90 sounds on shortwave with its internal speaker only, check out the following videos:

The Voice of Greece

Radio Nacional De España

Broadcast listening is basic with general coverage transceivers: the G90 has no synchronous detector with selectable sidebands, for example. G90 users have requested this feature in a future firmware update, but I wouldn’t hold my breath in anticipation. I imagine G90 developers will be more concerned with ham radio-specific functionality.

Mediumwave

Let’s face it: Asking the G90 or any ham radio transceiver to perform on the mediumwave/AM broadcast band is asking it to do something it was never designed to do.

With that said, I have been very pleased with the G90 on the AM broadcast band.

Audio fidelity is excellent, especially with the AM filter widened appropriately and when using an external speaker or headphones.

The G90 performs so well between about 900-1700 kHz, I have even done some proper mediumwave DXing with it.

Below 900 kHz, I’m still able to tune strong and weak stations, but I have found some odd behavior with imaging as I tuned down to 500 kHz: some stations would move across the spectrum display in the opposite direction to which I was moving the encoder. I suspect this may be due to a very strong local station near me on 1010 kHz that was overloading the front end.

Again, however, I never expected any reasonable performance on mediumwave–especially since many transceiver manufacturers intentionally attenuate those frequencies, so I’ll accept any quirks it may have here and consider any G90 mediumwave functionality at all simply icing on the cake.

Important caveat for the broadcast listener
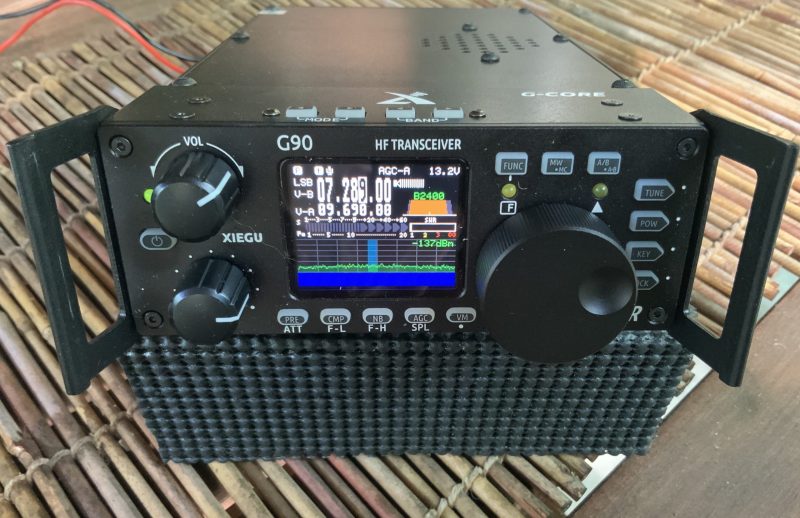
While, overall, I’ve been super pleased listening to the shortwave and mediumwave with the G90, there is (at time of publishing) a major drawback for anyone who would like to use the G90 exclusively as a stand-alone receiver: there is no way to completely disable the transmitter. 

The lowest power setting on the G90 is 1 watt. While that’s not a lot, it’s more than enough to fry your amplified magnetic loop antenna, for example. So, please use caution.

Although you could make it more difficult to transmit by not hooking up the microphone or a key (of course), there’s no way to disengage the internal ATU. If you accidentally press and hold the TUN button, it will engage the ATU and transmit.

In addition, if you press and hold the POW button, you will engage the antenna analyser function which will also inject RF as it sweeps across the bands testing the antenna’s standing-wave ratio.

Based on a suggestion, I even tried setting up the G90 in split mode with the transmit frequency set well outside the meter band I was operating.  I thought by having the transmit frequency out-of-band, it would keep the radio from transmitting. Turns out, I discovered a bug in the G90. When you perform this procedure, it essentially bypasses the safeguards that keep an operator from transmitting out-of-band. Since this is public now, I assume it will be addressed in a future firmware update.

And, as careful as I am as an operator, I would never hook my G90 up to an active receiving antenna for this very reason. While I’m sure there’s probably a hardware modification to kill the transmitter section on the G90, it would be brilliant if Xiegu developers include a function via a firmware update to snuff transmit.  At the very least, perhaps they could devise a way to disengage the ATU and antenna analyser functions via firmware.

Summary

Every radio has its pros and cons. When I begin a review of a radio, I take notes from the very beginning so that I don’t forget my initial impressions and observations. Here’s the G90’s list, from the first moments I turned it on to the time of writing this review:

Pros:

  • Amazing “bang-for-buck”––a lot of radio for the money
  • Crisp, easy-to-read backlit color display
  • Detachable control head, cables included
  • Built-in side panel protection for head and back
  • AM broadcast listening
    • Excellent shortwave reception
    • Capable mediumwave performance
  • 20 watts power output
  • Mic can control all-important radio functions, including direct frequency entry
  • Very good audio from internal speaker

Cons:

  • No built-in bail
  • No manual or auto notch filter
  • Very few options for customizing the display
  • (Minor) Firmware updates must be made to faceplate and transceiver body separately
  • MW: some weird functionality below 800-900 kHz (eg, images in opposite direction)
  • No voice keyer
  • No CW memory keyer
  • No internal battery option
  • Cannot lower power output below 1 watt, cannot disable transmit
  • Bottom of chassis gets hot during prolonged periods of operation
  • ARRL and Sherwood testing shows key clicks in transmit
  • Received audio a bit fatiguing over long listening sessions

Conclusion
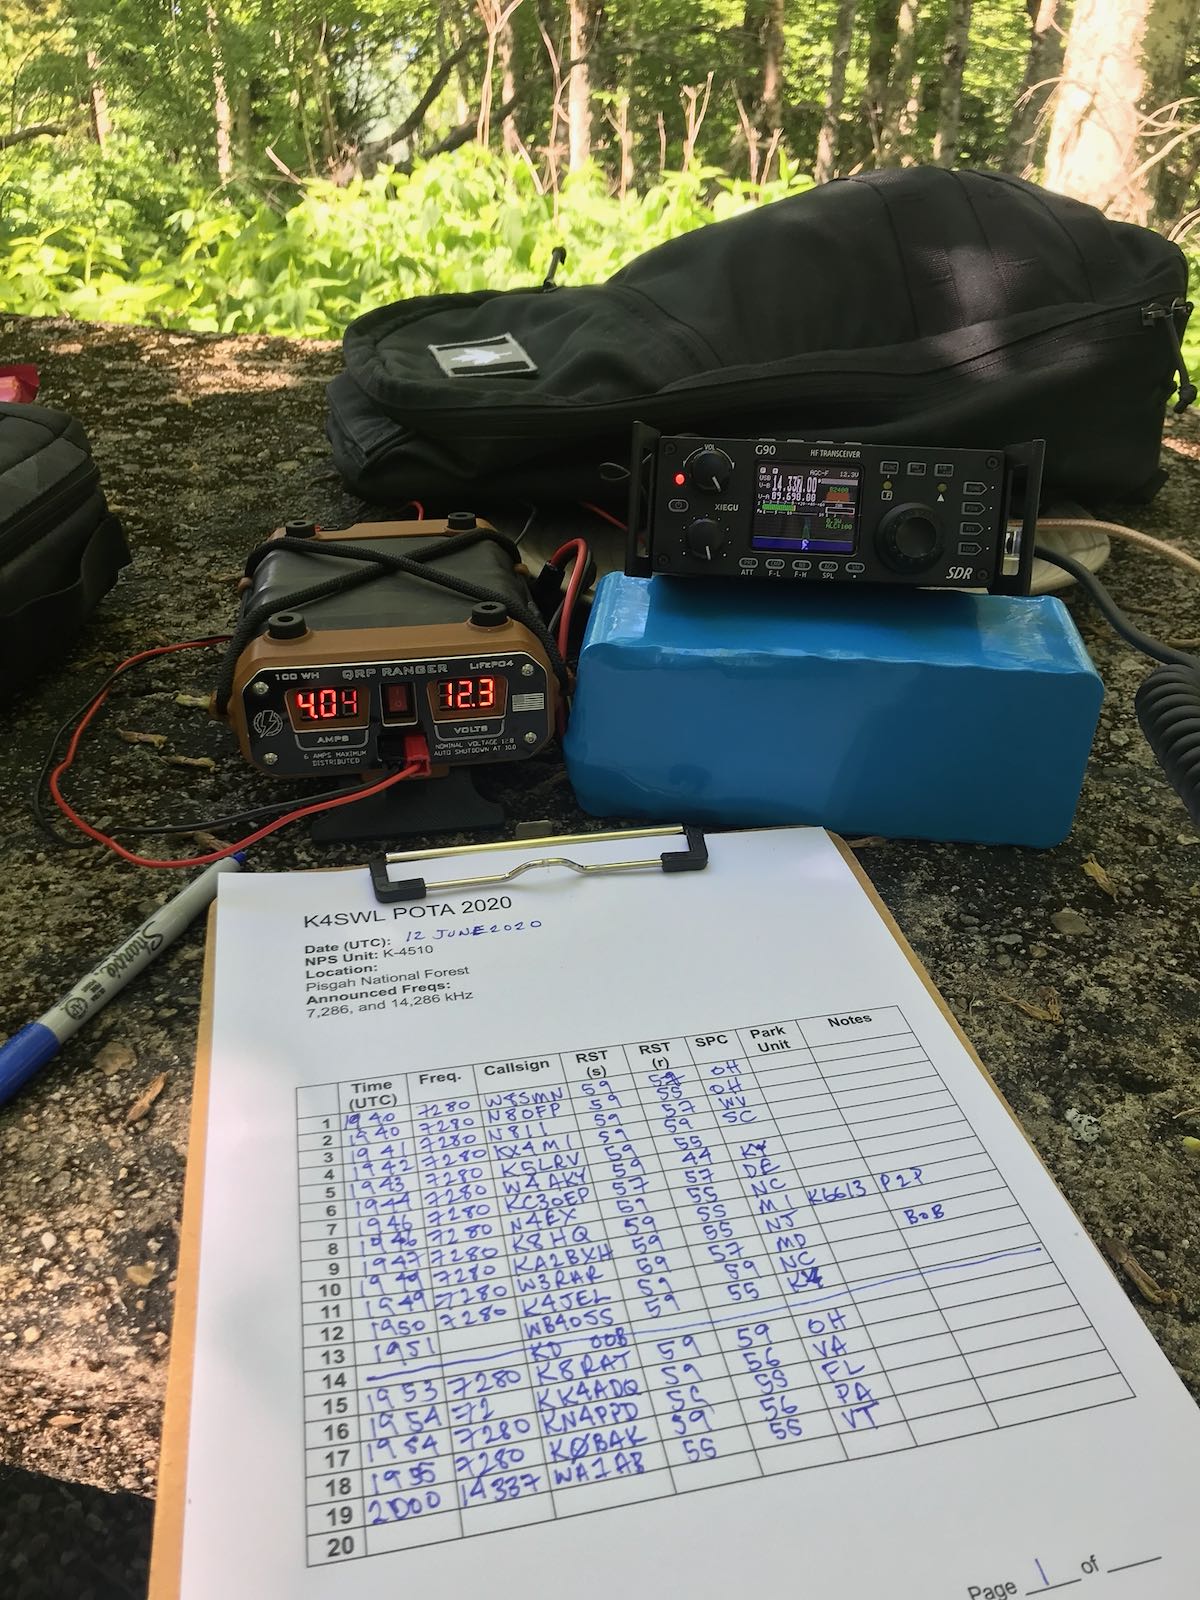
Despite the shortcomings above, I have to say: the Xiegu G90 has exceeded my expectations, and then some.

Without a doubt, the G90 is a solid radio and a steal at $450 US. If you’ve always wanted a field-friendly portable transceiver, but didn’t want to shell out a lot of money, you can buy the Xiegu G90 for the same price you might pay for a two year-old iPhone. Impressive.

Although the G90 is a budget radio, it doesn’t play like one. Performance is on par with a radio twice its price and not only does it pack a lot of extras––like an internal ATU, mobile-worthy control microphone and detachable faceplate––those extras actually work just as they should. Nothing about this radio feels “cheap.” In fact, I’d be more inclined to call it a little workhorse of a radio.

To answer a question I asked myself early in this process: will the G90 displace my Elecraft KX2 as my field radio of choice? No, but that’s because I already own the KX2 and find that it fits my operating style better than any other transceiver I’ve owned thus far. Yes, I still prefer the KX2’s operation, performance and versatility over that of the G90–it’s more refined–but the former is more than twice the price when similarly configured.

I think the G90 would also make for a stellar beginner’s radio, as it is a totally self-contained station; simply apply power, and play!

In short, I’m pleased to report that I’ve finally found a very affordable radio that’s a basic solid performer, and I look forward to further offerings from Xiegu.

Resources

Retailers


Do you enjoy the SWLing Post?

Please consider supporting us via Patreon or our Coffee Fund!

Your support makes articles like this one possible. Thank you!

Spread the radio love

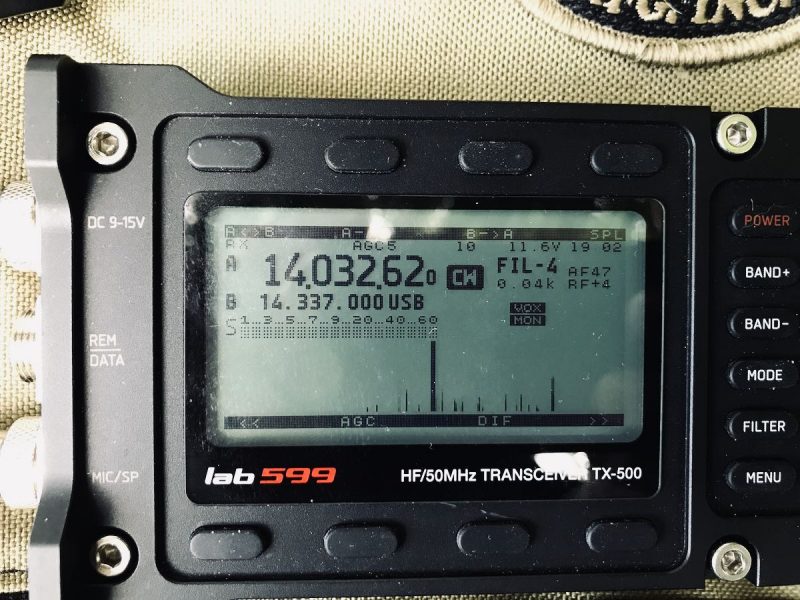
Field testing the lab599 Discovery TX-500’s selectivity and ADC overload

So the lab599 Discovery TX-500 I’ve been testing the past week has been sent to Ham Radio Outlet. Over the course of one week, I activated eight parks with this QRP transceiver and if I’m being honest, I miss it already. It’s an awfully fun and incredibly robust  field radio.
On my last outing with the TX-500 (last Wednesday) I did an activation of the Blue Ridge Parkway and Nantahala National Forest. I operated CW and SSB and worked stations from Maine to Ontario, Illinois to Iowa, and Louisiana to Florida running 10 watts into my trusty EFT Trail-Friendly antenna.

While I’m evaluating radios I take lots of notes so I can remember detail when writing my review. In the field, I often take short video notes as well.

While finalizing my TX-500 review for the October 2020 issue of The Spectrum Monitor magazine, I rediscovered the following video note. I made this with my iPhone and assumed I might include a link in the TSM article. In the end, though, it was really a journal note for my review.

I thought I’d share it here for those who are considering purchasing the TX-500 and are curious how well the receiver handles dense RF environments. I had the CW filter width set to 100 Hz–had I intended to publish this video I would have likely cycled through various filter settings.

I believe one of the strong points about the TX-500 is its receiver. It has a very low noise floor, great sensitivity, and is obviously capable of handling close-in signals. The CW filters must have sharp skirts. I would love to see what Rob Sherwood’s tests would show (although if he’ll be evaluating one). For a field radio, however, it’s right up there with my Elecraft KX3 and KX2 in terms of selectivity–those two are certainly benchmarks in my book.

Click here to read all of our lab599 Discovery TX-500 posts, videos and field reports.


Do you enjoy the SWLing Post?

Please consider supporting us via Patreon or our Coffee Fund!

Spread the radio love