A guide by London Shortwave
Radio interference is a major problem in big cities when it comes to indoor shortwave reception. One effective solution I have found is to head for the local park and engage in scanning the bands there. However, since my time for making such outdoor trips is limited, I would always feel like I am missing out on a lot of radio action by monitoring a single frequency, which is all you can do with a standard shortwave radio. There are so many signals out there — which one should I go for? This inspired me to put together a lightweight, portable set-up that would let me capture large chunks of the shortwave radio spectrum out in the field, which I could later explore in detail. After two years of experimenting with various Software Defined Radio (SDR) technologies I am pleased to report that I finally have a solution that works well for this purpose.
A good SDR can give the user access to large portions of the radio spectrum via a graphical user interface. The user can then either process a specified part of it in realtime or record the chosen spectrum window in its entirety onto disk and analyse it later with the supplied software. Here is a short video showing the playback of one of such spectrum captures I made in a London park in September 2016. Note the final part where I zoom out to show the entire recorded frequency range (covering two broadcast bands with one ham band in the middle!):
A ham from Thailand HS1LCI talking to another in France at 1747z 07/09/16 (2x6m dipole RX ANT) #OutdoorSpectrumGrab pic.twitter.com/ZaIOa9rZp9— London Shortwave (@LondonShortwave) 9 September 2016
Below is the list of the components I have used to put together my “portable spectrum capture lab”.
Components
Hardware
1. Toshiba Encore 8″ Tablet (Windows 8), 2014 Model ($169)
I bought this tablet in July 2014, based on the following criteria: the device had to have a reasonably powerful Intel processor, running the Windows 8 operating system. I believe that there are currently models on the market that are at least as powerful and are substantially cheaper (<$100).
2. On The Go USB Adapter ($15)
3. AirSpy R2 SDR ($169)
Owing to its unique hardware design, the AirSpy SDR can monitor large parts of the radio spectrum (up to 10 MHz in bandwidth) while offering a high dynamic range and robustness to overloading, with almost no mixing/imaging products.
4. SpyVerter HF UpConverter ($49)
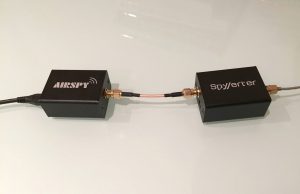
This additional device enables AirSpy to cover the shortwave bands (in fact, the entire frequency range between 0 khz and 30 MHz) and must be connected in-line between the AirSpy’s front end and the antenna feed line, as follows:
Connection cables
Below is a small collection of cable accessories to connect the antenna to AirSpy/SpyVerter:
5. 10cm SMA Male to SMA Male Straight RF Coaxial Jumper Pigtail ($2)
6. BNC Male Plug to SMA Female Jack Adapter ($2)
7. BNC Female Coupler ($5)
8. 3m long BNC cable ($15)
Matched dipole antenna
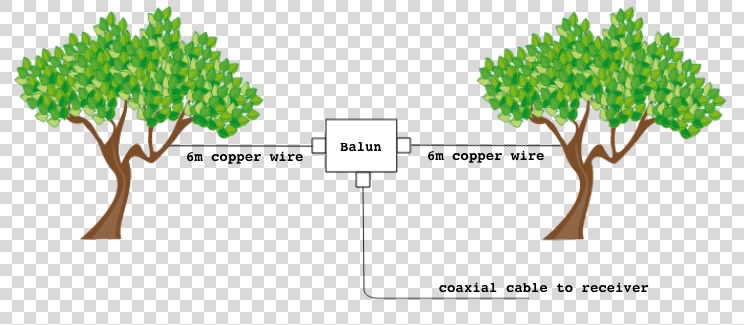
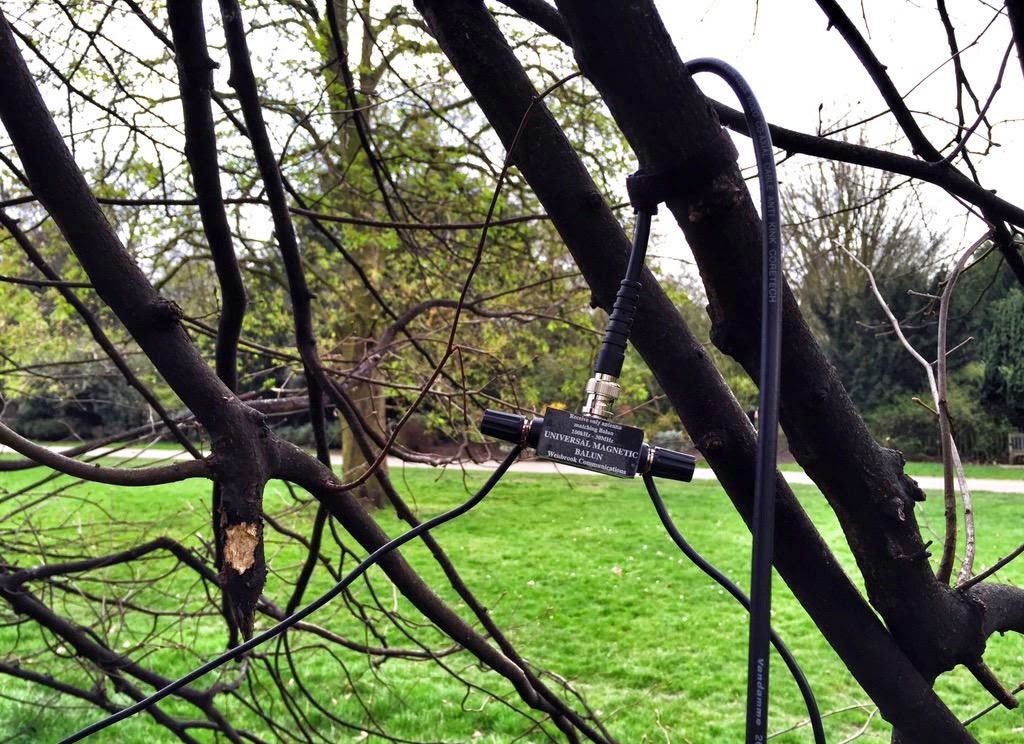
I use a three-terminal matched balun connected two 6 metre copper wires via its antenna terminals as a dipole antenna, and connect it to the SDR via the feed line terminal with the 3m BNC cable listed above. The balun (Wellbrook UMB130) is engineered in a way that prevents the radio noise current from the tablet (usually a significant source of interference) flowing into the receiving part of the antenna.
9. Wellbrook UMB 130 balun ($60)
10. 2 x 6m Copper Wire ($16)
Miscellaneous
11. Fight Case ($35)
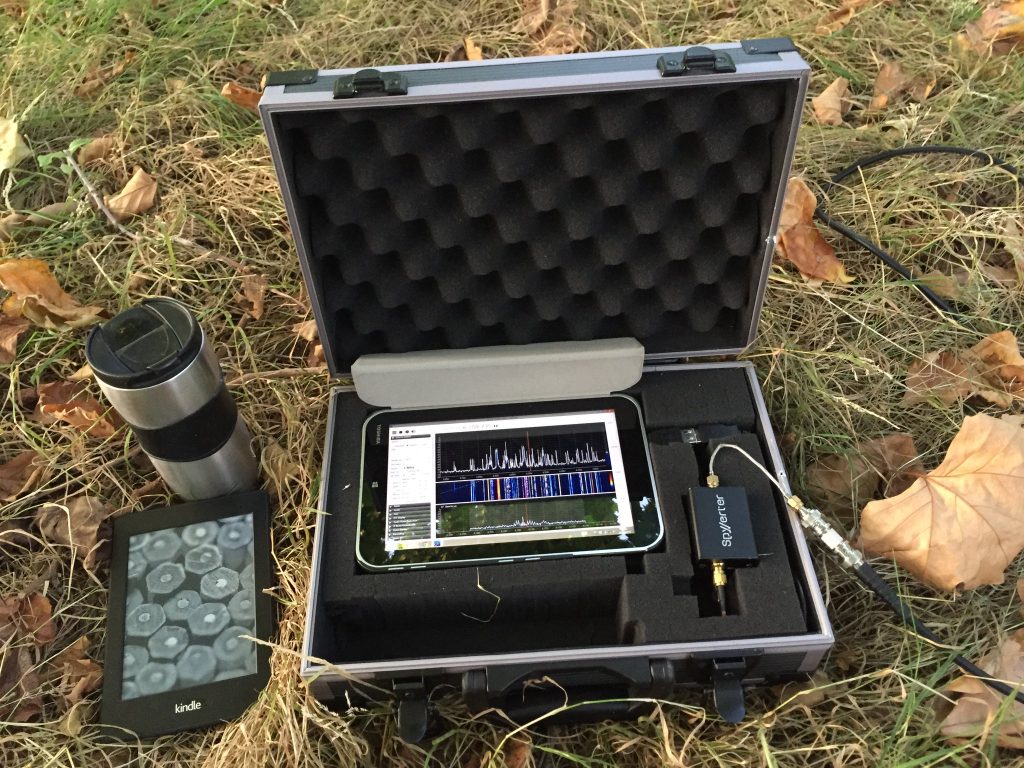
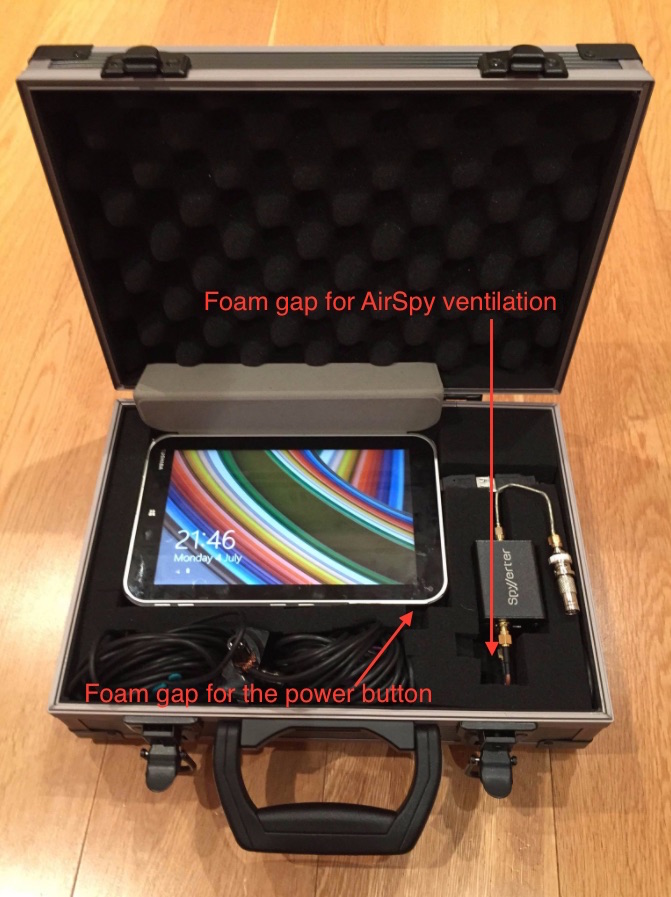
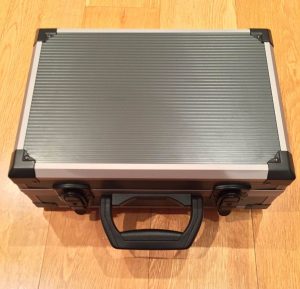
This foam-filled flight case comfortably houses all of the components. The parts 1 to 7 can remain assembled together, reducing the deployment time in the field.
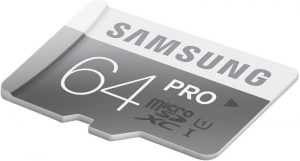
12. Samsung 64G Ultra-High-Speed MicroSD Card ($19)
I use this fast MicroSD card as the destination for my outdoor SDR recordings. The high transfer speed is critical – using slower MicroSD cards will result in large portions of the spectrum being dropped from the recordings. 64 Gigabytes can accommodate roughly one hour of spectrum data at 3 MHz bandwidth.
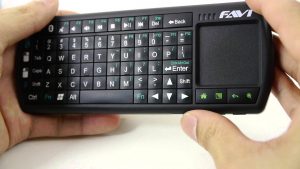
13. FAVI Bluetooth keyboard with trackpad ($37)
Windows tablets suffer from one major drawback: the touchscreen interface is usually inadequate for software that was designed for traditional computers with mice. A portable Bluetooth keyboard with a built-in trackpad solves this problem.
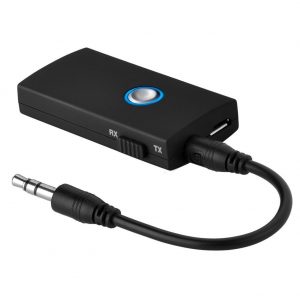
14. Bluetooth Wireless Audio Transmitter & Receiver ($17)
This small gadget turned out to be a very important part of the entire project. The Toshiba tablet has a rather unusual interference quirk that initially caused me hours of frustration. It turns out that significant amounts of radio noise are injected into the SDR when the tablet’s external speakers are active. One way to fix this is to plug a pair of headphones into the tablet’s line out jack, but this forces the listener to be glued to the device. The alternative is to pair the tablet with a Bluetooth audio receiving unit, such as the one listed above. It is worth noting that my other Windows tablet — a Dell Venue 8 — also suffers from this strange artefact.
Total cost: $610
Internal layout of the flight case
You’ll see that I have stacked the SpyVerter enclosure on top of the AirSpy one. As the latter can get very hot, it is essential to leave a sufficiently large gap in the foam for ventilation. It’s also worth leaving a small gap next to the tablet’s power button to prevent Windows from accidentally going into standby mode.
Software configuration
The best software to use with the AirSpy/SpyVerter combination is SDR#. It offers an impressive collection of features that many software packages and conventional radios don’t have, such as advanced noise reduction and synchronous detection with passband tuning. The following adjustments are required to make recording the spectrum a seamless experience:
Install the Baseband Recorder and File Player plugins
Baseband Recorder: this plugin enables efficient recording of very large spectrum (or “baseband”) files. Download and decompress the plugin zip file. Copy the .dll files into the directory with the SDRSharp.exe executable. Open the MagicLine.txt file and copy the first line of text into Plugins.xml file, just before the “</sharpPlugins>” line.
File Player: this plugin enables the playback of recordings made with the Baseband Recorder plugin. Download and decompress the plugin zip file. Copy the .dll files into the directory with the SDRSharp.exe executable. Open the MagicLine.txt file and copy the first line of text into FrontEnds.xml file, just before the “</frontendPlugins>” line.
Configure Baseband Recorder
Open SDRSharp.exe and check that the program reports no errors when it loads.
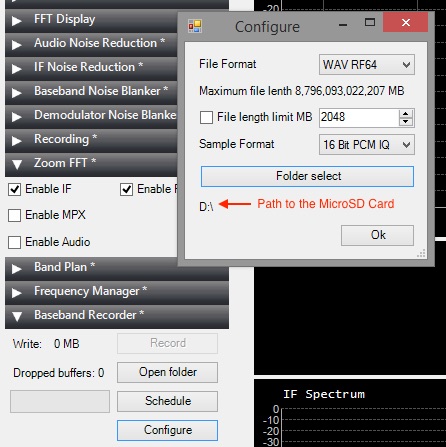
In the plugin pane on the left, expand the Baseband Recorder tab and click “Configure”. Change the File Format to WAV RF64 and make sure that the File length limit check box is not ticked. Click “Folder select” and choose the MicroSD card as the destination directory for the recordings.
Adjust AirSpy settings
Disclaimer: in this section I describe how I capture the maximum spectrum bandwidth that my tablet’s CPU can handle. It involves operating SDR# in “debug mode” and exposes some internal functionality of AirSpy, which, if used incorrectly, can damage the radio. If you choose to copy my approach, please understand that you are doing so at your own risk and follow my instructions carefully to avoid voiding your AirSpy warranty.
Open SDRSharp.exe.Config file in Notepad. Look for “<add key=”airspy.debug” value=”0″ />” line and change it to value=”1″.
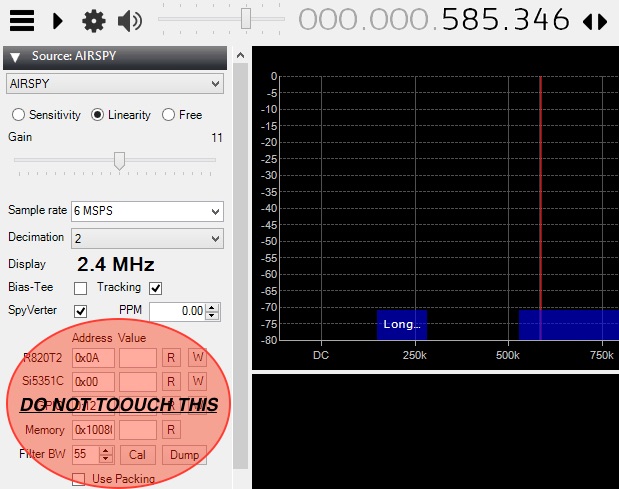
Once the AirSpy and SpyVerter have been connected to the tablet, open SDR# and select AIRSPY in the Source tab. You will see the following configuration dialog.
In the “Sample rate” field, type in “6 MSPS”. For the “Decimation” option, choose “2”. This setting will result in spectrum captures of 3 MHz bandwidth (although only 2.4 MHz of it will be shown on the waterfall display). To capture smaller chunks of the spectrum, increase the decimation value. Make sure the SpyVerter check box is ticked. Do not touch any of the fields or buttons under the “Address Value” line.
Make a short test recording
Press the play button in the top left corner and set the desired frequency.
In the Source tab, select the “Linearity” option. Keep increasing the Gain value by one position at a time until you notice that the radio signals suddenly become “saturated” (the waterfall display becomes full of artefacts and the signal you are listening to gets swamped with noise). Take the Gain value back down by two positions. This will ensure high sensitivity while preventing AirSpy from overloading.
In the Baseband Recorder tab, press “Record”. While recording, do not change the radio frequency and do not move/drag the waterfall portion of the display. Stop the recording after a few minutes.
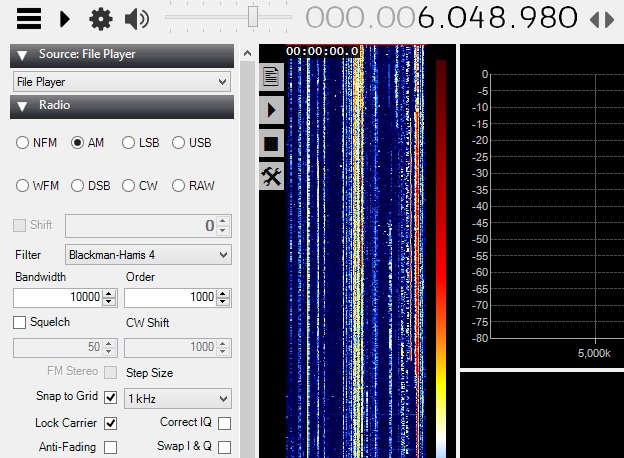
In the Source tab, change the input to “File Player” in the drop down menu. Click the Settings cogwheel button and select the spectrum recording file from the MicroSD card. A vertical band visualising the timeline of the spectrum capture will appear immediately to the right of the plugin pane. Click on the play button and select a radio signal to demodulate in the spectrum display. Listen to the audio carefully to make sure there are no dropouts or clicks: if so, your tablet and MicroSD card are capable of handing and storing the specified spectrum bandwidth.
Keep an eye on the gain
While making longer spectrum recordings, select a weak radio signal and keep monitoring its audio for signs of overloading. If the overloading does occur, reduce the Gain value further by one or two positions.
Some example spectrum captures

Shortwave for lunch. Playing back parts of the shortwave spectrum captured earlier in the park, inside a local cafe.
Below are some example videos in which I play back and explore the spectrum recordings I made during the trips to my local park.
Tropical and the 49m bands recorded outdoors on 03/07/16 at 0432 UTC. A good time of the day for listening to Latin America on shortwave.
From today’s outdoor spectrum grab: Zanzibar Broadcasting Corporation at 1630 UTC (1/2) #AirSpy #SpyVerter #SDRSharp pic.twitter.com/HceZ64viqX— London Shortwave (@LondonShortwave) 6 September 2016
Radyo Pilipinas at 1734 UTC #OutdoorSpectrumGrab #AirSpy #SpyVerter #SDRSharp pic.twitter.com/VZLXgUR6d7— London Shortwave (@LondonShortwave) 7 September 2016
Shortwave’s dead? Are you kidding me? The 31m band recorded 3 days ago (Tuned station: @radionz) pic.twitter.com/sgkPtY5xz3— London Shortwave (@LondonShortwave) 4 May 2016
Listening to Radio New Zealand International.
My most impressive catch of 3 years. Hearing R.Aparecida when the sun is up (06h UTC) with only a 12m dipole #AirSpy pic.twitter.com/hpHAfA9hXv— London Shortwave (@LondonShortwave) 20 September 2016
Radio Aparecida from Brazil, usually a challenging catch in Europe.
Comments, suggestions?
Drop me a line in the comments section or hit me up at @LondonShortwave. This article originally appeared on the London Shortwave blog.


Thanks DL4NO – Good info!! Cheers, Mark
Thanks London Shortwave for such a great article. I am just about to place an order for an AirSpy and SpyVertor to replace a RTL V3 stick (it covers HF) that I have been experimenting with for the last few week. The super low cost RTL is interesting, but its limitations have led me to deciding a AirSpy & SpyVertor will also be the basis of my reasonably low cost experiments. So you tweeting and posting your system has been really timely! And tanks for all the tips for SDR# and the plugins you use. Fantastic work!!
Before you buy you should set up a priority list.
For me exact frequencies were most important. This excludes all schemes with independent premixers into the 40 MHz range and above. My SDRplay derives all relevant frequencies from a single crystal oscillator. It also mixes first up and then down to zero IF or low IF, as most reasonable priced SDRs do. So the accuracy of the crystal oscillator directly determines the accuracy of the received frequency and 10 E-6 means 1 Hz at 1 MHz.
This way I can easily switch from AM to USB or LSB without any need to retune.
If you use a separate premixer to shift the SW bands up to 40-70 MHz or so, the accuracy of the reception frequency is relative to 40-70 MHz. If you get an accuracy of 10 E-6, that means an accuray for 40-70 Hz over the SW bands. At least if you wish to receive any form of music, as you always have as a BC SWL, you need to retune when switching from AM to SSB.
I have no Airspy. So I cannot compare it to the SDRplay.
Any RTL SDR systems are cheap and nice to play a bit or use them as measurement instruments. For SW they need premixers. by design you cannot calibrate them only in 10 E-6 steps, i.e. in 40-70 Hz steps. They only have 8-bit ADCs which limits their dynamic range to about 50 dB. The SDRplay is about 20 dB better.
> They only have 8-bit ADCs which limits their dynamic range to about 50 dB. The SDRplay is about 20 dB better.
I think your information is not up to date and even inaccurate. All the processing that was ported from the AirSpy code base to RTL-SDR’s made them also better than SDRPlay when used with the proper driver. According to the tests from Leif Asbrink SM5BSZ, when the narrow band filter of the R820T is enabled, it improves the dynamic range of the dongles by at about 30dB, but again this requires the non-osmocom drivers that know how to control the filters. Google is your friend.
In the other hand, the oversampling ratio in RTL-SDR is very high and the 8bit you start with becomes 14bit after decimation and the calibration can be set to a 1/100th of PPM depending on the software.
SM5BSZ also published many videos where the AirSpy is about 12dB better than SDRplay on HF and about 20 dB better in VHF/UHF in lab tests with generated and real signals. This can be explained by the fact that it has a high oversampling ratio along with adequate filtering. After decimation from 20 MSPS to the demodulator’s sample rate you end up with something like 17 bit. So it is normal it can beat naive implementations like SDRplay (which is a very nice receiver for the price btw), and even some “high-end” DDC’s like the ColibriDDC.
I cannot comment on the Airspy.
Oversampling helps to a degree. May be there is better software than SDR# to explore the oversampling gain.
There are no reasonable data sheets available for the RTL SDR ADC chip. The Mirics data sheet writes “at least 10 bit effective ADC resolution” which applies to the SDRplay. Which means they use a 11 or 12 bit ADC and provide a 10 bit liearity. Not all qualtizing steps are created equal as an ADC is a linear circuit.
For those not into the respective theory: Every ADC (analog-digital converter) has a limited resolution, i.e. the number output is up to half of a quantisizing step off. These errors produce the “quantizing noise”. This noise is evenly distributed over all of the reception range. If you make the reception range wide but only evaluate a small fraction of this, only a part of the quantizing noise falls within your reception bandwidth.
In simple words: If you receive with a 10 kHz bandwidth you get a better signal-to-noise ratio ist you use a 8 MHz sampling rate than with using a 200 kHz sampling rate.
BTW: Anything beyound a 14 bit ADC might perhaps be measurable but does not help in any way, at least on shortwave. It might be different in the UHF range as the atmospheric noise is much lower there.
The calibration error I mentioned depends on the hardware of the tuner chip in the respective RTL SDR – there are several used in different brands. I know of no tuner chip that can be calibrated more exactly than 1 ppm which is 10 E-6. The problems I mentioned I have seen at my DX Patrol which is an RTL SDR with an up converter.
Using SDR# my DX Patrol has a noise floor in the spectrum display about 50 dB below maximum single-signal input level. The noise level of the SDRplay is abut 70 dB below with otherwise identical parameters.
What you call “noise floor” has absolutely no actual meaning. It’s not how an RF engineer would describe the usable dynamic range of a radio. Did you by any chance meant to say “SFDR”? Because in that case, the RTL-SDR’s are also better than SDRplay by about 25dB. This allows them to apply a lot of decimation without unburying any nasty spurs, be it the ones generated by the ADC itself or those resulting from the digital feedback.
In the other hand, it appears that the reciprocal mixing characteristics are also limited by the Mirics tuner’s phase noise compared to the R820T, so this also sanctions the SDRplay’s ability to handle strong signals. You can see it easily in the AM BC band where the strong stations wipe out everything within 100kHz.
Then the other parameter is the linearity of the mixers, which is very modest in the Mirics tuner. Despite all the filtering and signal massaging done in the SDRplay, you can still see AM BC stations all around the HF bands. One is particularly nasty since it falls exactly in the middle of the 40m band. The radio is totally unusable with a real HAM antenna without a lot of external filtering.
Bottom line, it’s nice to have “more bits”, but if you end up with bad IM3 characteristics, then the extra bits you gain with oversampling are completely useless.
The SDR technology is still not very well understood by the masses, so these details can be easily overlooked. Of course, if you don’t mind the spurs, images, etc. you can just use what you have and be happy with it, but why the hell would you use something a cheap $8 RTL-SDR can outperform?! Luckily, people don’t understand what they see, otherwise they would be moaning all the way and asking for refund.
I have done extensive side-by-side comparisons of the DX Patrol (first version and Mk3) and the SDRplay. The weakest spot of the SDRplay is the unregulated LNA directly at the antenna input used from 50 MHz up which produced intermodulation of the BC signals in the 87 – 220 MHz range (FM, DAB+), up to about 400 MHz. Otherwise it won over the DX Patrol, a RTL-SDR, hands down.
About “dynamic range”: With the DX Patrol the noise floor in the spectrum display was about 50 dB down from a gain setting just below overload.
There were peaks that just made it above the noise floor. Switching to the SDRplay and its driver, with everything else set equal, including comparable SDR# settings, these peaks appeared about 20 dB above the noise floor, including their sidebands. Everything above the -50 dB line was identical for both SDRs.
The readability of any signal was as you would expect with its SNR. In other words: With the programable preamps set just below overload of the respective SDR, the SDRplay could receive quite some more stations.
For the finer points you mentioned I would need test equipment I do not have. If you look for equipment for a VHF/UHF contest station you would definitely prefer extremely narrowband equipment with a 3 kHz roofing filter immediately behind the first mixer. But those cheaps SDRs are universal wideband equipment and do not compete against specialized, much more expensive rigs.
There are more ways to do this.
For example an Android driver for the SDRplay is available. So the up converter with its frequency stability problems can be avoided. If you calibrate the SDRplay correctly you can switch frm AM to SSB without much loss in fidelity.
Another possibility would be an active receiving antenna. In this context I would prefer an active magnetic antenna to an electric antenna for size and RFI purposes. We discussed the latter problen some time ago.
Unfortunately I have not had much luck with SDRPlay for this purpose. The main problem with this radio is the large number of mixing/imaging artefacts at comparable sensitivity (signal to noise ratio) levels and spectrum bandwidth. The other problem that makes using SDRPlay impractical for this purpose is that most software packages I have tried cannot write large (3MSPS) streams to disk reliably without buffer overruns on low grade portable hardware, such as the tablet I mention above. In my evaluations, the Baseband Recorder plugin for SDR# is quite exceptional in this regard, and of course nowadays SDRPlay is not compatible with SDR#.
Thank you for these valuable additions! From time to time I see some artefacts of my SDRpaly. But its frequency stability is exceptional and cannot be met by a system with an independent up converter.
I either use an older SDR# version on Windows 7 or SDR touch on Android.
But you should consider a magnetic antenna like the AAA-1C. See https://swling.com/blog/tag/magnetic-loop-antennas/.