By Robert Gulley K4PKM
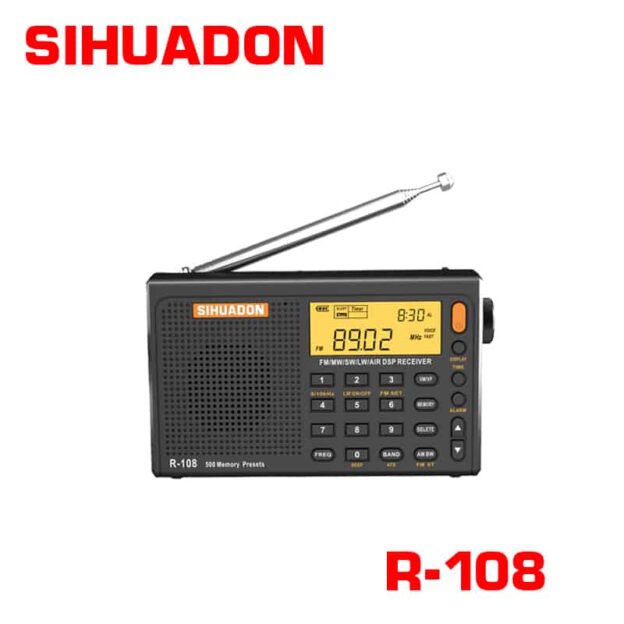
The SIHUADON R-108 is a compact, inexpensive and capable radio with many features radio hobbyists have come to expect. While I no longer have one of my earliest AM transistor radios, it is comparable in size, but not much else!! Being a radio “old-timer”, I never cease to be amazed at what can be fit into a jacket pocket these days!
For those who have seen, or own, a CCrane Skywave, the radios at first blush look very similar. Size and weight are almost identical. While they are indeed quite similar, they also have some significant differences, and so I will simply say even if you already own one or the other, having both in your radio arsenal can be easily justified given the prices involved.
With all of that as preface, the usual disclaimer applies – I was asked by XHDATA to review the SIHUADON R-108 with the complete understanding that I give fair and honest reviews, good or bad. Like all radios, the R-108 has a few nits I will pick at, but the short answer to the question of value and capabilities is: this is an excellent portable/travel radio which works great in the arm chair, as well as on the road or in far off locations.
We will start with the usual specifications according to the manufacturer:
Frequency Range:
- FM: 64 ~ 108 MHz
- Russia: 64 ~ 108 MHz
- Japan: 76 ~ 108MHz
- EU, USA:87.5 ~ 108MHz
- SW: 1711 ~ 29999 kHz
- MW: 522~ 1620 kHz
- LW: 150 ~ 450kHz
- AIR: 118-137MHz
Features
- Speaker: 5W / 4Ohm
- Earphone Jack: 35mm,Stereo type
- 500 Memories
- Power supply : USB 5V/250mA external adaptor (not included), BL-5C battery
- External Antenna Connection
Unit Size:
- 120(L)×70(W)×30(H)mm
- Weight: ~190g (Battery not included)
Package includes:
- 1 x SIHUADON R-108 Radio
- 1 x USB charge cable
- 1 x BL-5C lithium battery
- External Wire Antenna
- 1 x User Manual
Ergonomics
The R-108 has very good ergonomics for its size – even with rather large fingers the controls are easy to operate. There are a few multi-purpose buttons but these do not get in the way of typical operation, as most of them are designed to be used in the secondary function while the radio is off, such as setting the FM starting frequency for different parts of the world, or setting the MW bandwidth setting or clock function.
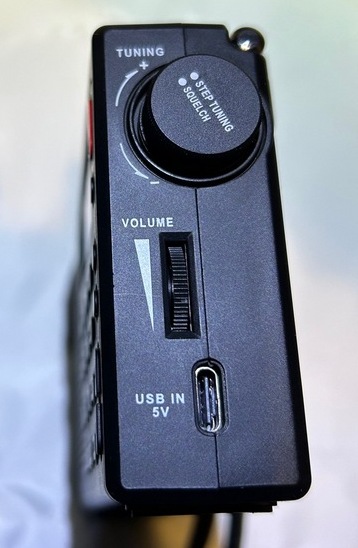
Tuning knob changes between Fast, Slow, and Stop with a press.
One feature I particularly like is the multifunction tuning knob. Rotating the knob does as one would expect in changing frequencies, and pushing the knob in switches between fast and slow tuning depending on the band. But a third option is “Stop”, which locks on to the frequency such that turning the knob will not change the current frequency. For a portable radio one is likely to be holding in the hands often, I find this a nice feature.
Direct keyboard entry is always a useful feature, one which I use quite regularly. With the R-108 you simply press the Frequency button and enter in the frequency based on the band – LW, MW, etc. There is no need to press a separate “enter” key when finished, as the frequency setting is complete with the last digit press.
The radio features a robust 19-inch telescoping antenna, and while any antenna is able to be bent or broken if enough force is applied, this antenna should easily last the life of the radio if handled reasonably. The screen is bright and easy to read, and the radio features a flip out stand on the back and a replaceable battery.
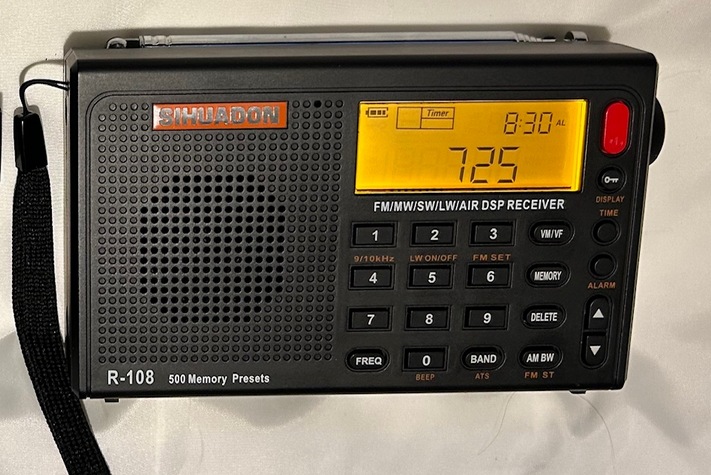
Bright Screen and External Antenna Jack
There is also an external antenna jack for the included wire antenna, and one could certainly build a longer wire antenna or adapt an existing external antenna with the appropriate plug. I only tested the included wire antenna and did not find that it overloaded the front-end of the radio, but the performance of the wire antenna was less than desirable (see Cons below). However, your mileage may vary, as they say, whether due to location or by using a different external antenna.
One of the more obvious design intentions for this radio is an appeal to a world-wide audience, as evidenced both by the variable FM frequency range options and the inclusion of the LW band. Depending on your location, the time of year, and listening conditions, this can be a nice addition. I cannot speak to the effectiveness of this radio’s implementation of the band in that there are few longwave signals I have been able to receive on my desktop radios, even with external long-wire antennas at my current location.
Bandwidth tuning is variable for SW/LW/MW/AIR with options of 6, 4, 3, 2 and 1 kHz.
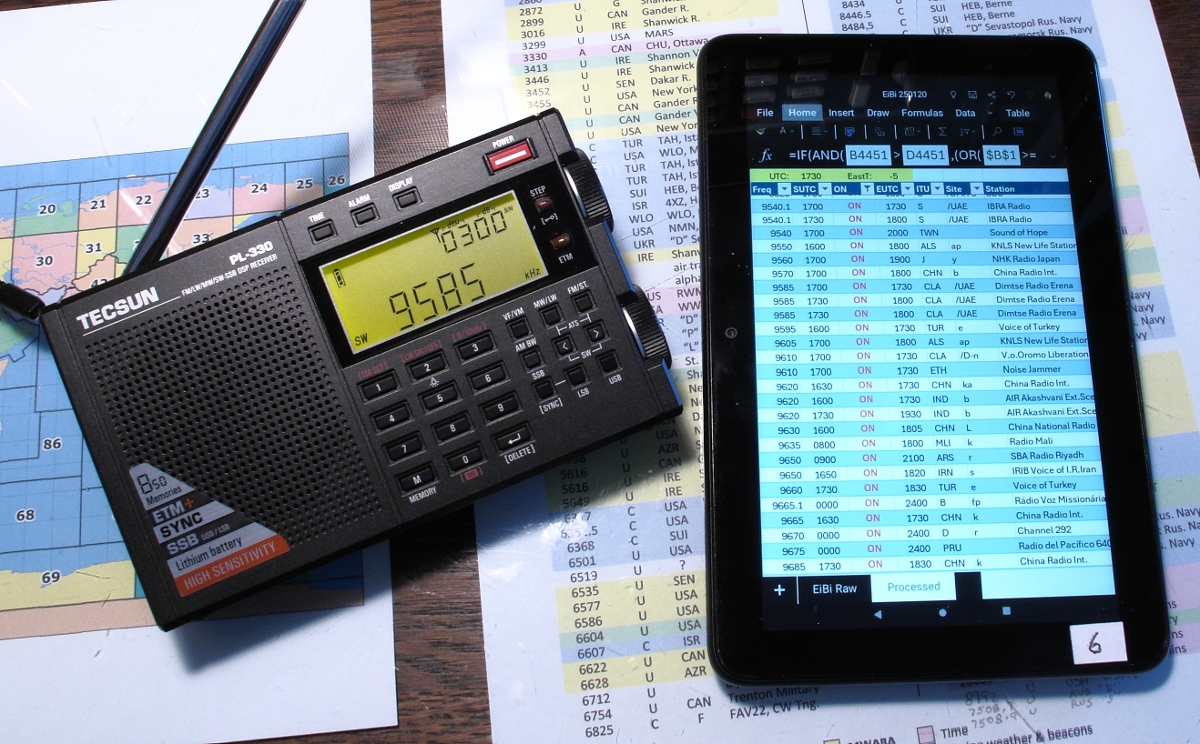
In testing the radio’s reception, I have compared it with the CCRANE SKYWAVE and it’s larger sibling, the XHDATA D-808, with some interesting results. On shortwave bands and FM I have found the three radios to be basically comparable in reception. Now, this deserves a bit of a deeper dive into performance. I say basically comparable because there are some differences in the SW reception.
The SIHUADON R-108 and the CCRANE are very similar, but the XHDATA D-808, even though it has a larger antenna (7-inches longer), did not receive signals as well as the R-108. There are likely two reasons for this. First, the most likely overall is a bit of a difference in design sensitivity. But what was more noticeable, and the secondary reason for the difference in reception, was the interference factor. The D-808 was simply more susceptible to electrical interference. There were several birdies present on portions of the SW bands which were not present on either of the two smaller radios.
This also brings up another interesting find: the audio out of the R-108 was noticeably better than the CCRANE or the D-808, even with the D-808’s larger speaker. This was a nice surprise as listening to MW and SW was much more pleasant to the ear. When connected to headphones the stereo audio quality was pretty much the same between the three units as one would expect.
This R-108, branded under “RADIWOW R-108”, was reviewed by Thomas a while back and exhibited some birdies on the MW band. This seems to have been corrected in my copy of the radio, but would be worth checking into to make sure if purchasing a new unit.
As a side note, the radio was also included in the excellent 2021 Ultralight Radio Shootout by Gary DeBock.
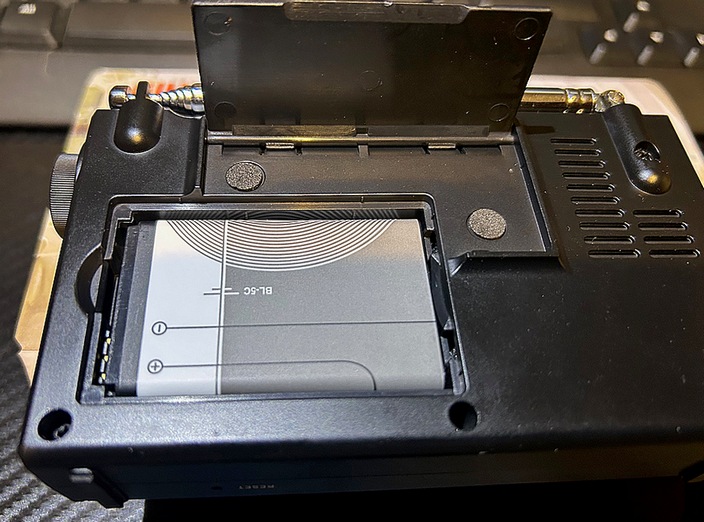
Replaceable Battery and Kick Stand
The radio has an ATS function which works quite well. The basic operation is like most radios with this feature in terms of scanning, but using the stored stations is not always easy with some radios, involving multiple button presses, “pages” or menu settings.
In the case of the R-108, once stations have been scanned on a particular band using the long press of the ATS key, selecting them becomes quite simple. For example, with the FM band selected, a press of the VM/VF key switches you from standard frequency tuning to your presets. This is indicated both by a change in the display to show the current preset selected, as well as a double beep, convenient for those who might be visually impaired. When in Preset mode you can tune the presets manually with the tuning knob, or make use of the U/D arrows to either fine tune or manually tune through the band. A long press on either the up or down arrows starts a scan of the preset stations, pausing for 5 seconds on each stored station for that band. Stopping the scan is done by pressing once again on the up or down arrows.
Below are a list of Pros and Cons, as well as my final thoughts on the radio.
Pros:
USB-C connector
Strong Antenna
External antenna jack
Bright backlit display
LW band inclusion
Superior Audio as compared to other portables of its size (and even larger)
Good battery life and convenient charging connection, replaceable battery
ATS function implemented well
Price
Cons:
Soft muting is present and the recovery time is a bit longer than most radios I have used
No WX band (For a travel radio in the U.S. this is a feature that will be missed)
External Antenna created more noise on SW signals with no boost in sensitivity for weak stations, and stronger stations were made less strong due to induced noise
Conclusion
As we so often say, no radio is perfect, and no radio will please everyone, or even fit everyone’s needs. I do not travel much, so a small portable radio that can be packed easily and not add a lot of weight to my luggage is not as important to me as it is to, say, our venerable leader Thomas, who travels a lot and loves a good compact radio.
I however do like to sit in my recliner and listen to AM DX, Shortwave, and the occasional classical music FM station or local AM station. I think Jock and I have a lot in common that way. For serious Amateur DX, Utility and serious DXing of almost any sort, I rely on my desktop radios and tie in my radios to my computer and external antennas. But I often like to just relax with a radio, and this is a great radio with which to do just that.
I have already mentioned the excellent audio which makes listening more enjoyable on all modes, and the ergonomics fit me quite well. The sensitivity of the radio is quite good, the range of reception band options is impressive, and the memory station tuning is a breeze.
What is most impressive in some ways is the price for which such excellent features may be found.
And speaking of price, XHDATA has offered a special coupon offer for a limited time for SWLing Blog readers:
From XHDATA: We’d like to provide you with a stackable 20% discount code.
Here are the exclusive discount codes:
R108 (Black & Gray): 20R108forSWL
Effective time: From 2025-2-6 To 2025-2-9 Pacific Standard Time
R108:
– Black: https://www.amazon.com/dp/B08XVVCP9L
– Gray: https://www.amazon.com/dp/B08HCYYW88
I have tested the codes and they are working for Amazon America purchases. Stackable means in addition to the 10% coupon offered on the Amazon site, you can add the above code during the checkout process to get an additional 20% off, making the price with tax ~$45! This code is for SWLing Blog readers only!
(Follow the tag Radiwow R-108 for additional posts.)