
Many thanks to SWLing Post contributor, Darren Davies, who writes:
Hello Thomas,
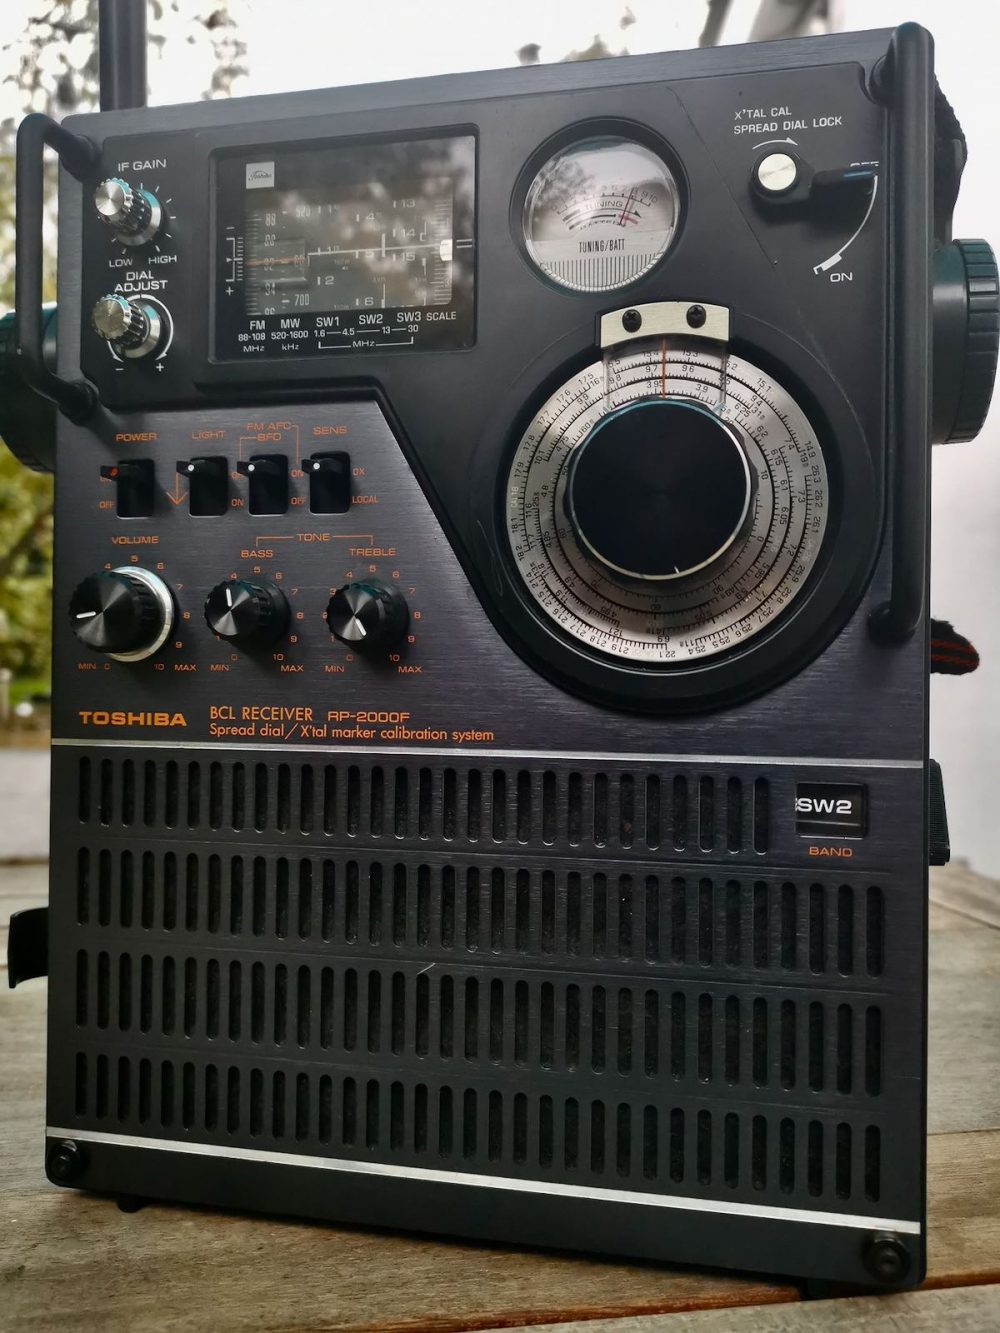
I was gifted the Toshiba BCL receiver by an old work colleague. It’s an absolute beauty, in excellent condition and is unusual in that in comes with UK FM band and not the more popular Japanese one. It wipes the floor with newer radios on MW.
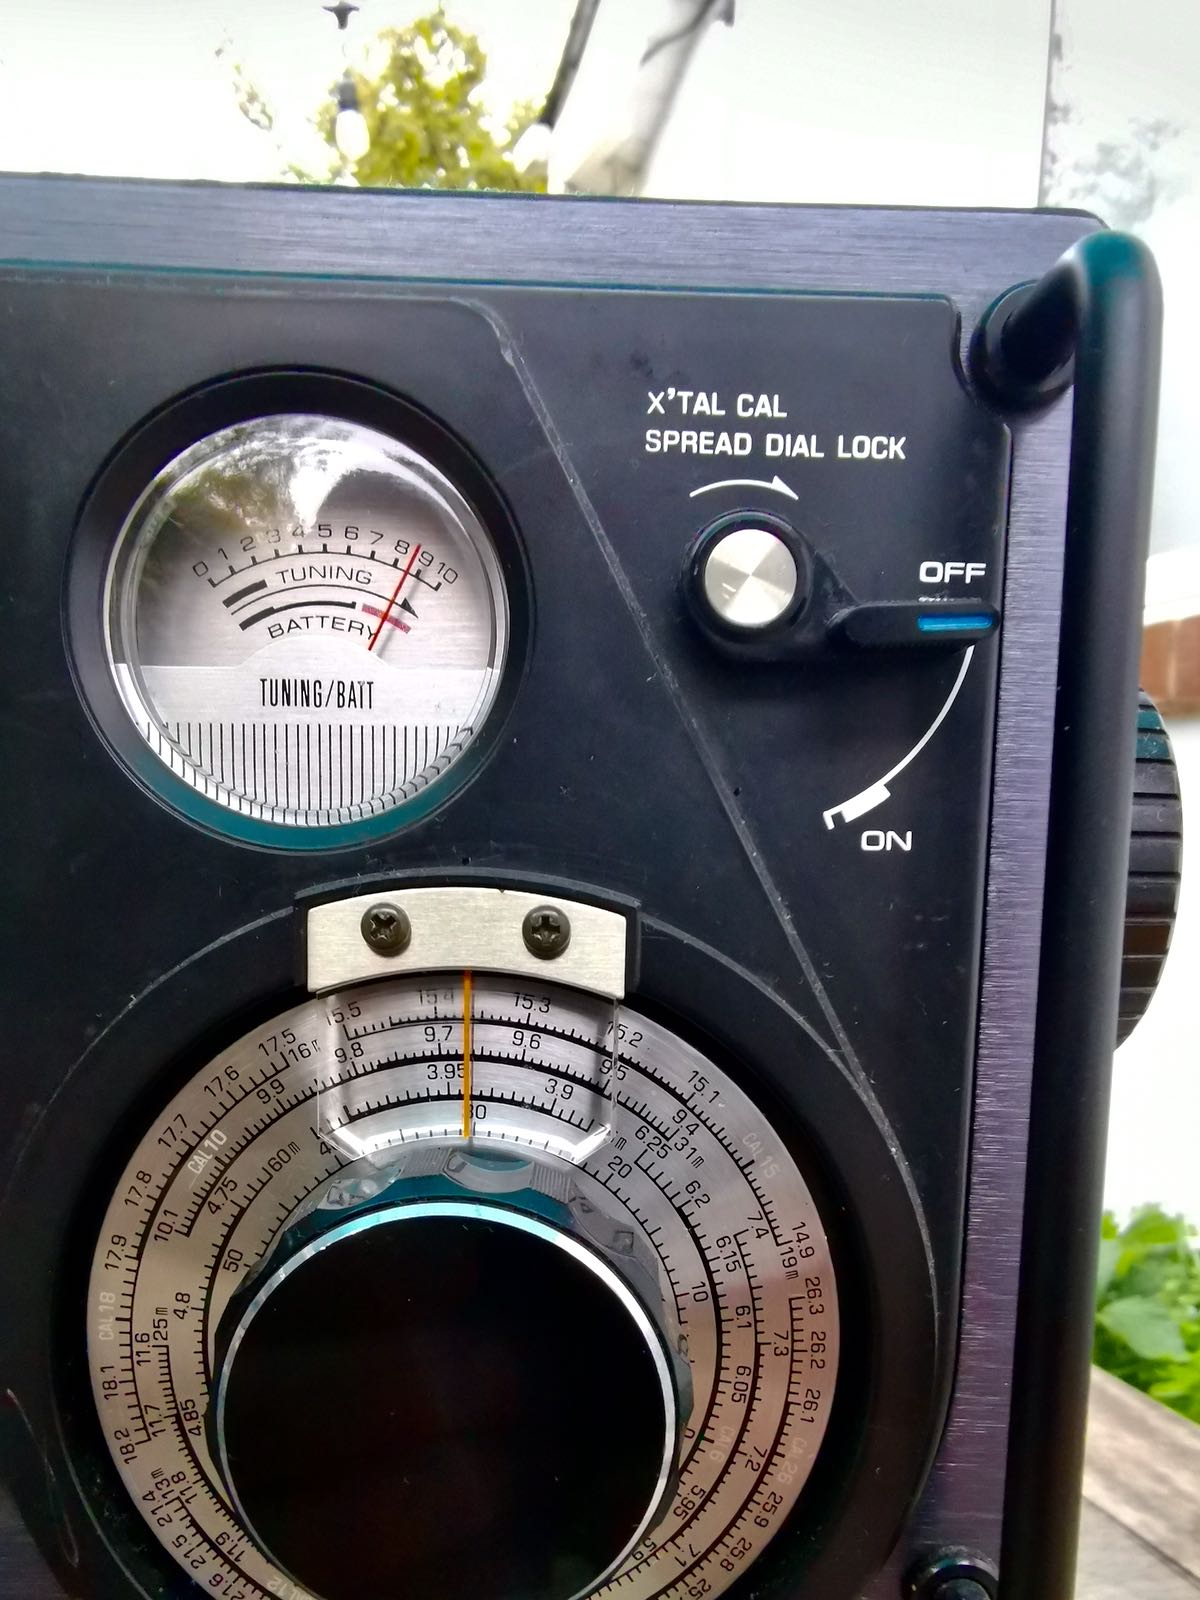
I writing to ask if any of your readers have any idea how to use the crystal calibration system. There’s very little information about the radio online and I’d like to get it into tip top condition.
Absolutely love your site and look forward to your daily emails. Keep up the good work.
Cheers Darren
First of all–wow! I love the design of this Toshiba. It’s brilliant that it even has built-in rails to protect the front panel. Obviously a radio that beckons to be taken to the field! Thanks for sharing your photos, Darren.
Post readers: If you know how to calibrate this Toshiba RP-2000F, please comment!
Thank you so much for the information. I’ll try the calibration later today. I have searched all over for this procedure but have found very little online about the radio.
The two circular pieces on the sides are to secure the carry strap, which is another useful feature of the receiver. The antenna must be pretty unique, it is articulated and can be positioned at any angle.
Cheers Darren
hallo
I have the same radio-Toshiba RP2000F, kept unused for years after the FM reception suddenly became weak. Tried online for a schematic without success( tried looking for Jap version TRY X2000)- no luck. Any suggestions? Am not very good at these things, but can give it it a try, if any transistor etc need replacement
13dka’s explanation is pretty much it as I understand it – dial up an even MHz (e.g. 7MHz) on the main dial, dial up the same MHz on the bandspread dial (marked with CAL), lock the calibrator with the “SPREAD DIAL LOCK” lever/knob (which locks the bandspread dial scale &, in the end position, enables the oscillator), then tune the bandspread knob until you hear the oscillator. Release the “SPREAD DIAL LOCK” lever, and you’re calibrated for that band.
What an oddball beauty! Also known as “TRY X 2000” in Japan (that may help if you want to keep looking for copies of the manual).
Calibration usually works like this – once you decided for a frequency range / band you put the spread dial on the corresponding nearest calibration mark, let’s say the “CAL 10” mark if you want to hear the 31m-band, then you engage the calibration crystal and use the main tuning knob to shift the marker signal so you can hear it (whether or not you receive the marker signal and not something else can usually be determined by toggling the marker on and off). When the marker was set to the dial mark, you can turn it off and use the spread dial for some more precise frequency readout.
That being said, the marker crystal is old and has likely dropped in frequency over the years, so some internal alignment may be necessary.
Well it looks like that thing has only one tuning knob for both dials, what sticks out to the sides is just a mechanism to tighten the odd antenna in position. 🙂
This site…
https://translate.google.com/translate?sl=auto&tl=en&u=https%3A%2F%2Fblog.goo.ne.jp%2Fvrc-tezuka%2Fe%2Fdb0d4a64f64758e4c365650cb1af2839
…seems to contain a clue on this – the marker switch is labeled “SPREAD DIAL LOCK” for a reason, it’s supposed to mechanically lock the dial in postion while you tune to the marker.