
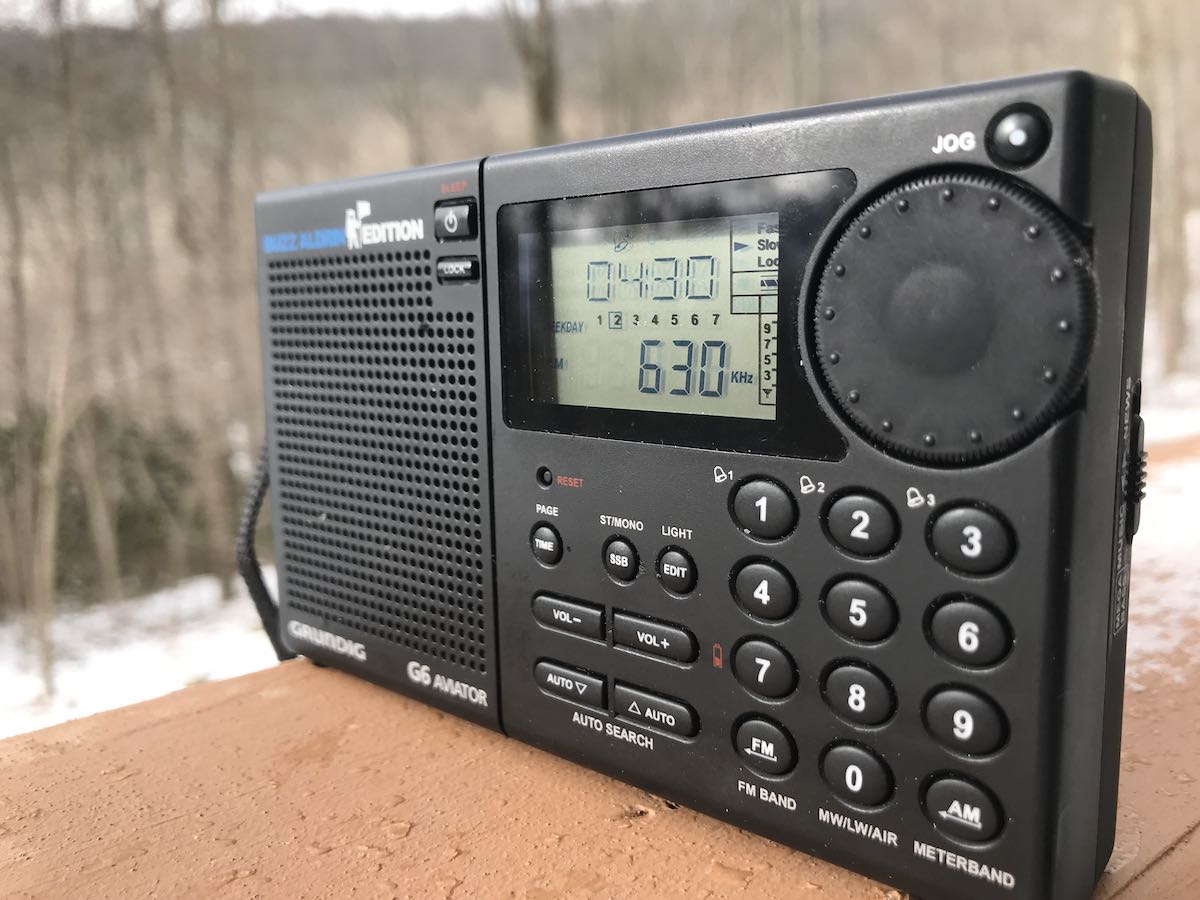
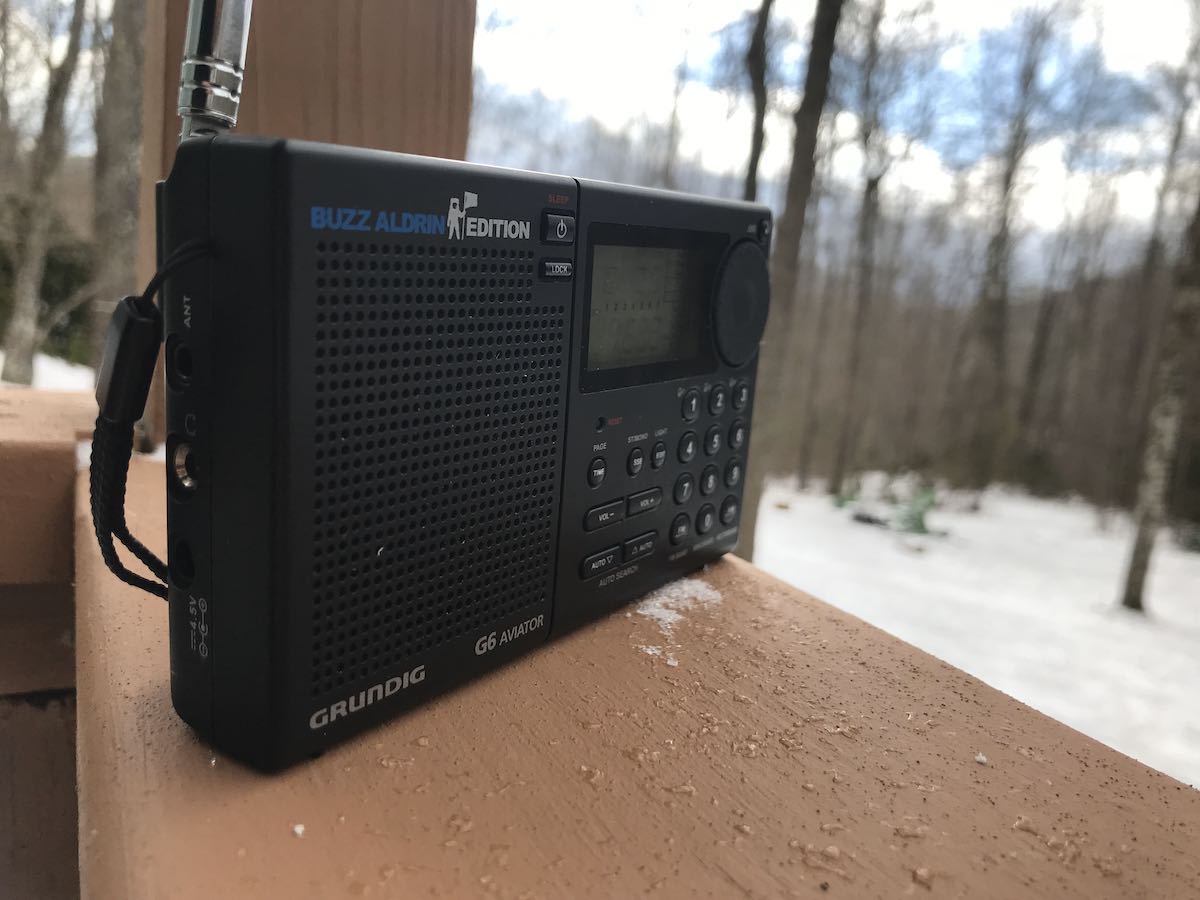
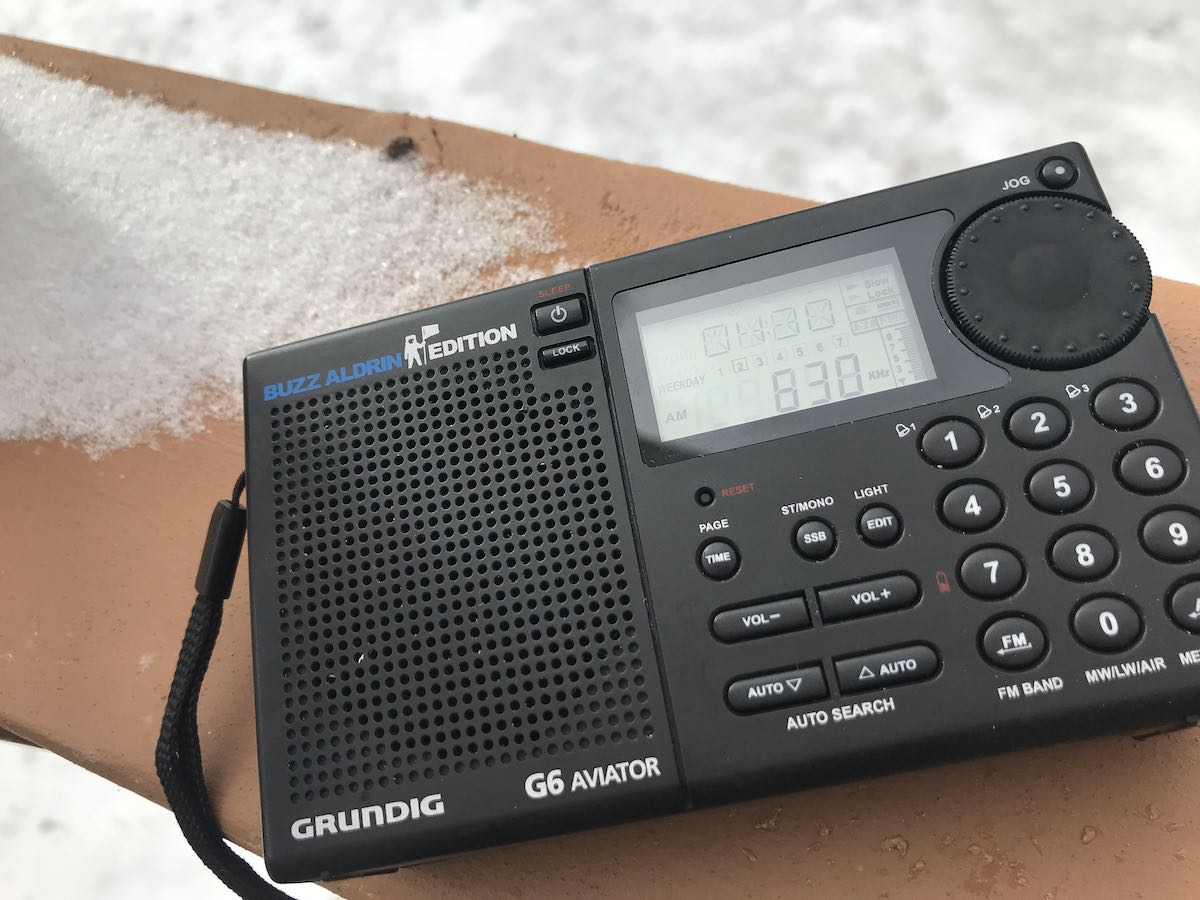
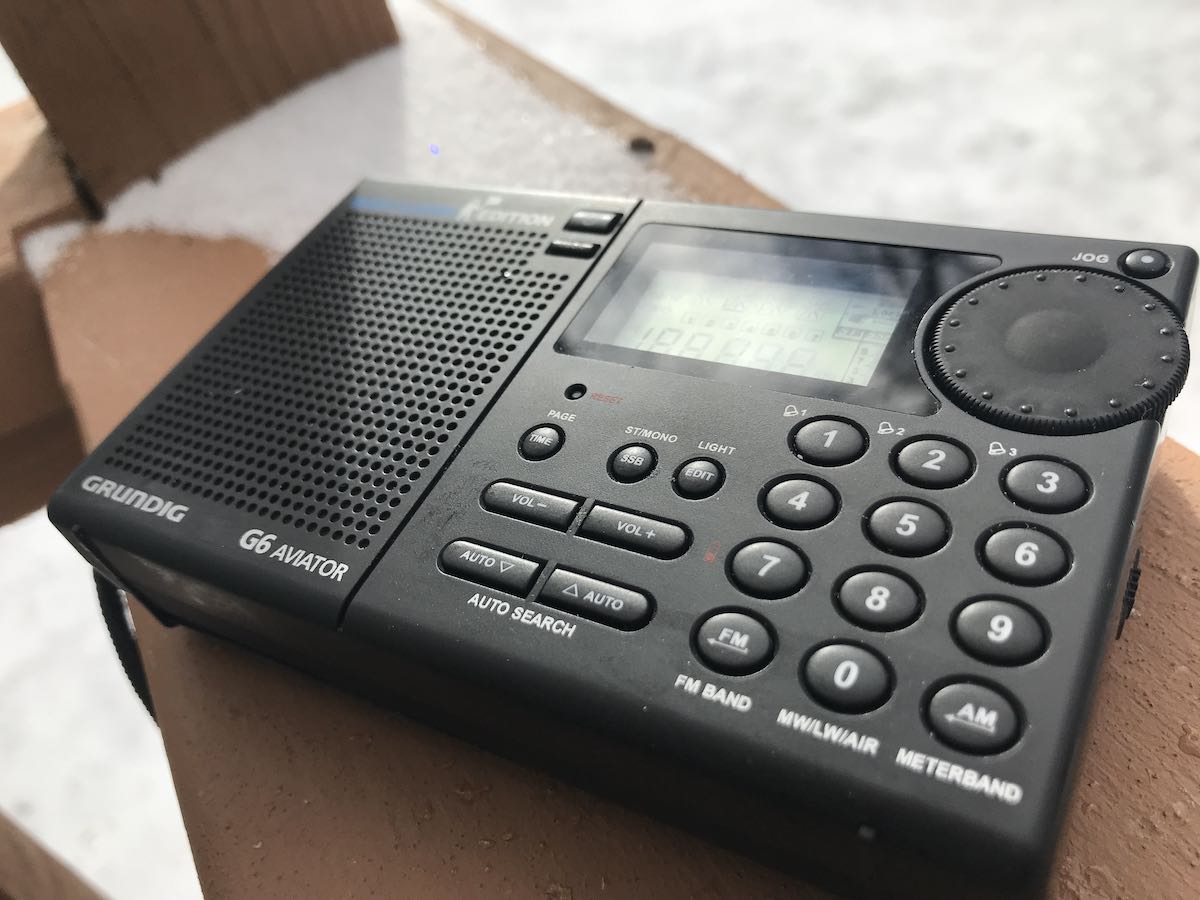
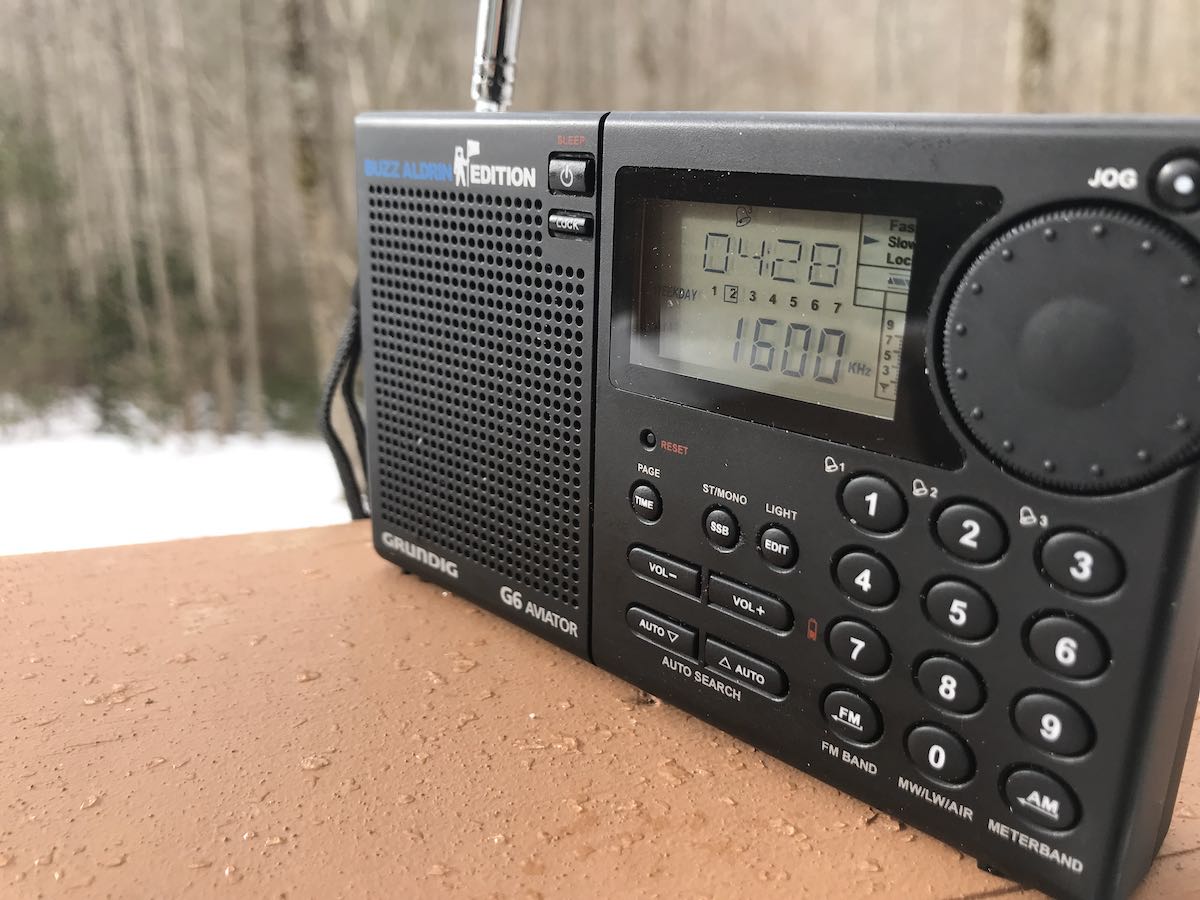
This has been a busy week, but Wednesday evening I took a few minutes to finally remove the sticky residue on my Grundig G6.
In case you’re not familiar, back in the day (roughly 2009 to 2013) Eton/Grundig covered a number of their radios models with a rubberized coating that unfortunately breaks down over time and becomes tacky or sticky to the touch. The Grundig G6 was one of those radios.
If you’ve been an SWLing Post reader for long, you’ve also no doubt read our numerous posts about cleaning off this mess. There are a number of solutions, but it seems the most positive long-term results by employing a de-greasing product called Purple Power (click here to read archived posts). Indeed, it’s the solution Eton Corporation recommends and the one I used to clean my Eton E1 XM.
Pre-cleaning, the G6 was incredibly sticky. It’s hard to see in the photos, but it was so sticky, it was challenging to remove it from its OEM pouch where it had been stored.

The Purple Power solution is effective, though. It requires only a few minutes to clean off the residue, then another few minutes to do a final polishing (I use a simple window cleaning solution).
The results are so impressive.
When I pulled the G6 from its pouch before cleaning, the back stand fell off. I believe it actually stuck to the inside of the pouch.
I’ll likely follow in Troy’s footsteps and eventually replace it with a 3D printed one. I’m not in a hurry at this point, though, as I’ve so many other things on my plate at present.
It’s so great to enjoy the G6 once again. It is a gem of a compact portable. One thing that surprised me? I forgot how fluidly the tuning works with no muting between frequency changes and how quickly (immediately) it switches into SSB mode. In the day an age of DSP portables, we’ve forgotten that these legacy receivers are actually better at both of these tasks.
Next up is my Grundig G3 which is quite sticky. I need to pull it from its storage bin.
Have you rescued a sticky radio recently? Please comment!
My G6 was mislaid during a move and spent ~10 years in a climate-controlled storage bin. When I finally located it, it was sticky as all get-out. I tried cornstarch, as prescribed by some website or other, but that did nothing. Rubbing alcohol didn’t seem to help. What worked was a Magic Eraser, I think recommended by the same website. The G6 is now in almost-new condition. However, the pouch is all sticky from the radio. No idea how to clean THAT.
I bought a G3 to replace the G6 and it’s a whole ‘nother ball of wax. The rubber coating isn’t massively sticky, but it is tacky and I’ve no idea what will clean it. Even the Magic Eraser has no effect.
How I cleaned my Grundig G3 Traveler.
SUPPLIES
CLR (Calcium Lime Rust Remover)
Paper Towels and Kleenex wipes
Rubber gloves (optional)
Cyran/Plastic Wrap (optional)
Hydrotreated light distillate petroleum/mineral spirits (AKA Green Mineral Spirits)
Dawn dishsoap
Water
Small Philips screwdriver
NOTE: CLR is a corrosive. After using CLR, likely will need additional maintenance for metal parts exposed, such as the back cover screws. Stainless metal will likely be OK, however, for conductivity concerns (etc), best just to likely water damp paper towel remove as much as possible any remaining CLR.
NOTE: Best using rubber gloves when using CLR, as well as adequate ventilation. (My guy brain, most of the time while cleaning, said it was OK though not using rubber gloves.)
I removed my antenna and plugged the hole with some plastic wrap. The metal swivel base will fall through into the inside, requiring opening for retrieval. I need to, as the screws need to be cleaned from the acidic CLR solution, then oiled for preventing corrosion. Also removed the side turn plastic dial, easily pops right off without removing any additional fasteners.
1) Somebody mentioned here within the comments, Grundig is now subsequently recommending CLR instead of Purple Power. Now, CLR is something I have on hand inside the house! So I laid the Grundig on some plastic wrap, and wiped several coats of non-diluted CLR on the exterior, avoiding the clear display window. Once several coats of CLR are applied, and the plastic is wet without drying quickly, left overnight. The ideology using CLR I think, CLR will significantly decay the clear silicone (chalk) material significantly more so, or significantly weaken the material. This is likely the next safest option for the letter etching, asides from using Isopropanol alcohol and/or mineral spirits or xylene. (Xylene, a very hot solvent, is usually the best option when removing anything with silicone, and still very messy!)
2) The next day, re-wet with CLR, then used blue non-scratch Scotch-Brite pads, cut to approximately half inch widths, and started rubbing the entire exterior of the radio, avoiding the display window. Wiping and re-wetting with CLR as needed.
3) After most of the silicone clear clear coating residue was removed, I wiped (several times) with a damp paper towel and dried.
4) Next using hydrotreated light distillate petroleum/mineral spirits (AKA Green Mineral Spirits), again wiped and scrubbed with the blue non-scratch Scotch-Brite pads, wiping dry and re-wetting with hydrotreated light distillate as needed.
5) Wiped with Dawn dish soap and water damp paper towels, again drying, the finish looks similar to something I’ve stripped of paint, however preserving all of the lettering/etching. I’m guessing the radio may need to be wiped several more times in the future with hydrotreated light distillate, and then lightly washed with Dawn dish soap, damp paper towels, until all of the smaller amounts of remaining small bits of silicone clear chalk residue have either completely decayed and/or completely removed.
God how I hate silicone chalk! I never use silicone chalk as removing as instructed for resealing, requires removing all prior chalking. Silicone chalking usually requires Xylene, and is usually too hot of a solvent for most substrates, and removing silicone chalk is usually a futile task!
Final note, I don’t think this is going to help with the poor reception or the static saturated audio during radio use, while already using a very long wire antenna.
Somebody else may also try just wiping with Hydrotreated light distillate petroleum (AKA Green Mineral Spirits), and seeing if this simply reduces the stickiness feeling. But my gut feeling, really need to remove the majority of the silicone clear chalk coating material, with first significantly weakening using CLR.
I have several other plastic items around here having a similar silicone clear chalk like coating, for which I’ve used Goo Gone (Xylene) and straight Xylene which will significantly affect plastic and any lettering. No matter the chemical or solvent of choice, still extremely messy coating when removing, far worse than removing paint. Ideology is likely using as little chemical/solvent and using only the necessary amount of rubbing/abrasion for preserving the lettering/etching.
This is roughly a two to three day job, if no parts are lost. So far, the fine black filter material on the back vents needs replacing, both from the CLR acid and past years normal use.
Caution: Do not use a heat gun on a low setting for drying the interior of the casing. The attached keypad attached to the interior front face of the radio, will melt rather quickly, leaving a permanent tangled spaghetti mess of keys.
On my unit, looks like the plastic keypad was permanently attached to the interior front face of the radio with a melted plastic peg. Could have been screwed in, but could not distinguish, with a magnifying glass, metal from melted plastic. I should have just yanked/cut the keypad out. Some here, were able to remove their keypads.
While cleaning the foam backing of the interior keypad, accidentally melted the fragile plastic keypad when drying the casing after cleaning when using a heat gun on a very low setting. (Doesn’t take much heat for melting the keypad!) Regardless, took a break for 12/24 hours for alleviating my anger, then used some duct tape for taping the keypad, or what keys I could tape, placing the duct tape on the front exterior of the casing and taping the keys into place. Then subsequently used the heat gun on low setting, and gently/quickly melted/un-warped almost all of the other keys into place. The interior of the keypad looks messy, and the five key was completely broken off the keypad (mostly from anger management skills), but all of the keys work, or do work after reassembly, with the mess being invisible from the front of the casing. Lesson, when using a heat gun to quickly dry plastic parts, portable radio plastic melts with very little heat and very quickly!
The foam backing of the interior keyboard, as well as the black interior rear mesh filtering material for the rear vents of the portable radio quickly accumulated the CLR acid, and smelled awfully of the acid after dried, not to also mention acids being caustic for metal. I probably should have just rinsed the whole unit in water, but due to the speaker still being fully attached, opted for quickly rinsing the back vents with 70% alcohol. The removable keypad foam backing was easy to clean, simply using Dawn dish soap then quickly rinsing with water, and press drying with paper towels. During this process, one of the 30 AWG speaker wires broke, and the clear translucent plastic/poly-carbonate window dislodged.
The clear translucent plastic/poly-carbonate window appears to be sealed from the front exterior with a (silicone) caulking within the beveled edging. Quickly cleaned with the Green mineral spirits, washed and rinsed. For adhering the window, I had a tube of 100% silicone for plastic projects, and smeared a very thin layer along the beveled edging. Seemed like a good plan, until realizing the task wasn’t going perfectly and obviously became a little messy, smearing some along the window edges and window. Regardless, while the window was carefully pressed into the beveled edging, wiped the front and back window using lens paper and green mineral spirits, until the excess caulking was removed. Then placed the unit on a table, with lens/tissue paper atop the window with something slightly heavy atop the paper, for providing weight for sealing the window onto the radio casing until dried. Next day, The window looks good.
For the broken speaker wire, I already had a Hako desolder and ordered an additional thinner Hakko Desoldering Nozzle /1.3mm Long N61-13 $14.28 cost. Removed the old 30 AWG speaker wires, this time being safe and placing adequate amounts of tin foil along the plastic case edges. Realizing the speaker wires were easily breaking due to a too small of a gauge wire being used, had some spare white 26 AWG wire, marked one wire hot with a magic marker and re-soldered using an optional very narrow solder tip for my Weller soldering station, with the aide of a Helping Hands magnifying glass. The soldering holes on the board, were adequately large enough for 26 AWG stranded copper, and possibly large enough for 24 AWG or larger wire. Tried doing some math with the ohm ratings, and think the original ~30 AWG wire was far too small, for the rating for the speaker, even though a very short run. I now have nine inches of speaker cable, both likely giving adequate clearance for disassembly and likely for the ratings of the speaker. Bigger gauge wires, more power, seems better sounding to my ears already!
All reassembled and seemingly fully working now. The majority of the sticky silicone mess seems to be a much thicker layer on the rear of the casing. The front casing, thankfully, seems to have had a much thinner layer coating, making cleaning easier on the front than the rear casing. Oh, and while inside the casing, I used Deoxit, fader cleaner, fader lubricant and regular lubricant on the FM antenna connections.
NOTE: Screws on the main exterior casing, there seems to be one larger/shorter screw than the other main rear case screws. Another black screw, just below the FM aluminum antenna on the rear of the case, holds the FM antenna base to the rear of the plastic casing, so omit removing this screw when intending only to remove the rear casing, unless you feel like disassembling/reassembling the FM antenna base.
NOTE: The display ribbon cable does not appear to be easily/readily removable, only giving about an inch of space/movement. Probably best being careful not to break the ribbon cable.
My Grundig G8 is an absolute mess. I dont even want to try and salvage it (good excuse to get something new). I have my eye on the Eaton elite executive, but i’d just die if i got one shipped and discovered it had the same coating. Does anyone know?
The Eaton Elite, along with some of the more recent shortwave portable radios such as Tecsun PL880, use an included 18650 lithium rechargeable battery.
There’s a US Government (cpsc.gov) warning concerning risk of injury, fire, explosion, death with using the loose 18650 types of batteries. Think there’s a more recent model number replacement, however the warning seems to include “any type” of 18650 lithium batteries. Remember the airplane fires started with lithium rechargeable batteries?
Think the Sangean shortwave radios are probably the best safest shortwave radio option, and I’ll likely find out shortly. The second option, one which likely will not leave the house due to risk of theft, an Icom HF radio. Both made in Japan. Sangean has smooth slippery plastic cases and uses common batteries.
Can someone tell me what station on shortwave radio station is ukrain on?
You can Google that…
Wikipedia has useful info:
https://en.m.wikipedia.org/wiki/Radio_Ukraine_International
Several years ago i removed the goo from my Eton E1 and E10 using 91% isopropyl and cotton rags and swabs. It took a bit of work, but they both came clean and the cases look and feel much better, and don’t collect dirt and dust. Also, when the hinge pegs on the E10 stand broke off, i drilled out the broken bits and replaced them with brass rods. Now the stand works better than before.
Hi, I tried oven cleaner & different methods but I always had a little bit gunk sticky left in certain spots.. until I tried something different. It worked great & cleaned it all off & polished it at the same time. 70% alcohol & a bounce or Gain dryer sheet. Gain dryer sheet did great. Wish 8 could add pictures as Grinding M400 shines new.
Tip for non-USonians: what’s sold as “Purple Power” (and “Simple Green”, and several other frequently-recommended cleaners for this sort of thing) are not necessarily the same products around the world. For example, in the US “Purple Power” is an ethylene glycol based cleaner/degreaser; here in Aus, if you ask for “Purple Power” you’ll get a sodium hydroxide based degreaser.
One will clean the gunk off your radio; the other will clean the gunk *and most of the labelling* off…
Some years ago I removed the goo from my Eton E1 and E10 using 91% isopropyl alcohol and cotton rags and swabs. It took some time and elbow grease, but they both cleaned up beautifully and have stayed that way. Also, when the hinge tabs on the stand of the E10 broke, I drilled out the broken tabs and replaced them with brass rod, and now the stand works better than new.
That’s a really nice rescue job!
What a hot mess in the first photos. I have some later RL Drake gear that has sticky paint, but that was made 40 yrs ago!
Grundig lost me as a customer after that fiasco. I bought a CCrane Skywave next.
Looks great. Mine has the added problem that I took it on a beach vacation several years ago and not only is it sticky but it has some sand grit stuck to it.
My Grundig G3 is perhaps a little sticky, but seemingly it is not much worse than it was after a few uses from new out the box. I do wipe it occasionally with a spray of Pledge electronics-safe surface cleaner or similar, so that might be the difference.
I have a G6 Buzz Aldrin that I put away a few years ago. I took it out and it had the worst case of the stickies ever PLUS the digital readout is off by 833 khz no matter where and on every band except FM. Weird – too bad too because it was a great performer.
Like Mike said alcohol work perfect 🙂
Bye and have a good 2021 !
Bye,
Jarno – PA3DMI
I followed this a few years ago and used GO Gone K kitchen Degreaser worked great but then few months later could not turn on anymore and if I did get it on could not shut off then and then finally died, Love the help you provide way back then.
Once got a mint G3 off eBay which had the stickies.
The popular solution then, was to remove it using isopropyl alcohol.
A laborious task, for sure, but since it had worked beautifully for my E100 I gave it a shot.
Ended up removing all of the silk screen printing from the front panel too.
I used a baby wipe to get rid of the sticky residue from my Eton G8 Traveler.
Peter