Many thanks to SWLing Post contributor, Kostas (SV3ORA), for sharing the following guest post which originally appeared on his radio website. Note that this project builds on the EMTX emergency transmitter project:
 PC keyer and AM modulator: A 15-components versatile keyer and powerful PSU modulator for the EMTX (Emergency Transmitter)
by Kostas (SV3ORA)

Schematic of the keyer and modulator (on the left) for the EMTX. The EMTX schematic is shown as well on the right, to determine the connections to the keyer/modulator.
Introduction
My very successful emergency transmitter (EMTX) was only capable of CW or other slow speed ON/OFF keying modes. Then I thought, why not “give voice” to the design? CW is good, but it is half of the fun. If you could use your simple CW transmitter to send out your voice as well, this would be great. You could now chat comfortably on the nets or use any digital radio amateur mode and have much more fun. The simplest modulation you can apply to an existing CW transmitter, is the AM modulation. And whereas this is an old modulation, mostly abandoned by HAMs due to beeing inefficient, there are still AM nets on HF. But do not forget, AM can also be heard by SSB receivers by zero-beating the receiver to the AM carrier. So you could still use your simple AM transmitter to QSO with the SSB guys!
Along with the modulator, there is also a versatile keyer embedded to the circuit, so that the EMTX can be manually keyed with different ways or automatically keyed by audio tones from the PC. For more information on the keyer, keep reading.
The AM modulator
In the old days, the most common way to apply AM modulation was to modulate the high voltage to the plate of the tubes, using a transformer and a powerful audio amplifier. In low voltage solid state circuits, you can still do it using transformers, but you can also use series transistors instead of the transformer. All these things require many components and/or powerful AF amplifiers if one is to modulate higher power transmitters. This does not match the keep-it-simple design I am trying to achieve here.
So I thought of a simple trick with the use of the extremely common LM317 regulator, used as a modulated power supply. This modulator uses just a few common cheap components and it is able to achieve remarkably good modulation levels for it’s parts-count, just from line audio input. It juices every bit of the internal circuicity of the LM317, just look at where the base current of the 2N2222 comes from.
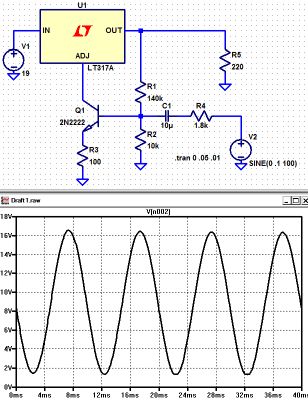
The AM modulator is a kind of novelty. Whereas there is nothing special in a modulated power supply, this circuit has some interesting properties. It is amazingly sensitive and it is able to provide lots of modulated current to any low power transmitter that it can feed. It can be easily driven by the line output of any laptop (around 20% volume) and provide a very good depth modulation to the transmitter. Charles Wenzel was kind enough to do a simulation on the circuit I developed, which is shown below.
His simulated circuit is a slight variation (for measurement purposes). The resistor to ground on the base stabilizes the bias and the ratio of R1 and R2 set the output voltage (0.6 volts across R2 gives about 8 volts across R1). He put in an emitter resistor just for good measure. Same for the series resistor from the source. Charles words, “I don’t know how believable these results are but it looks pretty darned good!”.
The circuit is being used as a current booster, the current being the supply to the transmitter and dependent on the voltage it produces. The LM317 always tries to keep 1.25V between it’s output pin and “adj” pin but where we benefit here is the current at the “adj” pin is very low, so it is easier to apply audio to it. Effectively, the error amplifier inside the voltage regulator is used as an additional amplifier stage. The output pin voltage varies according to the voltage on the “adj” pin so if we use it to bias the transistor we get negative feedback which improves the quality of the modulation. More output voltage = more bias current = lower output voltage. The result, is a very cheap, low components-count, very sensitive AM modulator that can supply lots of power to easily drive the transmitter and produce a clean and deep AM modulation!
The AM modulator bias is set with the 1M potentiometer. Depended on the bias level, the idle carrier on the EMTX can be set from about 0.5W all the way up to 8W. Needless to say that this modulator can modulate any similar power transmitter, not just the EMTX.
The keyer
If it is to modulate the EMTX from the PC, so as to use the different digital modes, there must be a way to key it also from the PC. This is why I decided to embed into the same circuit, a PC keyer which is triggered by the line audio of the PC, but also triggered manually (internal or external key). Keying by audio tones was decided, because modern PCs do not have LPT ports to trigger directly by DC. This keyer uses a reed relay to reliably, fastly and scilently key the EMTX, which is activated by a transistor. The base current for the transistor is derived from the audio signal after rectification. The incoming audio from the PC line passes through the mini audio transformer to increase its voltage, it is rectified and then charges the shunt capacitor to drive the base of the transistor. The keyer “speed” (decay) is determined by the shunt capacitor size. The circuit starts to trigger from about 50-60% of my sound card output signal level.
The relay used to key the EMTX, must be able to tolerate at least 1A of switching and carrying current. Note that the relay contacts switching current is not the same as the contacts carrying current. Reed relays are the best especially if you want long relay life, noiseless operation and very fast switching speeds, like the ones used in Hellshreiber. If you can’t find such a relay, you can use a reed switch capable of 1A of switching and carrying current and then place a suitable electromagnet close to it, so you can build the relay yourself. If you do so, find the best point where the reed switch responds to the electromagnet.
The keyer relay must be as close as possible to the emitter of the transistor used in the EMTX. The connectors at the back of the EMTX and the keyer/modulator have been physically placed so that when the two units are side by side, a very short link cable is required for this purpose. With the two devices placed close together, you can now use any length of cable for your manual external key, which is now connected to the “EXT” connector of the keyer/modulator.
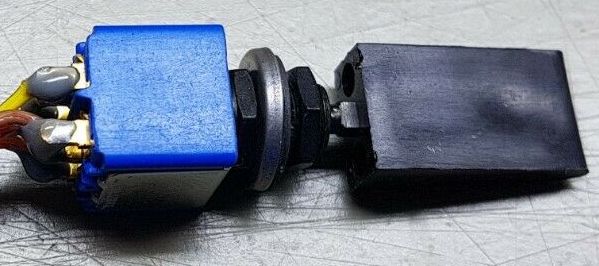
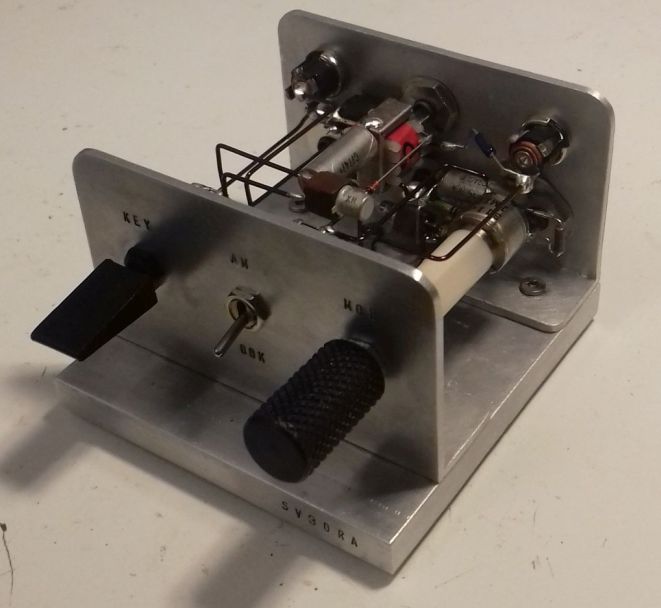
The keyer does also have an internal mini straight key. I find this idea very nice, to avoid extra cables. It is not the most convenient key in the world, but it is there along with the transmitter every time you need it. By using a special panel switch from apem, I was able to triple this switch usage for the different modes of the keyer. The vinyl lever cap you see in the next picture, is the original part of the switch, to make it easier to key with your finger. But you may build such a part on your own, to fit on other switches types.
The switch is an ON-OFF-(ON momentary) switch type. In the default (middle) position, only the PC keying action is activated. In the top position (ON), the keyer is always active, which is useful for broadcasting audio (into a dummy load). The bottom (ON momentary) position, is the manual PTT action. This is used as a straight key on OOK operation, or as a PTT on AM voice operation. Simple and effective!
Initially, I used one channel of the PC sound card for triggering the keyer and also as an AF signal for the AM modulator, but this caused several problems of unreliable keying or distortion. So I decided to use a second separate AF input (KAF) to key the keyer. This second input, uses the other channel of the stereo sound card. With the addition of this input, there is no interaction between the keyer and the modulator. The AF levels that the keyer and the modulator require, can be set independently. Instead of adding more hardware for the purpose, I have chosen to set these levels by adjusting the volume and the balance of the sound card, which works great. Also, programs like Fldigi, have options for using one of the two channels of the stereo sound card as a keying interface (PTT channel), which makes the keying efen more reliable. When the program is in transmit mode, a continuous tone is heard on the PTT channel. This steady tone, is used by the keyer as a reliable keying signal, independent of the audio signal of the digital mode that modulates the modulator. This solution works very reliably for any mode. But if the program you are using does not have an option for a PTT channel, that is ok, as the keyer works reliably even without this feature. For voice communication or broadcasting music (into a dummy load) you just use the internal key switch as a PTT to handle these modes.
Results
Prior to building the keyer and the modulator in the same device, I had tested the circuits independently quite a few times, to ensure the results can be reproduced. The modulation quality and depth out of the AM modulator have to be listenned to be believed. I have not made any linearity measurements, I just trust my ears on this one. It works great on music as well as on voice. Apart from that, this is the most sensitive AM modulator I have ever built, requiring only a small fraction of the line level output of the PC sound card.
When modulated by this modulator, the EMTX shows no audible signs of FM modulation. I switched my receiver to SSB and I could perfectly zero beat the AM modulated music signal which stayed on frequency and it’s tone did not change during loud audio signal music. Switching back and forth from SSB to AM modulation on the receiver, I did not notice any difference in the audio quality, apart of course from the narrower bandwidth on SSB modulation, due to the narrower IF filter inside the receiver on SSB.
The AM/OOK switch is used to select the modulation applied to the EMTX. When the keyer is set to be triggered by audio from the PC, at the OOK position, the EMTX is just switched on and off by the audio tones applied to the keyer, or by the manual key, internal or external (connected to the “EXT” connector). At AM position, the EMTX is switched on by the audio signal applied to the KAF connector and at the same time AM modulated by whatever audio signal is applied to the AF connector. On voice communications, the momentary position of the internal key is used as a PTT. On music broadcasting (into a dummy load) the non-momentary position of the internal key is used to keep the keyer always active.
Photos
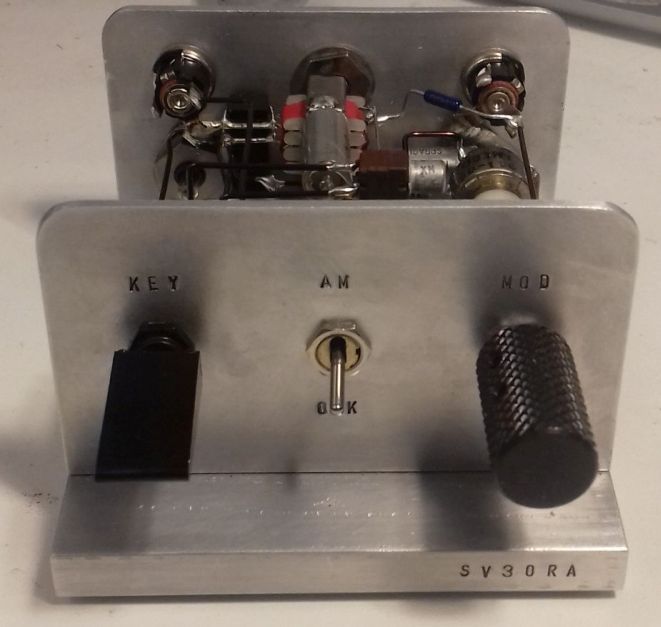
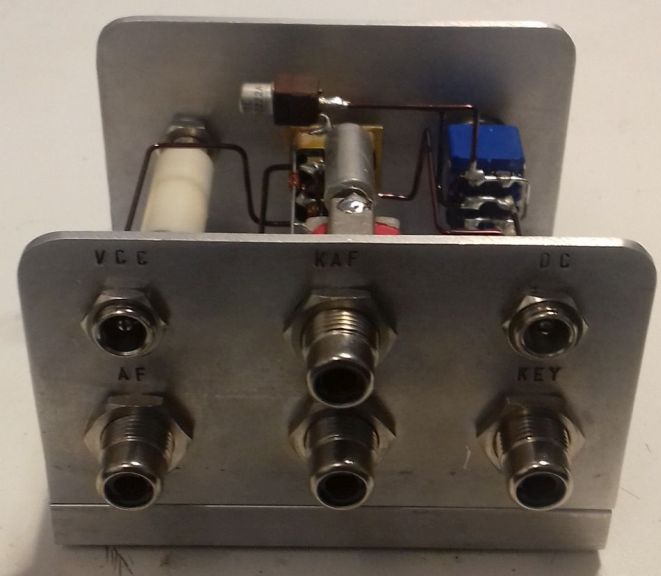
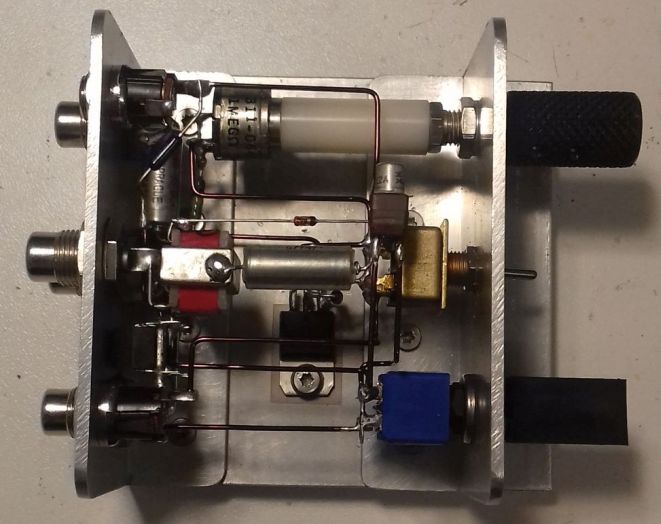
Pictures of the finished keyer/modulator. You don’t have to build it that nice-looking if you don’t care.
Thank you so much for sharing this brilliant and simple project with us, Kostas. Your handiwork is absolutely brilliant too!

