Tag Archives: Transceiver Kits

Taking the new Mission RGO One transceiver to the field!

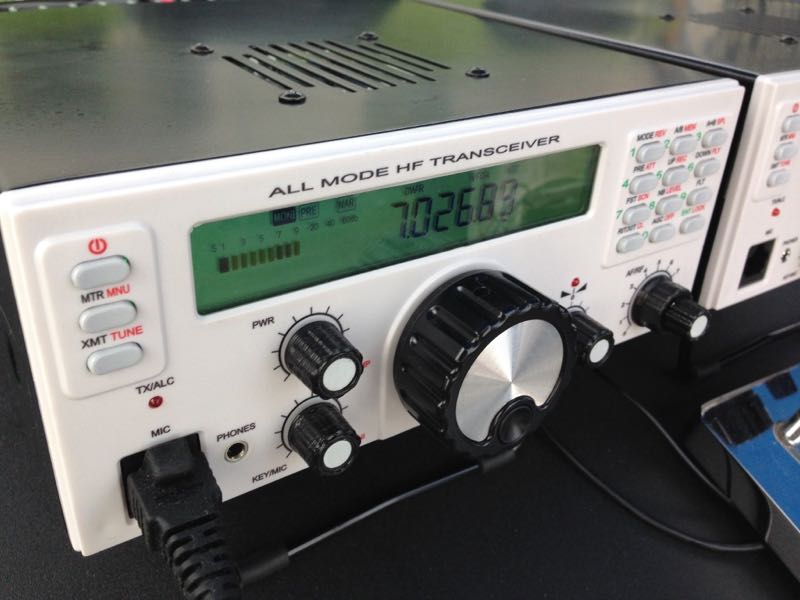
SWLing Post readers might recall that last year at the 2018 Hamvention, I met with radio engineer, Boris Sapundzhiev (LZ2JR), who was debuting the prototype of his 50 watt transceiver kit: the Mission RGO One (click here to read that post).

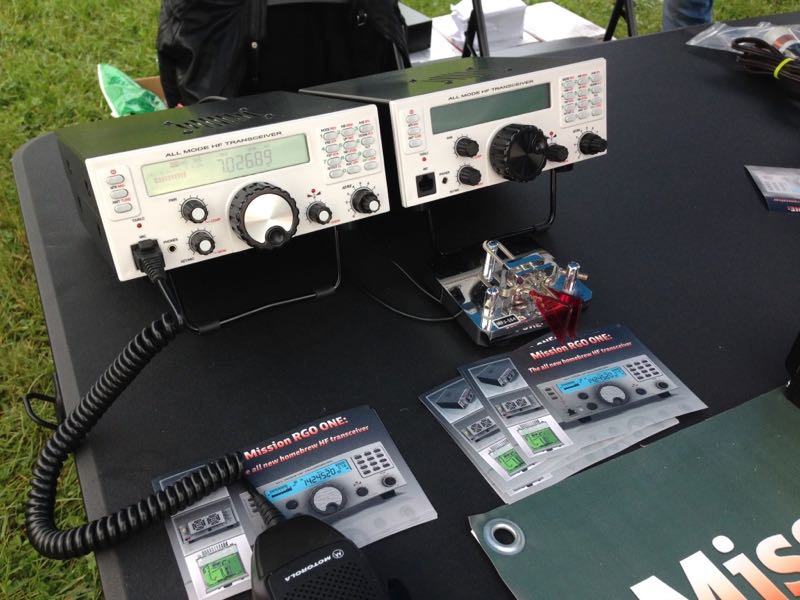
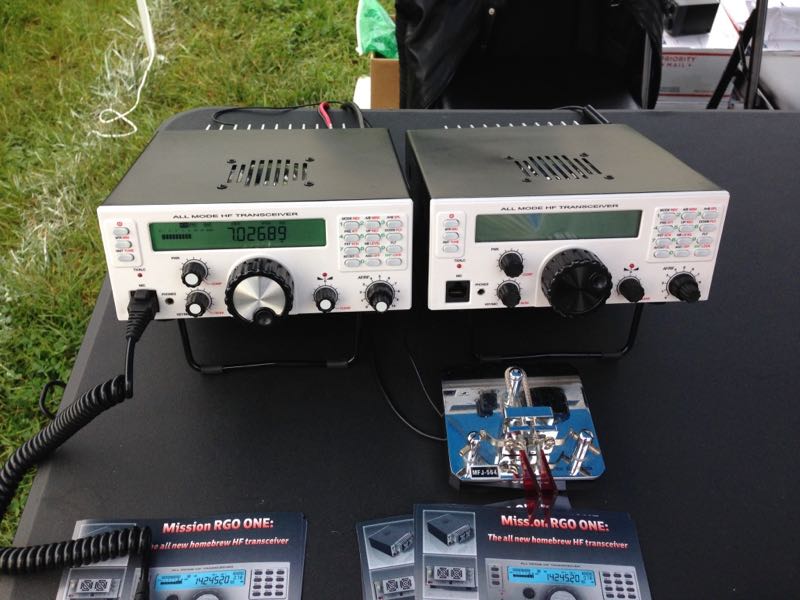
Since last year, I’ve been in touch with Boris, and we arranged to meet again at the 2019 Hamvention so I could take a closer look at the RGO One, especially since he has started shipping the first limited production run.

The RGO One delivers everything Boris promised last year and Boris is on schedule, having finished all of the hardware design and having implemented frequent firmware updates to add functionality.

Excellent first impressions

I’ll be honest: I think the RGO One was one of the most exciting little radios to come out of Hamvention this year. Why?

First of all, in contrast to some radios I’ve tested and evaluated over the past two years, I can tell immediately that the Mission RGO One was developed by an active ham radio operator and DXer.

Here are some of the RGO One features and highlights as taken from the preliminary product manual (PDF):

    • QRP/QRO output 5 – 50W [can actually be lowered to 0 watts out in 1 watt increments]
    • All mode shortwave operation – coverage of all HAM HF bands (160m/60m optional)
    • High dynamic range receiver design including high IP3 monolithic linear amplifiers in the front end and diode ring RX mixer or H-mode first mixer (option).
    • Low phase noise first LO – SI570 XO/VCXO chip.
    • Full/semi (delay) QSK on CW; PTT/VOX operation on SSB. Strict RX/TX sequencing scheme. No click sounds at all!
    • Down conversion superhet topology with popular 9MHz IF
    • Custom made crystal filters for SSB and CW and variable crystal 4 pole filter – Johnson type 200…2000Hz
    • Fast acting AGC (fast and slow) with 134kHz dedicated IF
    • Compact and lightweight body [only 5 lbs!]
    • Custom made multicolor backlit FSTN LCD
    • Custom molded front panel with ergonomic controls.
    • Silent operation with no clicking relays inside – solid state GaAs PHEMT SPDT switches on RX (BPF and TX to RX switching) and ultrafast rectifying diodes (LPF)
    • Modular construction – Main board serves as a “chassis” also fits all the external connectors, daughter boards, inter-connections and acts as a cable harness.
    • Optional modules – Noise Blanker (NB), Audio Filter (AF), ATU, XVRTER, PC control via CAT protocol; USB UART – FTDI chipset
    • Double CPU circuitry control for front panel and main board – both field programmable via USB interface.
    • Memory morse code keyer (Curtis A, CMOS B); 4 Memory locations 128 bytes each

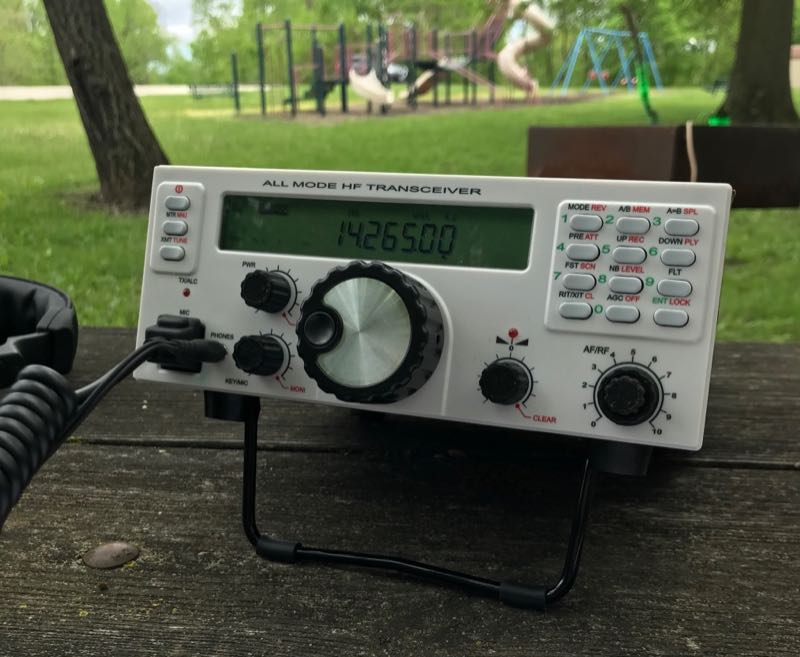
What really sets the Mission RGO apart from its competitors is the fact that it’s compact, lightweight (only 5 lbs!), and has a power output of up to 50 watts. Most other rigs in this class have a maximum output of 10 to 15 watts and require an external amplifier for anything higher.

The RGO One should also play for a long time on battery power as the receive current drain is a modest 0.65A with receiver preamp on.

The RGO is also designed to encourage a comfortable operating position. The bail lifts the front of the radio so that the faceplate and backlit screen are easily viewed at any angle.

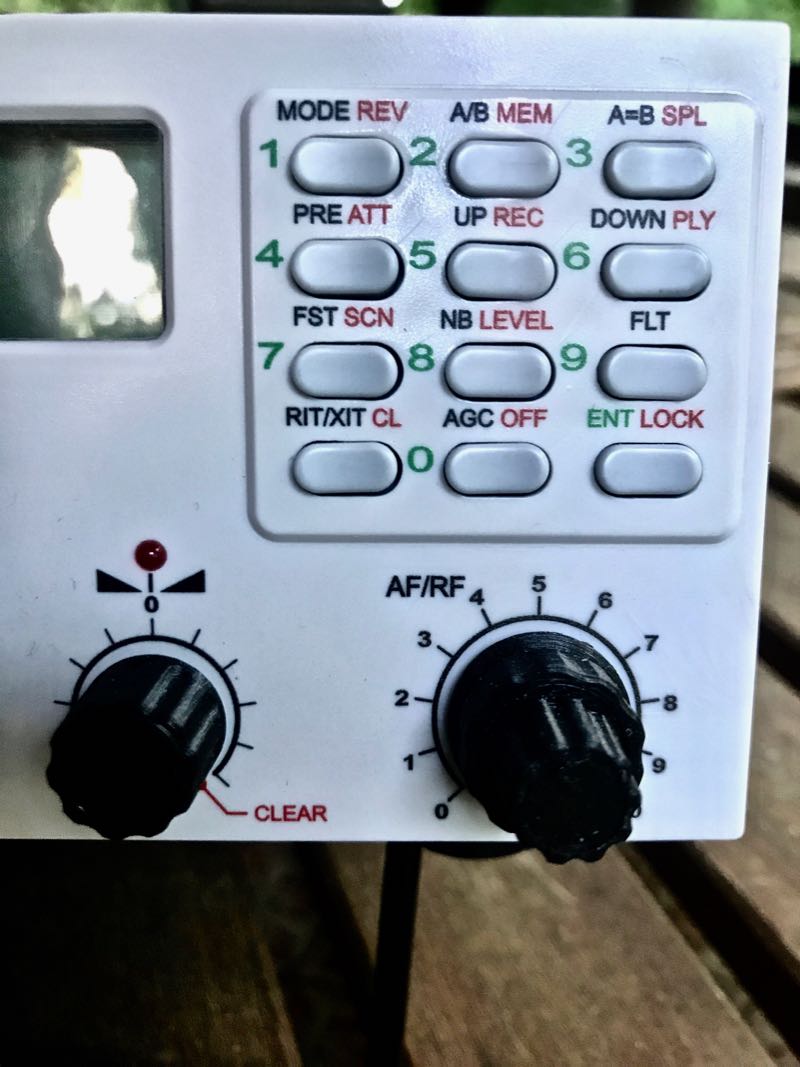
The keypad is intuitive and–hold your applause!–all of the important functions are within one button or knob press!

The front panel design is simple and clean. There are no embedded menus to navigate to change filter width, power level, RF gain, keyer speed, mic gain, pre amp, or audio monitor level. Knob spacing is excellent and I believe I would even be able to operate the RGO while wearing gloves.

Even split-operation is designed so that, with one button press, you can easily monitor a pile-up and position your transmit frequency where the DX station last worked a station. (This is similar to the Icom XFC button). The user-interface is intuitive; it’s obvious to me that Boris built this radio around working DX at home and in the field.

Speaking of the field…

Parks On The Air (POTA) with the Mission RGO One

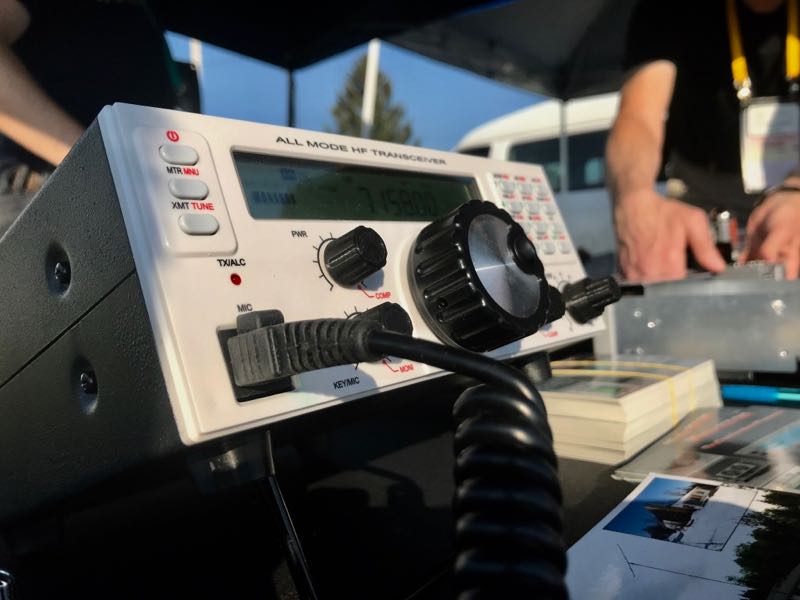
At my request, Boris has kindly loaned me one of the first production run units to test and review over the next few months. I intend to evaluate this radio at home, in the field, and (especially) on Field Day. By July, I should have a very good idea of how well this Bulgaria-born transceiver performs under demanding radio conditions!

I had planned to begin my RGO One evaluation after returning home from Hamvention, but I couldn’t resist taking it to the field, even though the propagation forecast was dismal.

The first leg of my journey home from Hamvention took me to Columbus, Ohio, on Monday, so I scheduled a Parks On The Air (POTA) activation of Delaware State Park, K-1946.

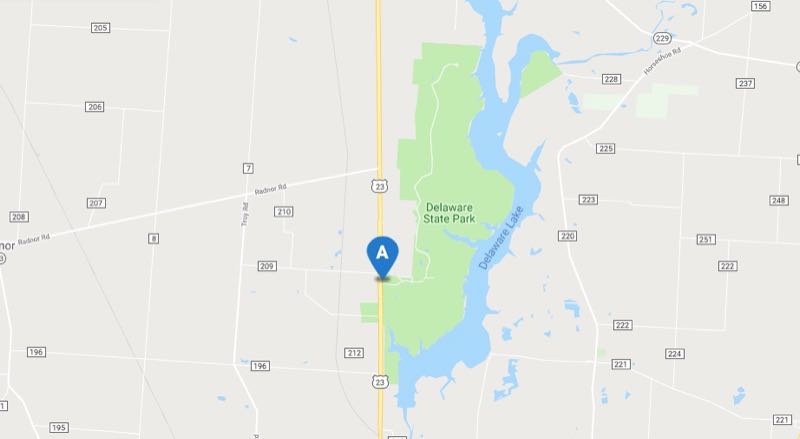
Delaware State Park (POTA K-1946) in Delaware, Ohio.

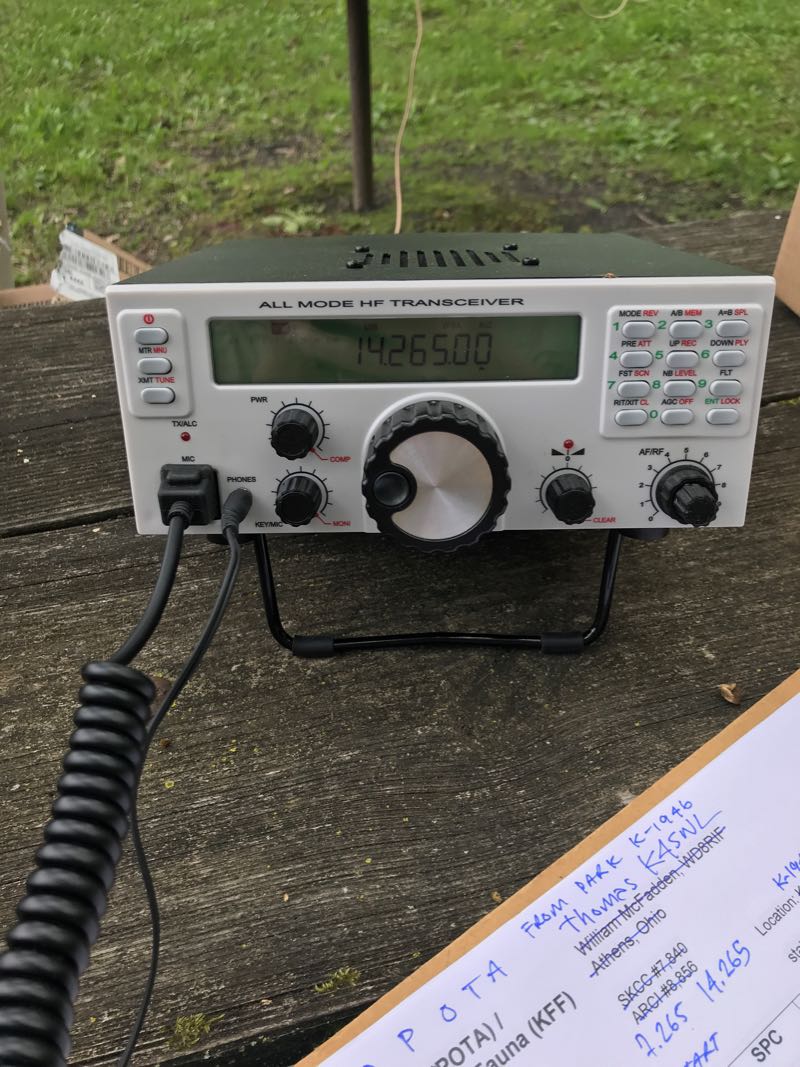
My buddy Miles (KD8KNC) and I met our mutual friend Mike (K8RAT) at the park entrance and quickly found a great site with tall trees, a little shade, and a large picnic table.

We set up the RGO One and, for comparison, my Elecraft KX2 for the POTA activation.

I won’t lie: band conditions were horrible. Propagation was incredibly weak, QRN was high, and QSB was deep. Yuck!

Still, this activation gave me a chance to test the RGO One in proper field conditions.

I was limited to SSB since the only CW key I had with me, the paddle specifically designed to attach to the front panel of the Elecraft KX2, wouldn’t work with the RGO One. In addition, I was limited to 25 watts output because the antenna I deployed, the LnR Precision EFT Trail-Friendly end-fed antenna, can only handle power up to 25 watts.

Although I had never operated the radio before, I was able to sort out most of its functions and features quickly.

The receiver audio was excellent and the noise floor seemed quite low to my ears. The internal speaker does a fine job producing audio levels that are more than ample for a field setting.  Still, I prefer operating with a set of earphones in the field–especially important on days like this when propagation equates to a lot of weak signals.

Although I failed to make a total of ten contacts to claim a proper POTA activation, I was pleased with offering up K-1946 to seven lucky POTA hunters/chasers. I simply didn’t have enough time available to work three stations more at such a slow QSO rate.

Of course, my signal reports were averaging “5 by 5” and were never more than “5 by 7” regardless of which rig–the RGO One or the KX2–I was using. The reports on the RGO One transmit audio reports were great.

Stay tuned!

I will publish my first review of the Mission RGO One in The Spectrum Monitor Magazine, most likely in August or September.  In the meantime, I will post updates here as I put the RGO One through its paces. I’m especially excited about using it during Field Day with my buddy Vlado (N3CZ) to see how it holds up in such an RF-dense environment.

And now that the POTA bug has bitten me?  Expect to catch me on the air with the RGO One over the next few weeks!

If you’re interested in following the Mission RGO One, bookmark the tag: RGO ONE.


Do you enjoy the SWLing Post?

Please consider supporting us via Patreon or our Coffee Fund!

Your support makes articles like this one possible. Thank you!

Spread the radio love

N6QW introduces the Sudden QRP SSB Transceiver

Many thanks to SWLing Post contributor, Pete Eaton (WB9FLW), who writes:

From the fertile mind of QRP Hall Of Fame Pete N6QW comes a new Radio Project, the Sudden QRP SSB Transceiver. If you have never Scratch Built such a Rig and would like to N6QW’s latest offering deserves close inspection.

Using only readily available (and cheap) components (and few of them) one can build a Full Blown SSB Transceiver for either 40 or 20 meters. The Radio’s Design will be featured in 2 installments of GQRP’s Sprat Magazine. The 1st being in the Fall issue (Receiver/LO) and the second part with come in the Spring 2019 issue (Transmitter).

http://n6qw.blogspot.com/2018/09/2018-year-of-ssb-transceivers_14.html

Pete is also providing extensive documentation on his Website:

http://www.n6qw.com/Sudden.html

One use for the Rig is on the Digital Modes, to that end he has design a simple Digital Adapter (which is also described on n6qw.com). One possibility is for a dedicated FT8 Transceiver!

Even if you do not intend to build the Rig take a moment to check out his Web Page. There you will find a wealth of information on designing and building such Transceivers.

Pete WB9FLW

(not to be confused with Pete N6QW 🙂

Thanks for the tip, Pete! How exciting! This looks like an innovative little rig and I love the concept of only using accessible components–in the end, that will give this little rig some longevity.

Spread the radio love

The Mission RGO ONE: A new 50 watt all mode HF transceiver

Shortly after posting a set of photos I took at the 2018 Hamvention, I received a number of reader inquiries regarding one particular radio: The Mission RGO ONE.

I found this cool tabletop transceiver in the flea market area of the Hamvention early Saturday morning and included it with my inside exhibits photos. I wasn’t able to gather a lot of information from the representative at the time because the Hamvention staff opened the gates to general admission a full 30 minutes early, so I had to make a sprint to my table at the other side of the fairgrounds.

The following specifications/features were listed on the RGO ONE product sheet:

  • QRP/QRO output 5 – 50W
  • All mode shortwave operation – coverage of the 9 HAM HF bands (160m optional)
  • High dynamic range receiver design including high IP3 monolithic IC in the front end and H-mode first mixer
  • Low phase noise first LO – SI570 chip
  • Full/semi QSK on CW; VOX operation on SSB.
  • Down conversion superhet topology with 9MHz IF
  • Custom made crystal filters for SSB and CW and variable crystal 4 pole filter – Johnson type
  • Stylish and professional look
  • Compact and lightweight body
  • Multicolor FSTN LCD
  • Silent operation with no clicking relays inside
  • Modular construction – Mother board serves as a “chassis” also fits all the external connectors, daughter boards, inter-connections and acts as a cable harness.
  • Optional modules – NB, AF, ATU, XVRTER
  • PC control via CAT protocol; USB FTDI chip
  • Memory morse code keyer (Curtis A, CMOS B)
  • Contest and DXpedition conveniences

For even more detail, I recently contacted the rig’s developer, Boris Sapundzhiev (LZ2JR), who kindly answered all of my questions.

Boris replied:

Hello Thomas,

Thanks a lot for your message and interest about our new homebrew project that we called RGO ONE. Here you can find more about the radio:

QRP HF Transceiver

There are clickable highlights on the text which lead to a schematic diagram for each module so you can have a look if you like. Final documents and last revision of schematics will be available soon.

The idea of this project was inspired of an old TEN-TEC radios with 9MHz IF – their perfect analogue design and crystal crisp audio both CW and sideband. Mine have two very old TEN-TEC ARGOSY 525D and several moreTEN-TEC equipments. So with the help of the new electronic components available on the market we realize this old concept…

We’ve been working hard for almost three years to see what you saw at Dayton flea market table. A real performing HF 50W CW/SSB transceiver. We are 4 people in the team.. Other team mates are very good in industrial electronics manufacturing and helping very much with electronic PCB design, parts delivery, microprocessors and other things.

The idea of the front panel and other constructions design is mine .. I literally drew it in a couple of hours then our CAD designer put it in AUTOCAD/INVENTOR 3D design software.

Click to enlarge.

Click to enlarge.

Click to enlarge.

LCD we made in China and already stocked plenty of LCD and backlight units. Front panel is made by means of plastic mold method:

Here it is:

FACE PANEL MOLD PLASTICS OR ALUMINUM MACHINED

So far we got two samples that we tested already in real conditions and made several contest (LZ2RS helped with this task).

You can seek for video clips on YouTube (my channel) to see how it works.

Click here to view on YouTube.

I am back in Bulgaria now and today we had a team meeting so it is decided to start first lot 10pcs which will be completely ready to run. The time range of this is somewhere next two months. Then next lot will be 100 units probably some of them or most of them will be in a kit form with ready populated SMD small foot print components.

At the show in Dayton we revealed our target price for the base version – $450-$550. Hope to keep it as promised but final price will be available when first units come to alive.
First units will ship from Bulgaria, then we will try to stock more units in US.

This is briefly about our intentions of the project. A lot of interest, expectations and positive “WOW” feedbacks received so this urge me to go fast forward.

73, GL

Boris LZ2JR/AC9IJ

Thank you for the detailed reply, Boris! I will certainly follow this project with interest and post updates (readers: bookmark the tag RGO ONE).

I love the size of the RGO ONE and the fact it’s capable of a full 50 watts out in such a portable form factor. The front panel is very attractive, ergonomic and the backlit LCD screen is quite easy to read at any angle.

Boris, if you manage to hit your target price of $550 or less, you’ll no doubt sell these by the hundreds! I’ll be watching this project with interest.

Spread the radio love

The Cricket: The Four State QRP Group’s latest transceiver kit

Here’s a hot tip for those of you who enjoy building transceiver kits:

The Four State QRP group has just released The Cricket: a simple 80 CW transceiver kit. The Cricket was designed by David Cripe (NM0S) who is behind a number of successful kits (including the Ozark Patrol and the Bayou Jumper).

The amazing part about this kit is that it’s super simple, has no toroids to wind and doesn’t even need to be aligned. It even includes a Morse key.

All this shipped for $32.68 in the US, $39.50 in Canada and $43.50 for international orders. A serious bargain, in my book.

Typically, Dave’s kits sell out the same day they are posted for sale. If you’re interested in The Cricket, don’t hesitate to order! (I just bought three, for example.)

Click here to order The Cricket.

Here’s The Cricket kit description via the Four State QRP Group website:

Kitted and Offered For Sale By The Four State QRP Group

The Cricket is a low cost entry level minimalist CW transceiver for the 80 meter band. Chosen as the build session kit for OzarkCon 2017, it bears a family resemblance to the well known but much lower performing Pixie. However it is very different and vastly improved over the Pixie. This is NOT a Pixie, it is far superior! It features low parts count, better components including MOSFETs for better sensitivity and switching, and a modern NJM2113D audio amp.

A TX/RX offset is also incuded so that you can work other stations that have zero beat you, or are using a crystal on the same frequncy. Full QSK and a sidetone complete the essential operating features. Dave’s famous etched spiral coils are included on the pc board, so there are NO TOROIDS to wind. Additionally a straight key is included on the pc board, just snap it off, mount it on the board, and the whole rig is then self contained. Also included is an electronic keyer adapter – you can use your favorite keyer with the Cricket! These are many features for such a low parts count and inexpensive transceiver.

ALL THROUGH HOLE parts make this kit very easy to assemble. It will make a fine, fully functional, and educational first rig for a new builder, the new ham, or seasoned veterans wishing to just have fun with a new rig at minimal expense and effort. Note that Novices and Technicians have 80M CW privileges from 3.525 to 3.600, same as everyone else – so they also can build and use the Cricket.

This simple rig is fun and functional, and made many contacts at OzarkCon after the build session. A proven design and a great choice for your next rig, it is perfect for a group build with nets and contacts after the build. This is an excellent club project.

Spread the radio love