Shortwave listening and everything radio including reviews, broadcasting, ham radio, field operation, DXing, maker kits, travel, emergency gear, events, and more
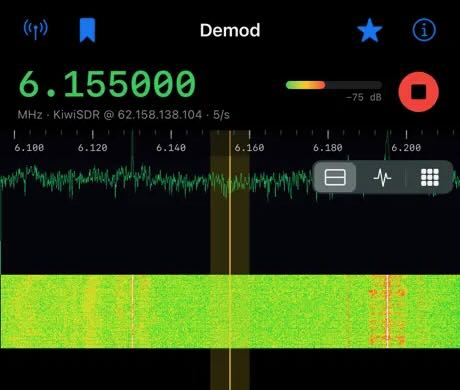
Many thanks to SWLing Post contributor Alphonse, who is an SWL and independent app developer, who recently reached out to introduce Demod, a new iOS/iPadOS receiver app designed for exploring shortwave and other radio signals via remote receivers.
Demod connects to KiwiSDR, SpyServer, and rtl_tcp servers, and includes a built-in directory of public receivers, so you can start exploring even if you don’t have any radio hardware of your own. One particularly intriguing feature is its Identify function, which uses the HFCC broadcast schedule, your receiver’s location, and the current UTC time to help identify the station you’re hearing, including its language and approximate transmitter distance. The app can also perform on-device live transcription and translation of received audio.
Alphonse says the app collects no data and contains no ads or tracking. The current release is version 1.3, and he has put together a short 90-second demonstration for anyone interested in seeing it in action:
I haven’t had a chance to try Demod myself yet, so consider this an announcement rather than a review—but it certainly looks like an intriguing tool for SWLs, particularly those who enjoy exploring remote receivers. I do plan to take it for a spin soon!
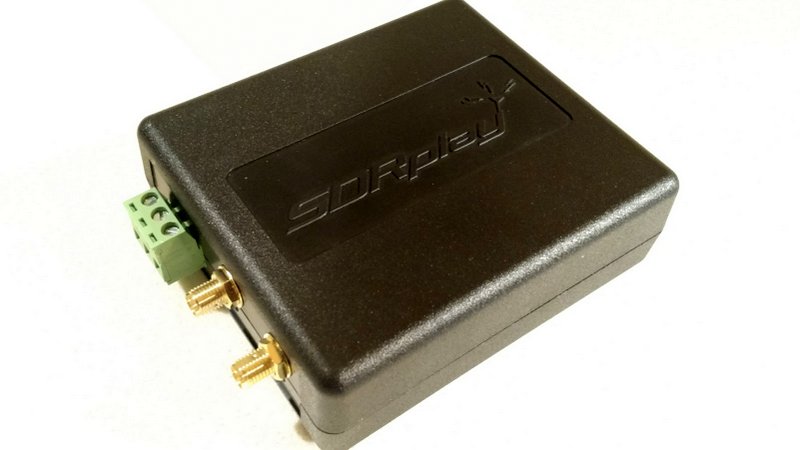
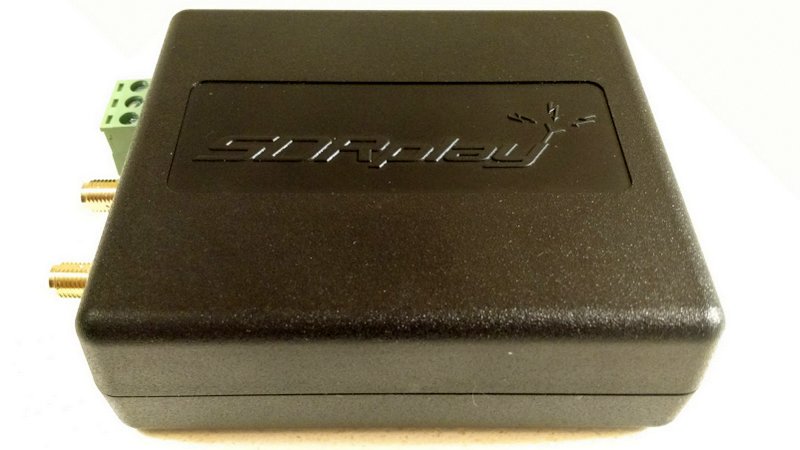
This morning, SDRplay Limited announced the release––and availability––of their second generation software defined radio, the RSP2.
Regular SWLing Post readers will note that I’m a pretty big fan of SDRplay’s first SDR, the RSP, or “RSP1,” as I’ll now call it (I published a review of the RSP1 in July 2015). To me, the $129 RSP1 has been the best wideband receiver you can buy under $200 US. Its HF performance, in particular, is sincerely impressive at this price point.
Introducing the RSP2
So what’s the RSP2, and how does it differ from the original RSP?
In a nutshell, here’s how SDRplay describes the difference between the two:
“The RSP2 delivers a significant number of additional features which result in a higher spec for specialist amateur radio users as well as benefits for additional scientific, educational and industrial SDR applications.”
In a sense, the RSP2 gives the enthusiast and experimenter access to more receiver parameters and control, opening it to a wider array of possible applications. The RSP2 will also cover a broader range, from as low as 1 kHz to as high as to 2 GHz, and is designed with better selectivity across the spectrum. Enhanced selectivity will certainly benefit amateur radio operators and SWL DXers who might seek weak signals in crowded portions of the band.
The following list outlines the primary additional features of the RSP2 (via SDRplay’s press release):
10 built-in, front-end pre-selection filters, with substantially enhanced selectivity
Frequency coverage extended down to 1 KHz
Software selectable variable gain Low Noise Preamplifier
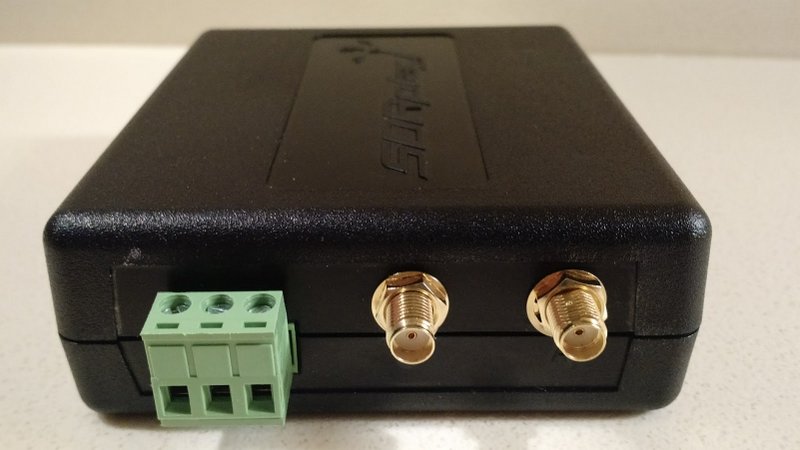
2 x SMA Software Selectable 50? RF ports (1.5 MHz – 2 GHz)
1 x High Impedance RF port (1 kHz – 30 MHz)
Built-in software selectable MW /FM notch filters
Highly stable 0.5PPM TCXO trimmable to 0.01PPM
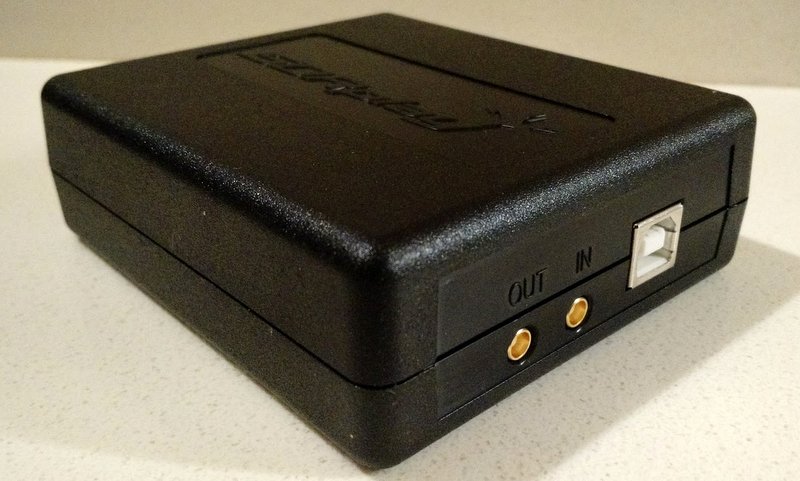
24MHz Reference clock input / output connections
4.7V Bias-T option (on one of the software selectable antenna inputs)
RF screening within a strong plastic case for the standard RSP2
A Rugged metal box version – the ‘RSP2pro’
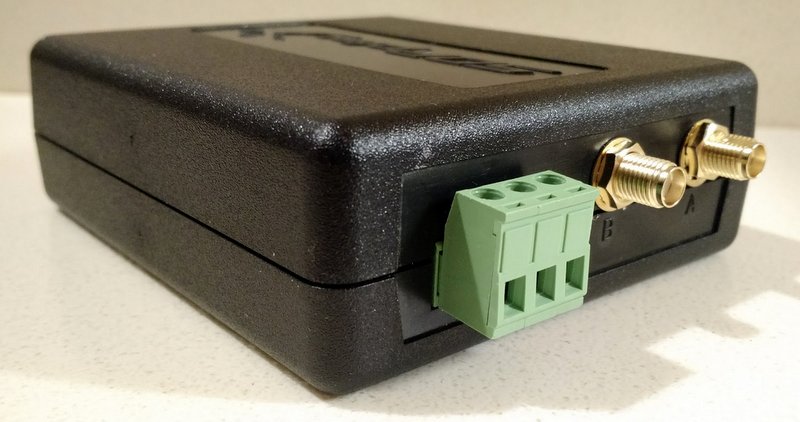
The RSP2 has a total of three antenna ports: two SMA and one Hi Z for optimal LW/MW/SW performance
For the moment, the RSP2 only works with SDRplay’s own application, SDRuno. But SDRplay is already working with developers to make the RSP2 compatible with HDSDR, Gnu Radio, CubicSDR, and SDR Console. I appreciate that although the RSP series has an excellent free proprietary application (SDRuno), it was nonetheless developed with many open-source applications, also free, as well. This level of compatibility and support makes SDRplay rather unique among SDR manufacturers.
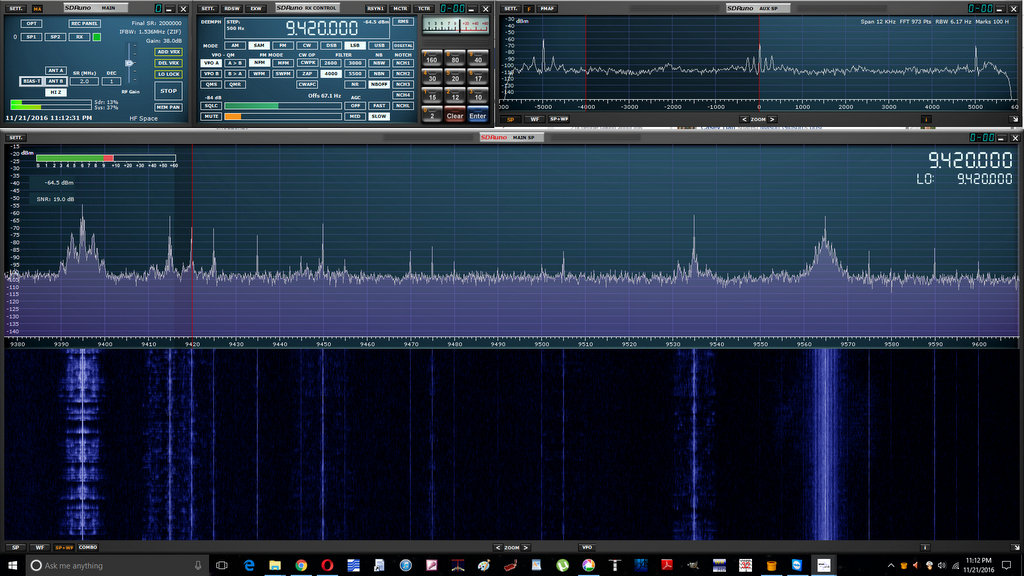
SDRuno running the RSP2 (click to enlarge).
Of course, SDRuno is a great application in its own right, and pairing it with the RSP2 will provide you with out-of-the-box calibrated RF and S meters. So far I’m very pleased with native SDRuno features like virtual receivers, embedded time code, spectrum display options, and streamlined design.
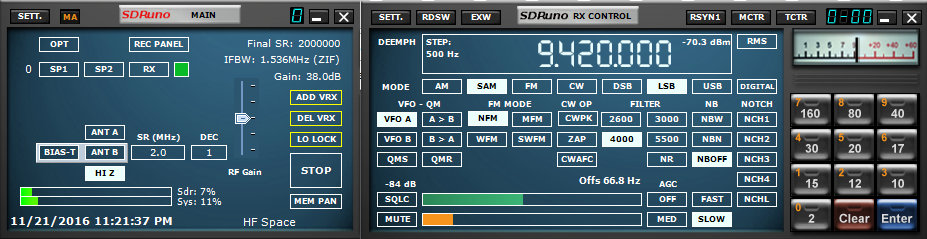
Current SDRuno users will note the different antenna and filter options with the RSP2 which works natively with the latest versions of SDRuno (click to enlarge).
SDRuno installs very easily and provides a plug-and-play experience. It does have a modest learning curve, but SDRplay has an excellent owner’s manual and “cookbook” available to help you set everything up the first time.
Preliminary impressions of the RSP2
SDRplay sent me a pre-release RSP2 (the base model, not the metal box “Pro” version) to evaluate and provide the company with feedback.
I installed SDRuno and put it on the air only this past week. In truth, as I’ve been traveling and must be on the road again this coming week, I prefer not to comment, at least in depth, on the SDRplay’s performance as I’ve had comparatively little dedicated time with the unit.
Yet I have had the RSP2 on the air a few hours of casual listening, and find that it performs as I would expect: low noise characteristics and sensitivity that seems to be at least as good as the RSP1, if not a bit better. I’m looking forward to a side-by-side with the RSP1 running an install of SDRuno on my laptop!
I must say that I’m very pleased with the RSP2’s Mediumwave/FM notch filter. It happens that a local daytime 45kW AM broadcaster in our area is having transmitter issues which send wideband spurs across the entire HF spectrum; but at night, when the station lowers its power levels, the RSP2’s MW notch filter effectively mitigates the noisy signal. I imagine this filter will be a welcome addition for listeners living in RF-dense environments.
When the RSP1 was first introduced, it retailed for $149. As the economies of scale worked in their favor, SDRplay lowered the price to $129. The new RSP2, meanwhile, is expected to retail at approximately £130 (excluding taxes), or $169 US (excluding taxes). Quite a value, in my opinion: at $169, you’re getting a lot of SDR for the price––and an effective SDR application, to boot.
But if you already own an RSP1, I wouldn’t necessarily rush out and grab the RSP2 just yet. Of course, if you like the added features mentioned above, or if you’d like an inexpensive SDR with no less than three switchable antenna ports and a MW/FM notch filter, $169 is a bargain and about the same level of investment as a good modern shortwave portable.
As for myself, I’m happy to see a mom-and-pop community-supported company like SDRplay continuing to innovate for our hobby. I’m pleased to support them, and am truly appreciative that they also support our SWLing Post. This is a win-win, in my view; I’d be pleased to support more such companies.
Again, check back here as I plan to compare the RSP2 with the RSP1 and several of my other SDRs.
I plan to take the RSP2 with me on my travels this week. Time permitting, I might even pair it with my recently acquired PK magnetic loop antenna for some spectrum gathering and testing.
In the coming weeks, as my schedule permits, I’ll post updates here on the SWLing Post, including audio comparisons with some of my SDRs. If interested, bookmark the tag RSP2.
For more information about RSP2 pricing and availability, check out SDRplay.com.
Many thanks to SWLing Post contributor, Mike Ladd, for the following guest post and overview of setting up and using the Soft66RTL3 SDR:
Soft66RTL3 SDR: A low cost…Good performer direct from Japan
by Mike Ladd
Much has changed in the last 8 years in the world of SDR radios. Fast forward to 2016 and just about everyone in the hobby has heard the buzz word “SDR radio”. When SDRs first came out to the market they were all aimed at HF listening and you had two types to pick from. The first being soundcard based and the second being direct sampling. The price gap between the two were several hundred dollars. The more expensive being direct sampling. As the hobby progressed, so did the technology and the prices started to shift dramatically.
You can now purchase a TV dongle for $10.00 and turn it into a SDR. The Soft66RTL3 is basically a TV dongle but with a lot more features.
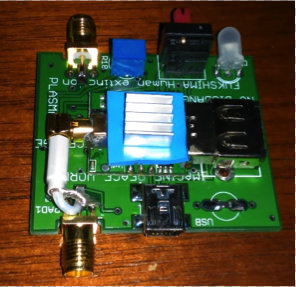
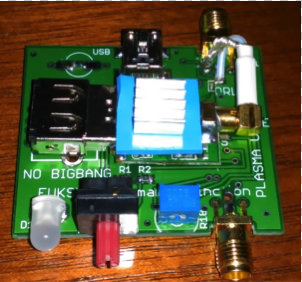
The Soft66RTL3 comes from an engineer who is no stranger to the world of SDRS. Kazunori Miura (JA7TDO) has been designing and selling many models of SDRS over the internet and shipping them direct from Japan for about 7 years. The Soft66RTL3 is his latest of model hot off his bench. This SDR is a dual input RTL-SDR with a built in 50 MHz upconverter along with 4 user selectable band pass filters that greatly increase your signal to noise ratio in the HF bands.
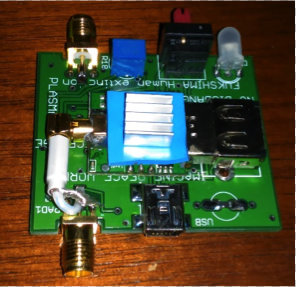
The frequency range of the RTL3 is from DC to Daylight (0.4 kHz to 1.7 GHz). Miura also addressed a heat issue with the previous version (RTL2) by adding a thermal pad and heatsink. RTL dongles are notoriously unstable due to overheating. In theory, the thermal pad should add frequency stability and keep drift to a minimal.
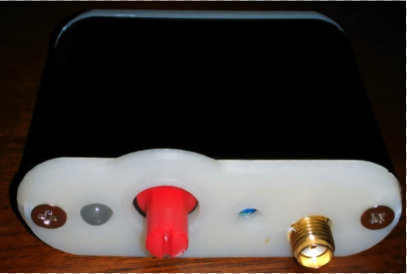
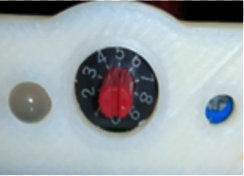
The last feature of the RTL3 is the input gain trimmer pot (see image above). The trimmer pot is for the HF side of the SDR and is already set before it’s shipped from Japan. If you would like to reduce or increase it the trimmer pot is easily accessible. I would suggest leaving it as is.
The RTL3 is broken down into two sections: the HF input side and the VHF/UHF input side.
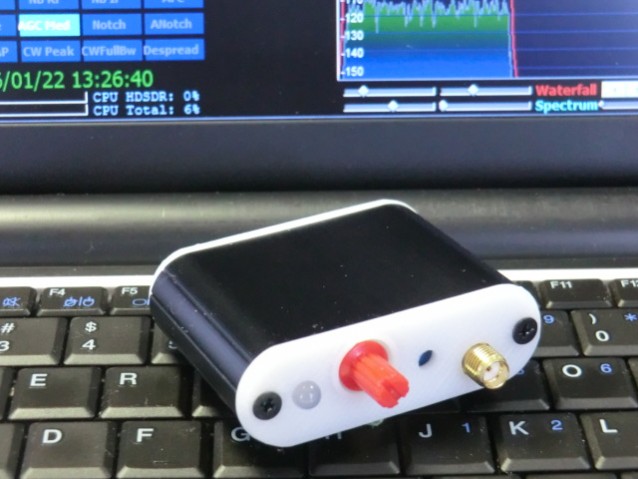
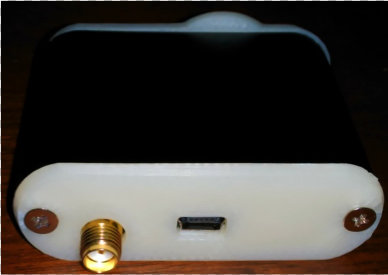
The HF side of the SDR (above) has a red rotary encoder and trimmer pot port. The VHF/UHF side (below) has the USB Mini-B connection.
Both sides of the RTL3 terminate to a SMA-Male connection and Power comes from a single USB Mini-B cable.
Band pass filter selection
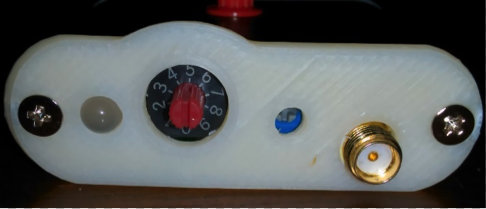
If you look at the rotary encoder (red cap cover) you will see a small notch window. The 12 o’clock position is #5 on the encoder dial. One click clockwise will take you to switch position #6 and one click counterclockwise will take you to #4. You should pull the red cap cover off to have a look and get your bearings.
The band pass filter selection is as follows:
#4 enables BPF 0.4 to 1.2MHz
#5 enables BPF 1.2MHz to 5MHz
#6 enables BPF 5MHz to 15MHz
#7 enables BPF 15MHz to 30MHz
#8 or #9 enables the VHF UHF side of the SDR
All other positions will bypass the filtering section on the HF side of the SDR.
Installation
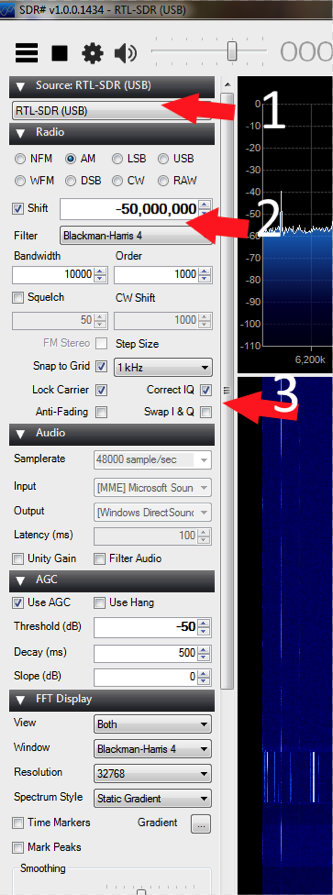
If you already have a RTL-SDR on your system then all you need to do is swap it out with the RTL3 and change the offset of -50,000,000 in HDSDR or SDR# to listen to the HF side of the RTL3–but if this is your first SDR we will need to install 2 items: the front end app and the driver.
I will assume your system is Win-7 or better and we will be using SDR# as our program of choice to drive the RTL3. The RTL3 runs just fine in HDSDR and SDR-Console, but by choosing SDR# it will reduce our setup time considerably.
Plug in the RTL3
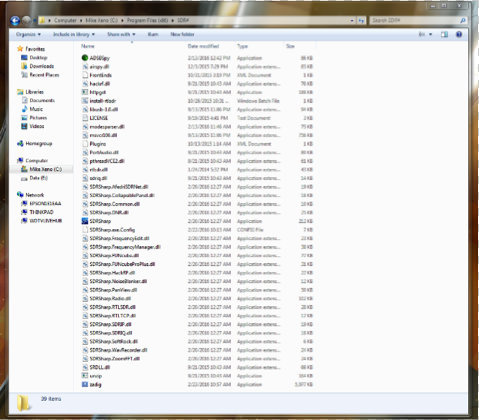
Make a folder on your desktop and name it SDR#
Download the latest version SDR# from www.airspy.com and copy the contents of the zip file to your newly created SDR# folder
Inside of your SDR# folder, double click on install-rtlsdr
After the batch completes, double click on the “zadig.exe” inside your SDR# folder
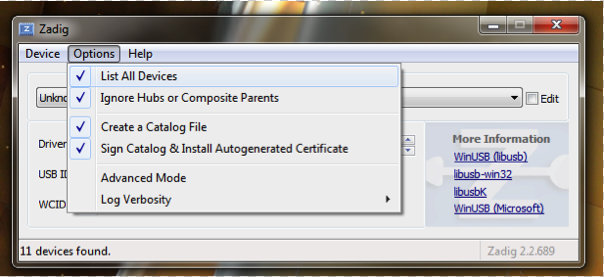
When you run the “zadig.exe” make sure you select “list all devices” as shown above.
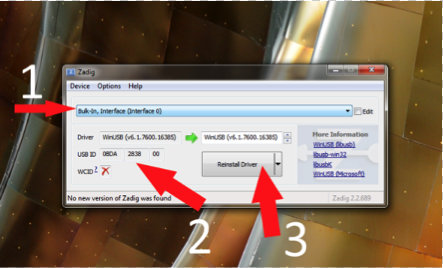
The next 3 steps are:
Select “Bulk-In Interface” (Interface 0)
Make sure the proper USB device is selected (2838)
Click “install driver”
The RTL3 is now ready to be used and no further setup is required.
I will assume you did not have any issues setting up the ZADIG driver and now move on to using the RTL3 inside of SDR#. I will show you real world conditions that are not from any scientific standpoint.
Antenna wise, for the HF side I will be using a G5RV mini and for the VHF/UHF side I will be using a Scanntenna ST-2.
You can now launch SDR# and check the following settings (see image below).
For the VHF/UHF side of the RTL3 you will want the rotary encoder on position #9. You want the cutout in the encoder cap showing the 5 o’clock position.
Summary
I have been using this SDR for a little over 3 months. Out of all the low cost SDR’S on the market, this one gives you the most bang-for-your-buck and it is a great entry level SDR with some “Pro” features.
Pros:
Low Price
HF VHF/UHF in one package
Works with any app that supports the RTL-SDR front end
Mike, thank you so much for this excellent overview of the Soft66RTL3! I’m especially appreciative of the time you’ve taken to explain the installation process–for many, this is one of the more difficult RTL-SDR learning curves.
I’m very tempted to check this out for myself–I love the fact that this little SDR has bandpass filters.
Post Readers: I suspect Mike will monitor the comments in this post, so feel free to ask questions. Make sure to check out Mike’s website, where you’ll find more articles about software defined radios.
Note that I’m not speaking strictly of the HF spectrum here. But mark this: a radio revolution is, right now, in the making. ARS Technica just last week published an article entitled, “How software-defined radio could revolutionize wireless” in which the authors argue that software defined radios (SDRs) might not only open the door to new uses for our radio spectrum–uses we can’t currently fathom!–but also open the door to unlimited free innovation. Innovation in the form of experimental hacking, much of which could simply fall below or outside of the FCC and other spectrum governing bodies, could become the province of literally anyone who wants to give it a go.
The article takes the reader through the evolution of SDRs and introduces a company manufacturing a product that could be to the radio spectrum and wireless communications what Apple became to personal computing.
I typically quote my favorite parts of an article, but this one is so very well-written and comprehensive, you really will want to read it in its entirety. Click here to read, “How software-defined radio could revolutionize wireless“–and let your imagination take flight.
I just received an update from WoodBoxRadio stating that the new ELAD FDM-S1 software defined radio will begin shipping Monday, March 26, 2012 to those who have pre-ordered the unit.
WoodBoxRadio also noted that the FDM-S1 is still available at a “special” price of 399 Euro. This pricing is only valid until March 31, 2012, at which time, I assume, the price will increase.
If you have purchased the ELAD FDM-S1, we would love your thoughts on this receiver. Please comment!
According to WoodBoxRadio, the ELAD FDM-S1 software-defined radio will be shipping this month (March 2012). This is an intriguing SDR and boasts some pretty impressive features–download their spec sheet here. Can’t wait to see how it compares to other popular SDRs.

 Many thanks to SWLing Post contributor Alphonse, who is an SWL and independent app developer, who recently reached out to introduce Demod, a new iOS/iPadOS receiver app designed for exploring shortwave and other radio signals via remote receivers.