
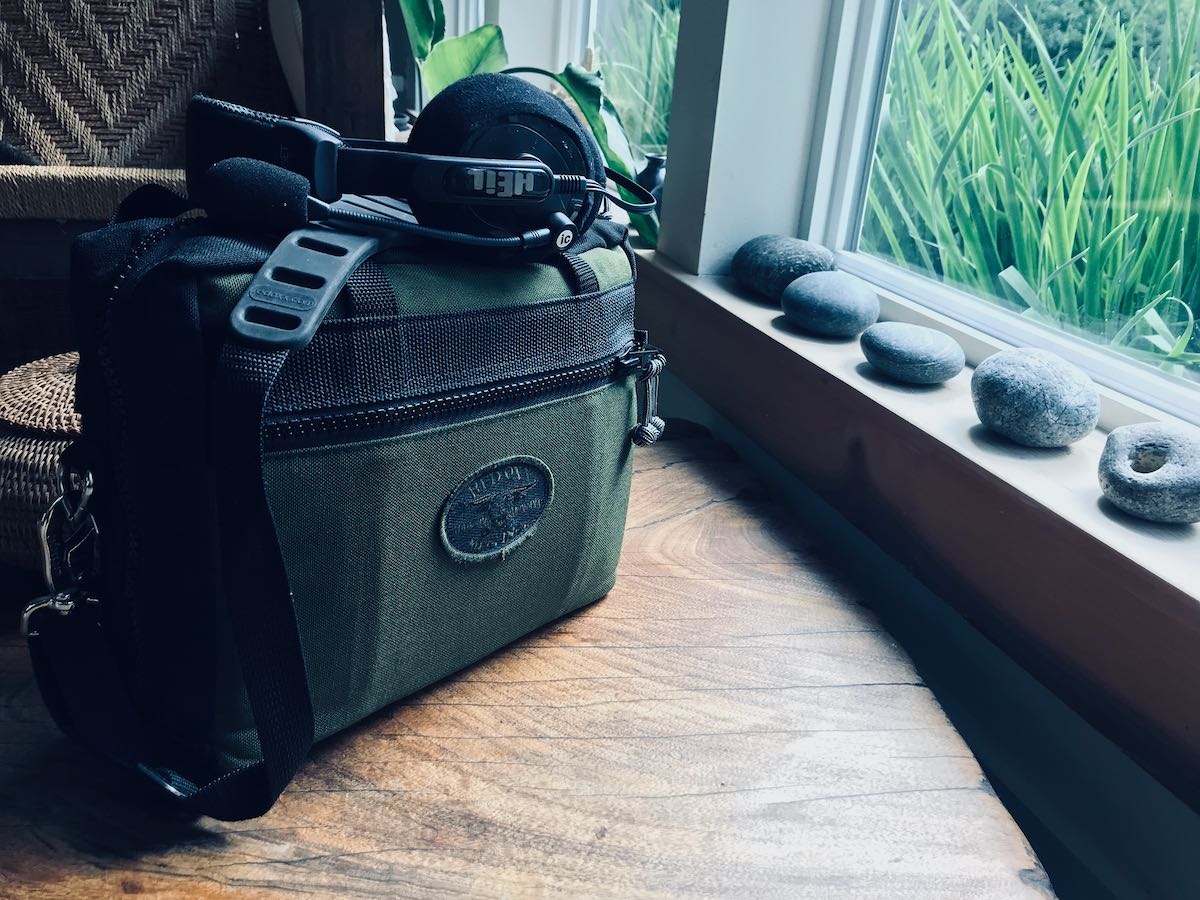
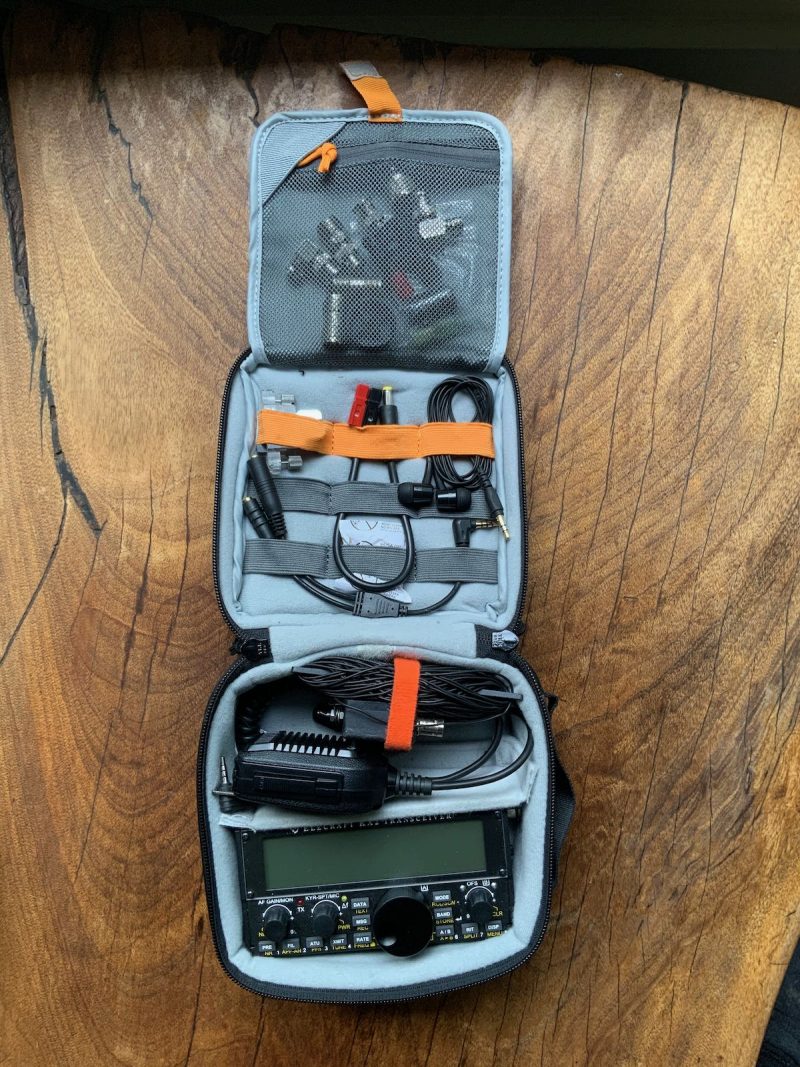
My Red Oxx Micro Manager packed with a full radio field kit
Yesterday, my family packed a picnic lunch and took a drive through Madison County, North Carolina. It was an impromptu trip. Weather was forecast to be pretty miserable that afternoon, but we took the risk because we all wanted to get out of the house for a bit.
Although that morning I had no intention of performing a Parks On The Air (POTA) activation, my family was supportive of fitting in a little radio-activity, so I jumped on the opportunity!
A quick glance at the POTA map and I determined that the Sandy Mush State Game Land (K-6949) was on our travel route. Better yet, the timing worked out to be ideal for a lunch picnic and before most of the rain would move into the area.
Ready for radio adventure
I had no time to prepare, but that didn’t matter because I always have a radio kit packed, fully-charged, and ready for the field.
My Red Oxx Micro Manager EDC pack (mine is an early version without pleated side pockets) holds an Elecraft KX2 field and antenna kit with room to spare (see photo at top of page).
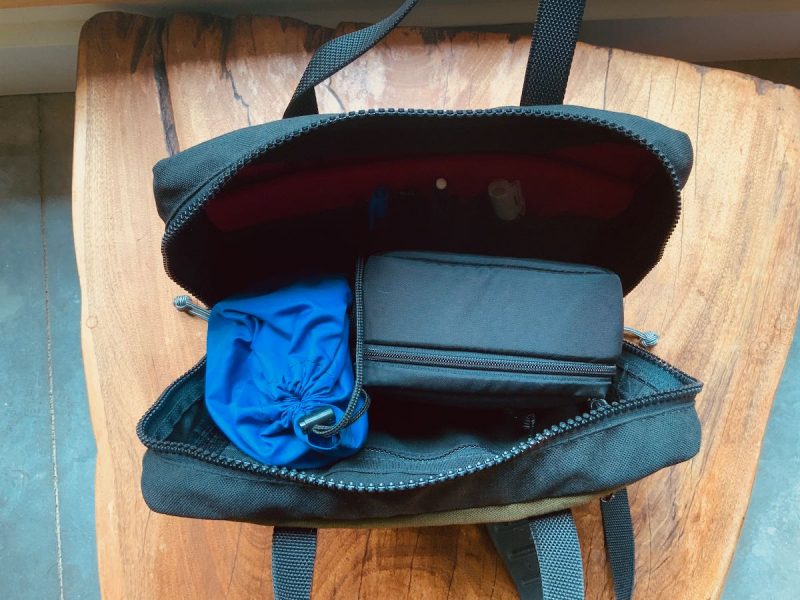
The Micro Manager pack easily accommodates the entire kit
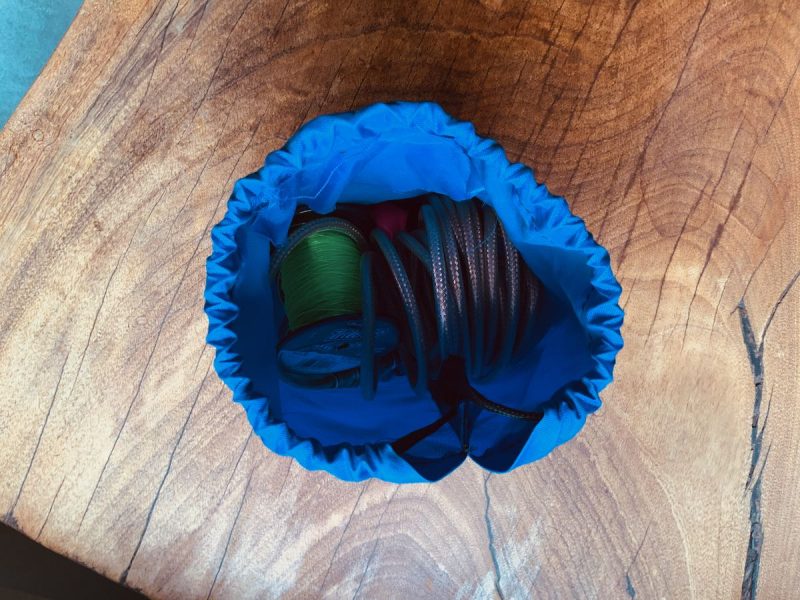
This 20 year old blue stuff sack is dedicated to antenna-hanging. It holds a reel of fishing line and a weight that I use to hang my end-fed antenna in a tree or on my Jackite telescoping fiberglass pole. The sack also accommodates a 10′ coax cable.
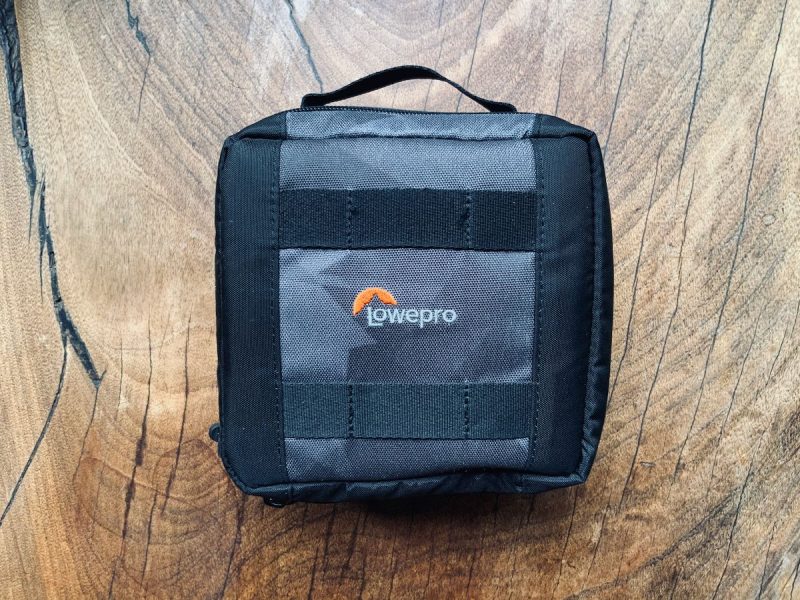
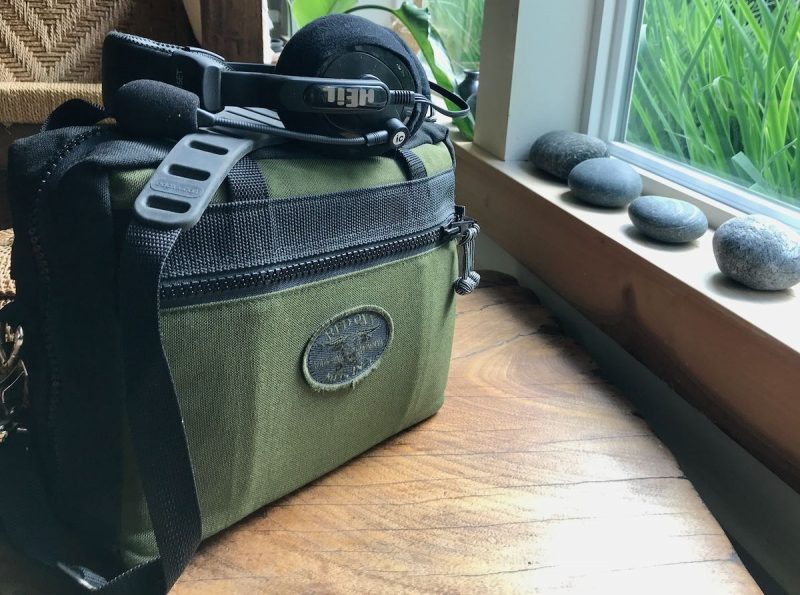
The Elecraft KX2 transceiver, EFT Trail-Friendly Antenna, hand mic, CW paddles, C.Crane earphones, and wide variety of connectors and cables all fit in this padded Lowe Pro pack:
 The advantage to having a simple, organized radio kit at the ready is that everything inside has its own dedicated space, so there’s no digging or hunting for items when I’m ready to set up and get on the air.
This level of organization also makes it easy to visually inspect the kit–missing items stand out.
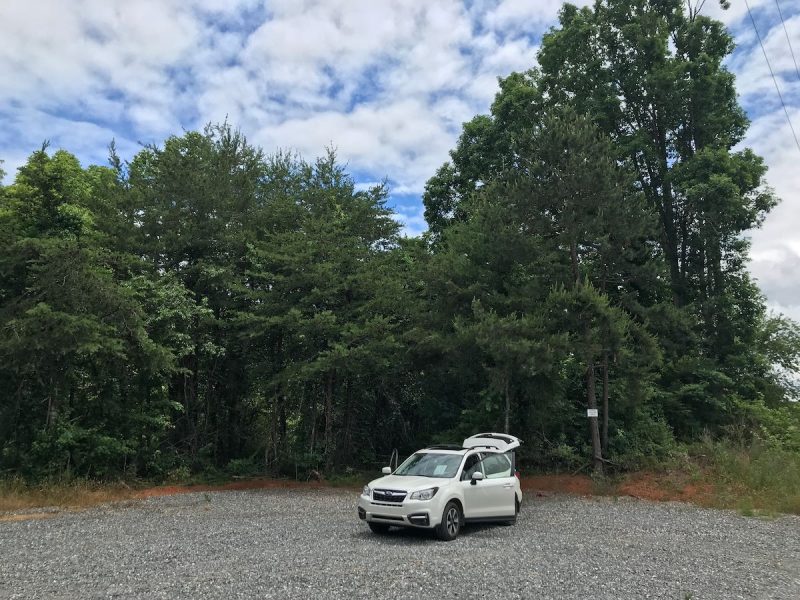
Yesterday I parked our car at one of the Sandy Mush Game Land parking areas, deployed my field antenna, and was on the air in a matter of seven minutes at the most.
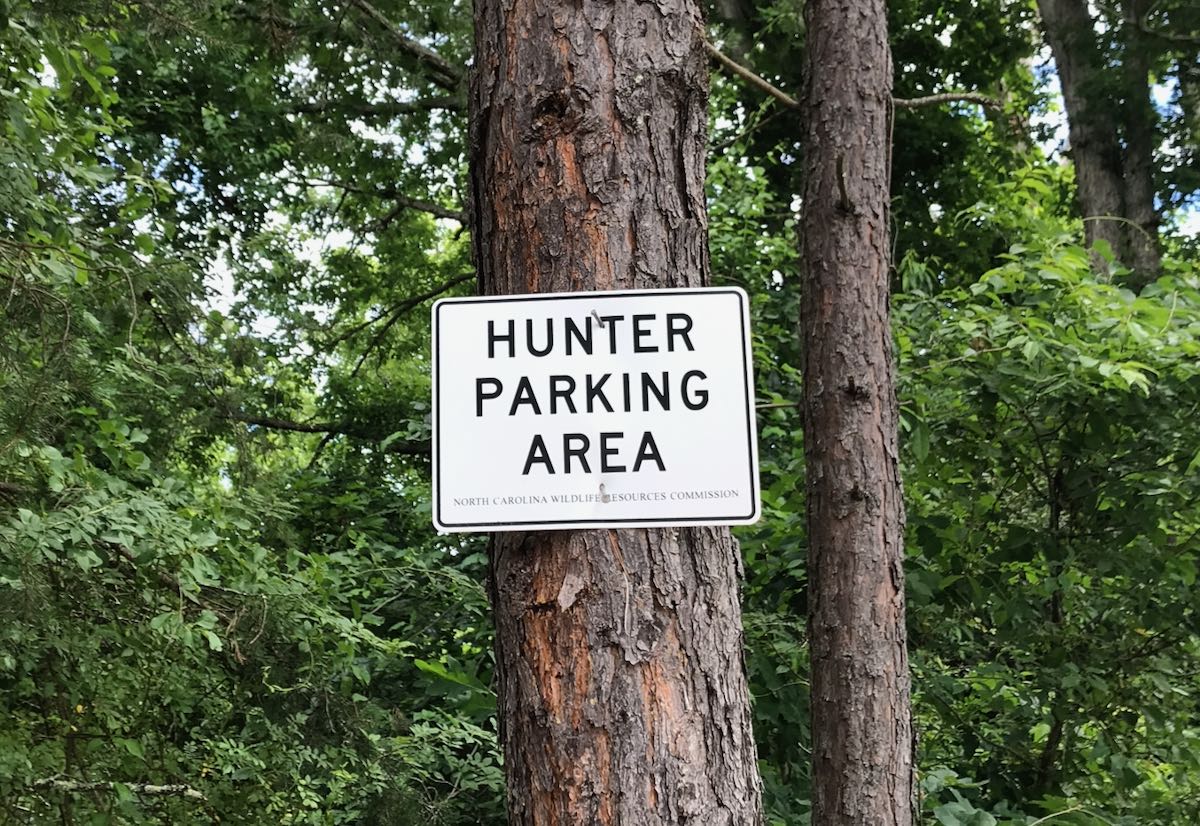
Technically, this should read “Activator” parking area! (A questionable inside joke for POTA folks!)
We planned for heavy rain showers, so I fed the antenna line through the back of my car so that I could operate from the passenger seat up front.
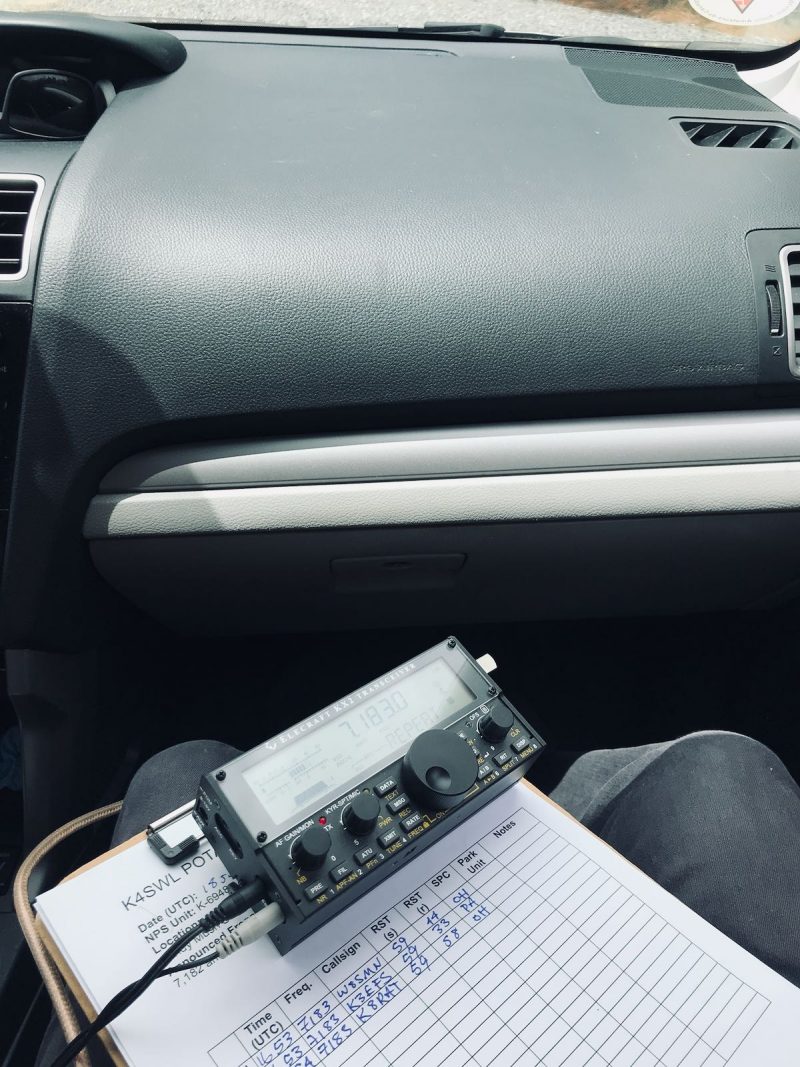
I also brought my Heil Proset – K2 Boom Headset which not only produces better transmitted audio than the KX2 hand mic, but it frees up my hands to log stations with ease. This is especially important when operating in the front seat of a car!
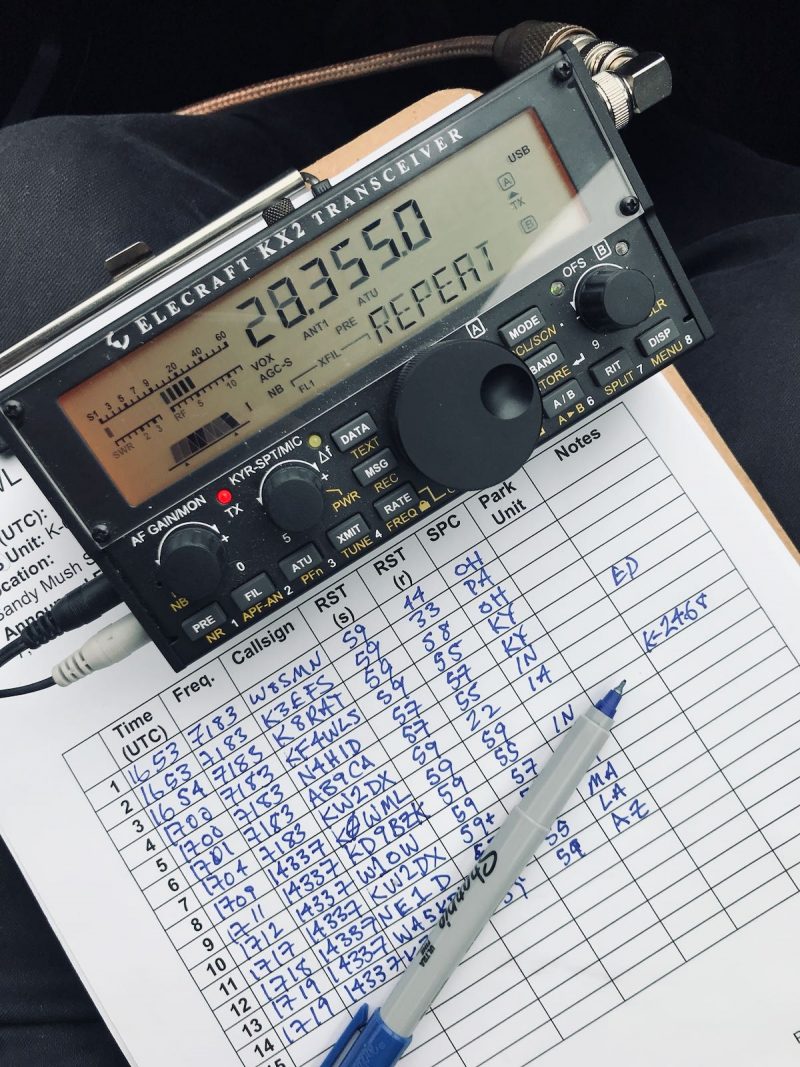
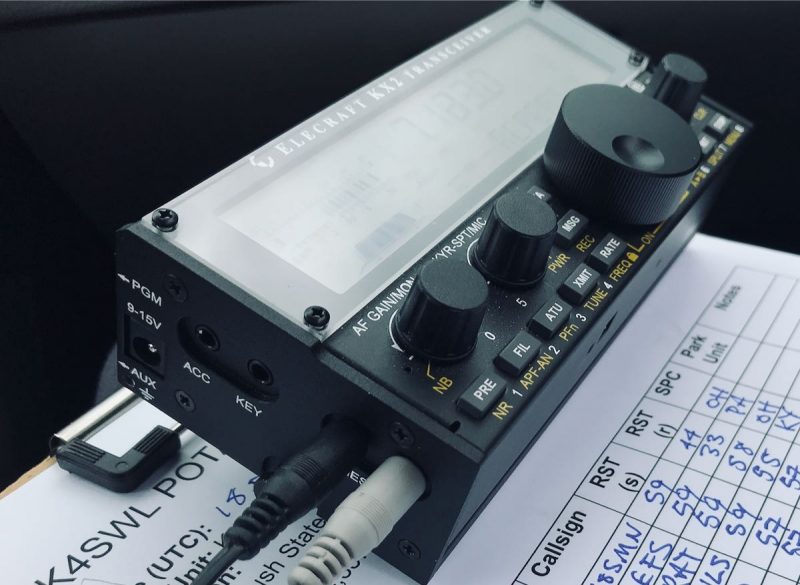
The great thing about the KX2 is that it’s so compact, it can sit on my clipboard as I operate the radio (although typically I have an elastic strap securing it better). Since all of the KX2 controls are top-mounted, it makes operation a breeze even in winter weather while wearing gloves.
Since I routinely use the KX2 for shortwave radio broadcast listening as well, I know I always have a radio “locked and loaded” and ready to hit the air. My 40/20/10 meter band end-fed antenna works well for the broadcast bands, as long as there is no strong local radio interference (RFI). When I’m faced with noisy conditions, I pack a mag loop antenna as well.
What’s in your radio go-kit?
Having a radio kit stocked and ready to go on a moment’s notice gives me a great sense of security, and not just for recreational ham and shortwave radio listening reasons.
Sometimes I travel in remote areas by car where I’m more than an hour away from the nearest town and where there is no mobile phone coverage.
If my car breaks down, I know I can always deploy my radio kit and get help from the ham radio community in a pinch. Herein lies the power of HF radio!
If you haven’t built a radio go-kit, I’d highly recommend doing so. Although I’m a bit of a pack geek, keep in mind that you don’t need to purchase special packs or bags for the job. Use what you already have first.
I’m plotting a detailed post about the anatomy of an HF radio field kit. In the meantime, I’m very curious how many of you in the SWLing Post community also have a radio kit at the ready–one based on a transceiver or receiver. Please comment!
Better yet, feel free to send me details and photos about your kit and I’ll share them here on the Post!
Do you enjoy the SWLing Post?
Please consider supporting us via Patreon or our Coffee Fund!
Your support makes articles like this one possible. Thank you!

As for the pole base, if a tripod doesn’t fit, check the surfcasting rods support “stakes” they may fit 😉 they’re like these
https://i.pinimg.com/236x/2d/e4/60/2de46040a0121ffc518dbbae375c56ef–rod-holders-spikes.jpg
and may be made of metal or some type of plastic (metal ones are better, not only they’re much more robust, but they can also be used as ground stakes :D)
Thanks, Andrew!
Hello Thomas,
I received an offer from Tecsun Radios Australia recently, and this is right on topic for those (like me) that have a PL880. It won’t all fit here, but I’ve added a link to the web site.
Protect your investment with this custom built stylish and durable Tecsun PL880 Hard Carry Case
The PL880 Hard Carry Case is custom designed to perfectly fit all your accessories including the Tecsun Li-ion Spare Battery, and battery charger, and an added bonus is supplied with the Tecsun AN-03L 7 metre longwire antenna. The Tecsun PL880 Hard Carry Case close fit moulded case halves ensure resistance to moisture and the inbuilt feet allow the equipment to be stored vertically.The Tecsun PL880 Hard Carry Case is a must have option for travellers, hikers, campers and those who simply want to take care of their Tecsun PL-880. We have a limited amount in stock.
That web link is https://www.tecsunradios.com.au/store/product/tecsun-pl880-hard-carry-case
Thank you, Jerome!
kx2 is great transceiver but disappointing the elecraft couldn’t figure out how to enable adequate AM BCB reception
It would be nice if the AM bandwidth could be widened to at least 8 kHz, but I think it actually sounds pretty good at 5 kHz with the audio fx filter engaged–I also tailor the RX EQ. Have you tried it?
You “bar” your written 7s, but don’t “hook” your 1s.
When did this start (i.e. not taught in US elementary schools)?
So I was born and raised in the US, but I lived in France, Germany and the UK for quite a while. In France, I attended university and got used to putting bars through my 7s and hooking my 1s. I also put bars through my Zs when not in cursive. When I eventually moved back to the States, I had a job that required filling out the odd form. My hooked 1s really irritated those folks who received my forms, so I re-trained my muscle memory. 🙂 Also, when writing strings of numbers, my 9s look more like a small G.
It’s funny you point this out because at the activation yesterday, I was evaluating my hand writing closely and decided that (since I work for myself), I’m going to bring backed the hooked 1. 🙂 It makes it much easier to read callsigns and not confuse a 1 with an L or I. Also, I decided I really need to work on my Us and Vs. I’ve always use zeros with a strike through them in callsigns.
I’ve been toying with putting together a radio “go bag” for a while now, and you’ve convinced me now might be the time. I have a couple old camera bags up on the shelf just collecting dust. I think they’d be about perfect…
Camera bags are nearly ideal as radio go-bags. They’re typically well-padded, durable and designed to be lugged around over the shoulder or as a backpack! In fact, the Lowe Pro pack used for my KX2 is actually a GoPro camera bag. Fits it like a glove and protects it very well.
Here’s a tip for a possible addition to your “go DX” bag, add it an elastic baggage cord like this one (just an example to show the thing I’m referring to)
https://images-na.ssl-images-amazon.com/images/I/41FN3DYXpOL._AC_.jpg
and possibly also add two thin tent stakes , either the “nail” shaped ones like this
https://www.rei.com/media/84e0057e-53db-483d-915c-41e670a3da32
or the plastic “screw” ones (lighter to carry but not so robust)
https://www.asmc.com/media/image/cf/26/33/33847-0.jpg
you may wonder how to use this stuff, well… let’s suppose you carry a telescopic walking stick with you (the ones used for hiking/trekking/nordic-walking), now… once you reach the place where you decide to deploy your antenna, you throw the fishing line up a tree and pull up your wire antenna, but then you need a second point to hold it, and here’s where the above stuff comes to use, you extend the walking stick to max length and fix the antenna wire to the top of the stick, then you put down the two stakes at some distance to form a triangle, pass the elastic cord through the stakes and lock the hooks to the walking stick, raise the walking stick and you’ll have a support for the antenna
Hope that the setup is clear enough, at first it may take you a bit of time, but once you’ll get accustomed it will take seconds to deploy it and it will give a good support for your antenna, plus, using two elastic cords, two walking poles and four stakes you may even use them to support the antenna at both sides, sure, it won’t be raised high, but if there are no supports around… 🙂
Very good additions, indeed! I have a separate stuff sack with cords, tape, and stakes to use with my Jackit pole. In truth, though, I rarely use it because I simply haven’t invested a little time into designing a collapsible base for the pole. When I do field activations, I like using as few parts and components as possible so there’s less to manage and quicker to deploy. I’m plotting a drive-on base for the pole and then some sort of tripod when I’m not near the car.
Thanks, Andrew!