Shortwave listening and everything radio including reviews, broadcasting, ham radio, field operation, DXing, maker kits, travel, emergency gear, events, and more
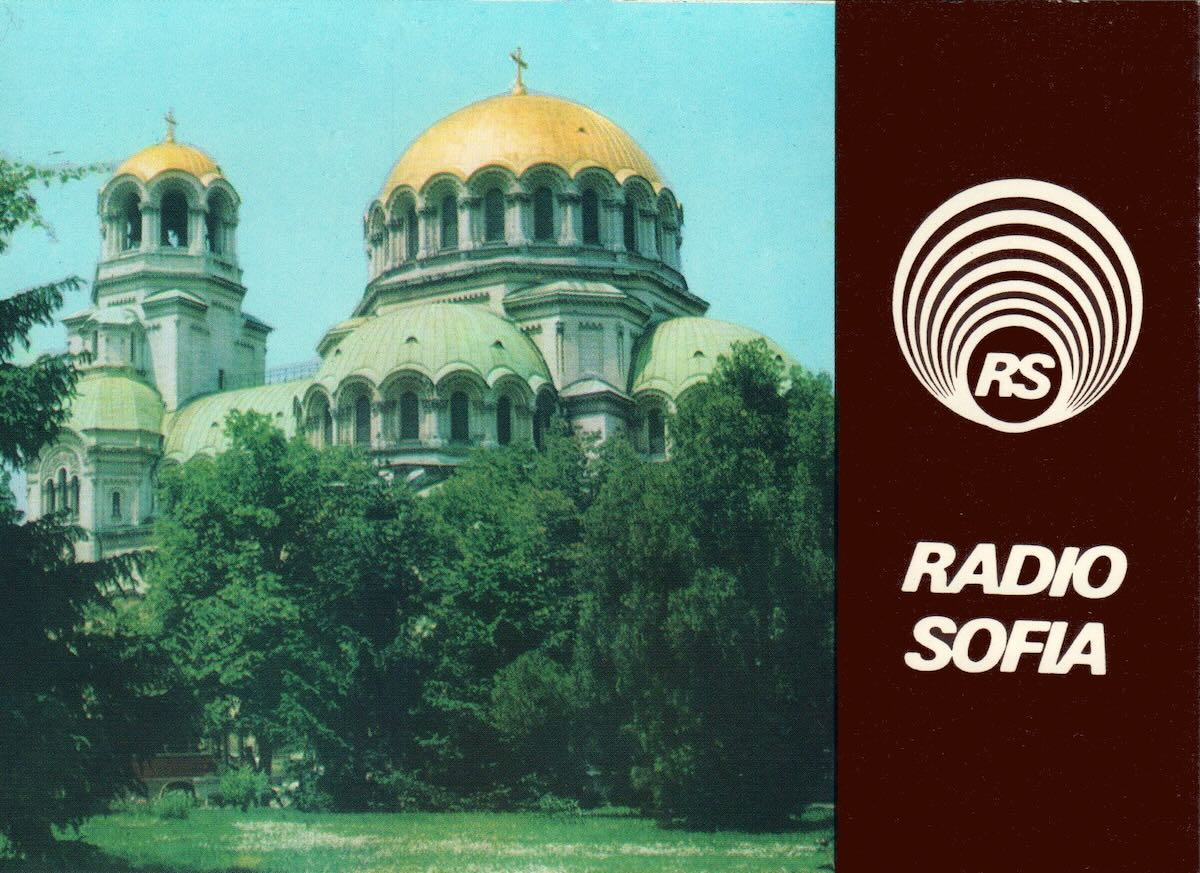
Many thanks to SWLing Post contributor Paul Jamet, who shares the following update and QSL card images related to Bulgarian National Radio (BNR) and Radio Bulgaria.
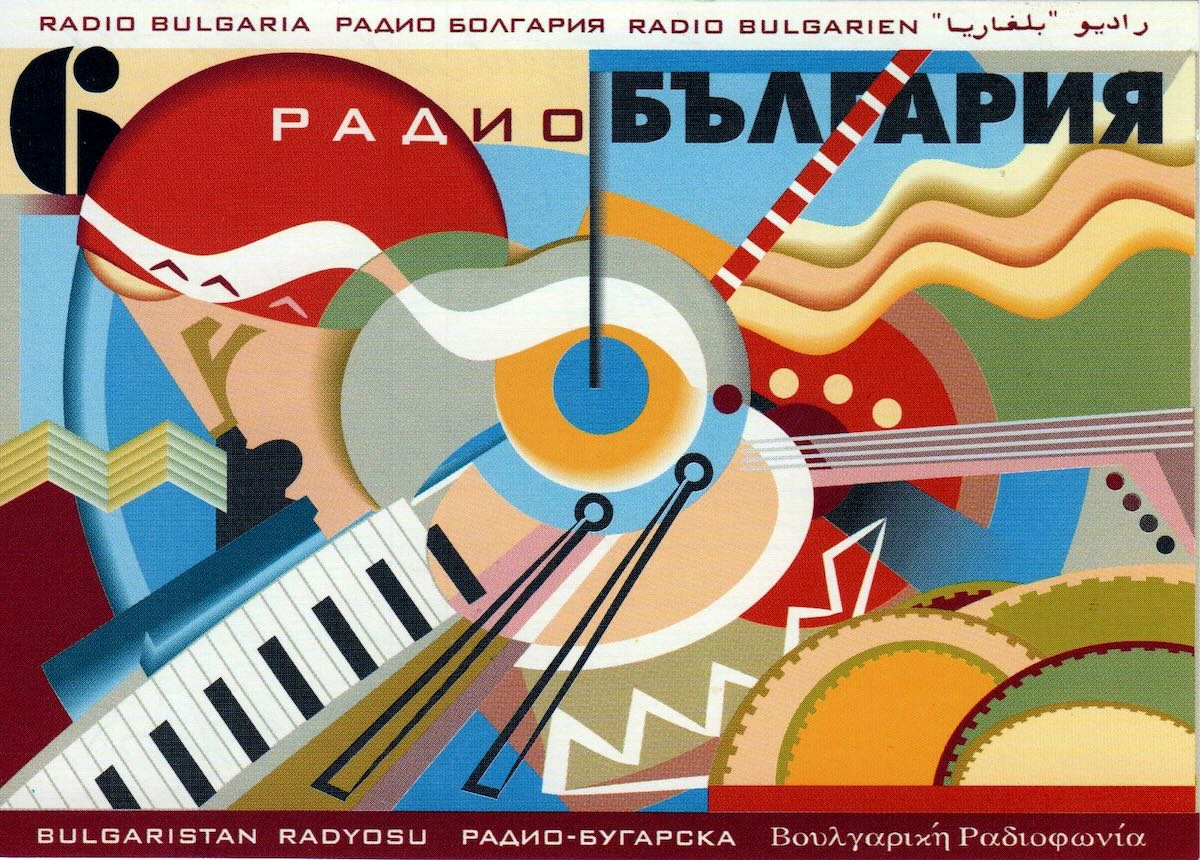
As Radio Bulgaria looks ahead to its 90th anniversary in 2026, Bulgarian National Radio has announced a new commemorative QSL card series for listeners who submit reception reports. The series will include 12 different QSL cards, each highlighting a key moment from the history of BNR and the Radio Bulgaria service. According to BNR, a new card will be released each month, along with a short publication explaining the historical background behind the featured image.
Paul also points to a broader retrospective titled “BNR at 90 – A Story of Pride and No Prejudice,” which looks back on nine decades of Bulgarian National Radio. The piece reflects on BNR’s history through periods of political change and technological transition, while underscoring the role of public broadcasting in preserving culture and maintaining a connection with international audiences.
Attached at the top and bottom of this post are two QSL cards from Paul’s own collection.
Many thanks again to Paul for sharing both the news and the QSL images!
Many thanks to SWLing Post contributor Dan Greenall, who writes:
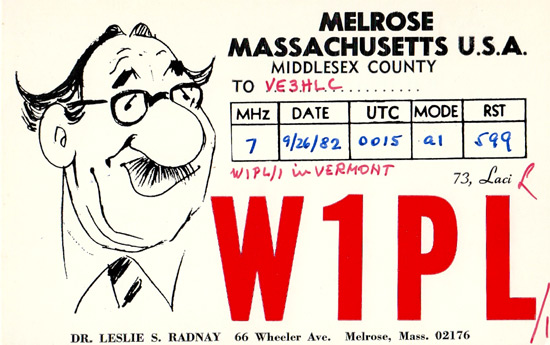
I know many of your readers are amateur radio operators and have a passion for all things radio. A couple of years ago, I was sorting through some of my old ham QSL’s and this one from W1PL caught my eye. A quick internet check confirmed he was indeed a silent key, however, I also uncovered his incredible story which I thought I would share here. Truly a remarkable individual.
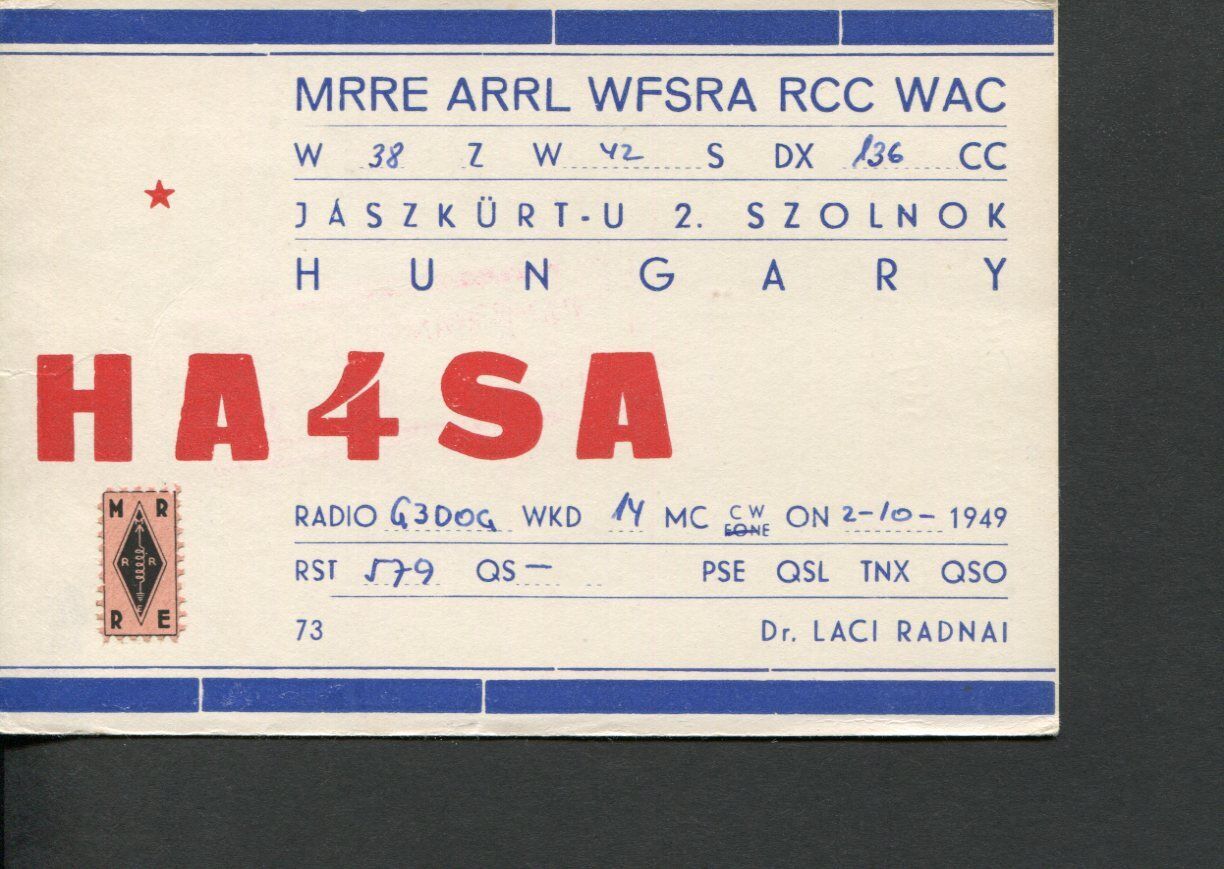
Dr. Leslie (Laci) Radnay, W1PL
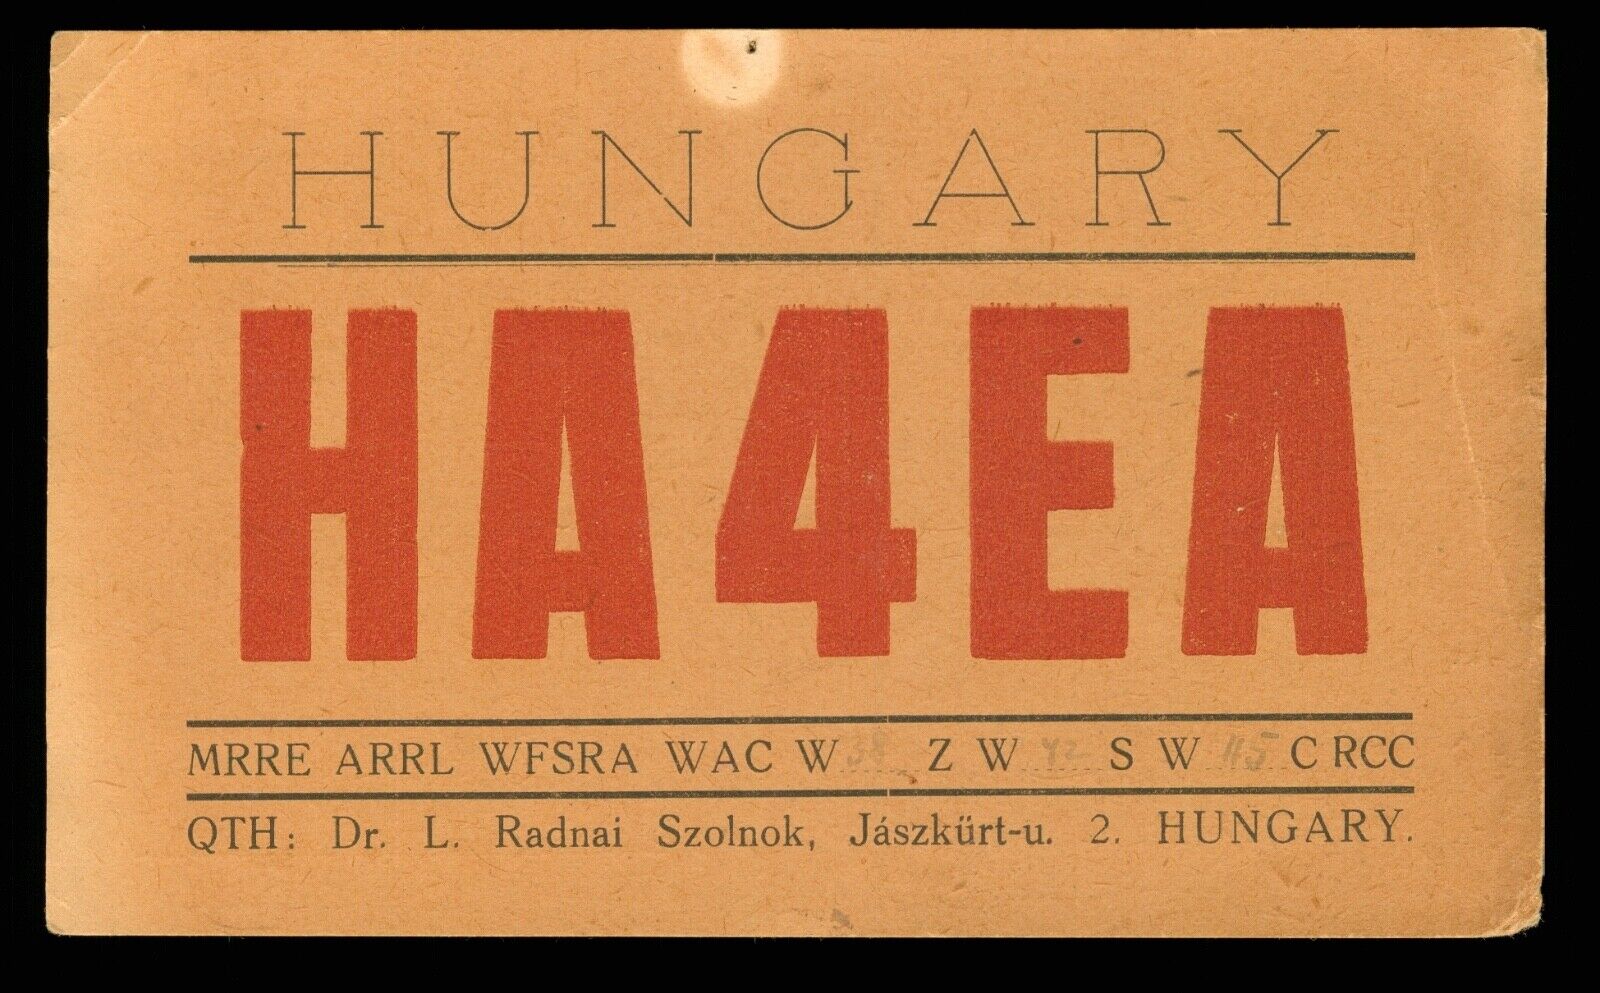
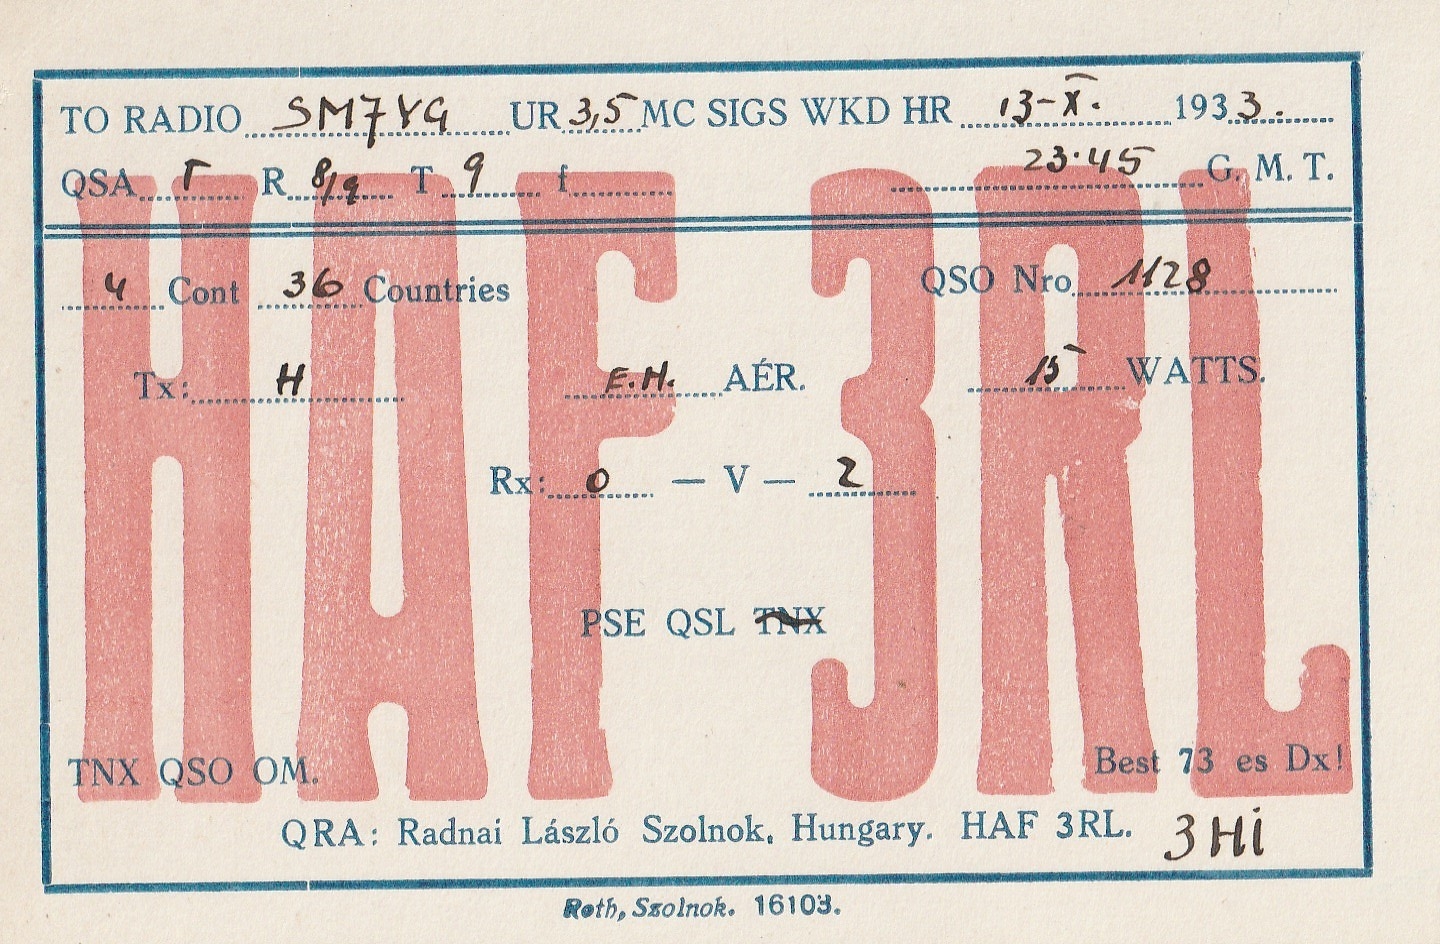
Dr. Leslie (Laci) Radnay, W1PL (1912-2008), is a story of how perseverance, determination, and the love of radio got him through the most challenging of circumstances imaginable, time and time again. In fact, it is truly the stuff that Hollywood movies are made of.
In spite of all of this, he was never too busy to help others. Certainly someone to look up to and admire for what he was able to accomplish, and I feel privileged to have had even just a brief contest-style QSO with him. He was instrumental in helping to start the Hungarian Radio Amateur Association and got on the air with a self-assigned callsign in 1928.
Attached are images of a number of QSL cards he issued over the years.
Thank you, Dan, for sharing.
Reading through Laci Radnay’s life story, I’m struck not only by the sheer scale of what he endured, but by how completely radio remained a constant thread throughout it all. Time and again, regimes changed, borders closed, equipment was confiscated, and lives were upended—yet radio, and the community surrounding it, always found a way back into his life.
W1PL’s story is a powerful reminder that amateur radio is far more than a technical pursuit; it is a human one. It builds resilience, forges lifelong friendships across borders, and, in Laci’s case, provided continuity, purpose, and connection through some of the darkest chapters of the 20th century.
I’m deeply grateful to Dan for sharing this remarkable story, and honored to help preserve the memory of an operator whose life so beautifully embodied the very best of our radio community. -Thomas
Many thanks to SWLing Post contributor Don Moore–noted author, traveler, and DXer–who shares the following post:
A Beginner’s Guide to ALE: Part One
By Don Moore
Don’s traveling DX stories can be found in his book Tales of a Vagabond DXer[SWLing Post affiliate link].If you’ve already read his book and enjoyed it, do Don a favor and leave a review on Amazon.
To me, part of the excitement of DXing has always been logging new stations. From the very beginning (over fifty years ago), I went after shortwave broadcast (SWBC), medium wave, and voice utility DX. Up until the mid-90s, I usually averaged logging one new SWBC station per week. Today, it’s hard to add more than one or two each year. There are also far fewer voice utility stations on the air today. At least medium wave is still going strong. Several years ago, my quest for logging new stations on the shortwave frequencies got me involved in DXing digital utility stations. I wrote an article here on monitoring DSC stations: https://swling.com/blog/2022/11/guest-post-monitoring-digital-selective-calling-dcs-with-yadd/).
But DSC is just one of several digital modes that I’ve been playing around with. The one that I’ve found most interesting – and the one that has yielded hundreds of new stations in numerous countries – is ALE.
Now, I am not an expert at monitoring ALE. I’m just an advanced beginner. But I think I know enough to help other beginners get started. And if you are an ALE expert reading this, I welcome your additions, corrections, and even criticisms to the comments section. I still have a lot to learn, too.
What is ALE?
Ever since the early days of radio, one of the most important uses of the shortwave spectrum has been two-way communication. It provides a means for an organization’s far-flung offices or bases to communicate without relying on external infrastructure. That remains true even today because satellites can malfunction and evil powers can cut undersea cables.
But shortwave isn’t consistent. The frequencies that work best between any two points will vary by time of day, time of year, solar conditions, and a host of other factors. In the old days, radio operators had to understand radio propagation to make an educated guess as to the best frequency to use to reach a particular distant station. Sometimes they guessed wrong, and stations would struggle to communicate or maybe not even connect. ALE, or Automatic Link Establishment, was designed to make two-way shortwave communication as simple as making a telephone call. Depending on your point of view, it has taken the guesswork out of frequency selection … or made it so easy that any dummy can be a radio operator.
In an ALE system, each station is assigned a unique identifier and the network has a set of preconfigured frequencies spaced throughout the shortwave spectrum. For example, here’s a partial list of frequencies and stations for the United States Air Force, one of the most active ALE networks.
The key to the system is a piece of software called the ALE controller. At periodic intervals, the ALE controller at a particular station, say PLA, will loop through the frequencies and send a “sounding” out on each one. That’s just a short digital identification burst saying “This is PLA!” Here’s a recording of an ALE sounding.
That’s not the kind of signal that anyone would enjoy listening to all day. Fortunately, no human being has to do that. Instead, all the other controllers in the network are monitoring every frequency and automatically make note of how well PLA is received (or not) on each channel. Now, if someone at Offutt Air Force Base needs to send a message to Lajes, they just go to their ALE controller and enter “PLA.” The system will select the best frequency to use based on the most recent observations. That’s the basic explanation. If you want to understand more, see the links at the bottom.
Monitoring ALE
You can’t DX ALE with your ears. A computer program has to do it for you. There are several hobby programs that do the job, and I’m going to look at two of them. The first one will get you started, and the second one will take your ALE DXing to the top.
I began with Sorcerer, a free program that decodes several dozen digital modes. See the links below for downloading. The program doesn’t need to be installed. Just unzip the file and place the executable in a suitable location. Next, you need an SDR and an SDR application. I prefer SDR-Console for digital work, but any SDR program will work if you can feed the audio into a virtual audio cable. And that’s the other thing you need – a direct audio connection from the audio output of your SDR application to Sorcerer. There are several similar products available, but I recommend VB-Cable. Your first VB-Cable is free, and you only need one to run Sorcerer. If you want to expand, you can buy more VB-Cables later.
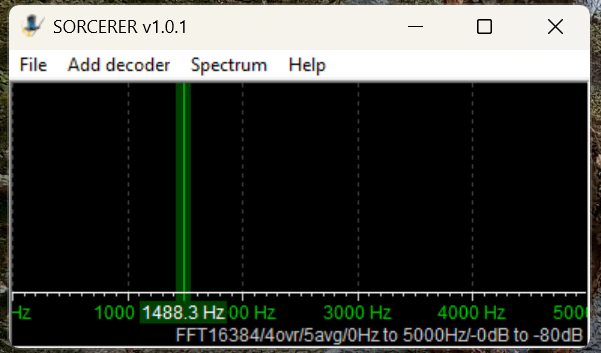
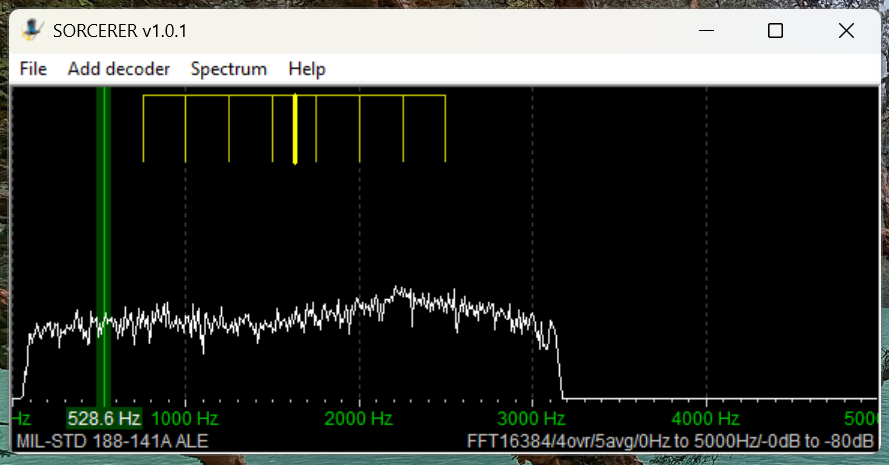
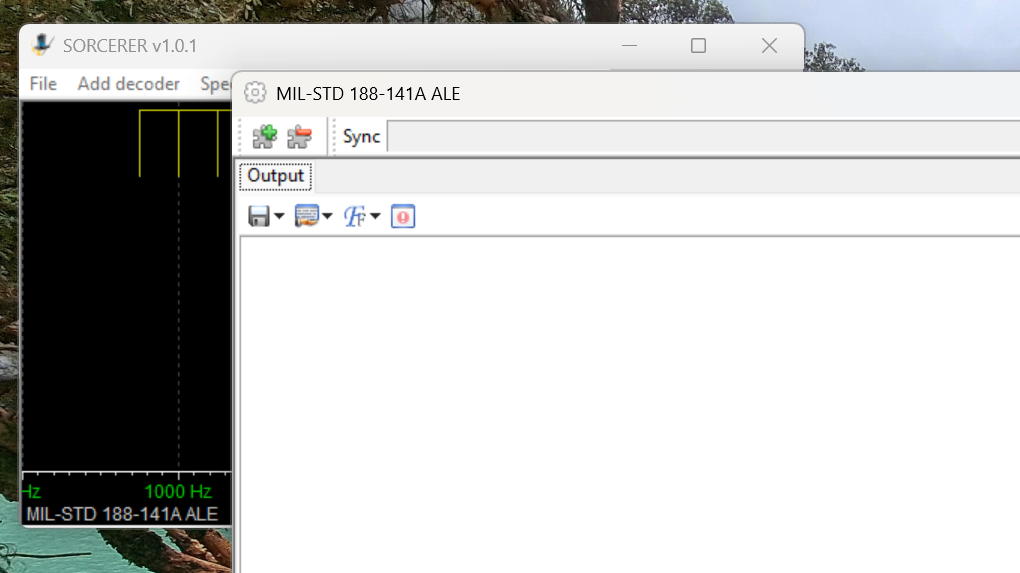
Here’s the main window that opens when you start Sorcerer.
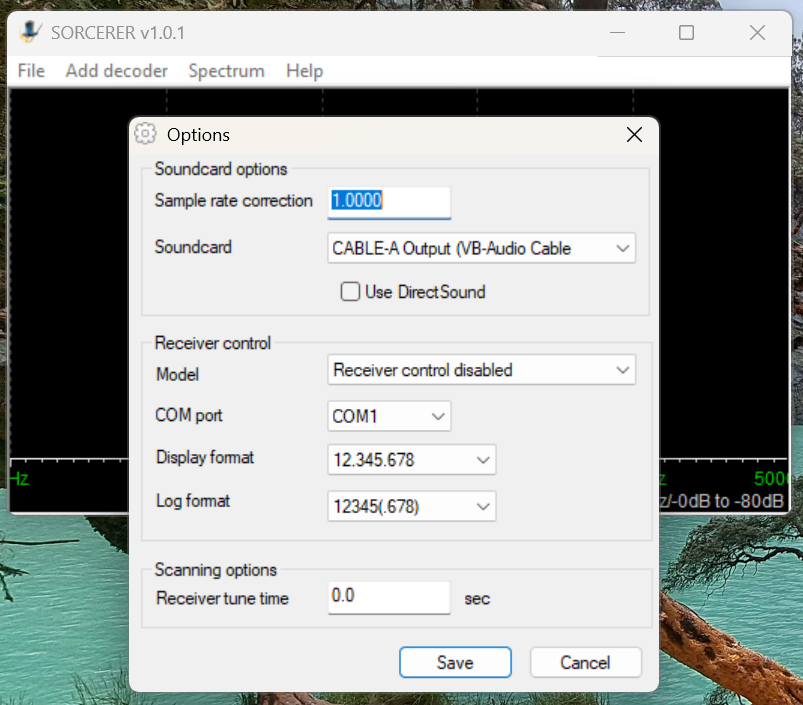
The first time you use Sorcerer you will need to connect it to your VB-Cable. On the menu select File then Options. Find the cable under the Soundcard list and save.
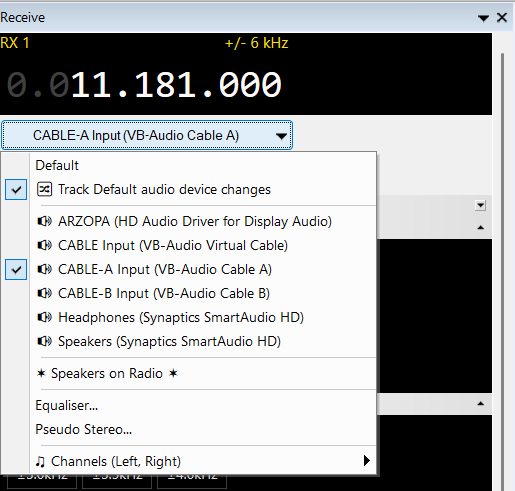
Open your SDR application and tune it to 11181 kHz. Set to USB mode with a filter value of around 2.8 kHz. That is one of the most heavily used frequencies by US Air Force bases around the world. Wherever you are, something should be received. Next, set the audio output of your SDR application to go to VB-Cable. In SDR-Console that’s done by a drop-down box under the current frequency. Next, slide the volume level all the way up.
Now go back to Sorcerer and confirm you are getting audio from the SDR application.
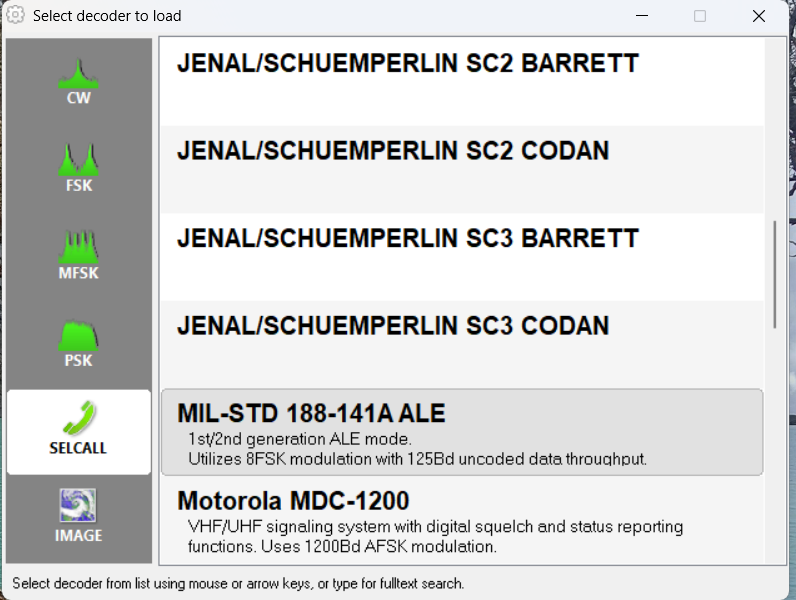
Now select Add Decoder from the top menu in Sorcerer. Then select SELCALL on the left side and scroll down and double-click to select MID-STD 188-141A ALE from the options.
That will open a large decoder window, which you can resize as needed.
Now, go get a cup of coffee and come back in about thirty minutes.
Sample Sorcerer Output
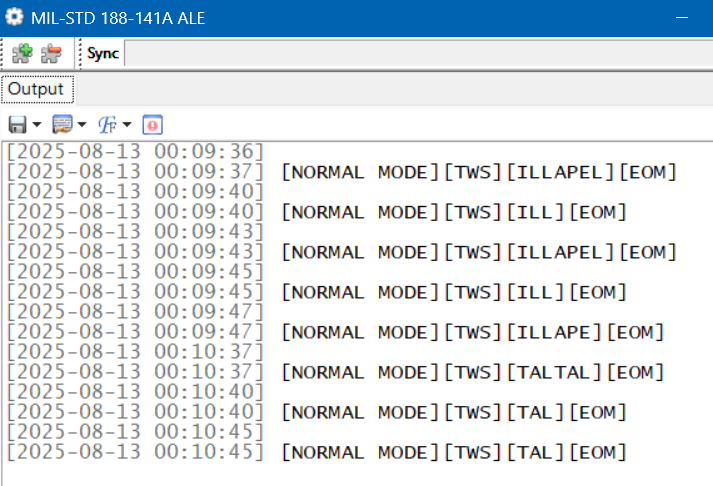
Let’s take a look at some sample output from Sorcerer. These loggings were made on 7915 kHz, a frequency used by the Carabineros (National Police) in Chile. First, Sorcerer shows the time and date the decoding was done per the current time on the laptop. If you are monitoring live, those are the correct date and time of the reception. For the record, I was decoding from SDR spectrum recordings in these examples, so the times and dates are not the real ones. (I got the real ones from the spectrum recordings.) TWS stands for “This Was” and EOM for “End Of Message.” ILLAPEL and TALTAL are the station identifications, which in this case correspond to two Chilean cities. Note that sometimes the end of the ID can be cut off if reception isn’t clear.
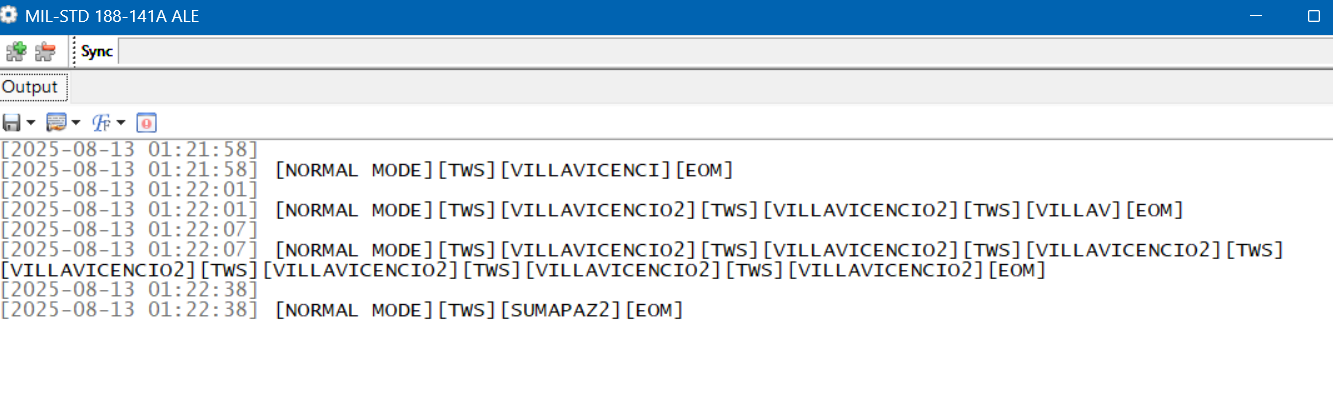
These next loggings are from the national police of Colombia on 7560 kHz. Villavicencio is a city east of the Andes, and Sumapaz is a national park in the remote mountains south of Bogotá.
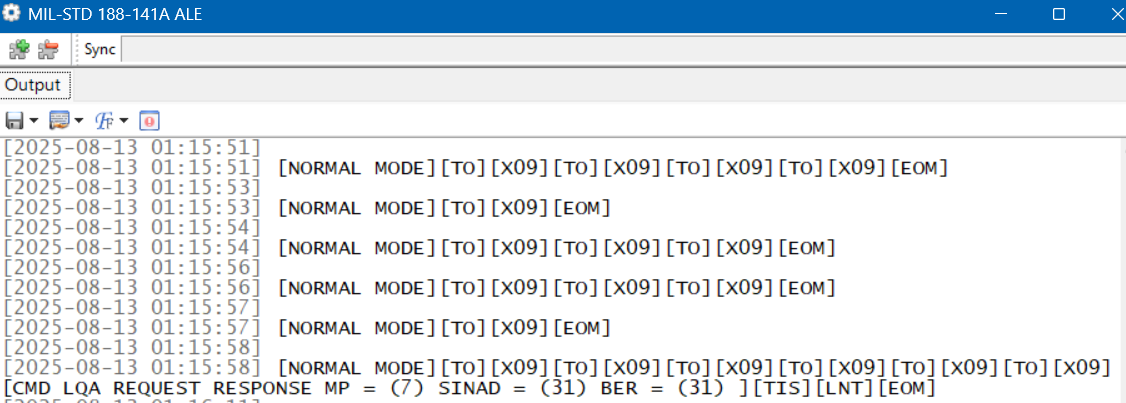
Here is a string of loggings on 7527 kHz, a frequency used by the US Coast Guard and other US government agencies. But here we have a TO, which means someone is trying to call X09. That happens to be a C-27J Spartan, a medium-range surveillance aircraft used by the US Coast Guard. Who’s doing the calling shows up in the final line. TIS (“This Is”) is a variation on TWS. LNT is the identification for CAMSLANT, the big US Coast Guard station in Portsmouth, Virginia.
The Limits of Single Frequency Monitoring
DXing live and monitoring one highly active frequency at a time with Sorcerer makes for a good introduction to ALE. However, if you just stick to monitoring easy frequencies like the USAF ones, you’ll get a lot of logs, but it won’t take long until you feel as if you’ve gotten everything. There are hundreds more ALE frequencies out there, such as the Chilean and Colombian police ones. But those are less active and might only be received at your location when conditions are just right. If you go after those by live monitoring with your SDR parked on a single frequency, you’ll spend a lot of days without getting a single hit.
What is needed is a way to cast a wide net to catch all the activity in a particular band. The idea I came up with was to use the Spectrum Analyzer feature of the SDR-Console program. See my article on this highly useful feature for an understanding of how this works.
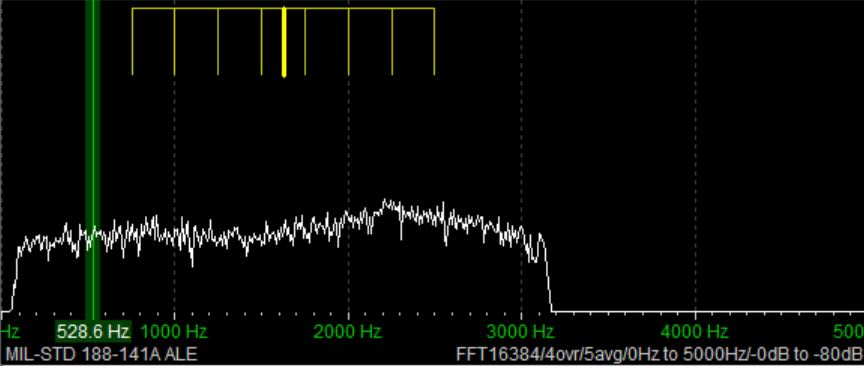
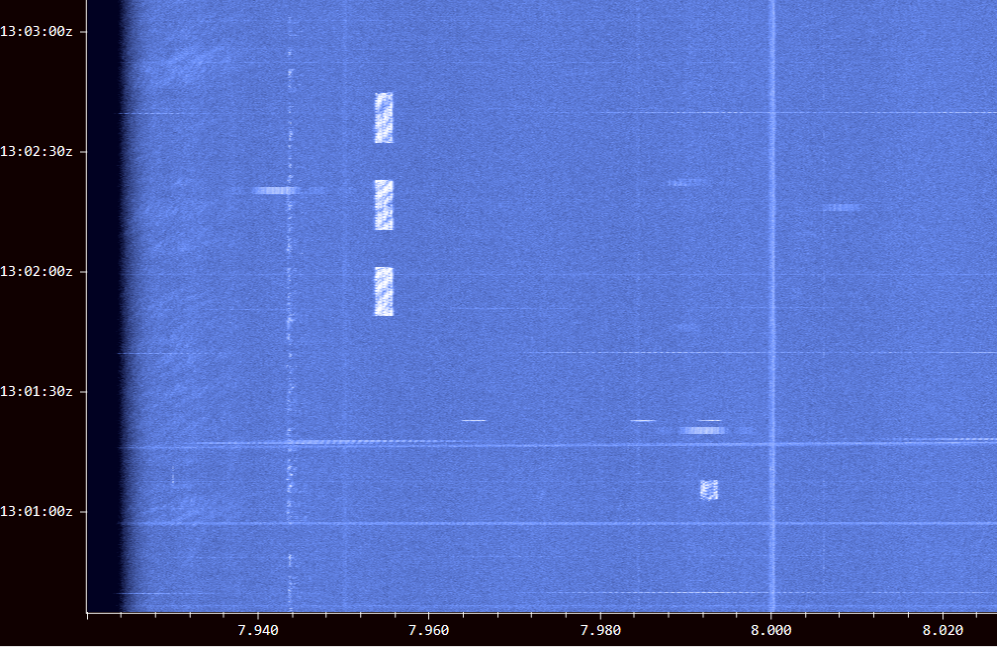
Using an Airspy HF+ Discovery, I would make several hours of spectrum recordings and then use the Spectrum Analyzer to visually find the ALE signals. Here’s a string of three long ALE bursts on 7953 kHz and a single weaker one on 7991 kHz. (Some other digital modes look the same on screen.)
I just had to click on a signal to play it into Sorcerer to get the ID. The process worked really well, and I found a lot of stations this way. But it was also tedious and time-consuming. I wanted something better … something that did the hard work for me. That’s what technology is for, right?
Stay tuned for Part Two …
Links
Sorcerer Download. Be sure to only download from this link and not from one of the many public download sites. Some years ago there were instances of Sorcerer infected with malware on public sites: https://www.kd0cq.com/2013/07/sorcerer-decoder-download/
VB Cable Download. Note, it is also possible to use Sorcerer by feeding the audio output from a traditional receiver into the audio input of a laptop. https://vb-audio.com/Cable/
Many thanks to SWLing Post contributor and noted political cartoonist, Carlos Latuff, who shares the following illustrated radio listening report of a recent Voice of the Islamic Republic of Iran broadcast.
Carlos notes:
Iranian armed forces are ready for any scenario, Voice of Islamic Republic of Iran, 15135 kHz
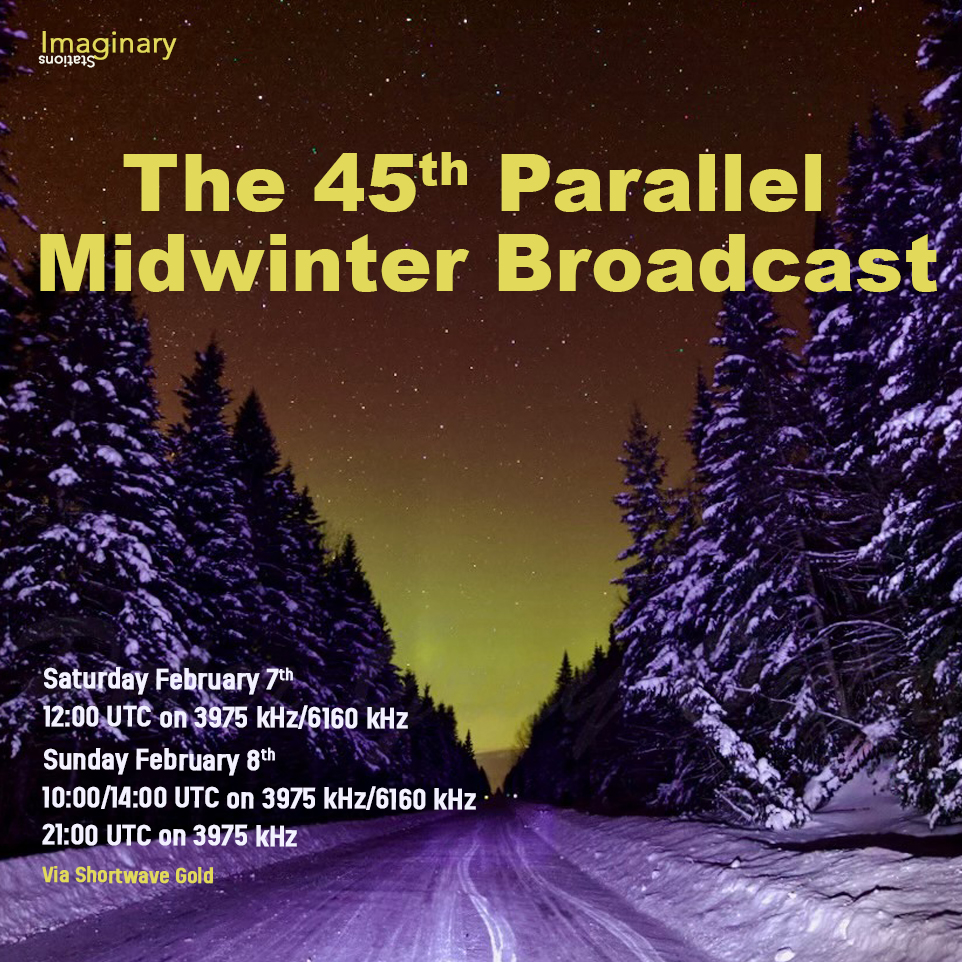
Greetings all SWLing Post community! This week Imaginary Stations takes you back to our secret shortwave laboratory along the 45th Parallel for our Annual Midwinter broadcast. No matter where you are on the planet, we’re halfway there. Great tunes are coming to you via the ionosphere from shortwaveradio.de on Saturday 7thFebruary 2026 at 1200UTCon 3975 kHz and 6160 kHz. In case you miss Saturday’s broadcast, there are additional transmissions on Sunday8thFebruary2026at 1000/1400 hours UTC on 3975 kHz and 6160 kHz and 2100 UTC on 3975 kHz.
And on Wednesday 11th February 2026 at 0300 UTC on 9395 kHz via WRMI it’s “ALL ABOARD!” with CTRN for all your railroading, hobo-ing, and freight-hopping needs. Ride the rails of adventure with your shortwave radio.
For more information on all our shows, please write to us at [email protected] and check out our old shows at our Mixcloud page here.
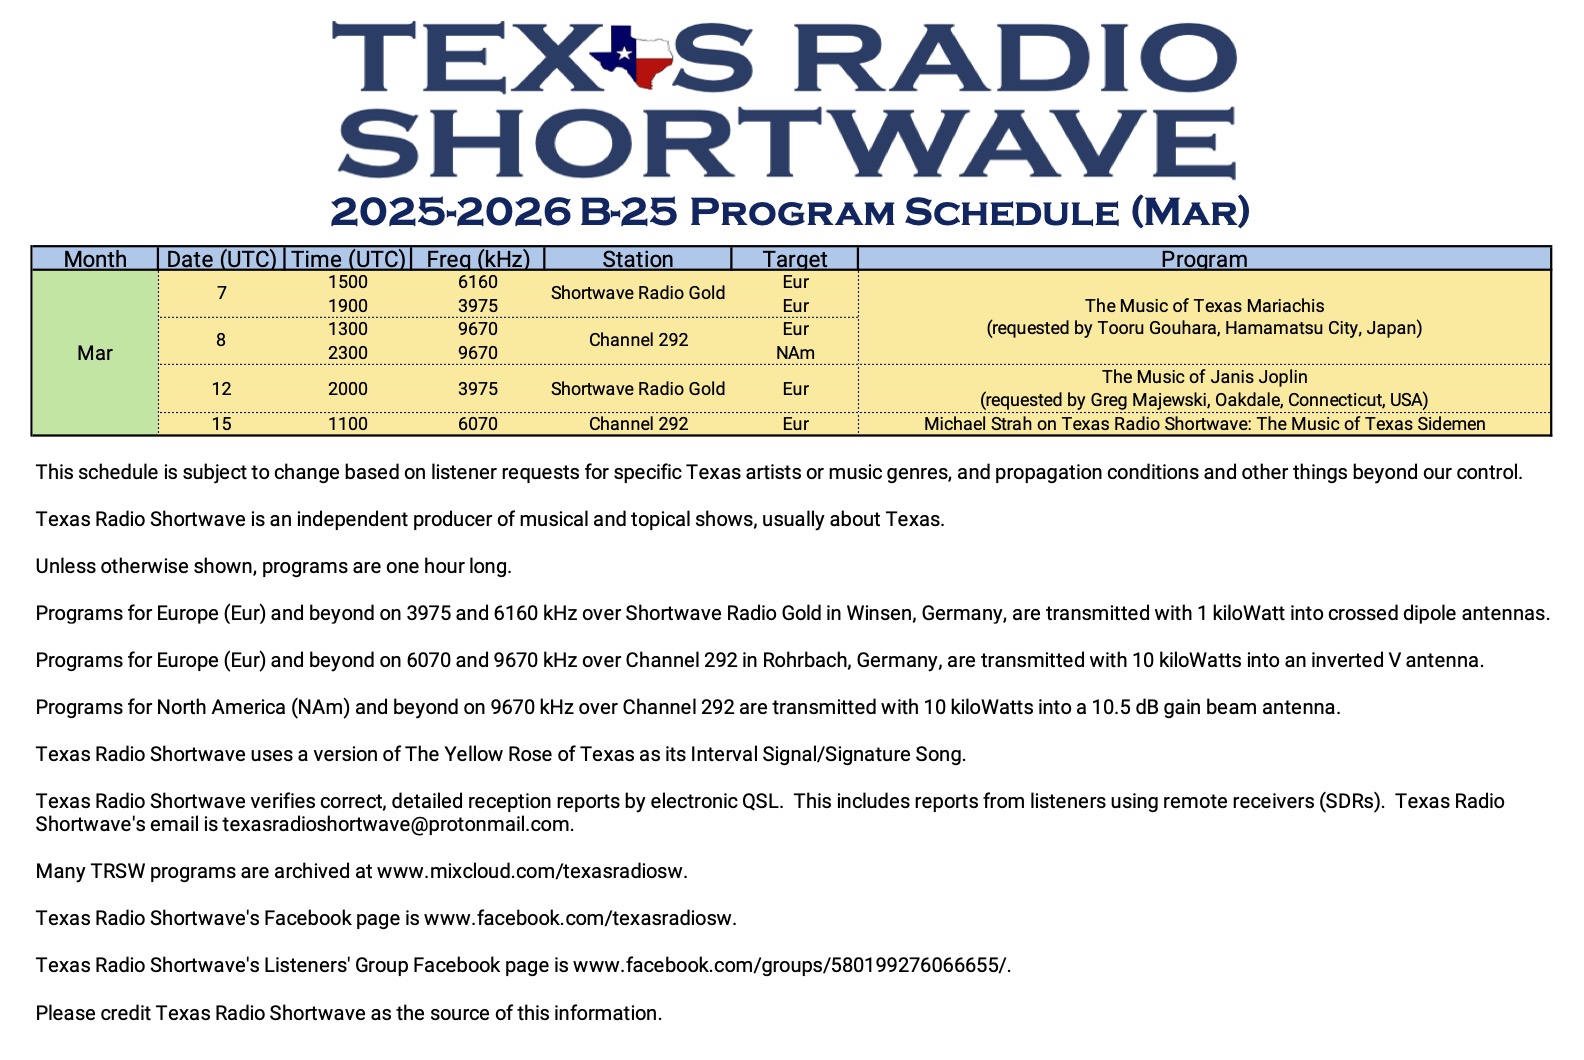
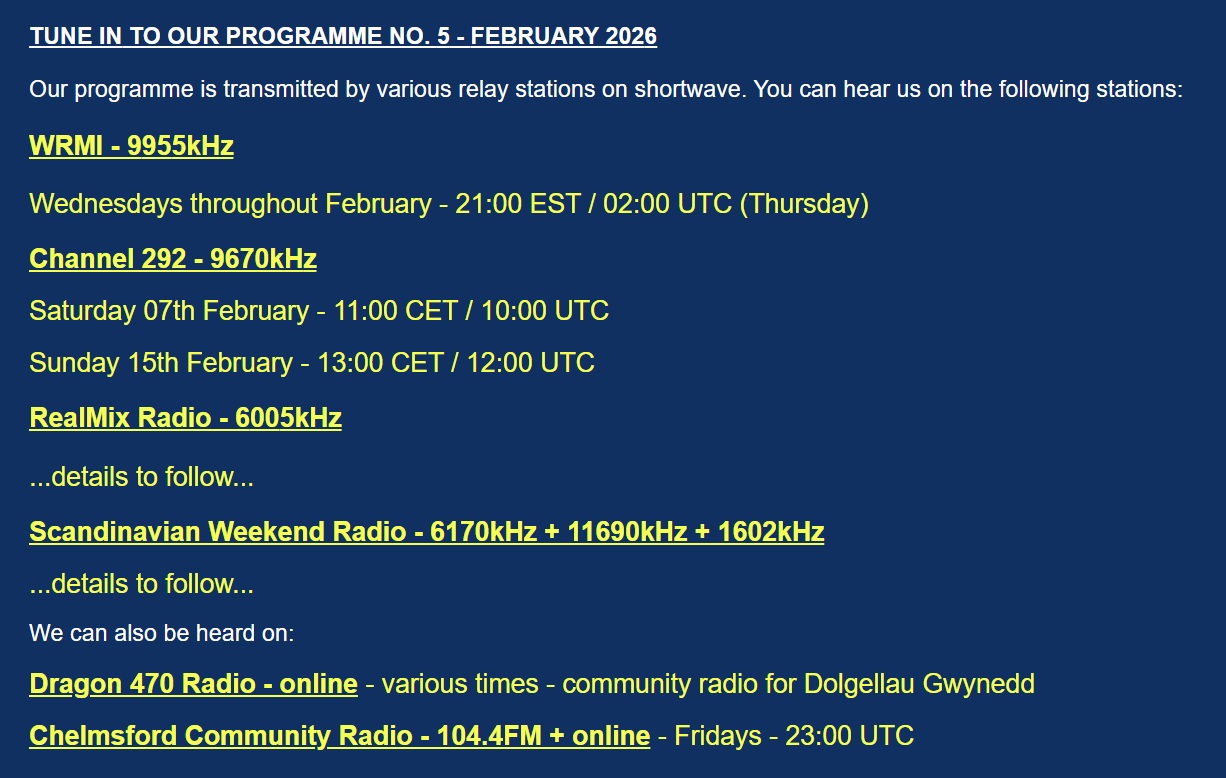
February programme now out!! 60 minutes of music you’ve likely never heard before (except for one) and – contrary to some popular belief – proof that they do make music as good as they used to, and, you can hear the words…!! (Yes I know… again I’m sticking my head above the parapet to be shot down…!!)
Programme schedule attached (above) – why not tune in & make contact for one of our eQSL cards, and then listen online at www.sjtjradio.com to our Mixcloud player. It’s a bit like tuning in to a fading MW signal ‘from a point at sea’ & then buying the album – and hearing so much more!! eQSLs issued for all types of listening in…

 Many thanks to SWLing Post contributor Paul Jamet, who shares the following update and QSL card images related to Bulgarian National Radio (BNR) and Radio Bulgaria.