Category Archives: Software Defined Radio

New Beta version of SdrDx allows for AFEDRI AFE822 two input phasing

afe822x_bnc_pcb_640px

Many thanks to SWLing Post contributor, David Goren, who shares this tip from Chris Smolinski at Black Cat Systems:

If you have an AFE822 Dual Channel SDR, and a Mac, run, do not walk, to the SdrDx website, and download a copy of the beta version. It now lets you phase the two inputs, much like using an external phaser such as the MFJ-1026. Great for nulling out another station, or noise/QRM. I have some descriptions of how to do this, along with some recordings, and the relevant links, in this HFU post. I believe a Windows version will be out shortly.

Chris’ post on the HF Underground goes into more detail and includes audio samples:

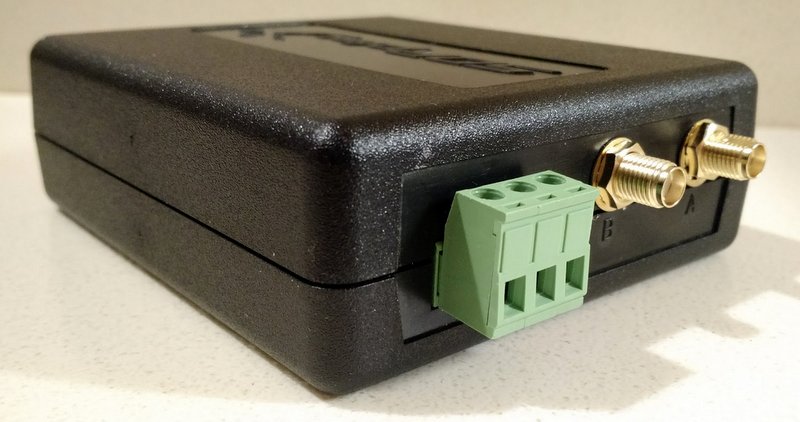
A few months ago, I picked up an AFE822 dual channel SDR, one of the reasons was to experiment with using it as a phaser for MW DXing. It was a bit of a daunting task, having to essentially write an entire SDR app. I then realized I could instead write a “black box” app that sat between the SDR and the SDR app, which would take the pair of I/Q channels from the SDR, and adjust their relative amplitude and phase, and combine them into a single I/Q channel, and send that on to the SDR app. I played around a bit with that, and was quite impressed with the results. I passed on the general idea to the author of SdrDx, who has implemented it in a beta of the app, which is nice because now it is all self contained, rather than having to use my kludgy app in the middle Grin

There’s gain adjustments for each RF input, as well as a phase control, an invert switch to flip the phase 180 degrees, and switches to zero either of the RF inputs, useful when first roughly setting up the gains.

I am quite impressed with how well it is working. As an example, here is a recording of 1680 AM from earlier this morning. I toggled the invert on the phase control a few times, so you can hear reception flip between the two dominant stations on that frequency.

This is going to be really nice for MW DXing. SdrDx is for both Windows and the Mac. If you’ve been considering getting an SDR, this feature alone in SdrDx is reason enough to get an AFEDRI AFE822. If you do buy one, be sure to let Alex of AFEDRI know the reason is because of SdrDx, we need to support the authors of third party SDR apps we use, and let the hardware manufacturers know how important they are.

The URL for the SdrDx page is http://fyngyrz.com/?p=915

The download link for the beta (Mac only right now, once this is confirmed to be working well, I am sure he will update the Windows version) is http://fyngyrz.com/beta.zip

Some more tests, this time on some local Graveyard channels.

1230, getting rid of WRBS:

1240, getting rid of WJEJ:

How to use the phasing adjustment with SdrDx, an AFE822 SDR, and your Mac.

Download the Mac beta (Windows version coming soon) of SdrDx: http://fyngyrz.com/beta.zip
If you have not used SdrDx before or recently, first download the stable version, and run that: http://fyngyrz.com/SdrDx-AA7AS-Light.zip
SdrDx page: http://fyngyrz.com/?p=915

Familiarize yourself with SdrDx if you have not used it before. You need two antennas of course, one plugged into each of the AFE822 inputs.

To use phasing:

Click on the PHA button, turn on Dial Channel Phasing Mode. Click OK to close the window.

Click the Run button to get the SDR into Run mode. Tune in whatever MW frequency you want to use. Ideally one with two stations you can hear at the same time. Graveyard channels are great for this. Be sure to put the SDR center frequency offset from that. For example if you want to null 1300 AM, make the center frequency 1305 or something like that. Or the I/Q imbalance will cause problems.

Click the PHA button to open the phasing window again. You want to keep it open now.

Make sure the Invert checkbox is off, the Both Channels On radio button is on. Set the Phase slider to the middle, both Gains to zero, far left.

Adjust the first Gain slider to bring the signal level up to a reasonable level. S9. S9+10, whatever you want. Make a note of it.

Click Chan A Muted

Now adjust the second Gain slider to bring the signal level up to where it was before with the first RF input. The goal here is to make the signal levels about the same, so you can begin the process of nulling out one of the stations, with some chance of it working.

Click Both Channels On now, so you have both RF inputs active.

Adjust the Phase control, until you notice a dip in the signal strength. Try to get it centered in the dip as close as possible.

Then adjust one of the gain sliders, I usually use the one with the largest value to make things easier, to increase the dip in the signal strength.

Then go back to the Phase control, and try to increase the dip. You may now notice the dominant station starting to be nulled, by listening to it.

Then, like washing your hair, lather, rinse, repeat. You have to iterate back and forth many many times. Eventually, if your two antennas produce different enough signals for the two stations, you will be able to null it out. There are cases where you cannot null out one station, because the antennas produce the same signal for both of them. So nulling out one also nulls out the other. But this is rare.

You can click in the invert checkbox, and reception should switch to the other station. Listen to some of my recordings to hear this in action. You are changing the phase by 180 degrees when you do this.

wn9t4nm

Most impressive, Chris!  Wow–I think this feature alone could make the AFEDRI AFE822 an invaluable tool for the mediumwave DXer. Those audio samples are amazing!

Spread the radio love

SDRuno tutorial videos

SDRuno running the RSP2.

SDRuno running the RSP2.

Jon Hudson with SDRplay recently noted the following tutorial videos in an SDRplay discussion forum. Since I’m also trying to learn the ropes of SDRuno, I thought I’d share this here on the SWLing Post.

Jon notes:

These video guides are very helpful for newcomers to SDRuno and the RSP1 or RSP2:
RSP1: https://youtu.be/xBGHB0oMXHU

RSP2: https://youtu.be/92Ijh_NAEfc

Especially when used in conjunction with the SDRuno Cookbook from Paul and Mike: https://www.nn4f.com/SDRuno-cookbook.pdf

Spread the radio love

Review of the SDRplay RSP2 software defined radio

The SDRplay RSP2

The SDRplay RSP2

This morning, SDRplay Limited announced the release––and availability––of their second generation software defined radio, the RSP2.

Regular SWLing Post readers will note that I’m a pretty big fan of SDRplay’s first SDR, the RSP, or “RSP1,” as I’ll now call it (I published a review of the RSP1 in July 2015). To me, the $129 RSP1 has been the best wideband receiver you can buy under $200 US. Its HF performance, in particular, is sincerely impressive at this price point.

Introducing the RSP2

sdrplay-rsp2-top

So what’s the RSP2, and how does it differ from the original RSP?

In a nutshell, here’s how SDRplay describes the difference between the two:

“The RSP2 delivers a significant number of additional features which result in a higher spec for specialist amateur radio users as well as benefits for additional scientific, educational and industrial SDR applications.”

In a sense, the RSP2 gives the enthusiast and experimenter access to more receiver parameters and control, opening it to a wider array of possible applications. The RSP2 will also cover a broader range, from as low as 1 kHz to as high as to 2 GHz, and is designed with better selectivity across the spectrum. Enhanced selectivity will certainly benefit amateur radio operators and SWL DXers who might seek weak signals in crowded portions of the band.

sdrplay-rsp2-usb-in-out

The following list outlines the primary additional features of the RSP2 (via SDRplay’s press release):

  • 10 built-in, front-end pre-selection filters, with substantially enhanced selectivity
  • Frequency coverage extended down to 1 KHz
  • Software selectable variable gain Low Noise Preamplifier
  • 2 x SMA Software Selectable 50? RF ports (1.5 MHz – 2 GHz)
  • 1 x High Impedance RF port (1 kHz – 30 MHz)
  • Built-in software selectable MW /FM notch filters
  • Highly stable 0.5PPM TCXO trimmable to 0.01PPM
  • 24MHz Reference clock input / output connections
  • 4.7V Bias-T option (on one of the software selectable antenna inputs)
  • RF screening within a strong plastic case for the standard RSP2
  • A Rugged metal box version –  the ‘RSP2pro’
The RSP2 has a total of three antenna ports: two SMA and one Hi Z for optimal LW/MW/SW performance

The RSP2 has a total of three antenna ports: two SMA and one Hi Z for optimal LW/MW/SW performance

For the moment, the RSP2 only works with SDRplay’s own application, SDRuno. But SDRplay is already working with developers to make the RSP2 compatible with HDSDR, Gnu Radio, CubicSDR, and SDR Console. I appreciate that although the RSP series has an excellent free proprietary application (SDRuno), it was nonetheless developed with many open-source applications, also free, as well. This level of compatibility and support makes SDRplay rather unique among SDR manufacturers.

SDRuno running the RSP2.

SDRuno running the RSP2 (click to enlarge).

Of course, SDRuno is a great application in its own right, and pairing it with the RSP2 will provide you with out-of-the-box calibrated RF and S meters. So far I’m very pleased with native SDRuno features like virtual receivers, embedded time code, spectrum display options, and streamlined design.

Current SDRuno users will note the different antenna and filter options with the RSP2 which works natively with the latest versions of SDRuno

Current SDRuno users will note the different antenna and filter options with the RSP2 which works natively with the latest versions of SDRuno (click to enlarge).

SDRuno installs very easily and provides a plug-and-play experience. It does have a modest learning curve, but SDRplay has an excellent owner’s manual and “cookbook” available to help you set everything up the first time.

Preliminary impressions of the RSP2

SDRplay sent me a pre-release RSP2 (the base model, not the metal box “Pro” version) to evaluate and provide the company with feedback.

I installed SDRuno and put it on the air only this past week. In truth, as I’ve been traveling and must be on the road again this coming week, I prefer not to comment, at least in depth, on the SDRplay’s performance as I’ve had comparatively little dedicated time with the unit.

Yet I have had the RSP2 on the air a few hours of casual listening, and find that it performs as I would expect: low noise characteristics and sensitivity that seems to be at least as good as the RSP1, if not a bit better.  I’m looking forward to a side-by-side with the RSP1 running an install of SDRuno on my laptop!

I must say that I’m very pleased with the RSP2’s Mediumwave/FM notch filter. It happens that a local daytime 45kW AM broadcaster in our area is having transmitter issues which send wideband spurs across the entire HF spectrum; but at night, when the station lowers its power levels, the RSP2’s MW notch filter effectively mitigates the noisy signal. I imagine this filter will be a welcome addition for listeners living in RF-dense environments.

When the RSP1 was first introduced, it retailed for $149. As the economies of scale worked in their favor, SDRplay lowered the price to $129. The new RSP2, meanwhile, is expected to retail at approximately £130 (excluding taxes), or $169 US (excluding taxes). Quite a value, in my opinion: at $169, you’re getting a lot of SDR for the price––and an effective SDR application, to boot.

But if you already own an RSP1, I wouldn’t necessarily rush out and grab the RSP2 just yet.  Of course, if you like the added features mentioned above, or if you’d like an inexpensive SDR with no less than three switchable antenna ports and a MW/FM notch filter, $169 is a bargain and about the same level of investment as a good modern shortwave portable.

As for myself, I’m happy to see a mom-and-pop community-supported company like SDRplay continuing to innovate for our hobby. I’m pleased to support them, and am truly appreciative that they also support our SWLing Post. This is a win-win, in my view; I’d be pleased to support more such companies.

Again, check back here as I plan to compare the RSP2 with the RSP1 and several of my other SDRs.

sdrplay-rsp2-antennaports-2

Click here to read SDRplay’s full announcement and press release.

I plan to take the RSP2 with me on my travels this week. Time permitting, I might even pair it with my recently acquired PK magnetic loop antenna for some spectrum gathering and testing.

In the coming weeks, as my schedule permits, I’ll post updates here on the SWLing Post, including audio comparisons with some of my SDRs. If interested, bookmark the tag RSP2.

For more information about RSP2 pricing and availability, check out SDRplay.com.

Update: Check out RTL-SDR.com’s assessment of the RSP2.

SDRplay has also posted the following video:

Spread the radio love

SDRuno Version 1.1 Update

sdruno-screenshot

(Source: SDRplay Press Release)

Today, we released version 1.1 of SDRuno, specifically for RSP. New features include a calibrated power measurement facility, an SNR meter and automatic S-meter calibration. There are many additional improvements and fixes. To find out more about all the additional features, documentation can be found on:

http://www.sdrplay.com/docs/SDRplay_SDRuno_Release_Notes.pdf

and the software is available to download from:

http://www.sdrplay.com/windows.html

Paul Jones and Mike Ladd have worked tirelessly to get the new features documented in an updated version of the SDRuno Cookbook: http://www.nn4f.com/SDRuno-cookbook.pdf

Other SDRs can also use SDRuno with a new increased bandwidth limit of 2.5MHz.

Many thanks to Jon Hudson at SDRplay for sharing this info!

Spread the radio love

Portable shortwave spectrum capture for the urban city dweller

A guide by London Shortwave

Portable Spectrum Capture Set-up

Capturing the shortwave spectrum out in the field.

Radio interference is a major problem in big cities when it comes to indoor shortwave reception. One effective solution I have found is to head for the local park and engage in scanning the bands there. However, since my time for making such outdoor trips is limited, I would always feel like I am missing out on a lot of radio action by monitoring a single frequency, which is all you can do with a standard shortwave radio. There are so many signals out there — which one should I go for? This inspired me to put together a lightweight, portable set-up that would let me capture large chunks of the shortwave radio spectrum out in the field, which I could later explore in detail. After two years of experimenting with various Software Defined Radio (SDR) technologies I am pleased to report that I finally have a solution that works well for this purpose.

A good SDR can give the user access to large portions of the radio spectrum via a graphical user interface. The user can then either process a specified part of it in realtime or record the chosen spectrum window in its entirety onto disk and analyse it later with the supplied software. Here is a short video showing the playback of one of such spectrum captures I made in a London park in September 2016. Note the final part where I zoom out to show the entire recorded frequency range (covering two broadcast bands with one ham band in the middle!):


When I got home from the park, I was able to replay that part of the spectrum capture many times over while scanning the frequency space, which is how I was able to identify a weak signal from a very distant ham radio operator that I might have otherwise missed.

Below is the list of the components I have used to put together my “portable spectrum capture lab”.

Components

Component List

Hardware

1. Toshiba Encore 8″ Tablet (Windows 8), 2014 Model ($169)

I bought this tablet in July 2014, based on the following criteria: the device had to have a reasonably powerful Intel processor, running the Windows 8 operating system. I believe that there are currently models on the market that are at least as powerful and are substantially cheaper (<$100).

2. On The Go USB Adapter ($15)

3. AirSpy R2 SDR ($169)

Owing to its unique hardware design, the AirSpy SDR can monitor large parts of the radio spectrum (up to 10 MHz in bandwidth) while offering a high dynamic range and robustness to overloading, with almost no mixing/imaging products.

4. SpyVerter HF UpConverter ($49)

This additional device enables AirSpy to cover the shortwave bands (in fact, the entire frequency range between 0 khz and 30 MHz) and must be connected in-line between the AirSpy’s front end and the antenna feed line, as follows:

AirSpy / SpyVerter

Connection cables

Below is a small collection of cable accessories to connect the antenna to AirSpy/SpyVerter:

5. 10cm SMA Male to SMA Male Straight RF Coaxial Jumper Pigtail ($2)

6. BNC Male Plug to SMA Female Jack Adapter ($2)

7. BNC Female Coupler ($5)

8. 3m long BNC cable ($15)

Matched dipole antenna

Antenna Schematic

I use a three-terminal matched balun connected two 6 metre copper wires via its antenna terminals as a dipole antenna, and connect it to the SDR via the feed line terminal with the 3m BNC cable listed above. The balun (Wellbrook UMB130) is engineered in a way that prevents the radio noise current from the tablet (usually a significant source of interference) flowing into the receiving part of the antenna.

Dipole Antenna

9. Wellbrook UMB 130 balun ($60)

10. 2 x 6m Copper Wire ($16)

Miscellaneous

11. Fight Case ($35)

This foam-filled flight case comfortably houses all of the components. The parts 1 to 7 can remain assembled together, reducing the deployment time in the field.

12. Samsung 64G Ultra-High-Speed MicroSD Card ($19)

Samsung MicroSD Card

I use this fast MicroSD card as the destination for my outdoor SDR recordings. The high transfer speed is critical – using slower MicroSD cards will result in large portions of the spectrum being dropped from the recordings. 64 Gigabytes can accommodate roughly one hour of spectrum data at 3 MHz bandwidth.

13. FAVI Bluetooth keyboard with trackpad ($37)

FAVI Bluetooth Keyboard

Windows tablets suffer from one major drawback: the touchscreen interface is usually inadequate for software that was designed for traditional computers with mice. A portable Bluetooth keyboard with a built-in trackpad solves this problem.

14. Bluetooth Wireless Audio Transmitter & Receiver ($17)

Bluetooth Transmitter / Receiver

This small gadget turned out to be a very important part of the entire project. The Toshiba tablet has a rather unusual interference quirk that initially caused me hours of frustration. It turns out that significant amounts of radio noise are injected into the SDR when the tablet’s external speakers are active. One way to fix this is to plug a pair of headphones into the tablet’s line out jack, but this forces the listener to be glued to the device. The alternative is to pair the tablet with a Bluetooth audio receiving unit, such as the one listed above. It is worth noting that my other Windows tablet — a Dell Venue 8 — also suffers from this strange artefact.

Total cost: $610

Internal layout of the flight case

Flight Case Internal Layout

You’ll see that I have stacked the SpyVerter enclosure on top of the AirSpy one. As the latter can get very hot, it is essential to leave a sufficiently large gap in the foam for ventilation. It’s also worth leaving a small gap next to the tablet’s power button to prevent Windows from accidentally going into standby mode.

Software configuration

The best software to use with the AirSpy/SpyVerter combination is SDR#. It offers an impressive collection of features that many software packages and conventional radios don’t have, such as advanced noise reduction and synchronous detection with passband tuning. The following adjustments are required to make recording the spectrum a seamless experience:

Install the Baseband Recorder and File Player plugins

Baseband Recorder: this plugin enables efficient recording of very large spectrum (or “baseband”) files. Download and decompress the plugin zip file. Copy the .dll files into the directory with the SDRSharp.exe executable. Open the MagicLine.txt file and copy the first line of text into Plugins.xml file, just before the “</sharpPlugins>” line.

File Player: this plugin enables the playback of recordings made with the Baseband Recorder plugin. Download and decompress the plugin zip file. Copy the .dll files into the directory with the SDRSharp.exe executable. Open the MagicLine.txt file and copy the first line of text into FrontEnds.xml file, just before the “</frontendPlugins>” line.

Configure Baseband Recorder

Open SDRSharp.exe and check that the program reports no errors when it loads.

Baseband Recorder Plugin

Baseband Recorder configuration

In the plugin pane on the left, expand the Baseband Recorder tab and click “Configure”. Change the File Format to WAV RF64 and make sure that the File length limit check box is not ticked. Click “Folder select” and choose the MicroSD card as the destination directory for the recordings.

Adjust AirSpy settings

Disclaimer: in this section I describe how I capture the maximum spectrum bandwidth that my tablet’s CPU can handle. It involves operating SDR# in “debug mode” and exposes some internal functionality of AirSpy, which, if used incorrectly, can damage the radio. If you choose to copy my approach, please understand that you are doing so at your own risk and follow my instructions carefully to avoid voiding your AirSpy warranty.

Open SDRSharp.exe.Config file in Notepad. Look for “<add key=”airspy.debug” value=”0″ />” line and change it to value=”1″.

Once the AirSpy and SpyVerter have been connected to the tablet, open SDR# and select AIRSPY in the Source tab. You will see the following configuration dialog.

AirSpy Settings

AirSpy configuration

In the “Sample rate” field, type in “6 MSPS”. For the “Decimation” option, choose “2”. This setting will result in spectrum captures of 3 MHz bandwidth (although only 2.4 MHz of it will be shown on the waterfall display). To capture smaller chunks of the spectrum, increase the decimation value. Make sure the SpyVerter check box is ticked. Do not touch any of the fields or buttons under the “Address Value” line.

Make a short test recording

Press the play button in the top left corner and set the desired frequency.

In the Source tab, select the “Linearity” option. Keep increasing the Gain value by one position at a time until you notice that the radio signals suddenly become “saturated” (the waterfall display becomes full of artefacts and the signal you are listening to gets swamped with noise). Take the Gain value back down by two positions. This will ensure high sensitivity while preventing AirSpy from overloading.

In the Baseband Recorder tab, press “Record”. While recording, do not change the radio frequency and do not move/drag the waterfall portion of the display. Stop the recording after a few minutes.

File Player Plugin

SDR# FilePlayer plugin

In the Source tab, change the input to “File Player” in the drop down menu. Click the Settings cogwheel button and select the spectrum recording file from the MicroSD card. A vertical band visualising the timeline of the spectrum capture will appear immediately to the right of the plugin pane. Click on the play button and select a radio signal to demodulate in the spectrum display. Listen to the audio carefully to make sure there are no dropouts or clicks: if so, your tablet and MicroSD card are capable of handing and storing the specified spectrum bandwidth.

Keep an eye on the gain

While making longer spectrum recordings, select a weak radio signal and keep monitoring its audio for signs of overloading. If the overloading does occur, reduce the Gain value further by one or two positions.

Some example spectrum captures

Shortwave For Lunch

Shortwave for lunch. Playing back parts of the shortwave spectrum captured earlier in the park, inside a local cafe.

Below are some example videos in which I play back and explore the spectrum recordings I made during the trips to my local park.


Tropical and the 49m bands recorded outdoors on 03/07/16 at 0432 UTC. A good time of the day for listening to Latin America on shortwave.


Listening to Radio New Zealand International.

Radio Aparecida from Brazil, usually a challenging catch in Europe.

Comments, suggestions?

Closed Flight Case

Drop me a line in the comments section or hit me up at @LondonShortwave. This article originally appeared on the London Shortwave blog.

Spread the radio love

Mark’s Global Spectrum Project MK2

mark-fahey-beagle-kiwi-sdr

Many thanks to SWLing Post contributor, Mark Fahey, who shares the following:

It’s been a fun weekend getting the first two remote modules for the Spectrum Project MK2 together. These modules tune into and then digitally preserve broadcasted human communication; music, discussion, culture for future generations to study and ponder.

This initial version of the hardware provides 0-30MHz with four (simultaneous) independently configured receivers that are controlled remotely from anywhere on the planet. The first of the modules will be installed near Vladivostok in Russia’s far east and the second is planned to go to one of the “stans” in Central Asia, most likely Kazakhstan.

markfahey-kiwisdr

The hardware includes a KiwiSDR 0-30MHz SDR 4 channel receiver AM LSB USB CW FM plus GPS for precision timing and location information. A BeagleBone Green is the CPU and the compact 100KHz-30MHz active antennas we are using are precision built by RA0SMS in Irkutsk, Siberia, Russia.

(Note to fellow SDR geeks – the WinRadio Excalibur running on the iMac [above] is not part of the remote system – it just happens to live on my assembly bench).

markfahey-sdr-module1

Remote Module #1 prior to sealing.

This first generation is built to connect to a wired internet connection and power supply. The hardware includes a KiwiSDR 0-30MHz SDR 4 channel receiver AM LSB USB CW FM plus GPS for precision timing and location information. A BeagleBone Green is the CPU and the compact 100KHz-30MHz active antennas we are using are precision built by RA0SMS in Irkutsk, Siberia.

Remote Module #3 and later will support solar power and a 4G/ LTE connection so the devices can be located anywhere on the planet that has reasonable cell phone coverage.

Remote Module #2

Remote Module #2

This is Remote Module #2 sealed and ready for connection to a network and power supply. The hardware includes a KiwiSDR 0-30MHz SDR 4 channel receiver AM LSB USB CW FM plus GPS for precision timing and location information. A BeagleBone Green is the CPU and the compact 100KHz-30MHz active antennas we are using are precision built by RA0SMS in Irkutsk, Siberia.

Remote Module #3 and later will support solar power and a 4G/ LTE connection so the devices can be located anywhere on the planet that has reasonable cell phone coverage.

Don’t forget you can tune into the prototype system now up and running near Sydney Australia. Point your browser to http://mediaexplorer.ddns.net:8073

This is simply amazing, Mark. I can’t wait to try out the receivers in your Spectrum Project MK2 once they’ve been deployed and implemented. We’ve talked about this concept before, but what I love about Mark is he simply pulls the trigger and makes it happen as soon as technology has made it possible to implement.

Mark: please keep us posted with your updates!

Spread the radio love

Kickstarter: The $239 RS-HFIQ 5 Watt General Coverage Transceiver

rs-hfiq-sdr

Many thanks to Jim Veatch (WA2EUJ) who shares the following:

HobbyPCB is offering their RS-HFIQ 5W SDR on Kickstarter starting at $239. Check it out here:

https://www.kickstarter.com/projects/hobbypcb/rs-hfiq-5w-software-defined-radio-sdr-tranceiver

Thanks, Jim-I wish you success in this campaign (though it appears you’ve met your base goal and are now into stretch goals).

While there are a fair amount of SDRs in the $200-300 price range, there are few that are actually transceivers.  I’m also impressed with the level of filtering on both the RX and TX stages and the fact that the baseband and digital section have separate and isolated grounds. The RS-HFIQ could potentially have a low noise floor and a decent front end.

If you back the RS-HFIQ, please consider sending us your review to publish here on the SWLing Post!

Spread the radio love