It’s a mystery

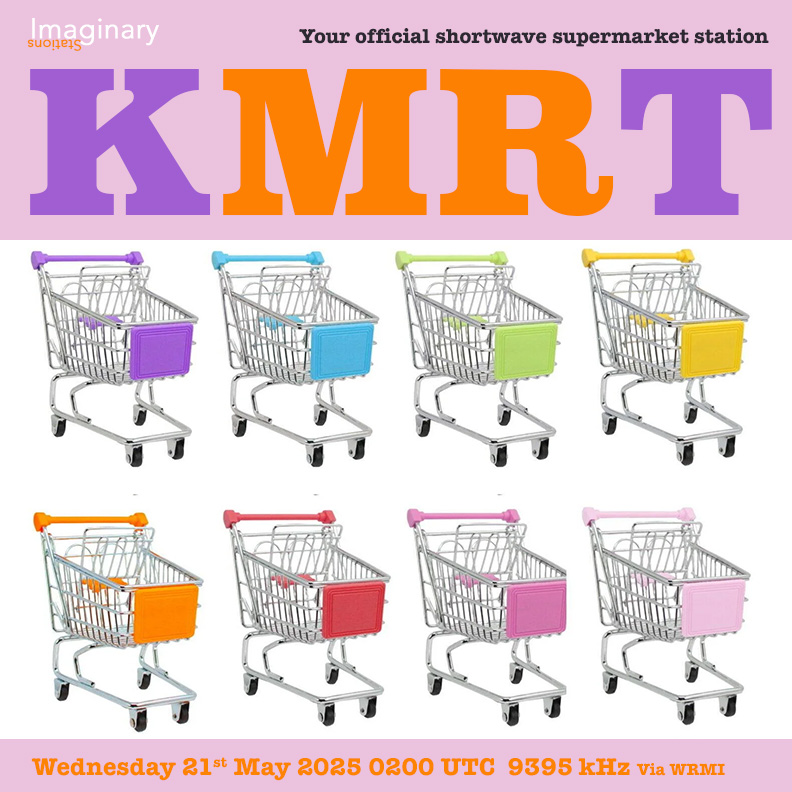
Hi FastRadioBurst 23 from the Imaginary Stations crew here letting you know about the Imaginary Stations Spring mystery challenge. We are inviting all our listeners to guess the theme of the show below on Mixcloud.

Please send your suggestions to [email protected] and the person who comes closest will be sent an individual QSL and a prize.

For more information on the shows please email [email protected] and check out our old shows here.

Spread the radio love

From the Isle of Music and Uncle Bill’s Melting Pot Return to Channel 292

Many thanks to SWLing Post contributor, Bill Tilford, who notes:

Beginning April 13 on Channel 292:

From the Isle of Music:
2nd Saturday of each month:
1100-1200 CEST/0900-1000 UTC on 9670 with beam D (Eastward)
Repeat 2100-2200 CEST/1900-2000 UTC on 6070

Uncle Bill’s Melting Pot:
3rd Saturday of each month:
1100-1200 CEST/0900-1000 UTC on 9670 with beam D (Eastward)
Repeat 2100-2200 CEST/1900-2000 UTC on 6070

The April 20 UBMP will be simulcast on 3955 from 2100-2200 CEST/1900-2000 UTC on 6070

Spread the radio love

Kostas improves the contrast on his FRG-7 digital display

Many thanks to SWLing Post contributor, Kostas (SV3ORA), for sharing the following guest post which originally appeared on his radio website:


FRG-7 digital display contrast improvement

by Kostas (SV3ORA)

The FRG-7 digital by Marcel Jacobs PA8MA, is a very well thought modification KIT for the Yaesu FRG-7 receiver. It really adds to it one of the things it misses (and it misses a lot) to become a more “serious” receiver in the modern era, the digital frequency readout and S-meter. If you are like me and enjoy classic radio gear, but you do not want to compromise much the every-day usability, I recommend you this KIT. I have to say here that, the first thing you would want to do if you use the receiver for SSB, is to perform my SSB-related mods as well.

When I installed this KIT on my FRG-7 The first thing I did not like about it, was the very bright display which blasts your eyes with light especially at night on a low-lit shack. Not only that, but your eye will condinuously focus on the bright display and you loose the magic of the rest of the radio controls and displays. I wanted the digital display to be one of the parts of the radio and not the major thing that my eyes will look all the time. Marcel was smart enough to include 2 brightness levels in software. The low brightness setting does not actually change the backlight of the display, it just changes the graphics in more dim colors. As a result in either setting, the backlight color is very bright and this decreases contrast a lot. The background of the numbers in the display has a blue-ish color and not true black. Not only that, but the edges of the display, are visible too. I have solved all of these problems with a simple modification to the KIT.

The picture above, shows the display after my modification. The picture is taken on a dim-lit shack using my phone, with no further image processing. What you see in this picture, is exactly what it looks in reality, after my modification. Notice how the background of the display, remains pure black and the numbers and graphics of the display do not blind you anymore and are of the same brightness as the rest of the original backlit graphics of the radio. This allows your eye to wander around to the rest of the nice radio backlit things, without focusing all the time on a bright display. This is very relaxing to the eye and the brain as you scan for stations. You actually only look at the digital display when you want more accuracy. Compare this nice display contrast with the one presented on Marcel’s manual and you will notice the difference.

The modification is really simple and it does not need a schematic. It is just a 22k potentiometer, connected as a variable resistor like shown in the picture. I just cut the second cable (from the left), of the ribbon and then soldered the variable resistor there. That’s it. Depended on the light conditions in which you operate the receiver and on your personal preference, you can set the brighness from full to very dim. In the software setting, set the brightness to maximum. Then use this variable resistor to decrease it to your desired level.

Spread the radio love

Radio Moscow Ephemera Circa 1972

Many thanks to SWLing Post and SRAA contributor, Dan Greenall, who shares the following Radio Moscow ephemera from 1972. This media is also posted on Archive.org:


I first began listening to shortwave radio in December 1969 at the age of 15. My parents were very supportive of this newfound hobby and allowed some space in the basement for a listening post, in addition to permitting external antenna wires to be run across their property. Various pieces of radio equipment, audio cassettes, shelves of reference books and printed matter including albums filled with QSL’s were accumulated over the next several years, and it all followed me when I moved out. Or so I thought! While clearing out my parents estate in 2016, I came across some ephemera received from Radio Moscow in 1972, that was mixed in with a pile of old papers.

These included a leaflet announcing a Quiz to celebrate the 50th anniversary of the USSR, a frequency guide for their North American service from May to October 1972, and a small 12 page program guide for their North American and Pacific Coast Services.

Spread the radio love

Alan Roe’s A-24 season guide to music on shortwave (version 1.0)

Many thanks to SWLing Post contributor, Alan Roe, who shares his A-24 (version 1.0) season guide to music on shortwave. Alan provides this amazing resource as a free PDF download:

Click here to download Music on Shortwave A-24 v1.0 (PDF)

As always, thank you for sharing your excellent guide, Alan!

Spread the radio love

Raddy RE40 Emergency Radio

By Robert Gulley (Guest Post)

The Raddy RE40 is another portable shortwave radio offering from Radioddity, but with a twist – it is intended to be an emergency radio first, and a listening-for-pleasure radio second. In this review I will cover the emergency options incorporated into the unit, as well as discuss operability and its overall functionality as a radio.

As always when I do a radio review, I will point out what I believe are the radio’s strengths and weaknesses, as well as where this might fit in your radio arsenal. The usual disclaimer applies for any product I review – I tell it like it is, good or bad. While the radio was provided to me without cost by Radioddity, that does not affect my opinions one iota. With that out of the way, let’s get into the meat and potatoes of the rig!

As we have come to expect from other Raddy portables, this has a lot of features packed into a relatively small package. I say “relatively small” because it is thicker than many vertical portables, and heavier. This is a solid bit of kit, and the size and weight are the first clue that this radio is not just intended to sit on a coffee table. It is definitely designed to work outdoors, as well as finding a place in the car or boat for when you need to check on the weather, or be out in it.

Specifications

    • Frequency Range: FM: 87-108MHz, AM: 520-1710KHz, SW: 5.7-17.9MHz, WB: 162.400-162.550MHz
    • Bluetooth: Version 5.0
    • Card Type: MP3/WAV/FLAC/APE
    • White Noise: 7 different natural sounds
    • Max. Capacity of Micro SD Card: 256GB (not included)
    • Size: 81x52x132mm / 3.2x2x5.2in
    • Weight: Approximately 350g / 0.77lb
    • Operating Voltage: 2.7V-4.2V
    • LED Light: 1W/120LM
    • Max. Power: About 5W
    • Speaker: 4? 5W
    • LED Flashlight: 1W/120LM
    • Battery Capacity: 4000mAh / 3.7V (non-replaceable)
    • Operating Temperature Range: -10? to 60??14°F to 140°F?

What’s in the box?

    • 1 x RE40 Radio
    • 1 x Type-C Cable
    • 1 x Wrist1 x User Manual

Power Options

This radio can be powered by an internal battery charged by a USB-C port, solar powered to charge the battery, or by a hand crank. Here is the manual description of the emergency power options:

A. Solar Charging

  1. Put the solar panel directly towards sunlight. When the green charging indicator lights on, it indicates that the solar panels charging the internal battery.
  2. The charging efficiency depends on the solar exposure: the stronger the sunlight, the better the charging effect.

B. Hand Crank Charging

  1. Turn the hand crank clockwise or anti-clockwise and the green charging indicator will light up to indicate that it is
  2. Speaker has no sound: Hand crank at 130-150 rpm for 1 minute, the flashlight can be used for more than 30+ minutes or play the radio (medium volume) for 3

NOTES:

  1. The hand crank can be turned for 3-5 minutes before using the product to activate the internal battery.
  2. The hand crank is normally used in emergency situations when the power is out.

Solar Panel

The radio has a compass built into the volume control knob on top, a flashlight, analog tuning dial, and switches for moving between playback modes (Radio, Bluetooth, and media) and desired operations (SOS, Standard battery or solar/crank charging modes, and USB charging). As an aside, the SOS feature is LOUD!

Almost the whole back of the radio is devoted to the solar cell. This is much larger than other solar cells on portable radios that I own, and presumably will recharge the internal battery faster. There is a rubber flap over the headphone, USB and memory card jacks/slots.

The unit has another interesting feature: you can charge your phone or other USB device from the standard USB slot under the flap. To use this feature the mode switch on the back of the radio has to be in the right-hand position under the charging symbol. When set to charge another device all other functions are disabled, so if you turn your radio on and can’t get anything to work, you might just have pushed the button over to the right accidentally, or intentionally the last time you used the radio.

Radio Performance

I’ll not spend a lot of time here, not because the radio performance is poor, but because as I have already noted, that is not the primary focus of this radio. There are plenty of portable radios by Radioddity and others which have better performance. However, I found the FM reception to be exceptional for a radio in this class, and AM radio reception to be reasonably acceptable for a radio with a lot going on inside. I did not test the AM radio reception with one of my loop enhancement units, mainly because I am not looking to use this as a regular radio receiver. This is going in my car for emergency/safety issues, and to grab when I am having a picnic lunch or the like.

Shortwave reception is on par with other radios of this size, and a pleasant feature is a sturdy telescoping antenna. Unlike several other small Raddy radios which have very fragile antennas, this one is much more solid.

Weather band reception is decent, but not quite as good as other radios I have tested. I can pick up one very strong signal, and a usable/readable second signal, but some other radios I have give me 4 or 5 stations. Of course, as long as you can get one strong signal, it is likely that is the one most important to you in your immediate location. With at least a second station you have the chance to pick up information should the one nearest you experience difficulties.

Sound and White Noise

As for the sound quality, it has a nice large speaker and delivers good sound, and I have found this typical of most all of the Raddy radios I have tested. In addition to the typical sleep timer radio option, this radio features a “white noise” option which allows the user to select between 7 different white noise options for those who prefer to go to sleep that way.

Compass and Flashlight

Pros

  1. Feature-Packed in a small footprint
  2. Loud SOS
  3. Sturdy Antenna
  4. Large Solar Charging Cell
  5. Ability to charge phone
  6. Multiple ways to power radio/flashlight
  7. Strong FM, acceptable AM and Shortwave (no SSB)
  8. Price ($49.99 from Radioddity, $44.99 plus 10% off coupon from Amazon at time of writing. There is also a bundle offer from Amazon which includes an SP4 4W Portable Solar Panel for $59 plus 10% off coupon) [Note that these are affiliate links that support the SWLing Post at no cost to you.]
  9. 18-month(!) warranty

Cons

  1. Weather band not as impressive as some other radios, but hardly a deal-breaker
  2. Analog tuning dial very sensitive (if you have shaky hands this is probably not for you, except perhaps for the emergency functions)
  3. Multi-colored striped analog dial is sometimes hard to read (then again, I need my reading glasses for a lot of things!)

Wrap-up

This little radio packs a lot of punch for the money, adding features similar emergency radios do not have. If you are like me, emergency radios are a necessity given our unstable weather and power grids, and I like knowing I can use solar power to recharge a radio, or crank it when the sun is not available. Some folks expect more power from a hand-crank generator than these small radios produce, but my main goal is to be able to quickly check weather conditions, use the flashlight, or make use of the SOS function if needed. These do not require massive amount of time spent cranking the generator, and to me that is a plus.

I would recommend one for each car or boat, or to take with you on outdoor trips just in case of an emergency. Of course, you could always listen to the ballgame on your front porch, too!

Cheers, Robert K4PKM

Spread the radio love

How to DX the 2024 Solar Eclipse!

Many thanks to SWLing Post contributor, Nick Hall-Patch, who shares the following article originally published in the IRCA’s DX Monitor:


2024 Solar Eclipse DXing

by William Scott, WE7W

DXing the mediumwaves promises to be an exciting event on April 8 during the 2024 total solar eclipse.    I’ve been mulling over the DX possibilities a lot lately and have come to some conclusions. I think it boils down to three promising DX scenarios:

  • Scenario 1. For those who live within or very near the path of totality (see Figure 1), I believe best chances of DX would be first to listen to your southwest, along the path where totality is approaching. Darkness will already have happened in that direction, and a certain amount of residual de-ionization of the ionosphere will still remain. After the point of totality passes your location, I would swing my attention to the northeast.
  • Scenario 2. For those living within about 800 km (or about 500 miles) of the path of totality I believe best chance would be a perpendicular path across the totality path to a point roughly equidistant on the other side. This puts the signal reflection point right at the center of the totality path, or the deepest point of darkness.
  • Scenario 3. For those living more than about 800 km from the path of totality I believe best chance would be along a line from your receiving site to a perpendicular intersection to the totality path. This should define the greatest shaded path.

I think that scenarios #1 and #2 have the best possibility for DX.

Figure 1 (Click to enlarge)

Across the U.S. and Canada, from its entry at Texas to its exit through NE Canada and into the Atlantic Ocean, the totality path width varies from a maximum of 199 km at U.S. entry to about 160 km at Atlantic exit, or 123 to 99 miles.

Important to keep in mind – skywave signal strength analysis is based almost entirely on the condition of the ionosphere at the reflection point, not at the receiving site. For single hop propagation, normally the reflection point is at the halfway point to the station along the great circle route.    That 800 km distance from the totality center I wouldn’t hold as gospel. I’m throwing that figure out as a point where scenario #2 may start to transition to scenario #3.

Timing is of the essence for DXing. The shadow velocity exceeds 1000 mph, increasing from 1587 miles per hour at Eagle Pass, Texas to 3176 mph at Houlton, Maine. You may have only minutes to DX.     I’ll be in Rochester, NY at the time of totality, and we are right at dead center. I’ll be scenario #1. My plan is to listen to my southwest initially, where totality is approaching. I’ll be listening particularly for WLW-800 in Cincinnati, OH, WHAS-840 in Lexington, KY, and others along or near that path.

Scenario #2 possibly holds the most promise. Calculate your distance to the path center line and look for stations on a direct line across the totality path and at an equal distance on the opposite side of the path from you. One such scenario might be WSB-750, Atlanta to a reception point in northwestern Illinois, central Iowa, or southern Wisconsin or southern Minnesota. Many possibilities on cross-paths exist here. I feel best results would be with a signal path that crosses the path of totality closest to 90 degrees.

A question was raised about the possibility of DX from Spokane, Washington, an extreme distance from the path of totality. That particular scenario would be scenario #3, more than 800 km to the path of totality. Maximum obscurity should be when northeast Texas (let’s say the Dallas area) is experiencing full totality, as the great circle line to the totality path intersects at approximately 90 degrees to the line at that point. This would be at about 1848 UTC. I would listen for any signals along a great circle path between Spokane to anywhere from the Dallas area and northward.     Obviously, Spokane to Dallas is an extremely long one hop path, at about 2450 km. At that distance, the reflection point is near Denver, which will have a solar obscuration of 65.1% at maximum.

A Dallas area reception would be next to impossible I would think, but there are many more stations along that great circle path one could try for. Closer stations will obviously move the reflection point closer and start to reduce the solar obscurity. I did a scan along that path and there are some 340 stations within 200 km either side of the line of the great circle path between Spokane and Dallas.

A presumed Scenario #4.

Another scenario was suggested by Nick Hall-Patch, that of reception parallel to the path of totality and outside the 100% totality band. The 2017 solar eclipse across the northern part of the U.S. was DXed extensively and produced some interesting results, which are well documented in IRCA Reprints.  Check their document repository here:

http://dxer.ca/images/stories/2019/irca-reprint-index.pdf

Nick reports: “The receptions of KSL-1160 described in IRCA Reprint # G-096 showed the results of 3 DXers listening across the path of the eclipse (Scenario #2), but the fourth, Dave Aichelman, was monitoring KSL from a location parallel to the eclipse path ( sort of Scenario #1?) and got very good enhancement as well.”    We might name this “Scenario #4”.

I checked out # G-096, that documents the KSL reception from the solar eclipse of 2017. It looks like the Dave Aichelman (at Grants Pass, OR) reception of KSL had a mid-path reflection point of about 95% solar obscurity. The distance was 971 km (602 miles). Graphing KSL, I see it has a nice fat low angle takeoff and impressive skywave strength at 900 km, some 1.3 mV/m for that distance. (ed. note: A map of fractional solar obscuration is in Figure 2, easily converted to the percentage figures quoted in this article. )

Better yet, the article indicated Aichelman also received XEPE-1700 across the Mexican border from San Diego too. That was a mid-point reflection obscurity of only about 83% as far as I can deduct from the maps. The distance was 1238 km (769 miles). The mid-path reflection point there was in the neighborhood of 700 km from the central path of totality.

So, DX is indeed possible where both the station and the receiver are off center from the totality path. It’s looking like anything from at least 80% obscurity at mid-path reflection may have some real possibilities, particularly if you are at the end nearest the path of totality. Lower obscurities, perhaps down to 50% or so may even produce results.

Check out these links.

https://nationaleclipse.com/cities_partial.html

https://eclipse.gsfc.nasa.gov/SEpath/SEpath2001/SE2024Apr08Tpath.html

https://eclipse2024.org/eclipse_cities/statemap.html

Using my pattern mapping program which has extensive area search capability, I’ve compiled a list of all US and Canadian stations that fall within the 2024 Solar Eclipse path of ~100% totality. There are 456 stations. Results are drawn from the March 20 FCC LMS database and Industry Canada database. Sorry I don’t have Mexico available.

If you would like this list, download from this link. https://www.mediafire.com/file/125ih5yrmw4puib/2024-eclipse-stations-by-longitude.zip/file

Across the US and Canada, from its entry at Texas to its exit through NE Canada and into the Atlantic Ocean, the totality path width varies from a maximum of 199 km at US entry to about 160 km at the Atlantic exit off Newfoundland, or 123 to 99 miles.   456 stations are found in this eclipse path. I purposely set the path width to 210 km from start to finish. This gives a few km slop on both sides of the 100% totality path for good measure.

Unzip the downloaded .ZIP file, where you will find 3 files. The stations in each file are sorted by longitude, from west to east. This gives us the progression of the eclipse path, with the eclipse starting at the first station in the list and ending with the last station.

File #1 is a simple text file.

File #2 is in .CSV format. You can easily input it to an Excel file.

File #3 is in .HTML format. It includes links to each station’s Google Map latitude-longitude coordinates for the satellite view of the transmitter tower array.

Another link takes you to the FCC AM Query link for that station.  I hope these files are beneficial. There should be many propagation path possibilities outside of this list as well.

(reprinted from the author’s blog at https://radio-timetraveller.blogspot.com/ )

********

Further sources of information concerning the eclipse include the following websites:

http://xjubier.free.fr/en/site_pages/solar_eclipses/TSE_2024_GoogleMapFull.html?Lat=43.66400&Lng=-76.13690&Elv=88.0&Zoom=6&LC=1

(Clicking anywhere on this map page will give all the information you need about obscuration, length of eclipse etc.at a given location).  Also:

https://www.greatamericaneclipse.com/april-8-2024

https://eclipsewise.com/2024/2024.html

Animations of the path of the eclipse versus time can be seen at:

https://eclipsewise.com/solar/SEanim400/2024_04_08_TSE_400px.gif

http://7dxr.com/4all/100km8Apr-movie–Frissell-HamSCI.mp4

The latter is particularly interesting, as it shows the moon’s shadow at 100km height above the earth, an area of special interest to DXers, as it is the lower edge of the E-region of the ionosphere.  Note especially that as the eclipse ends over the North Atlantic Ocean, that there is a temporary darkness path between Europe and North America, because night will already have fallen in Europe.  So will there be blips of TA DX in eastern North America as the eclipse passes by?   Listen, and find out!

Finally, our DX could be of interest to ionospheric physicists also.   The rapidly changing listening conditions will be indicating a similarly turbulent ionosphere, and DXers’ documenting those listening conditions through SDR recordings could provide information that will be useful to scientists who want to gain a better understanding of the Earth’s ionospheric dynamics.

HamSCI is an organization of volunteer citizen-scientists and professional researchers who study upper atmospheric and space physics, and will be interested in examining MW DXers’ wideband SDR recordings made during the eclipse period, and indeed, in having DXers assist with HamSCI’s research. (see https://hamsci.org/eclipse.  Especially if you are an amateur radio operator, there are several other ways that you might also contribute to the project.)

(This first appeared in IRCA’s DX Monitor and is used with permission.   See https://www.ircaonline.org/default.php for club details)

Spread the radio love