Category Archives: Accessories

A happy accident, and some experiments

By Jock Elliott, KB2GOM

When you live in an antenna-challenged situation as I do (stringing long wire antennas outside is problematic for me), the result is a never-ending search for an improved signal.

Toward that end, I’ve experimented with a horizontal room loop, an indoor end-fed, and a short dipole.

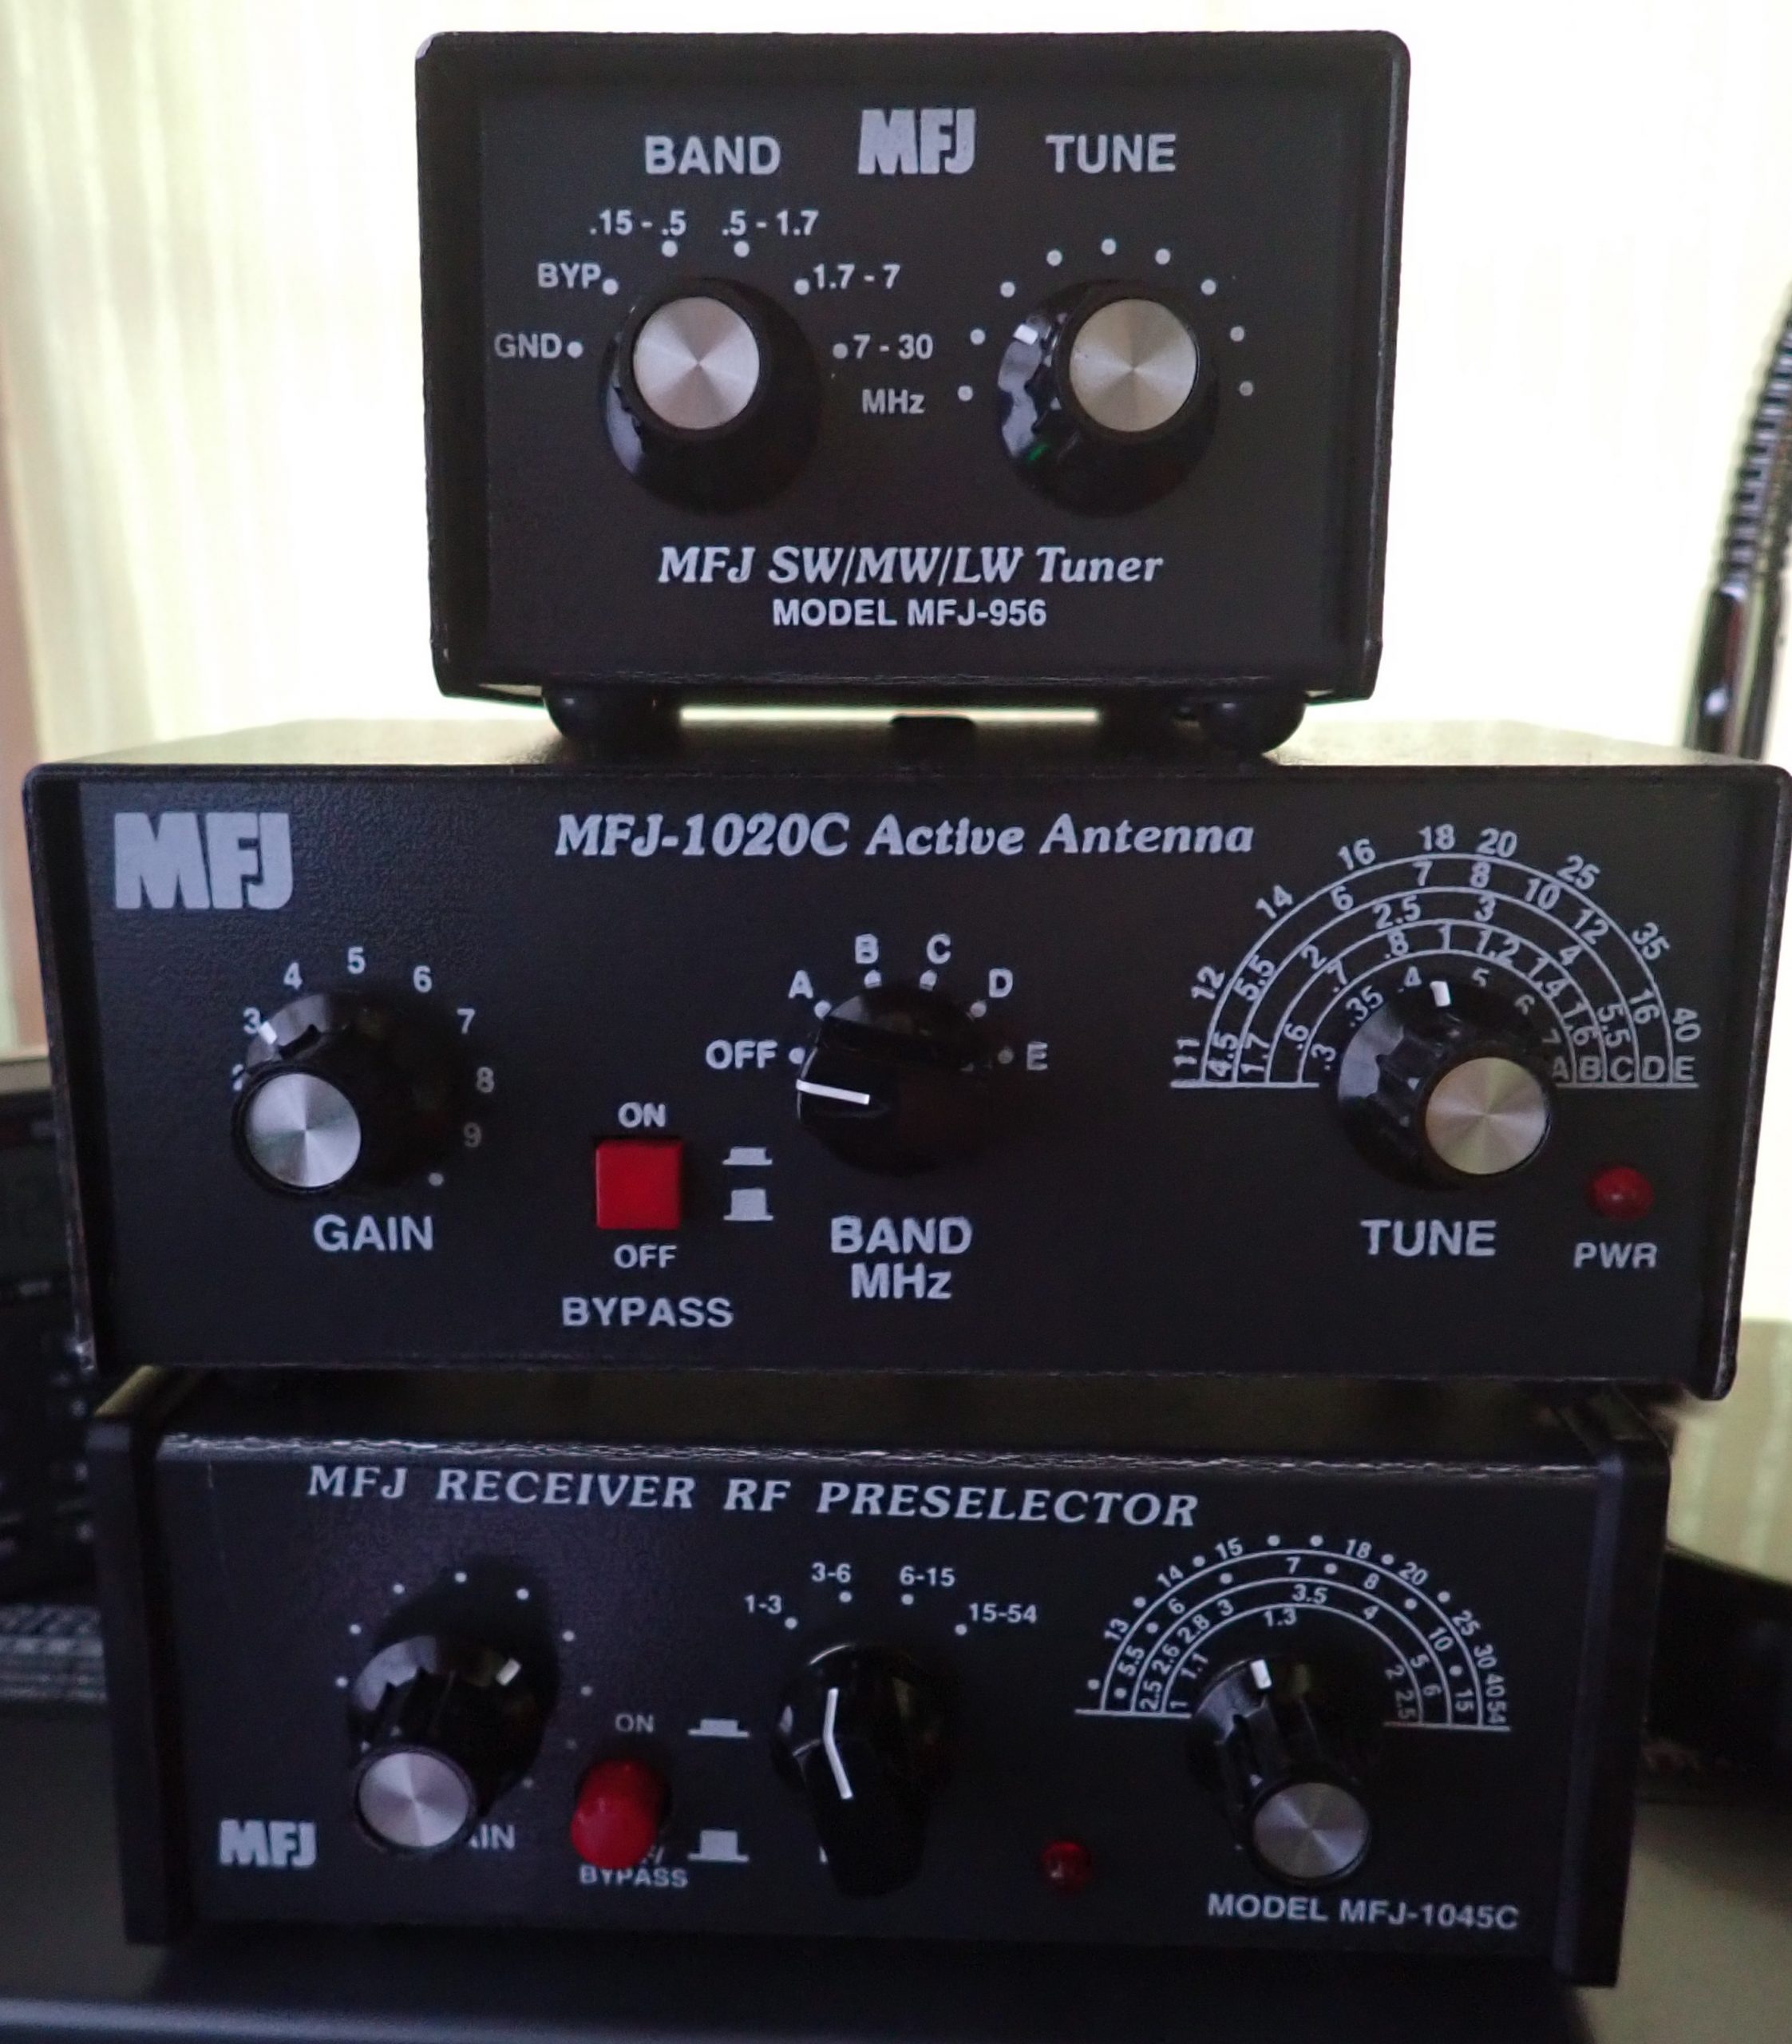
Along the way, I decided to test the MFJ 1020C active antenna/preselector, and I liked it pretty well. My conclusion was: Bearing in mind that it won’t improve every signal you want to hear, if you live in an antenna-challenged situation, the MFJ 1020C – particularly if you can get 20-50 feet of wire outdoors or run around the perimeter of a room – may be just what the doctor ordered.

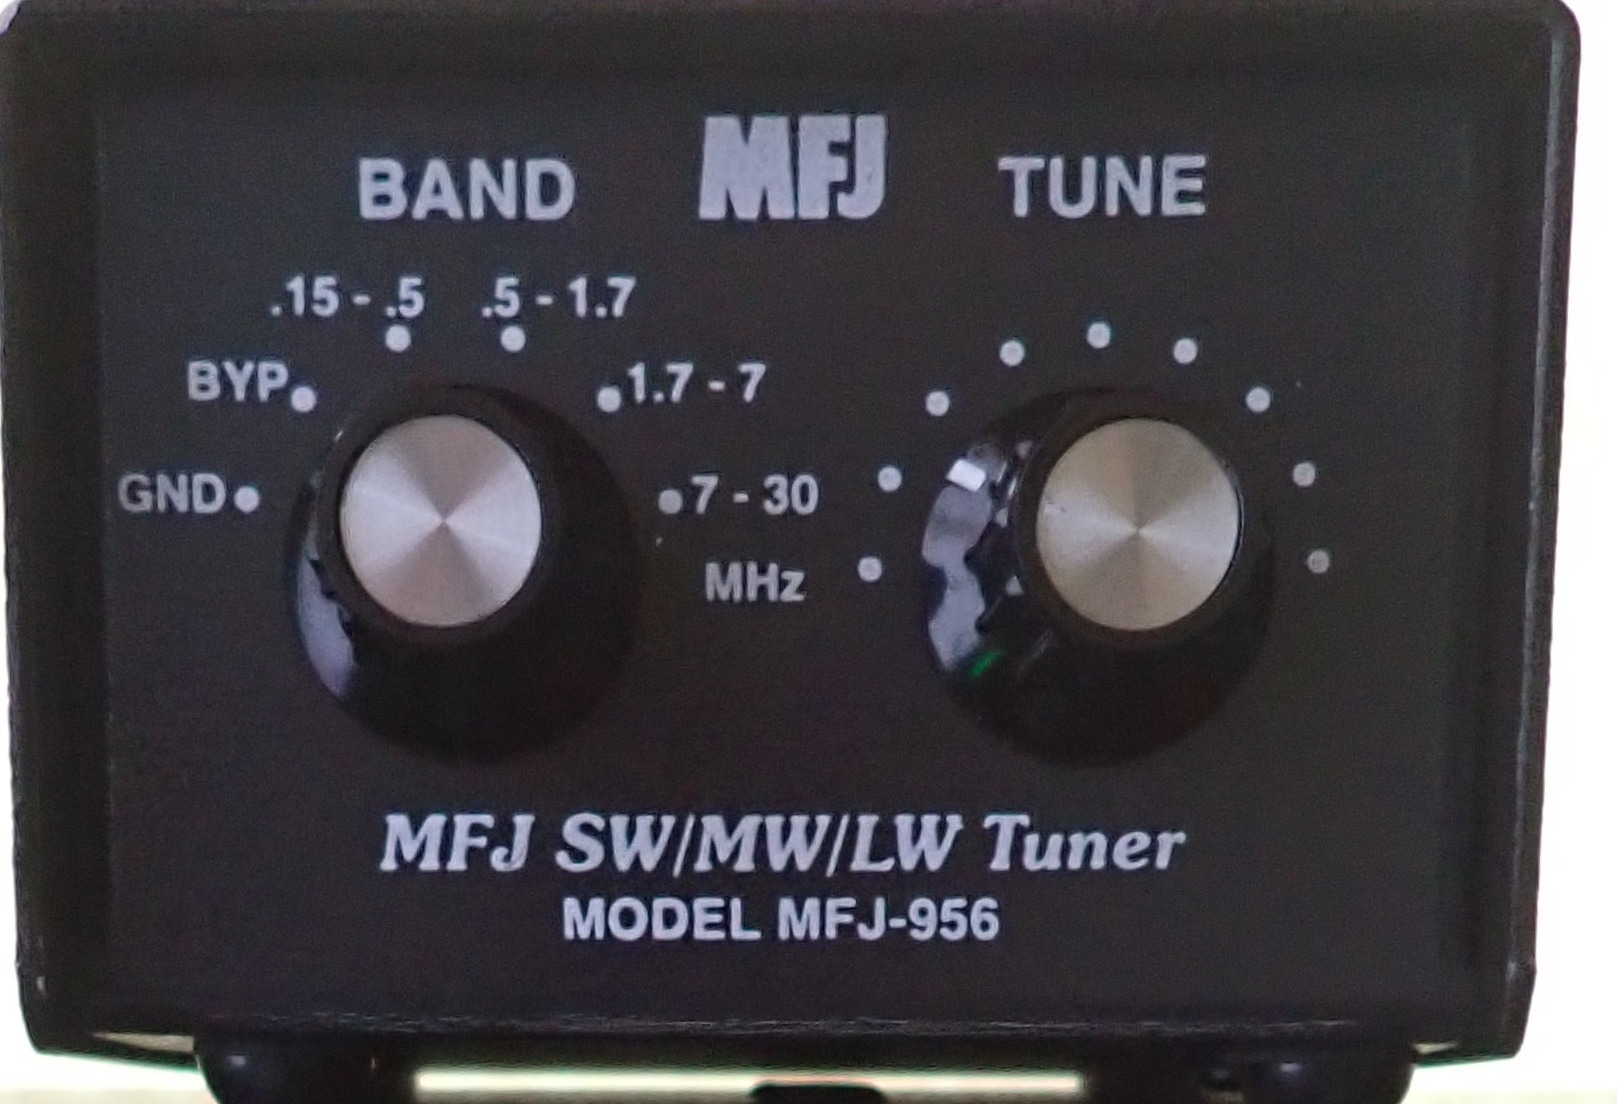
After my test of the 1020C, I had an online conversation with Andrew (grayhat), and he suggested that I might want to have a look at the MFJ 956 passive selector.  Its major claim to fame is: “Boost your favorite stations while rejecting images, intermod, and phantom signals!  The MFJ-956 Pre-Selector/Antenna Tuner greatly improves reception from .15 to 30 MHz — especially below 2MHz.  It has tuner bypass/ground receiver positions.  The MFJ-956 measures a compact 2 x 3 x 4 inches.

MFJ was kind enough to send a 956 to me, and while I did not test it below 2 MHz, I found that it proved very helpful in tuning in the BBC mid-winter broadcast to Antarctica. I started out with the MFJ 1020C. Lots of noise and fades. Reception was somewhat better using the 1020C (compared to bypass), but then I switched to MFJ 956. I found I could copy better with the 956, even though it provides no amplification. Tuning slightly off-peak offered the best copy, better than bypass. I was listening in USB. In all, it is a useful piece of gear.

While poking around the MFJ website I discovered the MFJ 1046 Receiver Preselector, 1.6-33 MHz. Among other claims, MFJ has this to say about the 1046: MFJs new Passive Preselector has extremely high dynamic range! It improves the performance of nearly any HF or shortwave receiver/transceiver. It vastly improves the most expensive receivers. Especially helpful to those with broadband front-ends that are prone to overload.

Sounds promising, I thought, so I emailed Thomas, SWLing’s Maximum Leader, to see if maybe MFJ would like me to have a look at one.

A happy accident

A few days later, package arrived.

I was unpacking it when the Brain Dudes interrupted.

Brain Dudes:  Hey!!

Me: What?!!

Brain Dudes: That thing look a little weird to you?

Me: Whaddya mean?

Brain Dudes: Look at the front . . . what do you see?

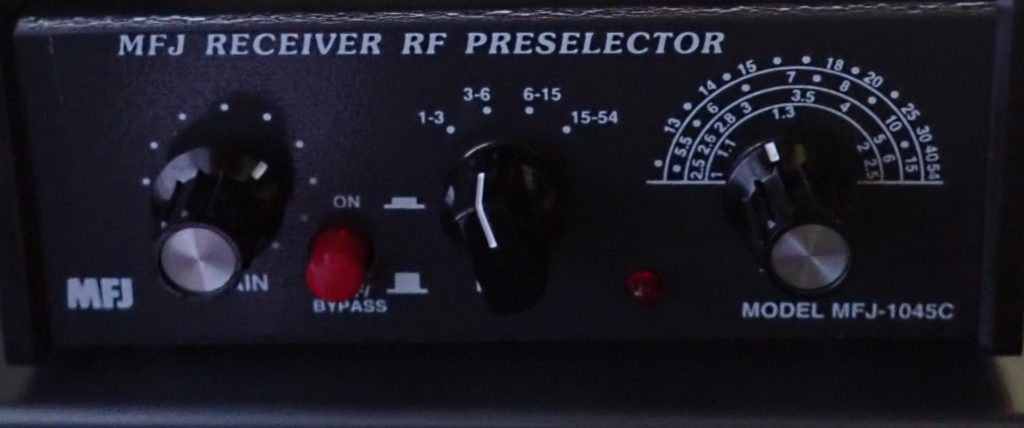
Me: Well, on left, a knob labeled GAIN; next to that, and ON/OFF button; moving to the right, a BAND selector switch, and finally a TUNE knob.

Brain Dudes: And what is the MFJ 1046 supposed to have?

Me: A big tuning knob, an ON/OFF switch, and a BAND selector switch . . . maybe this is an improved model . . .

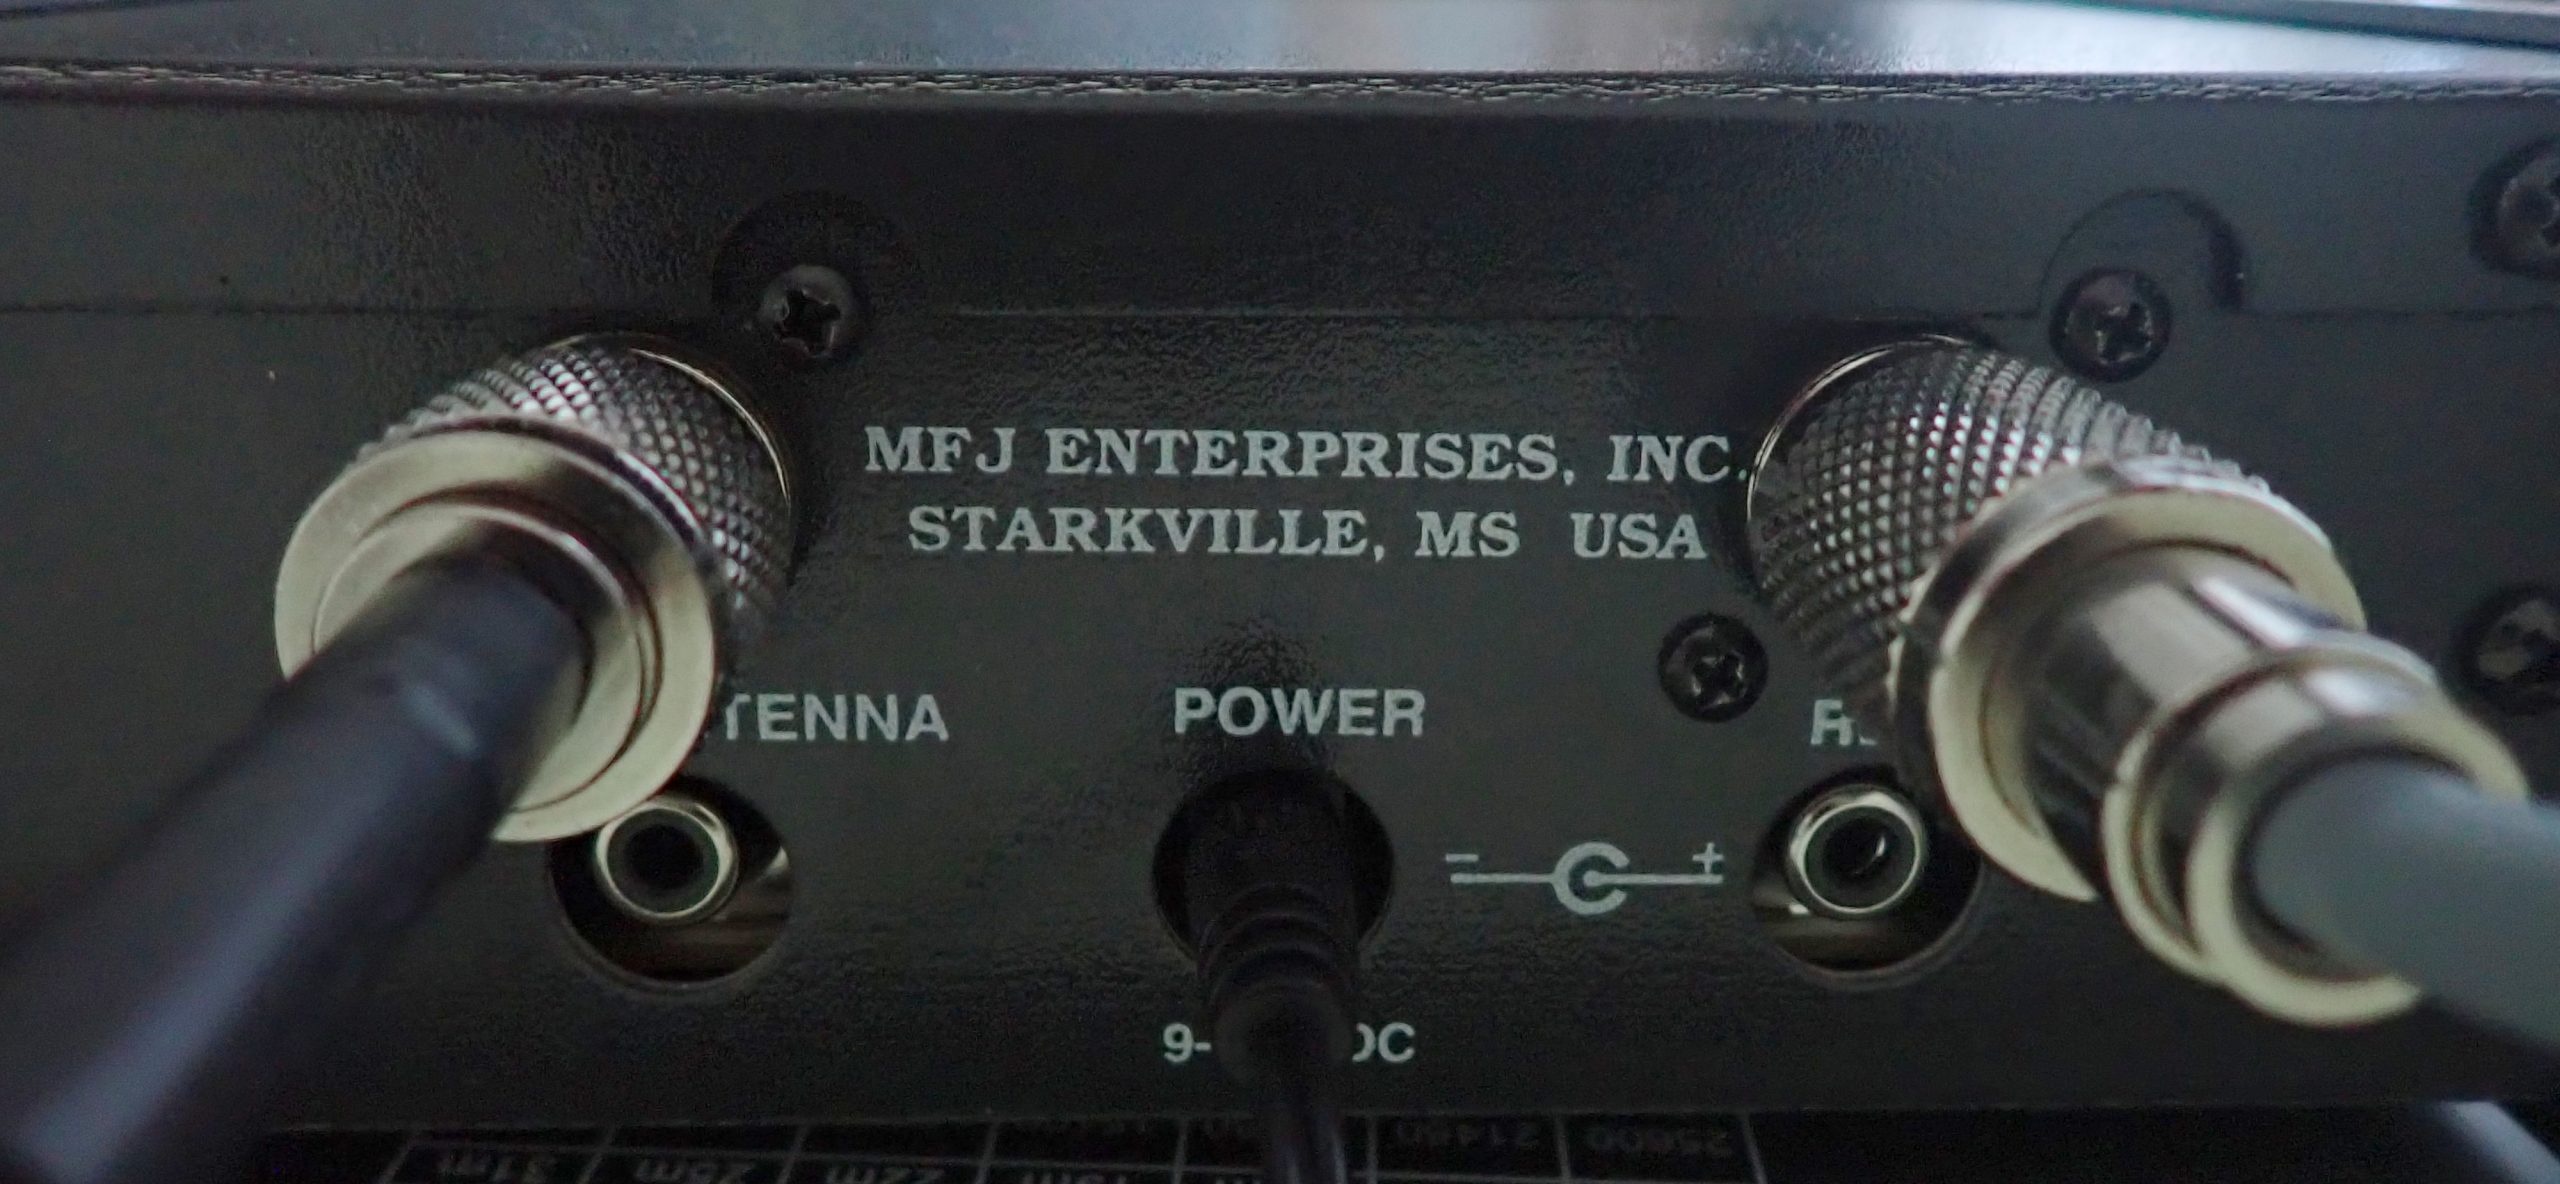
Brain Dudes: How ‘bout you look on the back panel . . . what do you see?

Me: The usual connections for antenna and receiver . . . and a plug-in socket for an external power supply.

Brain Dudes:  Is a passive preselector supposed to have a power socket?

Me: No . . .

Brain Dudes: OK, final clue, Sherlock: suppose you read the label on the front panel.

Me: MFJ 1045C. Holy smokes! They sent me the wrong unit!

(I hear the Brain Dude yelling at someone in the background: “Finally, the light comes on! I told you switching to decaf was a bad idea!)

Brain dudes: So they sent you the wrong unit; suppose you test it anyway since it’s here.

So I did. And it turns out that MFJ sending the 1045C instead of the 1046 was a happy accident because the 1045C, which is an active preselector, delivers excellent performance across the board.

This is what MFJ says about the 1045C: “Lets you copy weak signals. Rejects out-of-band signals, images. 1.8 to 54 MHz. Up to 20 dB gain. Gain control. Dual gate MOSFET, bipolar transistors for low noise, high gain. Connect 2 antennas, 2 receivers. Coax and phone jacks. 9-18 VDC or MFJ-1312D.

Once the antenna, receiver, and power supply are connected (I used the power supply that MFJ sent me with the 1020C), I operate the 1045C in much the same way as the 1020C:

  1. With the unit in BYPASS mode (the ON/OFF button out), tune the receiver to the frequency you want to hear.
  2. Set the GAIN knob to around 3 or 4.
  3. Set the BAND knob to the band with the MHz that you are tuned to.
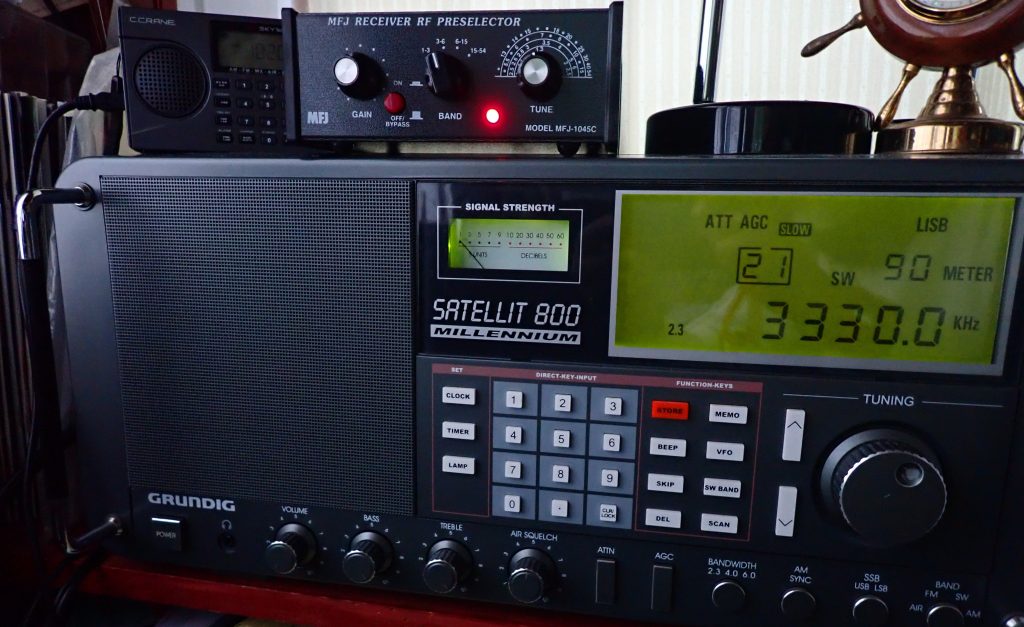
  4. Press the ON/OFF/BYPASS button in. This turns on the active preselector and amplification circuits and a red light comes on to let you know the unit is activated.
  5. Slowly turn the TUNE knob back & forth. At some point in its tuning range, you will hear the signal and/or noise peak.
  6. Finally, adjust the GAIN knob for maximum intelligibility of the signal. Sometimes tuning slightly to the side of the peak works best.

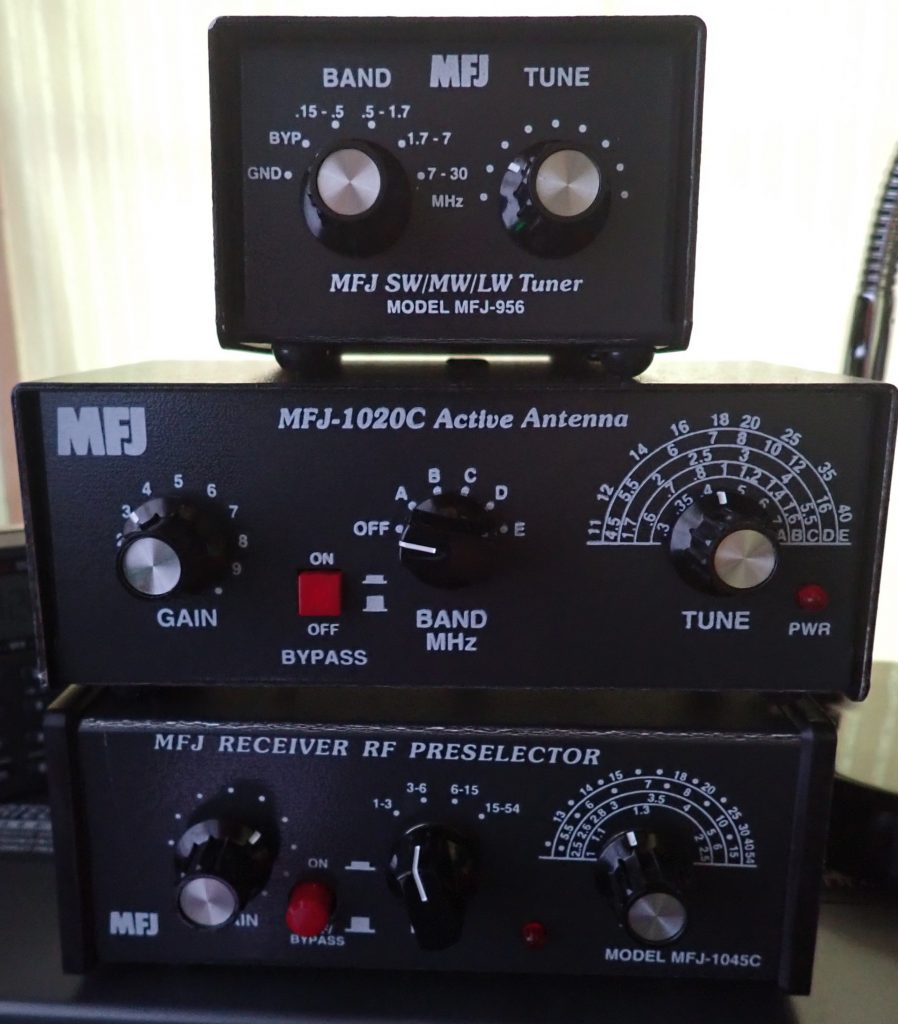
I tested the MFJ 1045C with my end-fed indoor antenna (see link above) and with the short dipole (also, see link above). I also did head-to-head comparisons with the MFJ 1020C and those two antennas.

The results

Here’s what I found:

  1. The indoor end-fed antenna (which is 45 long) out-performs the short dipole (which is 6 feet total length) in all cases. That’s no surprise, but bear in mind that not everyone has a situation in which they can deploy the longer antenna. The 6-foot dipole definitely out-performs the whip antenna on my Satellit 800.
  2. The 1045C has a broader range of amplification than the 1020C. It appears to reject adjacent channel interference as well or better than the 1020C, and, to my ear, the 1045C has a lower noise floor. If you turn the GAIN knob fully to the left, it gets to a position where it appears to actually attenuate the signal. And I never found a situation in which, if properly tuned, the signal delivered by the 1045C was at least equal to the bypass signal, and many times it was significantly better. In short, in the HF range the 1045C appears do to everything that the 1020C does (with the exception of the 1020C’s screw-in whip antenna) and do it better.
  3. When using the 1045C with a portable (my Tecsun 880), I found that I could hear the noise peaks better than with the 1020C, which is a great help in tuning for best performance.

So why would you chose the 1020C or the 956 over the 1045C? Short answer: if you are a MW or LW enthusiast. According to MFJ, the 1045C covers 1.8 to 54 MHz; the 1020C covers .3 to 40 MHz, and the 956 covers 150 kHz to 35 MHz.

However, if you are an HF weenie like I am who enjoys teasing out faint signals, and particularly if you are faced with a sub-optimal antenna situation, the MFJ 1045C, in my opinion, is definitely worth a try.

Click here to check out the MFJ-1045C.

Shameless plug: check out the SWLing Post Message Board there are often interesting discussions going on there.

Spread the radio love

Armed Forces Day QSL Card

On May 14, 2022, this blog published an announcement of the Annual Armed Forces Day Crossband Test.

The blog included a link to a PDF file that listed all the details, such as times, frequencies, and military stations that were participating (including some that were aboard ships), and there was even a link where you could submit your information online to receive a QSL card. I thought it would be fun to see if I could hear some of the military stations.

At 3:29 pm on May 14, I posted a comment on the blog:

1850Z & 1925Z — 14.487 MHz — Station sending CW CQ CQ CQ (I can copy but not read the rest), believed to be NSS — US Naval Academy transmitting for Annual Armed Forces Crossband test.

At 3:37 pm, I posted:

1934Z — 14.487 station NSS announces in voice they are listening 14.234.0 USB. Additional contacts in SSB. “It’s raining buckets here.”

Not hearing anything further, I filled  out the QSL request for — which asked for two-way contact information. I explained that I had only heard the Anapolis station, but I gave the details. Frankly, I did not hold out much hope for receiving a card, but yesterday it arrived.

As I reported elsewhere the MFJ 1020C active antenna/preselector made it possible to hear the Armed Forces Day station.

It was a very nice surprise to received the QSL card in the mail.

Spread the radio love

Beach Boys, Good Vibrations, and HB-7 Headphones

Many thanks to SWLing Post contributor, Mark C, who writes:

Thomas,

You have posted numerous photos of radios appearing in film. I found something similar but with an interesting twist.

The link is to the YouTube clip Good Vibrations the Lost Studio Footage. Watching the Beach Boys singing that iconic musical selection is thrilling enough but I would have never guessed I would be seeing them wearing the military HB-7 and using them as studio headphones while they were performing!

Good Vibrations the Lost Studio Footage

Click here to view on YouTube.

Sincerely,

Mark

That’s just brilliant, Mark. Thank you for sharing this. I would have never guessed HB-7s would be used in a studio setting, but it certainly looks like them in the video.

I have to thank you for sharing this lost footage of the Beach Boys, too. This was new to me. I love the song, too; certainly iconic!

Spread the radio love

Testing the MFJ-1020C Active Antenna/Preselector

By Jock Elliott, KB2GOM

Truth be told, I’ve been curious about the MFJ 1020C for a long time. Back when I wrote for Passport to World Band Radio, over a decade ago, I wondered if the 1020C was a worthwhile device, but then I had a big wire antenna outside connected to a communications receiver, so I didn’t worry so much about squeezing every last erg out of the signals I was receiving. As a result, I never experimented with an MFJ 1020C.

Now, however, I have a 50-foot indoor end-fed wire antenna connected to a Grundig Satellit 800, and I am constantly looking to improve the signal. Feeding the signal through a 9:1 unun and then through coax to the Satellit 800 has boosted the signal-to-noise ratio a bit — https://swling.com/blog/2022/05/the-satellit-800-the-tecsun-pl-880-and-two-indoor-antennas-an-afternoon-of-experimentation/ —  and so has grounding the unun — https://swling.com/blog/2022/05/jock-gets-a-good-grounding/. But is there such a thing as too much signal to noise? Not in my not-so-humble opinion, so the quest for improvement continues.

During a phone call with Thomas (Maximum Leader of SWLing.com), I mentioned my curiosity about the 1020C. Thomas said, “MFJ is a sponsor of SWLing.com, I’ll see if they would like to send you one for testing.” Two days later, a package arrived with the 1020C, a power supply for it, and a short coax jumper.

The Basic Layout

The 1020C is small — 2.5” H x 6.4” W x 3.3” D – and looks well made. It covers 300 KHz to 40 MHz. On the front panel are two knobs, a push button, and a selector switch. The left-most knob controls the gain of the amplifier. Moving to the right, you’ll find a push button that controls the bypass circuit.

To the right of the bypass button, you’ll find the band switch, which controls which frequency range is in use, and to the right of that is the tuning knob which allows you to peak the signal in the frequency range you have selected. We’ll get to how it all works in just a bit.

On the back of the 1020C, you’ll find a coax connector labeled INPUT and another labeled OUTPUT, a grounding post, and a connector for the external power supply.

Setup is easy. Plug the power supply into the wall and into the back of the 1020C. (You can also run the 1020C off a 9-volt battery, which we will discuss in a while.) Connect a coax jumper from the OUTPUT connector on the 1020C to the coax input on your receiver. (If you don’t have a coax connector on your receiver, we’ll deal with that issue shortly).

Finally, you need to make a choice about which antenna you want to use. The 1020C Owner’s Manual says:

You may connect either the telescoping antenna provided or an external wire antenna of your choice. To connect the telescoping antenna; screw the antenna end through the top cover and into the spacer located on the PC board. If you chose to use external wire antenna; plug it into the INPUT SO239 connector located on the back of the unit. (DO NOT HAVE BOTH ANTENNAS CONNECTED AT THE SAME TIME!)

Attaching the telescoping antenna can take a while since you may have to hunt around to get the antenna centered on top of the screw inside the 1020C’s case.

Operating the MFJ 1020C

Here’s how I operate the 1020C:

  1. With the BYPASS turned ON (the button pressed in), tune the receiver to the frequency you want to hear.
  2. Set the GAIN knob to around 3 or 4.
  3. Set the BAND knob to the band with the MHz that you are tuned to. You will notice that the red PWR indicator on the 1020C lights up.
  4. Press and release the BYPASS button. This turns on the active preselector and amplification circuits.
  5. Slowly turn the TUNE knob back & forth. At some point in its tuning range, you will hear the signal peak. With the 1020C, I often find there is a spot where the noise peaks and a hair to the side of the noise peak is the sweet spot for listening.
  6. Finally, adjust the GAIN knob for maximum intelligibility of the signal.

Note: When the BYPASS button is pushed IN (the ON position), that means you are hearing the signal straight through from the antenna without going through the amplification and preselection circuits of the 1020C . . . it’s like the 1020C isn’t even there. This is true even if the red PWR LED is illuminated. To put the 1020C to work for you, the BYPASS button must be OUT, and a band must be selected.

The Results of My Tests

Bottom line: the 1020C can really help in certain situations.

Initially, I set up the 1020C with its diminutive 20 inch antenna and connected a coax jumper cable between its coax output and the coax input on the back of the Satellit 800. I wanted to see if it would out-perform the four-foot-long telescopic antenna on the Satellit. No way, I thought; the Satellit antenna is twice as long. But I was wrong. On the first day I tested the 1020C, the atmospheric noise was terrible. I could not hear time station CHU on 3.330 MHz at all with the Satellit’s built-in antenna. But with the 1020C properly tuned, I could hear the time “pips” on CHU clearly.

A couple of days later, when SWLing.com announced the Annual Armed Forces Day Crossband Test —  https://swling.com/blog/2022/05/today-14-may-2022-annual-armed-forces-day-crossband-test/ — I set out to see if I could hear some of the stations. I removed the telescopic antenna from the 1020C and connected the 1020C to my indoor end-fed antenna. Putting the unit in bypass mode, I then started punching in the crossband test frequencies on the Satellit 800. At each frequency, I would first listen to the frequency in “barefoot” mode, then activate the 1020C to see if I could bring any intelligible signal up out of the noise. I had no success until I got to 14.487 MHz USB.  With the straight-through indoor end-fed antenna, I heard nothing, but with the 1020C engaged and carefully tuned, I could copy a station sending in CW: CQ CQ CQ. Later I was able to confirm the ID as NSS from Annapolis, Maryland, one of the stations in the crossband test.

On some easier-to-hear signals, the 1020C sounds as if it lowers the noise floor, improving the “listenability,” but the 1020C does not improve all signals. Sometimes the signal processed by the 1020C sounds roughly the same as the bypassed signal. And sometimes the bypassed signal (straight through from the antenna without the 1020C in-line) simply sounds better.

The pigtail.

Testing the 1020C with a Portable

Next, I tried the 1020C with my Tecsun PL-880. Immediately, I was confronted with a problem: how to get the signal from the coax output of the 1020C and into the antenna socket of the 880. Fortunately, a ham friend fabricated a “pigtail” for me that made the connection from the coax connector on the 1020C to the antenna input socket on the PL-880. As soon as I hooked it up, I heard an unpleasant hum that I had not heard on the Satellit 800.

I decided to see if running the 1020C off battery would offer an improvement. This involved another challenge: there is no “hatch” on the 1020C to provide access for plugging-in the 9-volt battery. Instead, you have to take out the screws on either side of the cabinet, remove the cabinet top, find the 9-volt connector hidden in a little plastic sleeve inside the 1020C, plug in the 9 volt battery, slide it into its clip, replace the cabinet top, and run the screws back in. That, in itself, is not difficult to do, but as soon as the battery needs replacing, you have to go through most of the process all over again.

The good news is that once the 1020C was running off battery, I could detect no hum, and the experience with the 1020C with the PL-880 was much the same as with the Satellit 800. Some signals were improved, some were the same, and sometimes the straight-through (bypassed) signal was better.

I have not tested the 1020C with a large, signal-devouring antenna out in the fresh air. The 2009 edition of Passport to World Band Radio offered that, with an inverted-L antenna longer than, say, 50-75 feet, the 1020C may not provide much benefit. However, my experience with a modest 50-foot indoor end-fed antenna demonstrates that the 1020C can deliver a significant signal boost in some circumstances, and I am glad to have it in my shack.

Bearing in mind that it won’t improve every signal you want to hear, if you live in an antenna-challenged situation, the MFJ 1020C – particularly if you can get 20-50 feet of wire outdoors or run around the perimeter of a room – may be just what the doctor ordered.

Suggestions for MFJ

There are three areas in which MFJ could make life easier for 1020C users: (1) make a pigtail or other device available to get the signal from any wire antenna to the coax input of the 1020C, (2) make a pigtail or other solution to bring a signal from the output of the 1020C to a shortwave portable (possibly a pigtail with an alligator clip to connect to the whip antenna), and (3) offer or provide quick-release pins for the 1020C cabinet for those who wish to operate it off batteries and want to be able to replace them quickly and easily.

Spread the radio love

Tecsun PL-990 Ferrite Rods

Many thanks to SWLing Post contributor, Gareth Buxton, who writes:

Hi Thomas

I see that Anon-co have the Tecsun PL-990 Ferrite rod aerial for sale. It even says in the product description “You can use it for your DIY projects.” I thought it might be of interest to your MW/AM radio constructors, especially if they can build a radio that receives more stations than the Tecsun using the same part!

Click here for the product page at Anon-Co.

Cheers
Gareth

Thanks for the tip, Gareth. This would indeed make it easy to construct an external MW antenna. Thank you for the tip!

Spread the radio love

Guest Post: Review of the Electronic Specialty Products – Model DD-103 Universal Digital Dial

Many thanks to SWLing Post contributor, Bob Butterfield, who shares the following guest post:


Review of the Electronic Specialty Products – Model DD-103 Universal Digital Dial

by Bob Butterfield

I recently brought out of storage my Yaesu FRG-7 Communications Receiver to use “in the shack” once again.  I have always regarded the FRG-7 as a capable receiver but just did not have space as my radios co-exist with part of my daughter’s over-flowing stuffed animal collection–among other things.  After a couple of dozen members of the plush collection were relocated, I now had room for another receiver!  I checked the FRG-7 out carefully and found everything was functioning well, except for a modification I made decades ago which was the installation of a 100 kHz crystal calibrator kit inside the receiver.

I am the original owner of this FRG-7 which is an early production unit (the one without the small fine tuning knob).  I had always desired an external digital frequency display for this radio and thought now is the time.  I did some research, visited various radio forums, and decided on purchasing an Electronic Specialty Products (ESP), Model DD-103 Universal Digital Dial.  This unit is not cheap, US$140, plus $15 shipping, but seemed to fit my needs.  If technically inclined, one could possibly build an external display for themselves at lower cost.  What may be of interest to many concerning the DD-103 unit is that it comes pre-programmed for dozens of transceivers and receivers (to include the FRG-7).  Plus, if your radio is not pre-programmed it can be set up manually.

The DD-103 is an attractive compact external unit measuring 2”H x 6”W x 4”D with a very easy to read backlighted LCD (white on blue).  The unit comes with connecting cables, U.S.-type power supply, and instruction manual.  In my opinion, despite its size, this is one solid and well-built unit.  As per the ESP web site, new units are not stocked but are assembled upon order.  After ordering I immediately emailed ESP with my receiver make and model (I would recommend this for all buyers).  My unit arrived in a little over two weeks and I received a separate sheet accompanying the unit with specific instructions for my receiver.  Hook up was a breeze.  All that was needed was to set a few DIP switches, connect one lead to the indicated test point on the identified board, and the other lead to chassis ground (alligator clip leads are provided).  The connection to the display is made with the included RCA cable.  I made one simple installation modification, installing a RCA female/RCA female bulkhead connector on the rear panel of the FRG-7 to allow for quick disconnect.

The DD-103 display is programmed into 1 MHz increments.  To operate, you select the MHz range you want (for example 9 MHz) on the DD-103.  On the FRG-7, I then tune its pre-selector and the same desired MHz range, and finally tune in the frequency and watch the DD-103 display change accordingly.  The operational design of the DD-103 fits nicely with the Barlow-Wadley circuit design of the FRG-7.

A key feature of the DD-103 display is that it reads the entire frequency (e.g., 9.940.1 MHz) so you always know where you are with just one look.  In addition to AM mode the DD-103 can be further programmed for CW, LSB, and USB modes, as well as 10 Hz or 100 Hz resolution.  As stated in the unit’s manual, it can also be calibrated on each frequency range so as to correct IF amplifiers that are a little off or errors associated with aging receiver crystals, if applicable.

It is nice to have my FRG-7 up and running again and utilizing the new external numeric frequency readout.  Truthfully, I have been reminded just how good the FRG-7 is.  Though it does not have as many features, it holds its own when put up against my other classic receivers (JRC NRD-545, JRC NRD-535D, and ICOM R-75).

I must say I am quite happy with the Electronic Specialty Products DD-103.  The unit has good accuracy and stability as it utilizes a TCXO reference oscillator.  If I had to nit-pick about anything, I would likely point out that the on/off switch is on the back of the unit.  If your radio is in a confined space this possibly could cause operational issues for you.  Also realize that for the most part this unit is kind of a “one size fits all” package and it would not surprise me if certain receivers or transceivers might require lengthening of the connecting cable.  All in all this professional looking unit is a simple to use, simple to install, easy to read, designed well, and I think worth the cost.  For anyone else who is thinking about adding a digital frequency readout to a vintage radio, you may want to give this model due consideration.

Bob Butterfield

Photo of my FRG-7 with the DD-103 on top:

Web site for Electronic Specialty Products: http://www.electronicspecialtyproducts.com/dd103.html

Disclaimer: I have not been compensated in any manner in regards to this unsolicited review and purchased the DD-103 unit with my own funds.

Spread the radio love

Frans experiments with the MFJ-1026 Noise Canceling Signal Enhancer

Many thanks to SWLing Post contributor, Frans Goddijn, who writes:

“Last week I purchased the MFJ-1026 ‘noise canceling signal enhancer’ and I posted two blogs with video about it. Initially the device seemed as useless as it is good looking but then I found a configuration where the device is not only pleasant to have but also useful for radio listening.”

Here are Frans’ reports which he kindly shares from these two posts originally published on his blog, Kostverlorenvaart:

Part 1: MFJ-1026 deluxe noise canceling signal enhancer

Using a GRAHN antenna, (a VENHORST wire antenna for noise reference), the iCOM R8600 radio and optional bhi DSP audio noise canceling, trying to see what’s the best way to cancel noise — on the antenna entry point of the radio or at the speaker output end.

In this case the MFJ-1026 seems ineffective. The DSP at the audio output end works well and easy.

I have also tried two GRAHN antennas on the MFJ-1026, one for MAIN and one for AUX but that was also not noticeably effective yet.

I will also try the little whip antenna that MFJ supplied with the box. Further tweaking may turn out to be helpful on some other frequencies / signals.

Before installing the MFJ i used the little TECSUN H-501x to scan the room for any devices producing radio noise. It turned out that the two Apple Homepods sit in a dense cloud of radio noise, the Macbook Pro also radiates noise, EVE smart plugs controlling lights also produce radio noise, two little label printers s well and the HP printer/scanner too. So I moved those to the other end of the toom or to another room. Continue reading

Spread the radio love