Category Archives: Aviation

Mike spots the RCA AR-88 in series “Prime Suspect: Tennison”

Many thanks to SWLing Post contributor, Mike Hansgen (K8RAT), who adds the following to our growing archive of radios in film. Mike writes:

Near the end of the current episode of “Prime Suspect: Tennison” [the radio operator mentions] he was listening on “the RCA 88”.

“Tennison” is set around the early ’70’s.

Great catch, Mike (and thanks to Eric WD8RIF for the screen cap).

According to the Crypto Museum:

The AR-88 was a valve-based shortwave general coverage communications receiver, developed and built by the Radio Corporation of America (RCA) in the early 1940s. Although the receiver was initially intended as the successor to the AR-77 amateur receiver, the outbreak of WWII made it evolve into a professional high-end military-grade receiver for which cost was no object.

The AR-88 is a 14-valve (tube) receiver, which covers a frequency range of 535 kHz to 32 MHz. Unlike the National HRO receiver, which had pluggable coil packs for each frequency band, the AR-88 uses a six-position band selector. A special version of the receiver, the AR-88LF, was suitable for LF and MF, covering 70 to 550 kHz (continuously) and 1.5 to 30 MHz (continuously).

Continue reading at the Crypto Museum online… 

The Crypto Museum photo of the AR-88 jogged my memory…

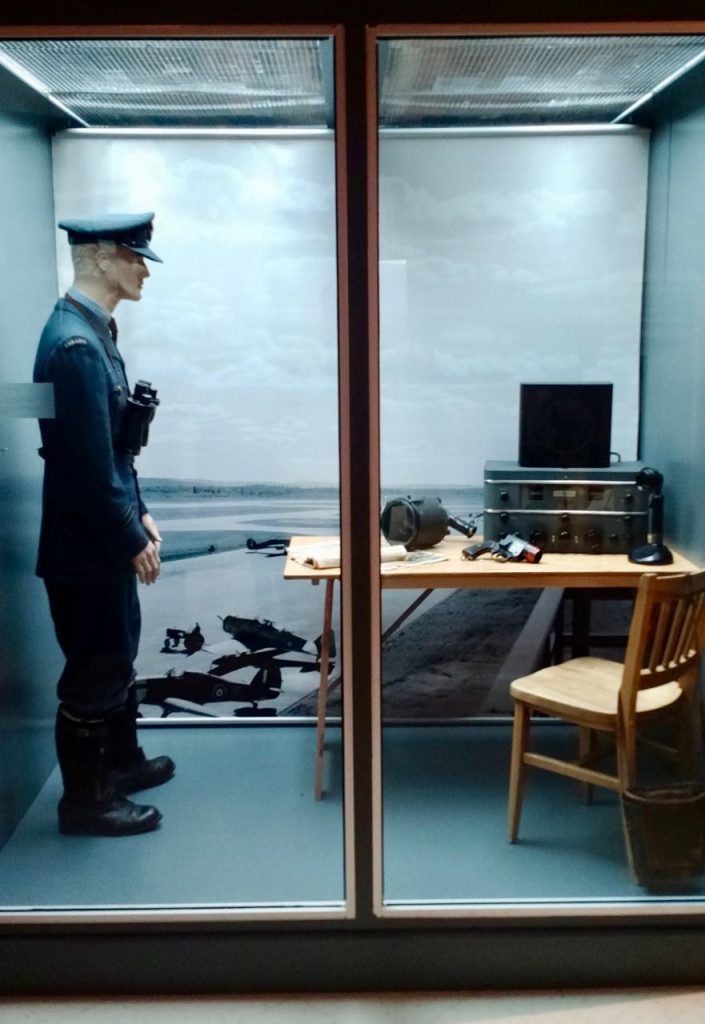
Last year, I visited the Musée de la Défense Aérienne at the Canadian Forces Base (CFB) Bagotville (a museum I wholeheartedly recommend, by the way).

I snapped this shot of this display:

I’m sure I actually have a close up of this receiver somewhere. It also appears to be an RCA AR-88 based on dial and control configuration, though I certainly could be wrong.

Do any SWLing Post readers have an AR-88? Please comment!

Spread the radio love

Video tour of the E-4B NAOC Doomsday Plane

An Air Force E-4B National Airborne Operations Center aircraft sits at the international airport in Bogota,Colombia Oct. 3, waiting for Secretary of Defense Robert M. Gates. U.S. Air Force photo/Tech. Sgt. Jerry Morrison)

Many thanks to SWLing Post contributor, Jason Whiteley, who shares a video tour of the E-4B NAOC Doomsday Plane and notes:

This is a pretty interesting video of the inside of the flying Pentagon or Doomsday Plane. There is a lot of radio equipment on board including a radio antenna that can fly out of the back of the plane:

Click here to view on YouTube.

This is very cool, Jason! It’s amazing how much technology they’ve crammed into this Boeing 747-200. The 747 is a large aircraft, but when loaded with so much technology and support staff, there’s no room to spare.

With a video this detailed in the public domain, I can’t help but think there may already be a replacement for the E-4B.

Thanks for sharing!

Spread the radio love

Video: Air traffic on the HF bands

Many thanks to SWLing Post contributor, Dan Hawkins, who writes:

Air traffic bands on VHF is well-known.

Not so well-known are the shortwave (HF) communications networks that must be operated by transoceanic flights.

This is an ARINC station for San Francisco, California. I am located about 70 miles inland from this station. I assume ARINC is using a directional antenna system beamed westward toward the Pacific Ocean.

I recorded this video of an ARINC station late last night for my YouTube channel.

Click here to view on YouTube.

Many thanks, Dan!

I enjoy monitoring air traffic on VHF and often forget that when I’m outside the range of an airport’s tower, I can still hop on HF and often hear international traffic. Thanks again!

Spread the radio love

Photos of a B-17G Radio Operator Position

I had the pleasure of visiting the Champaign Aviation Museum recently and examining their under-restoration B-17G, “Champaign Lady”. Actually, the term “under-restoration” is incorrect. In actuality, the Champaign Aviation Museum is effectively building their B-17G nearly from scratch—quite an undertaking but one that the volunteers are performing skillfully and enthusiastically.

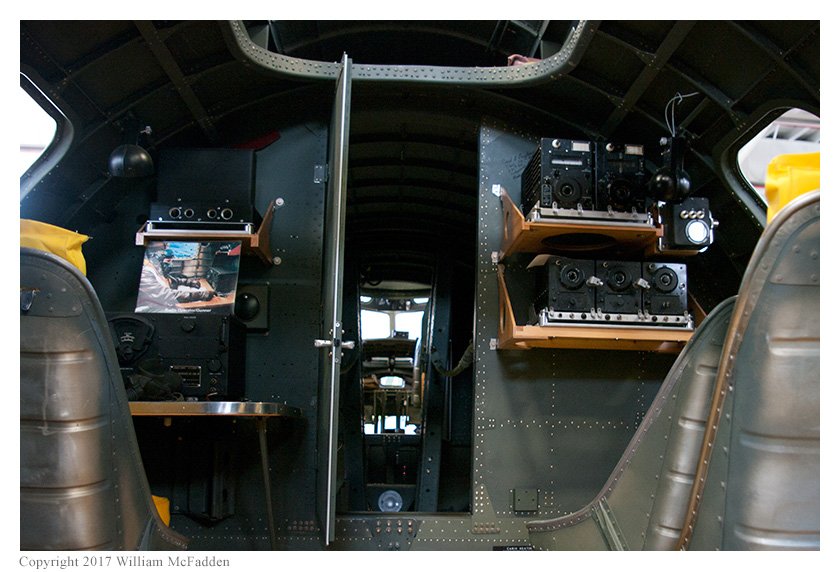
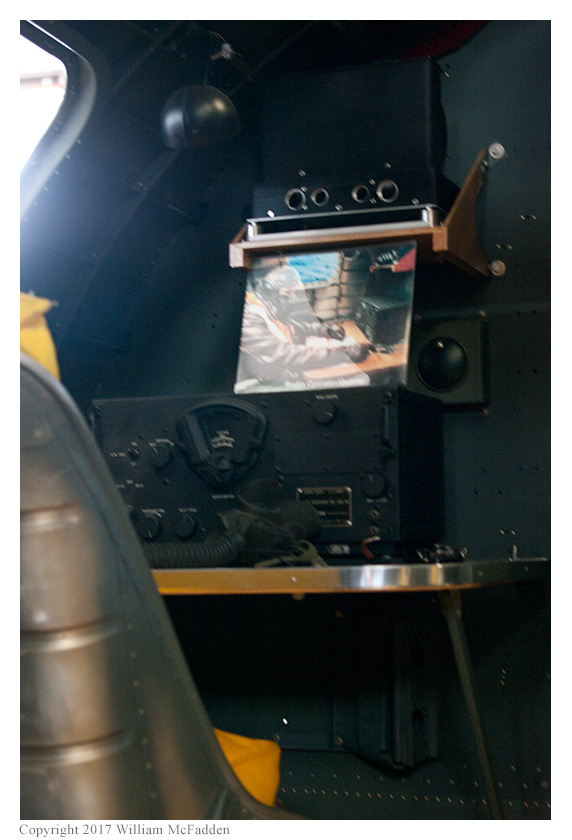
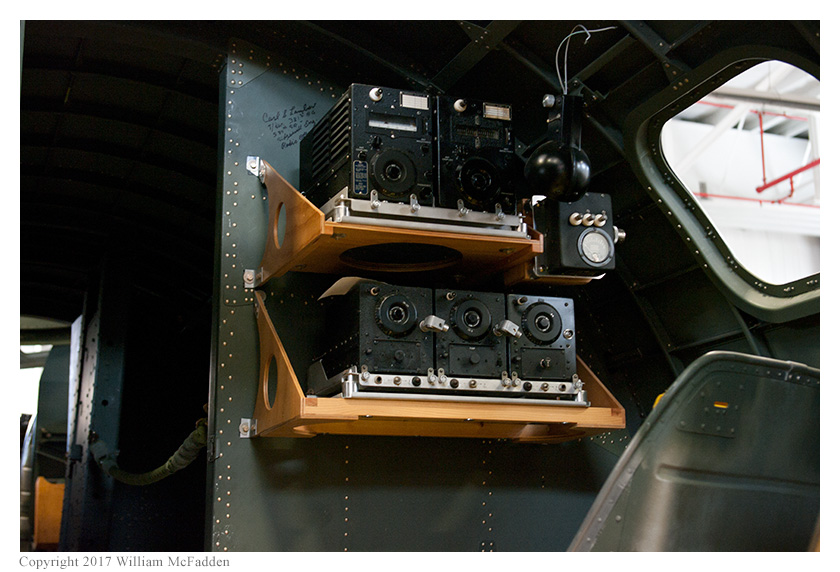
Being an amateur radio operator, shortwave listener, and would-be WWII-radio restorer, I was was pleased to see that Champaign Lady already has a nearly-complete radio-operator position installed, between the bomb-bay and the waist-gun section of the airplane. As a B-17G would have had during the war, Champaign Lady features a BC-348 liaison receiver and morse-code key mounted on a desk on the port (left) side of the bomber and a stack of AM/CW Command Set transmitters and receivers racked on the starboard (right) side of the bomber. In the photos, the top Command Set boxes are the transmitters and the bottom three Command Set boxes are the receivers. Of course, the BC-348 and the Command Set transmitters and receivers are fully tube-type, semiconductors having not yet been invented. During the war speedometer-type cables would connect the Command Set receivers to controls in the cockpit, allowing the pilot and co-pilot to control the Command Set receiver frequencies; electrical cables would have carried the receivers’ audio to the pilot and co-pilot and would have allowed them to change volume-level. The radio operator could transmit using the Command Set transmitters and could also switch the pilot or co-pilot intercom microphones to any of the Command Set transmitters to allow the pilot or co-pilot to broadcast to other bombers in the formation.

"Champaign Lady" radio operator position

B-17G “Champaign Lady” radio operator position; BC-348 liaison receiver on the port (left) side and Command Set transmitters and receivers on the starboard (right) side.

"Champaign Lady" BC-348 receiver

B-17G “Champaign Lady” BC-348 liaison receiver and morse-code key.

"Champaign Lady" Command Set transmitters and receivers

B-17G “Champaign Lady” Command Set transmitters and receivers on the starboard side of the radio room

During the war, the B-17G radio operator was an enlisted man, typically a sergeant or higher in rank. If in an earlier version of the B-17G, the radio operator was also responsible for manning a .50 caliber machine gun located in his section of the airplane. In all versions of the B-17G, the radio operator assisted the navigator by providing position reports based on radio fixes of beacons or radio stations. Additional information about the role of the B-17G radio operator can be found on the B-17 Queen of the Sky website.

And, for those interested, here is what Champaign Lady’s nose-art looks like:

B-17G "Champaign Lady" nose-art

B-17G “Champaign Lady” nose-art, starboard side; the port side features a mirror-image version of the same design

The Champaign Aviation Museum has a beautifully restored B-25J, “Champaign Gal”, in flying condition. Unfortunately, I’ve not been able to see if Champaign Gal features a restored radio operator position.

I have a BC-224, which is the 12-volt version of the BC-348 liaison receiver to put back into service as well as a BC-696A Command Set transmitter that I hope to eventually put back onto the air in the 80-meter amateur band. It would be wonderful if I had a B-17G in which to install these items—or even just room to build a replica B-17G radio operator position!

73,

Eric McFadden, WD8RIF
http://wd8rif.com/radio.htm

Spread the radio love

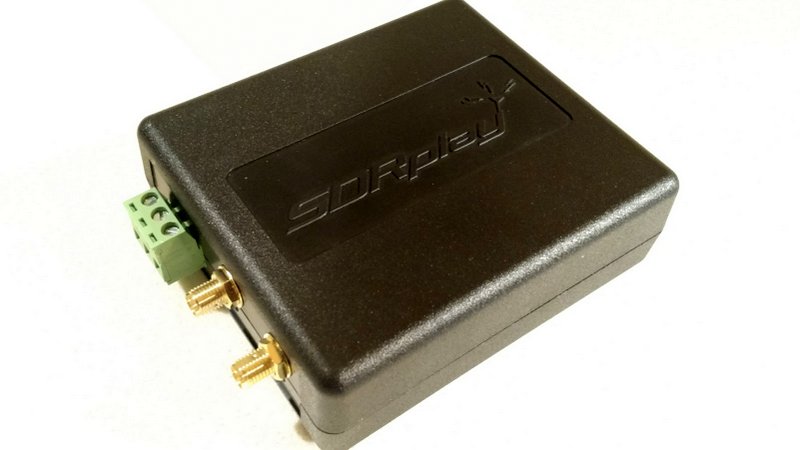
ADS-B for SDRplay RSP1 and RSP2 now available

I was very happy to see the following message from Jon Hudson at SDRplay this morning:

“ADS-B for both RSP1 and RSP2 is now available for the Raspberry Pi 2 & 3 – you can get the software from downloads – http://www.sdrplay.com/downloads

If you are an RSP2 user, make sure you use Antenna Port B when running ADS-B.”

This is great news as I’ve had a number of readers ask if the RSP series SDR was compatible with the DUMP1090 ADS-B system.

The SDRplay RSP2

If you have an RSP1 or RSP2 and either a Raspberry Pi 2 or Pi 3, this will be an easy, accessible way to experiment with ADS-B.

In the long run, however, I’d never devote an RSP as a dedicated ADS-B feeder. Why? The RSP is a very versatile, full-featured SDR and I wouldn’t want to tie it up with such a relatively routine, simple task.

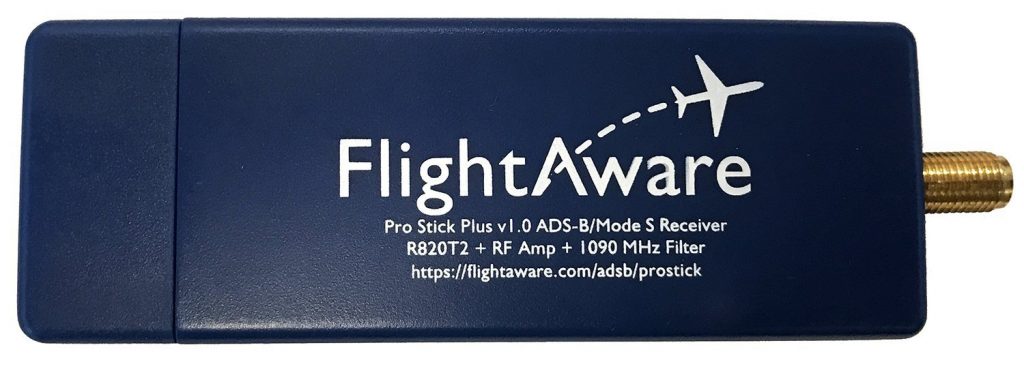
Instead, I’d give ADS-B a try with the RSP, and if I liked it, I’d purchase this inexpensive FlightAware RTL-SDR dongle with a built-in 1090 MHz bandpass filter for $18.95.

Click here to read my recent article about setting up a FlightAware ADS-B feeder.

I’m always so happy to see such active application development from “Mom and Pop” companies like SDRplay and AirSpy. Just more ways to put your SDR to work for you!

Spread the radio love

Dan’s take on ADS-B with the Raspberry Pi B model

Many thanks to SWLing Post contributor, Dan Srebnick (K2DLS), who recently posted a detailed overview of his ADS-B installation on his blog:

Monitoring NextGen ATC (on the cheap!)

A key component of next generation air traffic control is Automatic Dependent Surveillance – Broadcast (ADS-B). The current FAA mandate is for all included aircraft to output ADB-B transmissions no later than January 1, 2020. But you don’t have to wait to receive and map ADS-B. There is a lot of air traffic to be seen.

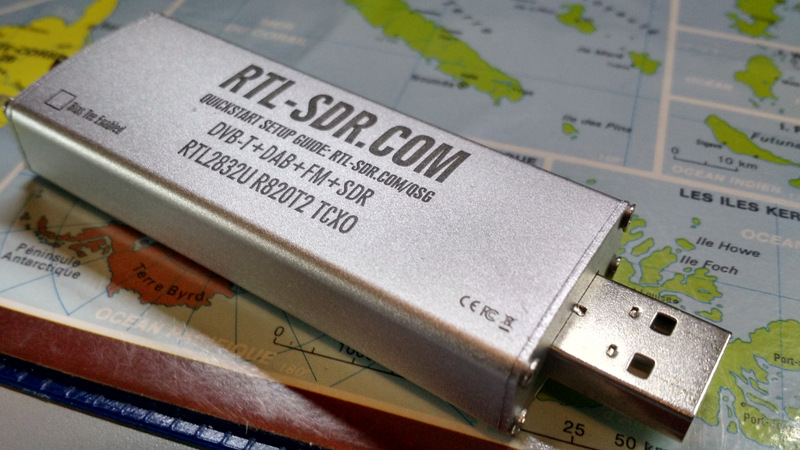
[…]I decided to use a spare older RTL-SDR stick based on the RTL2832U and R820T chips. This USB device comes with a small antenna that I hoped would be good enough to get me started. It is not in any way optimized for the 1090 MHz signals that are used by ADS-B and is roughly 19 parts per million (ppm) off frequency. It cost a bit over $10 at a hamfest a couple of years ago. The designs have improved since the early models were offered. Newer models include a TCXO (thermally compensated crystal oscillator) for stability and accuracy.

I needed software to take signals from the RTL-SDR stick and plot them on a map. That software is “dump1090”, originally written by Salvatore Sanfilippo. I added an install stanza to the Makefile, along with a systemd service file, for a smooth system install. I also needed to install the RTL-SDR USB drivers. The complete installation runs “headless”, meaning no monitor, keyboard or mouse need be connected. Remote management can be done via ssh.[…]

Continue reading on Dan’s blog…

This is fantastic, Dan! Thank you for taking the time to share all of the code snippets you needed to do the installation on the Raspberry Pi B as well. Post Readers: if you have an older Raspberry Pi and RTL-SDR sitting on a shelf, use Dan’s guidance to turn them into an ADS-B feeder!

Click here to read my ADS-B feeder tutorial based on the Raspberry Pi 3.

Spread the radio love

Making a FlightAware ADS-B feeder with a Raspberry Pi 3 and RTL-SDR dongle

It’s been nearly a year since I acquired both the RTL-SDR (above) and Rasperry Pi 3 (below)r.
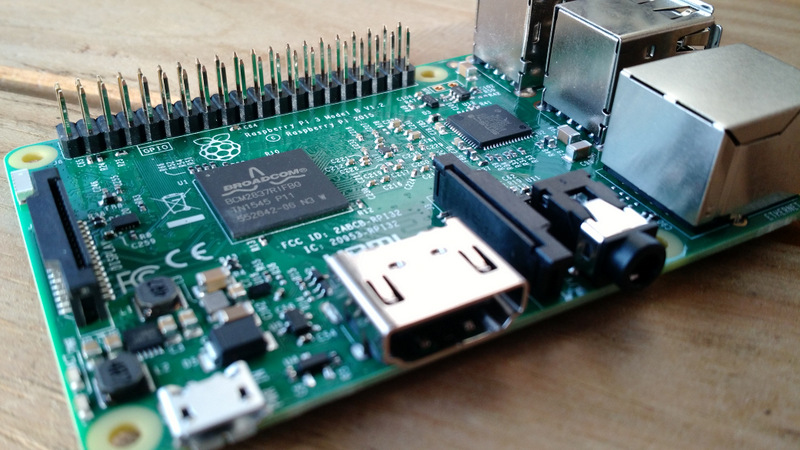
Remember when I made a plea for Pi 3 projects just last year––?

Although many of you suggested some great projects, I never actually got around to doing any of them. Now, don’t get me wrong––I wanted to, of course, but simply got involved with reviews, NPOTA, two months of travel…and, well, life.

Then, last week at the Winter SWL Fest, a common theme emerged in both presentations and discussions:  the numerous applications of the super-cheap, and thus super-ubiquitous, RTL-SDR dongle. In their engaging presentations, both Dan Srebnick and Mark Fahey––SWLing Post contributors and good friends––focused on the power of the RTL-SDR, expounding upon some simple, inexpensive applications in their forums. It was inspiring. Also, buddy Eddie Muro showed me just how easily an ADS-B receiver could be set up using an Android phone.

Back to the Pi. Though I was already aware the Pi 3 and RTL-SDR could be united to make an ADS-B receiver, watching Mark Fahey talk about how simply one could feed the FlightAware network with ADS-B data finally hooked me.  Why not, indeed? Here was fun to be had!
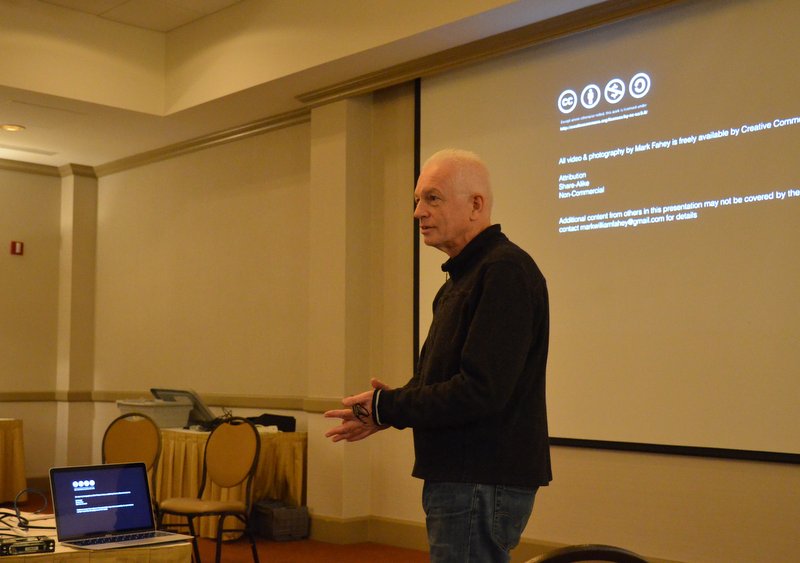
Mark preparing to woo his captive audience at the Winter SWL Fest!

I couldn’t get the idea out of my head, so Tuesday, the day following my return, I set the afternoon aside.  I rolled up my sleeves, and with my long-neglected Pi 3 and RTL-SDR, got ready to cook up a flight sensor.

I figured I was probably missing a component or two, and fully expected the process to be complicated, but decided I wouldn’t let this deter me. And guess what? I was wrong on both counts!

FlightAware ADS-B feeder recipe

Ingredients:

If you only plan to use this SDR and antenna as an ADS-B feeder, you might go for the FlightAware Dongle and 1090 MHz antenna combo.

Directions:

Note: I used this excellent PiAware ADS-B feeder tutorial to build my system–it’s detailed and doesn’t make the lofty assumption that you actually understand formatting cards, building disk images, and/or editing config text files.

Directions below are a highly distilled version of that tutorial. If you’re new to all of this, as I was, follow these directions instead of the above tutorial. Be aware that the directions assume you’re using the Pi 3 and a Windows PC to burn the image file.

  1. Download PiAware image7-zipSD card formatter, and the Win32 Disk Imager. Decompress all compressed files, install and note the folder locations.
  2. Register your username at FlightAware–presuming you don’t already have an account, of course.
  3. Use SD Card Formatter to format your MicroSD card.  Just make sure you’re formatting the correct drive, else you could easily wipe the wrong disk/card!
  4. Use Win32 Disk imager to write the PiAware image to your MicroSD card.
  5. If using WiFi, open Windows Explorer.  Locate text document called piaware-config on the MicroSD card, open it with a text editor, and locate the WiFi ssid and password locations. Per the config comments, edit them to match your WiFi system. Note that any special characters in both the name and password will require the use of quotation marks (again, noted in the config file comments). Save the file in the same location on the disc image.
  6. Remove the microSD card containing the PiAware image; insert it into the Pi 3.
  7. Connect the RTL-SDR or FlightAware dongle to the Raspberry Pi. Attach an appropriate antenna to the RTL-SDR. Note:  You’ll get the best results if you place the antenna outdoors with line of sight to the skies.
  8. Plug the Raspberry Pi 3 into a power source…and cross your fingers!
  9. Grab a cup of coffee, walk the dog, or listen to this 12 minute version of the BBC countdown; it could take at least this long for FlightAware to start receiving data from your ADS-B feeder.
  10. When you see this My ADS-B button in the header of FlightAware (see below), you’ll know you’re in business. Congratulations!  You can now watch the skies.

Feeding FlightAware
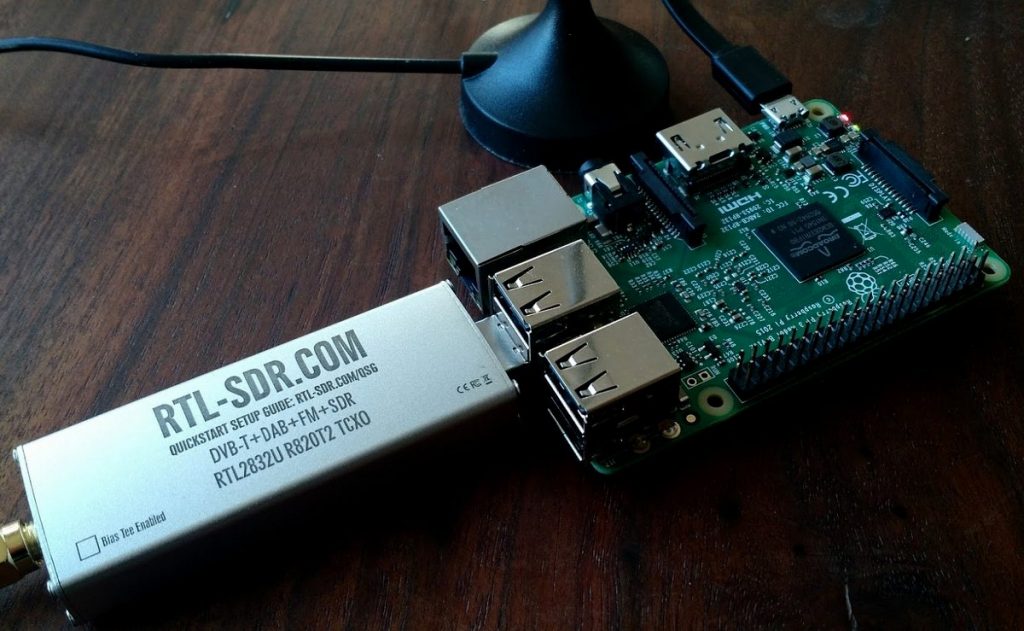
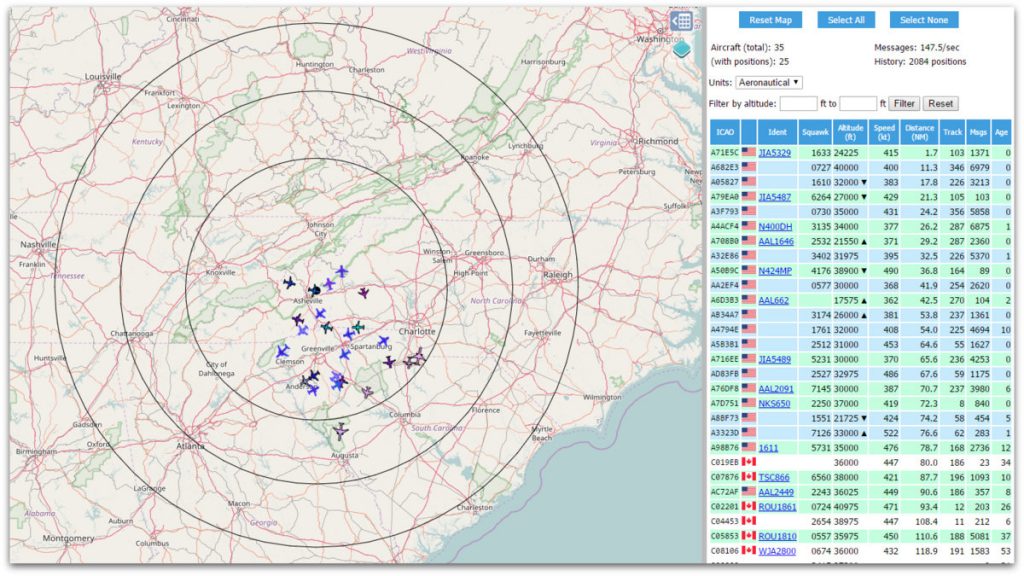
After my ADS-B receiver had been in operation for a while, I was very impressed with the data FlightAware was able to pull from my ADS-B feed. I was equally impressed with the number of distant aircraft I could receive with such a modest antenna––a number of them up to 135 miles from my location. Once I find a suitable outdoor location for the mag mount antenna, currently indoors, I expect the reception distance will increase significantly.

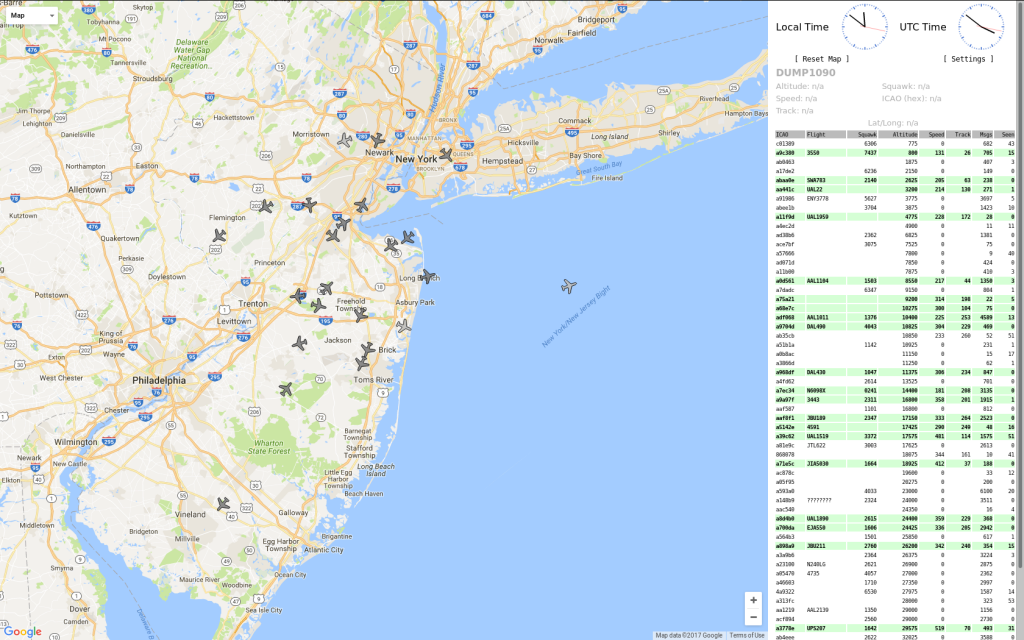
You can also connect to the live feed from your ADS-B receiver through your local network. Here’s a screenshot of my live data:
Future plans
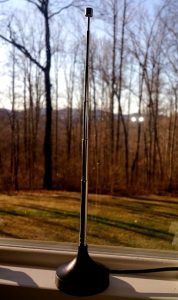
At the moment, my ADS-B receiver is located indoors, in a south-facing window.

It works, but clearly isn’t ideal. Since the Pi 3 connects to my network via WiFi, I intend to install the full ADS-B receiver system into a small weatherproof case and mount it outside. My Pi 3 has no case, so I purchased an inexpensive one yesterday. I should be able to feed it power with an outdoor outlet…but I’m very tempted to experiment with making it solar powered.  To find out if this is a logical move, I need to observe and measure the power requirements first, and will be doing that in the next few weeks.

Meantime, I’m thoroughly enjoying watching the (amazingly busy) traffic in the skies…and the kid in me relishes it!

Thanks, Mark, for the great idea!

Have any SWLing Post readers attempted to build a solar-powered or outdoor ADS-B receiver? Please comment!

Spread the radio love