Category Archives: Mobile Shortwave

QT80 10 meter Radio

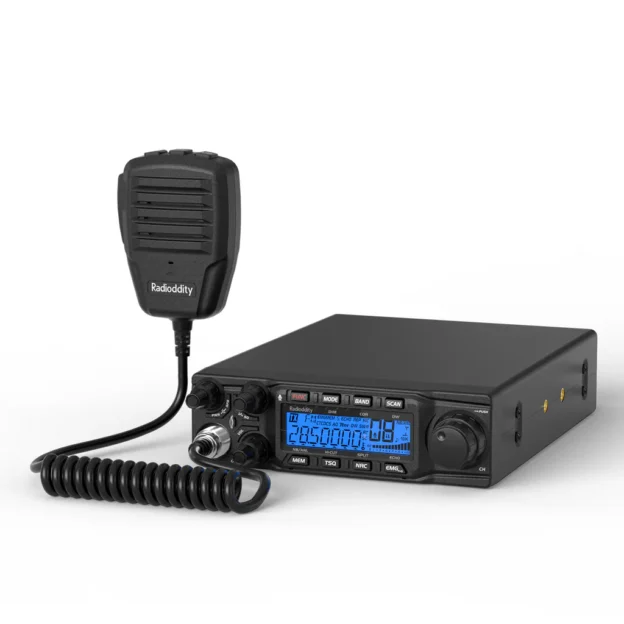
Radioddity QT80 10m Radio

Guest Review by Robert Gulley K4PKM

The Radioddity QT80 is a very interesting addition to the Radioddity line of CB and Amateur radios. It cleverly walks a line between being a CB (channelized) radio, and a channelized/VFO capable amateur radio.

You are likely to have heard of this radio already, as there are a number of video and written reviews out there for the QT80, with most all of them praising the radio’s features and capabilities. For those who have not heard about the radio, I list the basic information below, and then talk about my impressions of the rig.

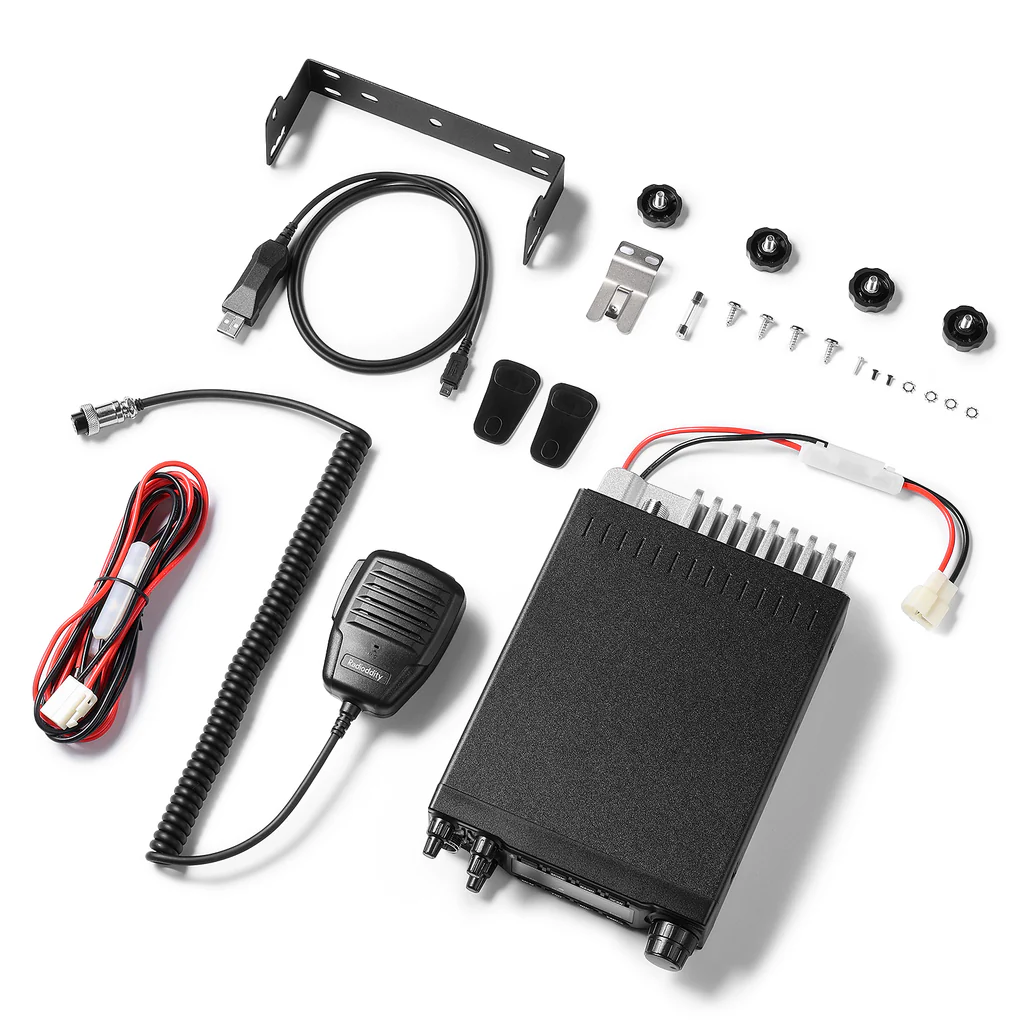
What’s in the box?
1 x QT80 10 Meter Radio
1 x Detachable Microphone
1 x Install Bracket
1 x Power Cable
1 x PC003 Programming Cable
1 x Spare Fuse (15A, 250V)
2 x Adhesive Case Protectors
4 x Adjusting Screws
4 x Screws
4 x Pads

Included in the box

Functions & Features
– 7-color screen display and backlight dimming
– FM, AM, USB, LSB, CW (need DIY work), PA modes
– SSB TX audio bandwidth control
– Frequency Tuning Steps: 10Hz, 100Hz, 1KHz, 5KHz, 10KHz, 100KHz, 1MHz
– ± 500Hz, 5KHz Clarifier (R/T/R+T selectable)
– Flexible menu functions and PC programming software
– RX and TX NRC Noise Reduction
– SQ, ASQ Function (FM and AM mode)
– RF GAIN Adjustment
– RF PWR Adjustment
– VFO / BAND / Memory Channel Modes
– Repeater Shift / Offset Frequency Function
– CTCSS/DCS with RX/TX Split functions
– SCAN Function
– CTCSS/DCS scan
– NB/ANL Function
– DW DUAL-WATCH Function
– SWR, S/RF meter Function
– TOT function
– HI-CUT Function
– EMG CALL
– SWR Protection
– Power Supply Voltage Protection
– Key-Lock Function
– DTMF Function
– BEEP Prompt
– Enhanced VOX Function (VOX.SPK can support digital mode operation)
– ECHO Function
– Programmable RB Function
– AM TX NPC
– User Defined (PF) key on microphone
– Audio path select 31.+10KHz Function

80W High Power: Experience clearer and stronger signals in challenging conditions with our 80W high-power radio. Perfect for amateur radio enthusiasts and professional operators, it guarantees reliable long-distance communication in any environment. FCC ID: T4K-AT6666PRO

Versatile Communication Modes: Seamlessly switch between FM, AM, SSB (USB, LSB), CW, and PA modes to adapt to various communication needs, from casual use to professional applications, catering to various communication scenarios.

Advanced Noise Reduction: Customize your listening experience with adjustable TX & RX noise reduction. Enjoy crystal-clear audio with minimized background noise and enhanced voice clarity, ensuring smooth and intelligible transmissions every time.

ASQ Function: The Automatic Squelch Control (ASQ) function intelligently filters out unwanted noise and static, providing a cleaner and more enjoyable listening experience. Say goodbye to constant manual adjustments and enjoy hassle-free communication.

7-Color LCD Display: Personalize your interface with a vibrant 7-color LCD display that complements any environment. Choose your preferred color for optimal visibility and a modern touch, enhancing your communication setup.

CTCSS/DCS: Use CTCSS/DCS codes to prevent interference and enhance privacy during group communications, ensuring clear and secure conversations.

Precision Frequency Tuning: Tune precisely with 7 Frequency Tuning Step options (10Hz/100Hz/1KHz/5KHz/10KHz/100KHz/1MHz), enabling accurate adjustments for clear communication.

___________________________________________________________________________ 

Data modes using DIY interface using the built-in VOX system

What you will need for QT80 – There are not many parts needed to get our own data-cable prepared.

– For the connection to the Radioddity QT80 you will need a 6-pin GX16-A6P plug, often called “aviation plug”.
– For the connection to your PC, you will either need a shielded stereo audio-cable with 3.5mm TRS plugs on both ends or two shielded open end stereo audio cables with 3.5mm TRS plug.
– If your PC does not have a built-in sound-card you will also need a USB soundcard with 3.5mm TRS sockets for MIC-in and Audio-out.

Full instructions may be found here:

https://www.radioddity.com/blogs/all/qt60-pro-qt80-data-mode-operation-guide?_kx=kFwIrsBfpgRCg9VuXhVWtqVpfz_NH8taLFTR4MEj-tU.HYtn7C

__________________________________________________________________________

I have included above some recently released information about how to use the radio for TX and RX with digital modes such as FT8/FT4 and SSTV, PSK etc.

While not indicated as such on the Radioddity website, the radio is capable of going down to 15 meters with a slight modification, demonstrated by some of the YouTube videos, which also includes the 11- and 13-meter bands.

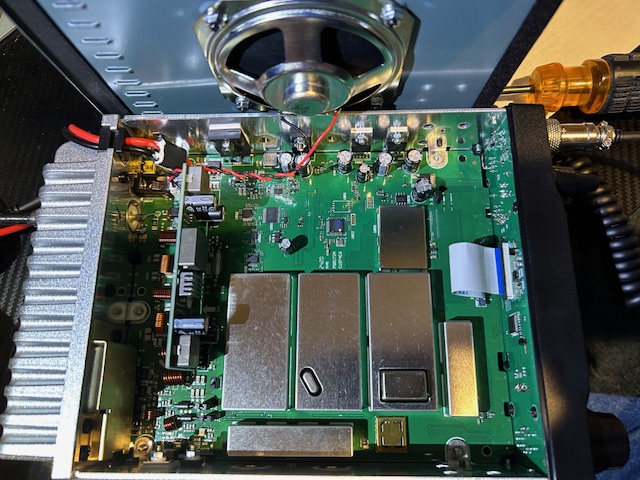
QT80 with case removed

Internal main PC board and large speaker

Additionally, Radioddity offers a Model CBL-561 15-30mHz vertical antenna option which can be attached to a mobile mount by way of its PL-259 connector. My sample copy of the antenna is extremely sturdy, and has an adjustable whip section for matching the chosen band.

My Impressions

The radio is well-built, solid, and has a heavy heatsink for handling the 80-watt output power, as there is no built-in fan. There are a number of nice features in the radio, including multiple color screen options, VFO tuning and scanning features down to 1 kHz, and very usable noise reduction and clarifier options. There is also a PA function which could come in very handy for emergency response situations.

The speaker is quite capable of being heard even with loud road noise, but due to the speaker placement on the bottom of the radio, where you have to mount the radio in your particular setting might determine if you need an external speaker.

The audio quality is quite good as I listened around to stations on 10m USB and 11m CB, as well as shortwave signals.

The noise reduction feature is designed to filter out unwanted noise on receive of course, but is also designed to work on the TX side of things to help with voice clarity. While the primary goal is clarity, if possible, I would recommend testing the TX side of things with someone who is familiar with your voice so you can adjust the noise reduction levels more accurately.

There is a USB connection which allows for firmware upgrades, programming capabilities, and, with some DIY effort, TX for Digital modes.

VFO Tuning vs. Channel Hopping

The QT80 offers both a channelized scan and tuning feature, as well as a scan and VFO option. Scanning/tuning of channels is as you would expect, allowing you to scan through 40 programmed channels, or 99 memory channels.

Scanning using the VFO method allows you to scan in various steps of 10 kHz or above. It should be noted that to tune to a level of 10 or 100 Hz accuracy, this must be adjusted by pressing the tuning dial in, which then allows you to select these tuning steps. For all automatic and manual tuning of frequencies using the tuning dial, the smallest step is 1 kHz. That can be a little confusing for those who are used to free turning VFOs on desktop/portable receivers.

As the tuning dial/channel switch (the big dial on the right-hand side of the unit) is designed primarily for channel selection and incremental tuning, there is both muting and an audible click as the dial is turned.

As the radio is clearly designed for mobile-style operation, the memory channels can easily be used to store 10-meter repeater stations (along with the necessary offsets), CB channels, as well as storing simplex frequencies to quickly tune in desired frequencies for scheds with other amateur radio operators.

The freely available programming software allows for easy programming of memories and channels, as well as controlling most all of the radio’s functions.

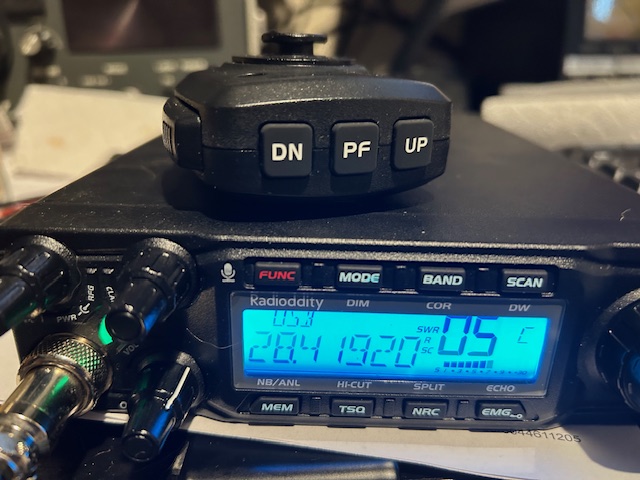
As you can see in the image below, the microphone has up and down buttons for tuning, as well as a PF button which can be assigned for specific programmed functions. The mic does not have a keypad, a nice, but not necessary function. As an aside, I have not seen any data as to what microphones might be interchangeable with the stock mic, so I would certainly do extensive research before trying a keypad-style mic with the radio.

QT80 in use

Receiving California QSO Party signals clearly

Pros and Cons

Pros

  • Advanced features such as noise reduction and receive clarifier
  • A reasonable number of memories which don’t get ridiculous in size like some radios (i.e. 1000 memories!)
  • Simplified front end with menu options (see also Cons)
  • Feature-Rich radio beyond many similar mobile radios (see Cons below)
  • Multiple color options for the screen to enhance viewing in different lighting conditions
  • Large heatsink
  • Capability to store 10m repeater stations in memory with offset info
  • Great audio
  • Ability to work digital modes using the built-in VOX capabilities with DIY solution, no separate sound interface needed
  • CW TX possible with DIY solution shown on website
  • Free programming software
  • Standard antenna connections giving many antenna/tuner options

Cons

  • Bottom-mounted speaker (common, but not good if mounted near floor or in compartment) but external speaker port available
  • Non-removeable front-end, useful for more localized placement/ease of operation in vehicle or tight spaces
  • Many special functions require menu options which make mobile operation more difficult or dangerous when driving
  • Fairly steep learning curve to take advantage of all the features (see Pros above)


Conclusions

I believe most folks will be very pleased with the advanced capabilities of this rig. There is a bit of a learning curve for those who may not have used this style of radio before, but the time spent learning its features so as to make use of all these features will be well rewarded.

The radio has excellent audio, a clear display, many adjustments to make the radio function as desired, and has expansive capabilities to broaden its appeal. 73, Robert K4PKM

Radioddity Link

Amazon Link


Spread the radio love

1976 Japanese TV commercial for the National Cougar 2200

1976 Japanese TV commercial for the National Cougar 2200 (aka Panasonic RF-2200 aka National Panasonic DR-22)

by 13dka

(The commercial starts at the 1:00 mark. It’s part of longer video with Japanese commercials from that year, there is a whole collection on YouTube if you like those!)

Doing some research on other old technical gems from Japan I stumbled upon this 1976 National/Panasonic TV commercial running on the domestic TV networks back then. While watching, I smiled and thought “only in Japan…” …it would’ve been perfectly normal to advertise something like a shortwave receiver in this fun (and funny) way. Anyway, I think RF/DR/Cougar 2200 owners and collectors (also the resident one on this blog , the blog owner) may want to have this link in their bookmarks!

Spread the radio love

Radio travel: Rob enjoys a shortwave-capable rental car in Namibia

Many thanks to SWLing Post contributor, Rob Gray, who writes:

I recently returned back from a three-month trip in Africa (Namibia, South Africa, and Morocco) and had a couple of shortwave-related items that you might be interested in.

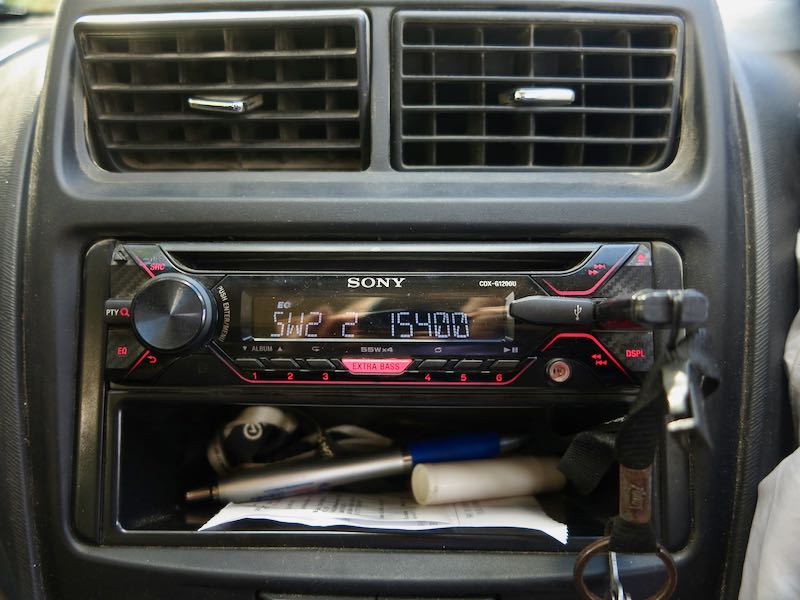
The rental car in Namibia had shortwave capabilities in the in-dash radio! The rental company was oblivious to the option when I mentioned it as a huge perk, I really don’t think they understood or cared. The radio was a Sony CDX-G1200U, and while I find this radio for sale in North America, I don’t see any mention of shortwave. I suspect shortwave is either an option for foreign markets (at least Namibia in this case), or possibly activated via a modification or firmware upgrade. Perhaps any shortwave enthusiasts travelling to other regions of the world might keep an eye out for this model.

There were two ‘bands’, low (SW1) included some of the tropical bands up to 41 meters, and high (SW2) covered 31 meters through about 19 MHz or so. Decent coverage for casual mobile listening.

I found the performance of the radio quite satisfactory in Namibia, the BBC came in very well in the mornings and evenings. There was a little more on shortwave during the day in English, Channel Africa, etc., but the BBC was by far the best offering for listening.

Another equipment data point from around the world, this time in Morocco.

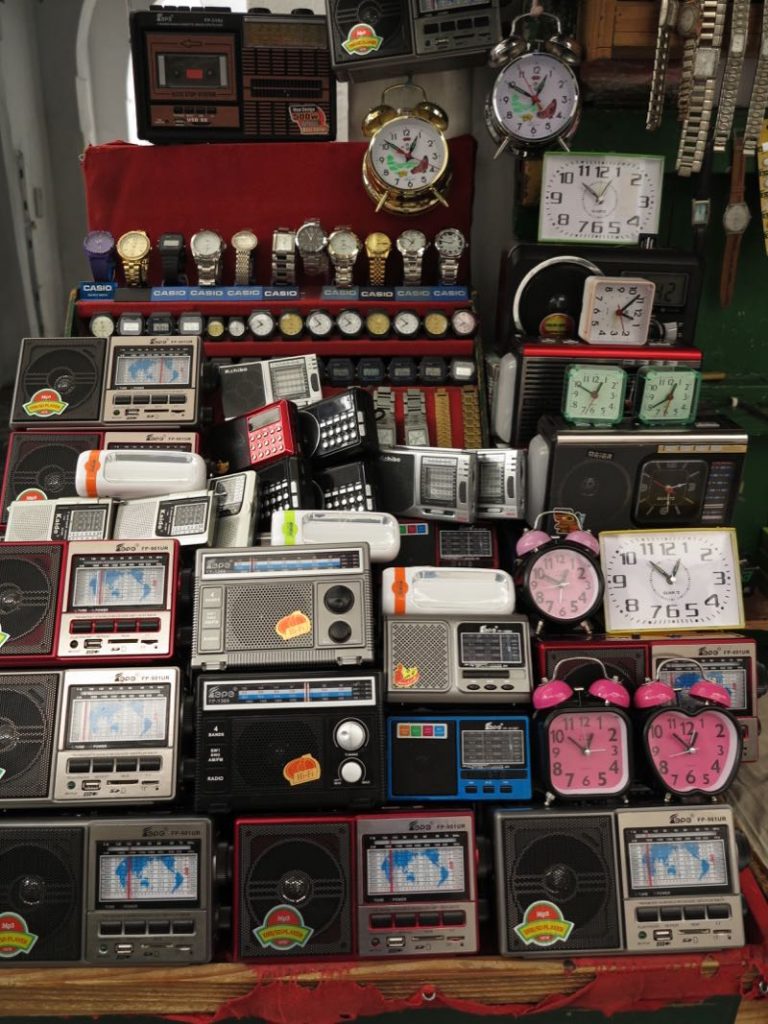
Several vendors in the Medina’s sold various radios (of questionable quality). The photo [above] was taken in Tetouan (which isn’t a touristy area) in March, but I did note similar for sale in Fez.

Brilliant, Rob! It sounds like you’ve visited some gorgeous parts of the world in your travels. I imagine on the long stretches of rural roads in Namibia, you could enjoy a proper low-noise environment for shortwave listening as long as the car itself didn’t produce RFI!

Post readers: Have you driven a car recently that sported a shortwave radio capabilities?  Please comment!

Spread the radio love

eBay find: Sony CDX-GT260S car shortwave radio

I still receive a surprising amount of questions about mobile (car/in-dash) shortwave receivers. We have a dedicated category to all things mobile shortwave but it is certainly a radio category with comparatively few options.

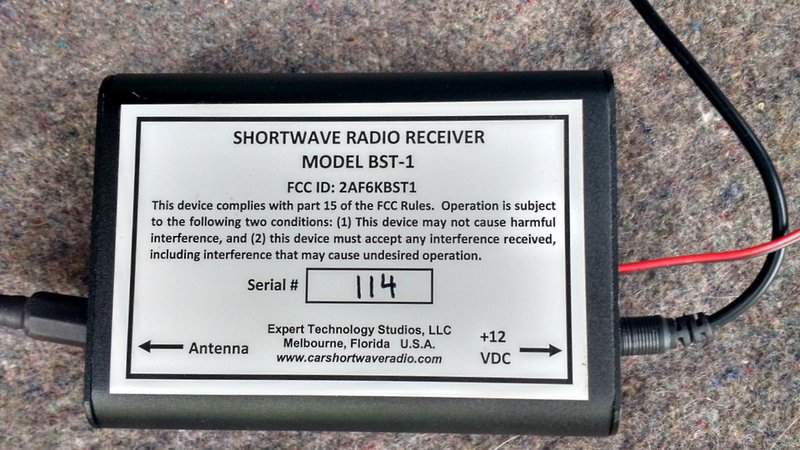
One option to consider is the BST-1: a receiver I reviewed two years ago.

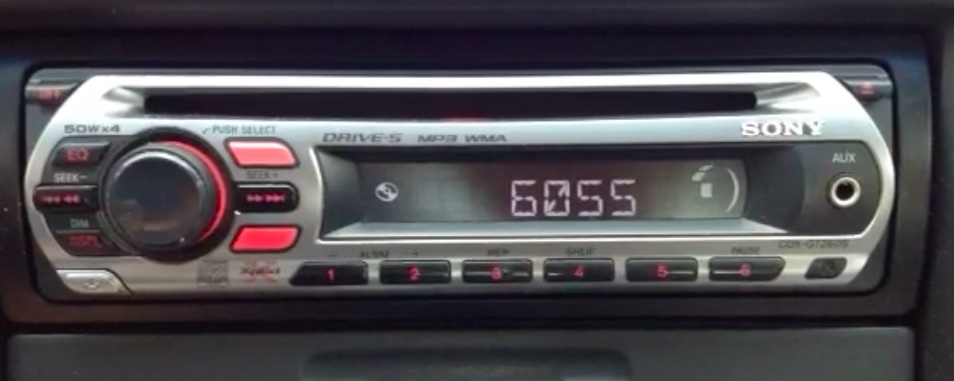
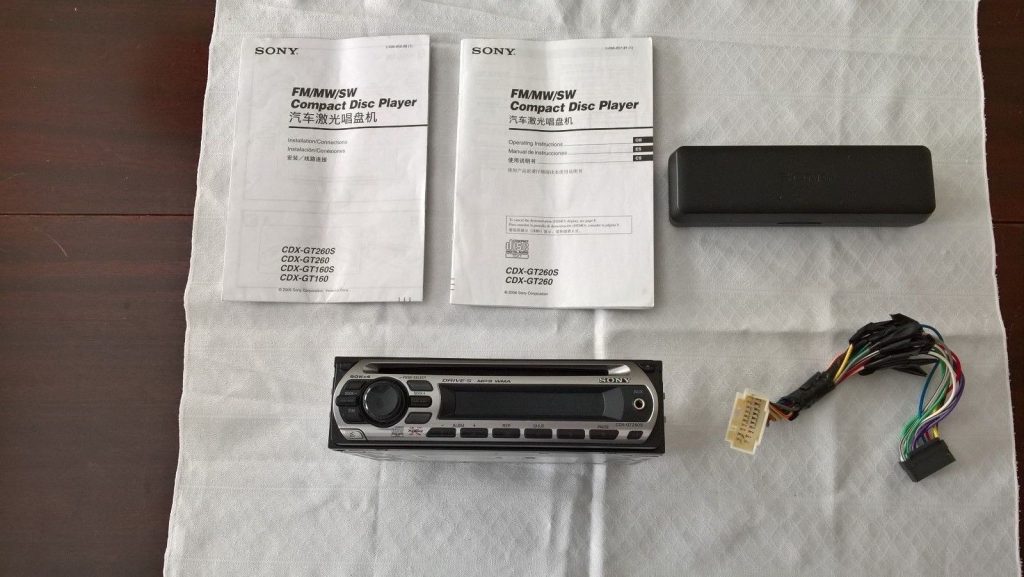
And then occasionally car receivers pop up on eBay, like this Sony CDX-GT260S:

Click here to view on eBay.

The Sony CDX-GT260S requires installation, but shouldn’t be overly complicated to install especially in older vehicles.

The seller actually posted the following video of the Sony CDX-GT260S in use:

Post readers: Anyone listen to shortwave in the car?  What’s your receiver of choice?

Spread the radio love

Matt’s review of the BST-1

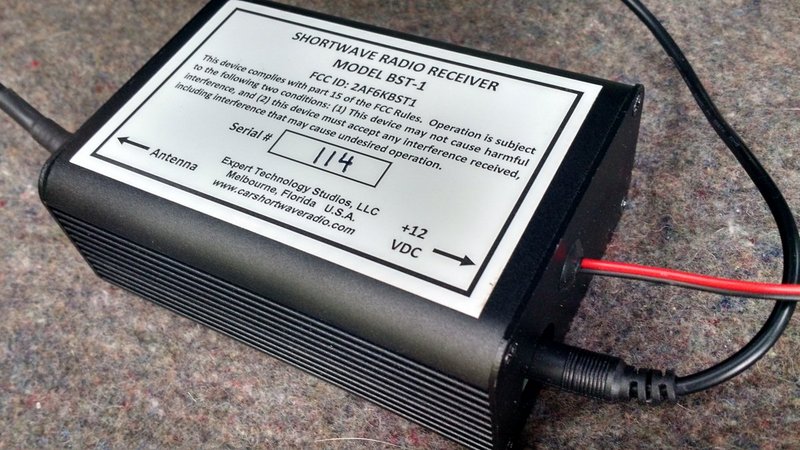
BST-1-Receiver-Label-AltMany thanks to SWLing Post contributor, Matt, who shared this review of the BST-1 car shortwave receiver:

Overall: a good sensitive receiver, with a very inventive interface. I am looking forward to my long commutes for a change.

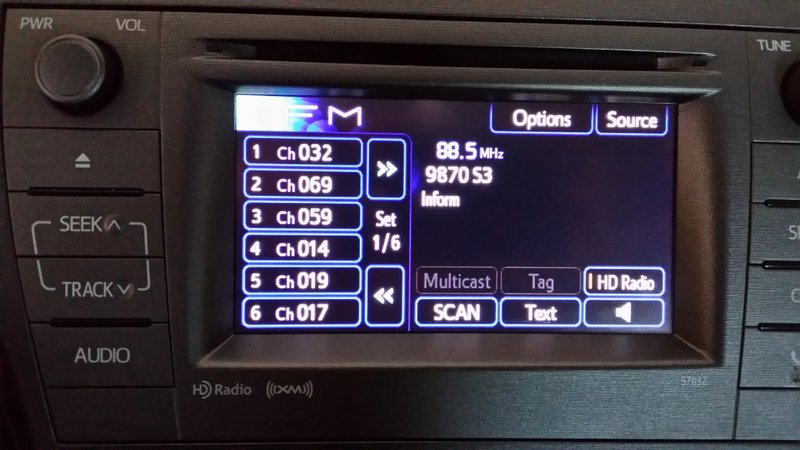
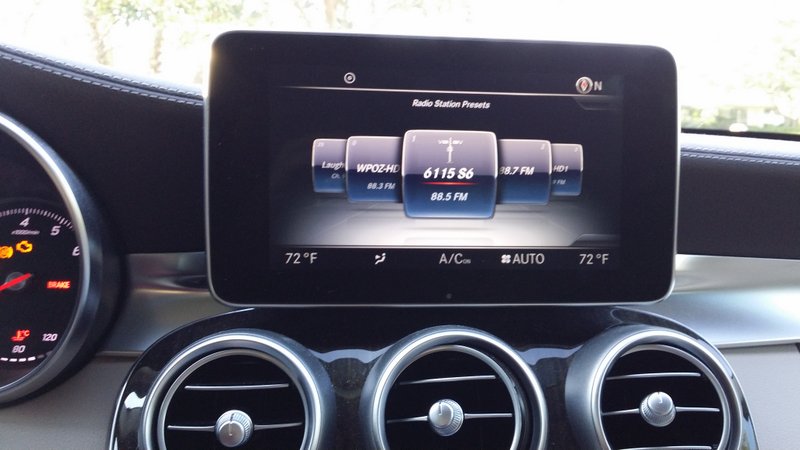
Using the FM RDS info on the car radio is a stroke of genius.BSTFM2

Performance: Miles ahead of my old MFJ 3 band heterodyne converter. I could hear 2 or 3 stations in the day, maybe 6 or 8 at night. With this new receiver during my morning and evening commutes in the NE US, I can hear dozens of stations day or night. Performance is roughly on par with a decent shortwave portable using the built in whip. I get 6070 Canada listenable 2 out of 3 days, 9580 Australia one out of 4 days in the morning, Radio Romania is an S5-8 beacon in the evenings.

Quirks: when the receiver is powered down, it does not save the music/speech bandwidth setting. It always comes up in the speech mode.

Also, when you are in tune mode and wrap around from 0 kHz to 33 MHz or vice versa, there is a glitch. Instead of scanning on the even 5 kHz intervals, it changes to scanning on the 3 and 8 kHz or 2 and 7kHz intervals: 32.003, 32.008, 32.013, 32.018, etc. instead of 32.000, 32.005, 32.010, etc. If you go back to preset frequencies, scan, and then go back to tune mode, it is back to normal.

I have only seen spurious signals around 2 MHz or so. I think it is some 15 MHz broadcasters bleeding through – only one or two usually. No other spurious signals apart from this seen yet.

Suggestions: restrict the tune mode to the shortwave bands to save time slogging through all that dead space between broadcasting segments (toggle all or band only tune?)

Make it so you can switch the AM broadcast filter in and out, maybe with an attenuator. I live over 50 miles from the nearest high powered AM station, and it would be nice to be able to BC/LW DX. The receiver is quite sensitive down there. On 1700khz where the filter doesn’t have much of an effect I can hear an AM station 80 miles away. Instructions on putting in a manual switch to do the same would be good as an alternative to this.

Thanks for sharing your review, Matt! I agree that the BST-1 is surprisingly sensitive, especially for a mobile receiver.

Click here to view the BST-1 order/information page.

Click here to view our review of the BST-1.

Spread the radio love

A review of the BST-1 car shortwave radio

BST1 FM1

The following article originally appeared in the June 2016 issue of The Spectrum Monitor Magazine.


The BST-1 receiver.

The BST-1 receiver.

Last year, I was approached by die-hard shortwave radio listener Fred Studenberg, who had an idea that at first seemed outmoded, but soon had me intrigued: he wanted to design and build a car radio. Well, a car shortwave radio.

Studenberg described his ideal car receiver. It seems he’d abandoned the idea of making a radio along the lines of a Sony, for example, that takes the place of an existing car radio. Rather, Studenberg, with singular purpose, envisioned something quite unique: a little black box shortwave that could be easily installed in the back of a vehicle, transmitting audio from the shortwave receiver to the car’s system via an FM transmitter link. One would tune the car radio to an FM frequency––say, to 88.5––and listen to the shortwave receiver which would be located at a convenient location, near the mobile antenna, somewhere in the car (in the trunk, under a seat, etc.).

I was doubtful…and for good reason. To begin with, I’ve never used an effective audio FM transmitter link in a vehicle. They’re all rather mediocre, and usually inject noise––or, are simply too weak to be effective. Secondly, I imagined it would be frustrating to remotely operate a little black box stashed in the trunk of your car without some form of display feedback at hand, showing frequencies and so forth. Plus, I concluded, wouldn’t it be a pain to install? And how would you control such a shortwave receiver? To top it off, I just couldn’t imagine such a system coping with the RF-noisy environment of an car. The more I thought about it, the less feasible it seemed. I hated to disappoint Fred with my concerns.

I needn’t have worried. Thing was, Studenberg had already developed said car shortwave radio, and even had a video of it being used in his own car:

And this video silenced my concerns: remarkably, it appeared Studenberg had managed to overcome each of my doubts. I was impressed, and interested.

All Studenberg wanted to know was, might any other SWLs benefit from such a device?

I thought of all the commuters and frequent travelers out there, with a penchant for shortwave and a shortage of time in which to enjoy it. Are you kidding? I thought. What SWLers wouldn’t give to turn a tedious traffic jam into a shortwave jam session?

Fast-forward to this year, when Studenberg put his BST-1 on the open market. And in late February, he kindly sent me a loaner BST-1 to evaluate.

Installation

As many regular readers know, this has been a particularly busy winter and spring for me, so I had to delay installing the BST-1 in my car. I was sure it would require dedicated time and likely a bit of troubleshooting to get the shortwave working as intended.

But recently I finally had a moment to install the BST-1. And I quickly I realized that, yet again, I had been fretting over nothing. My Toyota minivan was actually well-suited to installation of the BST-1, since it has a hinged hatchback door, a dedicated 12VDC plug in the rear, and even a small niche in which to tuck the BST-1.

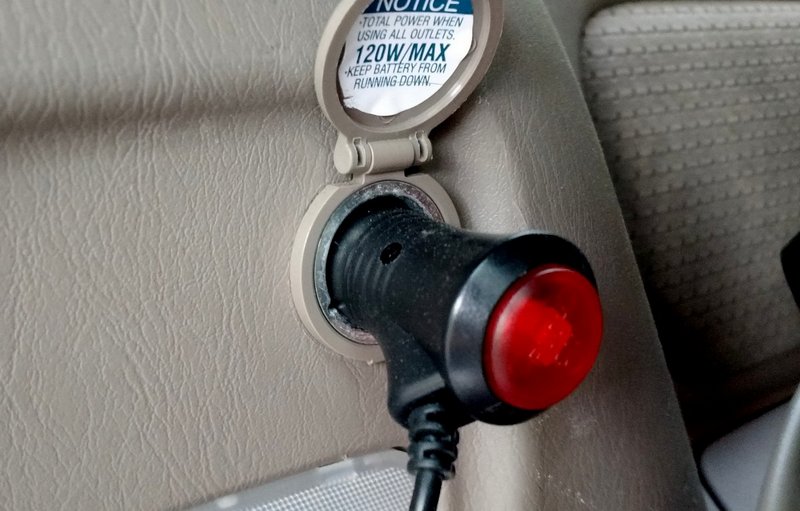
The BST-1 is also supplied with a 12VDC cigarette lighter plug. If you have a minivan or SUV with an auxiliary DC port, powering the BST-1 will require no tools.

The BST-1 is also supplied with a 12VDC cigarette lighter plug. If you have a minivan or SUV with an auxiliary DC port, powering the BST-1 will require no tools.

The radio’s proud papa also sent a Model CBST-1 mobile shortwave whip antenna with the BST-1. The antenna came with the steel whip and base, a trunk lip mount, and antenna feed line terminated with the appropriate connector. [Note: this whip is surprisingly short!]

The supplied shortwave radio steel antenna whip is short and effective. It should mount on most vehicles with little problem.

The supplied shortwave radio steel antenna whip is short and effective. It should mount on most vehicles with little problem.

Admittedly, my minivan’s hinged door doesn’t work perfectly with lip-mounted brackets—but after some trial and error, I found just the place to mount it where the door wouldn’t damage the base of the antenna. The feed line was easily long enough to cover the span from the top of the door to the receiver.

As for the receiver, it really was a cinch to install: I simply connected the antenna feed line, plugged in the supplied 12 VDC power cord (note that, alternately, there are also twelve VDC pigtails that can also be used) and placed the BST-1 in the back pocket compartment of the minivan.

I’m sure some vehicles will lend themselves to an easy installation like mine, while some may actually be a bit more difficult. Regardless, I do think the installation process is very easy compared with, for example, installing a mobile ham radio transceiver.

I turned on my car’s power, tuned the radio to the default FM frequency, and after a brief spot of tuning, recognized the unmistakable vociferations of Brother Stair—a sure sign that we’re (a) in North America, and (b) on the shortwaves!

Operating the BST-1

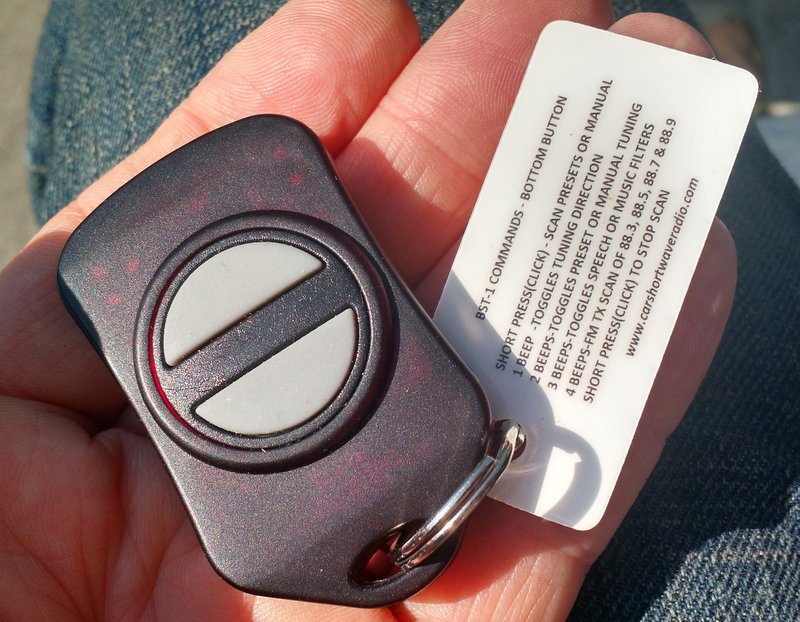
If, like me, you’re the type of person that likes to dive into a new product without referencing a manual, you may need to dial down your impulsivity a little to experiment with the BST-1. While the remote control—a two-button key fob—is extremely simple to use, it’s important to learn how it interacts with the BST-1 receiver.

Key fob

Studenberg’s tuning system is amazingly multifunctional, permitting the tuner to keep his/her hands on the wheel––and car on the road!––while simultaneously pursuing the SWL hobby.

Studenberg unlocked a total of twelve functions on a two-button key fob by employing a clever system of short or long presses.

The BST-1 Key Fob

The BST-1 key fob includes a handy quick reference tag

With a short press of the top or bottom button of the key fob—essentially a quick “click,” like you would use to unlock a car door, and which can readily be done while driving—you can single-step tune in 5 kHz steps, or cycle through preset memories.

Long presses, though, are where you unlock the bulk of the BST-1’s functionality. This was a little confusing to me at first, so I’ll explain how the long presses work:

After pressing and holding the top or bottom button, you’ll hear an audible feedback beep. As you hold the button down, you cycle through one, two, three, and four selections, each marked, again, by an audible beep, thus: beep, beep-beep, beep-beep-beep, and finally beep-beep-beep-beep. Each sequence has a slightly different tone to enable you to better distinguish them.

For example, if I want to toggle the AM filter between narrow (voice) or wide (music), I press and hold the bottom button until I hear one beep, then two beeps, then three beeps: as soon at the three-beep sequence is heard, I let go of the button, and the filter will toggle.

As another example, if I want to store a frequency in memory, I’d press and hold the top button until I heard a sequence of four beeps, then let go.

The commands are logically arranged, in that the most common functions are associated with the shortest key presses. Here’s the complete list of remote functions, courtesy of the BST-1 Owner’s Manual (PDF):

Top Button

Short press (click) – Single step PRESET channels or tune in 5 KHz steps in TUNE mode

1 Beep Toggles sensitivity between HIGH and LOW sensitivity

2 Beeps Sends frequency in Morse code and toggles S-Meter update on/off and toggles squelch on/off

3 Beeps Quick to tune Preset Channel 50, WWV at 5 MHz.

4 Beeps If in TUNE mode, stores currently tuned frequency (Morse code “S”). If in PRESET mode, it will delete the channel. To prevent accidental deletions, this delete function must be executed twice. The first activation will display the message “R U SURE” and send the Morse code “?”. The second activation will delete the channel and then display the message “DELETED”.

Bottom Button

Short Press (click) – Starts scanning up or down in PRESET and TUNE mode

1 Beep Toggles tuning direction up or down

2 Beeps Toggles between PRESET or TUNE Mode

3 Beeps Toggles receiver bandwidth between SPEECH (3 KHz) and MUSIC (5 KHz)

4 Beeps Starts scanning of FM transmitter among 4 frequencies : 88.3, 88.5, 88.7, 88.9 MHz.

It took a couple of days to get used to the commands I used the most (tuning by steps, scanning, memory scans, and changing the filters/sensitivity) mainly because I was driving while using the BST-1.

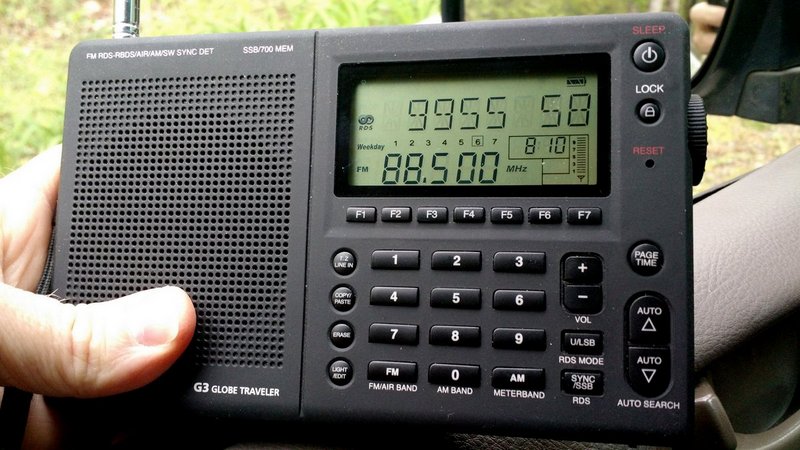
Several models of shortwave portables, like my Grundig G3, have RDS which allows me to easily set BST-1 station memories. Note that RDS is a standard feature on most vehicles sold today--sadly, my 2008 model minivan lacks RDS.

Several models of shortwave portables, like my Grundig G3, have RDS which allows me to easily set BST-1 station memories. Note that RDS is a standard feature on most vehicles sold today–sadly, my 2008 model minivan lacks RDS.

While driving alone, obviously I couldn’t divert my attention from the road to read the included reference guide attached to the key fob, so I had to simply take a bit of time off the road to review the manual.

Performance

Studenberg’s tuning system is amazingly multifunctional, permitting the tuner to keep his/her hands on the wheel––and car on the road!––while simultaneously pursuing the SWL hobby. My very first day on the road with the BST-1, I was pretty impressed with its performance.

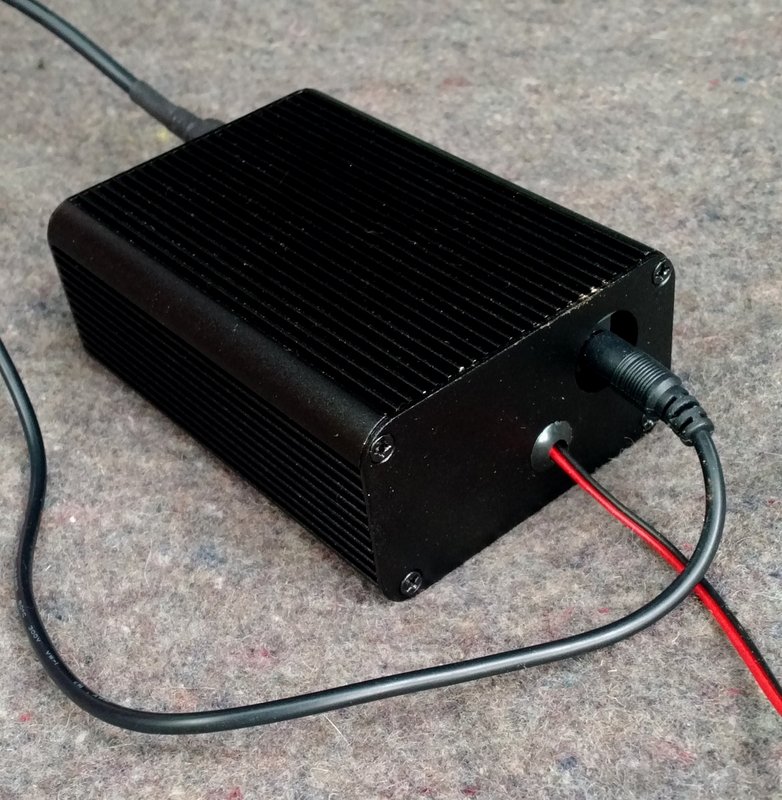
The BST-1 has the same form-factor of most SDRs: a black box. The small size and light weight make it ideal for stashing under a seat or in your vehicle's trunk.

The BST-1 has the same form-factor of most SDRs: a black box. The small size and light weight make it ideal for stashing under a seat or in your vehicle’s trunk.

Of course, “mileage may vary” depending on your particular vehicle and receiver installation, but in my case the BST-1 proved to be a fairly quiet receiver on the road. I heard no significant RF noise due to the car’s ignition or engine, and the FM transmitter audio link worked very effectively. I live in a relatively rural area with only a few broadcasters in the BST-1’s 88.3 – 88.9 MHz transmitter range. There is, however, a fairly strong broadcaster on 88.9, but surprisingly the BST-1’s FM transmitter is strong enough that my car’s FM receiver blocks it. Not bad!

Additionally, the shortwave audio is unexpectedly good through my car’s audio system. The 5 kHz/3kHz bandwidth selections are appropriate for decent audio fidelity; indeed, the 5 kHz filter actually sounds more like a 7 kHz filter to my ears.

In terms of sensitivity, the BST-1 exceeds my expectations. The sensitivity is ample enough to receive almost every domestic shortwave broadcaster, strong international broadcasters, and time stations like WWV and CHU Canada. To be fair, I’m sure the sensitivity is being hampered somewhat by the fact the receiver must operate in a mobile environment with the accompanying local interference, but it’s still quite capable.

In the time I’ve been using the BST-1, I’ve logged the following stations here in eastern North America while mobile:

  • WRMI
  • Radio Australia
  • Radio Havana Cuba
  • HM01 (Numbers Station)
  • WWCR
  • WTWW
  • China Radio International
  • All India Radio
  • WBCQ

Of course, here in North America (during the daytime especially), you’ll hear a lot of the Overcomer Ministries via various private/religious broadcasters. Most of the time, these broadcasts are received as clearly as a local AM broadcaster.

In terms of selectivity, the BST-1 is effective. For about ninety percent of my listening, it rejects adjacent signal interference. In extreme cases—like that of Radio Australia (9,580 kHz), which experiences regular interference from China Radio International (9,570 kHz)—it struggles. But in truth, only the very best of my receivers—typically ones with selectable sync detection—can mitigate most of CRI’s spurious emissions. In other words, I’m pleased I’m able to listen to Radio Australia with the BST-1 despite the noise from CRI.

Click here to view a video I made listening to Radio Australia while waiting 20 minutes in construction traffic.

The BST-1 is unlike any other receiver I’ve reviewed here on the SWLing Post. So let’s get to the point: is it worth the purchase?

What the BST-1 isn’t

If you’re looking for a receiver to snag rare and weak DX while mobile, you will be disappointed. Expectations should be kept in line on this point. Especially while your car is running, the BST-1 simply doesn’t have the characteristics of a DX receiver (low noise floor combined with excellent sensitivity and a super stable AGC, for example).

And frankly, the process of band-scanning in 5 kHz steps seeking an elusive weak-signal station would not be fun.

What the BST-1 is

Simply put: the BST-1 is a lot of fun! Without breaking the bank, the BST-1 can bring many of your favorite broadcasters, and the SWL experience, to your vehicle. Once memories are loaded, it’s a simple process to scan them manually or automatically. And at night? You may very well snag serious DX here and there—especially if parked in an area far away from urban radio interference.

In short, the BST-1 is simple to use, unobtrusive, and, frankly, does what it’s designed to do: permit you to SWL in your car.

BSTFM2

If your vehicle’s radio has RDS, you’ll have full access to the BST-1 display information.

Summary

Invariably, all radios have strengths and weaknesses; here’s a list of my notes from the moment I put the BST-1 on the air:

Pros:

  • Simple installation for a mobile radio
  • Ample sensitivity & selectivity
  • Little ignition/alternator noise in tested installation
  • Surprisingly good audio via FM transmitter link
  • Remote control/key fob (see cons)
    • Non-distracting while driving
    • Easily-to-learn common commands
    • Responsive beeps and “click” sounds to aid tuning
  • Two ways to connect to a DC source: 12V plug or traditional two-wire
  • Two AM bandwidths
  • Two sensitivity settings
  • Appropriate 5 kHz steps for broadcasting tuning
  • RDS tags work amazingly well (see con)

Cons:

  • Remote control/key fob (see pros)
    • Learning curve for infrequently used functions
    • Audio feedback only (no visual feedback) if your car’s radio doesn’t have RDS capability
    • Only two buttons control twelve functions
  • Limited tuning functionality (5 kHz steps up/down with band scan and memory scan)
  • No SSB
  • No sync detection

BST-1-Receiver-Label-Alt

In conclusion, I’m so glad I finally installed the BST-1. If your vehicle has a RDS capabilities, the BST-1 will feel like a fully-integrated part of your mobile audio system. Even without RDS–like my situation–it still packs a lot of punch and is impressively engineered for distraction-free operation..

I must admit, it’s awfully magical to be driving down the highway here in the States, listening to, for example, Radio Australia, some 15,700 km away… So if you travel or commute regularly, and you love SWL, this little mobile shortwave receiver might be just made-to-order for you, too.

At $179.50 plus shipping, the BST-1 costs about the same as a decent portable shortwave receiver–a good value in my book!

Click here for BST-1 ordering information.

Spread the radio love

Video: Listening to Radio Australia via the BST-1 car shortwave radio

Car-Shortwave-Radio

I’ve been evaluating the BST-1 car shortwave radio for a review that will soon appear in The Spectrum Monitor magazine.

I must admit: it’s mighty fun to be able to listen to shortwave broadcasters through my vehicle’s audio system.

Last week, the BST-1 saved my sanity, too. You see, I was in a rush to get to a morning appointment in town when Murphy’s Law stopped me dead in my tracks!

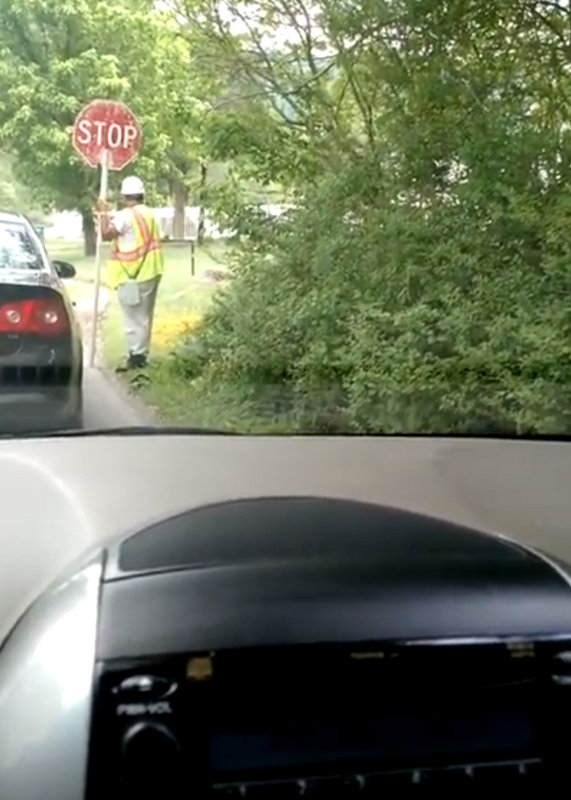
A construction crew began resurfacing a two mile (unavoidable) stretch of asphalt road on my route. As the road crew set up their gear, I was forced to wait a full 20 minutes (!!!!) before being allowed to pass.

Fortunately, I remembered that I had the BST-1 hooked up in the car. I tuned to 9580 kHz and there was Radio Australia. Somehow, hearing my staple broadcaster soothed my nerves. I accepted that I would be late for my appointment and simply enjoyed the moment. In your face, Murphy–!!!!

Here’s a very short video I made while stopped:

Click here to view on YouTube.

Spread the radio love