Many thanks to SWLing Post contributor, Steven Crawford, who writes with the following inquiry:
[I’m searching for] good quality USB powered battery chargers for AA and D size rechargeable batteries.
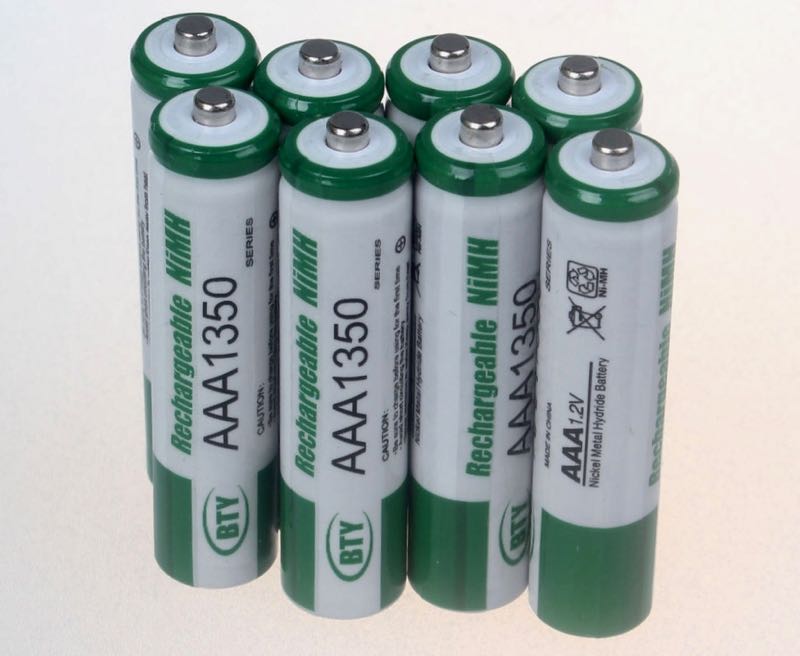
Wall outlet chargers are common but quality USB powered battery chargers appear much less common…less common than the packable solar panels with USB ports such as Anker’s, that could be used to power them. Ideally the charger should handle Nicad’s, NIMH and Ii-on but have standardized on AA, AA + D adapter sleeves, and D batteries for my storm supplies.
If I understand correctly, you’re searching for a good qualityUSB-powered battery charger that supports multiple battery chemistries (nickel-cadmium, NIMH and lithium ion) so you can recharge AA, AAA and D batteries with a portable solar panel.
I’m hoping SWLing Post readers can offer some suggestions.
I’ve also looked into this type of charger for both Ears To Our World and my own personal use when off-grid in the summer. I’ve never found one that truly supports all of the battery chemistries you mentioned. The one I’ve used (an EBL) works quite well, but only supports NiMH AA and AAA batteries. As you mentioned, you can use D cell sleeves with the AAs.

EBL makes a number of USB chargers that can be found by searching Amazon. This one–an EBL Quick Charger (affiliate link)–can recharge NiMH batteries within 40 minutes and I’ve personally used one. I’ve been pleased with EBL batteries as well.
I never use nickel cadmium rechargeable batteries at this point, so really don’t know what’s available on the market.
I have found that there are a number of USB-powered lithium battery chargers, but typically for specific lithium cell configurations like 18650, 16340, 14500, 26650, etc. Some of these inexpensive chargers have magnetic contacts that can fit almost any battery type and on Amazon and eBay they claim to recharge multiple battery chemistries, but frankly I’m quite skeptical. These $9 devices don’t seem to have a way of detecting battery chemistry, thus I’m not sure how they would adjust the charging cycle accordingly. Perhaps I’m incorrect in this assumption?
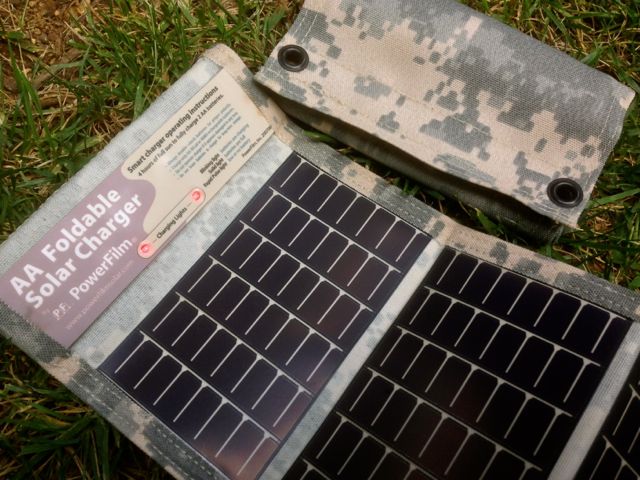
Other than using Powerfilm solar NiMH battery chargers (I can recommend these) which are incorporated in their folding panels, I’ve never charged batteries directly from a solar panel. Typically I have a 9ah or larger 12V battery floating between the PV panel and the charger.
I’ve found that using a 12VDC charger–like this–that’s pulling power from a 12V battery is simply a little more efficient, faster and reliable than charging directly from a small PV panel. Since I always have 12V batteries on hand when off grid, it’s a simple solution for for my system.
Post readers: do you have any USB-powered battery charging suggestions for Steven? Please comment!