Category Archives: Mediumwave

Radio Travel: A complete SDR station for superb portable DXing

Many thanks to SWLing Post contributor, Don Moore–author of  Following Ghosts in Northern Peru–for the following guest post:
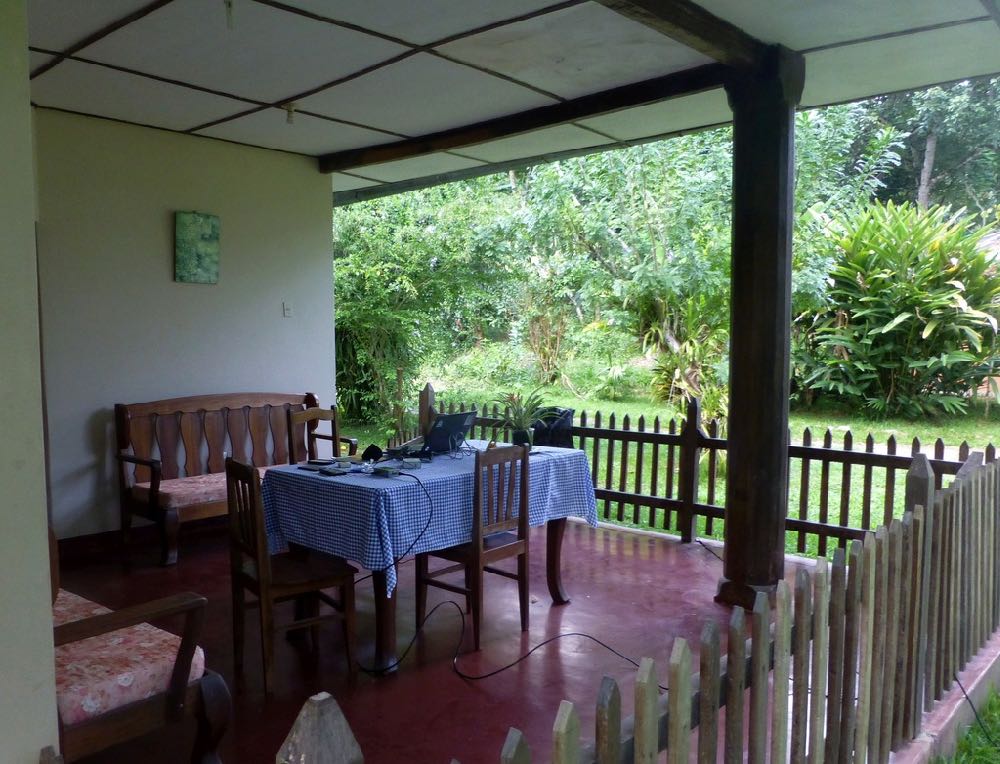

One of my favorite DXing locations was this little cottage at the El Rancho Hotel just outside San Ramon, on the edge of the Amazon jungle in Peru. At $18/night, including breakfast, the hotel was a bargain, and there was plenty of room for my delta loop.

A Guide To Vagabond DXing

By Don Moore

Ever since I served as a Peace Corps volunteer in Honduras in the early 1980s, Latin America has been my primary focus for both DXing and traveling. So when I retired in 2017, my main goal was to begin taking long annual trips . . . and I do mean long. From October 2017 to May 2018, I traveled through Peru, Ecuador, and Colombia visiting about fifty different towns and cities. This year, I’m on a five-month trip through southern South America. In Latin America you can get just about anywhere cheaply and easily by bus, so that’s how I get around. It’s also a great way to meet people and to see the countryside. But luggage can become a burden, so I limit myself to a single mid-sized wheeled suitcase and a large knapsack. And that means that my mobile DX shack has to be very carefully planned.

Your plans may not include multi-month odysseys like mine, but I think my experiences will help you prepare to DX on your next trip, wherever it might be. Of course, what makes a good mobile DX shack depends on what your DX interests are. I consider myself a station collector, in that I want to make loggings of lots of new and different stations and to build up an understanding of radio broadcasting in different regions. So on my travels I concentrate on the medium wave broadcast band and longwave beacons, with maybe little bit of shortwave utility DX. (There’s not much on shortwave broadcast that I can’t also hear at home.)

Take the DX Home With You

For years my standard DX travel gear was a Sony ICF-2010, a cassette recorder, and an old Radio West ferrite loop antenna. But listening time was always limited since it was a vacation. There were other activities on the agenda and I was generally too tired to get up early for DXing. I always went home with some interesting loggings and audio recordings, but once I left for home the DXing was done.

SDRs have changed all that and now my first rule of travel DX now is take the DX home. The best souvenir of a trip is the hundreds of hours of DXing that I take home with me. In a 2016 trip to central Colombia, I made about 300 MB of recordings of the medium wave band. While listening to them later I logged over 400 stations from twenty countries (and I still have about half the files to go through). I never would have even gotten close to that many stations listening on my Sony like an ‘old-fashioned’ DXer, hi!

Lately, I’ve been accumulating SDR files much faster than I could possibly go through them, so it’s a fair question to ask what the point is. When will I ever listen to them all? Like most DXers, I’m not fortunate enough to live in a perfect DX location. When conditions are mediocre, I’d rather spend my DXing time going through some more interesting SDR files.  And, I know I’ll have lots of good DX waiting for me years from now when I’m no longer able to travel the way that I do now. For me, SDR recordings make much better souvenirs that some cheap tourist trinkets that will gather dust on a shelf. It doesn’t matter whether your travels take you to a nearby park or to a distant continent. SDRs can preserve the DXing experience for years to come.

My Mobile DX Shack
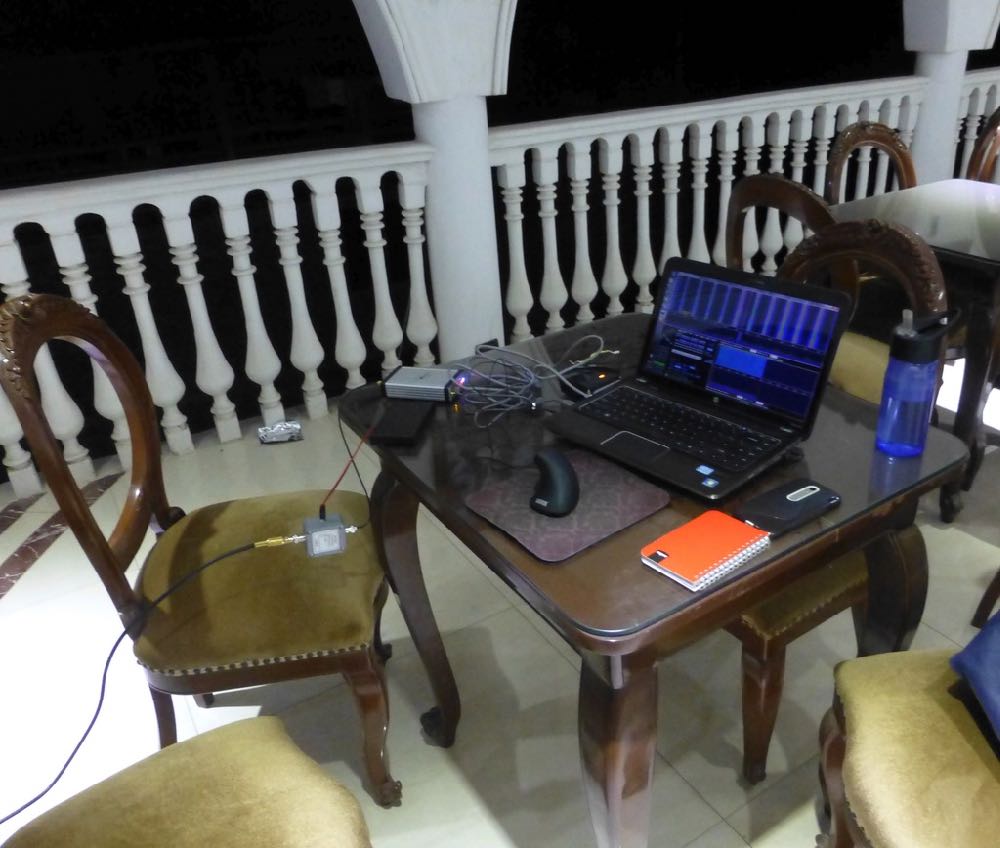
This is my typical DXing setup with the Afedri. The rooftoop terrace at the Hotel Rosa Ermila ($10/night) in Cascas, Peru was the most elegant place I’ve ever DXed from, but reception was only average with the PA0RDT dangling from the railing.

The centerpiece of any DX shack is the receiver. On my 2017-18 trip, I had an Afredri SDR-Net with an SDRPlay RSP1 as a backup, but this year I replaced the Afedri with an Elad FDM-2. Together, my two SDRs are smaller than all but the smallest portable receivers. Of course I also need a laptop, but I’m going to take one anyway. An important consideration in selecting a travel SDR is to get something that is powered off the laptop’s USB connection so that it is easy to DX totally off battery power if line noise becomes an issue.

The other vital component of DXing is the antenna. A good on-the-road antenna for SDR DXing has to be small, easy to erect, broadband, and versatile. That sounds like a lot to ask, but the perfect DX travel antennas do exist.

For compactness and ease of use, nothing can surpass the PA0RDT mini-whip. How good is it? That’s what I used to log over 400 medium wave stations in Colombia in 2016. I just attached the unit to my coax and threw it about three meters up into a short tree. The antenna works best when mounted away from nearby structures, but sometimes I’ve gotten decent results placing the PA0RDT on balconies and windowsills of tall buildings. It’s mostly a matter of luck as to how bad the local noise levels in the building are and how much the building itself may block signals. Using a short support, such as a broom or a hiking pole, it may be possible to mount the unit a meter or so away from the building.
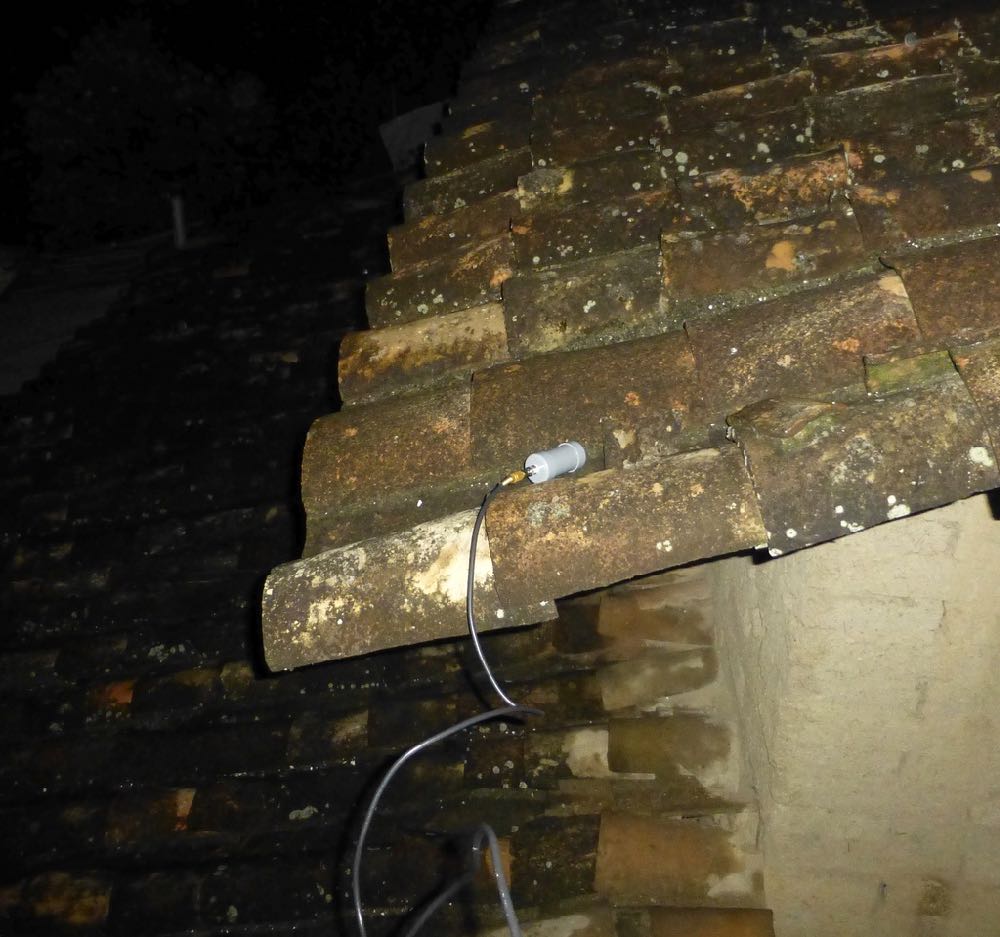
While it’s best to mount the PA0RDT away from obstructions, the antenna might give good results anywhere, even on the neighbor’s roof. (Just make sure it’s not likely to get stuck. Pulling the unit out of a stubborn papaya tree is no joke.)

The biggest drawback of the PA0RDT for serious MW and LW DXing is that it is non-directional. For a directional antenna, a Wellbrook loop is great if you’re traveling by car, but that one-meter diameter aluminum loop doesn’t fit in my suitcase. Fortunately, a few years ago Guy Atkins and Brett Saylor told me about an alternative: buy a Wellbrook ALA-100LN unit and attach it to a large homemade wire loop. Now my travel kit includes two nine-meter lengths and one eighteen-meter length of #18 stranded copper wire. The wires can be spliced together for loops of 9, 18, 27, or 36 meters circumference, according to what fits in a location. Erection of a wire loop is easy enough with a suitable tree branch. I just throw the wire over the branch and then form it into delta (with the bottom running just above the ground) using two tent stakes and some short cord to hold the corners. The ALA-100LN unit goes in the bottom center.
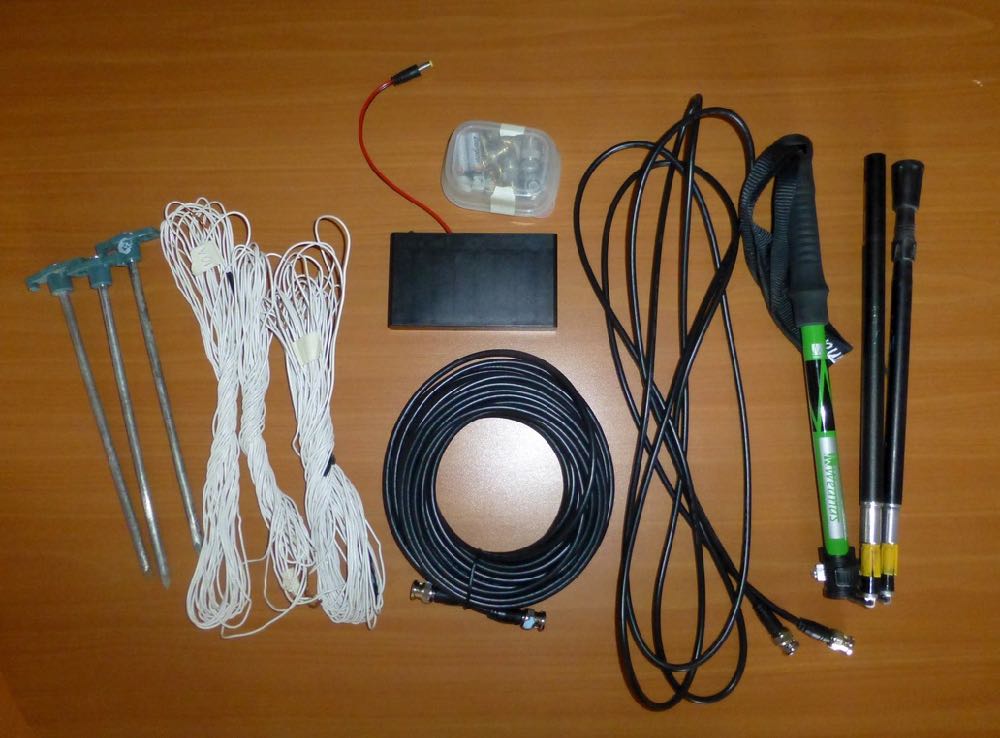
Items that go in my suitcase, left to right: tent stakes and wire for the Wellbrook loop, a small box with more adapters, another battery box, 50 foot coax, 12 foot coax, and my hiking pole. The pole doubles as a support for the PA0RDT sometimes.

The loop doesn’t have to be in a delta; that’s just often the easiest to erect. I’ve successfully used squares, rectangles, trapezoids, oblong diamonds, and right angle triangles. Any balanced shape with the ALA-100LN in the bottom center should be bi-directional in a figure-eight pattern. Non-balanced shapes will work equally well but with unpredictable directionality. Just keep the wire in a single plane and place the ALA-100LN unit someplace along the bottom.

Both the PA0RDT and the Wellbrook require a 12V power supply. The North American version of the Wellbrook comes with an excellent noise-free 110V power supply, but that’s of no use in 220V countries and also I want to be able to DX totally off battery power when necessary. Fortunately both antennas use the same size power connector, so I carry three eight-cell AA battery packs for remote power.
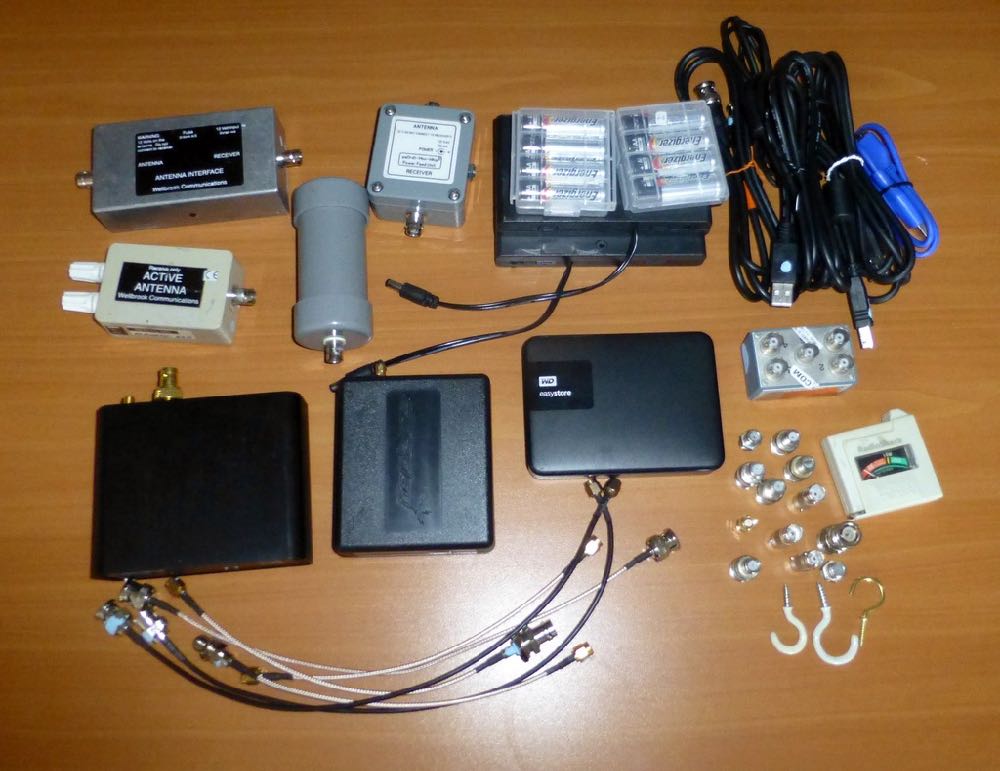
Contents of the DX box, clockwise from upper left: the two pieces of the Wellbrook ALA-100LN, the two pieces of the PA0RDT mini-whip, two 8xAA battery boxes and a set of batteries, USB and coax cables, a passive 4-way antenna splitter, battery tester, various adapters and cup hooks (for securing wires), 4TB hard drive, the SDRPlay RSP1, the Elad FDM-2, and more short patch cords.

My mobile DX shack is rounded out with everything that is needed to connect the parts together. I have at least four of every adapter and patchcord, since I know they won’t be easy to replace on the road. For lead-ins, I have 12-foot and 50-foot lengths of lightweight coax with BNC connectors. I also have a few F-to-BNC adapters so I could buy some standard TV coax if needed. A 4 TB hard drive provides plenty of space the SDR recordings I plan to make. (Before leaving, I fill it with videos that I can delete after I watch them or when I need space.) For DX references, I download various station lists online so that I have them available even if I don’t have an Internet connection. It’s also important to keep those lists with the SDR files from the trip so that if I’m listening to the files years from now I’ll have references which were current at the time.

Airport Security

A common concern for traveling DXers is getting through airport security. When I went to Colombia in 2016, I wrapped my DX gear in clothing for protection and then stuffed everything into my backpack. Security didn’t like what they saw and I had to empty the bag so that every single item could be examined and swabbed for explosive residue. The TSA lady was very nice about it, but I wanted to minimize the chance of that happening again.

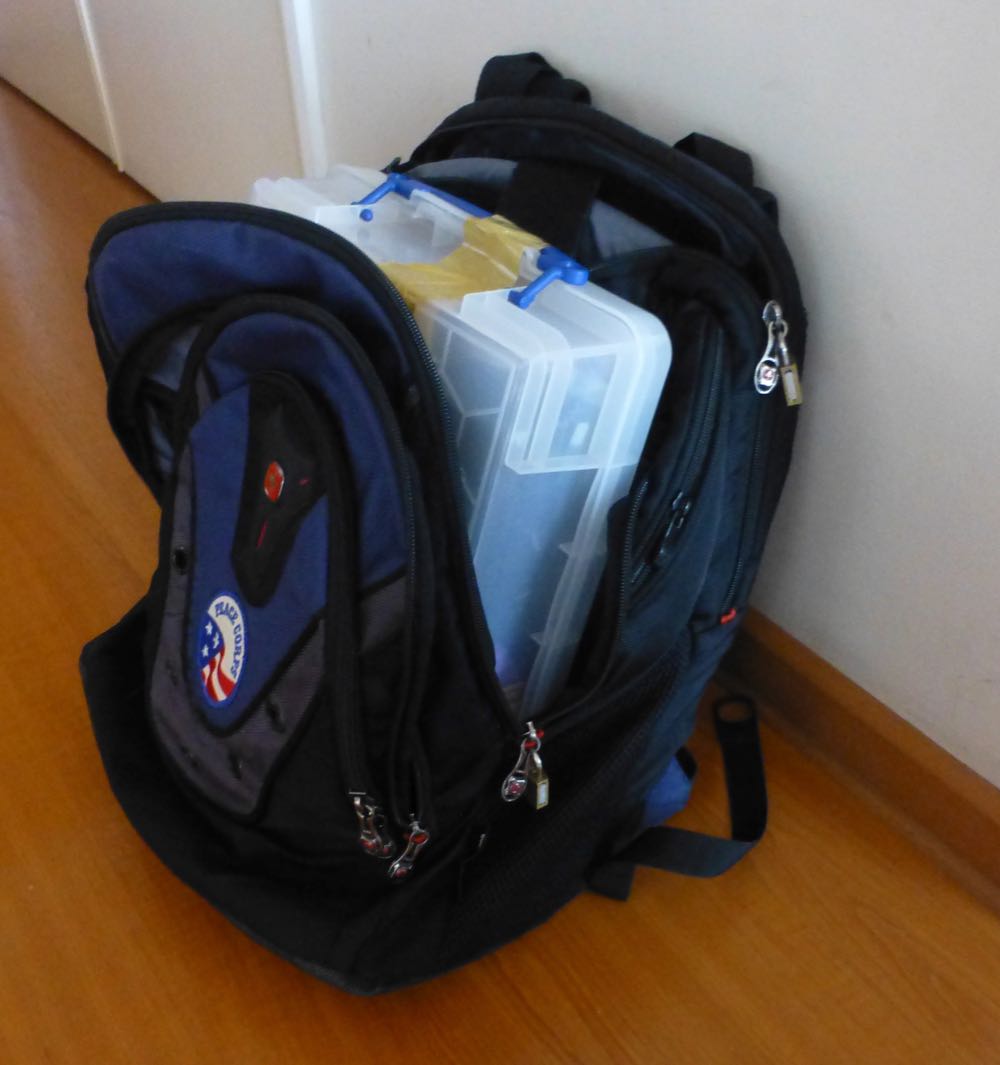
At an office supply store I found a plastic storage box that fits inside the main pocket of my backpack. My SDRs, antenna components, and hard drive get wrapped in bubble wrap and all placed together in the box along with small cables, adapters, etc. Larger items – the wire, coax, and stakes for the loop – get packed in my checked bag.
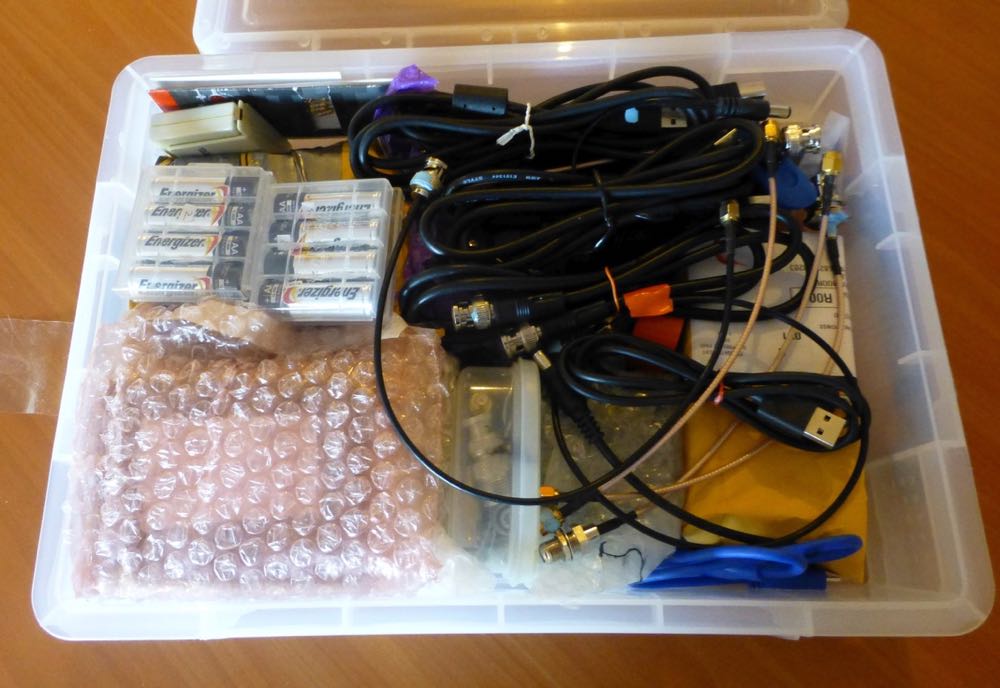
The DX Box packed and ready to go.

At the airport, I slide the box out of my backpack, place it into a cloth shopping bag, and then send it through the X-Ray machine on its own so that the agent can get a close look at the contents. So far in about a dozen security checks in the USA, Peru, and Mexico, the box of gear hasn’t caused so much as a pause on the conveyor belt. And, if the box would get pulled for a closer look, at least I won’t have to empty the entire backpack again.
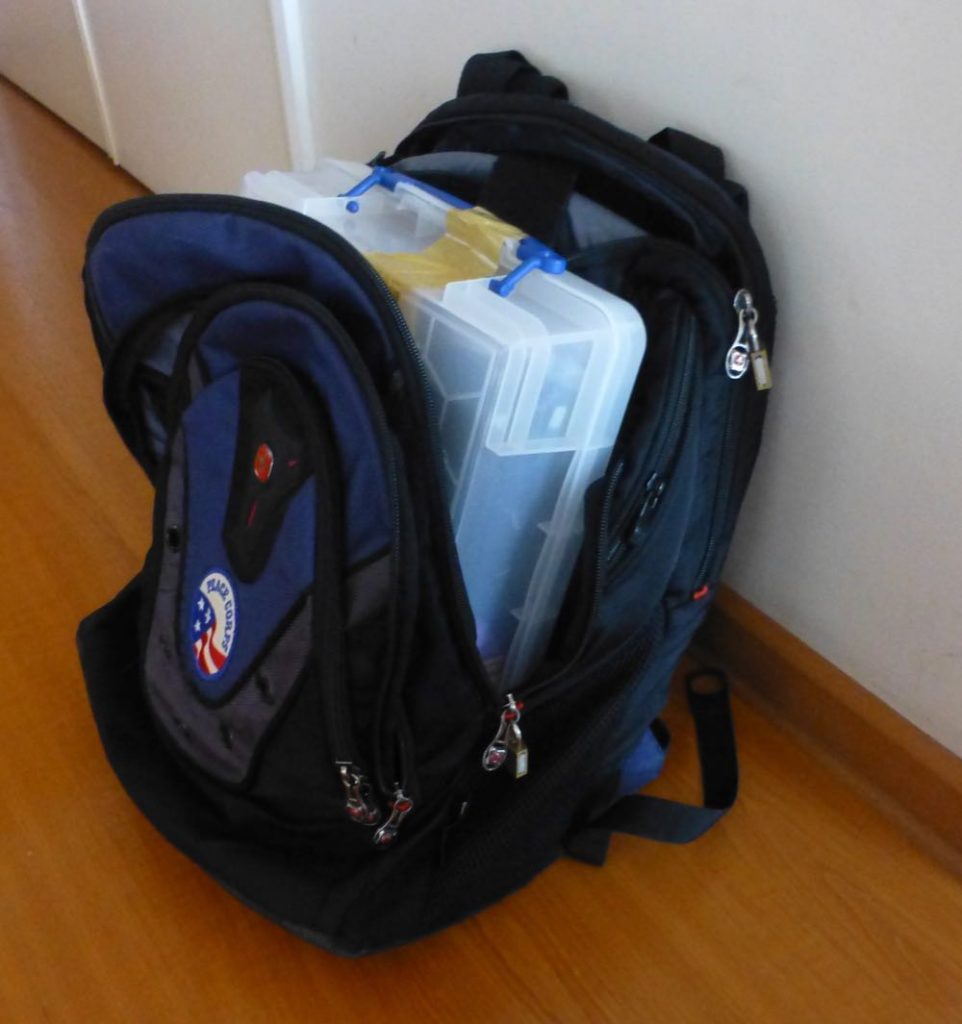
Most of my equipment fits in this plastic box which slides into my backpack.

Where to DX

A mobile DX shack isn’t worth anything without a suitable place to DX from. Hotels may work if you have a balcony where you can put a small antenna, but more likely than not there’ll be problems with RF noise. The best hotels are ones that are a collection of cottages or bungalows or that otherwise have an open yard-like space for an antenna. My favorite place to find possible DXing sites is on AirBnB. It’s often easy to find AirBnBs that are on the edge of town or even in the countryside with lots of space. Of course, since I don’t have a car, I need to make sure I can get there using public transportation.

While visiting Huanchaco, Peru with DX friends Karl Forth and John Fisher, we had a beach-front apartment with an adjoining rooftop terrace. We had excellent results with an oblong loop and the ALA-100LN on the terrace.

The key to selecting a DX location is to examine all the photos very carefully. Is there open space for the antennas? Are there trees or other potential supports? Is there a gazebo, terrace, or other space that could be used for DXing? Google satellite view and Google street view can be very helpful in scouting out a location (And it’s surprising how much of South America is now on Google Street View.)  And, I always look for possible noise sources. One place I almost rented in Colombia turned out to have high voltage power lines running next door when I found it on Street View.

I always tell the hotel staff or AirBnB host what I’m doing so that they understand why the gringo has wires running around. And I make sure not to put my antennas or coax anywhere that might interfere with the employees or other guests. Most of the time I’m able to erect the antenna near my room and run the lead-in into my room through a window. Then I can leave my laptop running all night to make scheduled SDR recordings. That’s the Holy Grail of DXing – catching the overnight DX while you sleep. But if my room turns out to have too much RF noise (as has been the case a few times), then I head out to the gazebo or terrace to DX using battery power.  That does mean I have to stay up late or get up early since I can’t leave the laptop outside on its own. But, some of the best DX that I’ve had has come from running off full battery power in gazebos.
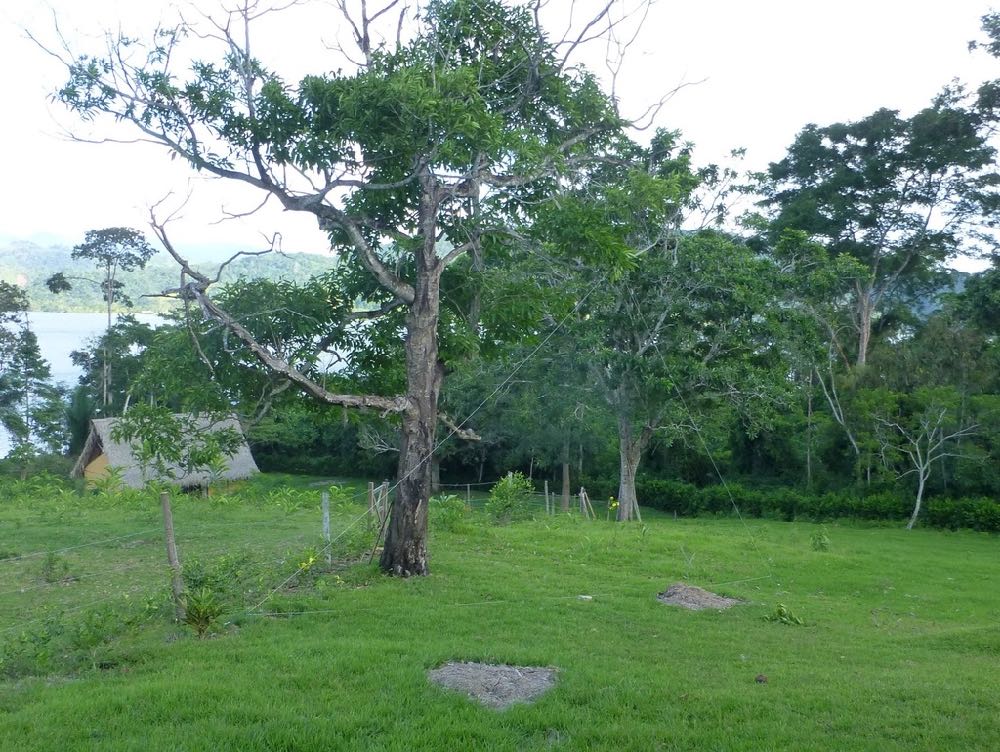
My delta loop had plenty of space at the Posada de Sauce ($25/night with breakfast) in the jungle near Tarapoto, Peru. The lodge was totally powered by solar panels and was one of the quietest places I’ve ever DXed from.

Antenna security is another consideration. At one place I stayed I wasn’t comfortable leaving my expensive antenna components unattended outside all night. And then there was what happened on my first trip to Colombia in 2010. I knew that a place I would be staying at for two nights had an open field right behind it, so on that trip I took 500 feet of thin insulated wire for a mini beverage-on-the-ground. DXing was great the first night but terrible the second. When I went out the next morning to wind up the wire I learned why. The worker who had been weed-wacking the hotel gardens the previous day had also done the field, and in doing so he had cut my wire in three places. He had, however, very nicely tied the wires back together.

Share the DX
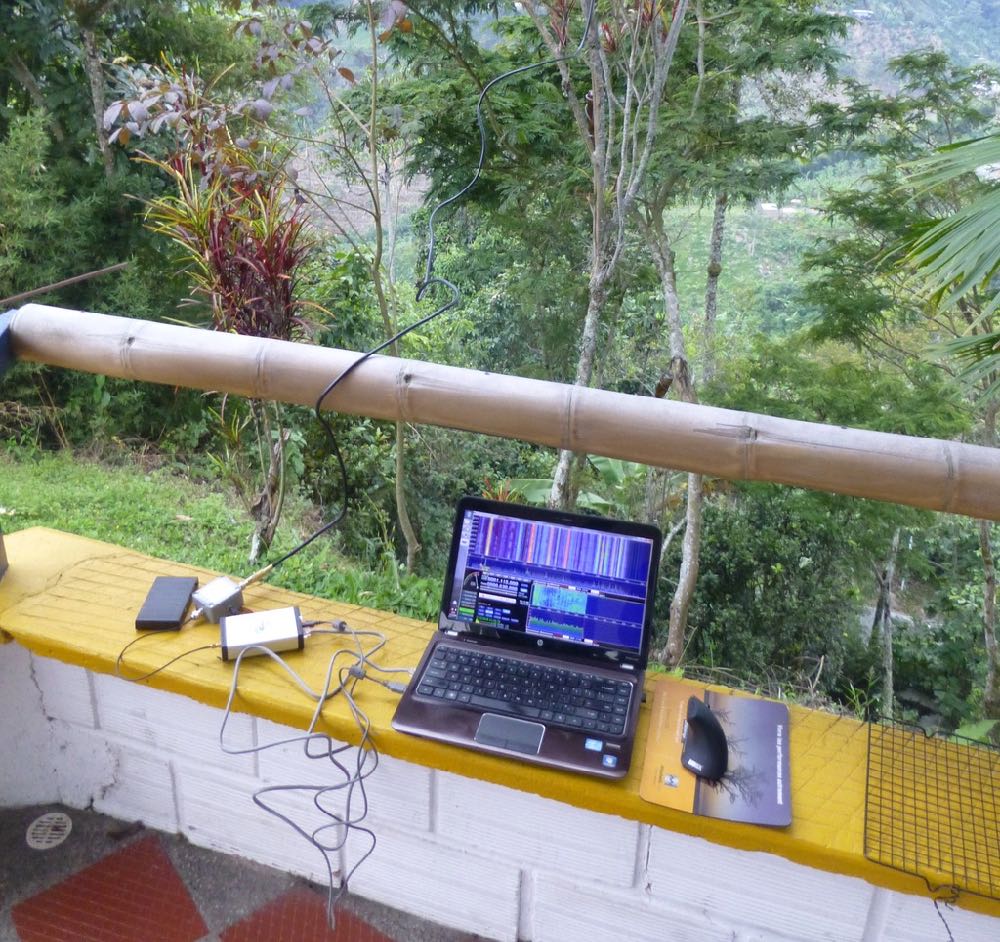
DXing off battery power in the gazebo in the Mauro Hilton Hostel in the mountains above Manizales, Colombia. The antenna was the PA0RDT thrown in a tree. I had great DX with the loop from my room, but I came here to enjoy the views one evening.

Finally, if you take an SDR on a trip and get some good DX, make a selection of your files available for download. Other DXers will enjoy hearing what the band sounds like somewhere else. Several dozen of my files from Peru, Ecuador, and Colombia are available for download in a shared Google Drive folder. If you see something you want, be sure to download it now. The winter DX season is just starting here in deep South America and in the coming weeks I’ll be replacing some of those older files with ones made in Argentina and maybe in Uruguay and southern Brazil. I’ve found a lot of places to stay that look to be perfect for a vagabond DXer.

Links

For fun, here are some of the better places I DXed from in Peru, Ecuador, and Colombia. The key thing to look for is an open place for the antennas:


Don, thank you so much for sharing your travel DXing expertise. This article is absolutely brilliant and so informative for anyone who wishes to make SDR field recordings. I love how carefully you’ve curated and distilled your portable setup and have given priority to having antennas for all occasions. I also think carrying spare parts and, especially, a spare SDR makes a lot of sense.

Post Readers:  As we mentioned in a previous post, Don is an author and has recently published “Following Ghosts in Northern Peru: In the Footsteps of 19th Century Travelers on the old Moyobamba Route” which is available in Kindle and print formats via Amazon.

Purchasing through this Amazon link supports both the author and the SWLing Post.

Click here to check out other guest posts by Don Moore.


Do you enjoy the SWLing Post?

Please consider supporting us via Patreon or our Coffee Fund!

Your support makes articles like this one possible. Thank you!

Ivan checks out the Kenwood TH-D74’s mediumwave performance

Many thanks to SWLing Post contributor, Ivan (NO2CW), who writes:

One category of receivers not much talked about are the wideband handhelds. I first owned one of those in 1992 when I paid a ton of money for an AOR-1000. Not only did it cost me a lot but I also ordered it from the UK so it was not subject to the “cellular blocked” rule. Don’t ask me why, it never made any difference in the end.

As a busy shortwave listener at the time I was eager to check out reception as the radio also featured Shorwave coverage and even a BFO (Beat Frequency Oscillator) knob! To sum it up it was a great receiver above 30 mHz but Shortwave and Mediumwave was barely there, with a 15 kHz wide filter and low sensitivity.

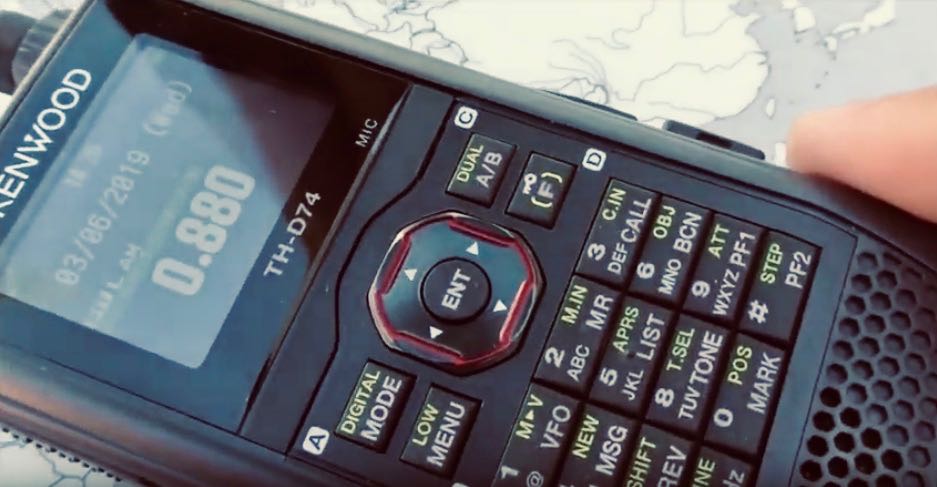
Well today I have in my hands a Kenwood TH-D74A – a top of the line handheld triband amateur radio transceiver with Medium Wave and Short Wave coverage. The radio is expensive due to the presence of GPS, D Star and APRS, but those are a features for the radio amateur. What about performance on the low frequencies?

Here is my video of the test which revealed surprising results:

Click here to view on YouTube.

So next time you consider purchasing a new receiver,as you dive into the choice of portables, SDRs, tabletops and classics from eBay you may consider adding this category as well – handhelds with wide band coverage.

Thank you, Ivan!  You’ve inspired me to check out mediumwave performance on a few wideband handy talkies I own: the Yaesu VX-3R, Yaesu FT2DR and the Kenwood TH-F6A. To my knowledge, all three have internal ferrite bars (tiny ones) but I’ve never actually compared their performance with each other. That could be a lot of fun. I also own an AN200 MW loop antenna so this could be an excellent test to see how it pairs with each radio.  I’m especially curious about the wee VX-3R!

Thanks again, Ivan. We always enjoy your videos and posts.

Guest Post: Repairing the National Panasonic DR22, the Panasonic RF-2200’s Euro-Sibling

Many thanks to SWLing Post contributor, Mario Filippi (N2HUN), who shares the following guest post:


National Panasonic DR22, the Panasonic RF-2200’s Euro-Sibling

By Mario Filippi, N2HUN

(All photos courtesy of author)

Thomas, your recent and thoroughly excellent post on the Panasonic RF-2200 was the inspiration for this short review of the RF-2200’s European sibling, the National Panasonic DR22.

A few years back when I was hunting for a used RF-2200, a second-hand National Panasonic DR22 was for auction on eBay. These radios were sold in Europe and are almost an exact match for the RF-2200, with a few minor cosmetic differences.  It was so close in appearance that I decided to bid and won the auction. The cost was around $150.00 plus shipping.

Author’s National Panasonic DR22, a.k.a. RF-2200BS

The seller described the unit as working, not a tech special, and was complete except for the original earphone.  The strap, which can be missing on some used models was in place, the antenna and all the knobs were there. When the radio was received, all appeared to be working well and most importantly the rotatable ferrite antenna was fully functional.  With the exception of tiny paint specks and years of accumulated dust the unit was cosmetically acceptable for a 40 plus year old radio. After a close olfactory inspection (smelling the unit hi hi) it was determined the radio was from a smoke-free home, which is important as smoke not only causes yellowing of plastic components, but it inundates the internal electronic components and coats them with a yellowish-brown stain.

National Panasonic DR22 Dashboard Shows Slight Labeling Differences

On close inspection, the unit differs slightly from the RF-2200, in that it is branded as a “National  Panasonic” along with the “DR22” designation on the upper right of the unit. And, the National Panasonic logo can be seen to the left of the AM/SW gain control.  Another difference is the additional labeling found above each shortwave band, the designations are KW1, KW2, etc.

Power, Dial Light, and BFO Switches Are Identical to RF2200

As for the rear panel of the DR22, a major difference is the presence of a voltage selector which allows one to switch from European voltage (220) to the US standard (110).   Inside the unit there’s a transformer that handles this option. Alternatively you can simply use four “D” batteries to power the unit.

DR22 Line Voltage Selector Switch

After receiving the unit, first order of business was a good cleaning of the outer case with mild soap and water.  All the knobs and carrying strap were removed and soaked in a warm soapy solution. A toothbrush was put to work to remove years of human tactile residue from the sides of the knobs.

Knobs (left) removed for cleaning. Carrying strap (right) was inundated with decades of dirt.

Next on the “to do” list was to obtain a copy of the service manual, available on line.  You’ll find it under the title of National Panasonic RF-2200BA. It’s an excellent manual with detailed photos of the circuit boards, exploded diagrams of the mechanical parts, parts list, schematics, and of course the alignment procedure.   Cracking open the case required removal of all the case screws and very gently coaxing of the two panels apart. Years of use, rust on the screws, and dirt/dust buildup all contribute to the challenge of this endeavor.

DR22 Case Disassembly

The alignment took several weeks as the radio was worked on in my spare time.  Note that I did not replace any electrolytic capacitors, and yes it was the lazy man’s way but a basic inspection of the caps for any evident leaks, explosions, or burns was conducted.  In short I did not want to replace capacitors at this time since the radio, as received from the former owner, was working well on all bands. Surely, as other operators have reported, cap replacement will restore full operational excellence but I felt if the radio passes the alignment specifications  that was good enough for me at this point.

DR22 Undergoing Testing

After several weeks the radio was restored to specifications, all switches were cleaned and dusted and the radio reassembled.  This was done a few years ago and the radio continues performing well. Even the 125/500 KHz crystal markers are pretty much on the money when checked against WWV.  No scratchy pots either hi hi. So now the radio sits in my kitchen and is on at least a few hours a day and keeps company with its sister, my RF2200. Note that recently DR22s have sold on eBay for $150 – $300US. Tech specials/parts radio run considerably less.  Thanks and 73’s de N2HUN.


Thank you, Mario! It looks like you scored an excellent deal on the DR22 and it’s serving you quite well! I’m glad you spent time checking for leaky capacitors after opening the chassis. Using the DR22 so frequently will keep those caps “juicy!”

Post Readers: Please comment if you love the National Panasonic DR22!


Do you enjoy the SWLing Post?

Please consider supporting us via Patreon or our Coffee Fund!

Your support makes articles like this one possible. Thank you!
Scott stumbles upon Radio Veronica at the NDSM Wharf

Many thanks to SWLing Post contributor, Scott Gamble, who writes:

[I was in Amsterdam recently] and was in a meeting over at the NDSM Wharf, and I happened to stumble upon Radio Veronica next to the office where I was meeting.

Never though I’d be so close to it. Such a cool piece of history.

Wow! What a fantastic opportunity to catch a glimpse of the legendary Radio Veronica! Thank you for sharing your photos, Scott.

Check out more info about Radio Veronica on Wikipedia:

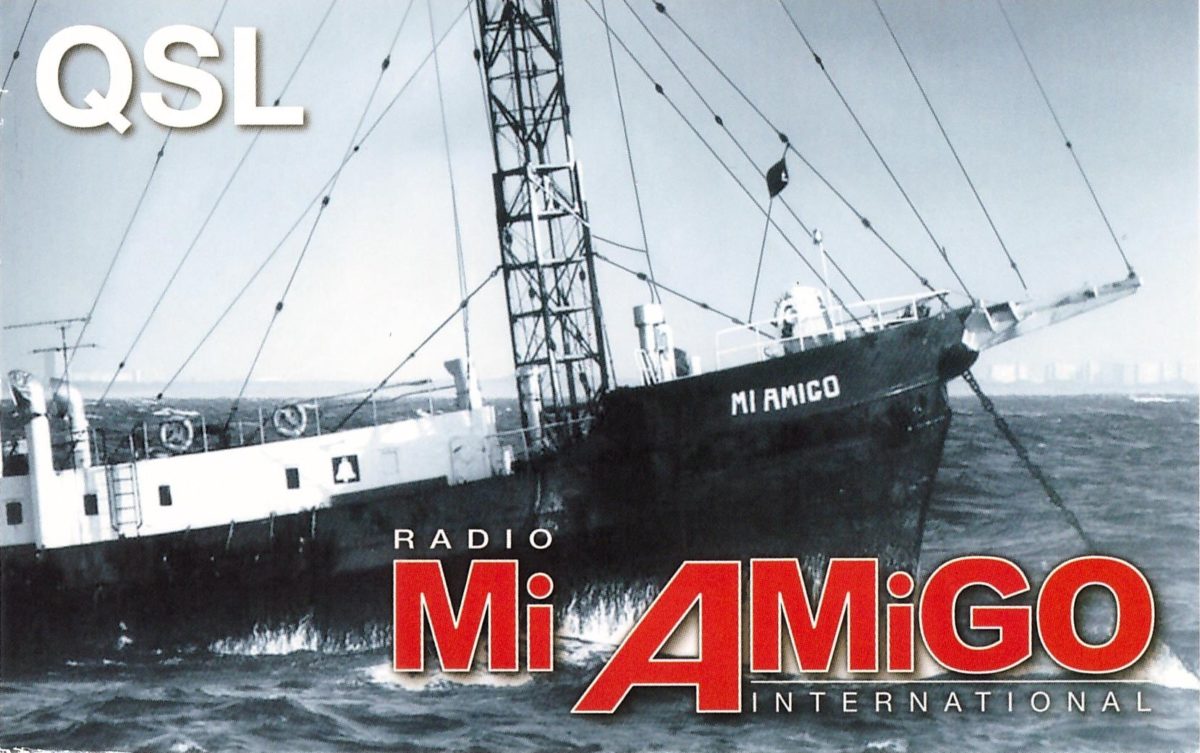
Radio Veronica was an offshore radio station that began broadcasting in 1960, and broadcast from offshore for over fourteen years. It was set up by independent radio, TV and household electrical retailers in the Netherlands to stimulate the sales of radio receivers by providing an alternative to the Netherlands state-licensed stations in Hilversum.

Broadcasts began on 21 April 1960. The station announced itself as VRON (Vrije Radio Omroep Nederland; Free Radio Station [of the] Netherlands) but changed to Radio Veronica, after the poem “Het Zwarte Schaap Veronica” — The Black Sheep Veronica — by the children’s poet Annie M. G. Schmidt.

After the station’s closure, some of its staff applied for a broadcasting licence and continued as a legal organisation with the same name.

The original Radio Veronica became the most popular station in the Netherlands. It broadcast from a former lightship Borkum Riff anchored off the Dutch coastline. The ship was fitted with a horizontal antenna between the fore and aft masts, fed by a one-kilowatt transmitter. Most of its programmes were recorded in a studio on the Zeedijk in Hilversum. At the end of the 1960s the studios and offices moved to bigger premises on the Utrechtseweg in Hilversum. Initially advertisers were reluctant to buy airtime, but those that did reported increases in sales and gradually the station’s revenue improved.

For a short time the station also ran an English language service under the call letters CNBC (Commercial Neutral Broadcasting Company). Although short-lived, CNBC was presented by professional broadcasters who were able to give invaluable technical advice to Veronica’s Dutch staff.

Click here to read the full Radio Veronica entry.

Mornings with the Panasonic RF-2200

It’s been a busy winter season here at SWLing Post HQ. Many of you might have noticed a slow response time if you’ve tried to contact me. I’m in the midst of a rather involved investment property renovation that’s consumed nearly all of my spare time.

Still, I’m keeping up with the Post and even managing a little one-on-one radio time in the early mornings/late evenings. Indeed, I’ve actually tried to turn my renovation project into an opportunity to play a little radio. The property is unoccupied and very rural, so there’s quite literally no RFI there. Woot!

Since I’ve been spending time evaluating the new CCRadio3 (click here to read my preview), I’ve also had the CCRadio EP Pro, Sony ICF-5500W and the legendary Panasonic RF-2200 nearby for comparison purposes.

All of these radios have their strong points, but the Panny RF-2200 is still the rig I reach for the most. That’s why I listed it as one of my daily drivers.

It also helps that my RF-2200 feels like a brand new unit after Vlado re-capped and cleaned it.

Band-scanning

Band-scanning with the RF-2200 is such a tactile experience. The ‘2200 tuning knob is quality and almost feels like a weighted encoder you’d find on a proper tabletop receiver. The RF-2200 even has fast/slow tuning gears and you can calibrate the dial so easily. Though tuning on the shortwaves feels a little vague, I find mediumwave is incredibly accurate.

Speaking of the dial and logging scale, I think it’s one of the most attractive from the 1970s:

Since I’ve been doing most of my listening around sunrise and sunset, it’s been a lot of fun to fit in a little mediumwave DXing as well. I see why the RF-2200 was one of The Professor‘s favorites.

If you ever find a good deal on a Panasonic RF-2200, don’t hesitate, just grab it!  Occasionally you’ll find one on eBay, but also check your local hamfests and swap meets! That’s where I’ve had the most luck.

If you ever find a ‘2200 for less that $100-125 that’s in decent cosmetic shape, with the original antenna, clean battery contacts, and is in good mechanical shape (meaning the tuning mechanism and dial work as they should), buy it! If there’s an electrical problem, Vlado can fix that. In fact, if your RF-2200 still has the original capacitors, you’d probably want to re-cap it anyway to keep leaky caps from eventually harming the board or internals. Plus, a properly re-capped ‘2200 will play like a new one!

My takeaway?  The RF-2200 is a keeper! I suppose that’s why I even have a spare!

Do you have or would you like an RF-2200? Please comment!


Do you enjoy the SWLing Post?

Please consider supporting us via Patreon or our Coffee Fund!

Your support makes articles like this one possible. Thank you!
Stan compares the C. Crane CCRadio3 with the CCRadio2E

Many thanks to SWLing Post contributor, Stan Horzepa (WA1LOU), who shares the following post originally published on his blog:

I bought a first-production-run C.Crane CCRadio3 AM/FM/WX/2-Meter receiver after reading K4SWL’s preview on his blog, The SWLing Post.

I already own the highly-regarded C.Crane CCRadio 2E Enhanced, which I reviewed here five years ago, so I decided to compare the two on the AM, FM and weather bands. Before comparing the two radios, I recalibrated the antennas of both radios, then with the radios sitting side-by-side, I tuned each radio through each band channel-by-channel

My findings follow.

On the AM band, the 3 captured signals faster than the 2E.

Occasionally, signals were stronger on the 3 than on the 2E and vice versa, but most of the time, the signal strength was the same on both radios. So I conclude that the sensitivity of the two radios are the same.

I tried the 3’s new Bluetooth function before reading the manual. I just pressed the Bluetooth button to access the Bluetooth mode and my iPhone and MacBook Pro found the 3 without pressing the radio’s Pair button, as instructed by the manual.

In conclusion, the differences I found between the 3 and the 2E were (1) the 3’s ability to capture AM signals was noticeably faster than the 2E and (2) the addition of the Bluetooth function in the 3.

I did not notice any other performance enhancements. I was hoping that the 3 might be more sensitive than the 2E (not that the 2E is not sensitive — it certainly is!), but I’d say that the 3 and 2E Enhanced are about equal sensitivity-wise, as well as selectivity-wise.

Believe it or not moments… During the comparison, I was very surprised that on two occasions (on 820 and 1500 kHz), each radio simultaneously received different stations while tuned to the same frequency!

Click here to check out Stan’s blog.

Thank you for sharing your thoughts after comparing the two receivers, Stan! I think this supports the idea that if one owns the CCRadio2E and doesn’t need Bluetooth functionality, there’s no real reason to upgrade to the CCRadio3. With that said, and as I think you found Stan, the Bluetooth functionality in the CCRadio3 is excellent. It must be one of the best Bluetooth receivers I’ve tested and as you point out, it’s also very easy to engage and use.

Thanks again!

Guest Post: A Visit to Radio Tarma


Many thanks to SWLing Post contributor, Don Moore–author of  Following Ghosts in Northern Peru–for the following guest post:


A Visit To Radio Tarma

By Don Moore

(Note: A more extensive set of photos from Radio Tarma, and other Peruvian radio stations, can be found at Don’s website. The website also contains details of the Peruvian travelogue book he recently wrote and published.)

Radio Tarma building

Shortwave stations in South America are few and far-between these days, but those of us who have been tuning the bands for a few decades remember the days when the tropical bands were filled with Latin American broadcasters from dozens of scattered mountain and jungle towns. One such place was Tarma, a picturesque but chilly city of about 50,000 nestled in a narrow valley in the central Peruvian Andes at 3,000 meters above sea level. Tarma has been an important commercial center since colonial times and archaeological findings indicate that the region was heavily populated long before the Spanish came. Today it sits at the junction of two major trade routes, so it continues to be a bustling place.

View of northern Tarma from the Radio Tarma transmitter site

While wandering around central Peru in April 2018, I made a point of stopping in Tarma so as to visit the town’s namesake broadcaster, Radio Tarma, one of the few Peruvian stations still on shortwave. Radio Tarma’s frequency of 4775 kHz has been a fixture on the sixty meter band for over four decades. What I didn’t know was that this would turn out to be the best of the over one hundred Latin American station visits that I have made in my travels.

Radio Tarma Frequencies

When I first stopped by on Monday afternoon, everyone was busy and no one had time for a visiting gringo. By chance I had arrived on the station’s sixtieth anniversary and they were preparing for a big celebration that night. I was invited to come back in the evening when there would be a huge street party with live music. That evening I got to talk to several members of the station staff and was introduced to owner-manager Mario Monterverde, who invited me to come back for a tour in two days after the celebrations and ceremonies were over.

Radio Tarma’s 60th Anniversary Party

The Radio Tarma Party Band

Radio Tarma Owner/Manager Mario Monteverde

The reason for Radio Tarma’s continued presence on the sixty meter band is Mario Monteverde, Radio Tarma’s energetic owner-manager.

Mario Monteverde in the old record library.

Running radio stations is his passion, and that includes reaching distant listeners on shortwave. Don Mario remembers what shortwave used to be like in Peru and he can rattle off station names and frequencies from past and present as good as any serious DXer. We spend a lot of time talking about stations I used to hear and the ones that I visited in my 1985 trip to Peru. We mostly talk in Spanish, although he speaks English well. He studied in Lima and later in the United States for several months. In the 1980s, he lived in San Francisco for a year while working as a DJ at a Spanish language FM station.

Don Mario thinks that it’s unfortunate that there is so little use of shortwave in Peru today, but other radio station owners think he is crazy to continue to use shortwave. The only listeners to shortwave in Peru are peasants in jungle settlements and remote mountain valleys. That may be a suitable audience for a religious broadcaster, but these listeners have no value to commercial stations, such as Radio Tarma, as they are mostly outside the money economy and of no interest to advertisers. But Don Mario doesn’t care and so Radio Tarma continues to broadcast on shortwave several hours every morning and evening for whoever might happen to tune in.

Studio for Radio Tarma

And, Radio Tarma can afford to broadcast as it sees fit. Don Mario’s Grupo Monteverde is one of the most professionally run and profitable communications companies that I have visited in Peru. In addition to Radio Tarma (on MW, FM, and SW), the company operates two television stations in Tarma, the local cable network, the local FM repeater for Radio Programas del Peru (Peru’s radio news network), and Radio Tropicana, a chain of FM music stations in Tarma and three nearby towns.

(Click here to open video in separate window.)

Founded in 1958 by Mario’s father, Radio Tarma was the first radio station in this city. Using two homemade 500 watt transmitters, the station initially broadcast on both medium wave and 6045 kHz shortwave, but the shortwave went off the air after about a year. Then in 1978, Mario’s father dusted off the old shortwave transmitter and applied for a new license. He was granted 4770 kHz, but that was soon changed to 4775 kHz, where Radio Tarma has been ever since. In the past four decades, Radio Tarma has been logged by thousands of DXers all over the world and, although it’s hard to believe, when I visited Tarma in April 2018 they were still using that original 500 watt transmitter that Mario’s father built sixty years before. However, a new one-thousand watt solid state transmitter was currently in Lima being tested by the Ministry of Transport and Communications. It should be on the air by now.

Studio for Radio Tropicana’s Tarma station

Don Mario starts by giving me a tour of the station building and its well-equipped offices and studios. He shows me the closet where the transmitter for the studio-to-transmitter-site link is and then takes me  upstairs to the record library. Radio Tarma has one of the largest and oldest collections of vinyl records in the Peruvian Andes and includes numerous rare recordings. Many of the disks are EPs, or extended-play, which was once a very common format in the Andes. These records are the size of a 45 but recorded at 33 rpm so that there are two songs on each side. Don Mario keeps the records for their value but they aren’t used on the air anymore as Radio Tarma and its sister stations are all fully computerized. When there’s time they work on digitizing the better historical recordings from their collection.

Radio Tarma mountaintop transmitter site

After seeing the studio, we get in Don Mario’s four-wheel drive SUV for the trip up a steep and winding dirt road that leads to the mountaintop transmitter site. For most of the station’s history, Radio Tarma broadcast from a field on the north side of town.

Radio Tarma’s pre-2012 transmitter site was in the large field in the center of this photograph.

Then in 2010 Don Mario decided to modernize by buying a modern 3000 watt solid-state transmitter for the medium wave frequency and by building a modern transmitter facility on a ridge overlooking town. The new site, which was inaugurated in 2012, is at 3,600 meters elevation (over 600 meters higher than Tarma) and located about 1.5 kilometers south of the old site. (If you’ve logged Radio Tarma both before and after 2012, I think it’s fair to count these as two different transmitter sites.)

Radio Tarma’s mountaintop transmitter plant.

Another view of Radio Tarma’s mountaintop transmitter plant.

Radio Tarma MW and FM masts

The transmitters and antennas for all the Grupo Monteverde stations in Tarma (MW, FM, SW, and TV) are housed in the gray fortress-like cement building covered with a jungle of antennas and satellite dishes, for both receiving and transmitting. All of Peru’s main cellular services have towers nearby, as do several other FM and TV stations in Tarma, but Radio Tarma has the best location, right at the end of the ridge overlooking all of the town. For shortwave, Radio Tarma uses a dipole antenna strung between two masts.

Radio Tarma’s shortwave dipole

The transmitters and other technical equipment are all housed in a large room that takes up most of the first floor of the building. Upstairs there is a small apartment, complete with a living room and kitchen, for the technician who lives here plus another small apartment where Don Mario comes to stay when he feels like escaping to the quiet mountaintop for a night or two.

Radio Tarma SW and three MW transmitters

Radio Tarma transmitter room

Don Mario takes pride in showing me the original 500 watt medium wave and shortwave transmitters that his father made. Normally the shortwave service is shut down for several hours in midday when the frequency won’t propagate, but he turns on the transmitter so that I can see the tubes come to life. The three medium wave transmitters – the original 500 watt one, its 1978 1000 watt replacement, and the new 300 watt solid-state one – are lined up against the wall adjacent to the shortwave transmitter.

Mario Monteverde and Radio Tarma’s original 500 watt shortwave transmitter

Alfonso, transmitter operator at Radio Tarma

Don Mario tells me that the two older medium wave transmitters are regularly maintained so that they could be used at a moment’s notice if needed. He then proceeds to show me that he means just what he says, and shuts down the solid-state transmitter. Once that’s down, he powers up the original Radio Tarma MW transmitter that his father made, and we watch the old tubes light up. Then when it’s operating fully, he turns his father’s transmitter off and switches on the 1978 transmitter for a few minutes before finally returning the signal to full power on the new transmitter. One wonders just what his listeners thought was happening with all this on-and-off transmitting on a beautiful sunny day barely a cloud in the sky!

View of southern Tarma from the transmitter site

Radio Tarma and the Grupo Monteverde are a model operation for radio in smaller cities in the Peruvian Andes. Getting to know both the city and the station was one of the highlights of a seven-month journey through the northern Andes in South America.

Don Mario’s father built the foundation and Don Mario turned Radio Tarma and its sister stations into the small but professional media group that they are. He’s now in his mid-sixties and plans to run the radio operations for several more years. But he is beginning to think of the future. He never married and has no children, his siblings live in Spain and Lima, and all his nieces and nephews are in the United States. It’s not likely that anyone in the family would return to Tarma to run a radio station. He is investigating options of how to set up the corporation so that Radio Tarma and its sister stations would continue as locally-owned and operated radio broadcasters. Whatever he works out, let’s hope it includes a commitment to continue broadcasting on shortwave for many years to come!

If shortwave conditions aren’t the best, you can always listen to Radio Tarma on the web.


Wow–Don, this was amazing. Thank you for taking us on a tour of the amazing Radio Tarma! What a special station to encounter during your travels!

Post Readers: If you like the photos Don included in this guest post, you’ll enjoy browsing even more on Don’s Radio Tarma page

Check out other radio travel photos’ on Don’s Peru DX Photos Page.

Don’s new book, Following Ghosts in Northern Peru: In the Footsteps of 19th Century Travelers on the old Moyobamba Route is available in Kindle and print formats via Amazon.

Purchasing through this Amazon link supports both the author and the SWLing Post.