Mike’s review of the Sangean HDR-14 AM/FM HD Radio

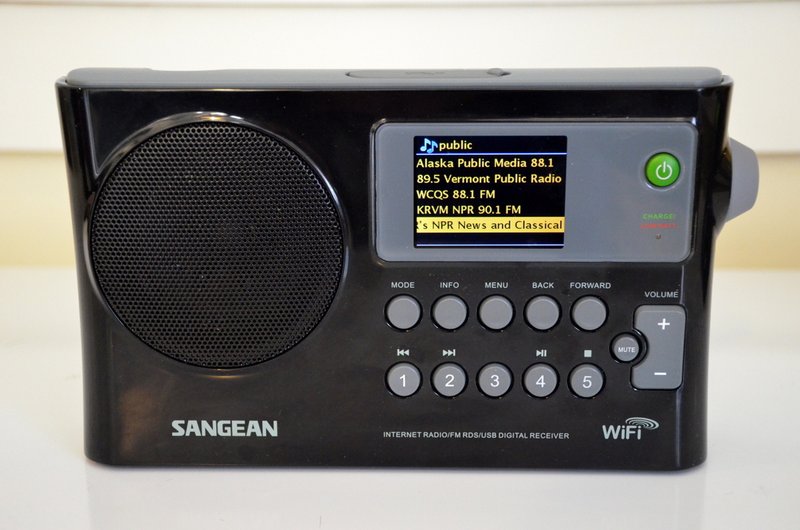
Sangean HDR-14 (left) and the C. Crane CC Skywave SSB (right) (Photo: Thomas)

Many thanks to SWLing Post contributor, Mike S, who comments with his short review of the Sangean HDR-14. Mike writes:

Well, I did something I said i would not do, triggered by Amazon’s tendency to introduce impossibly low prices on things for a couple of days, I sprang for the HDR-14. I have used it side by side with its direct competitor (the Nicetex “SPARC” SHD-TX2) for a few nights and a couple of days. Interesting little device.

As has been pointed out by those that read the specs, it is barely larger than the CC Skywave overall. It is made of the same soft, shiny black plastic as the larger Sangean portables (it is alternately a fingerprint magnet or a scuff magnet) but has a much less solid feel. The swivel-out foot on the bottom is a welcome addition and works well.

I have not yet played with other features (memories, etc) except to note that somebody has finally gotten it right in that memory locations store the chosen FM multicast channel instead of just the frequency.

The Sangean HDR-14 RDS display (Photo: Thomas)

Performance is a mixed bag. This is NOT an HDR-16 crammed into a smaller cabinet; not surprising, really, considering the amount of real estate available for circuitry. Analog FM and HD capture are right up there with the the larger sets and similar to the SPARC. I am unable to reproduce the spurious FM image problem noted by a lone Amazon reviewer. Audio is “just OK” out of the speaker with a harsh emphasis on treble – the SPARC portable is MUCH better with its passive radiator – but just fine for headphones or an external speaker.

However, for AM, that reviewer was spot on. The noise floor on AM is a tad too high and the native sensitivity a tad too low; resulting in “just OK” useable sensitivity on the band especially compared to the SPARC. I had no trouble with AM-HD on the only two stations in NYC metro (WCBS and WINS); however, it was unable to even detect the HD carrier from known stations in nearby cities that I was able to get >50% on the HDR-16 and HDR-18. The selectivity is better than the SPARC due to the DSP active for bandwidth adjustment; witness that I was able to clearly separate stations in Connecticut (600) and Philadelphia (610) from the splatter of local powerhouses at 570 and 620. Unfortunately too, analog AM reception is plagued with DSP artifacts reminiscent of earlier Tecsun sets which can even manifest in odd distortion in adjacent-channel splatter that bleeds into the tuned signal. The fact that the audio circuit/speaker accentuate the treble, make this even more annoying – the “ticks” from adjacent channel splatter are so harsh that you might think the speaker cone is damaged and vibrating.

I’m still waffling on whether to keep this one. It’s a nice little set which is sure to become a collector’s item, and its FM performance really is exemplary. But I kinda view the inclusion of the AM band as its raison d’être and in that regard it could certainly do better.

Thanks for your review, Mark!

It’s interesting that you couldn’t reproduce FM overloading or imaging. I have noted images on the FM band and it hasn’t been in a market as congested as that of NYC. It’s only noticeable when listening to stations adjacent to strong signals, however. It’s almost as if the FM filter is a little too wide.

I also agree about analog AM reception.

My HDR-14 review has been delayed due to a very hectic schedule, but I plan to complete it in the next couple of weeks! Thanks again, Mike!

Spread the radio love

FTIOM & UBMP, July 22-18

From the Isle of Music, July 22-28:
This week, our special guest is Cuban Jazz saxophone virtuoso Michel Herrera, who will share and talk about some of his new recording Nueva Era.
Four options to listen to the transmission:
1. For Eastern Europe but audible well beyond the target area in most of the Eastern Hemisphere (including parts of East Asia and Oceania) with 100Kw, Sunday 1500-1600 UTC on SpaceLine, 9400 KHz, from Kostinbrod, Bulgaria (1800-1900 MSK)
2. For the Americas and parts of Europe, Tuesday 0000-0100 UTC on WBCQ, 7490 KHz from Monticello, ME, USA (Monday 8-9PM EST in the US). This has been audible in parts of NW, Central and Southern Europe with an excellent skip to Italy recently.
3 & 4. For Europe and sometimes beyond, Tuesday 1900-2000 UTC and Saturday 1200-1300 UTC on Channel 292, 6070 KHz from Rohrbach, Germany.

Uncle Bill’s Melting Pot, Sun, July 22 & Tues, July 24, 2018
Episode 72 presents some very entertaining Assyrian music from different countries. UBMP thanks Alexandra the Romanian Bellydancer for introducing us to some of the music used in this episode.
The broadcasts take place:
1. Sundays 2200-2230 UTC (6:00PM -6:30PM Eastern US) on
WBCQ The Planet 7490 KHz from the US to the Americas and parts of Europe
2. Tuesdays 2000-2030 UTC on Channel 292, 6070 KHz from Rohrbach, Germany for Europe. If current propagation conditions hold, the broadcast should reach from Iceland to Western Russia, Scandinavia down to North Africa and the Middle East, AND a long bounce to parts of New Zealand. 

Spread the radio love

Boat Anchor Tuesday: National HRO-50T

Many thanks to SWLing Post contributor, Price Kagey, who shares the following photo for Boat Anchor Tuesday and writes:

“My wonderful HRO-50T. I have replaced all tubes and now need to start on capacitors and resistors.”

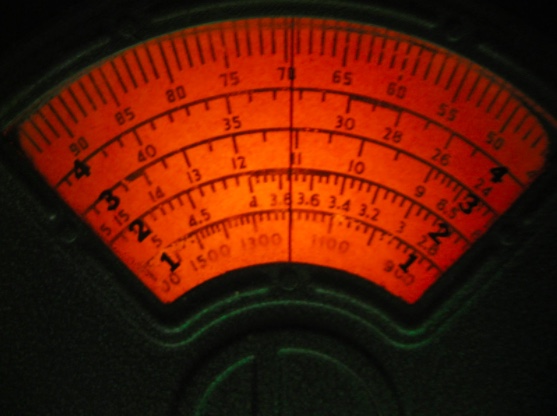
What a beautiful radio, Price!  Once you’ve re-capped and replaced the resistors in this girl, you’ll have a phenomenal receiver. I’m a sucker for those HRO dials! Thank you for sharing!

Post readers: If you’d like to share a photo of your boat anchor on Boat Anchor Tuesday, simply send me an email with the photo and a short description. I’ll put it in the pipeline to publish!

Spread the radio love

What is the Radio Hobby? One Perspective

The Geloso G.215-AN

I have recently been re-exploring the hobby of photography, which is a lateral move from studying astronomy (my main interest being astrophotography). At one time in my life I was a semi-professional photographer, having studied photojournalism in college and dabbling in nature and street photography (as it is now named). And no, I was never a paparazzo!

Following a link from an article on today’s SWLing Blog I landed on an Italian radio/audio company’s archive, the company being Geloso.  The above image is an audio amplifier and it caused me to think about radios (and related equipment) in much the same way I have been currently thinking about photography. Allow me to explain.

I spent about a decade in photography back in the days of film, black and white and color. (This was back in the days when the earth was cooling and dinosaurs roamed the earth!) Film cameras are to modern-day DSLRs much like IBM PCs are to modern day Intel Pentium i7 computers — that is to say, technology has really changed! Seeing what modern cameras can do within the camera is rather astounding, and certainly far beyond what we could even dream of in the 70s. The same is true in radios, of course, with radios from the 40s and 50s in comparison to today’s rigs.

And yet, just like film cameras of old being used today producing incredible photographs, radios from the past can still produce incredible sound if maintained well and their operation understood. And yes, I am getting to my main point, but in an intentionally somewhat circuitous route!

As I have been learning about these modern cameras and watching copious videos on YouTube, I have heard a recurring theme come up. Back in my early days I, like many folks today, always believed the next lens or camera would take me over the top and allow me to produce incredible shots. Oh, I might not have stated it that way, but it certainly was present in recesses of my brain. Now mind you, I was producing good photographs, but I was always looking for those shots worthy of a portfolio, and thereby sometimes missing out on great shots right in front of me.

Having just recently  purchased a DSLR camera kit with two lenses, before I had even taken a handful of shots with it, I was starting to think, “What will I need to add to this setup to make it really good? Oops, old habits die hard! Today’s cameras (and optics) from the top 4 or 5 DSLR makers are all head-and-shoulders above what we had access to when I was in photography years ago. There is no reason to look for the absolute best optics unless you have literally thousands of dollars to spend for what are at best, modest improvements under specific shooting conditions. The talent is not in the camera or the lens, but rather in the person behind the camera.

The same holds true for radios today, whether receivers or transmitters. Sure, you can spend thousands of dollars on the top of the line receivers or transceivers, and under certain circumstances, such a purchase may be the right thing. But for most of us, which radio you use does not matter nearly so much as the skill of the operator using the radio. Both the camera and the radio are tools, nothing more. A skillful radio operator can pull signals out of the mud or work stations at the farthest reaches of the globe with a 1940s radio that has gorgeous audio with little to no filtering, or they can use a modern DSP-equipped, roofing filter-loaded rig to hear stations so close together a cat’s whisker could fit between them on the frequency dial. In both cases, it is the radio operator who makes the difference by understanding their rig and knowing how to get the best from it.

Now if you are the type of radio hobbyist who really enjoys playing with the newest radio to hit the market and can afford it, wonderful! You help the rest of us have options when we do decide it is time for a new rig. But if you are the type person who believes you can’t really enjoy radio without having that “other” radio with the slightly better specs derived from precise laboratory conditions with nothing to interfere with signal reception, you may just be missing out on what you have right in front of you.

Believe me, I am not one to judge because people in glass houses should not throw stones! I have simply been surprised at myself as these old instincts have arisen in me, when I thought I had put to rest such things! In the radio world I have resisted the siren call of enticing marketing for the latest whiz-bang radios, at least in these more recent years (!) and now must use that same resistance in my photography. In radio I have learned to get the best out of my gear, and the results are very satisfying. Here’s to hoping I can do the same behind the camera!

Robert Gulley, AK3Q, is the author of this post and a regular contributor to the SWLing Post.       Robert also blogs at All Things Radio.

Spread the radio love

Shortwave Trading Part IV (Final Post)

(Source: SNIPER IN MAHWAH & FRIENDS)

After my first few public posts about shortwave trading, I gradually realized that I’d inadvertently created a worldwide network of deputy antenna sleuths. This is the final post in the Shortwave Trading series since the terms of my forthcoming employment agreement will prohibit me from future public talk on the technology of trading. I want to leave behind details on some of the research tools and techniques I’ve used. This is how the sausage is made.

I’ll also leave a list of locations that may be worth watching. Some may be near you. Even if I can’t talk about what’s found in the future, maybe you can? The comments below might be a good place to document new findings until there’s a better place offered.

In addition, following sections will set out the criteria I’ve used to assess the confidence that a shortwave trading site has been found, give example FCC searches, list links to web-based research tools I’ve found useful, give some tips on research techniques, and acknowledge the many people behind the scenes who’ve contributed to this work.

Plausibility Criteria

If you find something that looks like a shortwave trading site, how confident can you be that you’ve found the real thing and not a landing beacon for body-snatching space aliens? Since a shortwave trading site exists to link a local market to a remote market, I can think of two things that set a minimum bar for plausibility:

  1. Visual evidence of a shortwave antenna with a heading toward a remote market. Previous posts in this series have shown many shortwave antennas you can use as models of what to expect. Examples have included headings around 50º from Chicago which cover Europe.
  2. A path for connectivity to a local market. Visual evidence of this can be a microwave dish pointed in the direction of a local market.[…]

Click here to continue reading the full article.

Spread the radio love

Kris recognizes Italian receiver in “The Same Sky”

Many thanks to SWLing Post contributor, Kris Partridge, who shares the following comment regarding John Harper’s recent post:

The receiver which featured in Same Sky is of Italian manufacture, it’s from Geloso but I’m not able to identify which model.

Here is a link to a very interest and comprehensive page, by Tony I0JX, about John Geloso the founder of the company. Scroll down, but read enroute, and there are pictures of the receivers and transmitters bearing the Geloso name.

http://www.qsl.net/i0jx/geloso.html

Yes, you will agree it’s a Geloso in the film.

It must be fifty plus years since I was allowed to touch one. As a teenager one of the ‘Elmers’ at the local amateur radio club in Torbay had a complete Geloso station.

What a beautiful receiver! Thanks for the follow-up, and links to this company’s history Kris!

Spread the radio love

Guest Post: Mark’s Micro Go-Box for the ICOM IC-7100

Many thanks to SWLing Post contributor, Mark Hirst, who shares the following guest post:


Micro Go-Box for the ICOM IC-7100

by Mark Hirst

You’ll be familiar I’m sure with the IC-7100 base unit and separate head unit design. It lends itself very nicely for vehicle installation.

Using it in any ‘portable’ situation however has always presented something of a challenge. A FT-857 or FT-891 can be carried as a single physical package with the head unit integrated into the body. The radios can sit and potentially operate on their tail in a backpack, with products like the Escort from Portable Zero making that process even easier.

I’ve had a few attempts at solving this portability conundrum, driven by a concern that there could be long term problems continually connecting and disconnecting the component parts for transport and operation, but knowing that a permanently assembled IC-7100 will always be an awkward dispersed structure.

My first solution was a Stanley 16 inch toolbox, which is fortuitously sized to accommodate the base unit and provides enough space to loop the original connecting cable and head unit. The box is not a bad fit, but certainly bulkier than necessary and leaves enough room for things to rattle around. When tilted vertically, the head unit can start moving.

Fast forward to this week when I discovered that the IC-7100 base unit will also fit inside a 5 litre XL storage box made by Really Useful Boxes:

http://www.reallyusefulproducts.co.uk/usa/
http://www.reallyusefulproducts.co.uk/uk/

The XL version of the 5 litre box has a taller lid, and as you can see from the accompanying photos, accommodates the base unit with the head unit sitting on top of it in a ready to use configuration. The tolerances for height are also exact, the VFO knob very lightly touches the lid, so don’t put something heavy on the box:

Once the lid has been removed, the radio can operate directly from the container:

To make the whole thing fit, I used a 25cm CAT 6 cable in place of the original connection cable and a significantly shortened power lead. As luck would have it, I created the shortened power lead a while ago because I often put the battery right next to the radio.

You can see that I removed a section between the power plug and the fuses, and now use the removed length as an extension should the battery be further away. Although it wasn’t my intention at the time, the main part is about 2 feet long, the secondary about 8 inches.

For transport, the power cable is coiled behind the head unit, ensuring the fuse holders sit in the void immediately behind it, while the microphone cable is coiled on top leaving the microphone resting inside its own coil. You can see the arrangement below:

In the next photo, you can see how the cabling emerges from the back of the base unit:

There’s just enough space for the power cable to leave the base and bend around without undue pressure, and likewise for the CAT 6 cable to curve round into the back of the head unit. Two angle connectors make the antenna ports accessible from above, while a short USB external drive cable provides access to the USB port for data modes and CAT control. A longer USB extension cable is attached to this short cable only when required, and the extension uses much more substantial ferrite chokes to mitigate noise from the computer.

To complete the transport package, I’ve cut out a kaizen style foam insert to make sure the base unit can’t move back into the cabling space, and another to make sure the head unit doesn’t slide towards the front.

The last problem of course is cooling. The fan is located in the front of the base unit, with slots along the sides and top to allow air flow. The box unfortunately is exactly the right size for the base, leaving no gaps for air to circulate. In the absence of a proper workshop or professional tools, I opted to use a hole cutter designed for putting pipes through wood panels. It turns out that plastic has a tendency to deform rather than cut under the blades due to friction heating. A sharp knife was essential in dealing with the effects of that deformation to produce the final smooth edges around the holes:

While I’m happy with the port exposing the front fan, the two holes on each side do not completely expose the side slots. Do I drill out the space between them knowing how tricky and flexible the plastic can be, and would a larger hole compromise the strength of the box? For now, I’m going to keep a careful eye for any temperature issues.

The current arrangement is to carry the box horizontally in a cheap travel bag:

Could the box be tilted vertically with the base unit nose down and carried in a back pack for longer excursions? Yes, but experience has told me that the lid latches on Really Useful Boxes have a tendency to pop open when you do that, so a luggage strap around the box may be required to prevent its very expensive cargo from spilling out. I’m also mindful that the box lid gently touches the VFO knob, so might put load on it in the vertical position.

The final result is something of a Swiss watch, and there isn’t much room for error. Things have to be arranged ‘just so’ to fit, but it does mean I can pack and pick the whole thing up in a handy container. The radio only needs a battery and antenna to be connected on site and then it’s ready to go.

There’s something oddly satisfying when unrelated objects come together like this. Who knew that this box was just the right size to fit the radio?

So, what do you think?


Thank you for sharing this project, Mark!

I love your Micro Go-Box: it’s practical, affordable and makes an otherwise awkward field radio easy to deploy and use. Looking at your photos, I realize that the IC-7100 does have one strong suit for field use. The IC-7100 front panel is tilted at a very comfortable 45 degree angle for use. 

Post Readers: What do you think?  Any other IC-7100 owners out there who take their rig to the field? Please comment!

Spread the radio love