Many thanks to SWLing Post contributor, Bob Colegrove, who shares the following guest post:
A Conundrum with the Radio Data System (RDS),
or Why I Set the Clock Manually
By Bob Colegrove
There’s an old story about a man who owned two watches. One watch ran but lost a minute every hour. The other watch didn’t work at all. He always wore the watch that didn’t work, because as he said, “At least it will have the correct time twice a day.”
First off, a couple of caveats. This is not a definitive description of the Radio Data System (RDS). I leave that to much more knowledgeable sources. One detailed description is at https://en.wikipedia.org/wiki/Radio_Data_System. Second, my experience described here is confined to the Eton Elite Executive and the XHDATA/SIHUADON D-808. Other radios may operate differently.
I have surrounded myself with several multiband travel radios over the past year and enjoy them very much – each for different reasons. Besides listening, I like to push buttons to see what happens. The manuals? At best they occasionally provide a clue. I read them, eventually filling in the blanks on my own.
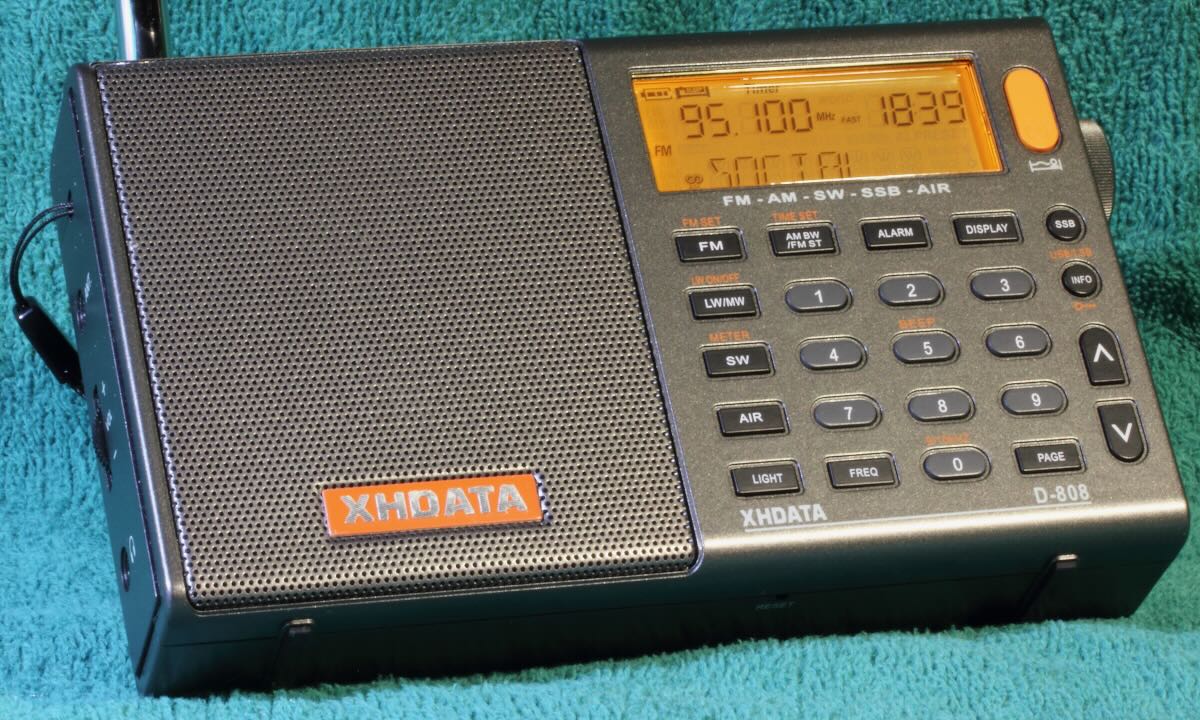
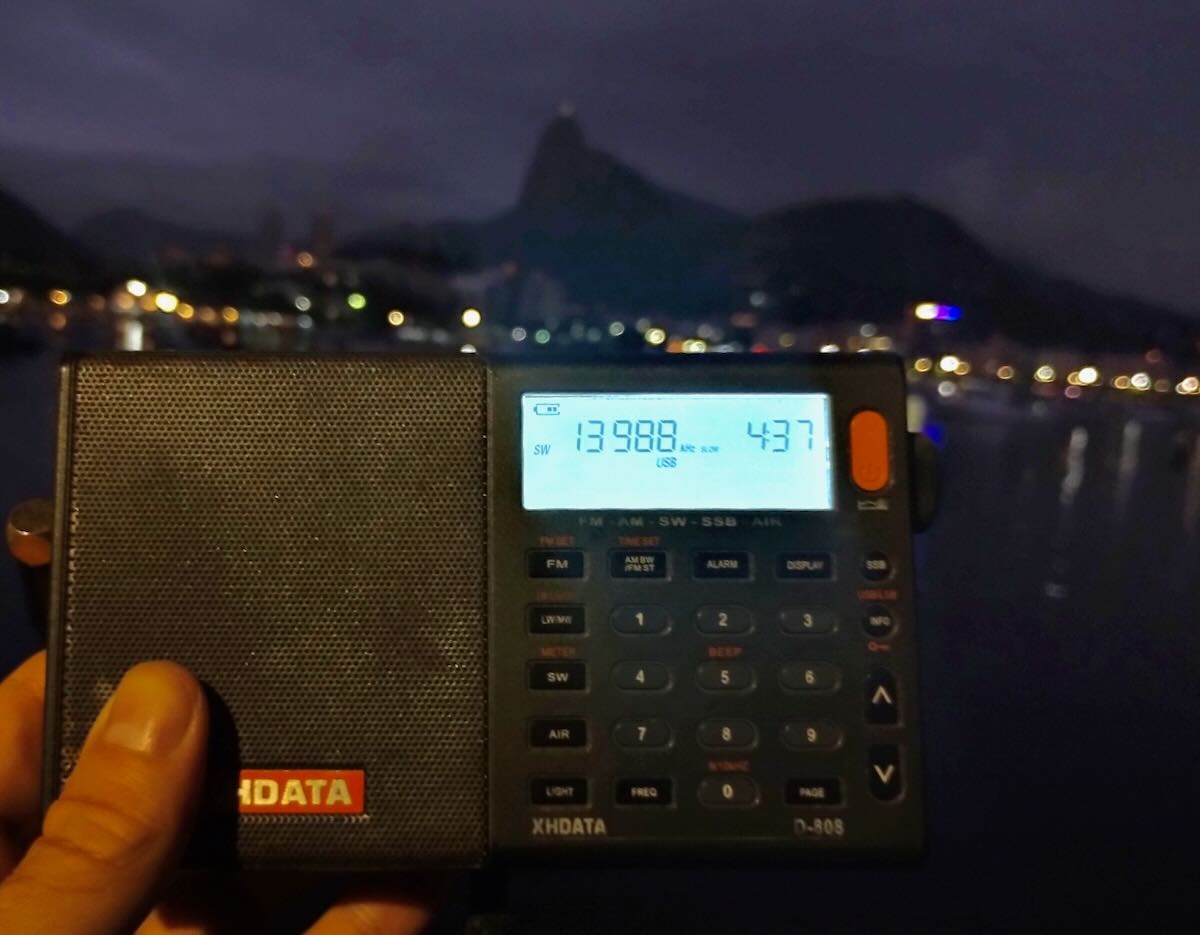
XHDATA/SIHUADON D-808
Basic RDS
What is RDS? RDS is a system which enables an FM station to transmit various fields of information such as date, time, call letters, frequency, and program information in text form. The call letters are useful, but if you have a digital radio, you already know the frequency. The name of the song and artist are particularly helpful if the DJ won’t tell you. As for the date and time, well, I’ll get to that.
RDS is an international standard and Radio Broadcast Data System (RBDS) is the official name used for the U.S. version. So why don’t we in the States just call it RBDS? Probably because our radios aren’t made here.
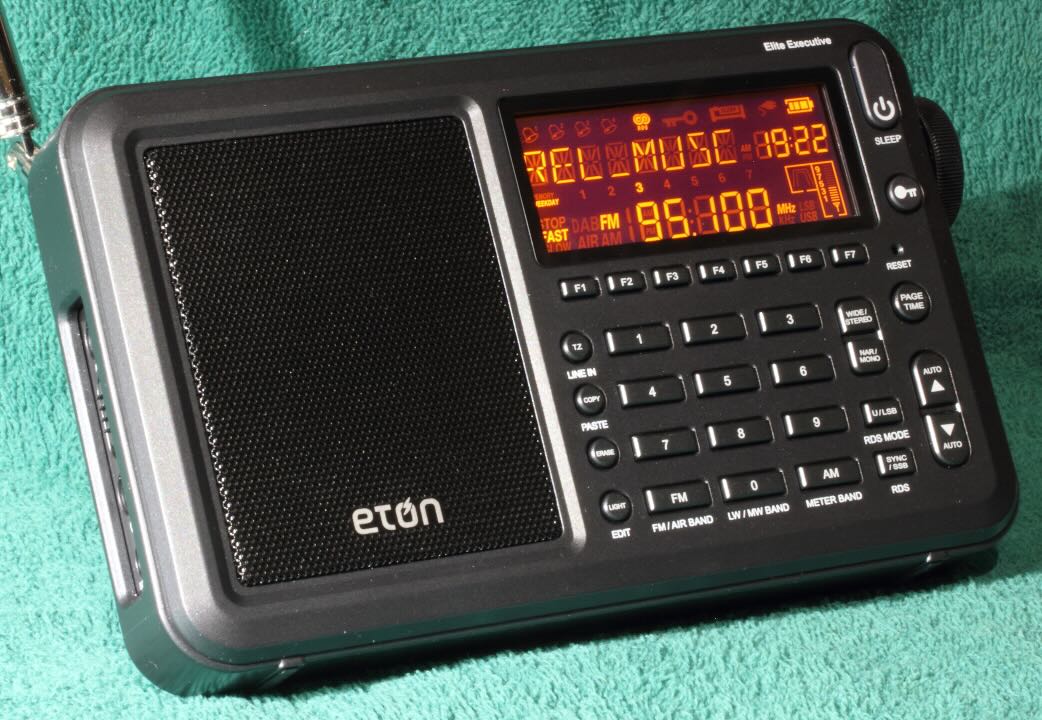
Eton Elite Executive
The XHDATA and Eton allow the user to display four of the several fields comprising the RDS standard. They each step through the same sequence, indicating a similar or possibly the same demodulator chip.

PS and RT seem to be freeform fields with stations providing whatever information they want to share. Often the call letters and frequency are contained here, along with program content. Clock Time (CT) is not displayed per se, but is used to set the radio time, and is included as part of the DATA field. DATA is important; it has four elements, which should provide the listener with an indication of the call, day, date, and time being received by the radio. The international RDS standard omits the call letters.
The RDS information transmitted by any given station may not contain all the fields identified above, including the time. For example, stepping through the fields you may encounter “NO PTY,” “NO PS,” “NO RT,” or “NO DATA.” Consequently, you may tune in to a station broadcasting RDS and wait a long time for the radio clock to synchronize, which it never does. The display of any content in the DATA field is probably the best clue whether CT is being transmitted.
It is interesting that the Eton is programmed for the US RBDS system, whereas the XDATA follows the international RDS system. For the international system on the D-808:
- “DATE” replaces “DATA” in the display.
- The call letters are omitted from the DATE field.
- The terms in the PTY field differ; for example, WRBS, 95.1 MHz, the PTY element displays “SOCIAL” instead of “RELIGIOUS MUSIC.”
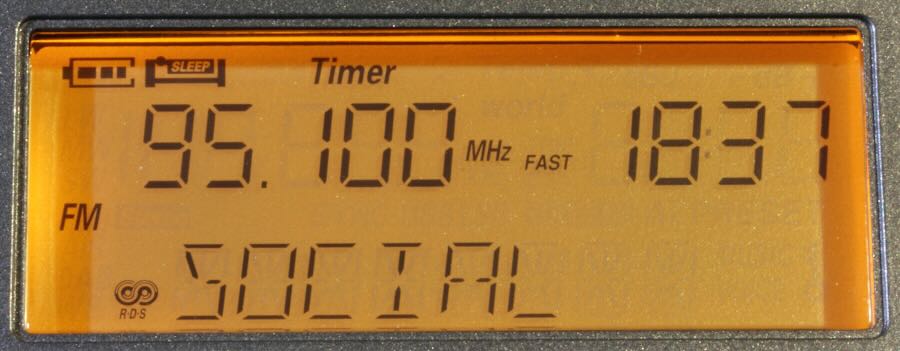
International PTY RDS term on the XHDATA
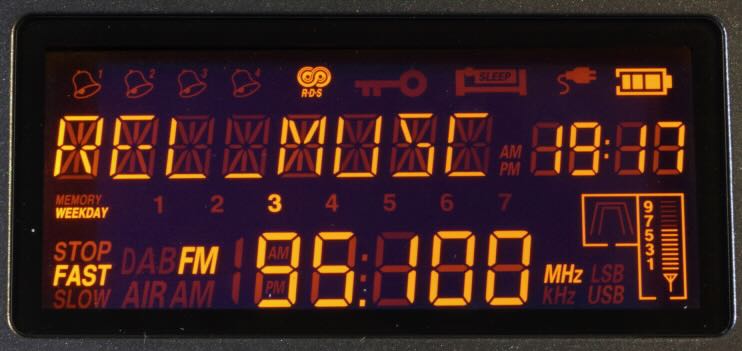
US PTY RBDS term on the Eton
The Conundrum
The mischief all began when I got my XHDATA D-808 and tried to program the clock to automatically update using the RDS information off FM stations. Minutes seem to display correctly, but try as I might, I couldn’t get the hours to register properly. Then I bought an Eton Elite Executive. It also has the RDS feature, so I tried again. It appeared to work OK for a day or so. Then the hour indication started to misbehave. In addition to the clock, the Eton allows programming of time zones and day of the week. I determined that the erroneous indication did not appear to be related to GMT, EST, 12-hour or 24-hour format settings. In theory, if you try to set your radio to GMT or some other time zone, the RDS time from a local station should override it.
When I tested the radios side-by-side, the DATA field was fraught with problems on both radios. Several local RDS stations containing CT were monitored. The whip antenna was extended a tad, as the information may not reliably register with some otherwise clear audio signals.
- When tuned to the same station, there were occasional inconsistencies between the two radios, presumably receiving the same exact information from the station.
- Sometimes the hour would not advance on the XHDATA after minutes transitioned from 59 to 00.
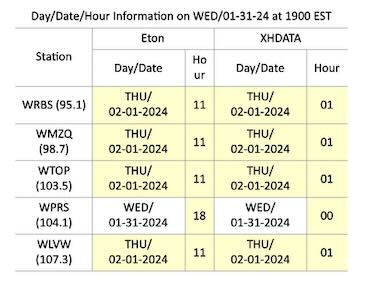
- Curiously, both radios might exhibit the correct date and time during the day, then at 1900 EST, several stations on both radios prematurely advance to the next day and date, and the hour would display incorrectly, completely unrelated to local hour. Minutes may or may not be correct. 1900 EST happens to be 0000 GMT. Are some station clocks running on GMT?
 RDS content obviously requires some attention at the station. In the end, they are responsible for the information going out. In fairness, with all that goes on in a studio and limited staffing, RDS content may not be a priority. As an example:
- Call letters in the DATA field for local WMZQ read KZQK, which is not assigned.
Conclusions
There are two main factors which may impinge on the accuracy of a radio clock when set automatically by the RDS:
- Accuracy depends on the station transmitting it correctly.
- With RDS set to the AUTO mode, there is a good chance that the clock will be updated repeatedly as the radio is tuned among various stations – not necessarily to the correct time.
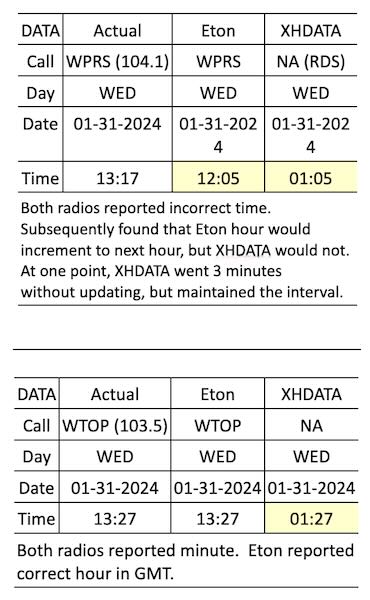
- For the Eton, the clock would reset each time when changing stations between WTOP (correct time) and WPRS (incorrect time).
- For the XHDATA, the clock would reset each time when changing stations between WTOP (correct minutes) and WPRS (incorrect minutes). In both cases, the displayed hour remained 00.
- There is still the unexplained premature update of day and date by some stations observed on both radios.
- With RDS set to the AUTO mode, there is a good chance that the clock will be updated repeatedly as the radio is tuned among various stations – not necessarily to the correct time.
- Correct time depends on the radio’s RDS demodulator to interpret the incoming data.
Trivial? Perhaps, but you may want to reconsider and program the clock manually, particularly if you depend on the alarm function of the radio to get to work on time.