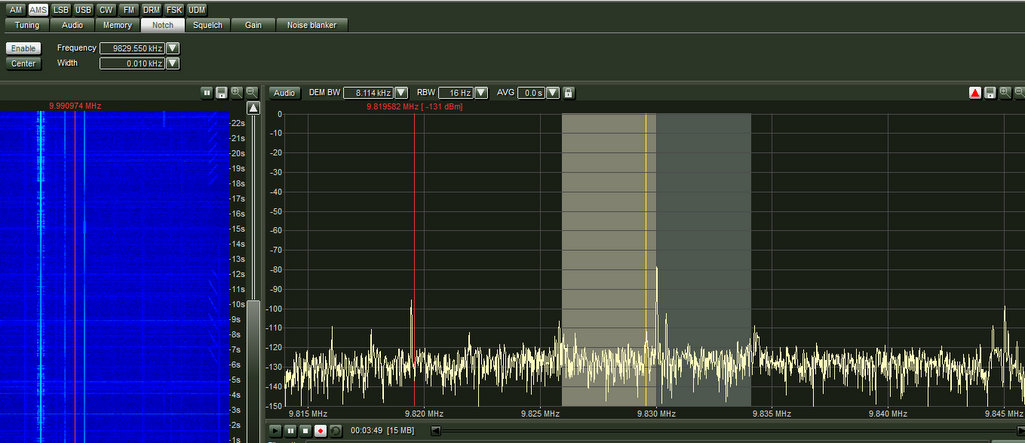
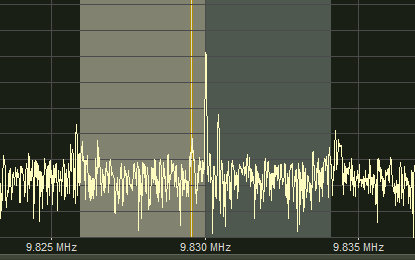
The lighter shaded side of the AM carrier indicates a lower sideband sync lock. (Click to enlarge)
A few days ago, I tuned to 9,420 kHz and found a relatively strong signal from the Avlis transmitter site of the Voice of Greece. The broadcast was quite clear until a heterodyne (het) tone popped up out of nowhere.
I checked the spectrum display of my Excalibur to find two steady carriers located about .5 kHz off each side of VOG’s AM carrier. I assume this may have been a faint digital signal centered on the same frequency as VOG.
The noise was annoying, but SDRs (and many tabletop radios) have tools to help mitigate this type of noise.
The het tone was originating from both sidebands of the VOG AM carrier (see spectrum display above). I had planned to use my notch filter to eliminate the noise, but I had two carriers to notch out and only one notch filter.
Synchronous detection to the rescue…
The simple solution was to eliminate one of the carriers using my SDR’s synchronous detector which can lock to either the upper or lower sideband. In this case, it didn’t make any difference which sideband I locked to because both had similar audio fidelity and were otherwise noise free. In the end, I locked to the lower sideband, thus eliminating the het in the upper sideband.
Next, I enabled my notch filter and moved its frequency to cover the annoying het carrier in the lower sideband; I kept the notch filter width as narrow as I could to preserve VOG’s audio fidelity. You can see the notch filter location and width in the spectrum display above (the notch filter is the thin yellow line).
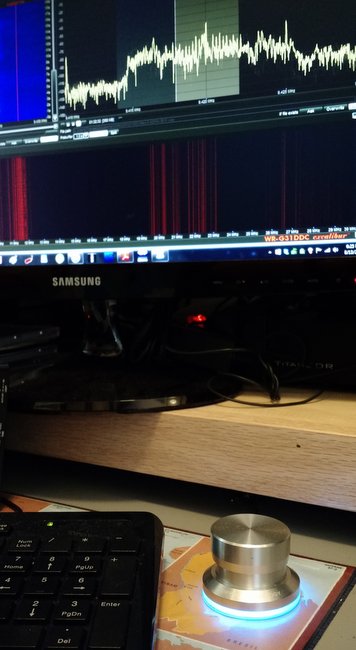
I should note here that the great thing about using an SDR–or tabletop receiver with a spectrum display–is that you can see where the noise is. I was using my WinRadio Excalibur, but pretty much any SDR in my shack could have handled this task.
The results? No het tone and I was able to preserve the great audio fidelity from the Voice of Greece broadcast!
Here’s a 3.5 hour recording I made after cleaning up the signal. I believe at one point in the recording, I switched off the notch filter to demonstrate how loud the het tone was: