Category Archives: Accessories

Testing the MFJ-1020C Active Antenna/Preselector

By Jock Elliott, KB2GOM

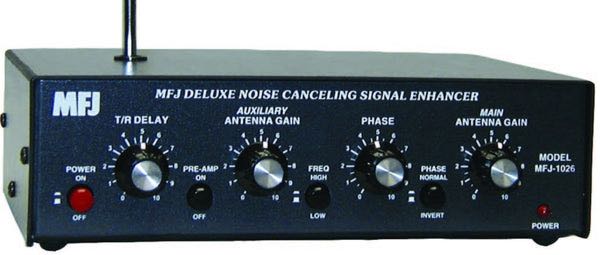
Truth be told, I’ve been curious about the MFJ 1020C for a long time. Back when I wrote for Passport to World Band Radio, over a decade ago, I wondered if the 1020C was a worthwhile device, but then I had a big wire antenna outside connected to a communications receiver, so I didn’t worry so much about squeezing every last erg out of the signals I was receiving. As a result, I never experimented with an MFJ 1020C.

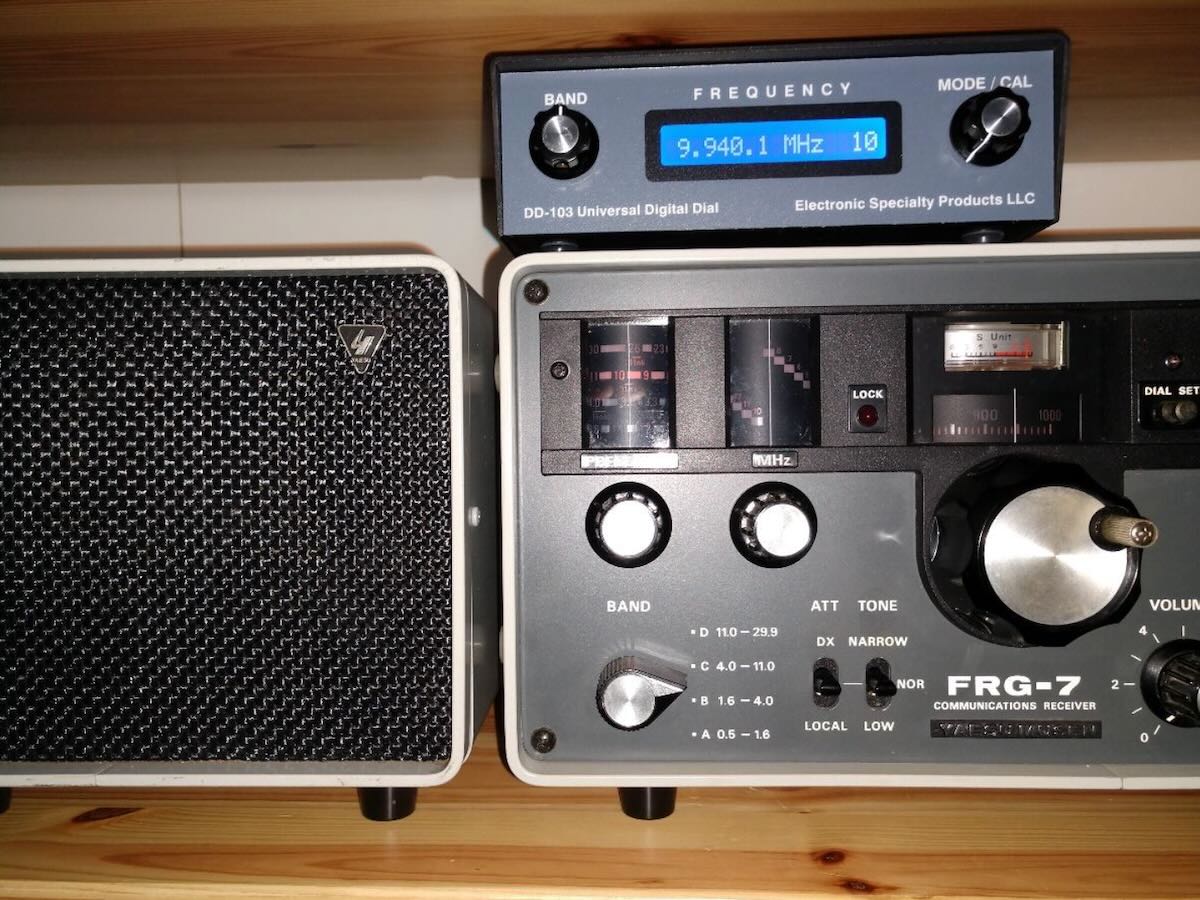
Now, however, I have a 50-foot indoor end-fed wire antenna connected to a Grundig Satellit 800, and I am constantly looking to improve the signal. Feeding the signal through a 9:1 unun and then through coax to the Satellit 800 has boosted the signal-to-noise ratio a bit — https://swling.com/blog/2022/05/the-satellit-800-the-tecsun-pl-880-and-two-indoor-antennas-an-afternoon-of-experimentation/ —  and so has grounding the unun — https://swling.com/blog/2022/05/jock-gets-a-good-grounding/. But is there such a thing as too much signal to noise? Not in my not-so-humble opinion, so the quest for improvement continues.

During a phone call with Thomas (Maximum Leader of SWLing.com), I mentioned my curiosity about the 1020C. Thomas said, “MFJ is a sponsor of SWLing.com, I’ll see if they would like to send you one for testing.” Two days later, a package arrived with the 1020C, a power supply for it, and a short coax jumper.

The Basic Layout

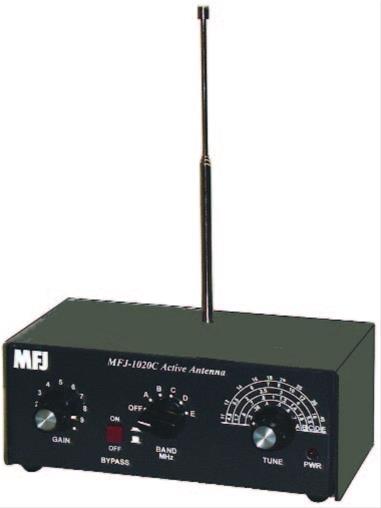
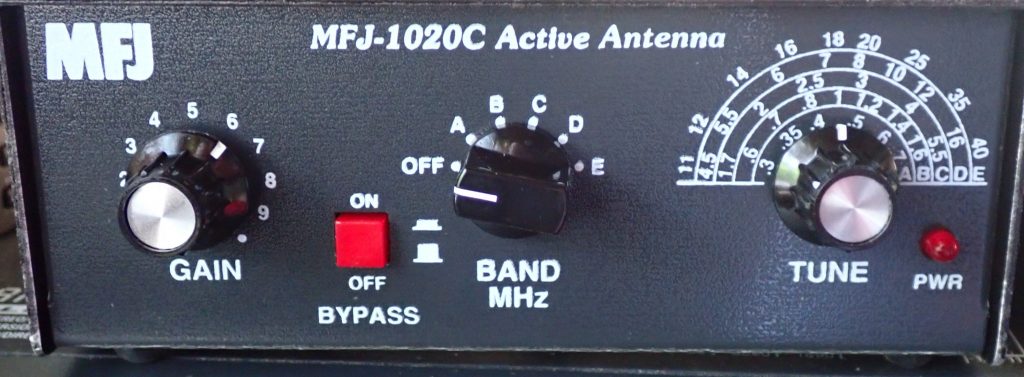
The 1020C is small — 2.5” H x 6.4” W x 3.3” D – and looks well made. It covers 300 KHz to 40 MHz. On the front panel are two knobs, a push button, and a selector switch. The left-most knob controls the gain of the amplifier. Moving to the right, you’ll find a push button that controls the bypass circuit.

To the right of the bypass button, you’ll find the band switch, which controls which frequency range is in use, and to the right of that is the tuning knob which allows you to peak the signal in the frequency range you have selected. We’ll get to how it all works in just a bit.

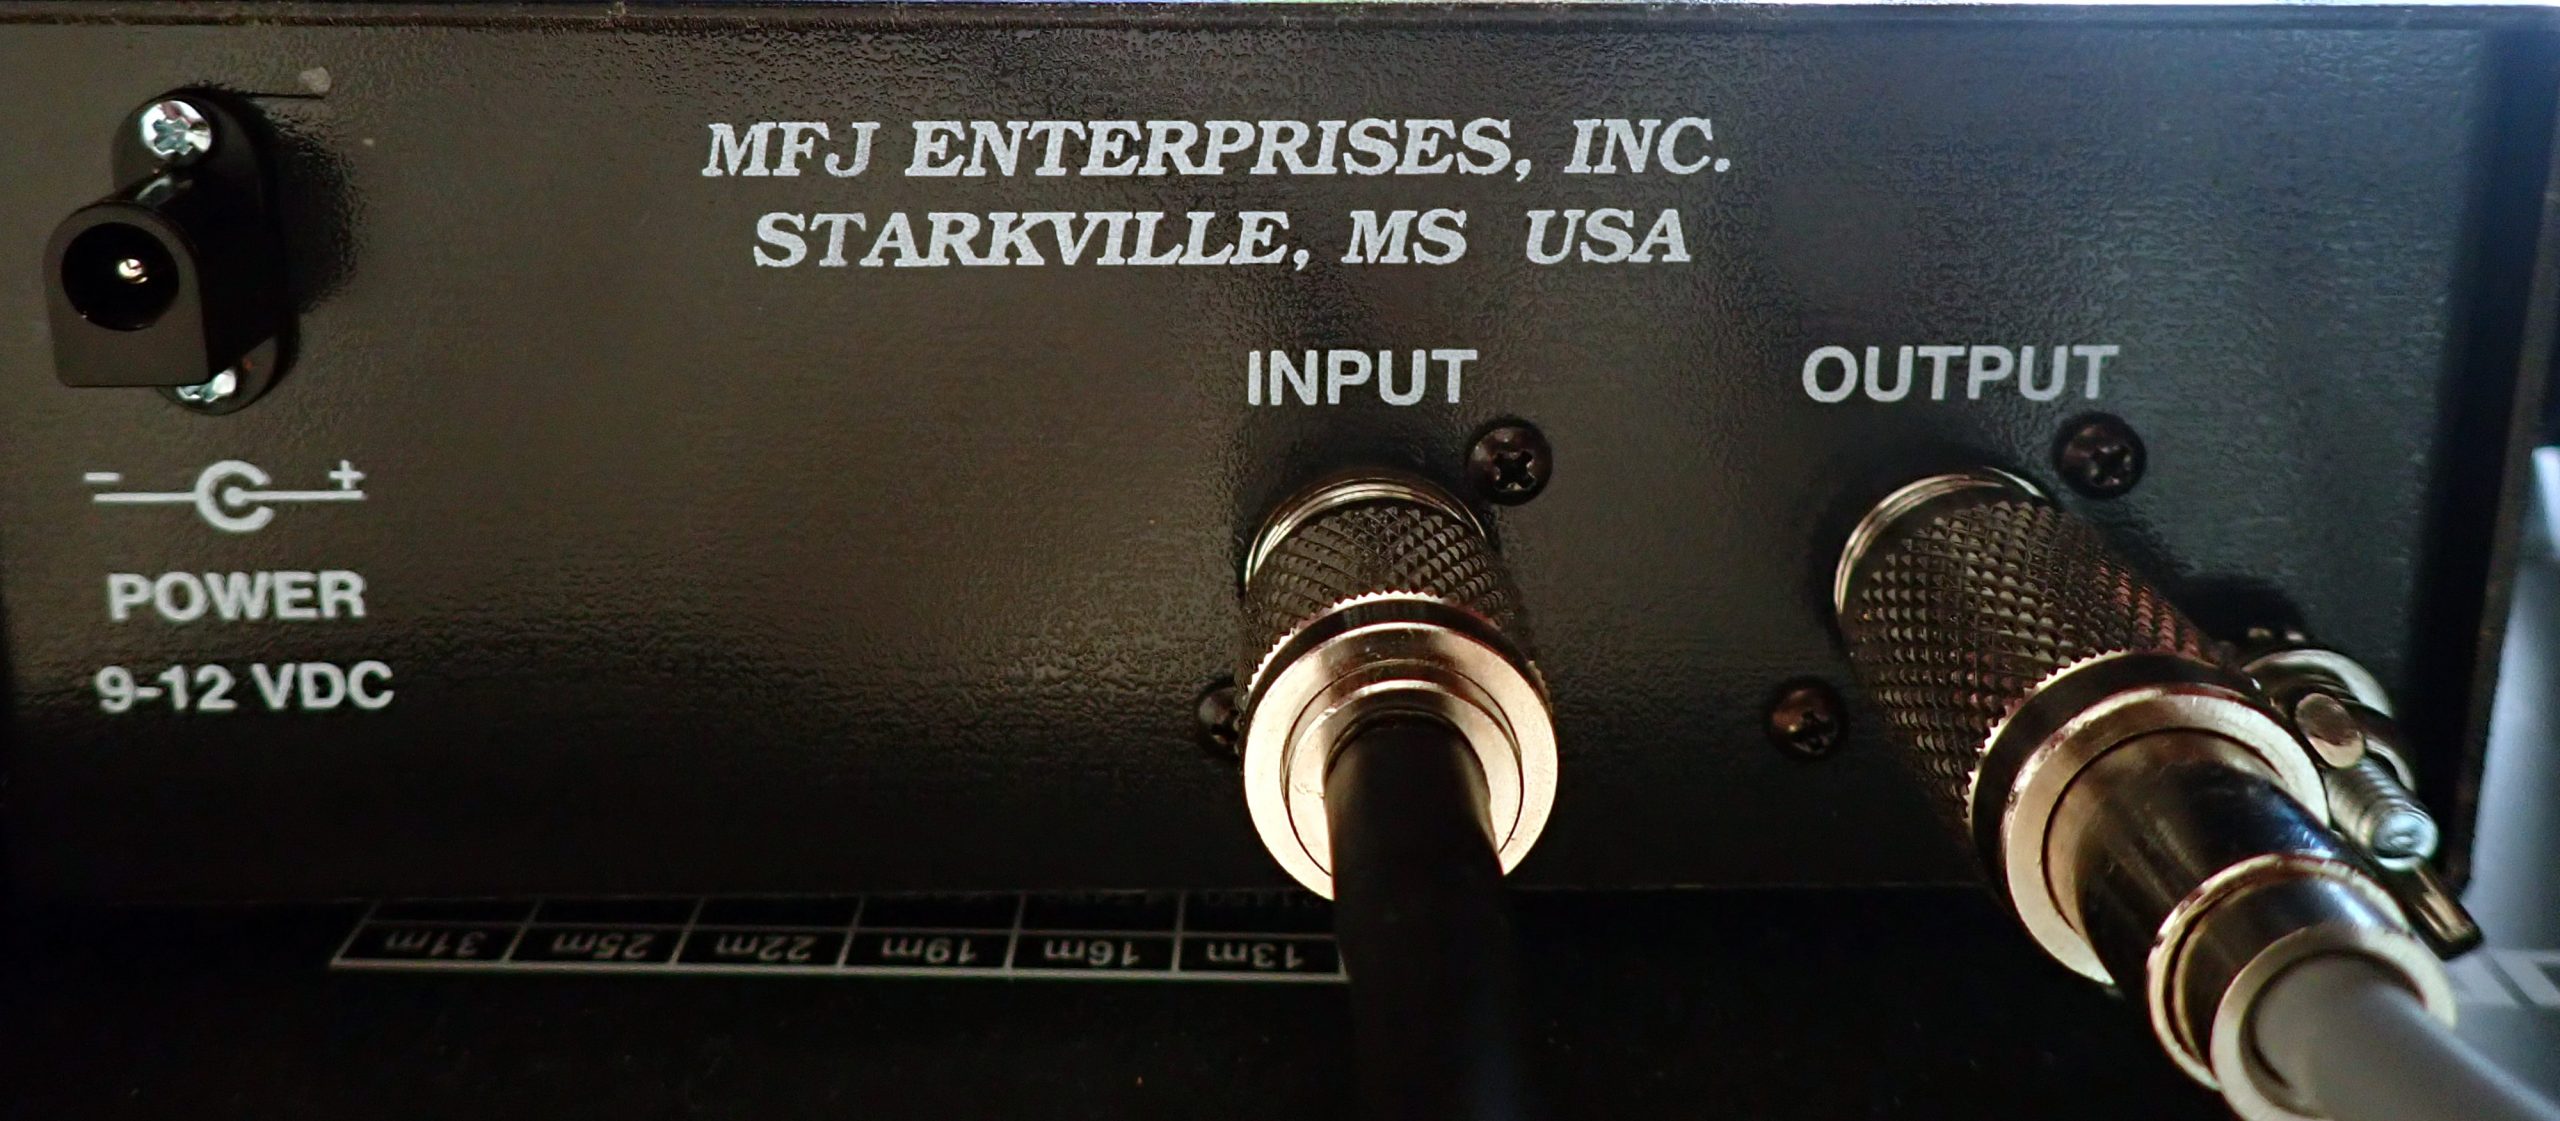
On the back of the 1020C, you’ll find a coax connector labeled INPUT and another labeled OUTPUT, a grounding post, and a connector for the external power supply.

Setup is easy. Plug the power supply into the wall and into the back of the 1020C. (You can also run the 1020C off a 9-volt battery, which we will discuss in a while.) Connect a coax jumper from the OUTPUT connector on the 1020C to the coax input on your receiver. (If you don’t have a coax connector on your receiver, we’ll deal with that issue shortly).

Finally, you need to make a choice about which antenna you want to use. The 1020C Owner’s Manual says:

You may connect either the telescoping antenna provided or an external wire antenna of your choice. To connect the telescoping antenna; screw the antenna end through the top cover and into the spacer located on the PC board. If you chose to use external wire antenna; plug it into the INPUT SO239 connector located on the back of the unit. (DO NOT HAVE BOTH ANTENNAS CONNECTED AT THE SAME TIME!)

Attaching the telescoping antenna can take a while since you may have to hunt around to get the antenna centered on top of the screw inside the 1020C’s case.

Operating the MFJ 1020C

Here’s how I operate the 1020C:

  1. With the BYPASS turned ON (the button pressed in), tune the receiver to the frequency you want to hear.
  2. Set the GAIN knob to around 3 or 4.
  3. Set the BAND knob to the band with the MHz that you are tuned to. You will notice that the red PWR indicator on the 1020C lights up.
  4. Press and release the BYPASS button. This turns on the active preselector and amplification circuits.
  5. Slowly turn the TUNE knob back & forth. At some point in its tuning range, you will hear the signal peak. With the 1020C, I often find there is a spot where the noise peaks and a hair to the side of the noise peak is the sweet spot for listening.
  6. Finally, adjust the GAIN knob for maximum intelligibility of the signal.

Note: When the BYPASS button is pushed IN (the ON position), that means you are hearing the signal straight through from the antenna without going through the amplification and preselection circuits of the 1020C . . . it’s like the 1020C isn’t even there. This is true even if the red PWR LED is illuminated. To put the 1020C to work for you, the BYPASS button must be OUT, and a band must be selected.

The Results of My Tests

Bottom line: the 1020C can really help in certain situations.

Initially, I set up the 1020C with its diminutive 20 inch antenna and connected a coax jumper cable between its coax output and the coax input on the back of the Satellit 800. I wanted to see if it would out-perform the four-foot-long telescopic antenna on the Satellit. No way, I thought; the Satellit antenna is twice as long. But I was wrong. On the first day I tested the 1020C, the atmospheric noise was terrible. I could not hear time station CHU on 3.330 MHz at all with the Satellit’s built-in antenna. But with the 1020C properly tuned, I could hear the time “pips” on CHU clearly.

A couple of days later, when SWLing.com announced the Annual Armed Forces Day Crossband Test —  https://swling.com/blog/2022/05/today-14-may-2022-annual-armed-forces-day-crossband-test/ — I set out to see if I could hear some of the stations. I removed the telescopic antenna from the 1020C and connected the 1020C to my indoor end-fed antenna. Putting the unit in bypass mode, I then started punching in the crossband test frequencies on the Satellit 800. At each frequency, I would first listen to the frequency in “barefoot” mode, then activate the 1020C to see if I could bring any intelligible signal up out of the noise. I had no success until I got to 14.487 MHz USB.  With the straight-through indoor end-fed antenna, I heard nothing, but with the 1020C engaged and carefully tuned, I could copy a station sending in CW: CQ CQ CQ. Later I was able to confirm the ID as NSS from Annapolis, Maryland, one of the stations in the crossband test.

On some easier-to-hear signals, the 1020C sounds as if it lowers the noise floor, improving the “listenability,” but the 1020C does not improve all signals. Sometimes the signal processed by the 1020C sounds roughly the same as the bypassed signal. And sometimes the bypassed signal (straight through from the antenna without the 1020C in-line) simply sounds better.
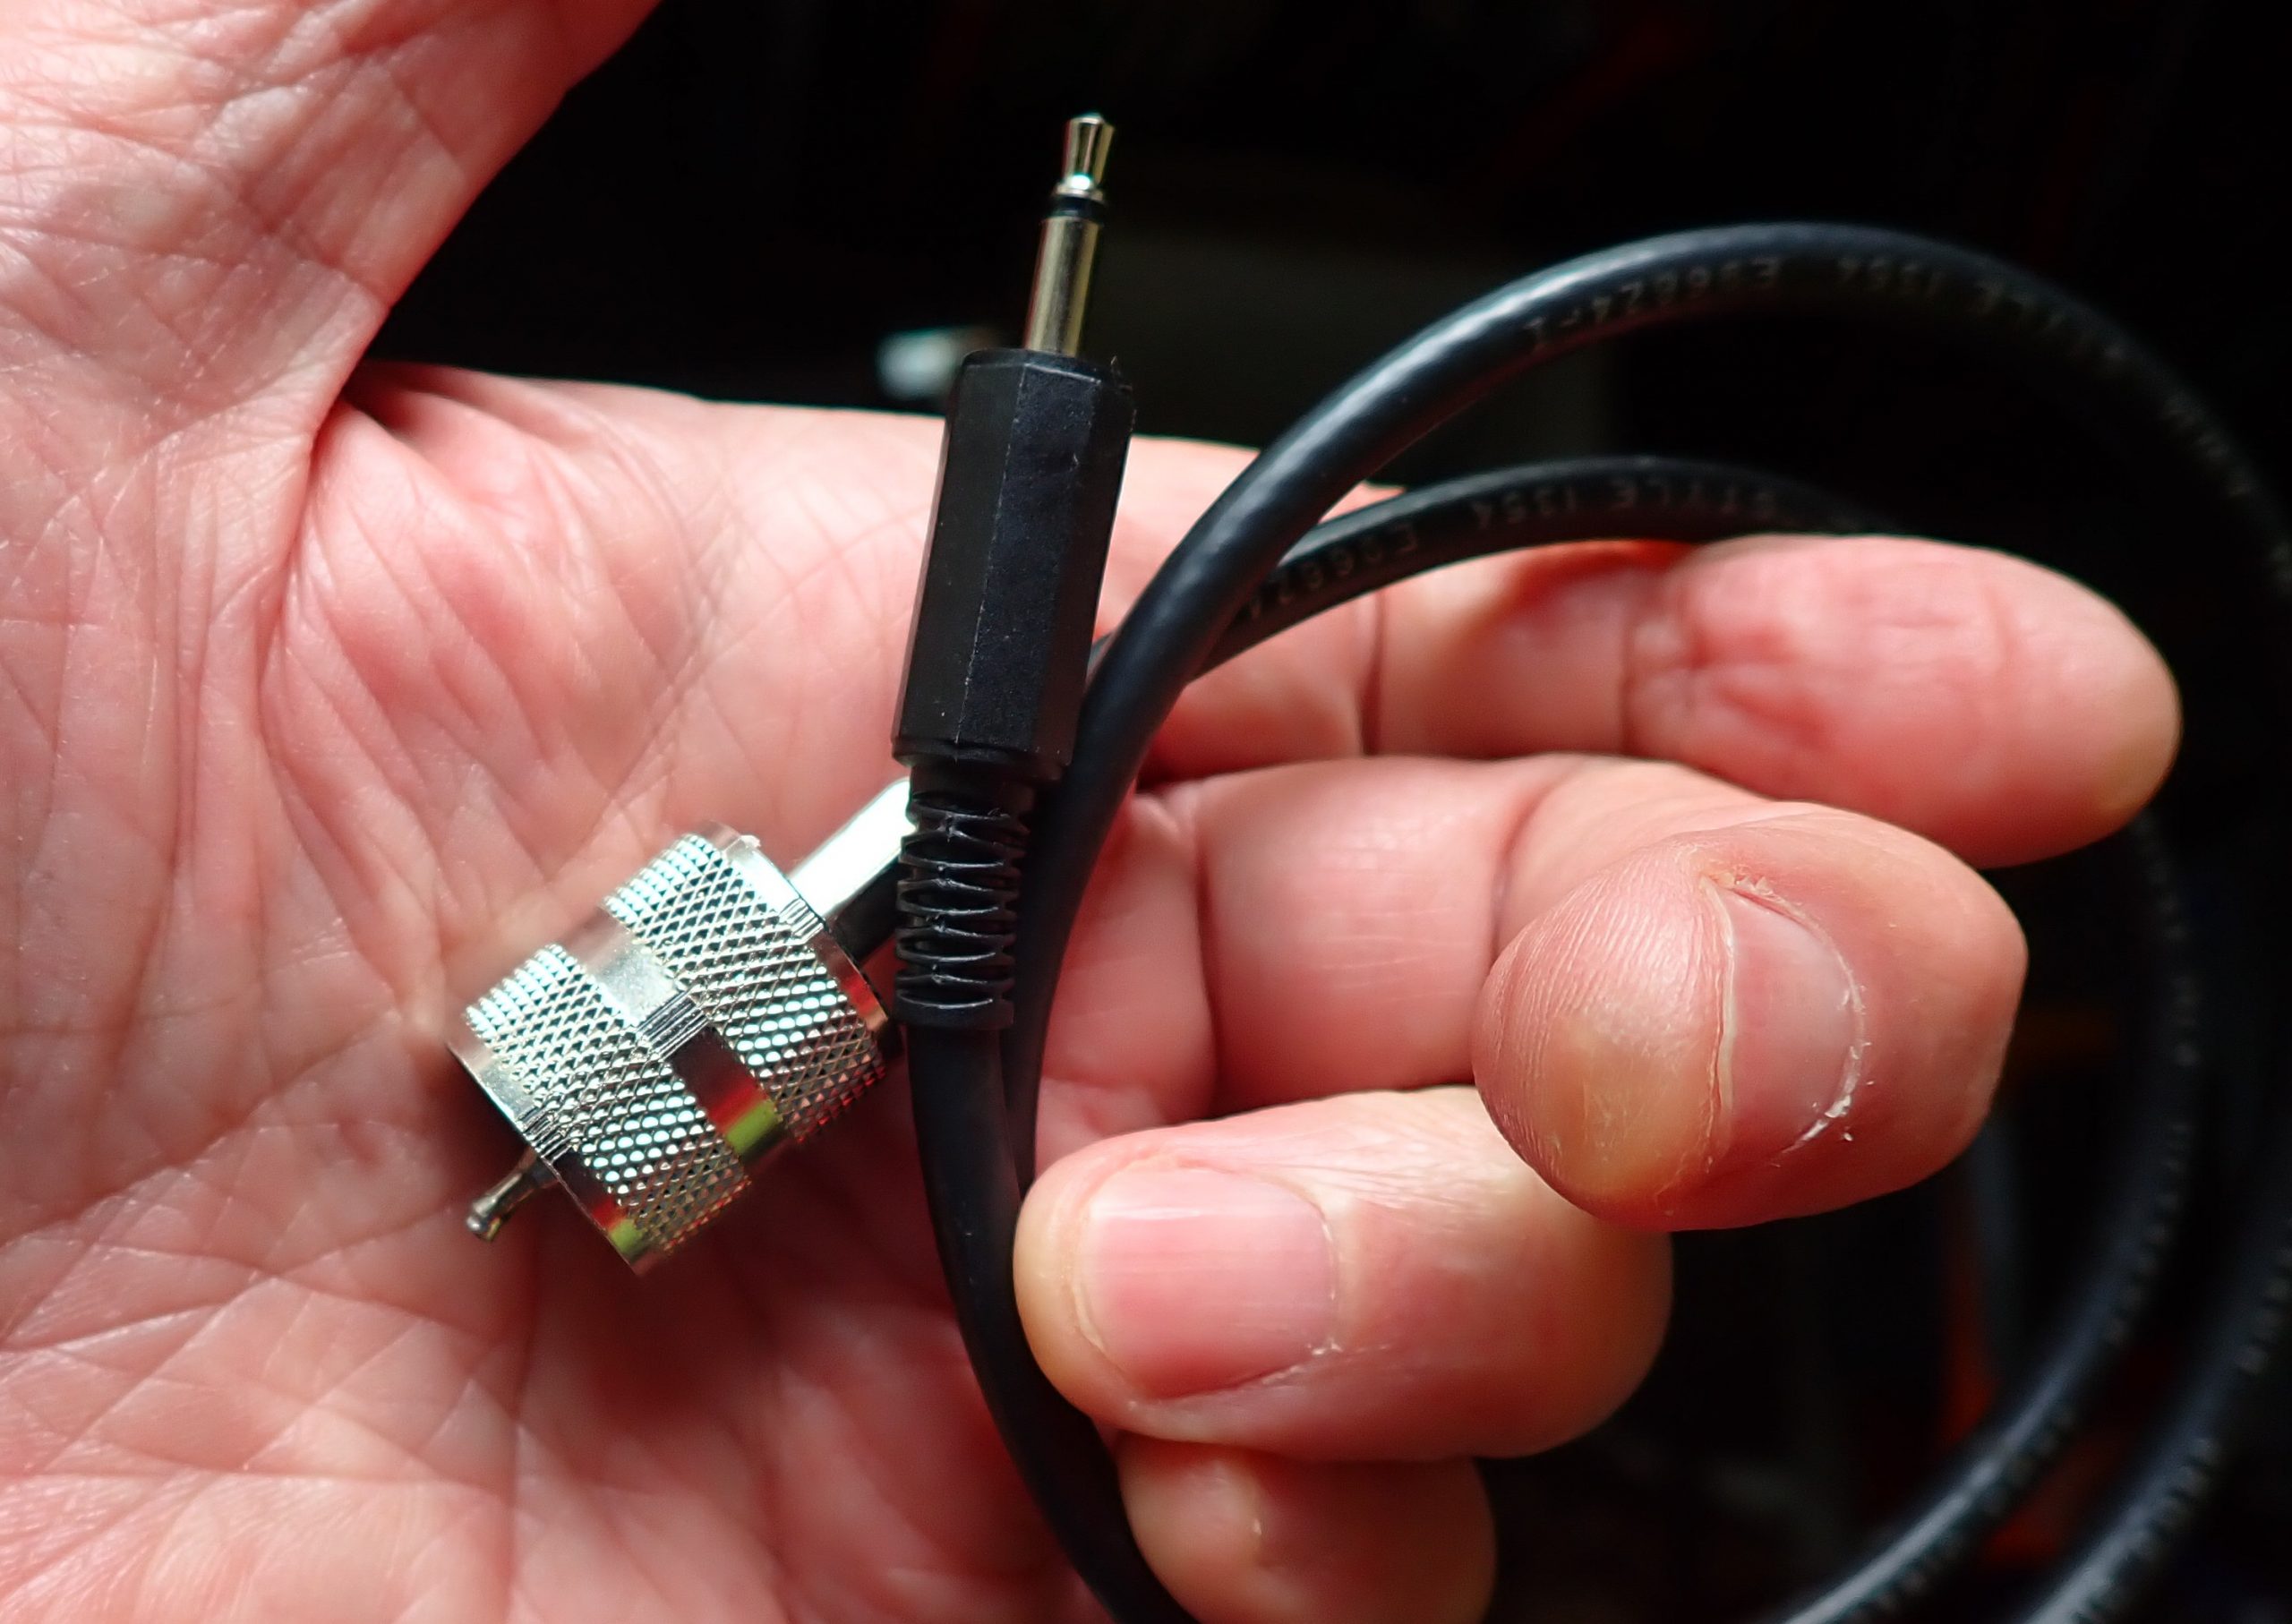
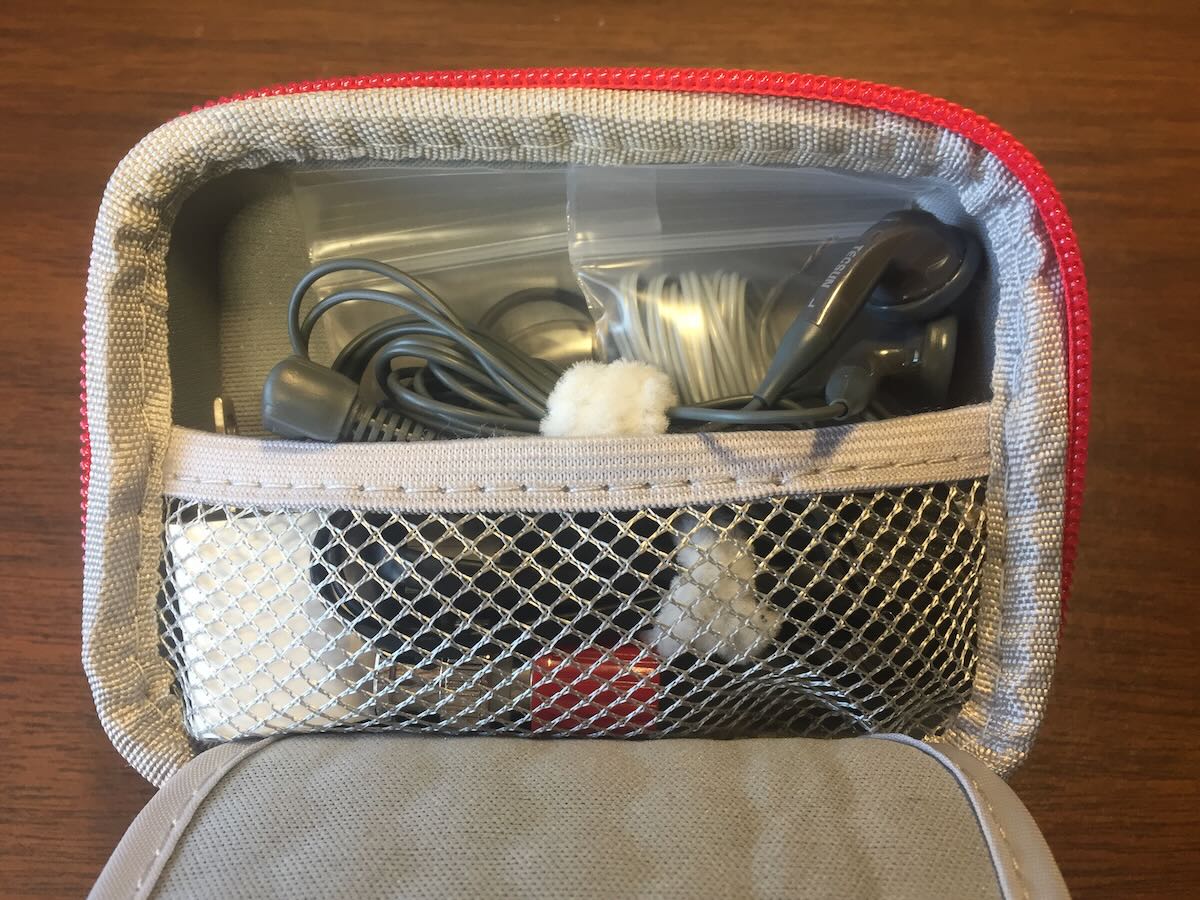
The pigtail.

Testing the 1020C with a Portable

Next, I tried the 1020C with my Tecsun PL-880. Immediately, I was confronted with a problem: how to get the signal from the coax output of the 1020C and into the antenna socket of the 880. Fortunately, a ham friend fabricated a “pigtail” for me that made the connection from the coax connector on the 1020C to the antenna input socket on the PL-880. As soon as I hooked it up, I heard an unpleasant hum that I had not heard on the Satellit 800.

I decided to see if running the 1020C off battery would offer an improvement. This involved another challenge: there is no “hatch” on the 1020C to provide access for plugging-in the 9-volt battery. Instead, you have to take out the screws on either side of the cabinet, remove the cabinet top, find the 9-volt connector hidden in a little plastic sleeve inside the 1020C, plug in the 9 volt battery, slide it into its clip, replace the cabinet top, and run the screws back in. That, in itself, is not difficult to do, but as soon as the battery needs replacing, you have to go through most of the process all over again.

The good news is that once the 1020C was running off battery, I could detect no hum, and the experience with the 1020C with the PL-880 was much the same as with the Satellit 800. Some signals were improved, some were the same, and sometimes the straight-through (bypassed) signal was better.

I have not tested the 1020C with a large, signal-devouring antenna out in the fresh air. The 2009 edition of Passport to World Band Radio offered that, with an inverted-L antenna longer than, say, 50-75 feet, the 1020C may not provide much benefit. However, my experience with a modest 50-foot indoor end-fed antenna demonstrates that the 1020C can deliver a significant signal boost in some circumstances, and I am glad to have it in my shack.

Bearing in mind that it won’t improve every signal you want to hear, if you live in an antenna-challenged situation, the MFJ 1020C – particularly if you can get 20-50 feet of wire outdoors or run around the perimeter of a room – may be just what the doctor ordered.

Suggestions for MFJ

There are three areas in which MFJ could make life easier for 1020C users: (1) make a pigtail or other device available to get the signal from any wire antenna to the coax input of the 1020C, (2) make a pigtail or other solution to bring a signal from the output of the 1020C to a shortwave portable (possibly a pigtail with an alligator clip to connect to the whip antenna), and (3) offer or provide quick-release pins for the 1020C cabinet for those who wish to operate it off batteries and want to be able to replace them quickly and easily.

Tecsun PL-990 Ferrite Rods

Many thanks to SWLing Post contributor, Gareth Buxton, who writes:

Hi Thomas

I see that Anon-co have the Tecsun PL-990 Ferrite rod aerial for sale. It even says in the product description “You can use it for your DIY projects.” I thought it might be of interest to your MW/AM radio constructors, especially if they can build a radio that receives more stations than the Tecsun using the same part!

Click here for the product page at Anon-Co.

Cheers
Gareth

Thanks for the tip, Gareth. This would indeed make it easy to construct an external MW antenna. Thank you for the tip!

Guest Post: Review of the Electronic Specialty Products – Model DD-103 Universal Digital Dial

Many thanks to SWLing Post contributor, Bob Butterfield, who shares the following guest post:


Review of the Electronic Specialty Products – Model DD-103 Universal Digital Dial

by Bob Butterfield

I recently brought out of storage my Yaesu FRG-7 Communications Receiver to use “in the shack” once again.  I have always regarded the FRG-7 as a capable receiver but just did not have space as my radios co-exist with part of my daughter’s over-flowing stuffed animal collection–among other things.  After a couple of dozen members of the plush collection were relocated, I now had room for another receiver!  I checked the FRG-7 out carefully and found everything was functioning well, except for a modification I made decades ago which was the installation of a 100 kHz crystal calibrator kit inside the receiver.

I am the original owner of this FRG-7 which is an early production unit (the one without the small fine tuning knob).  I had always desired an external digital frequency display for this radio and thought now is the time.  I did some research, visited various radio forums, and decided on purchasing an Electronic Specialty Products (ESP), Model DD-103 Universal Digital Dial.  This unit is not cheap, US$140, plus $15 shipping, but seemed to fit my needs.  If technically inclined, one could possibly build an external display for themselves at lower cost.  What may be of interest to many concerning the DD-103 unit is that it comes pre-programmed for dozens of transceivers and receivers (to include the FRG-7).  Plus, if your radio is not pre-programmed it can be set up manually.

The DD-103 is an attractive compact external unit measuring 2”H x 6”W x 4”D with a very easy to read backlighted LCD (white on blue).  The unit comes with connecting cables, U.S.-type power supply, and instruction manual.  In my opinion, despite its size, this is one solid and well-built unit.  As per the ESP web site, new units are not stocked but are assembled upon order.  After ordering I immediately emailed ESP with my receiver make and model (I would recommend this for all buyers).  My unit arrived in a little over two weeks and I received a separate sheet accompanying the unit with specific instructions for my receiver.  Hook up was a breeze.  All that was needed was to set a few DIP switches, connect one lead to the indicated test point on the identified board, and the other lead to chassis ground (alligator clip leads are provided).  The connection to the display is made with the included RCA cable.  I made one simple installation modification, installing a RCA female/RCA female bulkhead connector on the rear panel of the FRG-7 to allow for quick disconnect.

The DD-103 display is programmed into 1 MHz increments.  To operate, you select the MHz range you want (for example 9 MHz) on the DD-103.  On the FRG-7, I then tune its pre-selector and the same desired MHz range, and finally tune in the frequency and watch the DD-103 display change accordingly.  The operational design of the DD-103 fits nicely with the Barlow-Wadley circuit design of the FRG-7.

A key feature of the DD-103 display is that it reads the entire frequency (e.g., 9.940.1 MHz) so you always know where you are with just one look.  In addition to AM mode the DD-103 can be further programmed for CW, LSB, and USB modes, as well as 10 Hz or 100 Hz resolution.  As stated in the unit’s manual, it can also be calibrated on each frequency range so as to correct IF amplifiers that are a little off or errors associated with aging receiver crystals, if applicable.

It is nice to have my FRG-7 up and running again and utilizing the new external numeric frequency readout.  Truthfully, I have been reminded just how good the FRG-7 is.  Though it does not have as many features, it holds its own when put up against my other classic receivers (JRC NRD-545, JRC NRD-535D, and ICOM R-75).

I must say I am quite happy with the Electronic Specialty Products DD-103.  The unit has good accuracy and stability as it utilizes a TCXO reference oscillator.  If I had to nit-pick about anything, I would likely point out that the on/off switch is on the back of the unit.  If your radio is in a confined space this possibly could cause operational issues for you.  Also realize that for the most part this unit is kind of a “one size fits all” package and it would not surprise me if certain receivers or transceivers might require lengthening of the connecting cable.  All in all this professional looking unit is a simple to use, simple to install, easy to read, designed well, and I think worth the cost.  For anyone else who is thinking about adding a digital frequency readout to a vintage radio, you may want to give this model due consideration.

Bob Butterfield

Photo of my FRG-7 with the DD-103 on top:

Web site for Electronic Specialty Products: http://www.electronicspecialtyproducts.com/dd103.html

Disclaimer: I have not been compensated in any manner in regards to this unsolicited review and purchased the DD-103 unit with my own funds.

Frans experiments with the MFJ-1026 Noise Canceling Signal Enhancer

Many thanks to SWLing Post contributor, Frans Goddijn, who writes:

“Last week I purchased the MFJ-1026 ‘noise canceling signal enhancer’ and I posted two blogs with video about it. Initially the device seemed as useless as it is good looking but then I found a configuration where the device is not only pleasant to have but also useful for radio listening.”

Here are Frans’ reports which he kindly shares from these two posts originally published on his blog, Kostverlorenvaart:

Part 1: MFJ-1026 deluxe noise canceling signal enhancer

Using a GRAHN antenna, (a VENHORST wire antenna for noise reference), the iCOM R8600 radio and optional bhi DSP audio noise canceling, trying to see what’s the best way to cancel noise — on the antenna entry point of the radio or at the speaker output end.

In this case the MFJ-1026 seems ineffective. The DSP at the audio output end works well and easy.

I have also tried two GRAHN antennas on the MFJ-1026, one for MAIN and one for AUX but that was also not noticeably effective yet.

I will also try the little whip antenna that MFJ supplied with the box. Further tweaking may turn out to be helpful on some other frequencies / signals.

Before installing the MFJ i used the little TECSUN H-501x to scan the room for any devices producing radio noise. It turned out that the two Apple Homepods sit in a dense cloud of radio noise, the Macbook Pro also radiates noise, EVE smart plugs controlling lights also produce radio noise, two little label printers s well and the HP printer/scanner too. So I moved those to the other end of the toom or to another room. Continue reading

Egil is pleased with his new Belka-DX and Tecsun ICR-100 cases

Many thanks to SWLing Post contributor, Egil (LA2PJ), who writes:

Hi Thomas,

In the middle of march, Steve Allen (KZ4TN) posted this article showing a case for the BELKA-DX.

I found his idea so good that I ordered two of the small boxes, using the Amazon link given in his article.

The boxes arrived here in Norway just twelve days after ordering, and was delivered to my door by a local transporter.

Never before have I experienced that kind of service on any purchase via Amazon!


Tecsun ICR-100

While packing the BELKA-DX in one of the boxes, I discovered that my Tecsun ICR-100 speaker/audio recorder fit snugly in the other box. The two boxes also contains a six meters long wire antenna, charging cables for both units, earphones, and even an USB charger, just in case I get the opportunity to recharge the batteries.

Belka-DX and accessories

The attached pictures show my new setup. Two items are not shown in that picture: a wire antenna plus a 20Ah powerbank from Anderson. We are going to an off grid cabin for the Easter holidays, and hope that when leaving home with everything fully charged, the powerbank will keep this setup plus my smartphone happy for a whole week.

73s Egil – LA2PJ

Thank you so much for sharing this, Egil!  It’s absolutely amazing that the shipping service to Norway was so efficient. 

I think you’ll have no problem at all enjoying hours upon hours of DXing with the Belka-DX in your off-grid cabin.  No doubt you’ll be escaping the RFI and enjoying much lower noise floors while on vacation–this will give you an opportunity to truly take advantage of the Belka-DX receiver. You’ll have to report back with your experience and photos (hint, hint!).

A case for the Belka-DX and cautionary tale!

Many thanks to SWLing Post contributor, Steve Allen (KZ4TN), who shares the following guest post:


My Belka-DX: A Cautionary Tale

One of the most amazing SW radios I have ever owned and listened to is the Belka-DX. Its size to performance ratio is without equal, IMHO.

Late last year I dropped it on the floor and was emotionally traumatized when I picked it up and found the LCD to be broken (see photo above). It still received but most of the display was damaged and not readable. I tried to open it up with the intent of replacing the LCD myself (if I could source one) but I could not figure out how to remove the circuit board.

I contacted Boris at MobiMax in Bulgaria from whom I purchased the little squirrel. It took a few weeks of back and forth as he worked to get pricing for the replacement LCD. Eventually he had a very reasonable quote put together and I mailed the Belka-DX off to Bulgaria. Now the wait began. It took almost four weeks for it to finally arrive at MobiMax. Boris had the repair turned around in about a week and I made payment via PayPal. Just like before it took about four weeks transit time and I worried that it would disappear somewhere on the way.

It arrived safe and sound and I am very glad to have it back. I’ve been missing my bedtime SWLing.

So…moving forward I will now always store the radio in a hard case. After digging around in my box of assorted cases I found nothing that was the right size.

After twenty minutes on Amazon I found a hard case that was originally for a small point and shoot digital camera. It was a bit larger than the Belka-DX and it also had room for earbuds, the charging cable and power adaptor, and a small wire antenna.

I glued some foam in the case to hold the radio in place and it’s now nice and snug.

Click here to check out the case on Amazonm.com (affiliate link).

Now I can safely carry it in my daypack or other travel luggage without fear of damage.

Frank finds a Sony ICF-SW7600G/GR replacement antenna

Many thanks to SWLing Post contributor, Frank, who writes:

Thomas,

I have asked for and received help from your members a couple of times during the last year. I am sending this to you in an effort to “give something back” to your members.

I managed to stupidly break the built-in whip antenna on my Sony 7600GR and looked for a replacement. Several are on eBay for 5- 60 dollars which is a bit steep.

I eventually tried one (for $20) in the link below from eBay:

https://ebay.us/OpHEeP

It arrived very quickly (under 2 weeks from China) and it simply went into the radio with no problems and it works very well.

I am not a radio HAM or electronics expert so it may not be perfect but to me the reception is at least as good as the original.

If anyone needs one, it would be well worth trying.

Regards,

Frank from England

Thanks so much for sharing this useful tip, Frank!