Shortwave listening and everything radio including reviews, broadcasting, ham radio, field operation, DXing, maker kits, travel, emergency gear, events, and more
A few weeks ago, Chameleon Antenna sent me a pre-production model of their new wideband magnetic loop antenna called the Chameleon CHA RXL.
I’ve evaluated and reviewed a number of Chameleon’s ham radio antennas (primarily on QRPer.com). I find that the quality of their products are second to none. Price-wise, they tend to be at the top of the market, but keep in mind they machine and manufacture all of their antennas here in the US and they’re incredibly rugged; indeed, military-grade. And in the spirit of full disclosure, I’m proud Chameleon has been a sponsor the SWLing Post and QRPer.com since last year. My sponsors are by invite only and focus on companies I trust with our radio community’s business.
When Chameleon shipped the CHA RXL to me, it wasn’t from their factory, it was directly from the field: Fort Irwin, to be exact.
(Source: NTC Operations Group, Ft. Irwin)
This CHA RXL sample had been used by NTC Operations Group Fort Irwin (who, incidentally, won QRPX this year–click here to read the PDF report).
I was told that the condition of the antenna could be very rough after the QRPX because it had essentially been sandblasted in the desert winds. I was also told that someone accidently transmitted 5 watts into it at some point but it didn’t seem to harm it (for the record, like all amplified receive-only loops, it’s not designed to take RF).
Tony (W0NTC), who was one of the Ft. Irwin radio ops, sent me this note as he dropped off the shipment at Fort Irwin’s FedEx:
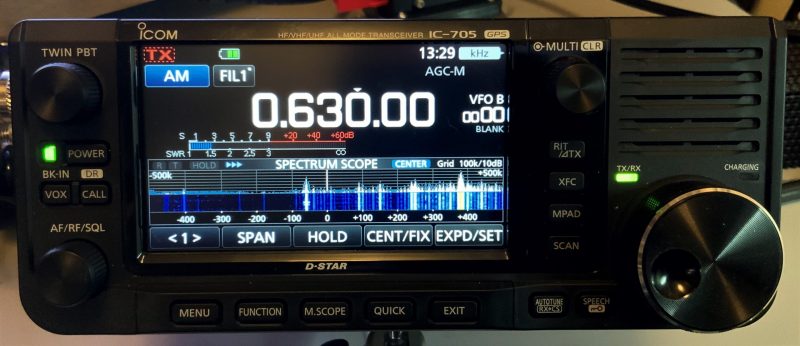
“Had a blast with [the CHA RXL], and it was absolutely critical while I was operating in the Army HF Low Power Competition (think tons of high powered MARS stations piling up and drowning out the 20W or less competitors). It absolutely crushed some localized RFI from a huge building I operated behind, and the receive on it I can only describe as “layered” in that I could hear stations somewhat clearer than usual if they transmitted simultaneously. Receiver I used was the IC-705 with default Auto Notch and Noise Reduction.”
Tony volunteered all of this info–I never asked him how it performed.
A few days later, I wasn’t sure what to expect when I opened the box although I knew that my operating locations were nowhere near as cool as its position next to a Humvee at Fort Irwin in the photo above!
I pulled the CHA RXL out of the box and it looked cosmetically flawless to me.
Frankly, there’s not a lot to get damaged. The 36 inch diameter loop is made of rigid aluminum and has a Navy gray powder coating. The preamplifier unit is completely sealed and made of a high-impact plastic/PVC type material. The steel loop is attached to the preamplifier loop flanges with wing nut connectors.
The only potentially vulnerable part of the antenna system is the Bias-T box which would normally be located in your shack close to your receiver.
If I mounted the CHA RXL permanently outdoors, I would use Coax Seal around the BNC connection point, of course.
Although the CHA RXL has a supplied mounting bracket for permanent installations, I love the fact that the preamp box has a 1/4” x 20 threaded camera socket on the bottom. This makes for a brilliant portable loop because it can so easily be mounted on a standard heavier-weight tripod! All antenna manufacturers should give us tripod mount options when possible.
On the air
One of the reasons amplified receive loop antennas have become so incredibly popular over the past couple of decades is because they do an amazing job mitigating radio frequency interference (RFI) a.k.a. “QRM.” If you live in a neighborhood with significant radio interference, you really should consider some form of loop in your antenna arsenal.
Ironically, at home, I live in pretty much an RFI-free zone. I’m surrounded by tens of thousands of acres of national forest, so I’ve only used amplified loop antennas in the past for mediumwave DXing–mainly, when I wanted to take advantage of their amazing ability to null out unwanted signals.
Many years ago, I purchased a Pixel Loop Pro antenna (now under a different name via DX Engineering), mounted it outside where it lasted almost a year before a bear decided to pull it down and chew through the coaxial feedline. He/she did so with enough energy that it ripped down the loop and damaged the connector end of the Pixel’s pre-amp. This all happened when our family was travelling for two months in Canada. Why bear, why?!? But I digress…
The CHA RXL version I was shipped has one single rigid loop–the “EU” version’s loop comes in two pieces (for easier shipping/transport)–but I had no problem fitting the entire assembled loop in the back seat of my Subaru or my truck (as long as no one was sitting back there at the time). If you plan to travel with your loop a lot, consider the “EU” version!
I’ve taken the CHA RXL to my parent’s home a couple of times and enjoyed doing a little mediumwave and shortwave listening. Inside the house, the loop would attenuate RFI nicely, but when outside it would all but eliminate many sources of RFI.
At their house, I primarily used my Icom IC-705 for cruising the bands (being careful, of course, to disengage the transmit function).
Listening time in my hometown, though, was very limited. Since the CHA RXL is so portable, I decided to set it up at home on our porch for a few days, giving me an opportunity to test both the Sangean ATS-909X2 and Tecsun H-501x with an external antenna.
I’ve especially appreciated using the CHA RXL on mediumwave. Even from our screened-in porch, I can rotate the loop and use its excellent nulling properties to pick out multiple station IDs on crowded frequencies.
I’ve spent time on shortwave, too, and found that it certainly gave these two portables a signal boost.
In fact, it was by using the CHA RXL that I discovered the audio level difference between AM and SSB on my ATS-909X2 is very minimal when an external antenna is connected.
I’m sure you’ll hear the CHA RXL in action when I post audio clips and recordings in upcoming reviews.
Summary
If I owned a CHA RXL loop, one of the first things I’d do is build a power cord for it with an in-line fuse and terminated with an Anderson Powerpole connector. Since the operating voltage of the Bias-T is 12-14 VDC, it would pair perfectly with one of my Bioenno LiFePo4 batteries, offering a power source with longevity in the field–ideal for a group LW/MW/SWL DXpedition.
It’s difficult for me to truly comment on the loop’s performance because I don’t have another loop at present for comparison. I can say that it’s amazing on mediumwave, where I’ve spent much of my listening time this past week. I believe shortwave reception has been at least on par with my former Pixel Loop, if not better. It’s hard to say, in truth, because propagation conditions have been so poor lately. The CHA RXL loop does effectively mitigate noise!
I’m not sure if the CHA RXL is currently on backorder or not, but I would suggest you check out the product page on Chameleon’s website and possibly contact them if you’re interested. They’ve a number of options and accessories to consider.
One thing for sure: this must be one of the most rugged and durable RX loop antennas on the market. In addition, that Navy gray powder coating helps this rigid aluminum loop disappear against the sky. I believe you could strategically mount this loop and the friendly neighborhood association may never notice–it’s pretty stealthy. Speaking of which…
Josh’s CHA RXL install and demo video
Josh over at Ham Radio Crash Course recently installed a CHA RXL on his house and tested it on several bands, comparing it with a number of his external antennas:
Many thanks to SWLing Post contributor, TomL, who shares the following guest post:
Recording Music on Shortwave
by TomL
I recently became curious about the seasonal music updates posted by Alan Roe. It is a nicely detailed list of musical offerings to be heard. Kudos to Alan who has spent the time and effort to make it much easier to see at a glance what might be on the airwaves in an easy to read tabular format. I do not know of any other listing specifically for shortwave music in any publication or web site. I especially like the way it lists everything in UTC time since I might want to look for certain time slots to record. For some listings, I would need to go outdoors away from noise to listen to certain broadcasts. Current web page is here: https://swling.com/blog/resources/alan-roes-guide-to-music-on-shortwave/ .
As a side note, I have also found a lot of music embedded in the middle of broadcasts that are unannounced, unattributed, and not part of a regular feature program. That can be a treasure trove of local music you might not be able to find anywhere on the internet. It can be worth recording a spectrum of frequencies using the capabilities of the SDR and then quickly combing through the broadcasts at two-minute intervals (most songs are three minutes or longer). In maybe ten minutes, I will have at least identified all of the listenable music that may or may not be worth saving to a separate file.
Whether at home or outdoors, I have wanted to try to record shortwave broadcasts of music using my AirSpy HF+ but never getting around to it until now. There is a certain learning curve to dealing with music compared to just a news summary or editorial. I found myself wishing I could improve the fidelity of what I was hearing. From static crashes, bad power line noise, fading signals, and adjacent channel interference, it can be quite difficult to get the full appreciation from the musical impact.
I am starting to monitor the stronger shortwave stations like WRMI, Radio Romania International, Radio Nacional do Amazonia, etc. These type of stations can be received in a strong enough manner to get good quality recordings (at least according to shortwave listening experience). I am also finding that I appreciate much more than before the effort that these broadcasters put into creating content/commentary to go along with the music and little pieces of background info about the music or the artist. I have also noticed how exact some broadcasters are in timing the music into the limited time slots. For instance, Radio Romania International tries to offer one Contemporary piece of music exactly at 14 minutes, Traditional music exactly at 30 minutes, and a Folk tune exactly at 52 minutes into the program (whether in English, French, or Spanish), with nice fade-outs if the music goes too long.
One thing I ran into was to bother checking my hearing range. If someone has impaired hearing, it does not make much sense to create files that have a lot of sound out of one’s hearing range. I found this YouTube video (among a bunch of others) and listened to the frequency sweep using my Beyerdynamic DT-990 Pro headphones (audiophile/studio type headphones). My hearing is approximately from 29 Hz through 14400 Hz. Of course, the extremes fall off drastically, and as with most people, my hearing is most sensitive in the 2000 through 6000 Hz range.
Recording Workflow
Let’s assume that you already know how to record IQ files using your SDR software and can play them back (In the example below, I recorded the whole 49 meter band outputting a series of 1GB WAV files). Then, when playing back to record to individual files, I have to choose the filters and noise reduction I want. This gets subjective. If I do not want to keep huge numbers of Terabytes of WAV files over time, I will want to record to individual WAV files and then delete the much larger spectrum recording. You might tell me to just record to MP3 or WMA files because there is that option in the SDR software. We will get into that as we go along. For the time being, I do not want to keep buying Terabytes of hard drives to hold onto the original spectrum recordings.
After lots of trial and error, I came up with this workflow:
Record the meter band spectrum of interest using the SDR software.
Record individual snippets of each broadcast in that spectrum to new individual WAV files. This includes not lopping-off any announcer notes about the music I want to retain. I also have to choose the bandwidth filter and any noise reduction options in the software. Because I am not keeping Terabytes of info, this is a permanent decision.
Take an individual recording and apply more processing to it.
Convert the processed recording to any number of final output formats for further consumption and/or sharing.
Repeat steps 3 & 4 to take care of all the individual WAV files.
Step 4 allows me to create whatever file format I might need it to be: WAV, MP3, WMA, or even use it as background sound to a video if I so choose. There are also different ways to create some of these files with different quality settings depending on what is needed. I have chosen to listen to the individual WAV files for personal consumption but there may come a time to create high quality MP3 files and transfer those to a portable player I can take anywhere (or share with anyone).
The example below is a snippet from the latest Radio Northern Europe International broadcast on WRMI. WRMI has some decent equipment and I like how clean and wide is the bandwidth of many of the music programs. This is captured on the AirSpy HF+ using SDR Console V.3 with a user-defined 12kHz filter (11kHz also seemed somewhat similar sounding).
If you click on the ellipses, you can Copy an existing filter, type in a new title and change the bandwidth. I also played around with the different Windowing types and found that I like the Blackman-Harris (7) type best for music and the Hann type for smooth speech rendering (the Kaiser-Bessel types can also have more “punch” for voice recordings). Click OK TWICE to save the changes.
I also use Slow AGC and the SAM (Sync with both sidebands) to reduce the chance of distortion as the signal fades. I found that trying to use only one sideband while in Sync mode would make the reception open to loss of Sync with the musical notes warbling and varying all over the place!
Noise Reduction
The SDR Console software has a number of noise reduction choices. I tried NR1 through 4 and found the smoothest response to music to be NR1 with no more than 3 dB reduction. More than this seemed to muffle the musical notes, especially acoustic instruments and higher pitched voices. Part of the problem has to do with trying to preserve the crispness of the articulation of the sound and combating shortwave noise at the same time. At this time, I have chosen NOT to use any NR mode. More about noise reduction below.
Generic MP3 sounds really bland to my ears, so creating higher quality files will be important to me. I have been using Audacity which can apply processing and special effects to WAV files and export to any number of file formats. WAV files are a wonderful thing. It is a “lossless” file format which means that every single “bit” of computer input is captured and preserved in the file depending on the resolution of the recording device. This allows one to create any number of those “lossy” output formats or even another WAV file with special effects added. You can get it here:
One special effect is listed as “Noise Reduction”. I literally stumbled upon it while reading something else about Audacity (manual link). Here is how I use it for a shortwave broadcast. Open the original spectrum recording (in this example the 49m band). Tune about 25kHz away from the broadcast that was just recorded. Remember, my hearing extends at least to 14.4k plus there is still the pesky issue of sideband splatter of bandwidth filters. The old time ceramic and mechanical filters use to spec something called “skirt selectivity” -60db or more down from the center frequency. This is still an issue with DSP filters even though they SAY they are measured down to -140dB; I can still hear a raspy sideband splatter from strong stations!
Find the same time frame that you recorded the broadcast and make sure it is the same bandwidth filter, AGC, and any noise reduction used. Now record one minute of empty noise to a WAV file. Fortunately on 5850 kHz, WRMI has no adjacent interference.
Now in Audacity, open the noise sample and listen for a 5 to 10 second space to copy that is relatively uniform in noise. We don’t want much beyond that and we don’t really want noise spikes. The object is to reduce background noise. In this case, I chose Start 39 seconds and End 44 seconds. Choose Edit – Copy (or CTRL-C).
Choose File Open and find the broadcast WAV file in question. Now click on the end-of-file arrow or manually type in the Audio Position (in this example 1 minute 15 seconds). Now Paste (or CTRL-V) the 5 seconds of noise to the end of the broadcast file. Now, while the pasted noise is still highlighted, go immediately to Effect – Noise Reduction and choose the button Get Noise Profile. It will blink quickly to read the highlighted 5 seconds of noise and disappear.
Now select all with CTRL-A and the whole file is selected. Go immediately to Effect – Noise Reduction and choose the parameters in “Step 2”. Through some trial and error, I found 3db reduction has a noticeable effect without compromising the music. I have used up to 5 db for some music recorded with narrower bandwidths. Higher levels of noise reduction seemed to create an artificial flatness that was disturbing to me. I also use a Sensitivity of 0.50 and Frequency smoothing of 0. You can choose the Preview button while the Residue circle is checked to actually hear the noise being eliminated. Press OK in order to process the noise reduction. You should now see the waveform change slightly as the noise is filtered. In a nutshell, I find this to be a better noise reduction than using 3db of NR1 in the SDR Console software. Don’t forget to snip off those 5 seconds of noise before saving the file.
Pseudo Stereo
The SDR Console software has an Option for Pseudo Stereo (for playback only) and it can be useful for Amateur Radio receiving, especially in noisy band conditions when one is straining to hear the other person’s call sign and location. There is a way in Audacity to add a fake kind of stereo effect to mono audio files. I found a useful YouTube video that explained it very clearly.
I do everything listed there except for the Reverb effect. I find that too fake for my tastes.
I found the added 10ms of Delay on the right channel to be a little too much, so I use 9ms.
My High Pass filter settings are 80 Hz and 24dB/octave. This is based partly on my hearing preferences as well as established industry standards. There was a lot of science and audio engineering that went into creating the THX home theater crossover standard. There is also science that says that anything below 200 Hz is omnidirectional. The suggested 48dB/octave is too steep in my opinion.
My Low Pass filter settings are more squishy. The YouTube video suggests 8000 Hz and 6dB/octave. I feel that is too gentle a rolloff into the upper midrange. I use 9000 Hz at 12dB/octave for very strong, high quality shortwave broadcasters like WRMI. For more constrained quality broadcasts, like due to limited bandwidth (Cuban broadcasters) or adjacent channel interference, I will decrease down to 8000 or 7000 Hz but still use a 12dB/octave rolloff. This is subjective but it also means I am making a conscious decision to add that processing to the recording for future listening.
MP3 Quality
Typical MP3 files are a Constant Bit Rate of 128k. Some interviews and voice-only podcasts are only 64k. This is adequate but for recording detail in the music I prefer higher quality settings. Frankly, with these days of 4G cell phone service and Unlimited Data minutes on cell phone plans, there is NO good reason to limit MP3 files to just adequate quality levels. The typical MP3 file sounds limited in frequency range (muffled sounding) to me and very lacking in dynamic range (narrow amplitude). This would include limits on stereo files which are about twice the file size of mono files.
I have tried creating WMA files and I actually like the quality a little better than high quality MP3 files. The WMA files seem slightly more “airy” and defined to my ears. But it is a proprietary format from Microsoft and not all web sites or devices will easily play them. They are also a fixed standard and one cannot easily change the quality settings if forced to use a lower quality rendering.
There are many web sites talking about MP3 files, but I found this blog post helpful in summarizing in one paragraph the higher quality settings for a nice MP3 recording using VBR-ABR mode.
So finally for my examples. Since most web sites still prefer MP3 files, I have created these using that blog post’s suggestions. Typically this is Min bitrate=32, Max bitrate=224, VBR quality=9, and Quality=High (Q=2). Let’s see if you can hear the differences. It would be much easier to hear if we were listening to WAV files, but those are way too big to post on this web site! The software I used is Xmedia Recode and I find it easy to use.
Many thanks to SWLing Post contributor, Grant Porter, who notes that Ham Radio Outlet has the Eton/Grundig AN200 loop antenna on a closeout sale for $15.00.
As Grant notes, this is an especially great deal if you live near an HRO retails store.
Many thanks to SWLing Post contributor, Gary DeBock, who shares his extensive 2021 Ultralight Radio Shootout.
This is truly a deep dive featuring five popular ultralight portable radios and examining mediumwave, shortwave, FM, and AIR Band performance.
The review is an amazing 40 pages long! In order to display the entire review, click on the “Continue reading” link below.
2021 Ultralight Radio Shootout
Five Hot Little Portables Brighten Up the Pandemic
By Gary DeBock, Puyallup, WA, USA April 2021
Introduction The challenges and thrills of DXing with pocket radios have not only survived but thrived since the Ultralight Radio Boom in early 2008, resulting in a worldwide spread of the hobby niche group. Based upon the essential concepts of DXing skill, propagation knowledge and perseverance, the human factor is critical for success in pocket radio DXing, unlike with computer-controlled listening. The hobbyist either sinks or swims according to his own personal choices of DXing times, frequencies and recording decisions during limited propagation openings—all with the added challenge of depending on very basic equipment. DXing success or failure has never been more personal… but on the rare occasions when legendary DX is tracked down despite all of the multiple challenges, the thrill of success is truly exceptional—and based entirely upon one’s own DXing skill.
Ultralight Radio DXing has inspired spinoff fascination not only with portable antennas like the new Ferrite Sleeve Loops (FSL’s) but also with overseas travel DXing, enhanced transoceanic propagation at challenging sites like ocean side cliffs and Alaskan snowfields, as well as at isolated islands far out into the ocean. The extreme portability of advanced pocket radios and FSL antennas has truly allowed hobbyists to “go where no DXer has gone before,” experiencing breakthrough radio propagation, astonishing antenna performance and unforgettable hobby thrills. Among the radio hobby groups of 2021 it is continuing to be one of the most innovative and vibrant segments of the entire community.
The portable radio manufacturing industry has changed pretty dramatically over the past few years as much of the advanced technology used by foreign companies in their radio factories in China has been “appropriated” (to use a generous term) by new Chinese competitors. Without getting into the political ramifications of such behavior the obvious fact in the 2021 portable radio market is that all of the top competitors in this Shootout come from factories in China, and four of the five have Chinese name brands. For those who feel uneasy about this rampant copying of foreign technology the American-designed C. Crane Skywave is still available, although even it is still manufactured in Shenzhen, China—the nerve center of such copying.
Prior to purchasing any of these portables a DXer should assess his own hobby goals, especially whether transoceanic DXing will be part of the mission– in which case a full range of DSP filtering options is essential. Two of the China-brand models use only rechargeable 3.7v lithium type batteries with limited run time, which may not be a good choice for DXers who need long endurance out in the field. A hobbyist should also decide whether a strong manufacturer’s warranty is important. Quality control in some Chinese factories has been lacking, and some of the China-brand radio sellers offer only exchanges—after you pay to ship the defective model back to China. Purchasers should not assume that Western concepts of reliability and refunds apply in China, because in many cases they do not. When purchasing these radios a DXer should try to purchase through a reputable seller offering a meaningful warranty—preferably in their own home country.
One of the unique advantages of Ultralight Radio DXing is the opportunity to sample the latest in innovative technology at a very reasonable cost—and the five pocket radio models chosen for this review include some second-generation DSP chip models with astonishing capabilities. Whether your interest is in domestic or split-frequency AM-DXing, FM, Longwave or Shortwave, the pocket radio manufacturers have designed a breakthrough model for you—and you can try out any (or all) of them at a cost far less than that of a single table receiver. So get ready for some exciting introductions… and an even more exciting four band DXing competition!
Many thanks to SWLing Post contributor, Ferruccio Manfieri (IZ1096SWL), who shares this report and excellent photo tour from a visit to the Museo Marconi in Bologna, Italy in 2018.
A visit to Museo Marconi in Villa Griffone, Pontecchio, Bologna
by Ferruccio Manfieri (IZ1096SWL)
Bologna, in Northern Italy, is renowned to be the seat of the oldest University in Europe and in the world (the Alma Mater Studiorum) and its historic, artistic and culinary heritage. From a scientific perspective, Bologna is the birthplace of Guglielmo Marconi as well as the place of his first experiments in transmission.
The inventor, born in Bologna on April 25th, 1874, was the son of an Italian father (Giuseppe, a wealthy landowner) and an Irish mother (Annie Jameson, of Jameson’s Whiskey family). At the age of 20, Marconi began to conduct experiments in radio waves, building much of his own equipment in the attic of his home at the Villa Griffone in Pontecchio (in the Bolognese countryside).
Marconi received his final resting place in Villa Griffone Mausoleum, an enterred crypt hosting his porphyr sarcophagus. The building was donated to the Guglielmo Marconi Foundation in 1941 after the death of the inventor (on the 20th of July 1937).
Sadly, Villa Griffone and the Mausoleum suffered heavy damages from WWII bombings and pillages and were patiently rebuilt in post-war years. Today, Villa Griffone is reborn as a hub of research and divulgation activities, hosting Guglielmo Marconi Foundation, the Marconi Museum, a library and two research groups on communication systems.
On the 26th of april 2019 I visited with my family the Museum hosted in the original building (a short trip from Bologna, 20 minutes by public transport)
Villa Griffone and the Marconi Mausoleum
The visit began with a nice stroll in the Villa gardens, home with the nearby hill of the Celestini of the first long-range and not in line of sight transmission experiment in 1895. Marconi managed to send signals over a distance of 2 km, beyond a hill situated between the transmission equipment (to which he had added a grounded vertical antenna) and the reception apparatus (characterised by an extremely sensitive coherer).
Villa Griffone gardens and “Hill of Celestini”
We were in the very spot Marconi was when he transmitted his three signals to the receiver operated by his brother and the gardener behind the hill. Nearby, the replica of eight meter wooden pole with the attached metal boxes used as antenna.
Marconi’s first “long range” antenna – replica
This experiment in universally aknowledged as the birth of radio transmission (and, by the way, the rifle shot used as a confirmation of the reception was the very first QSL…).
Our valent host and guide to the visit was the Director of the Museum, Barbara Valotti, who thoroughly described us (with knowledge, passion and communication skills) the historical framework of Marconi’s biography and works. A more engineering oriented and hands-on visit to the working replicas laboratory was subsequently hosted with passion and knowledge by Adriano Neri I4YCE.
In the Auditorium Dr. Valotti showed us two videos on the first transmission experiment and on the Republic incident in 1909, on of the first application of Marconi radiotelegraphy in an incident at sea, whose success (no lives were lost in the aftermath of the collision thanks to the coordination of rescue efforts via radiotelegraphy) gave a boost of popularity to radiotelegraphy and to the engineer, eventually leading to the Nobel prize in physics later that year.
A frame of the “Republic” video
This part of the visit emphasized his interest in real technological applications of his inventions and their commercial potential. Marconi was a “modern” mix of engineer (with an unhortodox, non-academic formation) and entrepreneur, ready to see the new potential applications of technologies in the society. Interestingly, Dr. Valotti underlined that the main focus of Marconi research was always the point-to-point trasmission and not the broadcast.
Hanging on the ceiling of the auditorium, a replica of the kite used by Marconi to lift an emergency antenna in the first transoceanic transmission from Poldhu to St Johns Newfoundland in 1901.
Yacht “Elettra” – memorabilias
The visit continued to the “silkworm room”, the original room (once used to breed silkworms) where Marconi held his laboratory and performed his experiments. The room was full of instruments replicas to show the laboratory as in the young Marconi years.
“Silkworm room” – Marconi’s first laboratory (original place, instrument replicas)
“Silkworm room” – Marconi’s desk (replica)
It was also possible to replicate the main experiments with educational working replicas.
Marconi transmitter – educational replica
Headphone and coherer used in the first transoceanic transmission (replicas)
The second phase of the visit was a more engineering-oriented explanation of the principles of radio telegraphy conducted by Adriano Neri I4YCE in a didactic laboratory on working replicas of the main epoch instruments.
Experiment table with working replicas: coherers, a wire decoder, a Marconi receiver
Instruments in the educational laboratory
With passion and competence, Mr. Neri explained us in a simple way (there were some very interested young people in the group) the cable telegraphy principles and the sequence of experiments and discoveries that led Marconi to his inventions.
In a detailed and fascinating exposition we saw applications of a Morse writer, the induction coil, the coherer and the first Marconi spark transmitter, all assembled in the end to transmit in the room some morse signals in the air.
Live demonstration of signal transmission by Adriano Neri . Against the wall a Marconi spark transmitter (note the antenna and ground plates), on the table: a Marconi receiver (with a coherer) connected with a Morse writer.
The laboratory, as the whole museum, hosts a huge number of working replicas (a wonderful collection in itself, handmade by Maurizio Bigazzi with rigorous standards of adherence to the original designs and, if possible, reuse of original parts) and some original equipment.
Ship wireless telegraph room – working replica
A last section of the museum is devoted to radio communication during the war (showing a WWI airplane-ground communication system) and radio broadcasting, with original sets of great interest like a 1923 Marconiphone (still working, we had a live demonstration receiving RAI programs) and a Ducati radio (the same Ducati company of motorbikes, based in Bologna).
WWI plane radio and ground receiver
1923 Marconiphone, working original set
Ducati radio
We spent all the morning in the Museum with great fun and interest from all the family.
I highly recommend a visit to the Museum for the place, its significance in the history of radio transmission and the competent and passionate exposition of the historical and technical themes related to Guglielmo Marconi.
A wealth of information (also in english) can be found of the Guglielmo Marconi Foundation website (www.fgm.it).
A detailed gallery of the Museum can also be found on the new Museum website (www.museomarconi.it)
Many thanks to SWLing Post contributor, Dan Robinson, for the following guest post and review:
Sangean v Tecsun in the Battle of Late Shortwave Era Portables: The ATS909x2
by Dan Robinson
Some years ago – actually more than a decade – I decided to give Sangean a shot at winning me over in the shortwave portable category.
I had and still do use numerous portables with a bias toward the classic SONY, Panasonic, and Grundig sets. The ones that made an impression stayed, often in multiples, as anyone can see if they visit the radio shack here in Maryland.
These include, for those interested: the Panasonic RF-B65, SONY ICF-SW77, ICF-2010, ICF-PRO80, ICF-7600D, ICF-7700, ICF-SW1000T, ICF-SW55, ICF-SW100s, ICF-SW07, Grundig Satellit 500, to which were added in more recent times the Toshiba RP-F11, XHDATA D-808, and Tecsun portables ranging from the PL-365 and new PL-368 to the PL-880, PL-990x, H-501x, and S-8800.
Sangean has generally not been on that list. There’s a good reason – I just never considered Sangean to be competitive when it comes to portables, though they did have some excellent larger sets such as the ATS-803A that made the first forays into multiple bandwidth options.
My last experience with Sangean was with the ATS-909. I liked the looks and capabilities of that receiver, and even went to the point of having mine modified by Radio Labs. But those mods were underwhelming, in my view, and the original 909 always seemed to me to be deaf when using the whip antenna.
That issue continued unfortunately with the 909x. Some of you may have seen a video I did a few years ago in which I set a 909x against a SONY SW-07 and Panasonic RF-B65. This was done barefoot with only the whip antennas, but near a window. In short, the other two radios wiped the floor with the 909x.
It took a surprisingly long time for Sangean to update the 909x with the 909×2, during which companies asked valid questions about the need for further development of world band portables.
Eton turned the market on its head when it introduced the still superb E1/XM which competed with the very end of SONY portable production, and co-designed with R.L. Drake added such superb features as Passband Tuning and three selectivity positions.
Meanwhile, Tecsun plugged away, introducing an impressive array of portables including the PL-600 series, then the 880 and now the 990x and H-501 portables.
So, now the 909×2 is here and with its 073 firmware upgrade has become a bit of a holy grail for portable receiver users. There have been a number of excellent reviews, including Dave Zantow’s deep dive, and some others here on SWLing Post.
I’m going to give you my impressions, using the really detailed Zantow review as a base. I received my 909×2 from Amazon just today – it is a 073 firmware which confirms that new supplies have the upgrade.
SENSITIVITY ON WHIP
First, let’s get the elephant in the room out of the way. Although I have not undertaken detailed technical testing of the 909×2 – nor do I have the equipment to carry this out – it does seem that Sangean may have finally tackled this crippling flaw that rendered the old 909x nearly useless when using it only on the whip. I’ll undertake further testing and comparisons with some of my other portables to confirm this. The whip antenna itself is robust – solid and long, something that Tecsun could take note of.
AIR BAND
Inclusion of air band on this radio is a major selling point for those interested in this type of monitoring. My initial tests showed the 909×2 to be quite sensitive and useful – I managed to pick up no fewer than five airport comms frequencies in my area here in Maryland.
SELECTIVITY / AUTO-BANDWIDTH
The 909×2 really shines with FIVE available selectivity options that are easily selectable in shortwave mode. It would have been nice to be able to actually see the values of each filter as one scrolls through, but that’s a minor point. Think about it – in shortwave AM mode, this is the number of selectivity positions that one finds on such power house communication receivers as a Drake R8. Amazing that we now have that in a portable. On the negative side, I find the auto-bandwidth feature on the 909×2 to be nearly useless, as useless as the similar feature found on Tecsun receivers. The automatic switching is distracting and annoying. My advice to users: forget this, and stick with manual bandwidth control. My advice to Sangean – I wish they had left this feature out but given us multiple bandwidths in SSB.
LCD AND BRIGHTNESS
Sangean hits it out of the park with this multi-stage lighting for the display. Simply superb and the kind of quality we could only hope for from other manufacturers.
MAIN TUNING / DETENT CONTROL
I found the detents on the old 909x to be annoying – indeed, modifications have been available that could remove this feature. But Sangean being Sangean, the detent wheel remains in the 909×2 and it is not a deal killer.
AUDIO QUALITY
The radio retains the excellent audio of the 909x – I am not sure the 909×2 exceeds what one hears from a Tecsun 990x or H-501x but it’s right up there and competitive.
POWER SUPPLY
As others have noted, thanks to Sangean for sticking with AA cells. Together with internal charging when using Ni-Mh cells this is a major selling point. On the other hand – competitor Tecsun went a step farther with its H-501x which though it uses 18650 lithium batteries, has dual batteries, one of which can be held in standby, and switchable charging. That’s a design feature that you really have to respect.
VARIABLE RF GAIN
Again, as noted by others Sangean retained the extremely useful thumb wheel RF gain control. This is an excellent feature.
KEYPAD
Another home run for Sangean when it comes to the keypads on the 909×2, which can be compared in this respect to the Tecsun H-501x which itself improves upon the 990x when it comes to front panel control. Time will tell, however, and we shall see if the keys on these radios hold up in heavy use.
UP/DOWN SLEWING
These controls which sit outside the circular main tuning knob are excellent, and reminds one of the slewing buttons on the SONY 7600GR, SW1000T and SW100.
S-METER / DISPLAY
RSSI and SN Digital Signal Strength Information are provided on the beautiful 909×2 display. This is an improvement over the Tecsun signal strength/SNR meters that I wish would be redesigned, if in fact Tecsun has any intention of future modifications to their portables.
NO SOFT MUTING
Thank goodness we don’t have to deal with the annoying soft muting issue that is still seen in some other portables (the XHDATA D808 comes to mind along with the Eton Executive). Soft muting quite simply ruins a listening session and it’s baffling that any manufacturer still puts it in.
NEGATIVES (I AM IN TEARS)
OK, close all airtight doors and prepare to dive! Here are the negatives I see with the 909×2. I held off obtaining one of these radios because I knew there would be issues. And I was disappointed enough in the past with the 909x and 909 before it that I had almost decided not to go for it.
SIGNS OF LONGWAVE RECEPTION PLAGUED BY CROSS-MOD FROM MEDIUMWAVE
On my particular unit – it remains to be seen whether this is true for others – long wave seems to be near useless. The band is filled with mediumwave stations bleeding through. Turning down the RF obviously helps but I still hear AM stations here in the DC area, when I am in LW mode.
SSB PERFORMANCE
ALERT FOR SANGEAN AND ALMOST A DEAL BREAKER – as mentioned in the Zantow review, and in other comments I have seen on the 909×2, the drop in level from AM to LSB is a killer negative.
This is less noticeable in MW. But if you are in shortwave and have turned your volume up on any particular station, say a strong one such as Greece on 9,420 kHz or Spain, or an AM station, and you then switch to LSB it is like you have almost lost the signal. This simply needs to be fixed. Level on USB seems fine and acceptable, but LSB on shortwave requires immediate upwards adjustment of volume, only to have to reverse the process when returning to AM mode. I find this problem to be sufficiently serious that I would recommend against obtaining a 909×2 until Sangean finds a way to fix it. This issue is on the same level of BAD as the still unsatisfactory SYNC mode in all three of Tecsun’s shortwave portables. In fact, I may return the 909×2 I obtained and wait until a fix for this emerges.
Example Video
In this video, I demonstrate the extent of the problem as seen on this particular unit of the 909×2, which carries a serial number dk201043181.
Dave Zantow says his unit does not have this issue, so there is a possibility this is due to unit to unit variation. As you can see, with a strong signal such as 12,160 kHz — switching from AM to LSB instantly reduces listenable level, and signal as measured on the 909×2 drops to zero bars or near zero. In USB, the reduction is less severe. Regardless, having to perform adjustments with main volume just to struggle to hear any signal in SSB is a bit ridiculous. This kind of thing is not seen on the Tecsun H-501x or 990x though as Dave correctly points out, Tecsun receivers are not exactly great performers in SSB. On Tecsun receivers, there is a slight processor pause while the receiver makes the switch into LSB or USB, without the sharp reduction in listenable level.
CALIBRATION ISSUES WITH NO WAY TO ADJUST
Imagine my joy when I first began using the x2. Initially, it seemed to be smack on frequency – I tried this on WMAL, the powerhouse local AM station here in the DC area, and then again with stronger stations on shortwave, such as 12,160 kHz. Ah, I said to myself, Sangean has some decent QC and paid attention. About 30 minutes later, however, what I found matches the Zantow review. Stations are consistently low of the tuned/displayed frequency by as much as 300 Hz. The reason this is so disappointing is that I feel Sangean could have taken a clue from Tecsun and provided a re-calibration function (unless it exists and we aren’t being told about it). On Tecsun radios, the re-calibration capability is the major counter-punch to poor synchronous mode – in my view, one can live with flawed SYNC on a 990x or H-501 or PL-330 as long as you can adjust and at least have zero beat or close to it across frequencies. At the same time, as Zantow points out, no one should be expecting TCXO level performance from portables such as these. However, it is a bit disappointing that after all these years and redesign of the 909x to add some really nice features, they’re still landing up to 300 Hz from a tuned frequency. On the other hand, is this really any worse than one would see from an off-tuned SONY ICF-2010? No, and adjusting those older receivers required surgery.
CONCLUSIONS
I really like the 909×2. There simply is something about this design that Sangean knew was a winner when it first arrived on the market years ago, so it’s not surprising that Sangean stuck with it. It’s clear that some hard thinking went into the step up from the old 909x, notably the larger LCD, addition of finer step tuning to make SSB easier, the robust antenna and the still pretty darn good audio through the wonderful speaker. The 909×2 is a radio that you can imagine guests would comment on if it were sitting on your coffee table – it just looks THAT GOOD.
But then here in 2021, so does a Tecsun H-501x LOOK THAT GOOD. As I noted above, where the Tecsuns fall down – with their still challenged synchronous mode – they make up for with the ability to re-calibrate.
That is a huge feature and one that Sangean struck out on, though surely Sangean designers had to know the 909×2 would appeal both to listeners and to hobbyists with obsessions about frequency accuracy.
To repeat, I really (really) like the 909×2. But another area where the receiver strikes out is the problem with sharp reduction in LSB mode. Seriously – you have to crank the volume control up to at least 50 percent to hear ANYTHING when you’re in LSB, whereas USB requires going only up to about 30 percent. Then when you’re completing your carousel back to AM, you have to be sure not to still have the audio up at 50 percent or more to avoid blowing your speaker.
Again, as I said above, the calibration/drift issue on the 909×2 can be lived with. The problem with LSB, in my opinion, cannot or should not be tolerated. So, the question is, do you want to purchase a 909×2 now that still has that LSB audio issue, or wait a while until Sangean gets its act together?
These and other earthshaking questions are before us here in 2021. We have some of the best portables ever made by anyone in a time of sharply declining shortwave use, but they each have their flaws.
I don’t usually do a star rating or RECOMMEND / NOT RECOMMEND for radios. This time, I am going to make an exception and it links directly to the issue of the LSB problem on the 909×2. These radios simply should not have been allowed to enter the market with this being as serious a problem as I think it is. For that reason, I honestly cannot recommend a Sangean 909×2 until this is corrected.
Spread the radio love
Please support this website by adding us to your whitelist in your ad blocker. Ads are what helps us bring you premium content! Thank you!