Many thanks to SWLing Post contributor, Tom Servo, for sharing the following review of the Sangean DT-160. His review was originally posted on the radio discussions forum:
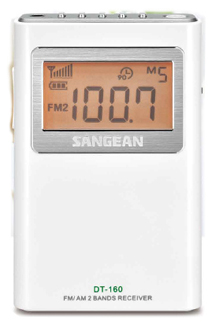
Got my Sangean DT-160 today. Thanks, Santa Claus!
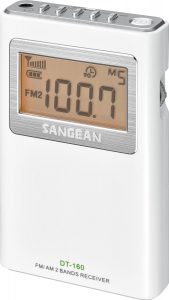
Initial impressions are positive, both in the build quality and performance.
It’s a lot bigger than I thought it’d be, though.
I was picturing in my mind something closer to the SRF-M37 but it’s bigger than a pack of cigarettes — taller and wider.
Some of the performance issues others have noted, I’ve noticed as well. The FM reception is superb and outperforms the Insignia HD portable that’s my benchmark FM radio. It can hold its own with the Grundig G8 in that regard.
The sound quality is weird, though. It sounds “crunchy” or watery. Like everything is being played via a low bit rate mp3. Granted, most my local stations ARE playing low bit rate mp3s and sound terrible (which is why I don’t listen to local radio much anymore) but the few stations that aren’t still sound “weird”. Crispy. It could be the DSP or just some odd EQ’ing on Sangean’s part. It’s not a deal-breaker by any stretch but when side-by-side with a different radio the audio differences were stark. The Insignia sounds truly “flat” while the Sangean sounds treble boosted. And crispy. Did I mention that?
[At first] the wide-narrow setting [seemed to make little] difference on FM. The only station that narrow mode improved was while listening to WTGF out of Milton, FL. It’s a mono station and I’m on the fringe, and the narrow cleared up a bit of static. It makes a much more noticeable different on AM, though. Not as much as a well calibrated “wide/narrow” filter might but enough to help some talk radio stand out from the noise.
[I did eventually] figured out where the wide-narrow setting makes the most difference on FM. It’s when you have two signals on adjacent channels, the narrow really does help cut out adjacent channel splatter. Not that there’s much of a problem to begin with, but it is a little extra added oomph.
With the narrow activated, I was able to pull in 93.1 WGDQ and 94.3 WKZW from the Hattiesburg, MS market. Two stations I haven’t heard in probably a year or better, and both are first-adjacent to local 100 kW sticks that are less than 15 miles from me.
Selectivity even in wide mode is fine. Definitely better than the Insignia and on par with the Grundig. We have a crowded dial here on the Gulf coast and sometimes you need a selective radio to pull out all the stations side by side. Here’s an example of what is possible to hear on a decent night:
98.1 – WHWY – Fort Walton Beach
98.3 – WLVM – Mobile
98.5 – WYLD – New Orleans
98.7 – WYCT – Pensacola
 I was surprised to hear WYLD coming in this afternoon. In fact, at first I thought it was an image of local 99.9 WMXC, because it was the same song/DJ. But the IDs were different. That’s a good pull and something neither the Grundig nor Insignia could pull off.
The dynamic bass boost is a horrible sounding gimmick, though. It makes everything sound muddy on my “real” headphones. I didn’t try the ones that came with it. I hate it that it lacks RDS, since so many Sangean radios have that and it makes DXing more interesting. The AM has a weird squelch like damping when it’s on an empty channel. If there’s a weak signal there (like my semi-local but hard to hear WABF out of Fairhope) it just sits there, perfectly quiet. It’s not until I used the Tecsun loop with it that reasonably clear audio came out of nowhere. I strongly suspect it’s “muting” weak signals on purpose on AM.
WWL is a moderate but noisy target here; the signal strength is usually good enough for even basic radios to pick it up… Not this Sangean. It took careful alignment before I heard anything. The slightest bit of movement and it went almost completely deaf again. Very odd.
It’s a shame that conditions for FM DX have been so poor on the coast this year, I think this would be a killer DX machine on FM. My friend in Florence has heard Mexico and Wyoming this year. I’ve barely made anything further west than New Orleans, which is pitiful.
Another plus is it drives my large Sennheiser headphones louder than any other “pocket” radio in my collection.
Thanks for sharing your review, Tom!
I sounds like the DT-160’s AGC or soft mute on the AM broadcast band is causing otherwise intelligible signals to drop out.
At time of posting, I’m still running the battery endurance test of the Sangean DT-160CL vs. Sony SRF-39FP, so I haven’t really given the DT-160CL (the correctional version of the DT-160) a proper receiver performance test. I will soon enough, though!