Tag Archives: Elecraft KX2

Latest Elecraft KX2 firmware includes AM reception improvements

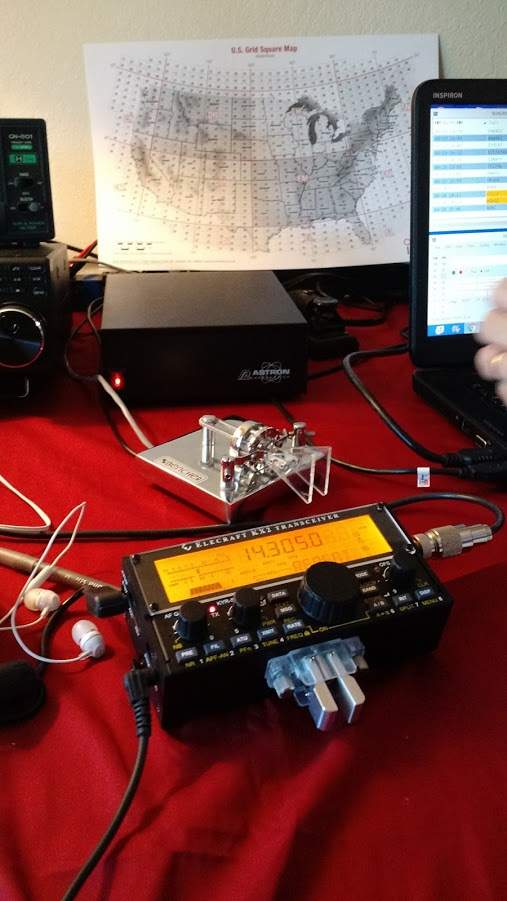
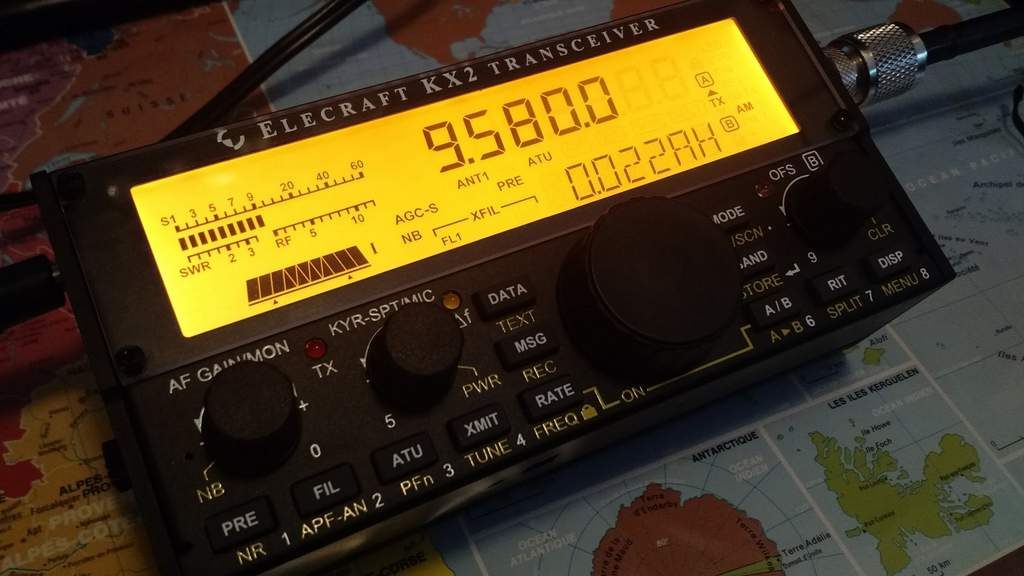
As I’ve noted in the past, I love my Elecraft KX2 and routinely use it for SWLing. I just learned that Elecraft has published a new KX2 firmware update that even includes some minor tweaks for AM mode reception. A proper nod to the SWLs in the Elecraft community.

From the release notes:

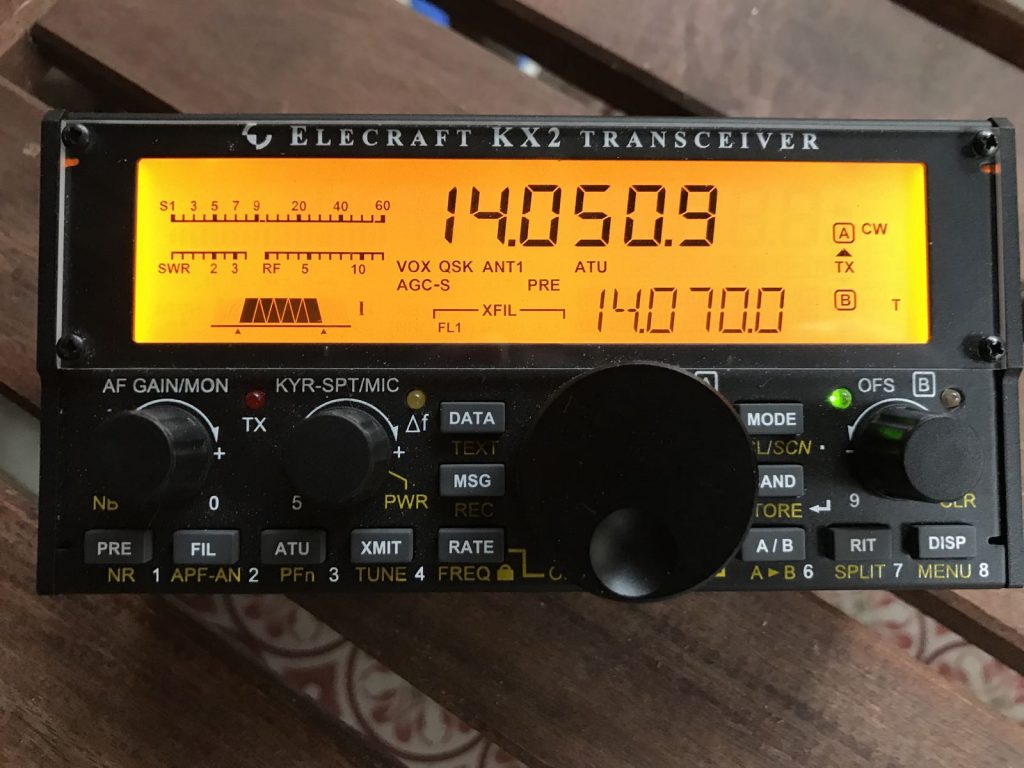
AM Receive: AM mode can provide a “warmer” sound when used to copy shortwave broadcast stations, and VFO tuning is less critical than when using SSB modes to copy AM. MENU:VFO CRS provides coarse-tuning selections of 1, 5, 9 and 10 kHz for AM mode.

Click here to visit the Elecraft Firmware and Software page to download the firmware and install utility.

Spread the radio love

Taking the Xiegu G90 QRP transceiver to the field!

Earlier this week, I took delivery of a new Xiegu G90 general coverage QRP transceiver. I’m reviewing this portable rig for The Spectrum Monitor magazine. Although this Chinese manufacturer has been around for a few years, this was my first purchase of a Xiegu product.

I’ve had the G90 on the air from home for a couple days, but I feel like the best way to test a QRP transceiver is in the field!

Due to the Covid-19 lock-down and a number of our regional parks either being closed or severely limiting visitors, I haven’t made many POTA (Parks On The Air) activations this year.

Recently, however, North Carolina has been opening state parks and allowing visitor access to hiking trails and picnic areas, but keeping all facilities (stores, cafes, visitor centers, and restrooms) closed to the public.

Yesterday, our family decided to pack a picnic lunch and head to Mt. Mitchell State Park (POTA site K-2747). My wife knew I was chomping at the bit to play radio in the field and actually made the suggestion. (She’s a keeper!) 🙂

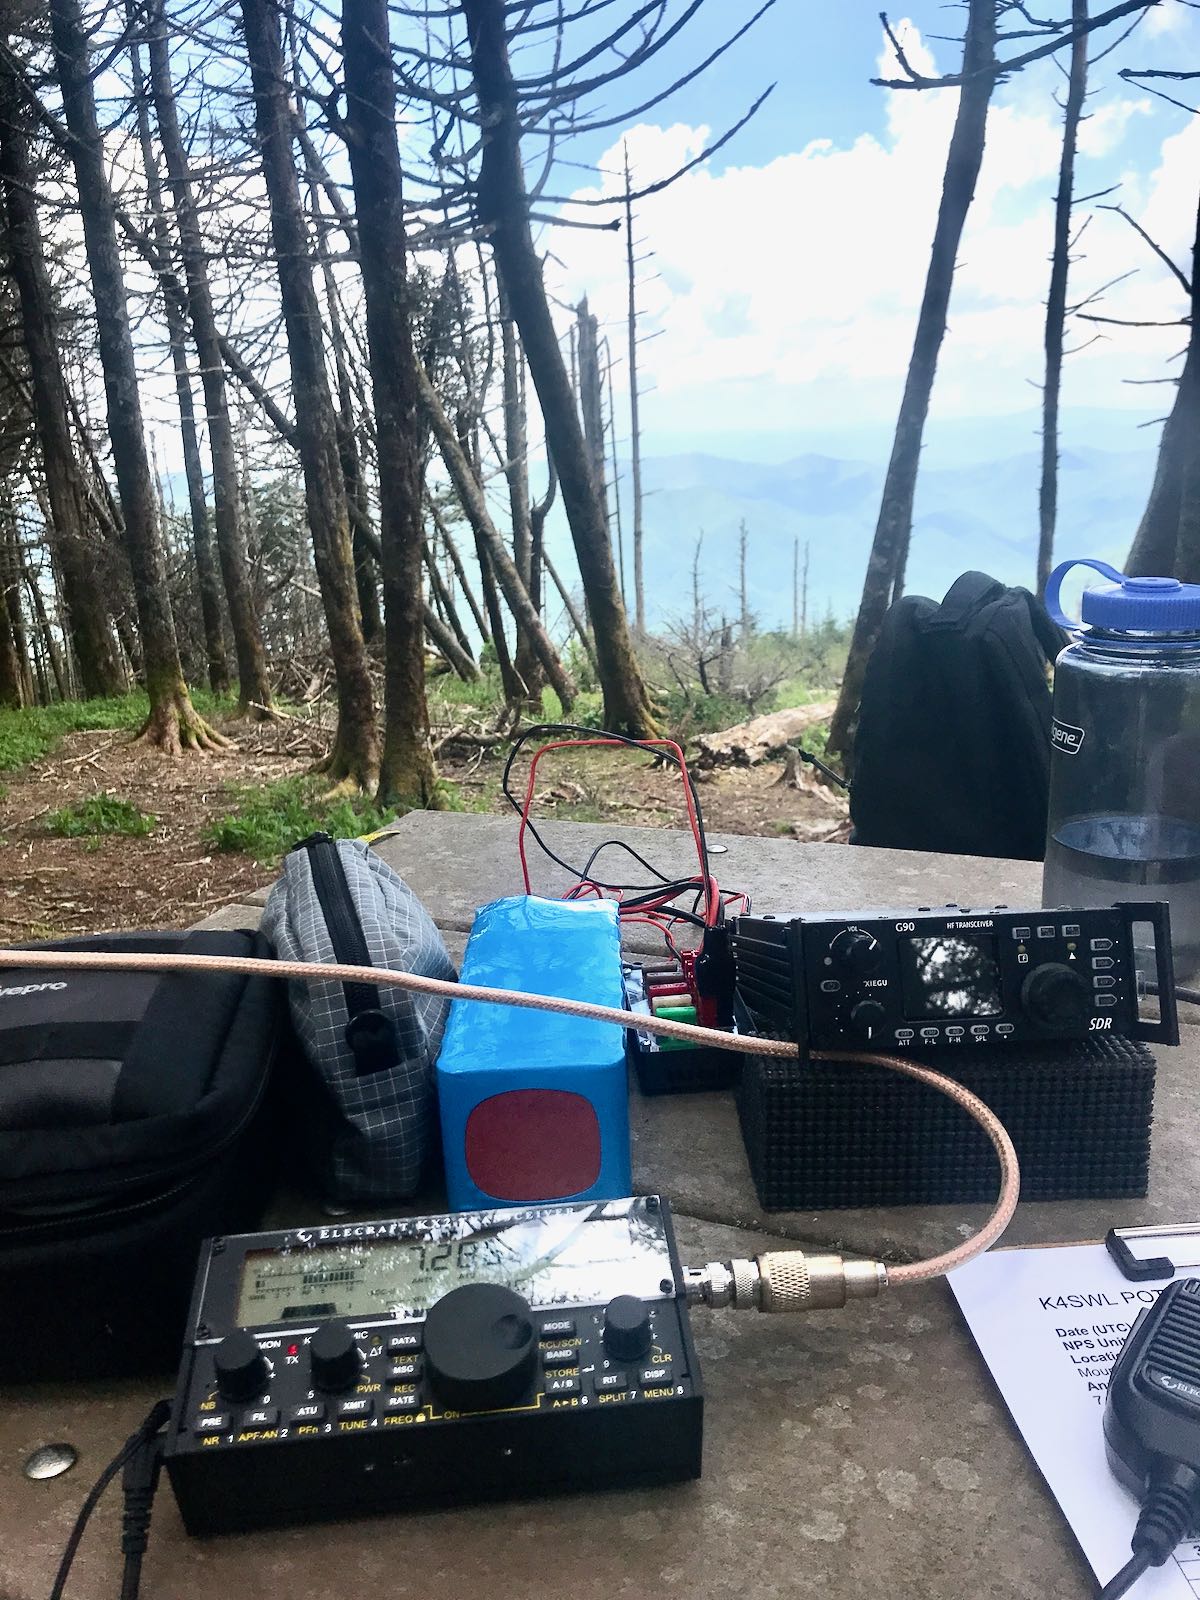
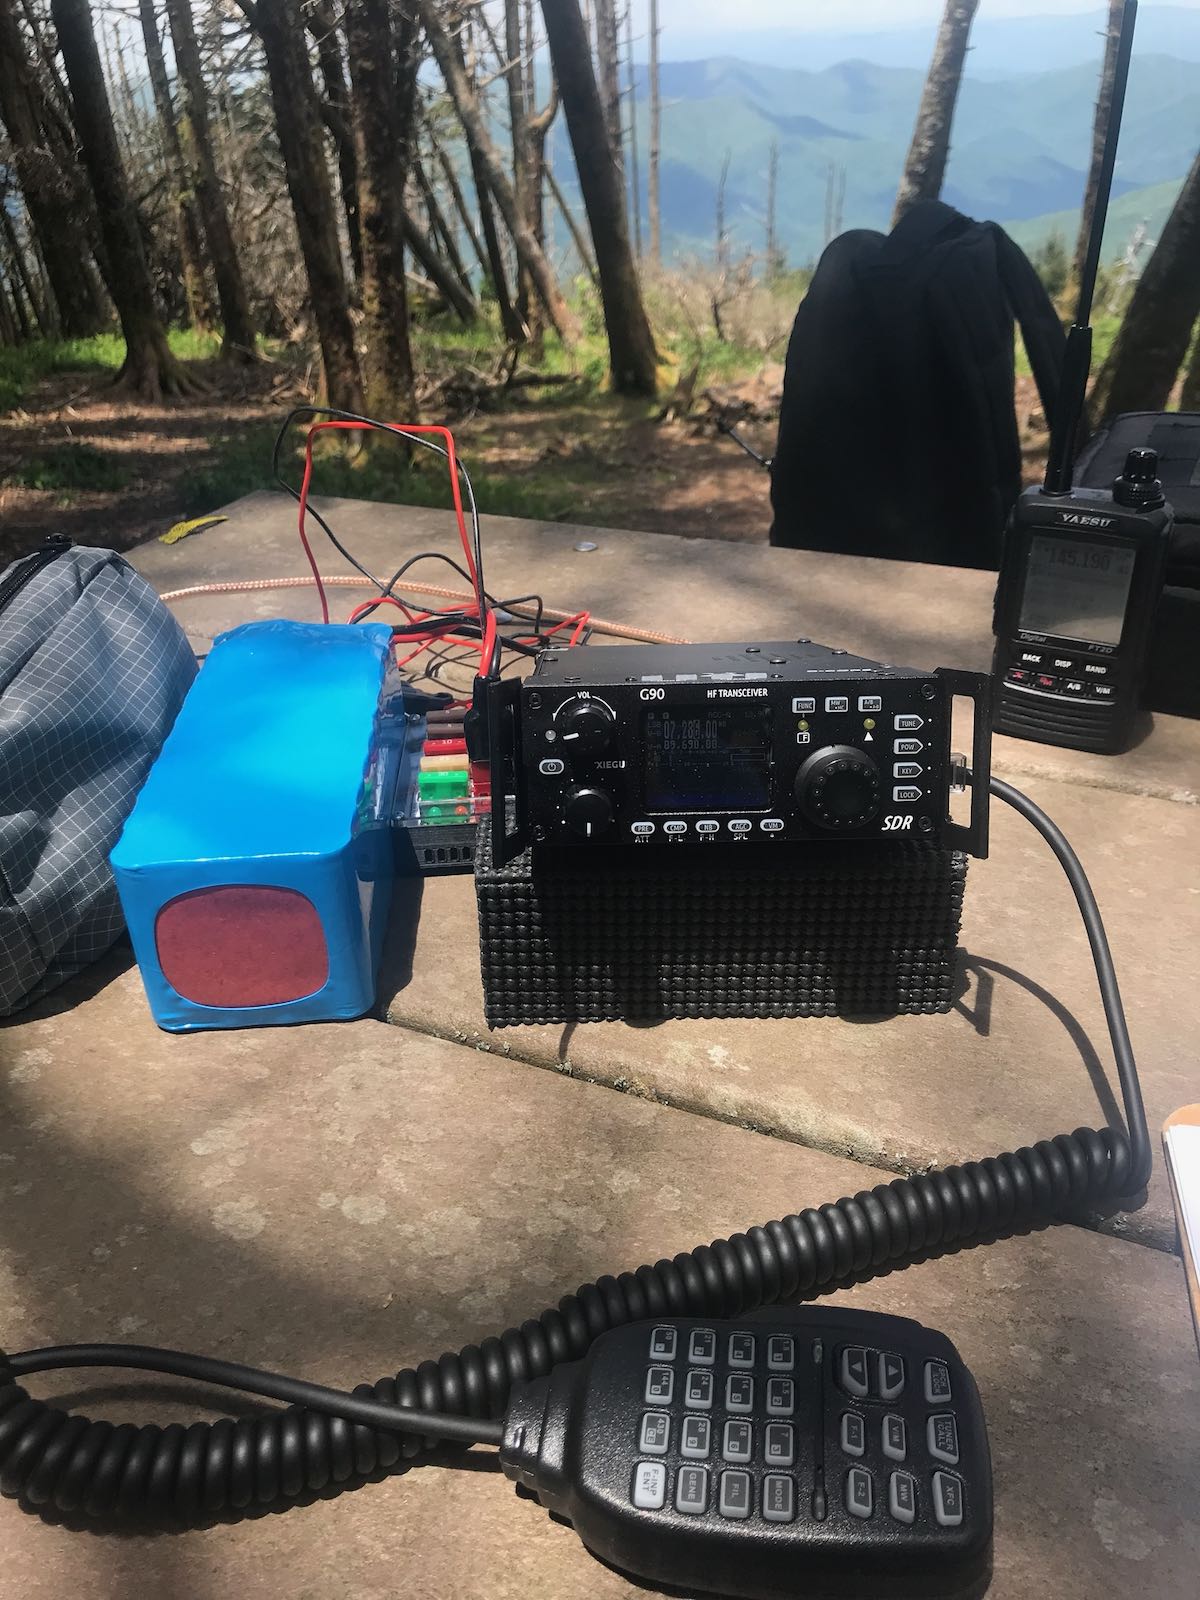
There were only a dozen people at the park so we essentially had the place to ourselves. Better yet, it gave me the opportunity to pick out the most ideal picnic site to set up and deploy my EFT Trail-Friendly 40/20/10 antenna.

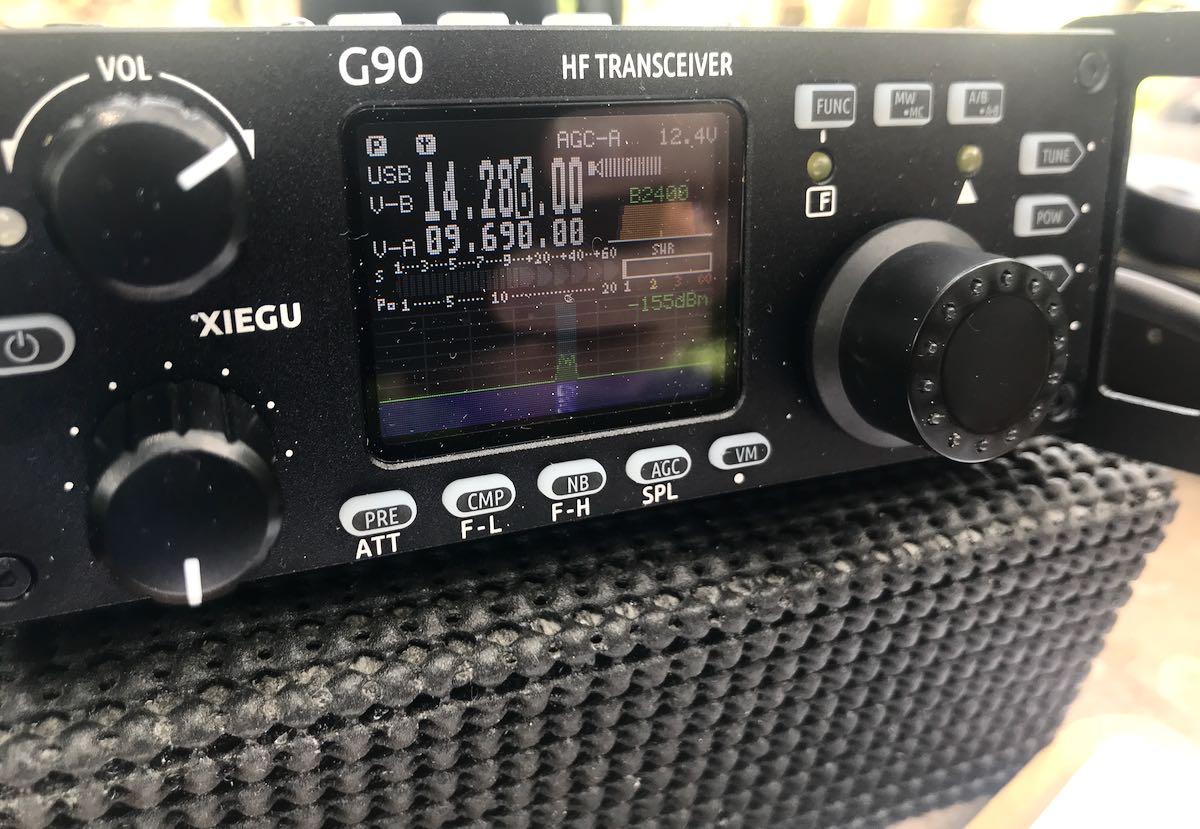
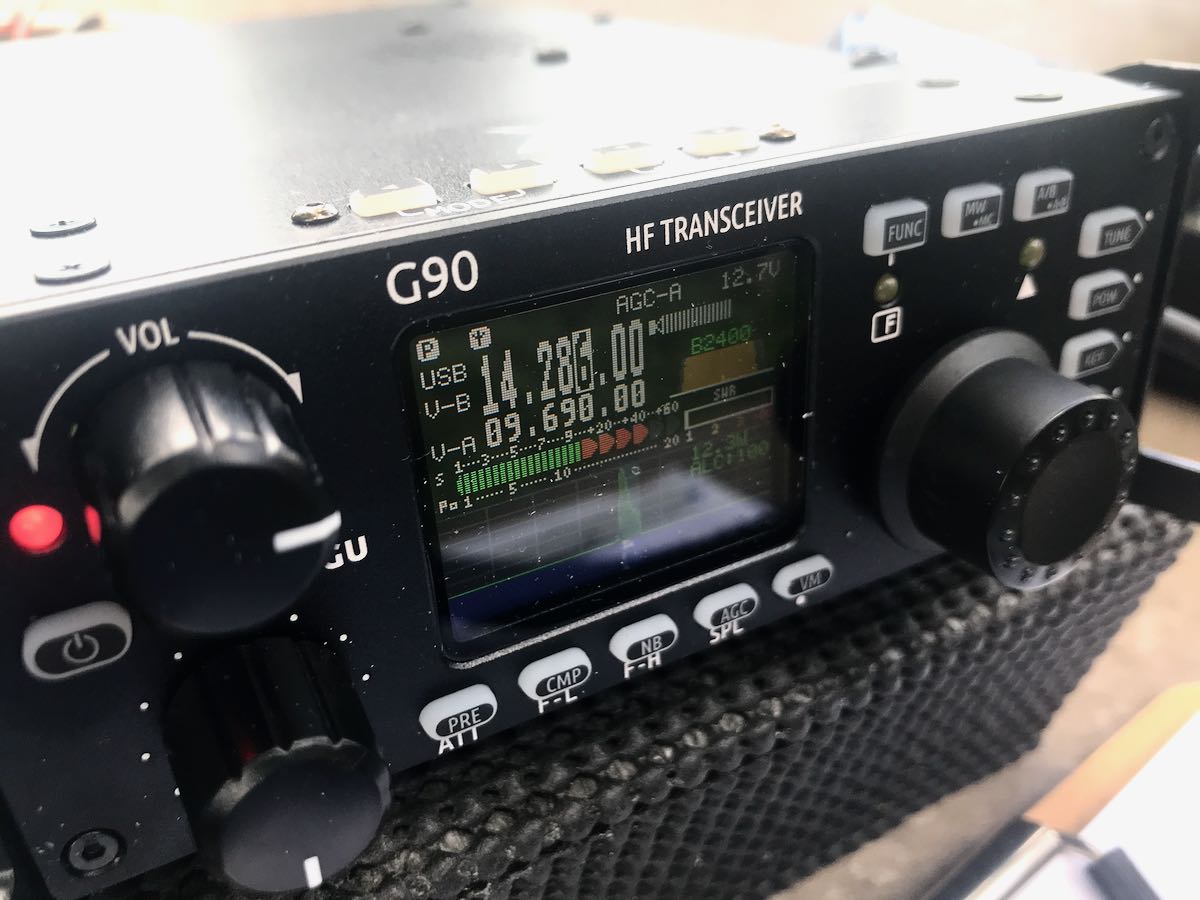
The G90’s backlit color display was actually quite easy to read in the field. My phone’s camera filter made it look darker than it actually was.

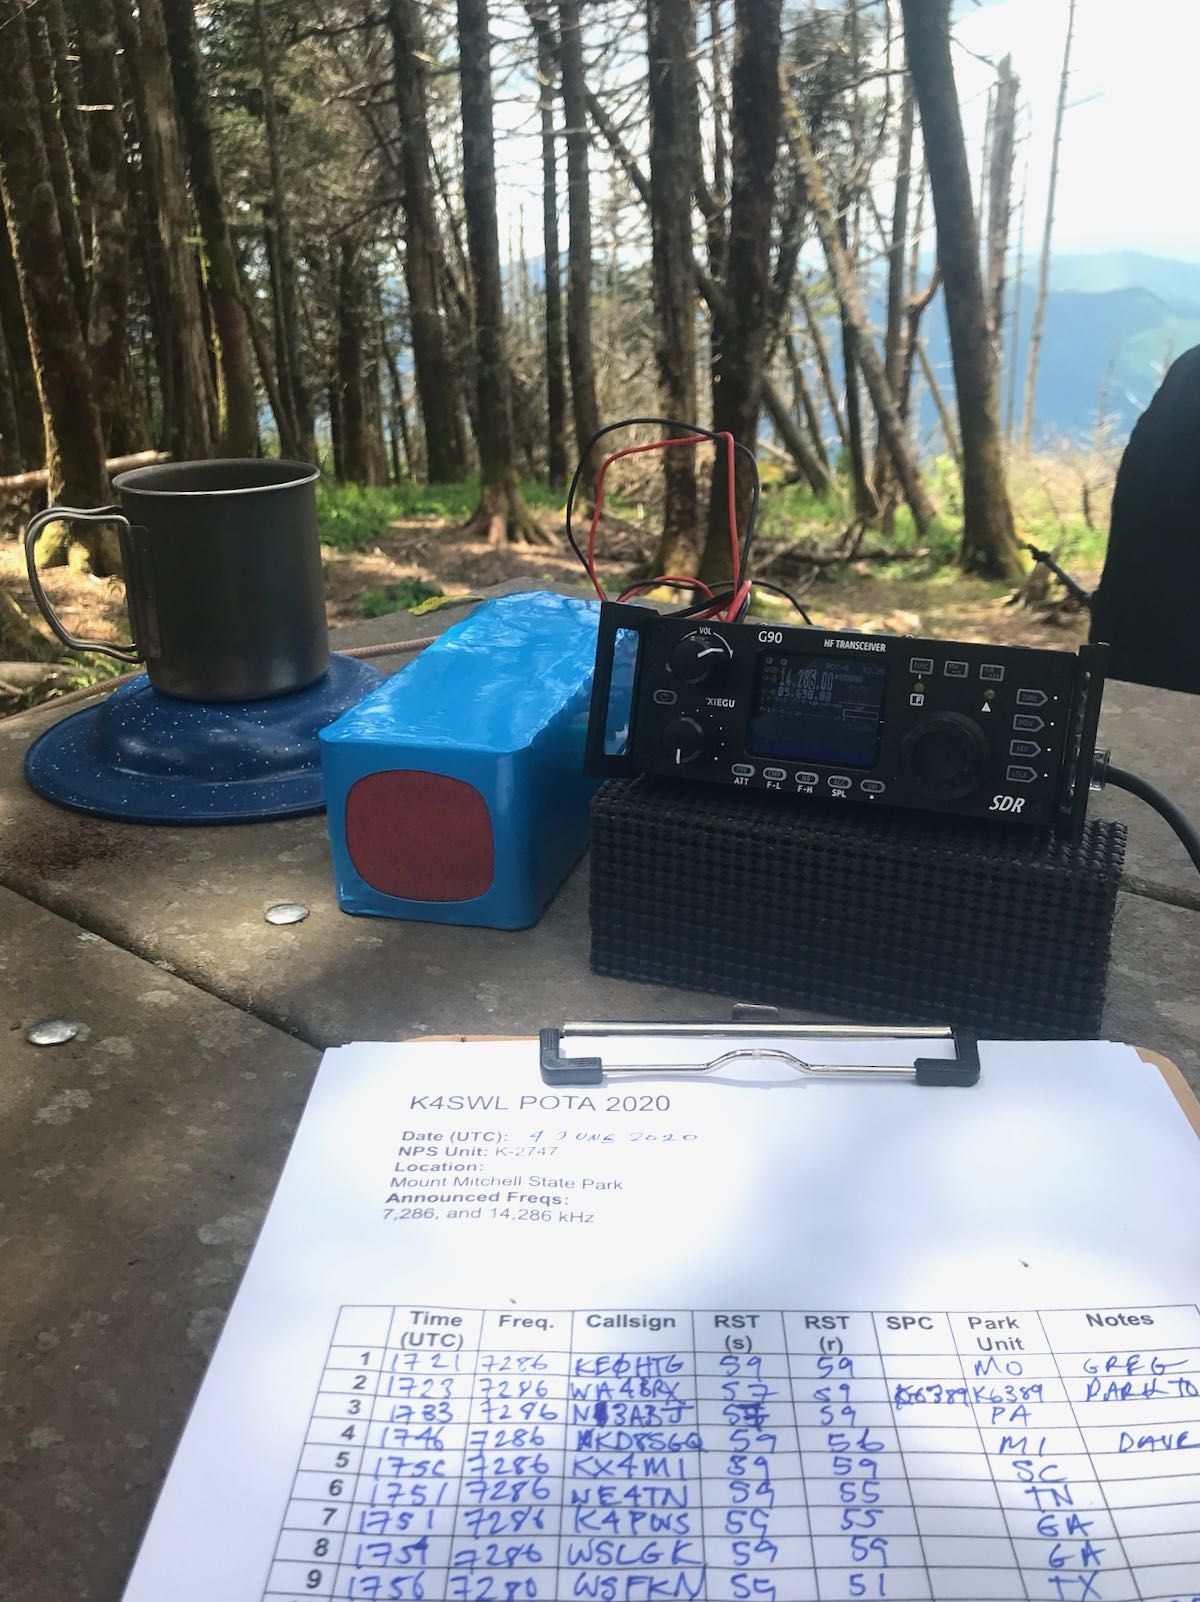
My POTA activation was unannounced and I didn’t have Internet access to self-spot on the POTA website, so I started the activation old school by calling “CQ POTA” until someone happened upon 7286 kHz.

After perhaps 10 minutes of calling CQ, Greg (KE0HTG)–a helpful POTA chaser–finally found me and spotted me on the network.

I worked a few stations in succession, but summer QRN levels were incredibly high and I believed static crashes were cloaking would-be contacts. The G90 has no RF Gain [Actually, thanks to this feedback, I now know the G90 does indeed have an RF Gain control (firmware version 1.73 and higher).] I asked one kind operator if he would hold while I switched over to my trusty Elecraft KX2.

The KX2 did a much better job managing the noise and that same op was easily readable where with the G90 I could barely copy him. I suspect I could have tinkered with the G90’s AGC levels to better mitigate the noise, but I didn’t want to do this in the middle of an activation.

I worked about fifteen stations with the Elecraft KX2 on 40 meters.

One real advantage of the KX2 during a POTA activation on SSB is its voice memory keyer (of course, it also has a CW memory keyer). I simply record my CQ and have the KX2 repeat it until someone replies, then I hit the PTT to stop the recording. Not only does this save my voice, but it also gives me an opportunity to eat my lunch while calling CQ!

I eventually moved up to the 20 meter band and switched back to the Xiegu G90.

On the 20 meter band, the G90 handled conditions like a champ.

Someone eventually spotted me on 20 and I worked a few stations.

The 20 meter band was very fickle and unstable yesterday. For example, I struggled to finish a contact with an operator in Massachusetts, yet got a solid 59 report from Spain with only 20 watts.

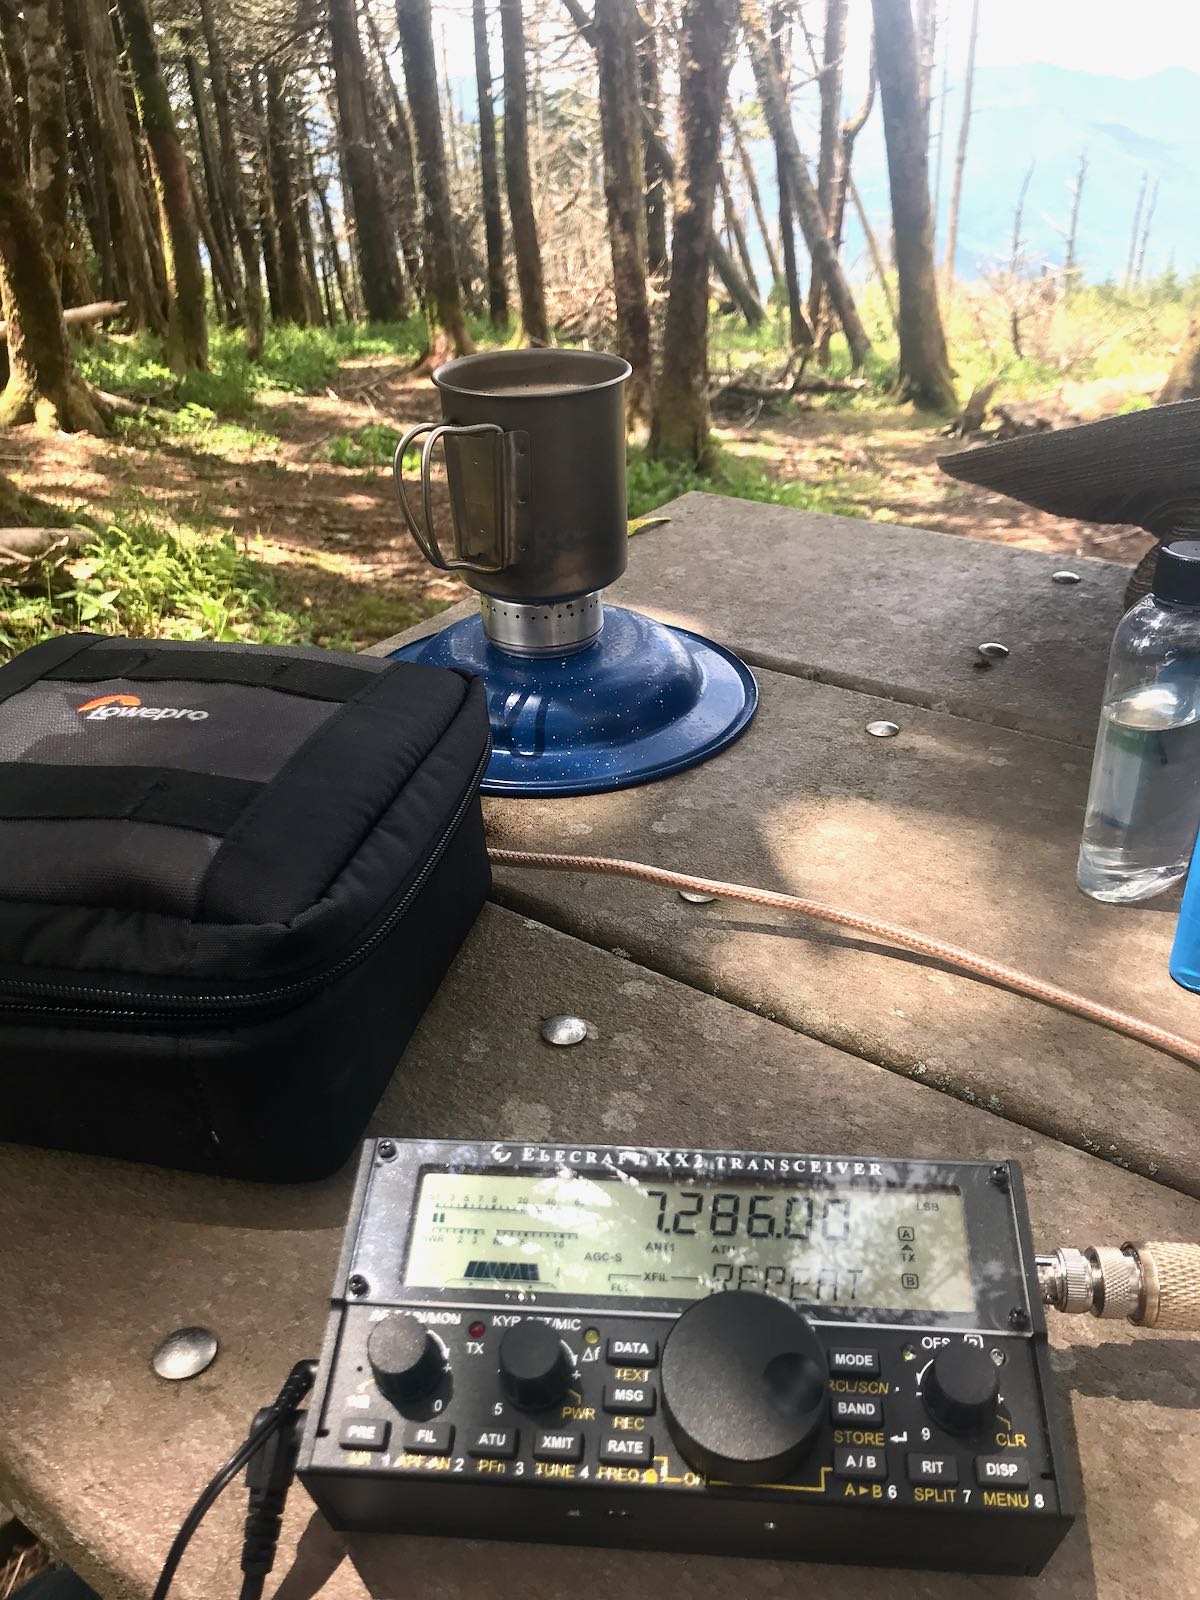
No activation is complete without brewing a cup of coffee on the alcohol burner!

I had a great time with the G90 in the field. I can see why it’s become such a popular transceiver as it offers incredible bang-for-buck (it can be purchased new as low as $450 US shipped).

This week, the noise levels on the 40 meter band should be very high here in North America, so I plan to spend more time with the G90 settings and see if I can mitigate the QRN a little better. I’d welcome any tips from G90 owners.

And yes, I’m already eyeing a couple of parks to activate next week!

Post Readers: Please comment if you’re familiar with the Xiegu G90 or any of the other Xiegu transceivers.


Do you enjoy the SWLing Post?

Please consider supporting us via Patreon or our Coffee Fund!

Your support makes articles like this one possible. Thank you!

Spread the radio love

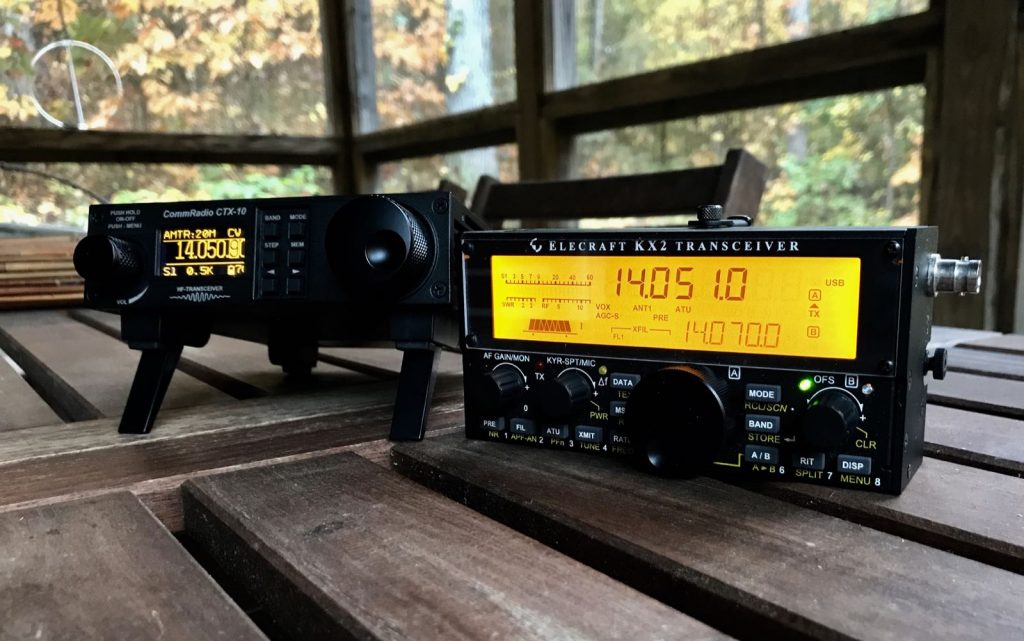
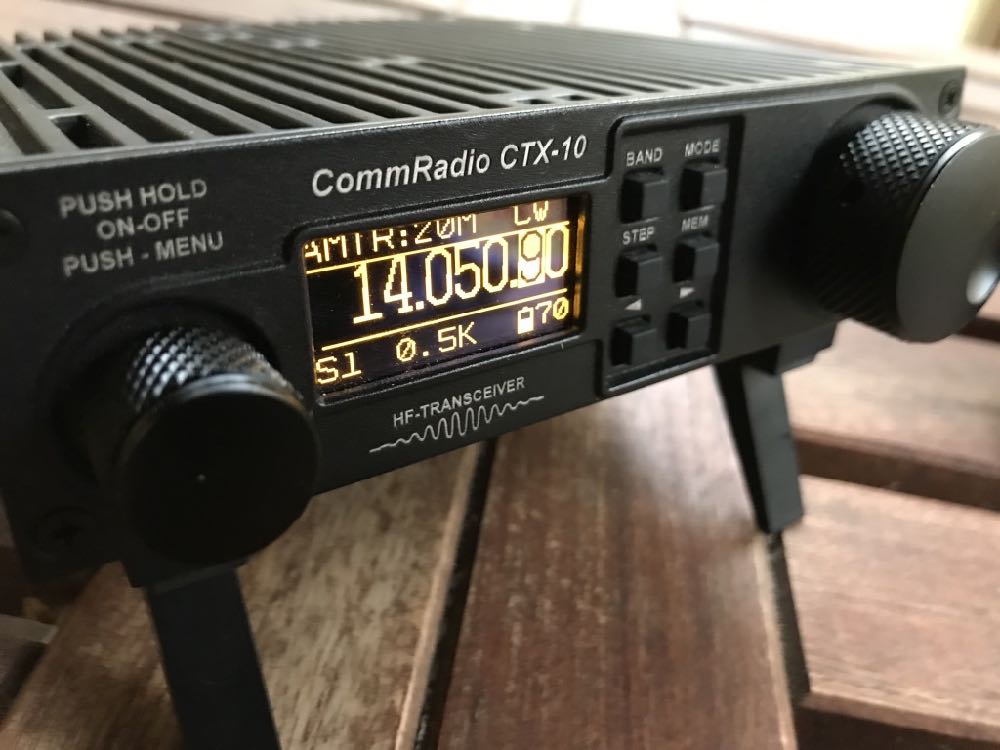
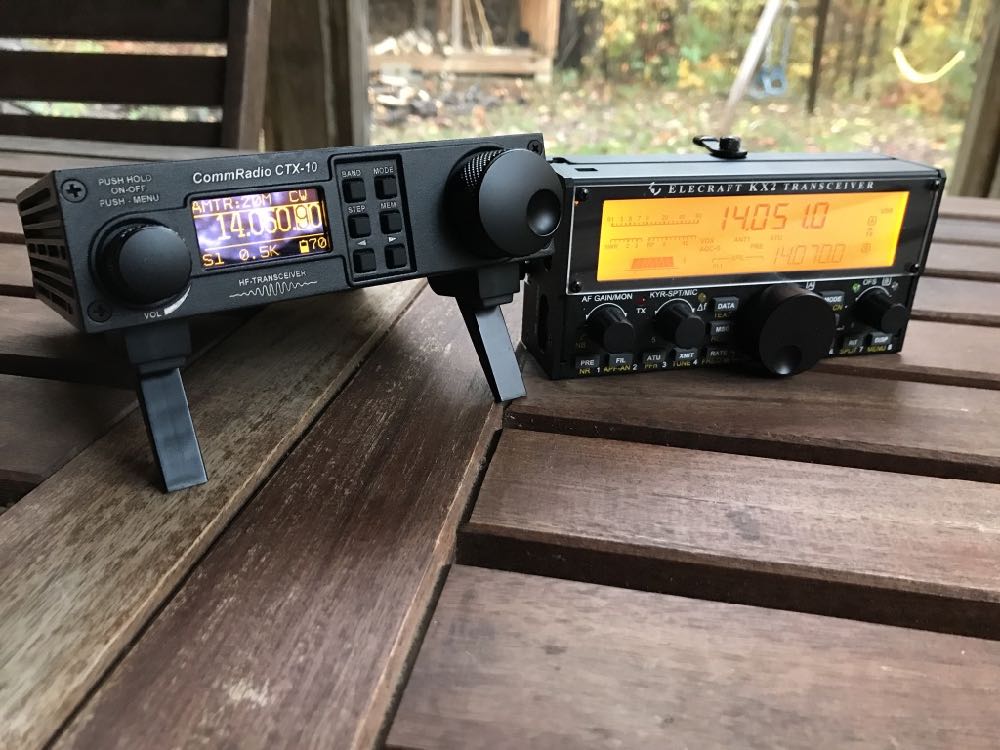
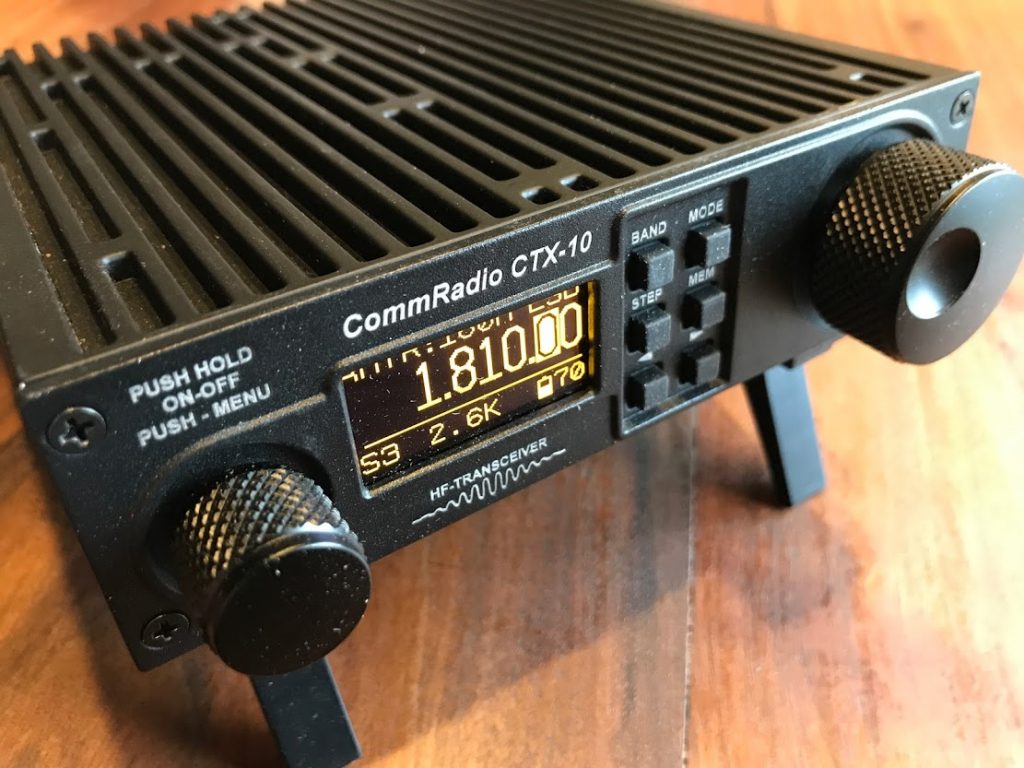
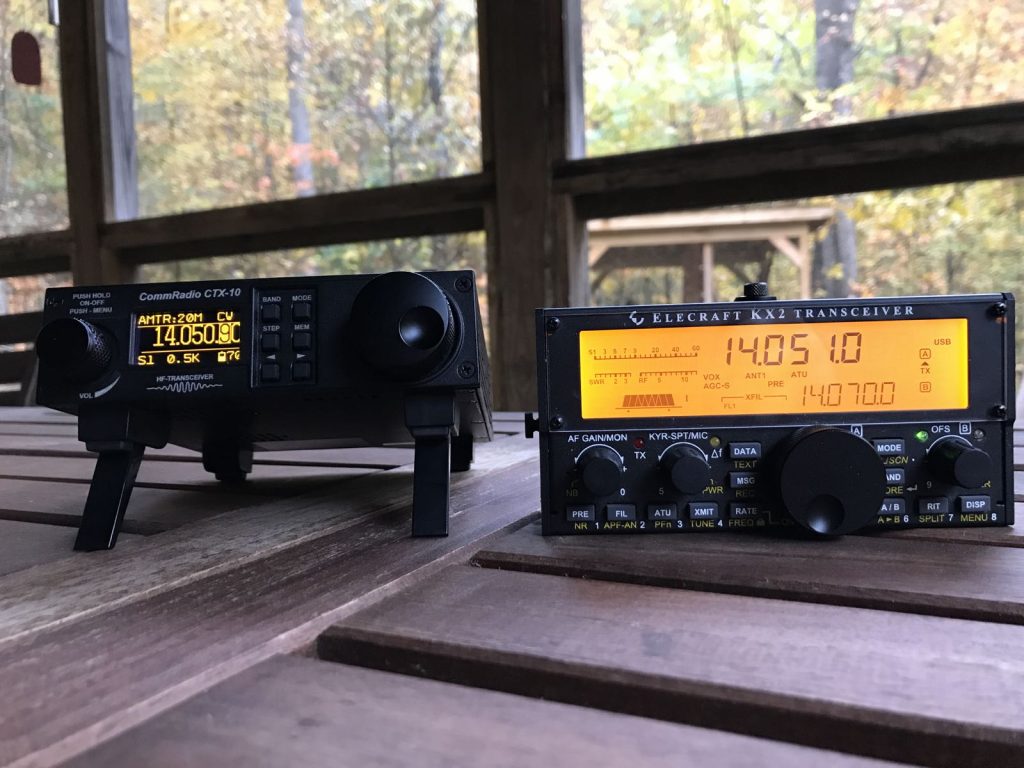
A Tale of Two Radios: CommRadio CTX-10 vs. Elecraft KX2

The following review first appeared in the February 2020 issue of The Spectrum Monitor magazine.


A Tale of Two Radios: CommRadio CTX-10 v Elecraft KX2

As my blog readers often point out: Why focus on low-power (QRP) ham radio activities when propagation is so dismal…even for high power stations?  A logical argument, I’ll admit, and lately it’s become a common theme in QRP discussion.

But I’ve said it before, and I’ll say it again: despite the current stagnation of the sunspot cycle, we’ve been seeing a very curious uptick in low-power radio innovation. Manufacturers have been churning out QRP transceivers at a rapid rate during this solar lull, and I can assure you, it’s a strategic move that the marketplace rewards.

So, why should this be? I attribute the influx of QRP radios to several factors.

First of all, leveraging innovations in SDR (software defined radio) design, it’s simply become less expensive to produce portable low-power radios with extra features. In other words, manufacturers can now offer more radio bang-for-buck. Similarly, the technology is accessible enough that even smaller manufacturers can produce competitive products.

Secondly, the new-found popularity of field activities––such as Parks On The Air (POTA) and Summits On The Air (SOTA)––fuel the need for field-portable, all-in-one transceivers. Anyone who falls in love with field portable operation, and it’s easy to do, will quickly discover how handy it is to have a dedicated radio for these activities.

However, it’s not always competition that pulls radio operators to the field. With so much QRM (human-generated interference) at home or in built-up areas, many operators and radio enthusiasts now take to the field to escape the noise. Likewise, many operators live in restricted communities that don’t allow for permanent antennas, so it’s in their best interest to make their radio shack…well, portable.

And why not? Weak-signal digital modes like FT-8 have made signal-hopping across the planet with only a few watts of power easier than ever before. I’ve spoken with a number of operators who have––using FT-8––worked DXCC for the first time with stealthy, portable antenna systems, and others who have taken the dare to work DXCC only on individual bands. Such challenges are all in the name of fun.

Finally, in general, QRP transceivers are much less expensive than their 100 watt counterparts. QRP radios gain a competitive edge by omitting pricey amplification in the design, while still offering the operator DX-class features and receiver performance.

Making a choice

With so many new field-portable QRP transceivers on the market, making a choice can be difficult. Still, there are some guidelines that will help you eliminate a number of models.

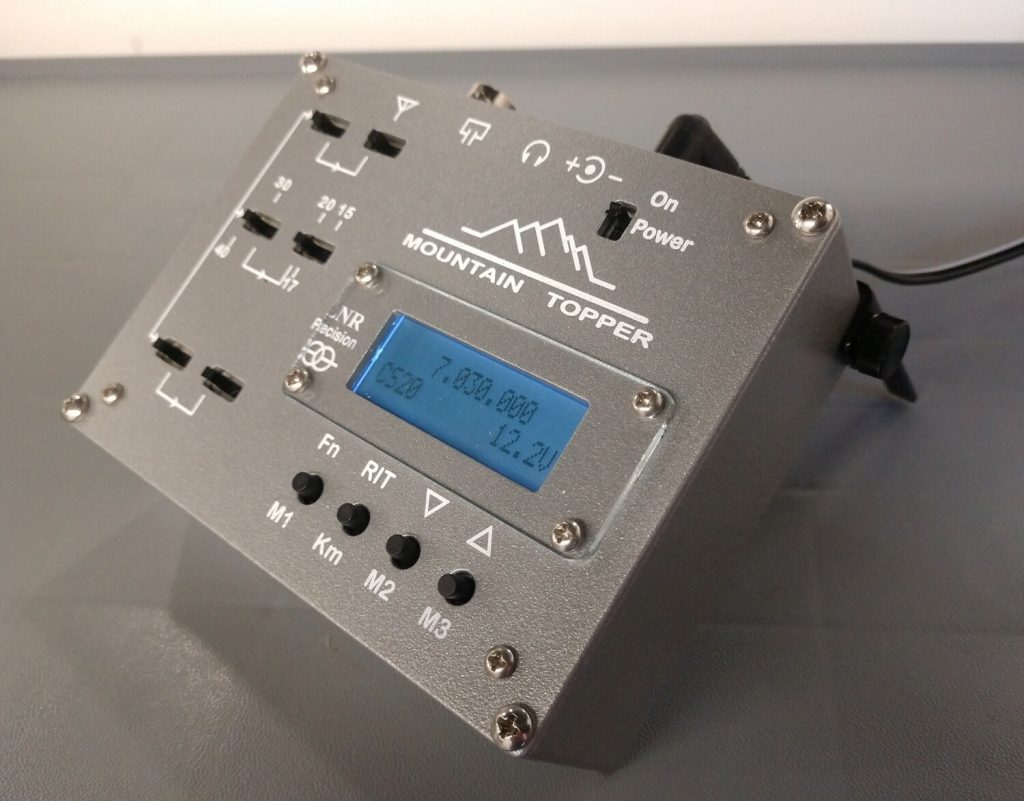
The Mountain Topper MTR5B

For example, if you only plan to operate CW and don’t need a general coverage transceiver, you can effectively eliminate all of the priciest QRP transceivers. CW-only transceivers like the popular Mountain Topper series are incredibly portable, durable, and half the price of full-featured multi-mode transceivers.

Also, if you use resonant antennas, there may be no need for an internal or external antenna tuner––this can save you upwards of $200. If you prefer using an external battery, there may be no need to purchase a model with an internal battery option.

In this article, however, we’ll be looking specifically at two general coverage QRP transceivers that are very much all-in-one. With an antenna, mic and/or key, these radios will get you on the air in a matter of seconds.

Our competitors


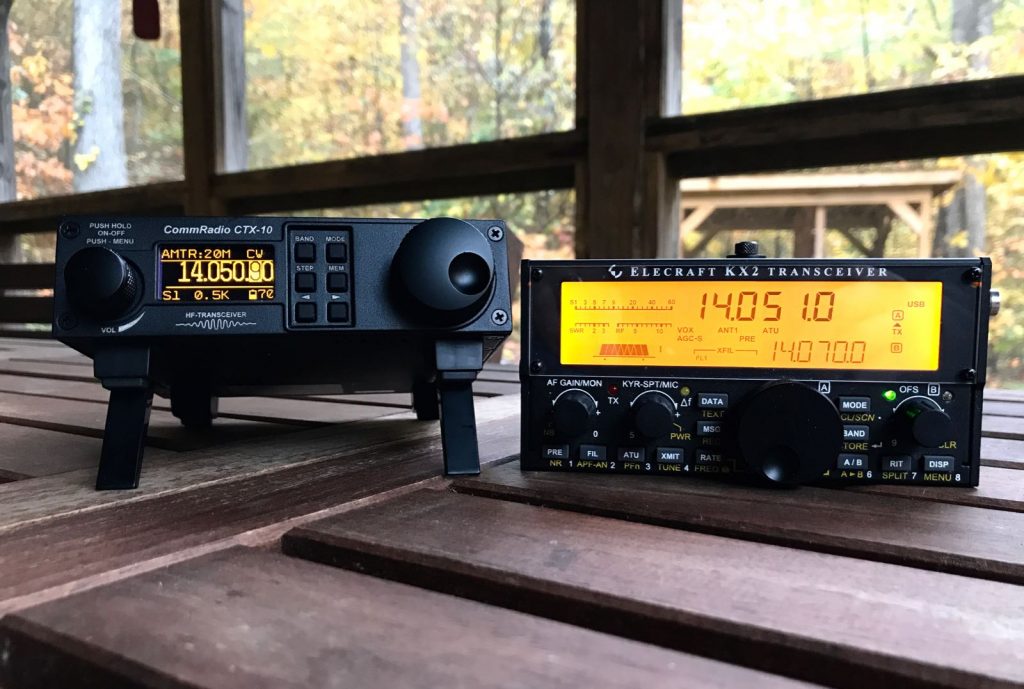
Over the past year, I’ve received numerous emails and comments asking for advice choosing between two specific radios: the recently reviewed CommRadio CTX-10 and the Elecraft KX2.

I’m not surprised, because both of these field-portable QRP transceivers sport similar basic features and options, e.g.:

  • Ham band coverage from 80 – 10 meters
  • General coverage receiver
  • Internal batteries
  • Built-in ATU
  • Small and lightweight
  • Designed and built in the USA

Although the CTX-10 and KX2 share the same goal of functioning as an all-in-one, grab-and-go field radio, I believe they have very different appeal. 

Herein lies the key to choosing the right rig for you, and the point I hope to prove in this article: it’s based on your personal operation philosophy.

The Elecraft KX2 is the “Swiss army knife” transceiver. It has an amazing array of capabilities, features, and adjustments, yet is incredibly compact and could easily fit in your jacket pocket. Moreover, the KX2 is backed by Elecraft, one of the most successful amateur radio manufacturers in business.

The CommRadio CTX-10, on the other hand, was designed with a basic feature set in mind, dead-simple operation, and near mil-spec quality inside. The CTX-10 is the transceiver iteration of the popular CR-1 series receiver by CommRadio.

When I’m asked which radio is best, I respond with a series of questions––because I first need to discover what type of operator the potential user is, to give him/her a good recommendation. Below, I’ll break down some of the key questions to help guide you in making a decision between these two transceivers.  Note that these questions are ones that should be asked when purchasing pretty much any transceiver.

Do you plan to engage in more ham radio operation, or broadcast listening?

True, since the CTX-10 and KX2 are both general coverage transceivers, either radio can serve. But if you’re primarily looking for a broadcast listening radio and you might only occasionally hop on the bands to make casual ham radio contacts, then you should give the CTX-10 some consideration.

The CTX-10 is essentially a transceiver version of the excellent CR-1a receiver. It is better equipped for listening to broadcasts than the KX2 because it has three AM filter settings: 5, 7.5, and 15 kHz. In contrast, the KX2 AM filter can only be widened to about 5 kHz. CTX-10 AM audio fidelity is superior to that of the Elecraft KX2.

In addition, the CTX-10’s receiver coverage dips down to 150 kHz and it’s quite capable on the mediumwave band. The KX2’s receiver covers 3 MHz – 32 MHz and  0.5 – 3 MHz with “reduced sensitivity.” In other words, the KX2s receiver architecture is designed for the ham bands, thus mediumwave sensitivity is suppressed on purpose. I’ve certainly listened to mediumwave stations on the KX2, but only to local, strong stations. You could never hop into mediumwave DXing on the KX2 like you can on the CTX-10.

With that said, if you’re primarily looking for a ham radio transceiver for operations in the field, and you might only occasionally do shortwave radio listening, then you should give the KX2 serious consideration. In my opinion, the KX2 is simply a more capable, adaptable ham radio transceiver than the CTX-10. (More details on this point to come.)

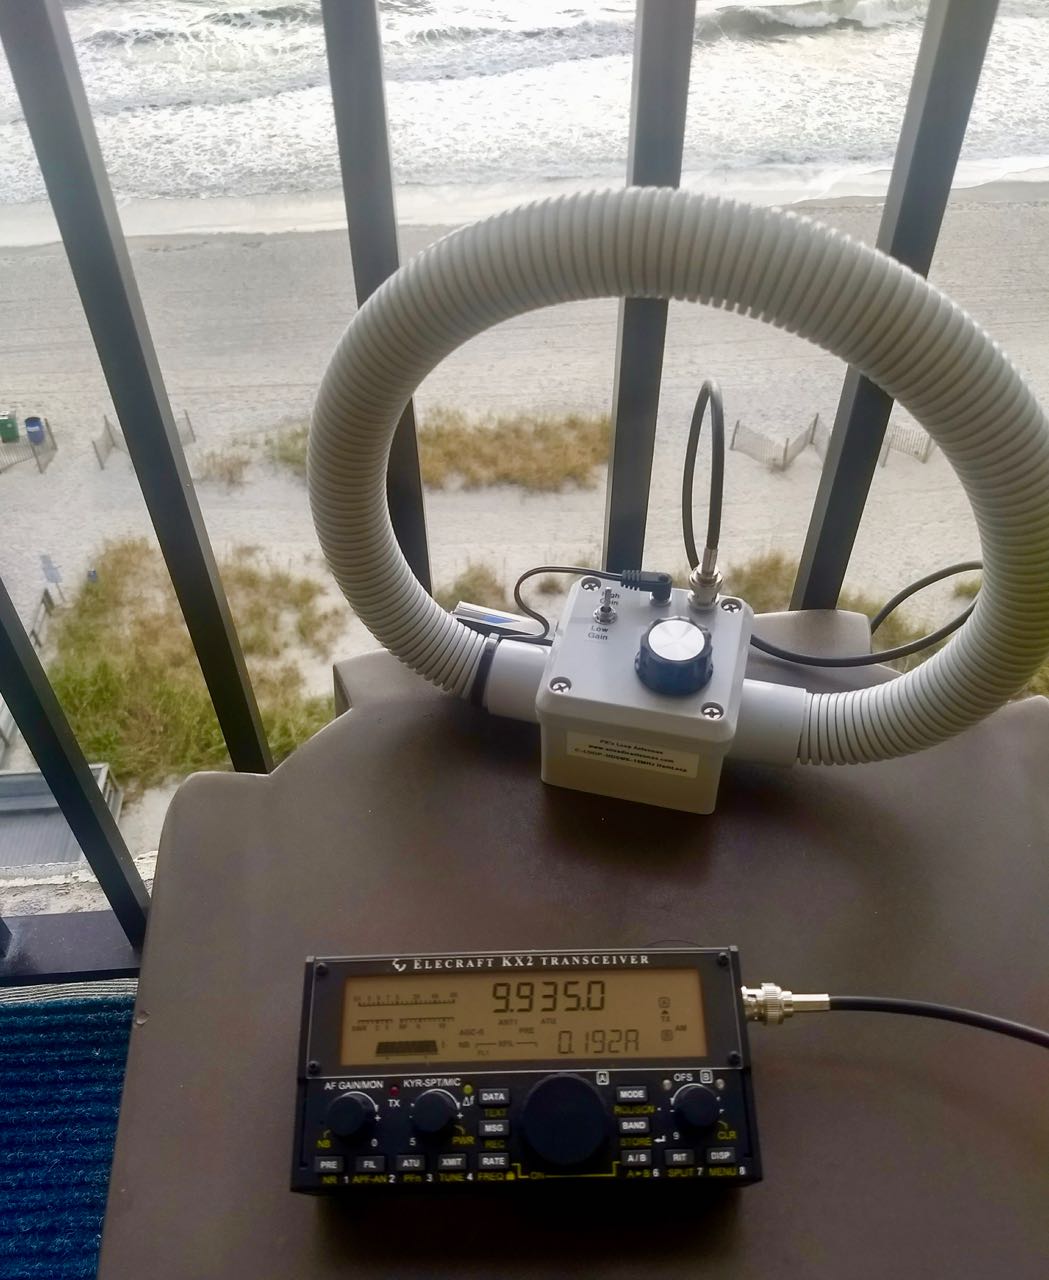
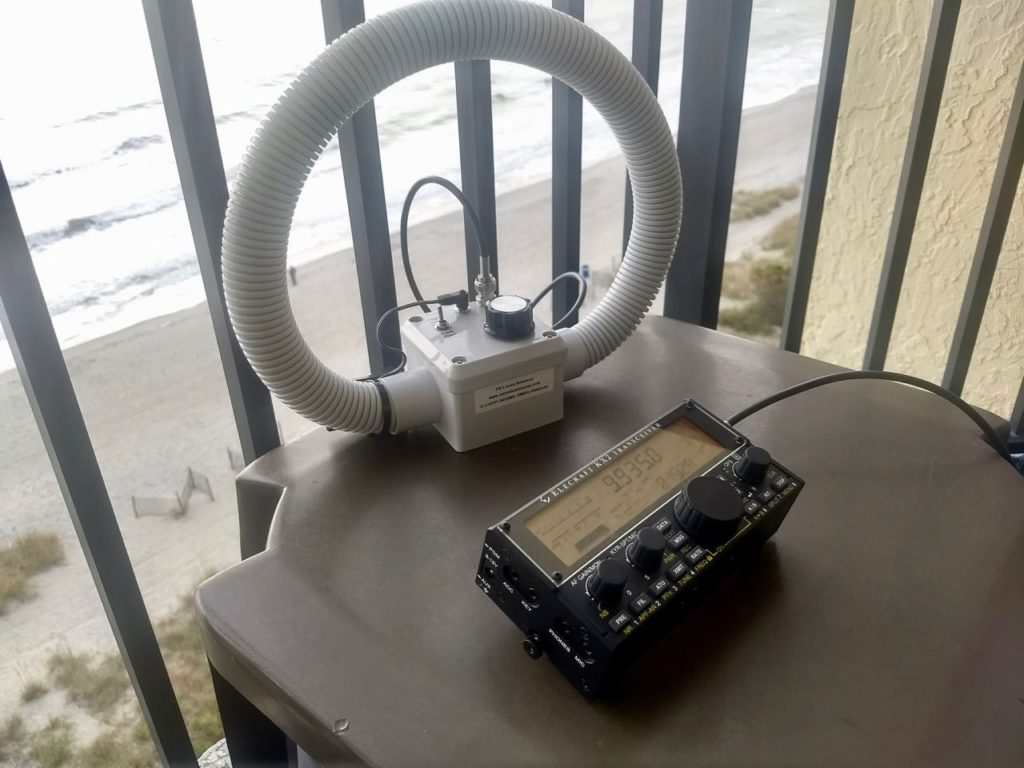
The Elecraft KX2 doing a little coastal SWLing.

Now, here’s the irony: Although I had a CTX-10 in my shack for almost a year, I still defaulted to taking the KX2 on trips when I thought SWLing might be my primary activity. Why? The KX2 has a very robust and capable HF receiver. Its only real limitations are a lack of wide AM bandwidths and sub-3 MHz frequency coverage and performance. I find that the KX2’s 5 kHz AM filter sounds pretty good, though; when using headphones, the KX2’s simulated stereo audio effect really makes the audio sound broad and pleasant. I also rarely use ham radio transceivers to do mediumwave or longwave DXing––I use dedicated portables like my Panasonic RF-2200, or an SDR––so mediumwave and longwave reception is never a serious limitation for me.

But, again, if you primarily plan to do broadcast listening, the CTX-10 is the stronger of the two choices.

Are you looking for a feature-packed radio that can be tweaked and adjusted on a granular level?

If so, you’ll definitely want to choose the KX2 over the CTX-10. The CTX-10 has an incredibly basic feature set, while the KX2, like most Elecraft radios, has an abundance of features, functions, and adjustments at your disposal.

If you want a simple, unfussy radio that automatically adjusts most user controls like microphone gain and compression, then the CTX-10 will suit you fine. If you like both automatic and manual control of your radio’s settings, the Elecraft KX2 is your rig.

How important is internal battery operation and ease of recharging?

The CTX-10 has best-in-class internal battery capacity and intelligent charging. You can literally play radio for hours on end without depleting the batteries in the CTX-10. The internal batteries can be charged via the DC power port, or even via USB cable.

The KX2 Battery

The KX2 uses an internal battery pack that must be removed each time to charge. I’ve taken the KX2 to the field more than 100 individual times and find that I can operate at full power for about one hour fifteen minutes (with a heavy amount of transmitting) before the voltage drops, and the output power, as well from about 10 watts to 5 watts. Of course, when in receive, it’ll operate for hours without recharging.

Of course, with a swappable battery pack, you can bring additional pre-charged batteries to the field to eliminate the need to recharge.

I’ve never found recharging or swapping KX2 batteries to be a problem, but internal battery operation via the CTX-10 is certainly its strong suit.

One known issue with some of the CTX-10 units: when charging the internal Li-Ion cells, my initial evaluation unit produced a high-pitched audible whine. I measured the audio frequency with a simple smartphone app and determined that it hovers around 10.5 kHz. It was quite annoying because I can still hear frequencies in that range. The second evaluation unit didn’t have this problem. If your CTX-10 has this problem, contact CommRadio for help.

Are you primarily a CW operator?

If you are a CW enthusiast, chances are great that you’ll prefer the KX2 over the CTX-10.

The CTX-10 has very few settings for CW mode. In fact, it doesn’t even (presently) have a side tone control or support iambic operation. The CTX-10 uses a traditional relay for TX/RX switching, but you can’t presently change the hang/delay time. The CTX-10 cannot do full break-in QSK.

Elecraft transceivers are designed by CW operators and sport true benchmark CW performance. The KX2 allows granular control, thus can be tailored to accommodate any operator. The KX2 has silky-smooth full break-in QSK. If you’re a CW operator, you’ll much prefer the KX2.

Are you primarily a digital mode operator?

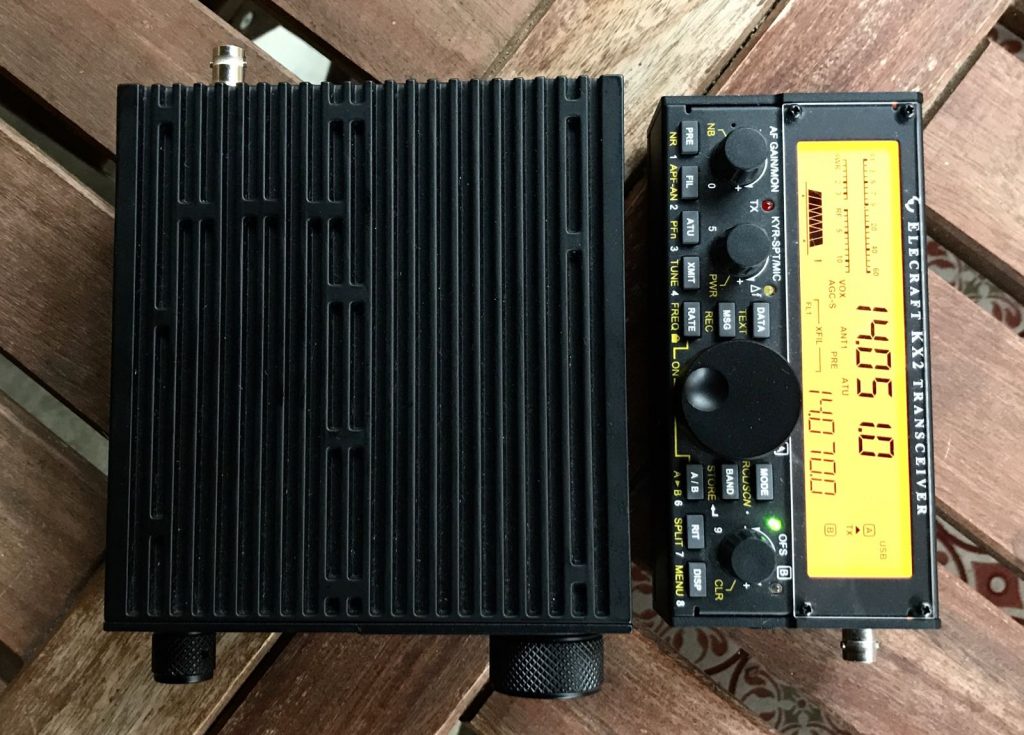
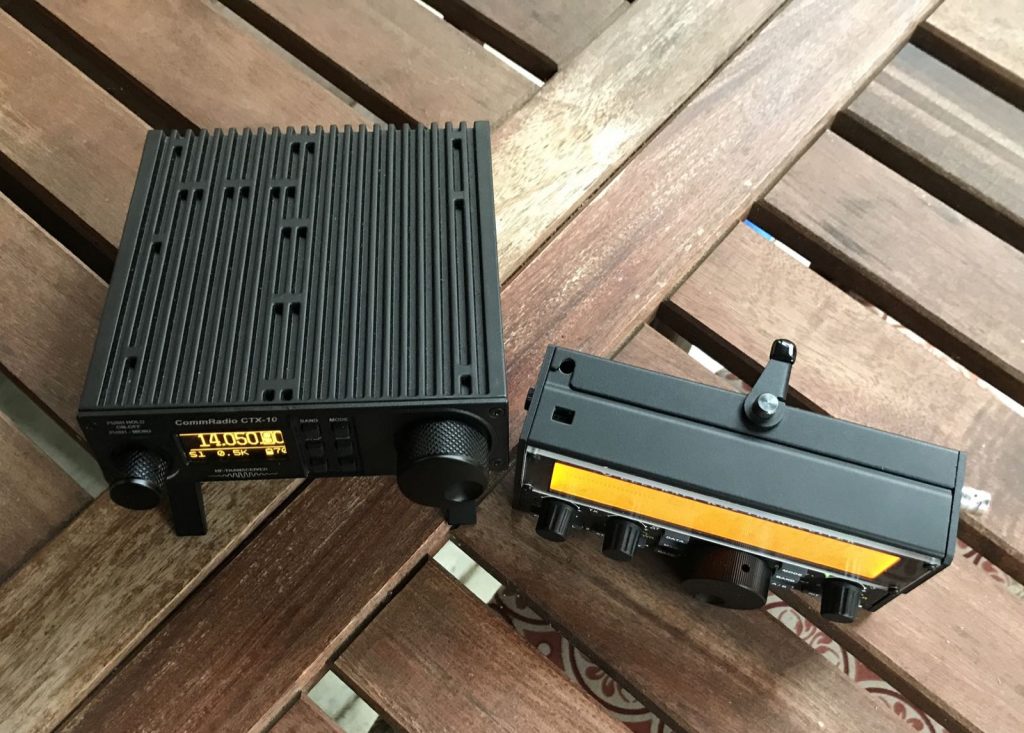
The CTX-10 body (left) is essentially a large heat sink.

If so, you’ll want to consider the CTX-10, because it can run high-duty cycle modes like FT-8 in the field without ever overheating. This is also one of the CTX-10’s strongest points.

Both the Elecraft KX2 and KX3 will decrease power output after running FT-8, for an extended period of time, to protect the finals from overheating. Operation time can be significantly extended by adding an optional third-party heat sink.  The CTX-10 does not have this issue, however, as the CTX-10 body itself is essentially a heat sink. In all of my testing, I never came anywhere close to overheating it.

Are you primarily an SSB/phone operator?

If SSB is your game, you’ll prefer the KX2.

The CTX-10 essentially has no microphone controls––in fact, it doesn’t even have an adjustable mic gain. The microphone input is completely auto-controlled by the CTX-10, via a limiting pre-amplifier, built-in compressor, and ambient noise gate. The only ways you can really affect how audio is transmitted, in fact, is by changing the distance from your mouth to the mic, and/or changing how loudly you speak into the mic.

If you have a favorite boom headset (like Inrad or Heil), note that it may not work well with the CTX-10, simply because you have no control of the mic inputs.

The KX2, on the other hand, has robust microphone controls; you can, for example, even change the EQ settings of your transmitted audio.

How important to you is the capability of your rig’s internal ATU?

The CTX-10 sports a nifty internal antenna tuner, but it doesn’t match the performance of the KX2’s internal ATU option. In my field work, I found that I needed antennas that were pretty close to resonant for the CTX-10 to match them. The ATU was certainly a handy feature on the CTX-10, but it didn’t allow me the flexibility to, for example, load up a random wire antenna.

Update (23 Mar 2020): Brian Haren informs us that with firmware update 1334 issued by CommRadio on December 18, 2019 “performance of the internal tuner was vastly improved.” This firmware was issued after my review unit was sent back to CommRadio.

The KX2’s internal ATU, on the other hand, is benchmark, and can tune via nearly any antenna––indeed, it would almost tune a metal chair, if you tried to load it. It’s as good at matching antennas as my Emtech ZM-2 balanced line tuner. In fact, I once loaded a 20-meter hex beam on 40 meters with the KX2 in order to work a rare park activation. No other radio in my arsenal could match that (well, frankly, it was asking a lot), but the KX2 not only matched the antenna, but it got an excellent match:  if memory serves, something like 2:1. (And, yes, I worked my park!)

Note that the ATU comes with the CTX-10 package, while the KX2 internal antenna tuner is a worthwhile $200 option.

Are you on a budget?

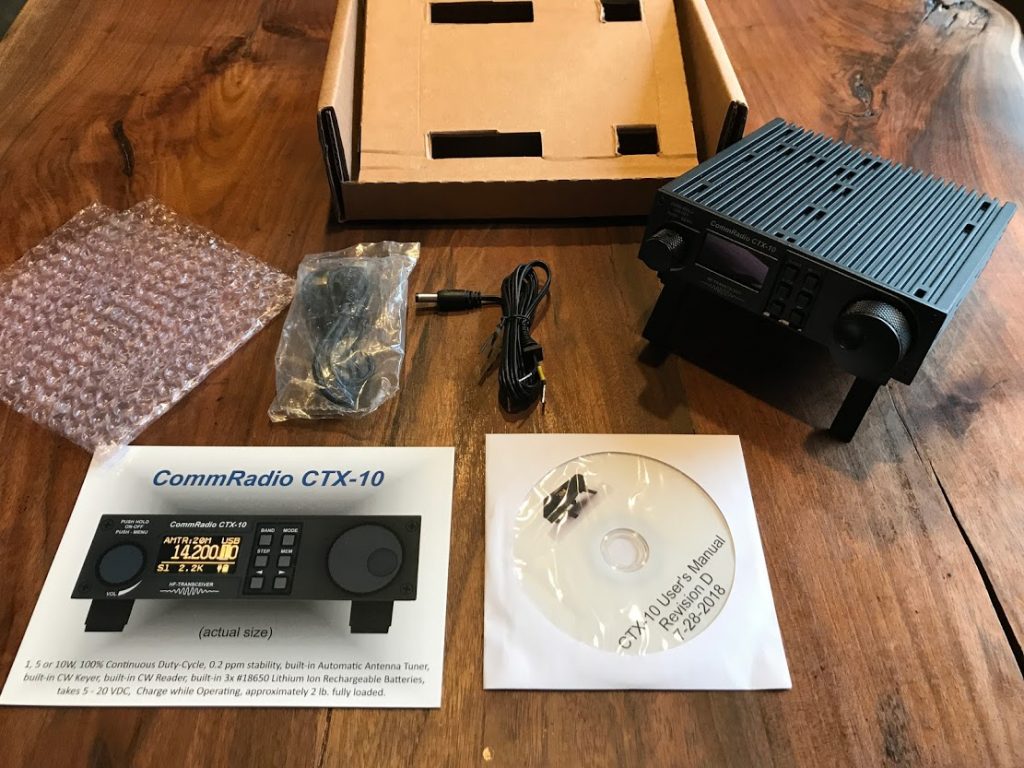
Everything included in the CTX-10 box.

When you purchase the CommRadio CTX-10 for $999.99, you’re buying an all-in-one package: a transceiver, internal batteries, and an internal ATU. There are no other options to purchase separately. The CTX-10 doesn’t ship with a microphone, but it does include a USB cable, DC power cord, and CD manual. You simply unbox your CTX-10, make sure it’s been charged, plug in your microphone (requires a modular plug type like the Yaesu MH-31A8J or MFJ-290MY) or key, add your antenna, and boom! You’re ready to hit the air.

Unlike CommRadio, Elecraft started as a kit manufacturer. Their philosophy has always been one of purchasing a basic unit, then adding features when you’re ready. In a sense, this gives the customer a lower starting price point. Here’s how the KX2 pricing breaks down:

  • Elecraft KX2 transceiver: $789.95
  • KXAT2-F internal ATU option: $199.95
  • KXBT2 Internal Lithium Battery option: $59.95
  • KXBC2 Lithium battery fast charger: $29.95
  • KXIO2 Real-Time clock: $79.95

To configure the KX2 to be equivalent to the CTX-10––meaning, with ATU, internal battery, and charger––your total price would be $1,079.80. This is the configuration of my KX2.

If you use just an external battery and resonant antennas, the base KX2 might be the only radio you’ll ever need. At $789.95, that’s $210 less than the CommRadio CTX-10. Fully configured, however, the CTX-10 is about $80 less expensive than the KX2.

Apples to oranges, in radio terms

If you haven’t gathered already, although both the CTX-10 and KX2 are general coverage QRP transceivers, they are completely different––like comparing apples to oranges––in terms of the market they wish to reach.

No doubt, CommRadio designed the CTX-10 to appeal to people who love commercial or military channelized radios. Based on my interaction with CTX-10 owners, many are into preparedness and primarily infrequent simplex SSB operations.

The KX2 will appeal to hams who are active operators and who enjoy full control of their radio’s functions and features. Elecraft has a massive and loyal community of users and fans.

Summary

If I haven’t made it clear yet, there’s much more involved in making a purchase decision than simply looking at the specifications of a radio. Often, it’s a truly personal and subjective choice.

Be honest with yourself about your needs, and base your purchasing decision on those. After all, in this case we’re talking about two capable radio transceivers, either of which should provide years of great operation and listening.

Click here to check out the Elecraft KX2 and here for international distributors.

Click here to check out the CommRadio CTX-10 and here to purchase via Universal Radio.


Do you enjoy the SWLing Post?

Please consider supporting us via Patreon or our Coffee Fund!

Your support makes articles like this one possible. Thank you!

Spread the radio love

SDR Primer Part 3: From High-End SDR Receivers to SDR Transceivers

The following article originally appeared in the October 2018 issue of The Spectrum Monitor magazine:


Welcome back to the world of SDRs once again

In September we began of our three-part Primer on Software-Defined Radios (SDRs). Part One (September) focused on the nomenclature and components of a functioning SDR system; Part Two (October) took a look at some affordable SDR station options that will propel you into the world of SDRs for less than $200 US. This month, in Part Three––our final installation––we’ll dive a little deeper into the SDR rabbit hole, and investigate higher-end SDRs as well as ham radio transceivers with embedded SDRs.

Investing in SDR hardware

As we mentioned in Part 2 of our primer, gaining entry into the world of SDRs can be quite affordable. With merely $200 or less, you can fully explore the radio spectrum with an SDR that has truly excellent performance characteristics.

So, why would you pay more?

Let’s consider this.  If, say, you happen to live in an RF-dense environment, such as a busy city, if you live near strong broadcaster(s), and/or if you’re a DXer who’s seeking benchmark performance, then you might wish to devote a little more of your cash to your SDR hardware.

When you pay more for an SDR, the additional cost is typically going toward the hardware rather than the software. Indeed, my favorite SDR (software) applications are absolutely free, and pair with a number of benchmark SDRs. But good hardware is vital to performance. The lineup of SDRs––that is, the receiver hardware––discussed below typically has better filtering, preselectors, shielding, and receiver architecture focused on HF performance. They also tend to offer a more robust front end, lower noise floor, and better dynamic range. All of this, of course, results in better performance overall. Some of these SDRs also offer unique specialty features, like built-in web servers.

The following SDRs are carefully hand selected, and in my view, represent a balance between price and performance. And again, this is by no means a comprehensive list; it’s simply a selection of what you’ll find currently available on the SDR market.

So, without further ado, we’ll begin our discussion with “black box” SDRs, then move on to  SDR transceivers and transceivers with embedded SDRs.

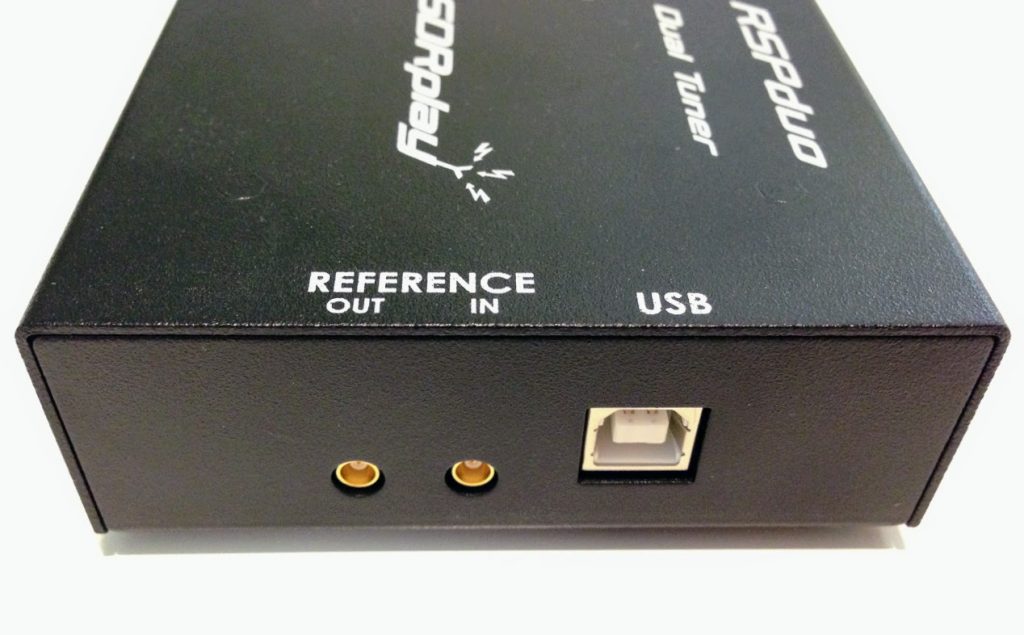
SDRplay RSPduo
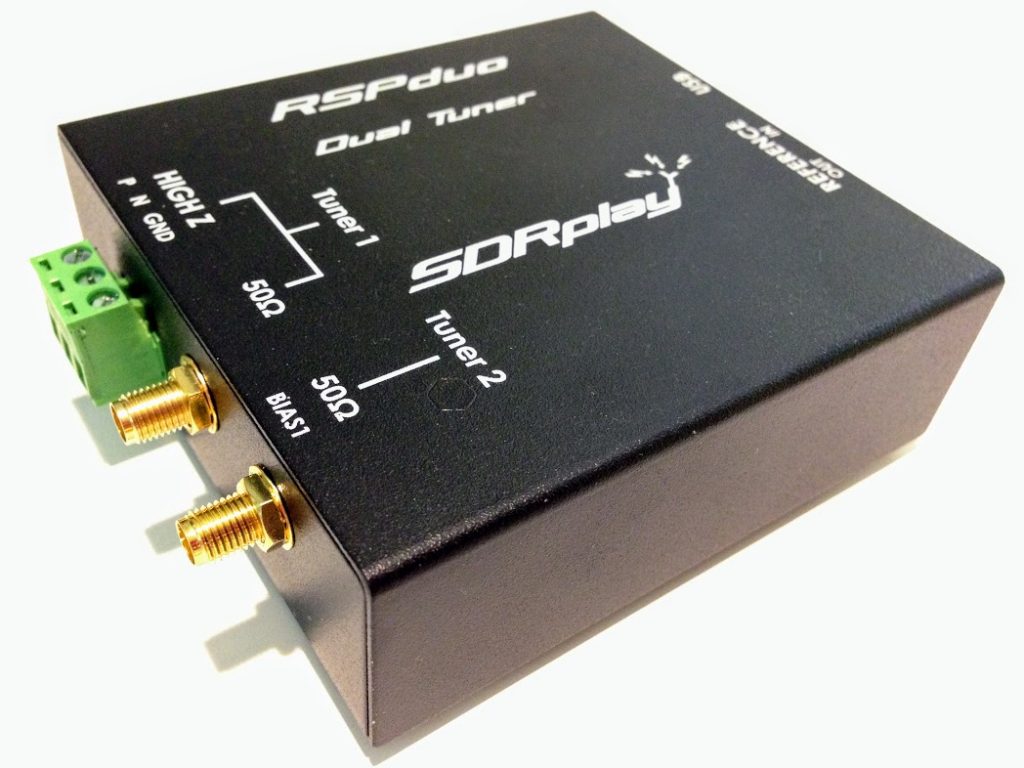
The SDRplay RSPduo

In May of this year (2018), the UK-based SDR designer and manufacturer SDRplay released their latest receiver: the SDRplay RSPduo.

What sets this little black box apart from the competition is just what its name implies:  the duo is a dual tuner SDR.  In other words, it’s two independent SDRs rolled into one.

Being the price leader in the world of SDRs, SDRplay retails the RSPduo for $279.95. And, I must add, it’s a true bargain for a feature-packed 14-bit high-performance device.

The RSPduo’s tuners can operate individually, anywhere between 1kHz and 2GHz, with up to 10MHz of working bandwidth. You could also set up the RSPduo so that both tuners can operate simultaneously, again between 1kHz and 2GHz, with up to 2MHz of bandwidth per tuner. The RSPduo has a high-stability reference along with external clocking features which makes this SDR an affordable option for industrial, scientific, as well as educational applications. It’s housed in a quality steel enclosure.

SDRplay’s development team is already working on new features such as true diversity reception, which will be included as a free upgrade to their popular SDRuno proprietary application.

To be clear, there is no other sub-$300 SDR on the market that currently has true dual-tuner functionality. Thus, the RSPduo is a good value, in my opinion––and an inexpensive upgrade to a proper dual-receiver SDR––so if this is something you’d like to add to your shack, go ahead!  Bite the bullet, and acquire an RSPduo. Likely you won’t regret it.

Check out the RSPduo via:

KiwiSDR
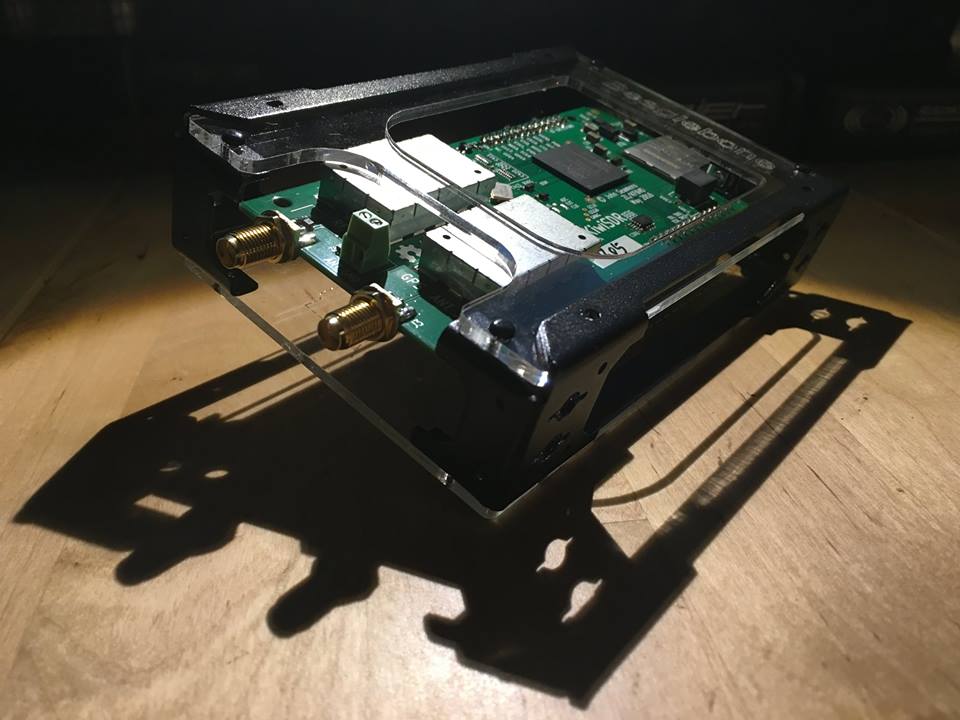
Photo by Mark Fahey

Like the RSPduo, the KiwiSDR has a unique feature that makes it stand out among the other receivers mentioned here: it is designed to be fully controlled via a web-browser-based SDR application. Not only can you use your KiwiSDR locally, but you can share it with the world via the KiwiSDR network. You can configure the KiwiSDR to allow up to eight simultaneous guest users, assuming only that you have access to the modest amount of Internet bandwidth this requires.

The KiwiSDR ships as a simple modular kit, and requires no special tools to assemble: the SDR is a custom circuit board (known as a “cape”) that you connect to BeagleBone Green or BeagleBone Black mini computer. (Click here to learn more about the BeagleBone).

The KiwiSDR is available in two versions: the SDR cape, alone, and a more complete version which includes the SDR cape, BeagleBone computer, enclosure, and GPS antenna. Both versions include all SDR software loaded on a micro-SD card.

Although the KiwiSDR might sound like an experimenter’s receiver since it requires a degree of assembly and configuration––at least, a bit more so than the other units I review here––it’s actually fairly simple to assemble, install, and put on the air. In fact, the only challenge that you might face is that of setting up your router for global access to your KiwiSDR. It does require either a static IP address or (more commonly) an IP address forwarding service. Check out the support documentation in advance to make sure your Internet connection will work.

The KiwiSDR covers from 10 kHz to 30 MHz, thus is not a wideband receiver like the SDRduo. Like the SDRs that follow, it focuses its performance on HF and lower bands.

I find it incredible that for just $299 US, you can purchase the full KiwiSDR kit––one that includes everything you need to put your SDR on the air and online. Because of this, I believe the KiwiSDR has become the dominant web SDR platform currently on the market. Perhaps this remarkable fact overshadows the fact that the KiwiSDR is also a superb performer, touting a brilliant dynamic range as well as overall excellent sensitivity and selectivity.

As my friend and fellow radio listener Mark Fahey, an early adopter of the KiwiSDR, is quick to point out, the KIwiSDR is unique in that it doesn’t connect to a PC or other computer to operate. It’s a stand-alone:  just connect an antenna, DC supply, and network cable, then you’re ready to go. All of the “work” is delivered by the piggyback BeagleBone CPU.

What’s not to love? While the web-based SDR application is full-featured, it does lack spectrum recording and some other advanced controls. This is due to the relatively modest processing power of the onboard CPU. That said, The KiwiSDR application does contain features/functionality via extensions that are fairly impressive.

Additionally, when updates are rolled out for the KiwiSDr application, these take effect globally. Only recently, for example, audio recording and amazing TDoA (Time Distance of Arrival) functionality were added.

Oh, and one more thing before we move on: the KiwiSDR is the only SDR I know that is exclusively controlled by a web-based SDR application for both the online guest and the local user/owner. There is no separate downloadable application.  Thus, whether you’re using your own local KiwiSDR or an online SDR, the user experience is exactly the same. It’s seamless and user-friendly…just as it should be.

Want to try the KiwiSDR before purchasing? Easy! You can browse and select any one of two hundred KiwiSDRs online on SDR.hu.

Check out the KiwiSDR via:

ELAD FDM-S2/FDM-S3
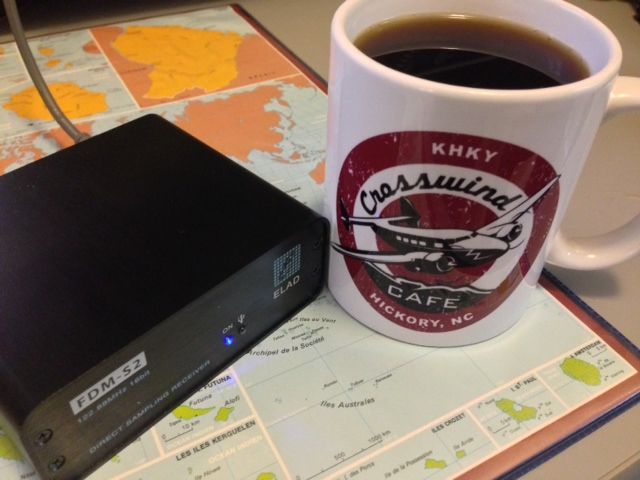
Italian-based SDR manufacturer, ELAD, has built a solid reputation over the years for truly pushing the SDR performance envelope in the $500-$1000 market.

I have owned their Elad FDM-S2 for four years now (check out my full review in the November 2014 issue of The Spectrum Monitor). The FDM-S2 continues to impress and to hold its own among more recent competitors––a true indication of excellent engineering and hardware.

The FDM-S2’s frequency coverage is 9 kHz-52 MHz, 74-108 MHz, and 135-160 MHz. I should note here that besides being a great HF and mediumwave performer, the FDM-S2 is an FM DXer’s choice receiver; FM performance on this rig is just superb.

ELAD supports all of their SDRs with their own proprietary application which, of course, is designed to take full advantage of the SDR’s available performance. The ELAD application is feature-packed and even includes built-in DRM decoding. Interestingly, it will allow the FDM-S2 to be used as two completely independent tuners in “double DDC mode”––the working bandwidth of each tuner, in this case, is 384 kHz, and each can be placed within one of the FDM-S2’s input ranges.

In truth, I like pairing my FDM-S2 with the excellent (and free) SDR Console SDR application; I prefer its user interface and recording functionality over the ELAD application.

If you live in an RF-dense area, you might consider one of ELADs external pre-selection filter systems to keep the FDM-S2 from overloading in the presence of very strong signals.

The FDM-S2 is currently priced at $529 US.
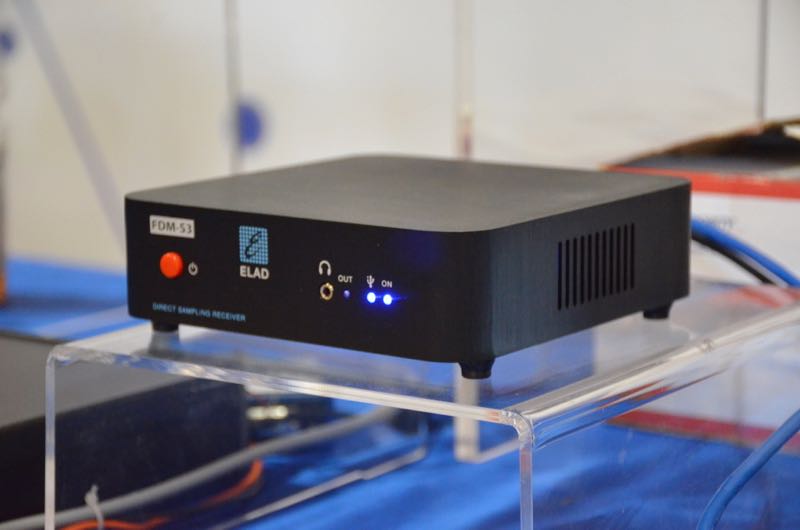
Photo of the new ELAD FDM-S3 from the 2018 Hamvention

Note that ELAD will soon be releasing the newest addition to their product line: the FDM-S3. I know very little about the FDM-S3, but I do know ELAD is promising groundbreaking performance and dynamic range, setting a new benchmark for the $1000 price bracket. We do know the FDM-S3’s processing bandwidth is an impressive 24.576 MHz––wide enough to include the entire FM broadcast band!

I’m not sure if FM DXers will be able to take advantage of spectrum recording at a 24 MHz bandwidth, because I suspect it could push 24GB of data per minute. The FDM-S3 may well keep up, but I’m not sure the typical computer hardware can handle that kind of data transfer…it may be likened to, in radio terms, drinking from the proverbial fire hose!

However: ELAD will be sending me a loaner FDM-S3 to review in the coming months, so stay tuned for more on this DXer’s dream rig!

The current FDM-S3 price, by the way, is 949.90 EUR.

WinRadio Excalibur
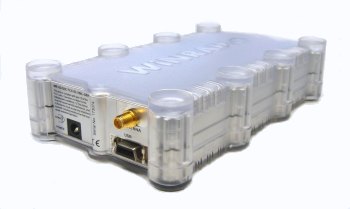
The WinRadio Excalibur

My first foray into the world of benchmark SDRs was made with the Australian-made WinRadio WR-G31DDC Excalibur. And although this SDR has been on the market for the better part of a decade, it still outperforms many of its competitors.The Excalibur’s frequency range is 9 kHz to 49.995 MHz, providing absolutely stellar performance across the spectrum.

It’s a favorite SDR in my radio shack, despite the fact that it can only be fully controlled by WinRadio’s own proprietary SDR application (at least, I know of no other compatible applications). On the plus side, the WinRadio application is one of my favorites.

The application’s file size is extremely compact––only a 9MB download. The user interface is logical, ergonomic, and responsive. Other than SDR Console, it has some of the best recording functionality available today.

I’ve logged more airtime with the Excalibur than with any other SDR I own, mainly because of its superb overall performance, responsive application, and recording functionality. I use the Excalibur as a benchmark for receiver evaluations and find that very few can match its solid performance.

The WinRadio Excalibur can be purchased through a number of distributors worldwide for about $950.

Enablia TitanSDR Pro
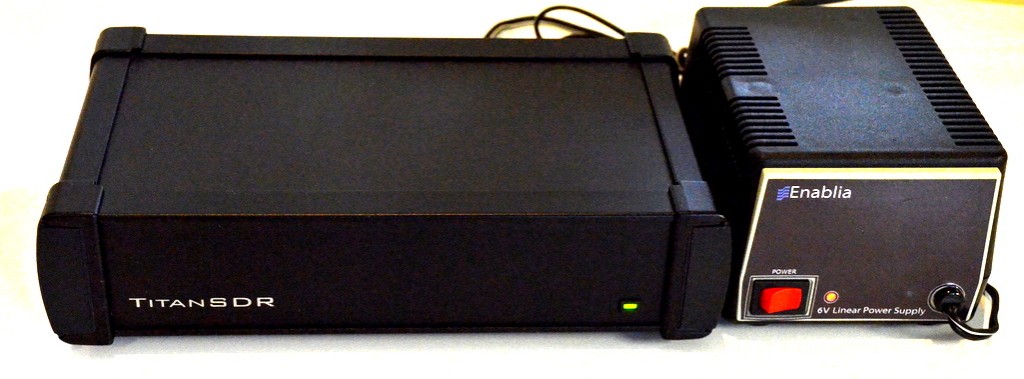
The Enablia Titan SDR Pro is an outlier product in our SDR Primer series, in that it retails in excess of $2,000. However, it’s the highest performing SDR I’ve ever tested. Serious weak-signal DXers will likely be quite pleased with this rig.

And speaking as a radio archivist, the Titan has the most powerful set of audio and spectrum recording features I’ve used, to date. Selectable spectrum recordings can be made from within the wide working bandwidth, and it can run up to four fully-independent SDR receivers, simultaneously.

The Titan comes with 16 frequency preselectors onboard, and a 9 kHz to 32 MHz frequency coverage. Its front end is simply bullet-proof, and thus could be operated in a demanding RF environment.

The TitanSDR ships with a brilliant proprietary application. It’s designed to make managing the Titan’s multiple virtual receivers and four independent SDR receivers as straightforward (and easy!) as possible. As I said in my review, Enablia engineers quite successfully accomplished this. The only downside is that only the TitanSDR application can run only the TitanSDR; no other third-party apps work with it. In addition, when making spectrum recordings, the file format is unique and the header information is actually stored in a separate file. This means when you are transferring a set of spectrum recordings, the header file must also be accounted for.

Of course, there is the daunting price tag of the TitanSDR, which makes it clear that this was a receiver designed for government and commercial use, in particular, for signal intelligence.  Thus it’s likely no surprise that the basic version of the TitanSDR retails for 1380 EUR, the TitanSDR Pro for an even heftier 1970 EUR.

To be fair, there are not many readers who would consider the TitanSDR Pro, but I thought it worth mentioning as it demonstrates a clear case of hardware becoming an innovation’s primary focus.

Enablia’s website is quite basic, so I would recommend you contact them directly to ask for a price quote if you’re interested in one of their TitanSDRs.

Other SDRs

The SDRs above represent merely a small slice of SDR market availability. There are several other notable manufacturers and SDRs worth considering, thus worth noting.
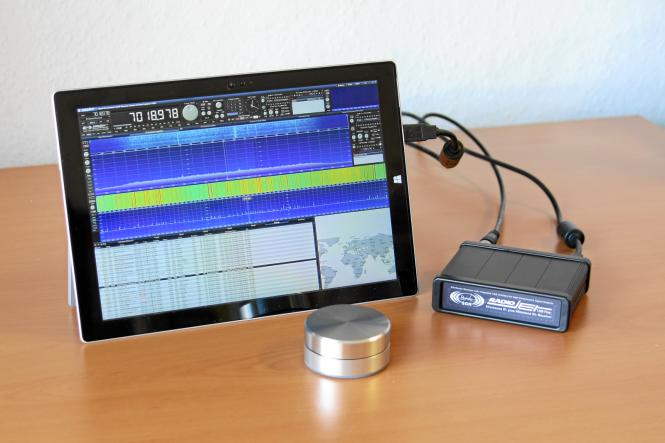
The Bonito Radiojet 1309 Plus

Germany-based Bonito manufactures a number of SDRs, antennas and components that are highly regarded among DXers. Bonito’s “hybrid” SDRs pack a lot of performance yet require very little in terms of computer resources.  Their latest SDR, the Bonito RadioJet 1309 Plus covers 0.02 MHz to 1600 MHz with a spectrum display that can be widened to 3.2 MHz. I have not personally evaluated the RadioJet 1309 Plus, but I did review an early version of the RadioJet (the 1102S) that lacked the additional IQ-receiver of the 1309. I found it an impressively sensitive and selective receiver with excellent audio characteristics. Click here to read that review.

The RFspace Cloud-IQ

RF Space has been manufacturing SDRs longer than many other manufacturers, and the company offers a number of products, including the SDR-IQ, the NetSDR+, the Cloud-IQ, and––soon to come––the CloudSDR.

In Part 2 of our primer, we mentioned the AirSpy HF+ which packs impressive HF performance. Airspy also manufactures the Airspy R2 and Spyverter R2–this $218 US combination produces a compact SDR package with excellent dynamic range and superb frequency stability.
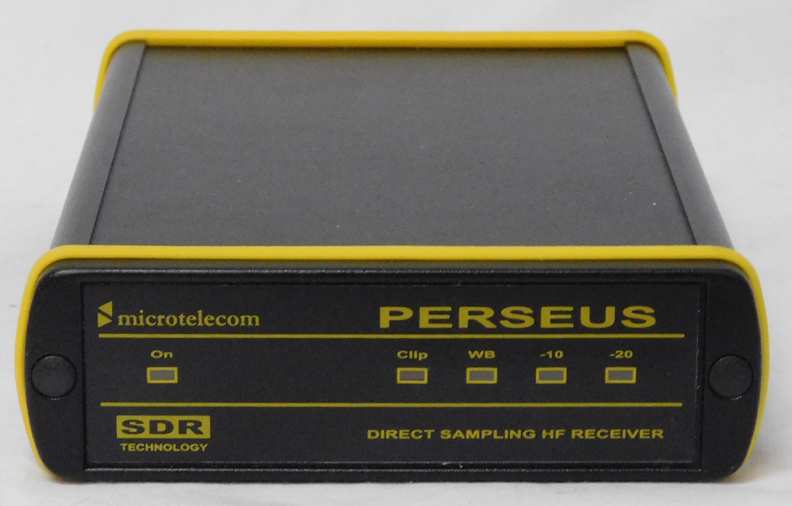
I’m also fond of the classic Microtelecom Perseus SDR, which I’ve seen sold used for approximately $700 US. WinRadio, too, offers higher-end SDRs with a wider frequency range and working bandwidth than the Excalibur––so if your budget allows, you might consider these.

Regardless, keep in mind that if you want to use your monetary resources efficiently, there is no need to splurge for higher-end SDRs unless your use and application demands increased performance. Before you pull the trigger to buy such a rig, I would simply take into consideration the unit’s frequency range, working bandwidth, and performance characteristics, as well as taking the time to read plenty of user reviews. This increases the odds that you’ll get just what you want.

SDR Transceivers

So far, I’ve only mentioned SDR receivers in this primer, but there is a healthy selection of “black box” type SDR transceivers on the market, as well. By “black box,” I mean the transceiver itself (all of the hardware) housed in a box––with, of course, the relevant ports for antennas, data, power, mics, CW keys, and a number of peripherals. These SDRs almost always require a computer for operation, although lately manufacturers are beginning to offer optional touch-screen front panels which can bypass the need for external computer operation.

Unlike the world of tabletop radios, where it might be less expensive to invest in a general coverage transceiver rather than a dedicated receiver, SDR transceivers almost always cost more than an equivalent SDR receiver.

Also note that SDR transceiver applications do not always include audio and spectrum recording functions.  In addition, their working bandwidth might be more narrow that other receive-only SDRs, although they may offer more virtual receivers and spectrum “slices.”

Finally, SDR transceiver applications tend to be proprietary; when you purchase the transceiver, you’re also likely receiving the only SDR application that will interface with it. Hypothetically, if you purchase an SDR transceiver and the company that produced it goes under, you might have issues when the application is no longer updated with operating system upgrades and iterations.  The lesson here is that I believe you should try to stick with the healthiest companies and those with solid, large user bases. This increases the likelihood that the application will be supported in the future.

Low-cost, low power SDRs for the experimenter

We’ll start with the least expensive SDR transceivers designed with the experimenter in mind, that can, with a little adaptation, also be employed by ham radio operators as very low-power transceivers.
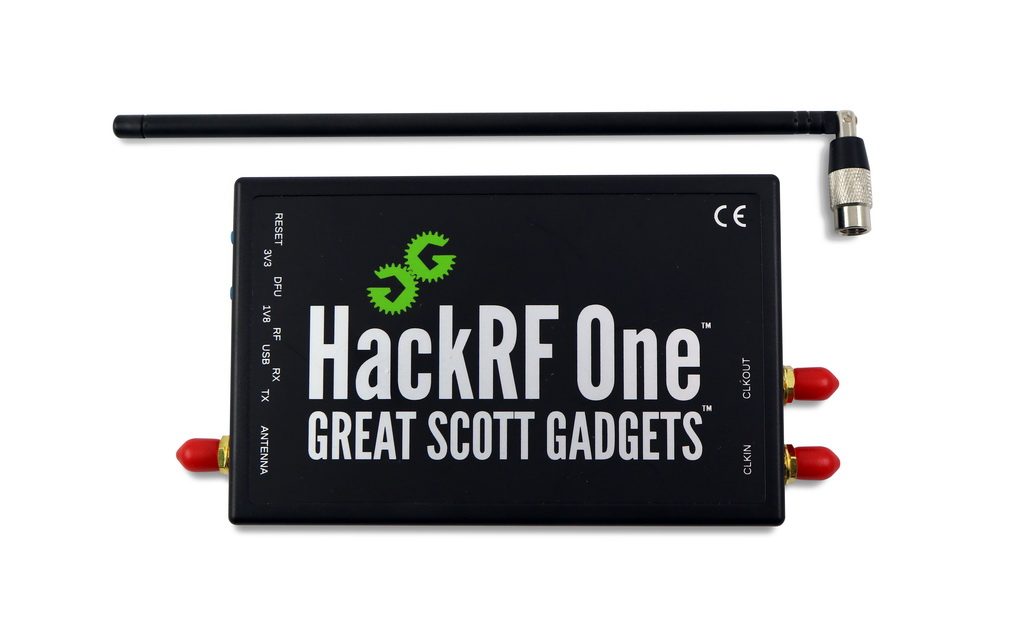
The HackRF One ($299) by Great Scott Gadgets is an excellent SDR. It has an incredibly wide frequency range (1 MHz to 6 GHz), and can transmit anywhere from 3 mW to 30 mW depending on the frequency. That’s flea power, true, but if your goal is to experiment in your local surroundings, it’s typically more than enough output. The HackRF is open-source and sports a large user community that have employed it in dozens of applications. The HackRF was one of the first SDRs to really give experimenters a full tool set to manipulate the world of wireless.

Check out the HackRF One via:
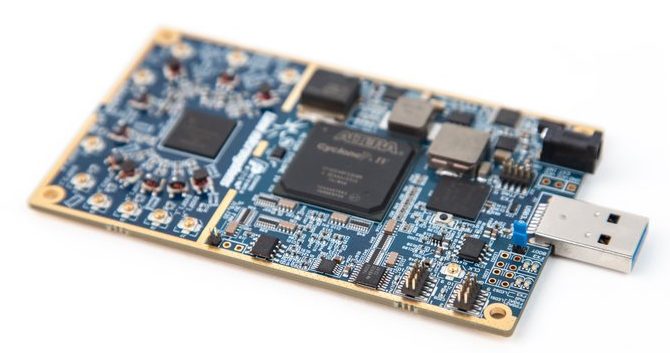
The LimeSDR board

The LimeSDR ($299) is another crowd-funded project that has been incredibly popular.  Like the HackRF, it is a low-cost, open-source SDR platform that can be used to support just about any type of wireless communication standard. What makes the LimeSDR unique is that it is integrated with a Snappy Ubuntu Core, which means users can simply install applications from an app store to increase functionality. As LimeSDR states, their platform “gives students, inventors, and developers an intelligent and flexible device for manipulating wireless signals, so they can learn, experiment, and develop with freedom from limited functionality and expensive proprietary devices.

Again, only consider the HackRF of LimeSDR if your main goal is to experiment with the world of wireless. If you’re looking for a full-featured SDR transceiver intended for ham radio, read on.

Ham Radio SDR Transceivers

The Flex Radio booth at the 2018 Hamvention.

Without a doubt, the dominant name in the world of US ham radio transceivers is Texas-based Flex Radio.  Flex has been around since the very earliest days of SDR transceivers and has produced a wide variety of high-performance rigs. In recent years, their product development and production has focused on higher-end transceivers with the discerning DXer and contester in mind. Their signature series SDRs pack incredible performance, yet can be operated from modest PCs since most of the processing horsepower and hardware are all within the radio chassis. Flex has also developed a fully wireless touch-screen Maestro Control Console that can be used over a local network, or even the Internet, to seamlessly control a remotely-connected Flex SDR. Flex Radio SDRs can cost anywhere from $2,000 – $7,500 US.
The Flex-6600

Gary Wise (W4EEY), my go-to guy for all things Flex Radio, also notes:

“One of Flex’s newest models, the Flex-6600, includes 7th Order Contest Band Bandpass Filters and dual Analog to Digital Converters. Which means that, using this radio, one can listen on one band while transmitting on another. Contesters call this ‘Single Operator Two Radio’ operation, and if you can do it successfully, it leads to big contest scores. Having this functionality in one box, without additional controllers and interfaces, is remarkable.”

Indeed.
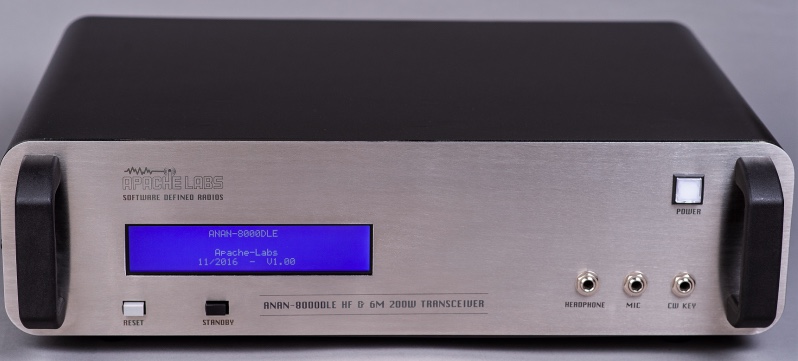
Two other SDR transceiver manufacturers with large user bases are the Sweden-based SunSDR and India-based Apache Labs. Both companies produce high-performance SDRs and, like Flex, set benchmarks in terms of transceiver performance. I will not comment at length about either company because I’ve not had the opportunity of personally testing their products, but I encourage you to search online reviews about their products.

Tabletop SDR transceivers
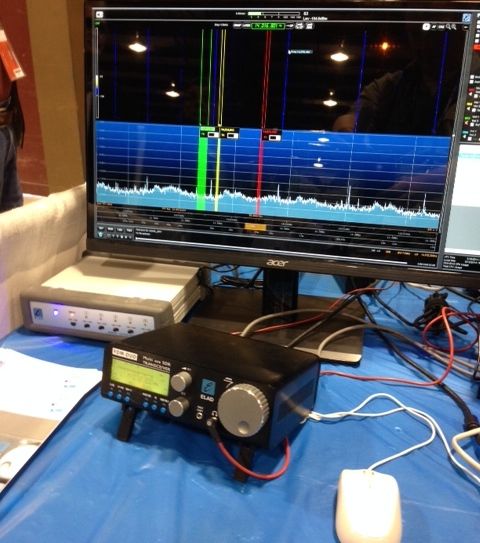
The Elad FDM-DUO transceiver is both a stand-alone tabletop and fully-functioning SDR when paired with a PC.

There are a number of full-featured tabletop SDR transceivers on the market. One of the first SDR manufacturers to build a fully self-contained tabletop model with PC integration was ELAD, with their FDM-DUO QRP transceiver. Tabletop SDRs at the time of the FDM-DUO’s release were very limited in their functionality when connected to a PC. Some of them had stripped-down applications and lacked features like spectrum recording and multiple virtual receivers. The FDM-DUO, when connected to a PC running ELAD’s software, gives the user full control of the SDR.  Indeed, the experience is identical to that of using the FDM-S2 mentioned above, however the DUO is also a transceiver. Since the DUO’s release, other SDR manufacturers have designed models with full SDR application integration.
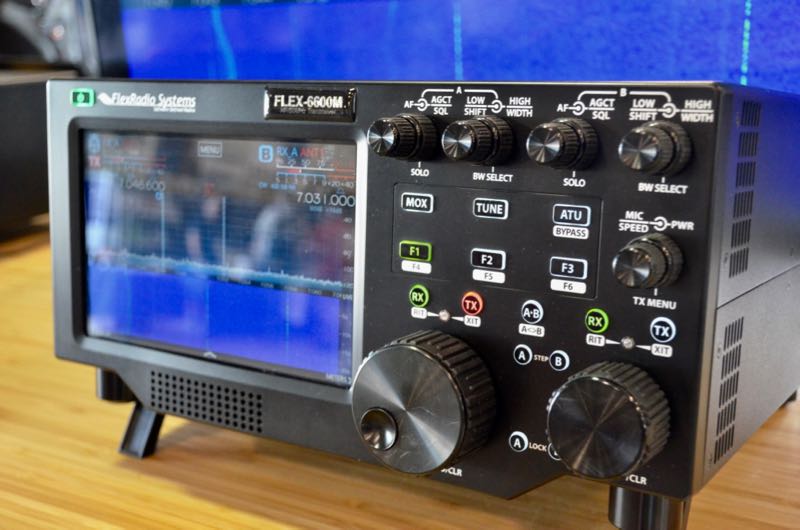
The Flex 6600M is a handsome standalone SDR transceiver.

Recently, Flex Radio introduced their Flex “M” Signature Series SDR Transceiver. These tabletop SDRs can be configured with most of the SDR receivers Flex currently produces. Their displays are impressive and useful; indeed, the spectrum waterfall resolution and size is one of the best I’ve seen on a tabletop transceiver.  The front panel is large and sports a number of controls, the design harkening back to large contest-grade transceivers like the Ten-Tec OMNI VII and Orion series.
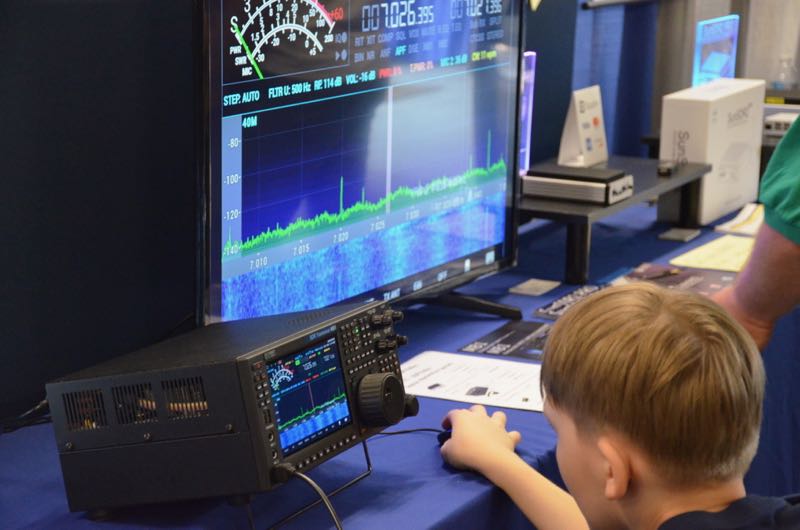
The SunSDR MB1 at the 2018 Hamvention.

This year at the Hamvention in Xenia, OH, I had a chance to check out the SunSDR MB1. Like the Flex M series, the MB1 sports a comprehensive front panel and an amazing assortment of connections on the back panel. As I took a tour of this radio––and it really did require a tour, it’s so densely feature-packed––I was most impressed by the thought that went into this stand-alone SDR transceiver. I love the front panel display, graphics, and overall ergonomics. I understand it will also deliver benchmark performance; indeed with prices starting at a steep $7,000 US, I would expect nothing less!

SDR transceiver summary

As we’ve pointed out in this part of our primer, pure SDR transceivers are a product for radio operators willing to invest more financially in order to take advantage of the advanced functionality and performance a true SDR can provide. At present there are surprisingly few players in the pure SDR transceiver market; this is a product category ripe for expansion. And as more manufacturers get into the game, I believe competition will direct prices into even more affordable territory.

Transceivers based upon SDR technology

The final category we’ll discuss is transceivers based upon SDR technology.  It’s a sign of the times, indicating the direction that all enthusiast-grade transceivers and receivers are likely heading.
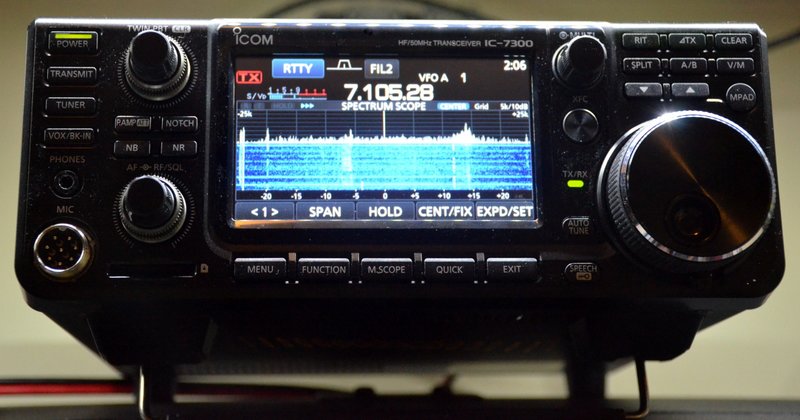
The Icom IC-7300 transceiver

Because the fact is, whether or not you feel inclined to embrace SDRs in your radio world, you may be surprised that you already have: for many years now, radio manufacturers have built their transceivers and receivers on SDR and I/Q quadrature down-sampling technology. All of the transceivers introduced in the past few years that sport on-board spectrum displays––like the Icom-IC7300, Icom IC-7610, and the new Yaesu FT-DX101D––are, of course, based on SDR technology.
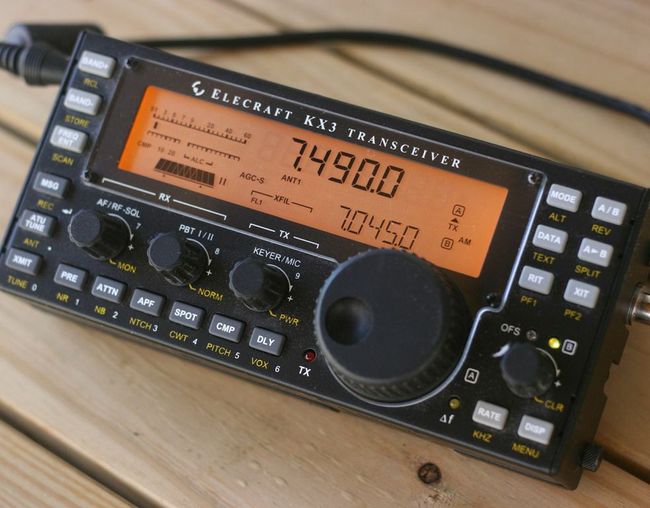
Many others, like the Elecraft KX3 and KX2, which look much more like a traditional radio, are also based on SDR architecture. Indeed, almost all of the major manufacturers implement SDR technology in their current product lines. Manufacturers have caught on, learning how to leverage SDR technology in a way that maximizes receiver performance while keeping the overall price more affordable than comparably-performing legacy radios of former days.

Yet while these radios are SDRs at their core, they often are limited in their functionality when connected to a PC; most can be completely controlled by a PC and many can even export their I/Q data, but usually they won’t offer the working bandwidth and the advanced functionality of a true SDR transceiver.

Conclusion
If I’ve piqued your curiosity about the world of SDRs, and have yet to add one to your shack, I would encourage you to invest in an SDR receiver––at the very least, in one of the affordable rigs mentioned in Part 2 of this series.

Speaking for myself, I was once a “knobs and buttons” radio operator who thought I’d never want to control a radio through a computer and monitor. But when I hesitantly invested in my first SDR, I found it eye-opening––not to mention somewhat democratizing, in that it sets all radio listeners on the same level, as the spectrum becomes visually understandable, and thus accessible, to all who encounter it. I found that if you love to listen, also being able to look at your audio, especially when editing or archiving, but any time you’re tuning around through the spectrum,  just clarifies and enhances your overall radio experience. I soon became hooked…and have never looked back.

Now, I can assure you, I’ll never again be without an SDR. The ability to visualize our radio spectrum via SDR’s virtual window is truly illuminative.  What’s more, I’d even venture to speculate that you may share in finding the experience, if you’ll forgive the colloquialism, pretty darn cool.

Do you enjoy the SWLing Post?

Please consider supporting us via Patreon or our Coffee Fund!

Your support makes articles like this one possible. Thank you!

Spread the radio love

The Elecraft KX3 continues to impress

I’ve owned my Elecraft KX3 for five years, and this little rig continues to amaze me.

In 2013, I gave the KX3 one of the most favorable reviews I’ve ever published–and it continues to hold its own. That’s why last year I recommended the KX3 to my buddy and newly minted ham radio operator, Sébastien (VA2SLW), who had already been eyeing the KX3 as his first HF transceiver.

A few weeks ago, Sébastien bit the bullet and is now the proud owner of a KX3 with built-in ATU. He purchased the KX3 with plans to do a lot of field operations including SOTA (Summits On The Air) and also use the KX3 at home.

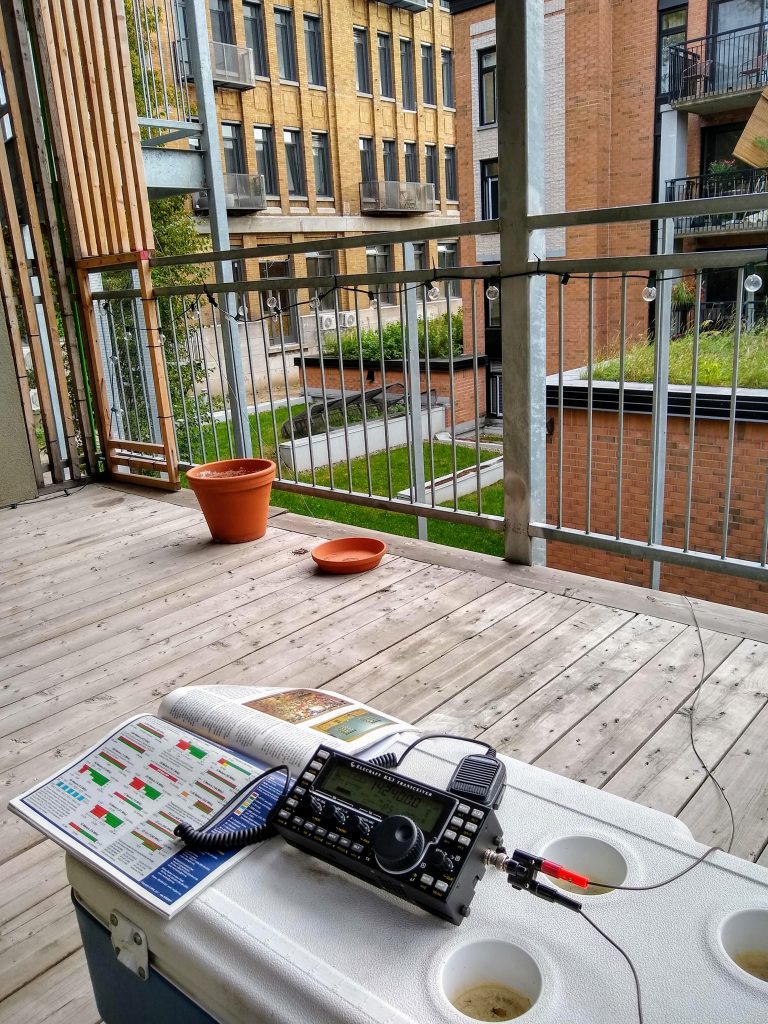
Wednesday, I popped by Sébastien’s flat to help sort through some low-profile antenna options. I had suggested that he not invest in a factory made antenna just yet, but instead explore what he’s able to do with a simple wire antenna directly connected to the KX3 with a BNC Male to Stackable Binding Posts adapter. I’ve had excellent luck using this simple arrangement this in the past with the KX3, KX2 and even the KX1.

I did a quick QRM/RFI survey of his flat and balcony with my CC Skywave SSB. While there were the typical radio noises indoors, his balcony was pleasantly RFI quiet. At 14:00 local, I was able to receive the Voice of Greece (9,420 kHz), Radio Guinée (9,650 kHz) and WWV (both 10,000 and 15,000 kHz) with little difficulty. His building has incredibly thick concrete walls–I assume this does a fine job of keeping the RFI indoors. Lucky guy!

We popped by a wonderfully-stocked electronics shop in Québec City (Électromike–which I highly recommend) picked up some banana plugs and about 100′ of jacketed wire. We took these items back to the flat and cut a 35′ length of wire for the radiator and about 28′ for the ground. We added the banana plugs to the ends of each wire.

Sébastien temporarily attached one end of the antenna wire to the top of the fire escape and we simply deployed the ground wire off the side of the balcony. Neither of these wires interfere with his neighbors and neither are close to electric lines.

I had planned to cut both the radiator and ground until we found the “sweet spot”: where the ATU could find matches on 40, 30, 20 and 17 meters (at least).

Much to my amazement, the KX3 ATU got 1:1 matches on all of those bands save 80M where it still could achieve a 2.8:1 ratio.  I couldn’t believe it!

Frankly, Elecraft ATUs are nothing short of amazing.

Even the ATU in my little KX2 once tuned a 20 meter hex beam to 40 meters and found a 1:1 match to boot. In contrast, the Icom IC-7300 sitting next to the KX2 wasn’t able to match that hex beam even though we performed a persistent ATU search. Not surprising as I wouldn’t expect a 40 meter match on a 20 meter antenna, but the Elecraft ATU did it with relative ease.

Sébastian did a quick scan of the ham radio bands where we heard a number of EU stations. I also took the opportunity to point out how well the KX3 operates as a broadcast receiver with the AM filter wide open and using headphones in the “delay” audio effects mode. The Voice of Greece sounded like a local station–absolutely gorgeous signal.

It was getting late in the day, so I couldn’t hang around to call CQ with Séb, but I left knowing that he is going to have a blast playing radio at home and, especially, in the field. Next, he plans to build a simple mag loop antenna, get a BioEnno LiFePo battery and eventually add other Elecraft accessories to his station. I’d say he’s off to a great start!

Want more info? Click here to read my review of the Elecraft KX3 and here to read my review of the Elecraft KX2.

Do you enjoy the SWLing Post?

Please consider supporting us via Patreon or our Coffee Fund!

Your support makes articles like this one possible. Thank you!

Spread the radio love

Elecraft KX2/KX3: An inexpensive adapter for earphone and mic operation

Many thanks to SWLing Post contributor, Mike Hansgen (K8RAT), who shares this message from Wayne (N6KR) of Elecraft. This message was originally posted on the Elecraft email reflector:

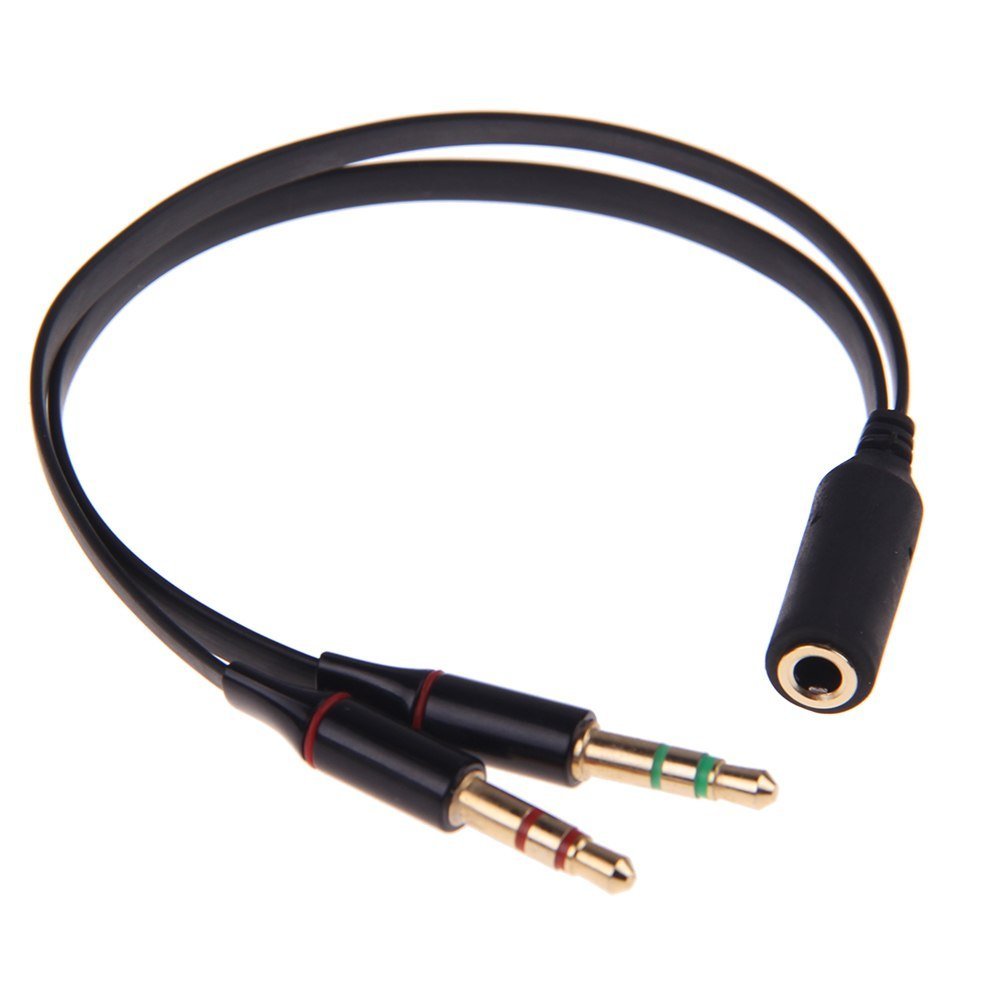
Several KX2/KX3 users have asked what I use as an adapter to go from an iPhone headset to the rig’s headphone and mic jacks.

Here it is.

This unit works beautifully with both my old and new iPhone headsets. The combination of the headset and this adapter take a tiny amount of space in my go-bag. Audio reports are great, even with speech compression set to max (MENU:TX CMP).

You’ll need to set MENU:MIC BIAS to ON, and I also recommend setting MIC BTN to OFF.

You can tap the XMIT button to start voice-mode transmit, or use VOX. See VOX menu entries in the owner’s manual.

Note: There’s a rumor that one legacy version of the iPhone headset was different from the others. I don’t have any info on this, but it means there’s a slight risk that this $6 adapter won’t work in your case. But it certainly works with the earpods I bought a couple of months ago.

73,
Wayne
N6KR

Thanks for sharing this, Mike! I’ve just placed an order for this little adapter. When doing field operations, I always use in-ear headphones, but a separate hand mic because I don’t like packing or wearing bulky headsets. I’ve a couple of earbud/mic sets (neither an Apple brand) that should work brilliantly with this adapter.

Click here to view on Amazon.com (affiliate link).

Spread the radio love

The evolution of a radio shack…and parting ways with my Elecraft K2/100

[Update: One of our readers purchased the K2/100! Thanks!]

I freely admit it: a lot of radios enter and exit my radio shack––especially portable receivers and SDRs of all stripes.  It’s just the nature of doing gear reviews and evaluations. I also keep a fairly robust arsenal of radios here at SWLing Post HQ for future comparison reviews and evaluations as models are upgraded.

But amateur radio transceivers that I personally use at home and in the field––? These come and go much less often.

I feel lucky in that I get exposure to most of the radios currently on the market. Yet I’m also cursed in that I simply can’t turn off that internal reviewer when I use a radio! I’ve become a bit extra-critical, hopefully constructively so, of radio ergonomics, user interfaces, functions, and of course, performance.

I used to have a healthy selection of transceivers in my shack as well, but over the years I’ve found it necessary to distill them down to just a few––almost all of which, if you’re curious, are Elecraft models.

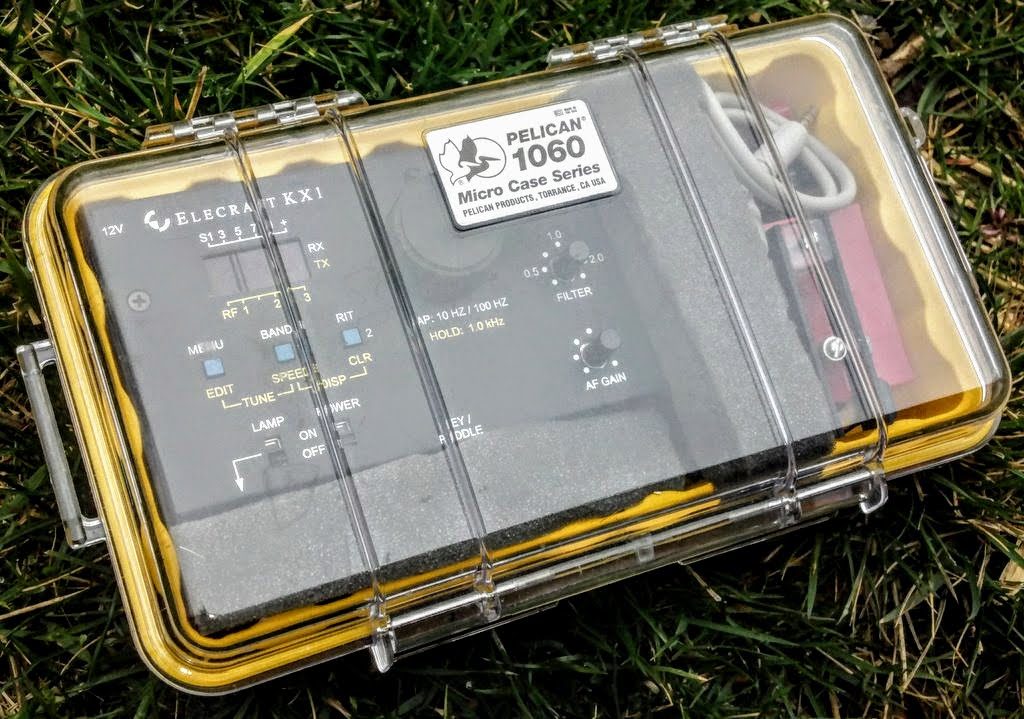
My Elecraft KX1 in the Pelican 1060 case which fit it and its accessories perfectly.

One of the first Elecraft rigs I owned was the KX1, the ultimate handheld field portable 4-band CW radio of its time. I believe I acquired it in 2008. SWLs will be interested to know that I could even tune to broadcasters on the KX1, using ECSS.

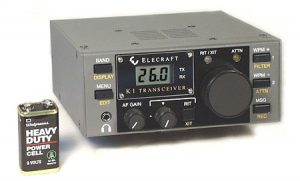
The Elecraft K1 (Source: Elecraft)

I loved the KX1 so much, in fact, shortly thereafter I purchased a K1.  The latter I ended up keeping for perhaps one year or so.

Soon thereafter, I purchased an Elecraft K2/10 (the “/10” stands for 10 watts).

I should note here, for those who are not familiar, that almost all of Elecraft’s products are available in kit form. The K1, KX1 and K2 are proper kits. You can’t buy them factory built at Elecraft. With that said, I’ve never had the pleasure of building any of these models from kit form because I purchased them second hand.

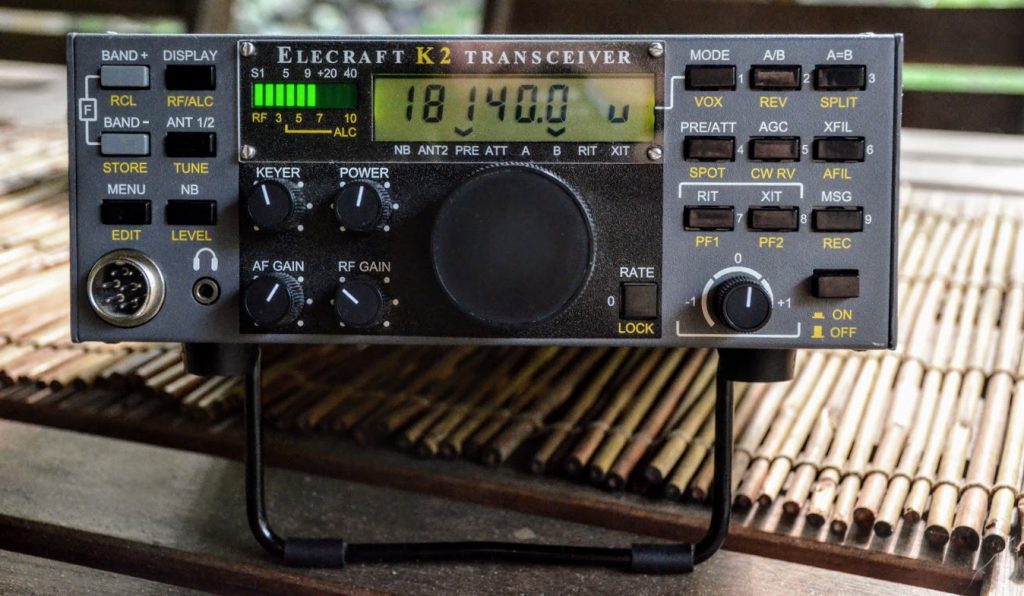
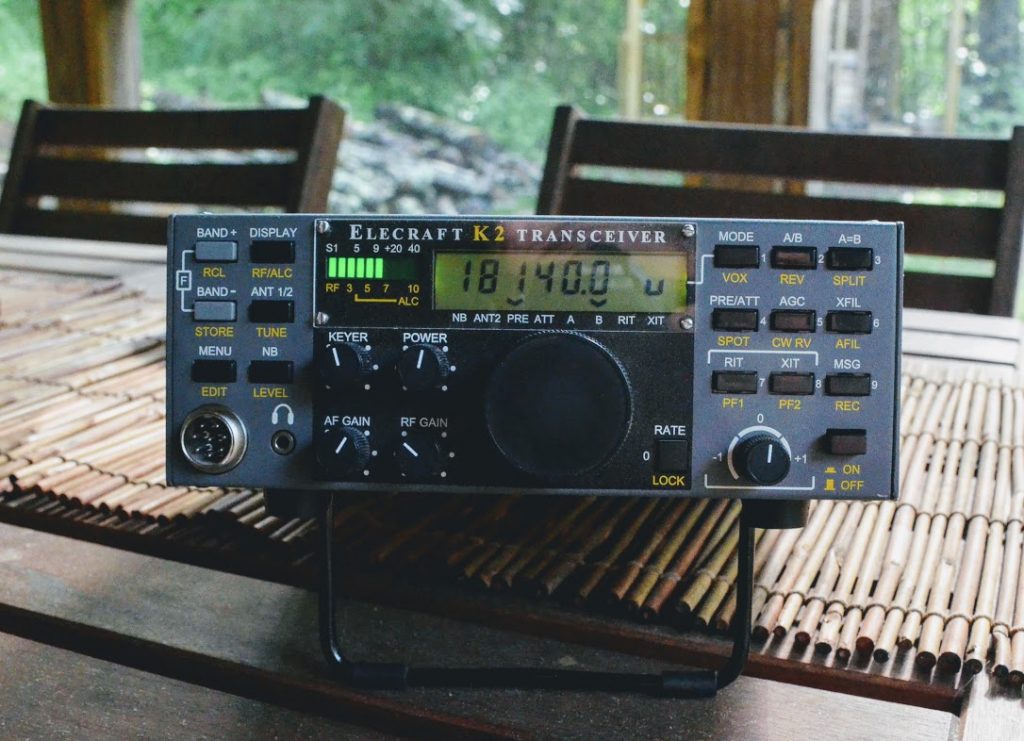
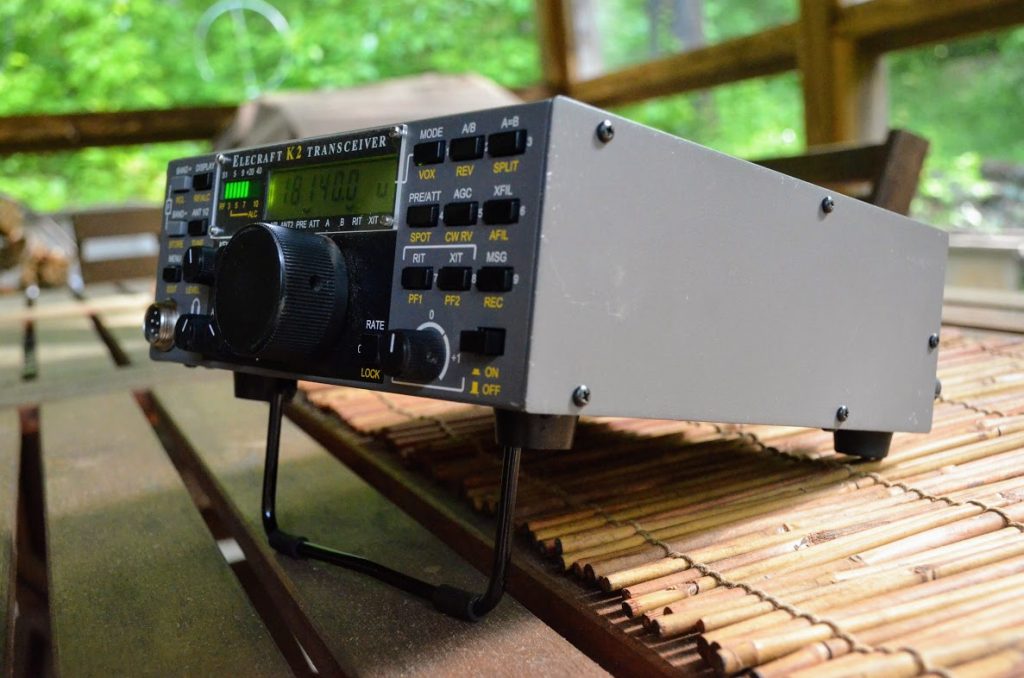
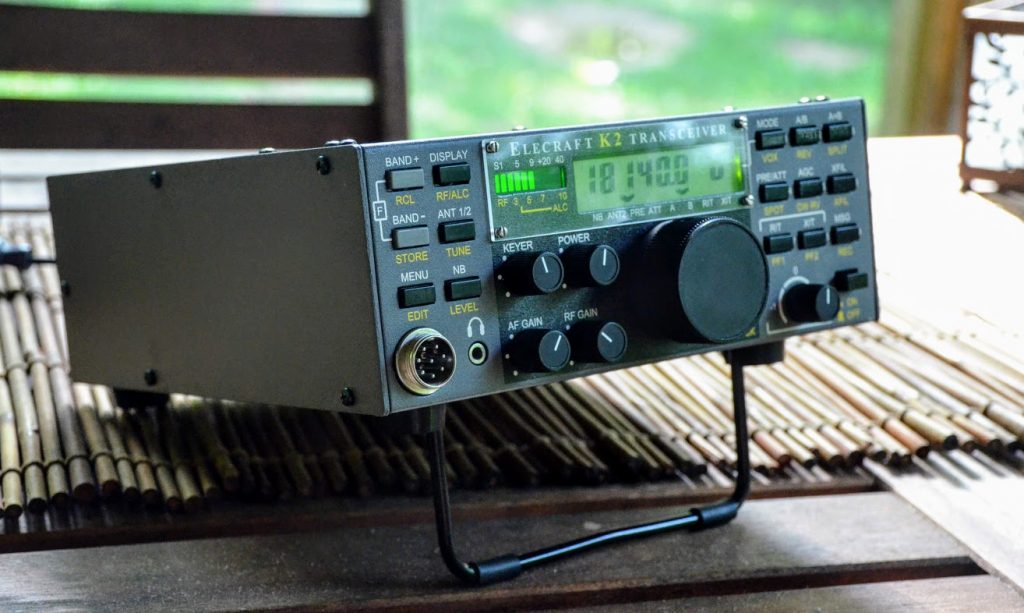
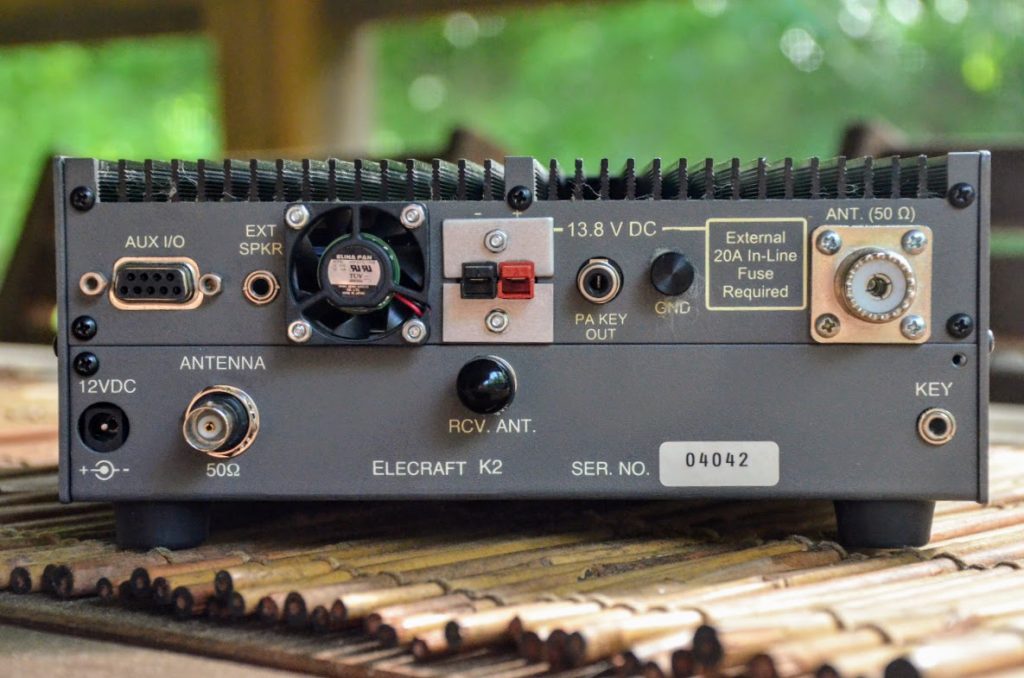
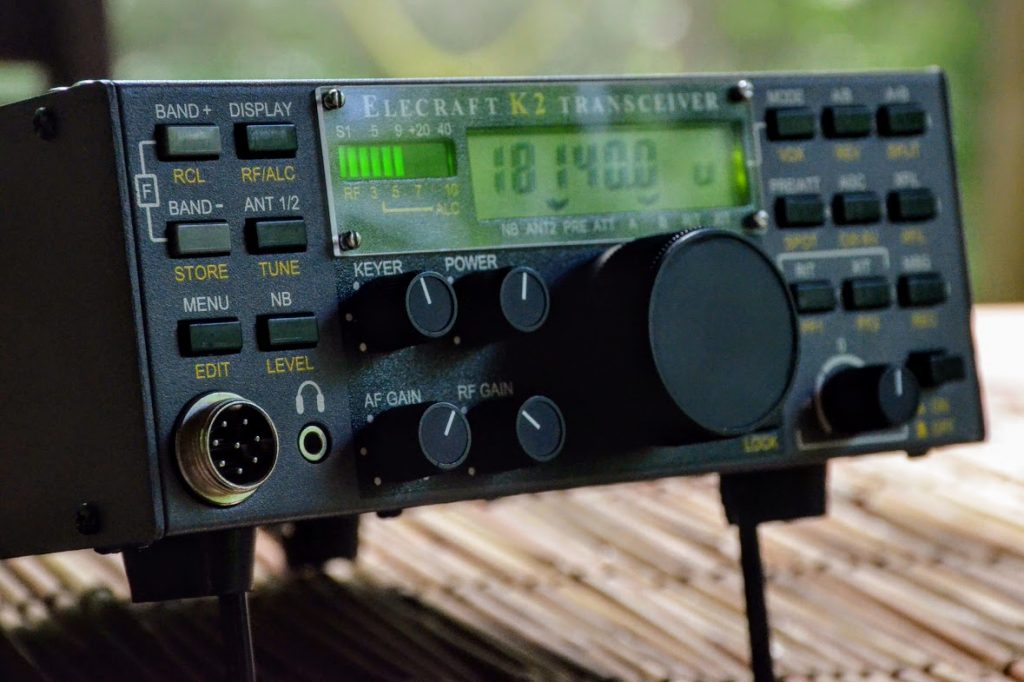
The Elecraft K2

The K2 has been in production now for twenty years (!!!) and it still has a healthy market and dedicated community. The K2 must be one of the best documented, benchmark performance through-hole kit transceivers ever made. Because of the robust user base and the fact Elecraft still produces it, it’s also one of the easiest radios on the market to diagnose and repair. The thing was designed to be a “hands-on” radio–to be pulled apart and serviced–there’s no mystery meat inside.

I used my K2/10 for many years…and assured myself I’d never sell it.

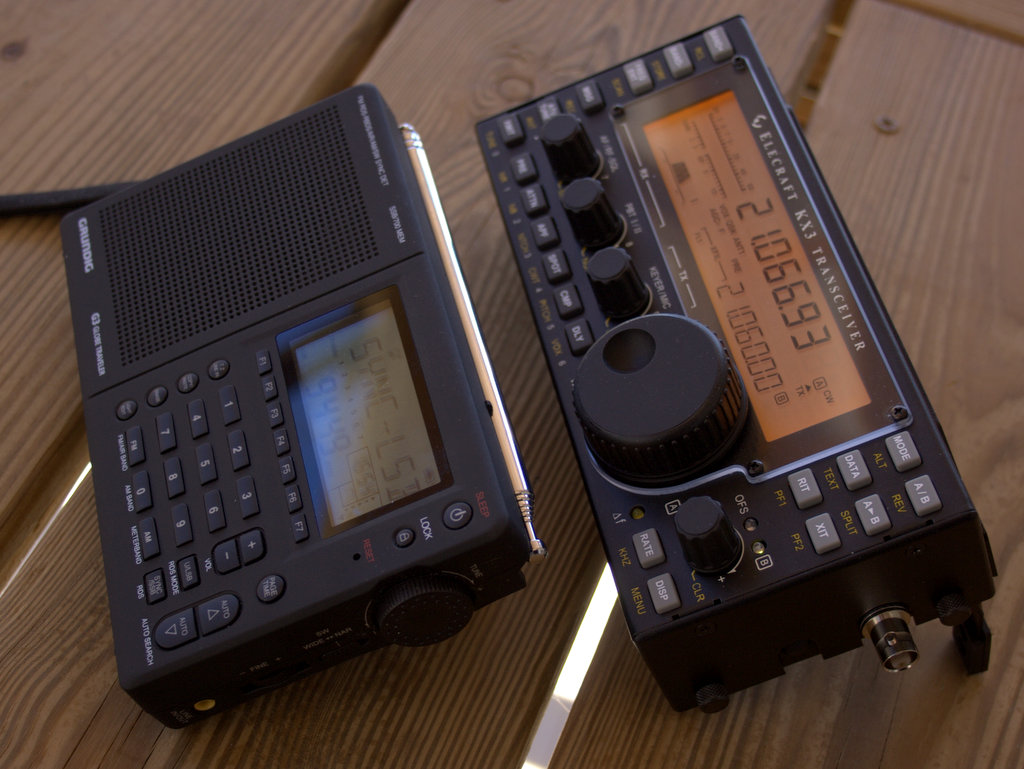
Grundig G3 shortwave portable (left), Elecraft KX3 general coverage transceiver (right)

Ah, the best laid plans of mice and men…! In 2011 Elecraft introduced the venerable KX3 and I fell head over heels for that radio (just read my review). All of a sudden, my trusted K2/10 wasn’t getting as much air time and started collecting dust, so I (reluctantly) sold it to free up some radio funds.

Then, within weeks of selling my K2/10, someone posted a K2/100–a 100 watt version of the K2–for sale on our local radio club’s email group. No one in the group showed interest. The sale was for a late local ham, now SK (silent key), and his friend who was selling off the equipment really wanted to unload it quickly for the benefit of his family. I expressed interest, and only two weeks after selling my K2/10, I was a K2/100 owner.

I figured this must be the universe intervening because, had I not sold the K2/10, there’s no way I would have had funds to purchase the K2/100.

After purchasing the K2/100, I sold my only other 100W rig:  my beloved Ten-Tec OMNI VI+. I had been the owner of the OMNI VI+ for more than a decade and it was a radio I dreamed about in the 1990s. Still, it took up way too much table space in my modest little shack and, yet again, I needed to consolidate.

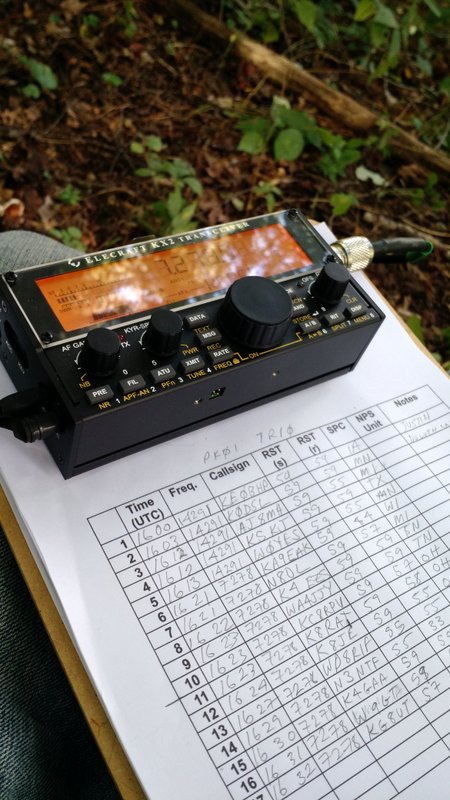
Activating PK01 (The Appalachian Trail) with the KX2 during the amazing National Parks On The Air event.

Fast forward a few years to the day before the 2016 Hamvention:  Elecraft announced their new field portable radio, the Elecraft KX2. The Elecraft team gave me early access to the KX2 and once again, I was head over heels for this new rig. When I started my review of the KX2, I already knew I wanted one, so didn’t even bother reaching out to Elecraft for a loaner––I just bit the bullet and purchased it. Click here to read that review. Shortly after making this purchase, I sold my KX1.

If you’ve been keeping track thus far, you’ll note that I currently have: an Elecraft KX3, an Elecraft KX2 and an Elecraft K2/100.

You’d think I was an Elecraft fan, but that’s not entirely the case. Elecraft KX series transceivers simply suit my operating style and meet my performance expectations. Why?

  • excellent ergonomics
  • benchmark performance (just ask Rob Sherwood)
  • general coverage SW broadcast reception
  • accessible, friendly customer service
  • regular updates and upgrades
  • and brilliant portability!

Recently, I’ve come to realize that although I still love the K2/100 in so many respects, I reach for my KX3 and KX2 more often…even though the K2 is my only 100-watt transceiver.

For this reason, I’ve decided I must sell the K2/100 so that I can fund the purchase of the (rather pricey) Elecraft KXPA100 amplifier. With the KXPA100, both my KX3 and KX2 will have a 100-watt linear amplifier at their disposal. Integration is seamless, and the amplifier is quite portable. With the KXPA100, I’ll be able to run a “full gallon” on Field Day on two radios I know like I know the back of my hand (especially the KX2!).

It has the latest firmware and includes all modifications. It’s fully-loaded, too–here are the options:

  • KPA100 K2/100 Internal Integration Kit
  • K160RX 160M and 2nd RX port
  • KDSP2 SSB Adapter (which is now discontinued)
  • KNB2 High Performance Noise Blanker
  • KSB2  SSB option

The only option it lacks, as far as I can tell, is the K60XV (60M and transverter adapter).

I’m hoping to sell the K2/100 for about $900 shipped (unless you, gentle readers, advise otherwise).

My K2/100 will be on view at the Winston Salem, NC hamfest this weekend, where I plan to hold down a table with my buddy, Vlado (NC3Z). I doubt I’ll sell it there, so will likely post it online later.

Here’s the thing, though…I look at this awesome little radio and wonder why I’m selling it! And then I close my eyes….take some deep breaths…and remember that it’s all about consolidating the shack and maximizing the potential of the KX3 and KX2.

And, who knows? Maybe the universe will intervene once again, and I’ll own another K2 in the future.

Post Readers, weigh in:  What radios have you bought and sold?  Any regrets?  Which have been, or are still, your favorites––and why?

Spread the radio love