Tag Archives: Kits

BITX40: A Fully Assembled $45 SSB QRP transceiver

bitx40v3_main

Many thanks to Pete (WB9FLW) who writes:

Don’t know if you have seen this or not. VU2ESE of BITX20 Fame has just introduced the BITX40.

This is a fully assembled and tested SSB Transceiver for $45 including shipping from India!

http://www.hfsigs.com/

Wow! I may have to purchase one of these and try it out.

I’m currently teaching a HamRadio 101 course to a group of 13 year olds. One of them recently asked how much it would cost to get a basic HF radio kit with SSB mode.  HF rigs–even basic ones–tend to be quite expensive if they include SSB.

Here are details from the BitX40 order page:
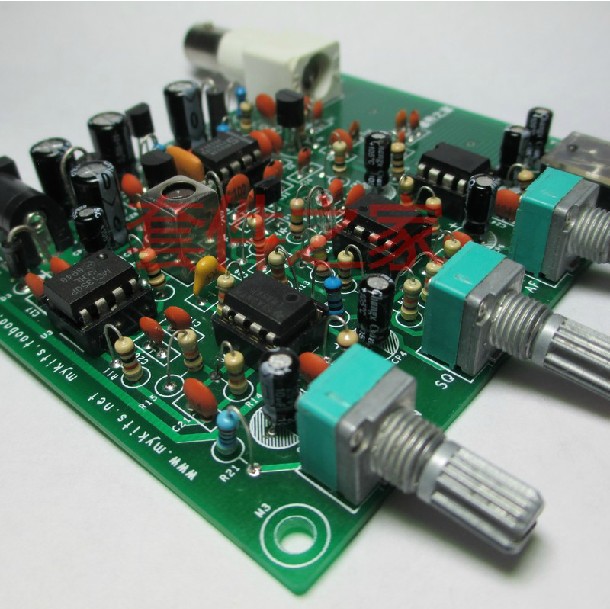
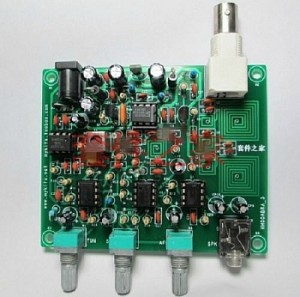
BITX40
Work the world on 40 meters

When was the last time you used a radio you had built? The BITX40 board is single circuit board 40 meter SSB transceiver module. Inside an evening, you can be on-air with this SSB transceiver module, chatting with the local gang or chasing DX. Plug in the earphones, the included electret mic, tuning and volume controls and you are on air! Included are high quality connectors, all the needed sockets and jacks, tuning and volume controls, mounting hardware, etc.

Technicals

The BITX40 is a very clean, crisp and quite receiver. The front-end has a triple tuned circuit that cuts out-of-band signals from getting inside, a diode ring mixer front-end with a very low phase noise, all analog oscillator makes this a crisp receiver that doesn’t overload easily. The all analog signal path to your ear makes provides outstanding signal clarity that is to be heard to be believed.

7 watts of SSB provides you with enough juice to have thousands of contacts on 40 meters, daily rag chew and occasional DX chasing. Any common 2 ampere 12 linear volts supply will provide enough juice for this transceiver. Or you could simply run it from a battery!

Hackable

The BITX40 will inspire you to experiment. Modify it, mount it, tweak it, change it.

The PCB uses all analog large sized SMD components that are laid out on an easy to understand manner on a double sided board with broad tracks. This can be your main module around which you can start experimenting. There are jump-points from where you can add more modules like the DDS, more bands, better audio amplifier, etc. Imagination is your limit. You can separately increase the power amplifier’s supply voltage to 25 volts to be more than 20 watts of power : You will have to add a better heat sink. The mods are on the way!

The board can be installed inside any box that you like. Make your own station rigs, man-packs, trail radios or mount it in a cigar box and leave it on your bedside table. The tuning capacitor has been replaced by a varactor tuning so you can place the tuning knob anywhere as it only carries a DC voltage. Watch the instructions video.
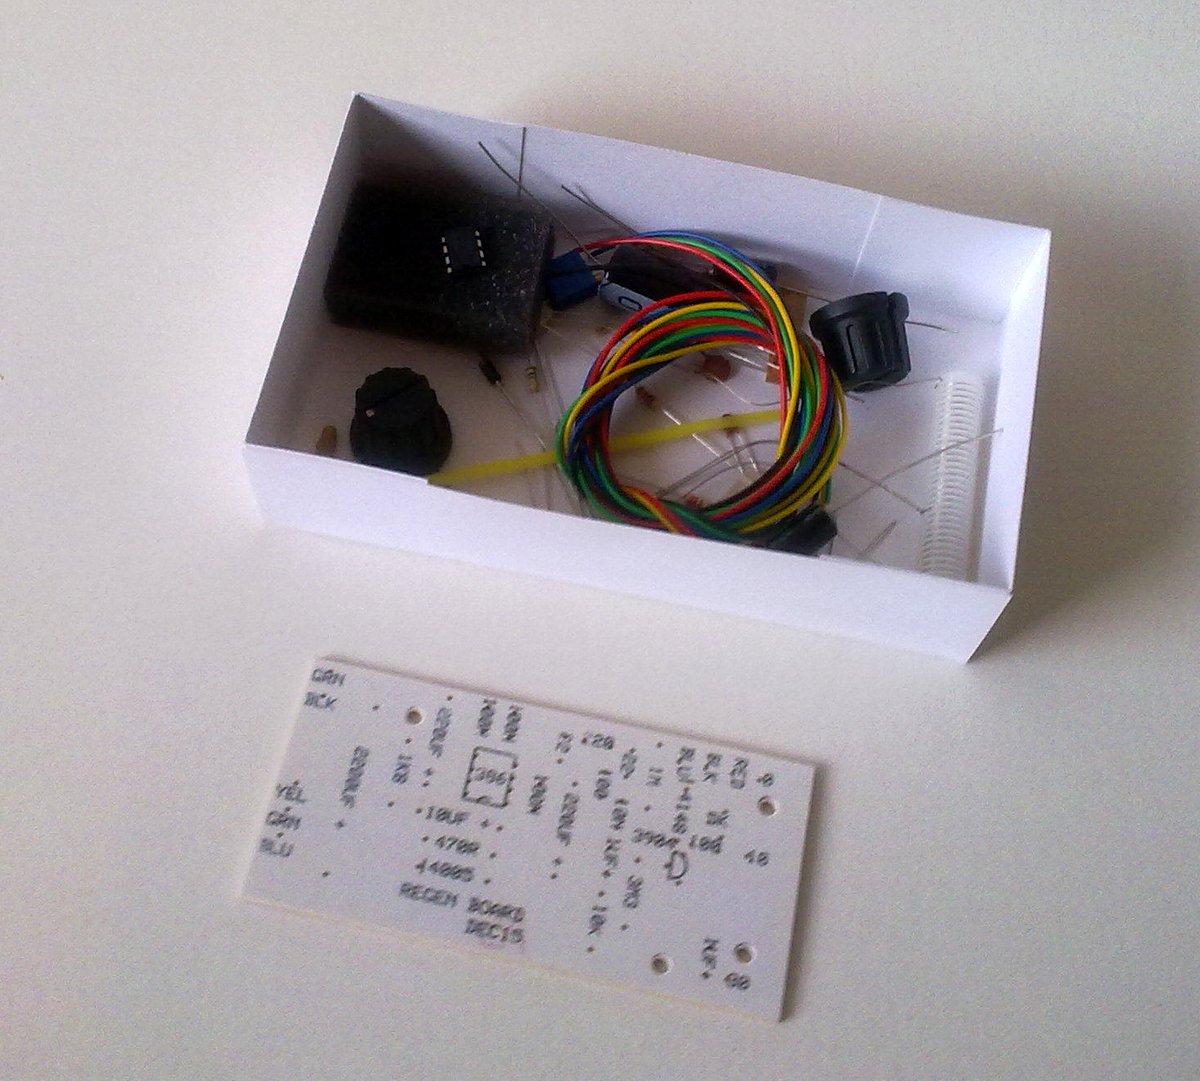
Box Contents

We have tried to include connector/hardware you might possibly need to build a full radio. However, we also had to balance the shipping weight to keep the overall cost down. You will have to supply your own box, power supply and earphones/headphones/speaker.

  • 4-1/2 inches by 5 inches tested SSB transceiver module, covering any 150 KHz segment of the 7 MHz band
  • Small electret microphone
  • High quality BNC connector for the antenna
  • Two earphone style audio jacks for the mic and the earphones/speaker
  • A set of DC power socket and plug
  • Volume control with on/off switch
  • 100k linear pot for tuning
  • 4 Brass stand-offs with mounting nuts and bolts
  • Connectors with wires for all connections on the board

* Note : A speaker is not included in the kit as earphones/headphones/speakers are easily available locally. No cabinet is included to save on the postage cost. Almost any box maybe used.

Manufacture

The BITX boards are hand assembled by a collective of women. Each of the toroids is hand wound. This provides these women with livelihood. The assembled boards are then DC checked a final RF check is performed to check the receiver’s sensitivity as well as transmitter’s output before being shipped. Each board is individually numbered.

Click here to view the BITX40 ordering page. 

Spread the radio love

The KRC-2 shortwave regenerative receiver kit

KRC-2 shortwave regenerative receiver kit1

Tony Westbrook recently contacted me about a regenerative receiver kit he has designed and produced in the UK.  It’s called the KRC-2.  Here’s the product description:

1 – 30 MHz with band spread tuning.

Regeneration with a difference. The regeneration setting on the KRC-2 is unaffected by the receiver tuning or the antenna coupling. How do we achieve this? The regenerative stage is fixed at 10.7MHz and used as an IF amplifier. The main receiver board is extremely simple to construct using only one FET and an audio IC. Like all the KRC kits it comes with a comprehensive construction manual which brings this project well within the grasp of the keen constructor. It was referred to as “a very sensitive little receiver” by Rob Mannion of Practical Wireless. Its unconventional design and simplicity should amaze even the experienced constructor. Case size 7 x 4 x 3 inches. 6 x AA batteries supplied.

According to Tony, the kit comes with everything; UK orders are even supplied with batteries. Tony stated, “the only thing the customer needs is a soldering iron, solder cutters, etc.”

By request, Tony sent a few construction photos and three videos of the radio in operation:

Photos

KRC-2 shortwave regenerative receiver kit4KRC-2 shortwave regenerative receiver kit11 KRC-2 shortwave regenerative receiver kit10 KRC-2 shortwave regenerative receiver kit8 KRC-2 shortwave regenerative receiver kit7 KRC-2 shortwave regenerative receiver kit3 KRC-2 shortwave regenerative receiver kit2 KRC-2 shortwave regenerative receiver kit9 KRC-2 shortwave regenerative receiver kit6 KRC-2 shortwave regenerative receiver kit5

Videos

Video 1

Video 2

Video 3

Click here to view the KRC-2 and Tony’s other kits. 

Spread the radio love

James adds an LM386 amplifier kit to his Heathkit GR-150

Heathkit Explorer Jr. Completed w. screwdriverMany thanks to SWLing Post contributor, James Surprenant (AB1DQ), who shares this update to his review of the Heathkit Explorer Jr. TRF AM radio receiver kit:


With regard to the Heathkit TRF AM receiver kit, I did indeed build my LM386 amplifier.

I was planning on home-brewing it from scratch as the chip is pretty much all you need and there are various proven schematics for the circuit, but in the end I went with a small kit from Nightfire Electronics for $10 plus $5 shipping that I found on Amazon.com.

It was a bit cheaper to buy it in kit form, of course, and then there was the convenience of having all the parts in one place.

Here is a photo of the kit as advertised on Amazon

kit

And here is my build with the Heathkit…

Heathkit + LM 386

I modified the kit to add a 3.5mm input jack, replacing the RCA jack that came with the kit, to make it easier to plug into the Heathkit radio.

I deliberated whether to install the audio amp into the Heathkit cabinet drilling out a couple of holes for the pot shafts. It all would have fit and I could have easily mounted the 3″ 8 ohm speaker to the back panel of the Heathkit radio. In the end, I decided to keep the radio original and mounted the amplifier board on a small piece of wood I found at a hobby store and decided to leave it all exposed. It works well, all things considered.

(Click here to view video on Facebook.)

It worked well and per my original review on SWLing Post, I feel Heathkit should have included such a little amp in the kit – it makes a big difference.


Many thanks for the update, James! That little LM386 amp kit seems like an affordable addition for any receiver lacking an amplifier or adequate audio amplification.

Spread the radio love

The Heathkit GR-78: Ed’s “basket case” radio

BasketcaseMany thanks to SWLing Post reader, Edward Ganshirt, who writes:

I picked up this Heathkit GR-78 at a estate/moving sale. It was in a pile of “e-waste” (you know, old vcr’s broken TVs, remote controllers, dead cell phones, etc.).

I found a container and sorted through the stuff to retrieve all what looks like Heathkit parts. The radio was disassembled and scattered about. I was able to collect all the critical components and brought the works to the sales table. The person manning the table said that was stuff they were discarding and I could have it for free but the Easter basket was $0.50.

So far I had put little time into it but was able to mechanically assemble it completely. All the fasteners holding the cabinet were missing. The rest appears to be all there but the primary side of the transformer is open and the NiCads are shorted and stone dead. The manual that I found in their recycle bin is complete and appears to gone through 3 owners by 3 sets of handwriting in the notes and comments through out the manual. If anything this looks like a CSI/forensics troubleshooting process getting into the mind of 3 different owners unsuccessful at making it work.

I will keep you posted on the progress.

WA1-LAI

More power to you, Ed! There are few things as difficult as picking up where someone else left off on a kit build. Your project is exponentially more complicated since there were three people involved and parts are scattered.  Please update us with your progress.

Readers: If you have any experience with the GR-78, I’m sure Ed would welcome your input!

Spread the radio love

James reviews the Heathkit Explorer Jr. GR-150 TRF AM radio receiver kit

HeathkitExplorerJr
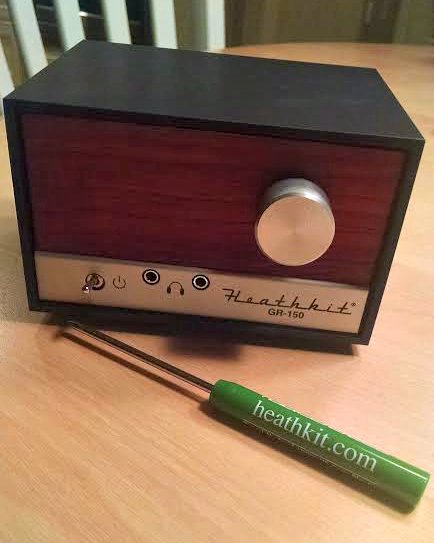
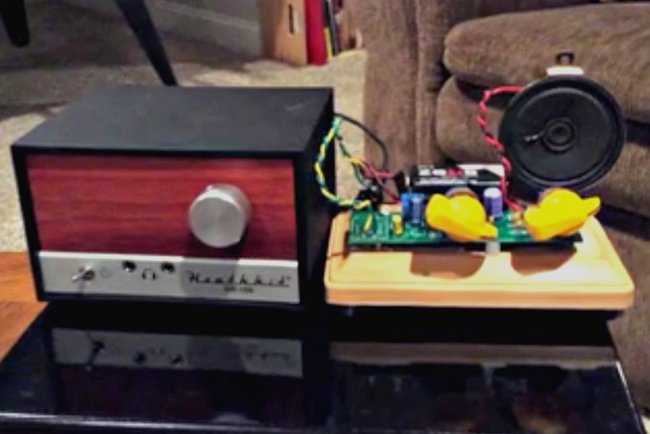
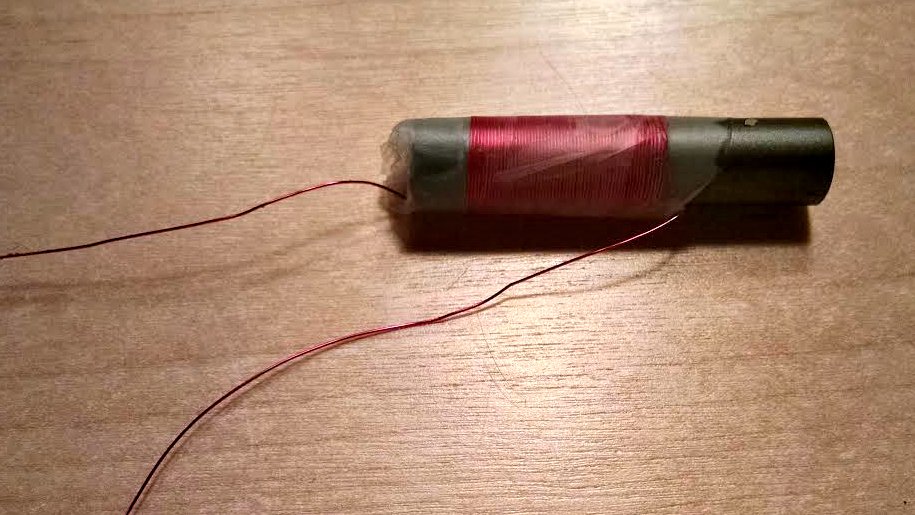
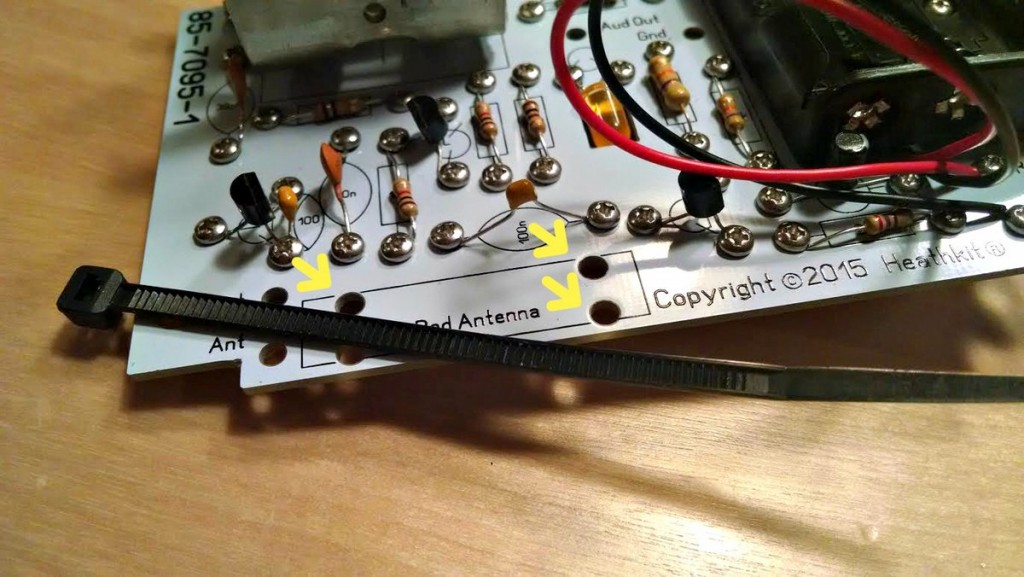
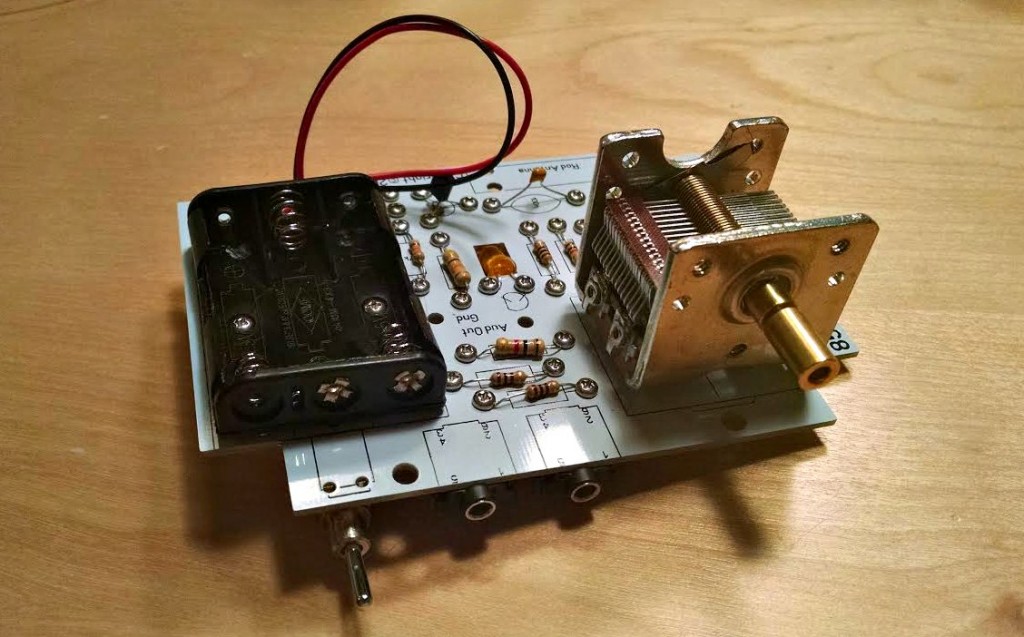
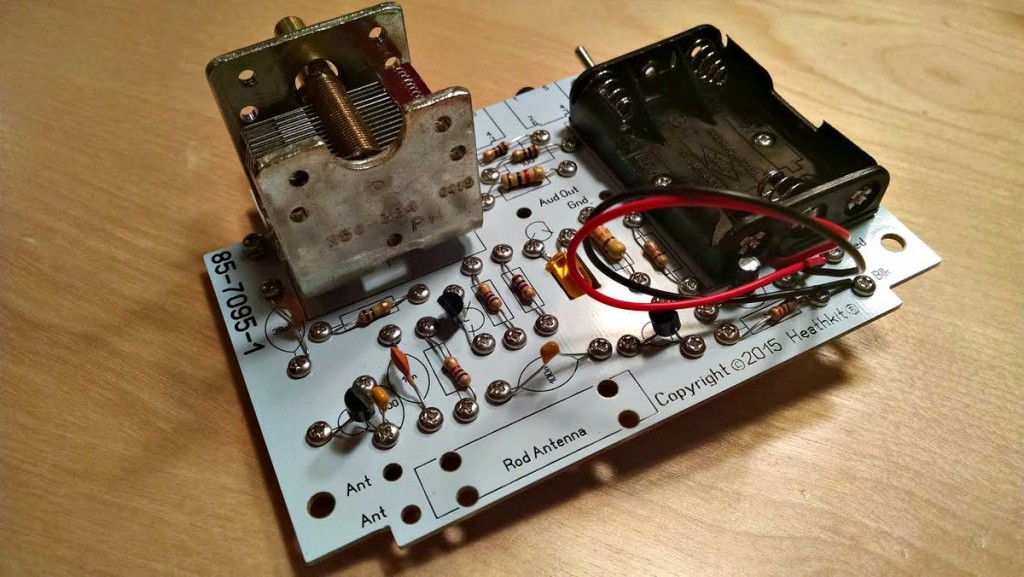
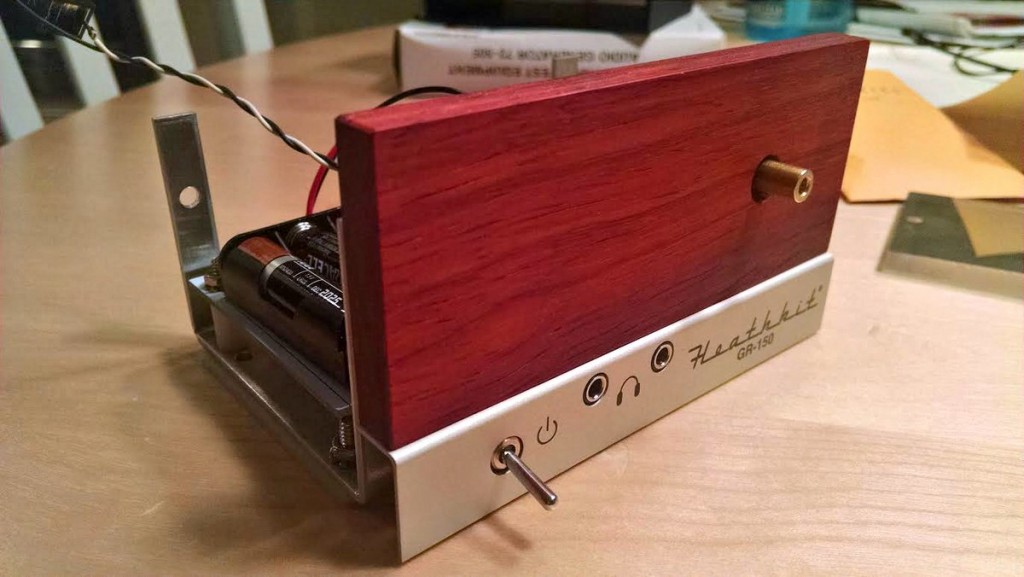
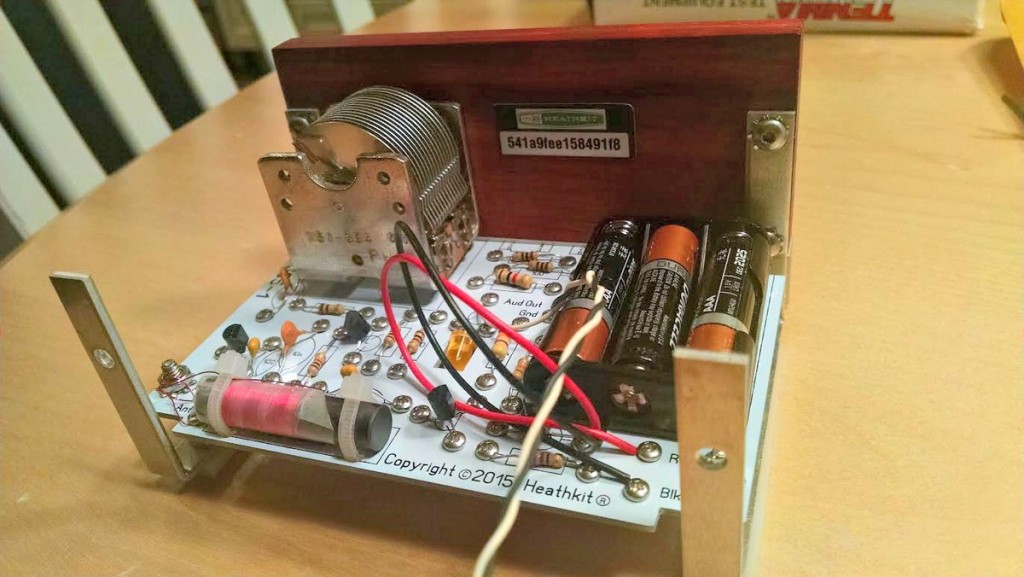
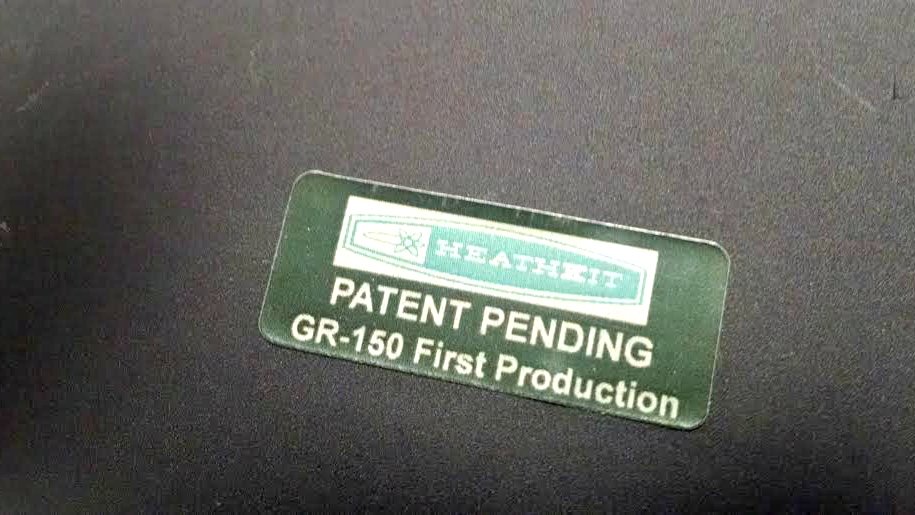
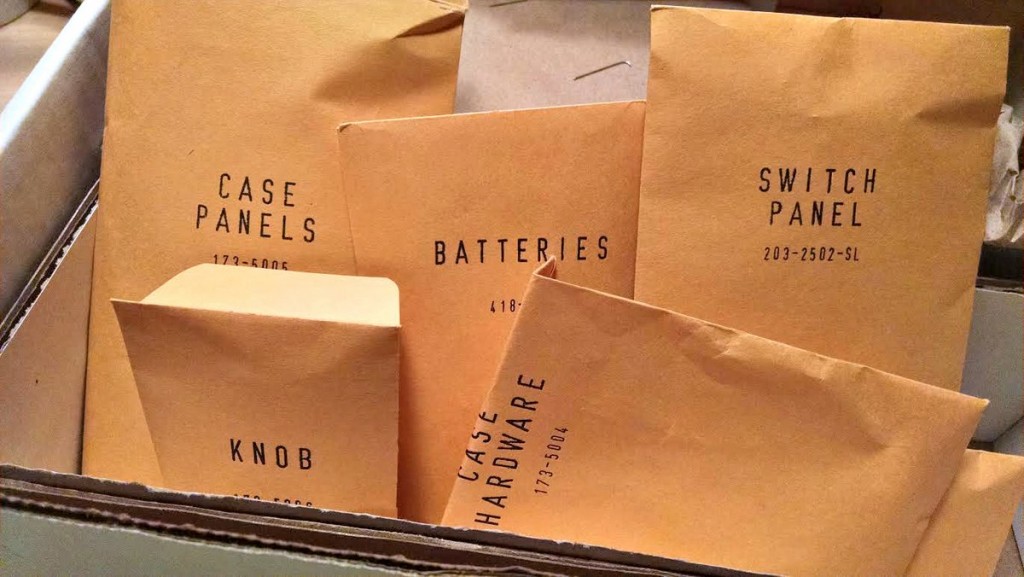
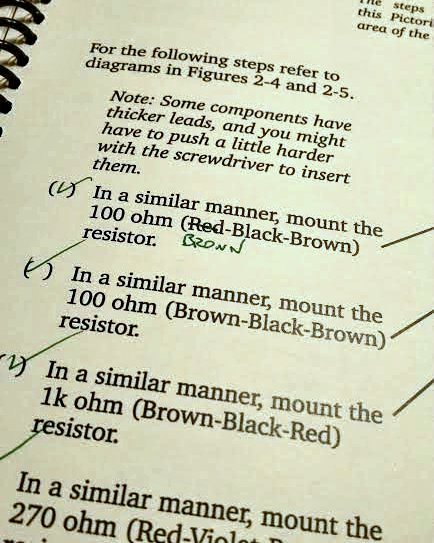
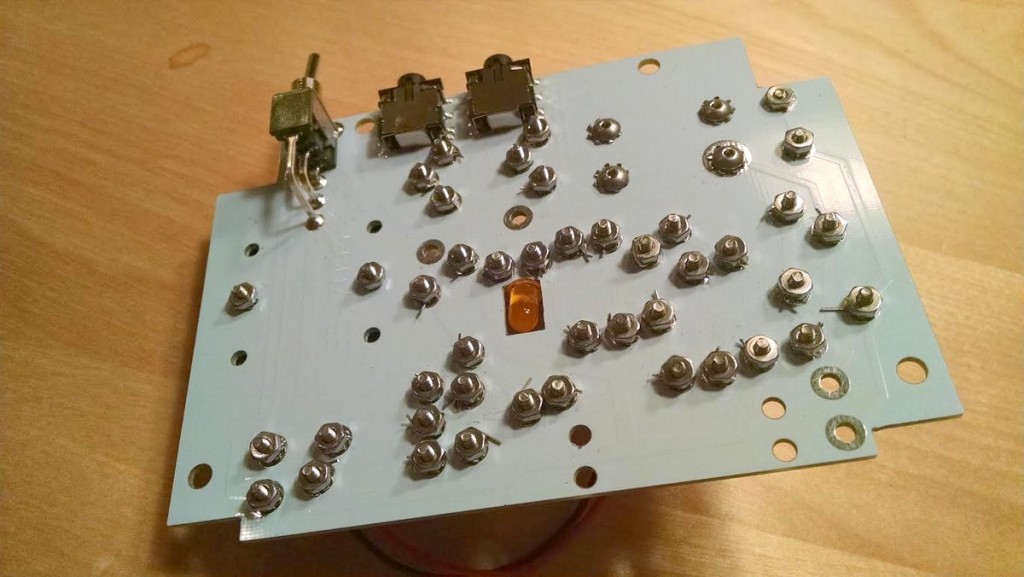
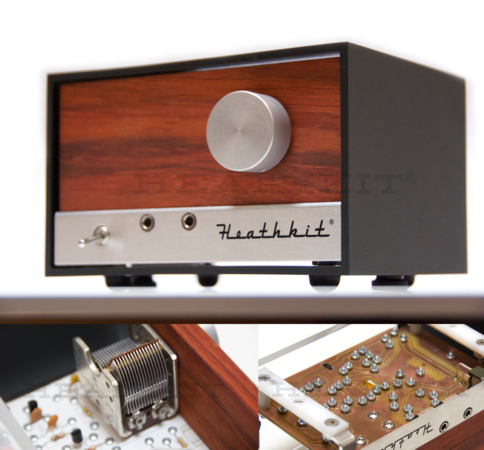
Many thanks to SWLing Post contributor, James Surprenant (AB1DQ), who shares this review and photos of the new Heathkit Explorer Jr. TRF AM radio receiver kit:


 Heathkit Explorer Jr. Review

I received this Heathkit kit for Xmas from dear old Dad.

Heathkit Explorer Jr. Manual

The Explorer Jr. manual is very nicely done, spiral-bound, and very reminiscent of the old Heathkit manuals in terms of lay-out and detail.

Heathkit Explorer Jr. Retro envelope packaging

The packaging of the parts is also reminiscent of the old Heathkits with parts grouped into envelopes by phase, ie. “Active Components,” “Passive Components,” “Small Parts,” “Knobs,” etc.

The first night, I worked through completion of the circuit board attaching all electronic components and stopped at the step for winding the coil. I thought it would make sense to start fresh on that step since winding coils is generally a pain.

Even on the first night, I had a few criticisms:

  • A couple of the envelopes were ripped open when I unpacked the kit. There were nuts, bolts, spacers and an Allen wrench loose in the outer box. That said, no parts were missing.
  • I found two errors in the manual:
    1. The color code for one of the resistors was incorrect in the manual. With my aging eyes, and the miniaturization of components today, I always use an ohm meter to test all resistors before attaching them to the PCB when I build a kit.

      Incorrect color code in manual.

      Incorrect color code in manual.

    2. The circuit contains 10 resistors and all 10 were included in the kit. But one was completely missing from the step-by-step instructions. After I finished attaching all active and passive components, I had one resistor left over and fortunately there was a matching empty space on the circuit board for the same value resistor. I double and triple checked the instruction manual and I can not find where it calls for this resistor to be attached.
  • My biggest criticism so far is the fact that this kit is “solder-less.” All components are attached to the PCB with screws, lock washers and a nut. You insert the leads for each component through the over-size pass-through holes on the PCB, and bend the leads tight against the edge. Then you insert a screw in from the topside, place a lock washer on the bottom side and fasten with a bolt.
Bottom of the PCB board

Bottom of the PCB board

On the upside, the fact I didn’t need to work with a hot solder iron meant I felt comfortable building the kit at the kitchen table. (My XYL would not be pleased if she found burn marks on the table!) So I had a nicer environment to work in than the basement work bench.

Heathkit Explorer Jr. sheered off resistor leads
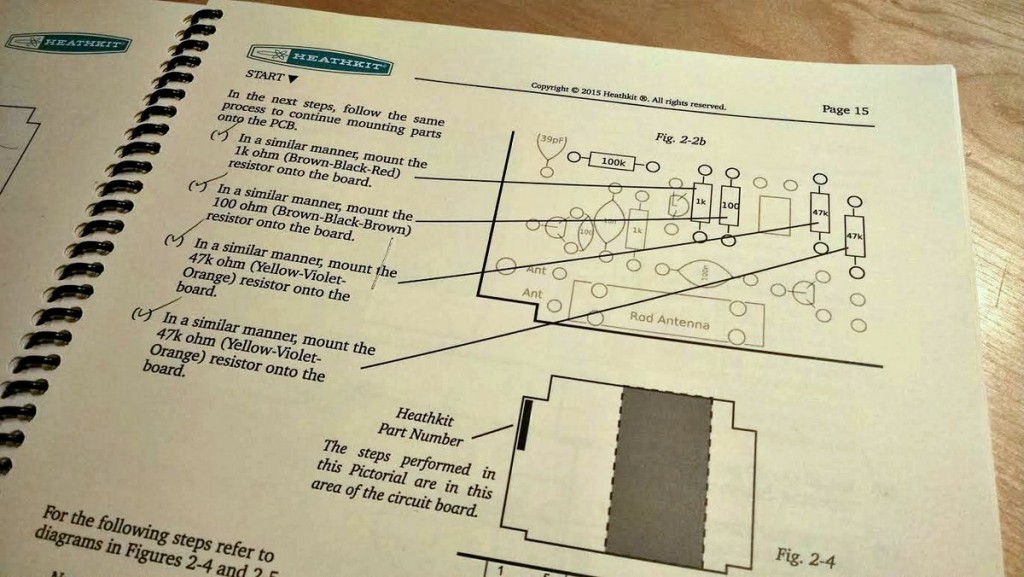
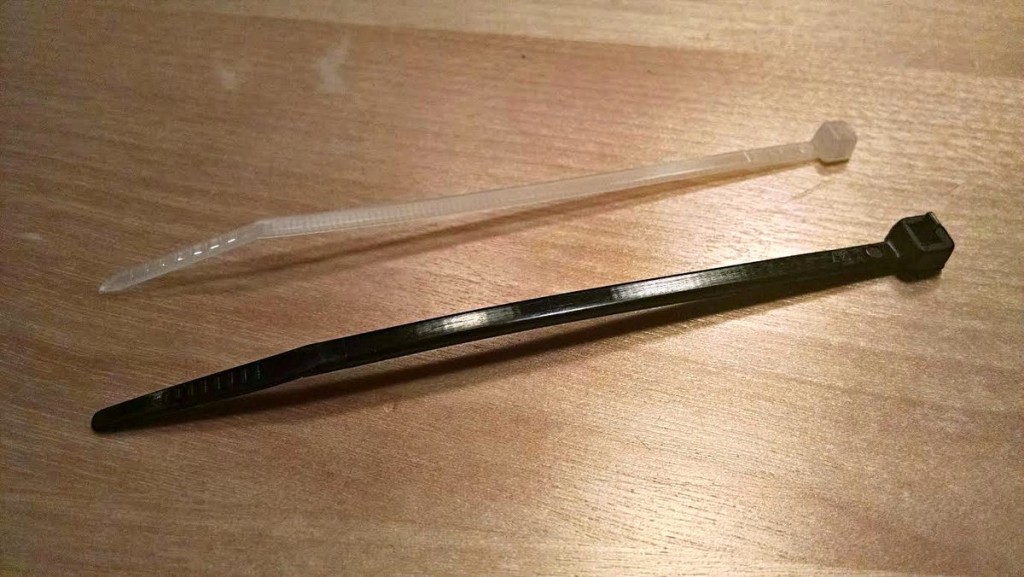
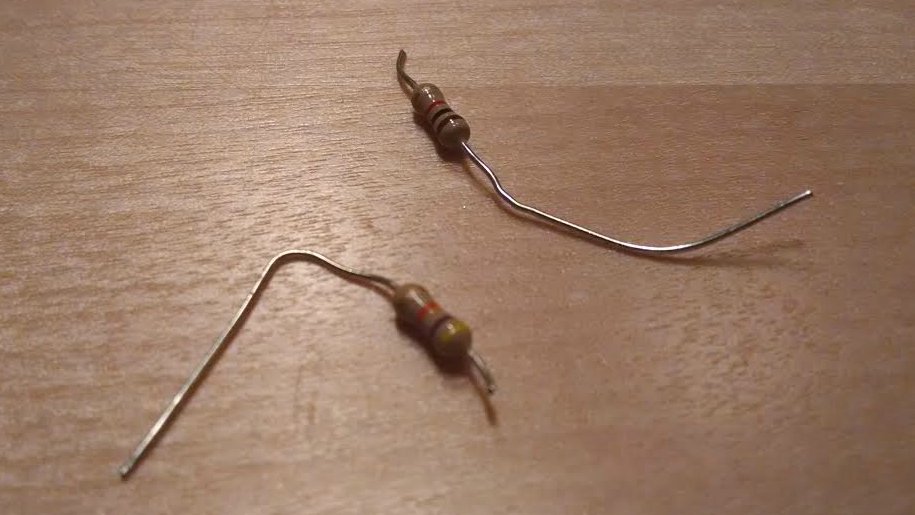
On the downside, I managed to sheer off the leads on TWO resistors when tightening the screws. Fortunately I was able to replace the busted resistors from my on-hand stock.

The other odd thing about this method of attaching components is that Heathkit included a nifty screwdriver in the kit, but leaves it up to the kit builder to provide a small socket wrench or pliers to hold the nut in place while tightening the screw.

Finally, the instructions call for the kit builder to ‘bend the excess leads back and forth’ until they snap off, rather than instructing the kit builder to snip off the excess leads with nippers. That seemed really strange to me.

Heathkit Explorer Jr. Completed coil

I completed my build of the GR-150 Explorer TRF radio this past weekend. I had no difficulty winding the coil, which involved 56 turns of magnet wire around a ferite core and securing it with transparent tape.

Heathkit provided the black ties, which were too large.

Heathkit provided the black ties, which were too large.

The next problem I encountered was attaching the wound coil to the PCB. The kit came with two zip cords to use as fasteners, but the zip cords were much much too large to fit through the holes drilled in the PCB. So this required a trip to the hardware store.

You can clearly see that the holes are too small for the black cable ties.

You can clearly see that the holes are too small for the black cable ties.

Once I had the coil mounted, I encountered the problem again with the bolts and nuts shearing off the leads – this time, it took me about 4 tries to attach the thin fragile coil wires to the PCB. It’s a very fragile process that again had me wishing this was a solder kit.

Heathkit Explorer Jr. Top of PCB front

The rest of the assembly went well. The only other glitch I encountered was in assembling the cabinet, the kit came with six locking star washers for the cabinet, in fact the parts list indicates that six should have been included in the kit. But then the actual assembly called for 10 star washers.

Heathkit Explorer Jr. Top of PCB

Heathkit Explorer Jr. Nearly finished frontHeathkit Explorer Jr. Completed PCB mounted

So, how did the radio perform? About as expected. It is a single stage TRF receiver without a proper audio amplifier. The instructions say you should use earbuds to listen to the radio, but I found that my standard stereo earbuds to be off too low an impedance for while the radio worked, all stations heard were very faint – about as strong as you’d hear from a typical crystal radio kit.

Heathkit Explorer Jr. 1st run sticker

I hooked the radio up to a set of PC speakers which helped – a lot. Once I could hear the audio output, I was very pleased with the radio’s performance. The tuning cap is geared and it takes a good five turns of the tuning knob to cover the entire broadcast band. The radio was fairly sensitive and not too selective – again, as you’d expect.

So, was it worth it? For me, sure… but it depends on what you are looking for.

It’s a bit pricey for what you get, but if you want to support Heathkit as it attempts to rise from the ashes, and if you have the $$$ to ‘donate’ towards the cause, it may be worth it.

Heathkit Explorer Jr. Completed w. screwdriver

Here is my take:

The good

  • Very nice quality materials….the PCB, tuning cap, and cabinet were of a quality you don’t often see in kits.
  • Nostalgia factor–from the packing to the manuals, the kit really does capture some of the Heath nostalgia.
  • Level of detail in the step-by-step instructions.
  • Documentation. The manual ends with a very nice feature on radio theory and theory of the different stages of the TRF and how to read a schematic. It’s clearly written for a youngster as it’s complete with drawings of smiley-faced electrons moving through the components and circuits.
  • The radio does work and is a joy to tune across the dial.

The bad

  • Quality control is lacking. It’s hard to imagine a kit ever leaving Benton Harbor back in the day with such glaring errors in the manual (wrong color code, missing steps), or with the wrong size zip ties, etc.
  • Price. Even though the materials are high-end, the retail price seems a bit high.

The ugly

  • I really wish Heathkit had included either a built in audio amp circuit (there is plenty of room in the cabinet to add a simple IC-based amp), or would have marketed a separate audio amp kit. Having an amplified speaker would add a lot in terms of pleasure from the completed kit. Another kit vendor, Peebles Originals, peeblesoriginals.com, sells a nice little audio amplifier kit for use with their regen radio kits. I’ve built it, and it’s a simple straight forward kit. Heathkit could have done this and it would have made a big difference. (I think I’ll try my Peebles amp with the Explorer!)

Overall, I really enjoyed the build and I like the radio. I’m looking forward to see what the ‘new” Heathkit does next.

I applaud Heathkit for making a go at a come-back and will continue to support their efforts by buying and building their pricey stuff – yeah, I’m that guy.

73 de AB1DQ
James


James, thank you for not only sharing your experience–along with errors and omissions–but providing excellent, detailed photos. I can’t tell you how many times I’ve been confused by kit instructions and turned to Google to help me find photos and notes from other builders. Your details will help others attempting to build the Heathkit GR-150.

I hope you enjoy your new Heathkit! You’ll have to let us know how that Peebles powered speaker works with the G-150!
Spread the radio love

DIY Kit for Aircraft Band Monitoring

Aircraft-Band-RadioThere is an interesting kit being sold on eBay designed specifically for aircraft monitoring of 118-136 MHz (meaning it could also cover a number of ACARS frequencies). The receiver is being sold as a DIY kit, a completed kit, or an assembled kit and enclosure. Prices range from ~$16 to $38 plus shipping from Hong Kong. I purchased a kit and enclosure, as building it is part of the fun for me. I will let you know how the construction goes and how the receiver performs after I get the kit together. Delivery time is estimated to be between 2 and 3 weeks, typical of things coming from Hong Kong.

Here is a picture of an assembled board:

swl-aircraft-kit

If anyone has experience with this kit let us know your results!

Robert Gulley, AK3Q, is the author of this post and a regular contributor to the SWLing Post. Robert also blogs at All Things Radio.

Spread the radio love

New kit by NM0S: the 4S-Tuner/Antenna Coupler

4stuner_panelDave Cripe (NM0S) has designed yet another QRP kit for the 4 State QRP Group: the 4S-Tuner/Antenna Coupler.

Description (per Four State QRP Group):

This excellent random wire antenna tuner is the classic T-Match design which is known for wide matching range and smooth operation. Dave has added a nice wrinkle – the SWR indicator employs TWO leds, not the normally seen single red LED. A green one indicates output power with a red one indicating reflected power. The beauty of this arrangement is that the operator sees the output power peaking as the SWR goes down, just like a power meter with dual meters – very intuitive. This makes tuning easier and leaves no doubt that it’s tuned for maximum power output. For a high SWR the red LED is at full brightness and the green LED is off. At 2:1 both are at equal brilliance. At 1:1 the green is full on and the red is off. The small size is perfect for portable operations. Add this dandy little tuner to your portable ops go bag, or use it at home. It’s equally at home on a picnic table, in a tent or camper, as well as on the operating desk in your shack.

Specifications and Design Features

  • Wide tuning range: 80 meters thru 10 meters. Tested on EFHW and 100′ wire.
  • Maximum Power Throughput: tested at 10 Watts.
  • Low loss large toroid
  • Twelve taps for small inductance step selection.
  • Low insertion loss when matched.
  • Enclosure Size: 3″x3″x2″.
  • Pittsburg Construction.

Shipped price is $51.00 (US), $55.00 (Canada), $60.00 (Outside US/Canada).

Dave Cripe designs excellent kits for the ham radio community; they’re easy to build, fun and functional.  If this kit is as popular as his past kits, the first run will most likely sell out in short order.

 Click here to check out the 4S-Tuner/Antenna Coupler at the Four State QRP Group website.

Spread the radio love