Shortwave listening and everything radio including reviews, broadcasting, ham radio, field operation, DXing, maker kits, travel, emergency gear, events, and more
[Update: Please note that this survey has been closed, but the audio samples–labeled Radio A and Radio B–will remain to allow others the opportunity to make an evaluation prior to reading the PL-680 review.]
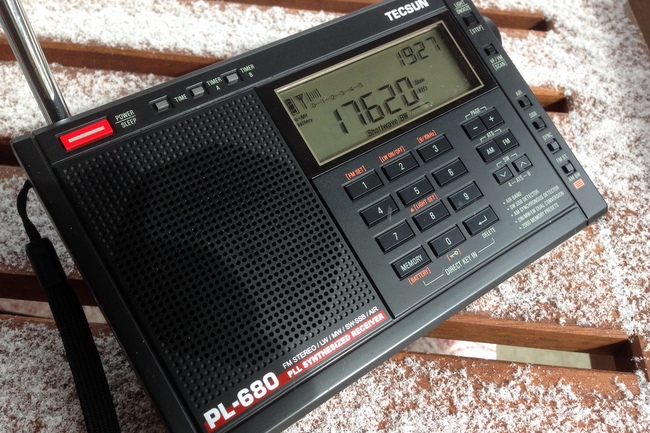
I’ve been spending a little time with my new Tecsun PL-680 today, and it’s been most interesting. Of course, I’ve already begun to form a few opinions about the radio and am taking notes. Yet I never believe a shortwave radio can be judged in one sitting; there are simply too many variables to account for, such as minute changes in propagation, fading, local radio interference, all of which can have a temporary effect on performance. It’s better to judge a radio after having used it over the course of at least a week or so, in diverse reception conditions.
Still, as I tuned the PL-680, I was already wondering how it compared with its predecessor, the PL-660–? And since I’ve received at least ten emails from readers curious about the same thing, I thought I might start a series of blind audio tests in order to let our readers decide for themselves.
So…ready for some fun?
Below, I’ve embedded eight recordings comparing the PL-660 and PL-680 on shortwave. All of these are recordings of broadcast stations, no SSB yet (I simply didn’t have the time today).
To participate, just listen, then fill out the form that follows with your choice of “Best Radio” for each broadcast. But do note the following:
I’ve attempted to set the audio levels equally on both radios. Iused the broadcast in the first recording to set the audio levels; they remain at this level for the remainder of the recordings. Nonetheless, you’ll note that one of the radios seems to have lower audio on a couple of the higher-band recordings; this is not due to any change in the incoming volume nor adjustments to the audio levels.
As seen in the photo above, I used a Zoom H2N digital recorder to make these recordings on the tailgate of my truck. Any time you hook a digital recorder up to a radio on the medium wave or shortwave bands, you most likely will inject a little noise. When I listened to each radio without the recorder in-line, I determined that the Zoom injected very little audible noise.
The assignment of “Radio A” and “Radio B” was chosen by a coin toss–so pretty much at random!
I included two recordings of WWV on 25 MHz. This is because the reception conditions from WWV change in a a matter of minutes, which would provide recording variation. I thought it would be best to include two such recordings.
Both radios have the gain set to “DX” and bandwidth set to wide. None of these recordings employ synchronous detection. The telescopic antenna was fully extended on both units. Additionally, both radios had the tone control set to “bass.”
No less relevant: it was 32F/OC with strong wind gusts and blowing snow in my face when I made these recordings. But I knew our readers would understand (and likely appreciate) this dedication to the absorbing art of SWLing…just as I appreciate your participation in judging this head-to-head radio showdown!
Audio Samples
9,395 kHz – Radio Prague via Global 24 (strong signal example)
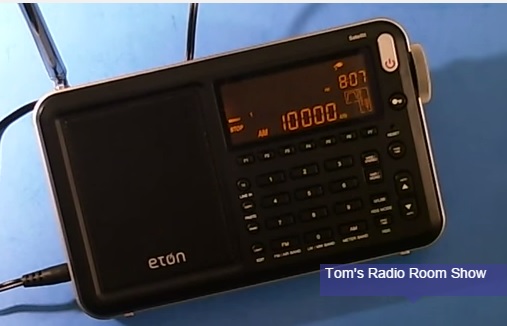
Many thanks to SWLing Post reader, Thomas Ally, who points out that Tom Stiles has published an array of videos featuring the Eton Satellit. The actual reviews and features begin with TRRS #0446.
Readers: I suggest you check out the library of informative videos Allan (W2AEW) has created over the years and even subscribe to his YouTube channel. His tutorial videos are quite professional and he does a brilliant job explaining complex electronic principles. Indeed, be sure to check out one of his latest on the ETOW HumanaLight kit:
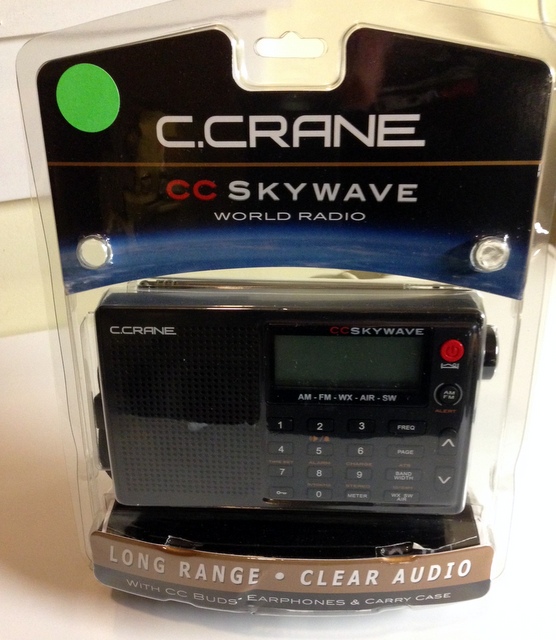
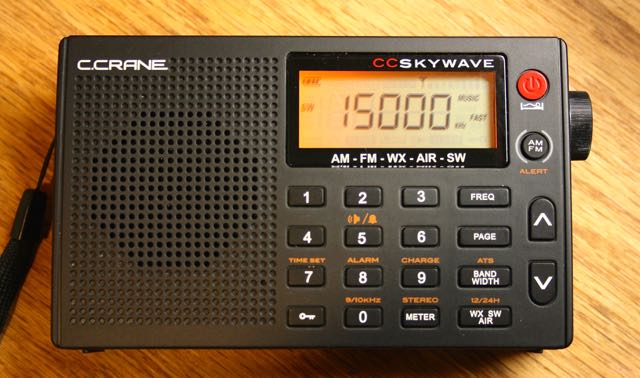
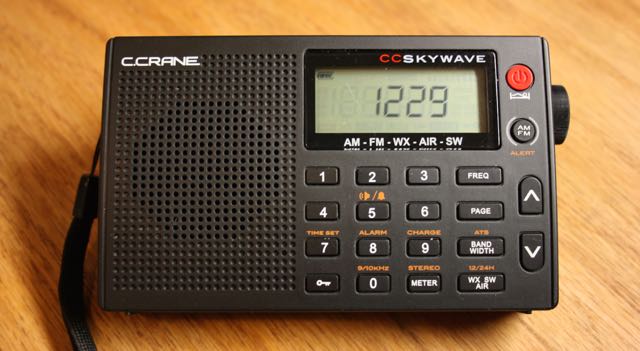
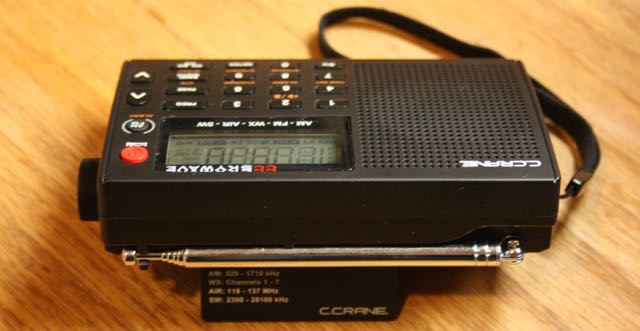
While electronics manufacturer C. Crane offers a number of unique AM/FM radios, including some of the best portable medium wave receivers on the market, they’ve traditionally only had two models of shortwave radio––namely, the CCRadio-SW, and the CCRadio-SWP. Earlier this year, however, C.Crane announced a new portable that would join their product line: the CC Skywave.
Admittedly, I was eager to give this little radio a go: C. Crane touts the Skywave as an exceptional travel radio, for which I’m always on the hunt. Last week, I had my opportunity when C. Crane sent me the new CC Skywave sample for review. I instantly got to work scrutinizing their newest offering…and here’s what I’ve discovered.
First impressions
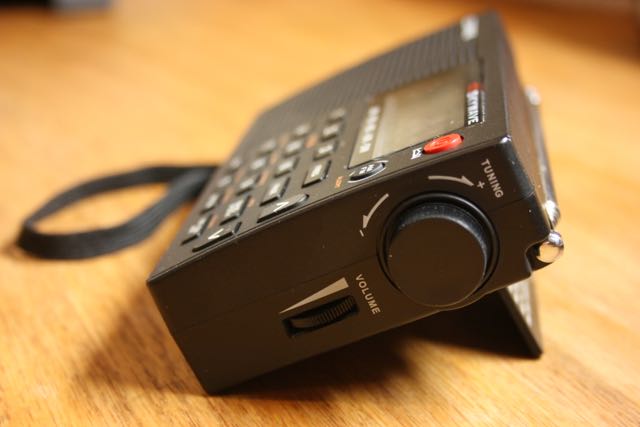
The form factor of the Skywave is very similar to C.Crane’s CCRadio-SWP pocket radio; in fact, its smooth plastic body even feels the same. While this radio doesn’t have the rubberized coating that have become popular on radio exteriors in recent years, supposedly to provide an easy-to-grip surface, I’m pleased that C.Crane does not use this, as these coatings can eventually deteriorate over time and with heat exposure, becoming somewhat tacky or sticky to the touch.
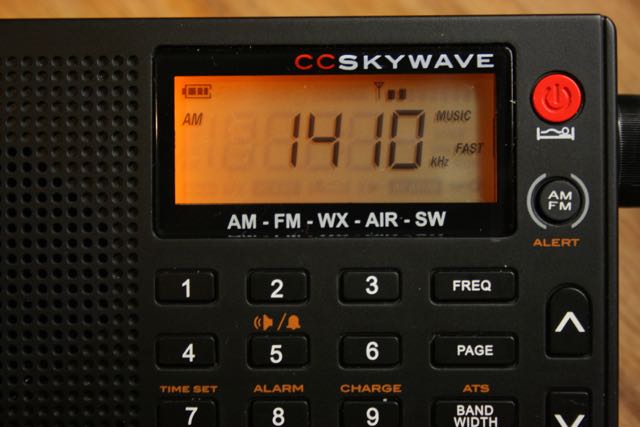
The Skywave’s backlit LCD display is small, but readily viewable from several angles. All of the buttons on the front of the Skywave have a tactile response, again, similar to the CCRadio-SWP. The buttons require slightly more pressure to activate than Tecsun and Degen models; I prefer this, especially for a travel radio: should I forget to activate the key lock, it’s much less likely that the radio will accidentally turn on during transit.
As always, I attempted first to see how many radio features and functions I could uncover without first consulting the owner’s manual. In the past, C.Crane products have been some of the most intuitive on the market. Fortunately, the Skywave did not disappoint: first, I was able to set both the clock and alarm within moments; both essential in a travel radio.
Once the radio is on, it will display either the time or frequency on the main display. While the Skywave defaults to a time display, I discovered that the lock button toggles the display between time and frequency for ten seconds. (Note: After reading through the manual later, I learned that you can actually change the default display mode to either time or frequency–very nice touch!)
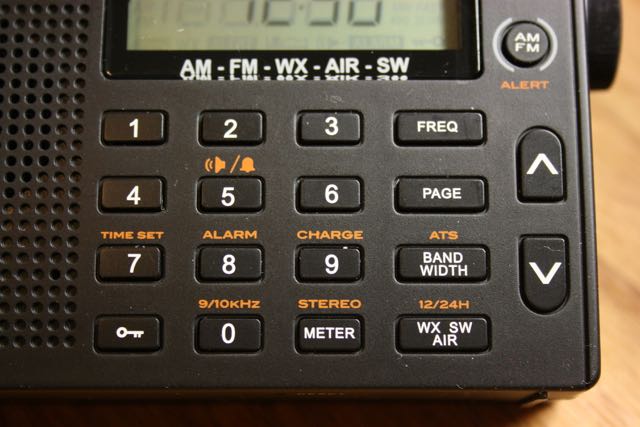
I then turned on the radio and found the memory allocation to be very straightforward: tune to the desired station, then press and hold a number button two seconds to save. Press a button quickly to recall. Memory remembers bandwidth, stereo, or mono (if FM), and any voice or music audio filters utilized–very handy!
Speaking of bandwidth, the Skywave has five on shortwave, medium wave, and air bands: 6, 4, 3, 2, and 1 kHz. By pressing the bandwidth button, you can cycle through these from widest to narrowest. The bandwidth defaults to 3 kHz, but the default can be changed by holding down the bandwidth button for five seconds (with radio powered off).
To enter a frequency in AM/FM/SW, you simply press the FREQ button, then key in frequency. To scan through the band, simply press and hold one of the up/down arrow buttons. Worth noting: the Skywave’s scan function is one of the fastest I’ve seen in a portable.
On the topic of scanning, and since this is a travel radio, I would have liked C.Crane to include an ETM function like that found in the Tecsun PL-310ET and PL-380. It’s quite a handy function for auto-populating temporary memories from a simple band scan. I assume this is not an option on the DSP chip powering the Skywave.
Owner’s manual
Once I had my fun trying to discover as many functions on the Skywave without the manual’s aid, I finally opened it and discovered a few more functions.
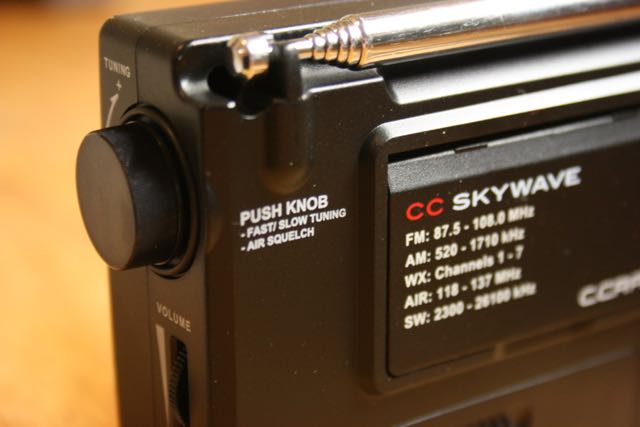
One feature I’ve already come to love in the Skywave: the ability to change the tuning speed, and thus frequency step-spacing on the tuning knob (option of 5 or 1 kHz steps), just by pressing the knob itself. I much prefer this to using a front-panel tuning step button because it’s so easy to operate in low-light settings (lounging in bed, for example).
Another unique feature of the Skywave is a switchable audio filter for voice or music. With the filter set to “voice,” the audio is enhanced for human voice intelligibility. When set to “music,” it widens the audio filter, thus optimizing audio fidelity. Toggling the audio filter settings between voice and music is very easy, but not intuitive; indeed, it’s almost a hidden feature you can discover via the owner’s manual. Simply press the “1” and “2” simultaneously while listening to a broadcast to toggle the filter.
I should note that the C.Crane owner’s manual is one of the most straightforward and simple I’ve seen in ages. You can tell that, at least in the English version that came with mine, this manual was written by a native English speaker. It made for simple, clear instruction without head-scratching over obscure terms. Even the least technically-inclined user will understand these instructions, no problem.
AM – Medium Wave
After asking SWLing Post readers what they would like me to include in this review, a number of you responded that you wanted me to give the AM broadcast band reception a proper review.
My foray into medium wave listening with the Skywave started off on the right foot. The very first night with the Skywave, I tuned it to 740 kHz, my favorite, albeit challenging to reach, AM station here in the North America–CFZM “Zoomer Radio” While those living in the midwestern and northeastern US can receive Zoomer radio easily enough at night, it is often a tough catch here in the southeast in the evening hours. After nightfall it competes with clear channel stations that also occupy 740 kHz. With a portable radio, the lock on Zoomer is never terribly strong and is very prone to fading.
But after tuning the Skywave to Zoomer, I received CFZM so well it sounded like a local station–in fact, I couldn’t believe it until a station ID confirmed that I was receiving it. Even more surprising was that I received it away from home, in an area plagued with RFI noise where I typically have to carefully turn a radio to null out the noise in an effort to enhance the desired broadcast. But the Skywave somehow mitigated this noise better than my other portables. Even when I turned the radio in the direction of the offending electrical noise, it wasn’t as bad as on other portables. Truly, the reception was remarkable.
With Zoomer firmly locked in, I hopped into bed, turned the volume to a comfortable level, and listened for at least half an hour before falling asleep. I was pleasantly surprised the following morning, some eight hours later, when I woke to the Skywave playing CFZM at the same level. Phenomenal! Perhaps conditions were exceptionally favorable that night; nonetheless, the Skywave couldn’t have impressed me more.
A side note–on the previous day, I’d inserted two generic alkaline AA batteries in the Skywave; after a total of ten hours playing at medium volume, the battery indicator still showed full capacity.
Medium wave audio samples
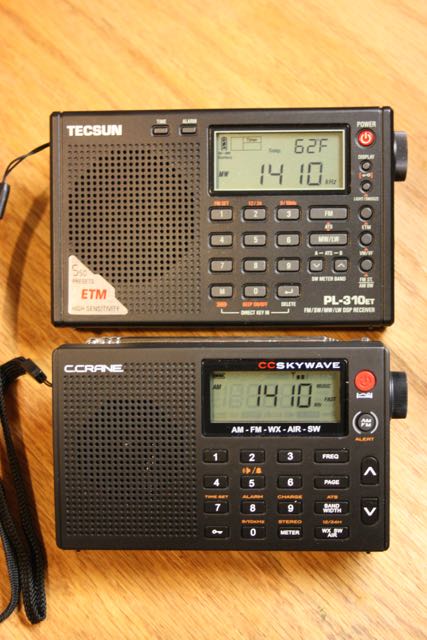
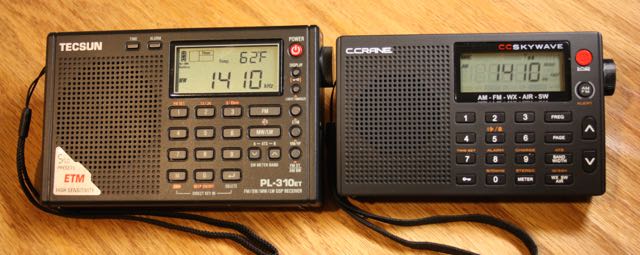
While time won’t allow a full audio sampling of the medium wave band for comparison, I did record the following comparison between the Skywave and the Tecsun PL-310ET (which I regard as one of the more capable sub-$100 ultra-compact portables on the market).
Since SWLing Post readers specifically asked to hear how the Skywave handles choppy nighttime medium wave DX conditions, I tuned to two frequencies with overlapping broadcasts, one of which was slightly dominant: 950 kHz and 990 kHz. I set the AM bandwidth to 3 kHz on both radios and made the recordings within one minute of each other. The CC Skywave’s audio filter was set to “voice.”
In the following recordings, listen for Radio Reloj (Cuba)–it’s buried deep in the noise. You might detect the ticking and “R” “R” in Morse code. These recordings were taken within one minute of each other.
To my ear, the Skywave was clearer and the commentator’s voice seemed to pop out of the noise better.
I’ve spent a great deal of time listening to the Skywave on the medium wave band this week and I feel comfortable recommending it for the medium wave DXer.
FM
While I’ve spent comparatively less time (thus far) evaluating the Skywave’s FM band, I can say that the Skywave receives my “benchmark” FM stations with ease. Sensitivity also seems to be on par with my other DSP based portables (meaning, excellent sensitivity).
Shortwave
Of course, being a shortwave enthusiast, I’ve spent the bulk of my listening time since receiving the Skywave on the shortwave bands. And during this time, alas, shortwave radio band conditions have been challenging for any radio. Yet I’m happy to note that this little radio does not disappoint: it has excellent sensitivity and selectivity for a radio of its size. When I compared the Skywave with the Tecsun PL-310ET, in almost every situation, they are nearly equal in performance.
Shortwave audio samples
Below I’ve included audio samples of the Skywave on 9580 kHz (Radio Australia). Under normal conditions, Radio Australia would be a blowtorch signal here in North America, but this particular morning, propagation was quite poor. In the audio, you’ll hear both radios attempting to cope with pronounced fading, with their AGC circuits reacting to the quick rise and fall of signal strength. Both radios were set to a 3kHz bandwidth and the Skywave’s audio filter set to “voice” to help mitigate noise.
Note that Radio Australia was broadcasting music, which can be more difficult to evaluate, but the vocals were prominent enough I felt it made for a good comparison.
This morning, I also recorded WWV on 15 MHz. Again, propagation conditions were poor across the bands, so even WWV (normally very stable) was affected by quick fading (QSB). For kicks, I decided to add the benchmark Tecsun PL-660 to this comparison. If you recall, it received some of the highest marks for sensitivity in our weak signal shoot out. The Tecsun PL-310ET and CC Skywave were set to 3 kHz bandwidth and the Tecsun PL-660 to it’s narrow bandwidth (which I felt was most equivalent).
The good news is that the Skywave is certainly a sensitive and selective portable. While evaluating shortwave performance over the past week, I’ve been pleasantly surprised by how well this little radio receives.
NOAA Weather radio
Those of us living or traveling in North America will appreciate the Skywave’s built-in NOAA weather radio functionality. Since I have at least a dozen self-powered radios and desktops that have built-in NOAA weather reception, I typically don’t give the band much thought. I figured NOAA reception would be a mediocre add-on with the Skyview. I was wrong.
Not only does the Skywave have NOAA weather radio, but it also has weather alerts. What’s so great about that? Imagine that you’re travelling to a rural area and weather is looking ominous; in this case, you can simply set the Skywave to the strongest NOAA channel and activate the weather alert (choose options for 4, 8, or 16 hours). If severe weather is reported for your geographic area, the Skywave will alert you.
I’m very pleased with the NOAA weather radio reception, as well. The Skywave receives NOAA stations even better than one of my dedicated weather radios.
AIR band
C.Crane included the Air band for travelers, as a means to listen to air traffic control while in an airport or awaiting a flight’s arrival. I have several portables with the AIR band, but most lack an autoscan ability (Grundig G3, G6), and performance on these tends to be mediocre at best.
I’ve traveled to three different cities over the past week and used the Skywave to tune to the local air-traffic control tower. After a bit of scanning, it eventually found the frequency, and reception was quite good. I have not yet used the AIR band in an airport (notorious for RFI) nor in a large metro area, so I can’t comment about performance under those conditions.
What really separates the Skywave apart from my other shortwave portable with the AIR band is that it actually has an adjustable squelch mode. Nice touch!
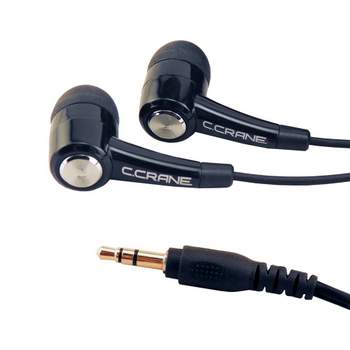
CC Buds Earphones
Unlike Tecsun portables which typically ship with batteries, an external antenna wire, chargers, travel cases, and the like, the CC Skywave comes with very few included accessories––just a carry case, an owner’s manual, and earphones.
Most of the headphones/earphones that accompany a shortwave radio package are of the cheapest quality. I’m happy to note that the Skywave’s included earphones are the best I’ve ever received as an included accessory with a shortwave radio.
The CC Buds Earphones are in-ear style (which I prefer, for sound isolation) with soft silicone earpieces. They are tuned to a frequency response which favors voice, an enhanced mid-range. For SWLing and MW DXing, I believe they’re nearly ideal. Indeed, I’m planning to use these with my Elecraft KX3 next time I’m operating QRP––I’m sure that SSB will sound great.
Since these are tuned for the spoken word, however, I wouldn’t necessarily favor the CC Buds Earphones over my Sony in-ear buds for music listening.
Summary
Every radio has pros and cons, and I jot down my reactions as I evaluate a new radio so as not to forget any details. The following is my list:
Pros:
Overall great sensitivity and selectivity for a portable in this price class
Considerate design, well-tailored for the traveler:
Compact size
Air band
NOAA weather radio
Easy to set clock and alarm
Simple controls
Lightweight
Operates on 2 AA batteries
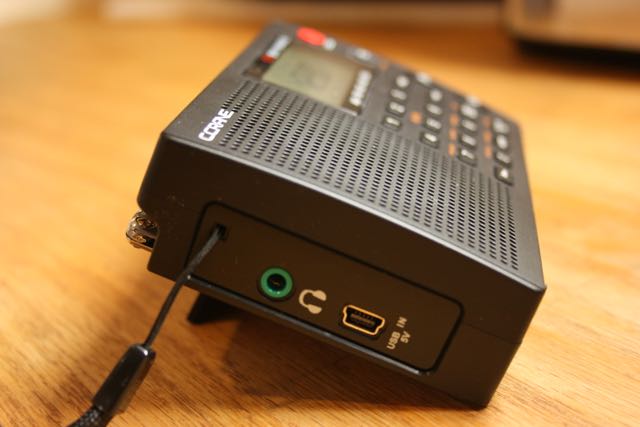
Charges from Mini USB (see con)
Wide HF frequency range (2.3 up to 26.1 MHz) compared to the PL-380/PL-310 (2.3 up to 21.95 MHz)
AIR band is truly functional: includes both scanning and squelch
NOAA Weather radio reception excellent
Includes soft silicone earphones (in-ear type) actually worthy of AM/SW listening
Auto scanning with the up/down buttons is very rapid
Integrated charging circuit
Uses common micro USB port for power/charging
Tuning speed easily changed by pressing tuning knob
Volume control is fully variable (free wheel, analog style), not in pre-determined digital steps
Selectable audio filters for music and voice
Cons:
Internal speaker audio is somewhat tinny (use of the voice audio filter helps)
No external antenna jack
No SSB mode (in this price class of $90 US, SSB is an included mode on some models)
Only one clock; no provision for dual local/UTC time
Mutes between frequency changes
Whip antenna is short––only 16” fully extended. While the Skywave seems to perform brilliantly with this short antenna (see pro), I can’t help but wonder if more length might boost some bands.
While no inconvenience to me, the Skywave does not come with an adaptor or USB cord for powering/charging. (Should you need it, C.Crane sells a proper noise-free regulated power supply separately ($15 US); however, most buyers will already have these cords and any USB port on your PC or USB-based phone charger will suffice. Also note that listening to virtually any radio while charging will inject noise into the receiver, resulting in sub-par reception.)
Can overload on shortwave and AIR bands if located near a strong radio station (see this comment)
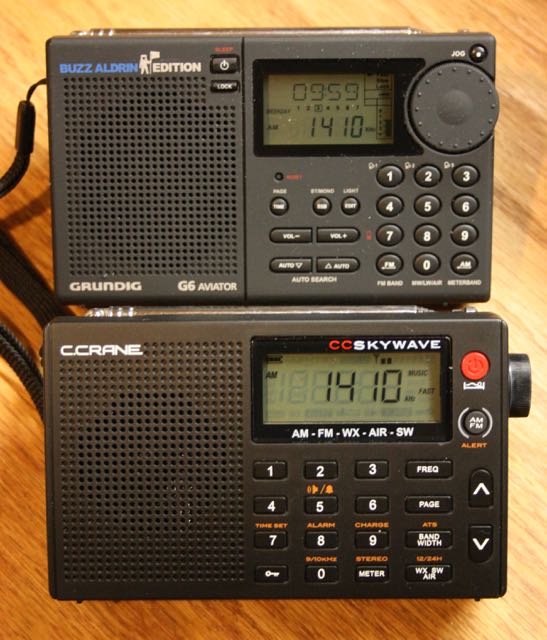
Conclusion
The CC Skywave is nearly identical in size to the late and great Grundig G6.
C. Crane has few shortwave radios in their product line, and all perform rather well for their price point; I know, as I have owned all of them and even purchased as gifts in the past.
Fortunately, it’s clear that C. Crane noticed the shortcomings of the AR1733 and has modified the Skywave’s design and firmware accordingly, which may account for the delayed roll-out of the CC Skywave. Obviously, the Skywave’s ACG circuit has been tweaked to cope with medium wave and shortwave listening, since a poor ACG circuit is one of the shortcomings of the AR1733. But, if so, wow…what a tweak.
Because all in all, the CC Skywave is a excellent little radio. Indeed, in terms of the ultra-compact portable market (models like I included in a recent shoot-out), I think it’s one of the best surprise performers I’ve seen in the past couple of years.
After just one week with it, I’ve already decided to take the CC Skywave along on my travels to see how it performs over time. It will replace my PL-310ET and PL-380 for my one bag domestic and international travelling. The CC Skywave is also especially well-suited for the “go”-bags and “bug-out” bags used in evacuations and other emergencies. Indeed, with AM/FM/SW/AIR plus functional NOAA radio, this little radio packs a lot––in short, the Skywave packs enough to get packed in my bag.
C. Crane has sent me their new CC Skywave shortwave portable for review. I’ve been using it since Friday and have started putting together a quick review.
If you have any thoughts or questions, please comment and I’ll try to address them in the upcoming post.
I tried out the software earlier this week by downloading 4GB of sample files from DK8OK and the Elad software. There are a lot of interesting features.
It is small! I like the use of the USB port for power. I can see how it would be a good receiver to throw into your laptop bag for trips.
I have a harsher Urban RF environment with 5KW and 1KW AM Broadcast transmitters within 2.5 miles. They reduce power at night. The Wellbrook AHA1530 Loop outputs a very high signal level from all the area’s AM stations. I have to use the attenuator on any radio at my QTH below about 2.5 MHz.
The unit having one preselection filter for LW/MW/HF is noticeable as I got ADC Clip warnings when directly connected to the Wellbrook loop. Turning on the 11 dB attenuator took care of the problem and did not seem to affect the weak signals much. It also was not as bad when I connected a Mini-Circuits ZFSC-2-6+ two port splitter between the Elad and the Wellbrook.
The Perseus has multiple preselection filters, but I noticed only one low pass filter for the 0 to 1.7 MHz range. So a MW band reject filter would be useful for Long Wave with both units. I plan on building an external preselector.
The option for multiple receivers and two RF ranges is pretty neat. I was listening to multiple FM stations at once. This morning I set one range to 31 meters and the other to 49 meters. I listened to Radio Australia on 9580 KHz using the right laptop speaker for audio, and could check their other frequencies on 31 and 49 meters using the left laptop speaker for audio.
I do HF Utility monitoring on digital signals, so I want to setup the Elad software with external decoder software. I have seen reports that the Elad can receive Airband pretty good, so I will also try receiving and decoding multiple ACARS frequencies at the same time.
So many experiment to try this Winter!”
Thanks for sharing your experience, Eric! Since I live in such a rural area, I never have to worry much about low pass filters (though I’m sure they couldn’t hurt). I’ve had the FDM-S2 since June this year. I can tell you that there are so many features, settings and possibilities with this radio, you could easily spend the winter and spring experimenting. I have yet to use the WinRad app to drive the S2.
Eric, we welcome any other discoveries you make along the way! Many thanks!
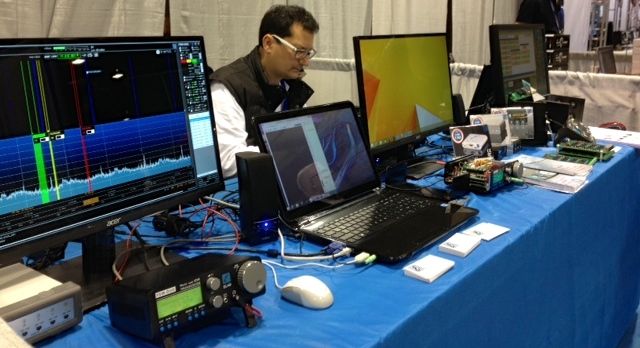
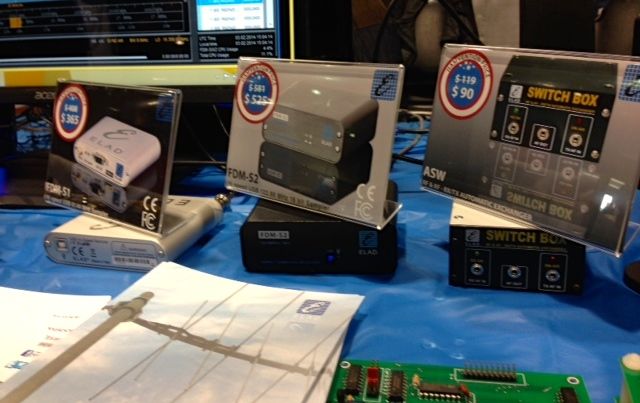
Although I’ve known about Elad and their products for some time, and often found them intriguing, I hadn’t yet investigated Elad’s offerings simply because I was under the impression they sold and warrantied their equipment only within Europe. Indeed, this was the case…until just recently. Elad has now begun shipping–and supporting–their products within the US, via their division Elad-USA. Thus my renewed interest in Elad at the Hamvention.
At their Hamvention booth in the East Hall of Hara Arena, the Elad staff gave me a superb table-tour of their array of products. Indeed, I was completely unaware of the broad scope of Elad’s product offerings, which include antenna switches, antenna splitters, test equipment, and, of course, software defined radios (SDRs). Their current SDR offerings are as follows: the Elad FDM-S1, the FDM-S2, and the newly released FDM-DUO. The FDM-DUO is actually a transceiver, while the “S” line is receive-only.
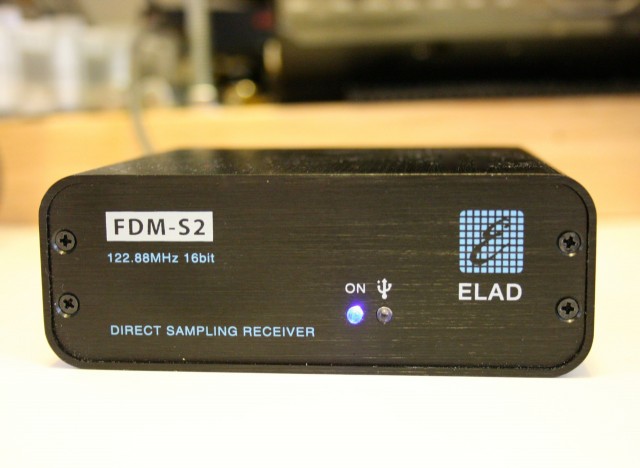
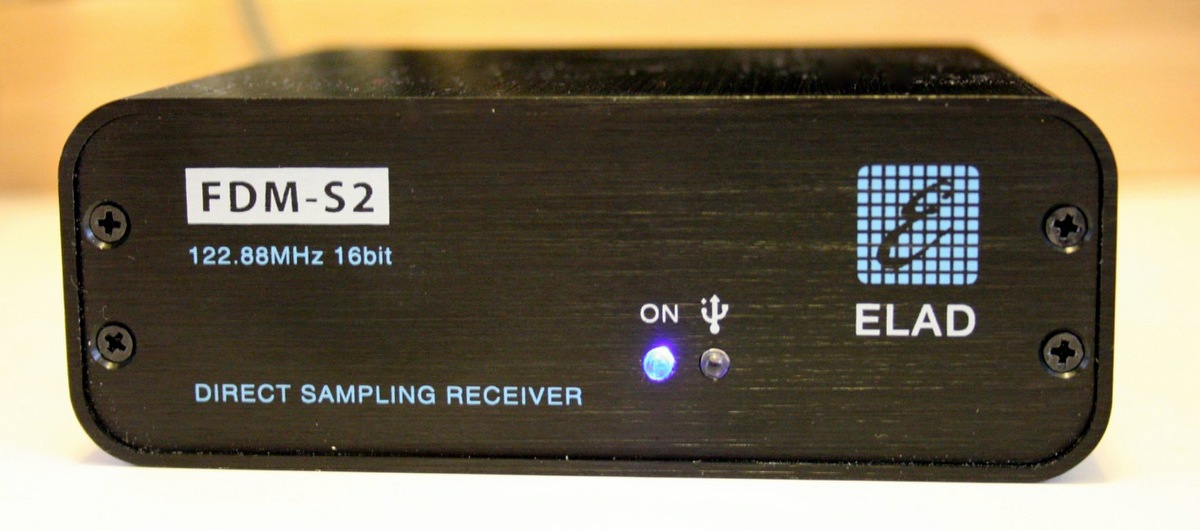
Among Elad’s SDRs, I found myself most interested in the FDM-S2 receiver; a quick demo at their booth caught my interest, as I instantly liked the GUI (graphical user interface), the features, and the specifications of this model. I requested that Elad provide the loan of this SDR for review, and they kindly complied.
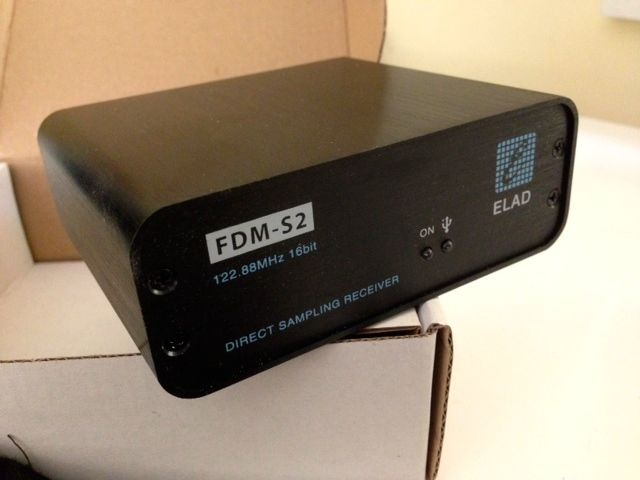
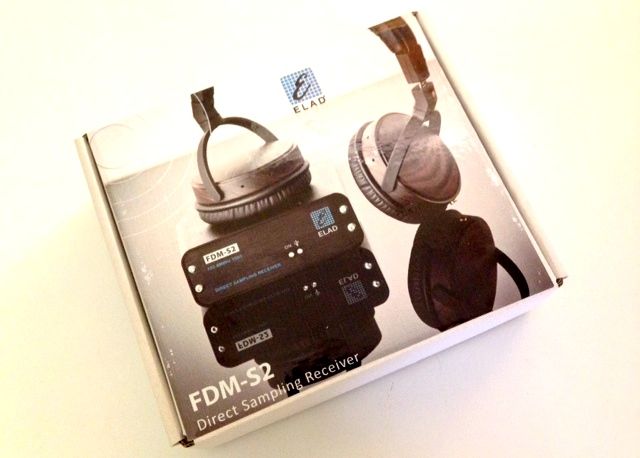
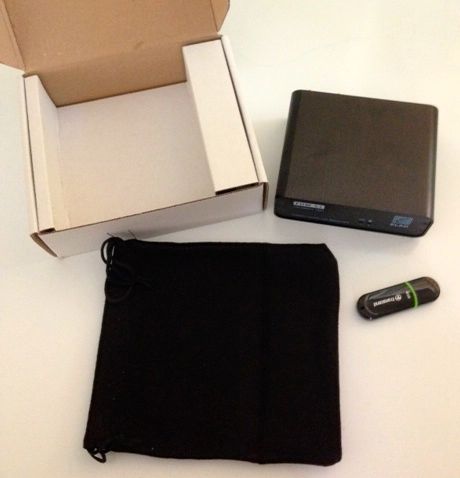
Unboxing and installing the Elad FDM-S2
Contents of the FDM-S2 box are few and simple: the FDM-S2 receiver, a black cloth carrying bag, and a 4GB USB drive with installation software and documentation are enclosed. A standard USB cable was also included in the shipping box.
I found installation of the S2 to be fairly straightforward. I would encourage new owners to follow the included guide, since installation is a two-part process:
First, you install a C++ package on your Windows PC. When complete, this triggers the actual Elad software installation, a two-part installation that you initiate only once.
Secondly, you install the USB driver for the FDM-S2, found in the installation folder of the supplied software. Note: at present, the USB driver cannot be automatically discovered and installed by your PC–you must initiate this installation via the device manager. However, this is very easy: the guide takes you through the process step-by-step.
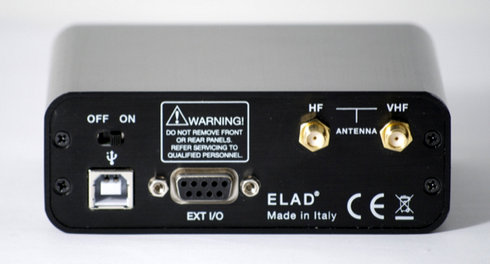
On the back of the FDM-S2 you’ll find an HF and VHF SMA antenna ports, a USB port, serial interface, and on/off switch.
The FDM-S2 derives its power from the same USB cable that is used for data; no separate external power supply is required–a huge plus, for those of us who like to travel.
Once I installed the software and driver, I hooked up my antenna to the HF SMA connector on the back, turned on the FDM-S2, and launched the application. The FDM-S2 clicked to life, and the application ran on the first go–very nice!
Scope of this review: application
Reviewing an SDR is challenging, especially with a third-generation SDR like the FDM-S2. There are nearly an infinite number of setting combinations for gain control, filters, demodulation, audio, even color schemes; covering all of these is beyond the scope of a basic review such as this, or indeed, virtually any review. In addition, the FDM-S2 can be used with several third-party SDR applications. Therefore, for the sake of this review, I decided to limit myself to evaluating the Elad application that ships with the FDM-S2. In addition, in this evaluation I attempted to retain many of the settings that come as defaults in the Elad application, to support new users. Finally, I limited myself to evaluating the shortwave bands.
After installing the Elad application, I spent a good hour or so familiarizing myself with the software. It’s quite a departure from the WinRadio Excalibur, SDR-IQ, and Microtelecom Perseus applications with which I’m most familiar. There is a modest learning curve involved with using the Elad FDM-S2–it took a good hour with the application to feel relatively comfortable with its functionality. But the trade-off is much more customization and functionality than one can achieve with the Perseus or WinRadio software, for example.
First impressions
First, let me begin by saying that new users will greatly benefit from reading the owners manual and join the Elad Yahoo group. If you’re attempting something that the owner’s manual does not cover, most likely someone in the Elad forum has already posted the answer. Elad’s engineer, Franco, also actively monitors and responds to requests on the Yahoo group.
Once on, the FDM-S2 defaults to the frequency of 0 Hz. Indeed, the Elad software uses Hz as the unit of measure for frequency, so any frequency entered must be in Hz: for example, to enter 9,420 kHz, you must key in 9420000, then press “Enter.” As a shortcut, you can enter 9420 and the “+” key on your number pad which will automatically add the trailing “000.” I found that a bit unusual in the beginning as most SDR software defaults to kHz, but after using the FDM-S2 for a few minutes, it became second nature.
There are several ways of tuning the FDM-S2:
Frequencies can be directly keyed in (as described above)
You can click on a frequency in the spectrum and waterfall windows (if the center frequency isn’t locked)
You can use the scroll wheel on your mouse like a tuning wheel, to scan up or down
You can use the arrow keys on your keyboard (left/right are defaults with up/down controlling tuning steps)
With your mouse pointer, you can click and drag one of the three horizontal tuning bars at the bottom of the window
Tuning Bars: Click to enlarge
I find it easiest to tune by using the horizontal tuning bars to move to a particular meter band, then locking the center frequency and use the scroll wheel on the mouse to scan in 1 or 5 kHz increments. This makes tuning feel like the experience I’m most used to with other SDRs. I must say that I really like the horizontal tuning bars; these make it quite easy to quickly center on a meter band.
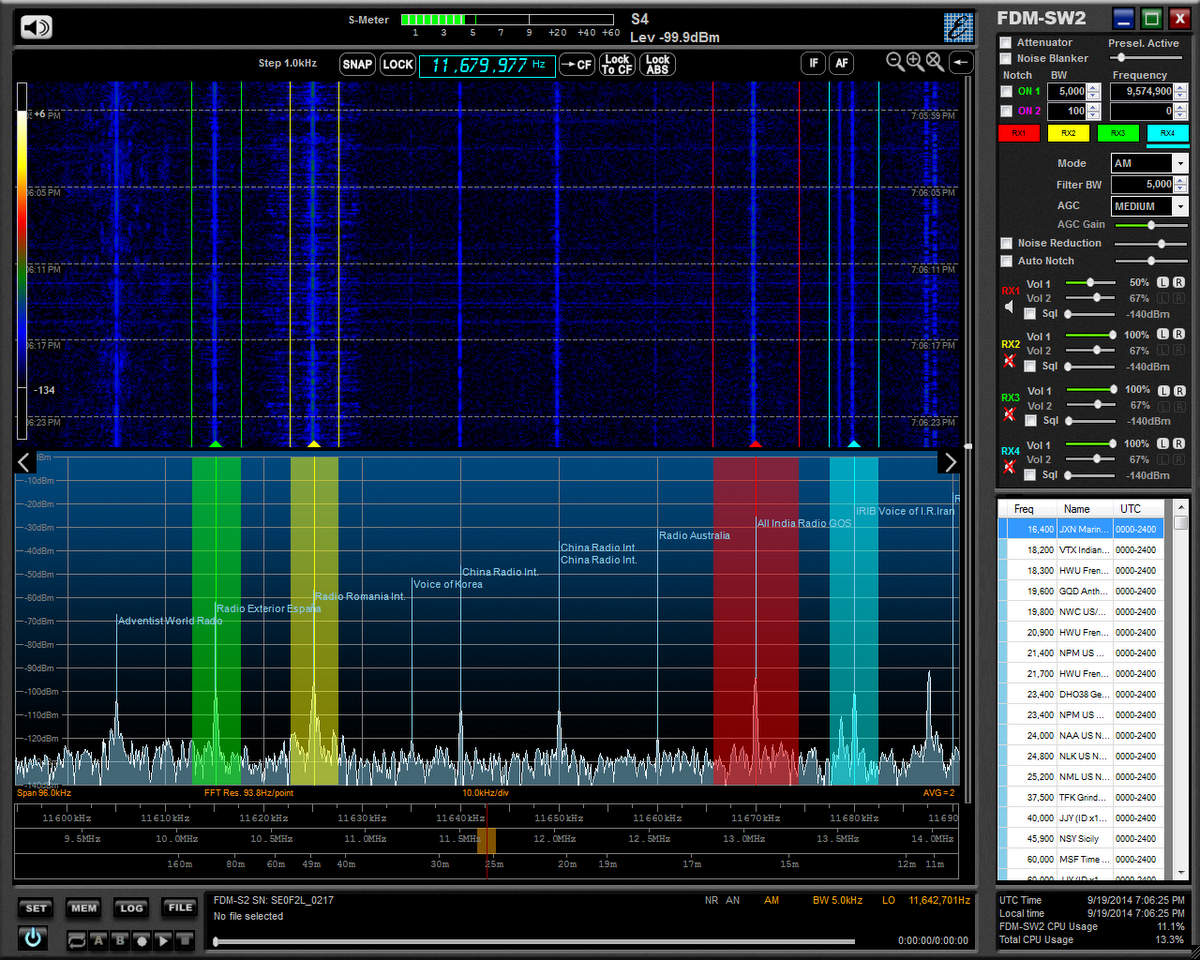
I would also note that I’m favorably impressed with the S2’s waterfall and spectrum display; not only can you customize the colors via the settings window, but you also have the options to embed timecode in the waterfall and to display broadcaster information from the frequency database in the spectrum.
The FDM-S2 has a total of four “virtual receivers,” labeled RX1, RX2, RX3 and RX4. Depending on the receiver configuration and bandwidth you’ve chosen in the S2’s device configuration (see below), you can use each virtual receiver simultaneously. Each receiver can have its own filter settings and modes selected–your only limitation is that each of the four receivers must be tuned within the FDM-S2’s bandwidth.
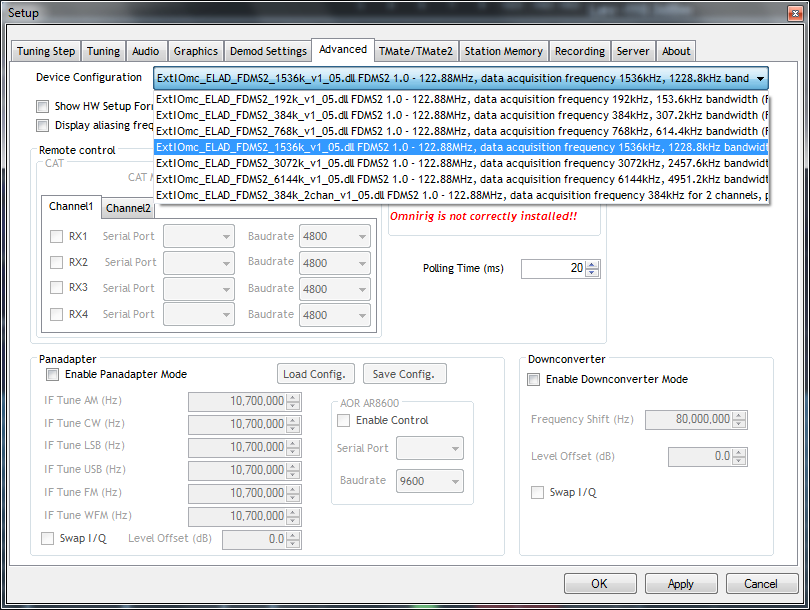
FDM-S2 receiver bandwidth configurations
The S2 currently has seven receiver configurations:
1 Channel 192 kHz bandwidth
1 Channel 384 kHz bandwidth;
1 Channel 768 kHz bandwidth;
1 Channel 1,536 kHz bandwidth;
1 Channel 3,072 kHz bandwidth;
1 Channel 6,144 kHz bandwidth; and
2 Channels 384 kHz bandwidth.
If you set the S2 to a total bandwidth of 192 kHz in one channel, all four of your virtual receivers are limited to that 192 kHz area. This is a great configuration if you plan to listen to a single broadcaster at a time, and don’t need to see so many signals within the spectrum display. It’s also an excellent configuration to save storage space if you wish to record a relatively small chunk of IF spectrum.
If you choose the 6,144 kHz bandwidth, you can use each of the four virtual receivers simultaneously within the bandwidth. For example, on Saturday evenings I could tune RX1 to the Voice of Greece on 9,420 kHz; RX2 to The Mighty KBC 7,375 kHz; set RX3 to search for pirates around 6,925-6,975 kHz; and listen to the 40 or 30 meter ham radio bands on RX4. All at once! [Note: in the screenshot above, each virtual receiver is marked in the spectrum with a green, yellow, red or blue vertical marker.]
The two-channel 384 kHz option is also a powerful and unique feature of the S2. With this configuration selected, you can have two completely independent receivers with 384 kHz of bandwidth, each. Though this may be more radio than you need, each receiver has four virtual receivers of its own. That’s a whopping 8 virtual receivers!
Most of the time, I keep the configuration set to 1,536 kHz, unless I want to listen in two different meter bands at once. At 1,536 kHz, I can record spectrum and capture a full broadcast band to play back later. I’ve even recorded 6,144 kHz of spectrum, and played it back with no hiccups on my Intel i5 PC, although it did chew through a lot of storage space (roughly 2 GB of data per minute of recording). That equates to 120 GB per hour–but the result is a recording of everything between, say, 4 and 10 MHz. For shortwave radio archiving this is a most impressive capability!
DRM
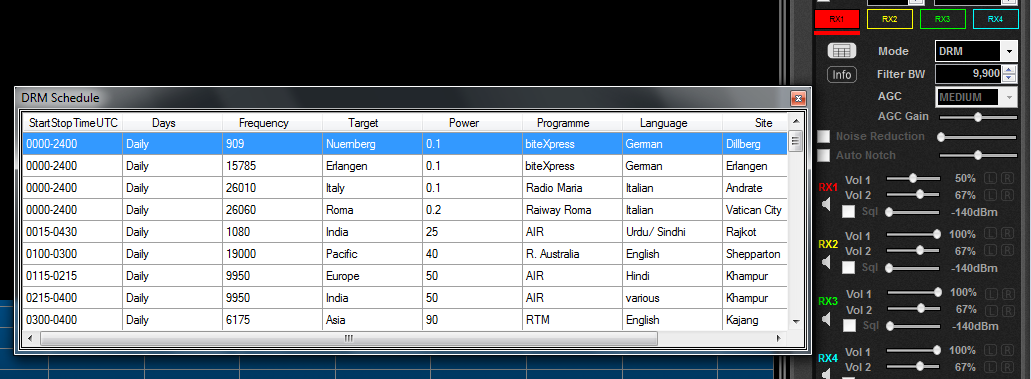
While Digital Radio Mondiale (DRM) is not the most popular mode on the shortwave broadcast bands, DRM is built into the FDM-S2; there is no need to purchase a separate license or plugin as with most SDRs. If you’ve never listened to DRM, you might be surprised by the impressive listening results.
Here is a two hour audio sample of the FDM-S2 recording RNZI DRM:
[On a side note: It simply boggles my mind when I realize that this RNZI broadcast originates from a transmitter some 8,400 miles (13,518 km) from my receiver. Regardless of what one thinks about the future or utility of DRM, this is nothing short of magical in my book.]
Note that only the first virtual receiver, “RX1,” employs the DRM mode. This is important to note, as I find I’ve sometimes finished listening to a DRM broadcast, turned off the FDM-S2, then when I turned it back on later, initially wondered why I was hearing no audio on strong AM signals. I had inadvertently left the DRM mode engaged–user error only, in this case. Just something to be aware of.
But finding a DRM broadcast is very easy with the Elad software; there is a dedicated button that appears when the DRM mode has been selected. When you press the schedule button, it will load all of the DRM broadcasts from the HFCC schedule. You can simply scroll through this list and click on a frequency to find an audible DRM broadcast. So far, on the FDM-S2, I’ve decoded RNZI, Radio Exterior de Espana, and even All India Radio from my QTH in eastern North America. Not bad!
Recordings
One of the reasons I latched onto the FDM-S2 at the Dayton Hamvention this year was that I immediately saw the potential of the S2 as a recording receiver. Besides posting recordings on the SWLing Post, I also actively make recordings for the Shortwave Radio Audio Archive, so no surprise that one of the first functions I evaluated on the FDM-S2 was its recording capability.
There are two recording modes: AF and Full Span Input Spectrum. You switch between modes in the Recording tab of the Settings window. After the settings have been saved, you simply locate the broadcast or chunk of HF spectrum you wish to record, and press the red record button located on the screen’s bottom left quadrant.
The Elad application also gives you a great degree of control for automatically naming the recorded files; mine is currently set up to embed the frequency, date, time, and device in the filename.
There are few things I’ve reported to Elad as possible improvements for recording:
I do wish that it wasn’t necessary to open the settings window to switch between bandwidth configurations and recording modes (IF or AF); my Excalibur has all of this on the front panel, which is more convenient. While there is a more direct way of opening the recording settings window–simply right click on the red record button–I think it would be preferable to at least have the option of including the information on the main user interface. Also, when you stop a recording, the receiver turns itself off; this obviously needs to be corrected. Fortunately Elad has noted these concerns and plans to address them in future software updates.
Additionally, I’ve noted that while one can record either IF or AF, both can’t be recorded at the same time, a lacking shared, incidentally, by the Microtelecom Perseus. While I probably do more recording than most SWLs, I frequently record both spectrum and an individual broadcast simultaneously on the WinRadio Excalibur. I hope Elad will consider adding this to their software, as well.
Performance
Features are always nice to play with, and the FDM-S2 is chock-full of them–but most important are your receiver’s ability to detect faint signals, block adjacent ones, as well as cope with unpredictable conditions.
The FDM-S2 has a wide frequency coverage: 9 kHz-52 MHz, 74-108 MHz, and 135-160MHz. It’s one of the few SDRs on the market that doesn’t need a module or add-on for FM and VHF coverage. It has separate SMA connectors for HF and VHF antennas. While I have not thoroughly tested beyond the HF bands as of this writing, but many experienced FM DXers tout the S2’s abilities in their own reviews, and I don’t doubt them.
On the shortwave bands, the S2’s performance has impressed me: this SDR has remarkably excellent sensitivity and selectivity. Indeed, its performance is on par with my WinRadio Excalibur, and surpasses that of my RFSpace SDR-IQ, no mean feat. I have made many A/B comparisons with my Excalibur on weak signals; the two receivers are nearly indistinguishable. I’ve conducted blind-listening tests on weak signals (much like those described here) and found that the two recordings were nearly identical. On occasion, I might favor one receiver’s AGC over the other in a recording, but a slight tweak to the AGC settings could readily fix any discrepancies.
Herein lies the difficulty of reviewing an SDR’s performance–the user has so much power to control variables and thus shape the receiver’s function, that it’s hard to make an “apples-to-apples” comparison. But clearly, the Elad holds its own.
Noise reduction
While I’m not a great fan of digital noise reduction, the Elad software has a variable noise reduction feature that I admit to have used on several occasions. I found that by increasing it to approximately 10-20%, audio characteristics of an AM signal were mostly preserved while noise was effectively mitigated. This is where the S2 has a distinct advantage over the Excalibur which has no noise reduction feature.
AM Synchronous detection
With that said, the Excalibur has an edge on the S2 when it comes to blocking adjacent signals. At the time of review, I’m using version 1.12 of the Elad software, which lacks a selectable AM sync detector–a powerful tool to block noise, which may only be present in one sideband of an AM broadcast. Elad engineering tells me that they have this feature planned for a future software update.
Flexibility
Remarkably enough, the FDM-S2 can actually be used with a number of third-party SDR applications. The FDM-S2 comes with Winrad EXTIO Dlls compatible format: all software based on Winrad derivatives (like HDSDR and Studio1) work, and have been tested by S2 users. So if I really need sync detection, for example, I can simply find and use another SDR application to run the S2.
Indeed, flexibility may be among the most powerful features of the S2. If for any reason you don’t like the Elad application, you can simply use another one.
Summary
Invariably, all radios have strengths and weaknesses; here is a list of my notes from the moment I put the S2 on the air:
Pros
Beautiful, rich audio fidelity via headphones or my amplified speakers
Excellent sensitivity
Excellent selectivity (which would be enhanced with USB/LSB selectable sync–see con)
Low noise floor
Four virtual receivers: RX1, RX2, RX3, and RX4
Superb DRM decoding built-in, no additional license key or plug-in purchase required
Noise reduction is quite effective with few digital artifacts, even at low levels
Tasteful waterfall and spectrum displays
Wonderfully rapid tuning via horizontal tuning bars
Power derived from USB port (no external power supply needed)
Separate HF/VHF antenna ports
Ability to embed and record UTC time in waterfall display
Can display schedule information in waterfall and spectrum
ES2 supported by third-party OEM and open-source SDR applications; not confined to Elad application (as tested)
Small form factor/footprint, convenient for travel or limited shack space
Networking features for remote receiver control (not tested)
Iterative agility: application/firmware updates influenced by customer feedback
Great value–$300 less than most of its competitors
Cons
Recording cannot be fully controlled from the front panel; to adjust most settings, you must do so via a separate settings window
Receiver turns off completely after stopping a recording (Elad plans to fix this)
AM sync currently lacks USB/LSB selectivity
Elad application has steeper learning curve than other OEM SDR applications
Though highly customizable (see pro), changing color schemes requires patience and practice
Some reports from users indicate that sensitivity may be compromised if you live near a blowtorch AM station
IF and AF recordings cannot be made simultaneously; AF recordings cannot be made from an IF spectrum recording without a virtual audio cable application (similar to the Microtelecom Perseus)
While the Elad FDM-S2 has some growing to do, I expect many of these concerns may be addressed in updates over time, and I look forward to trying the S2 with other SDR applications. I’m fairly confident that Elad is serious about their products’ iterative agility, which is to say, software development based on customer input. They’ve been responsive to email and active on the Elad Yahoo email discussion group, which indicates promise. I believe they’re serious about supporting the North American market as well as they even attended the 2014 Dayton Hamvention.
Frankly, at $580 US (via Elad USA) I think the FDM-S2 is quite reasonably priced, especially considering this SDR’s performance and features. After all, it’s only $80 more than the RFSpace SDR-IQ, while it is $300-400 less than the Microtelecom Perseus and WinRadio Excalibur. That’s good value, in my book.
But with each review, I always ask myself: “Would I buy it?”
For the Elad FDM-S2, the answer is, unhesitatingly, Yes!I intend to purchase the FDM-S2 from Elad immediately following the publication of this review. I believe it will make a fine addition to the shack–I can see myself using it often for travel, future DXpeditions, and, of course, shortwave radio archiving.
As always, the proof is in the pudding: look for my Elad FDM-S2’s coming contributions to the Shortwave Radio Audio Archive in the near future. And listen for yourself.


 After just one week with it, I’ve already decided to take the CC Skywave along on my travels to see how it performs over time. It will replace my PL-310ET and PL-380 for my