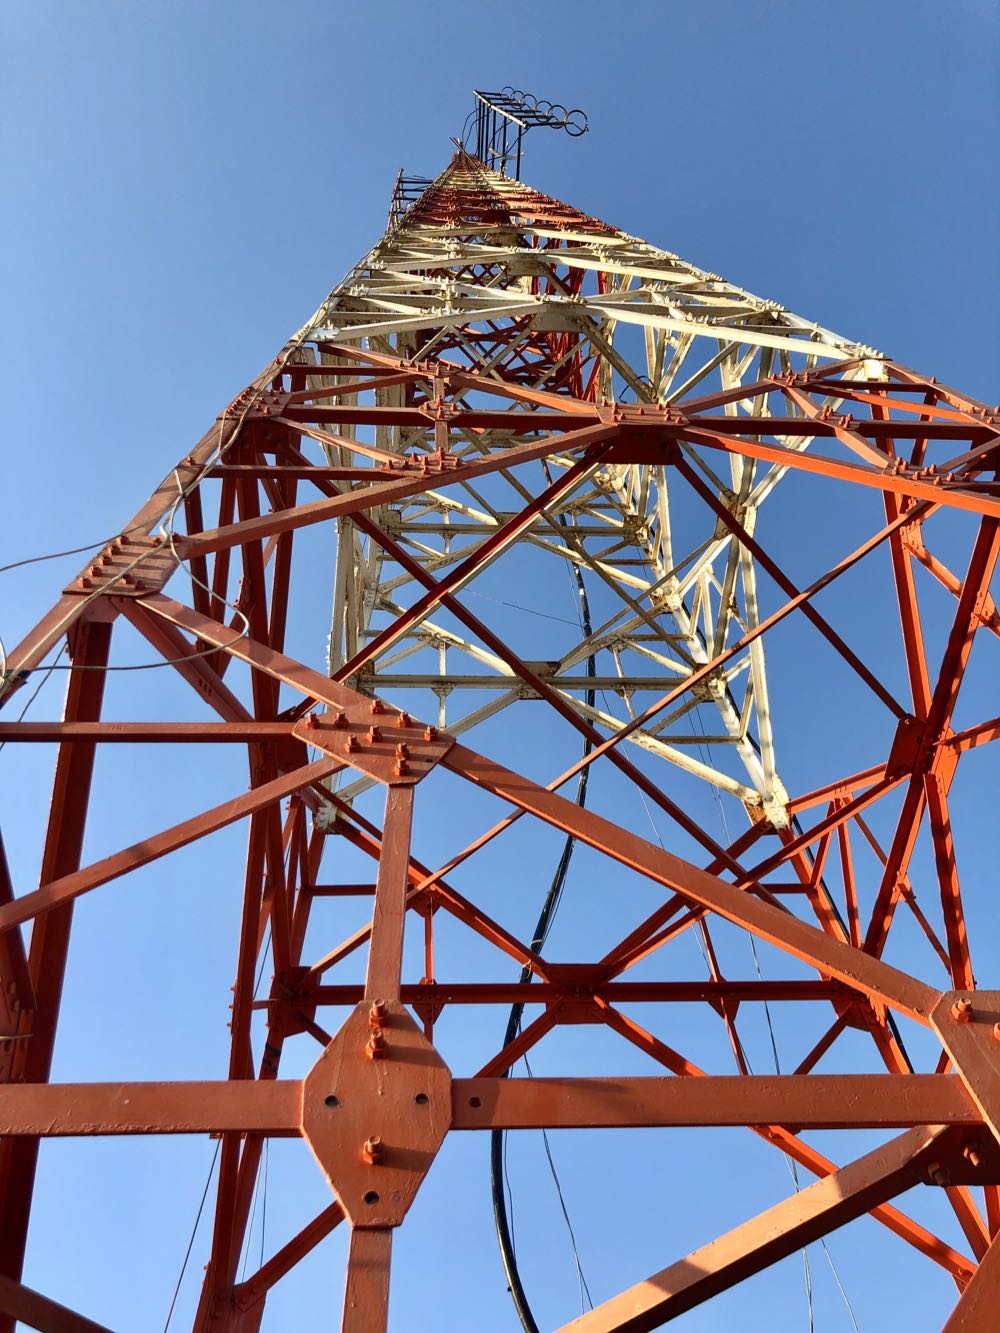
A comprehensive review of the Mission RGO One general coverage 50 watt transceiver

The following review was first published in the November 2020 issue of The Spectrum Monitor magazine:


A review of the Mission RGO One ham radio transceiver

by Thomas (K4SWL / M0CYI)

Wow…I love this!

If I am perfectly frank, that would sum up my initial impression of the Mission RGO One.

It was the 2018 Hamvention in Dayton, Ohio, and I had just met up with radio engineer Boris Sapundzhiev (LZ2JR) who was debuting the prototype of his 50-watt transceiver kit, the Mission RGO One. With its clean, functional design and simple front face, large weighted encoder, and enough tactile buttons and multi-function knobs to keep one’s most needed features within reach, the kit was certainly pushing all the right buttons for me.  Without a doubt, I was impressed from the start.

Boris (LZ2JR) the designer and engineer of the Mission RGO One.

To my mind, the RGO One smacks of classic 1990s-era transceivers:  a traditional tabletop front-facing panel, a large fold-out bail, and a unfussy backlit LCD display that’s large enough to read in the field and viewable at any angle.

Perhaps it’s only because I can’t turn off the innate radio reviewer, that I was rapidly checking mental boxes in this first encounter with the RGO One.  Indeed, when I first set eyes on any new radio, I do skim through my mental “operations checklist” to see how difficult the rig might be to use at home and/or in the field. Specifically, I’m looking for the following controls:

  • Encoder
  • AF Gain
  • RF Gain
  • Mode switch
  • Power output adjustment
  • Tune/Xmit button
  • Preamp/Attenuator
  • VFO A/B
  • Split and A=B
  • Mic gain and keyer speed
  • RIT
  • Filters
  • Band switching and direct frequency entry
  • Key and encoder lock

Of course, these days it’s fairly rare that radios actually contain all of these functions without the user having to dig into layers of menus, multi-function controls, or touch-screen options to access them.

Remarkably enough, the Mission RGO One, despite simple design, manages to include all of these features on the front panel without the need of embedded menus. In contrast with some of the radios I’ve tested and evaluated over the past several years, I could tell by the layout alone that the Mission RGO One was developed by an active ham radio operator and DXer: the controls are that intuitive.

Alas, the tantalizing prototype on Boris’ table in the 2018 Hamvention flea market was for show only.

Boris promised that he’d have fully-functional models available at the 2019 Hamvention. Because of this, following that first meeting in 2018, I kept in touch with Boris; we arranged to meet again at the 2019 Hamvention so I could take a second, much closer look at the RGO One––especially since he intended to start shipping the first very limited, early-production-run rigs shortly afterward.

So…did Boris deliver?  And more importantly: did the RGO deliver––?  Let’s find out.

On The Air

Within hours of taking delivery of the prototype radio, I had it in the field activating parks.

It was May 2019 when Boris delivered on his promise, handing me a loaner prototype RGO One. He did so with the understanding that the prototype was still a little rough around the edges. I acknowledged this, thinking in terms of a late Beta-test model since he welcomed reports of any bugs or anomalies I encountered and was fully prepared to address them.

After taking the initial RGO One to the field, I did note a few bugs, but nothing major.  All of my field notes were then sent to Boris and turned into action items.

Then, in July of 2020, Boris sent me a fully-upgraded Mission RGO One with the new internal ATU and optional adjustable filter. This radio represented the “fully-grown” production model, and in preparation to put it through its paces, I returned the prototype.

Although there are planned hardware upgrade options and, of course, firmware upgrades, the RGO One has now reached full maturity as a transceiver.

However, it was one thing to have ham-friendly ergonomic controls. The real question was, how did the RGO One stack up against the competition? It was time to find out.  After all, this is the danger of a “love at first sight” radio encounter––it often leaves the door open for disappointment, and of this I was well aware.

What follows is my full review of this 2020 Mission RGO One transceiver. Let’s take a deep dive into this rig…

Features and specifications


What follows are some of the RGO One features and highlights as written in the product manual (PDF):

  • QRP/QRO output 5 – 50W [can actually be lowered to 0 watts out in 1 watt increments]
  • All-mode shortwave operation – coverage of all HAM HF bands (160m/60m optional)
  • High dynamic range receiver design, including high IP3 monolithic linear amplifiers in the front end, and diode ring RX mixer or H-mode first mixer (option)
  • Low-phase noise first LO – SI570 XO/VCXO chip
  • Full/semi (delay) QSK on CW; PTT/VOX operation on SSB. Strict RX/TX sequencing scheme with no “click” sounds
  • Down conversion superhet topology with popular 9MHz IF
  • Custom-made crystal filters for SSB and CW and variable crystal 4 pole filter – Johnson type 200…2000Hz
  • Fast-acting AGC (fast and slow) with 134kHz dedicated IF
  • Compact and lightweight body, only 5 lbs
  • Custom-made multicolor backlit FSTN LCD
  • Custom-molded front panel with ergonomic controls
  • Silent operation with no clicking relays inside – solid state GaAs PHEMT SPDT switches on RX (BPF and TX to RX switching) and ultrafast rectifying diodes (LPF)
  • Modular construction – Main board serves as a “chassis” also fits all the external connectors, daughter boards, plus inter-connections, and acts as a cable harness
  • Optional modules – Noise Blanker (NB), Audio Filter (AF), ATU, XVRTER, PC control via CAT protocol; USB UART – FTDI chipset
  • Double CPU circuitry control for front panel and main board – both field programmable via USB interface
  • Memory morse code keyer (Curtis A, CMOS B); 4 Memory locations 128 bytes each

Build quality

First impressions proved accurate in terms of construction.  I’m very pleased with the build quality of the Mission RGO One. Keep in mind, however, you might note from the photos that some items––like the volume and multifunction knobs––are 3D printed, and I’m not certain if they’ll ever have custom knobs manufactured.  But I really don’t even think this is necessary, as the 3D printed ones are very nice, indeed––moreover, should a replacement ever be needed, I love the idea I could simply print one myself!

The RGO One main optical encoder/tuning knob is just brilliant. It’s weighted properly for the right amount of “heft” while tuning. I’m very pleased with the overall feeling and quality. It’s substantial, yet silky-smooth in operation, just what I look for in a tuning knob.

On the back of the unit, there is an externally-mounted heat sink with two small fans. These fans are quiet and efficient.

The chassis and bail are both top-shelf quality and should withstand years of field use. Just do keep in mind that like almost every other amateur transceiver currently on the market (save the recently reviewed lab599 Discovery TX-500), the chassis is neither water-proof nor weather-proof, so will require common-sense care to protect it from the elements.

Portability

The Mission RGO is relatively compact, lightweight (only 5 lbs without the ATU), and has a power output of up to 55 watts, even though the specs list just 50 watts. As a point of comparison, most other rigs in this class have a maximum output of 10 to 20 watts, and require an external amplifier for anything higher. The form factor is very similar to the Elecraft K2.

The light weight of the rig and the extra power makes the RGO One a capable and versatile field radio. Although the RGO One is configured like a desktop radio (with a front-facing panel), it’s still relatively compact and can easily be set up on a portable table, chair, or on the ground. Unlike field-portable rigs with top-mounted controls (think the Elecraft KX3 or KX2), obviously, it would be tough to do handheld or laptop operation.

The RGO One should also play for a long time on battery power as the receive current drain is a respectable 0.65A with the receiver preamp on. It’s not as efficient as, say, an Elecraft KX3 or the new Icom IC-705, but keep in mind the RGO One can provide 50 watts of output power and has a proper, internally-mounted, amplified speaker. The popular 100 watt Yaesu FT-891, in comparison, has a current drain closer to 1.75 to 2.0 amps [update: actually the specifications indicate 2 Amps in receive, but user reports are less than half that amount].  I pair the RGO One with my larger 15 aH Bioenno LiFePo battery. When fully-charged, I can operate actively for hours upon hours without needing to recharge.

Mission RGO One Bioenno LiFePo

The Bioenno 15aH battery powers the Mission RGO One for hours at a time in the field.

If it’s any indication of how much I wanted to take this rig to the field, when Boris handed me the prototype RGO One on Saturday at the 2019 Hamvention, I had it on the air that same day doing a Parks On The Air activation at an Ohio State Park.

Since then, I’ve easily taken the Mission RGO One on 30 or more park activations.

Performance

What’s most striking and obvious about the Mission RGO One’s receiver from the moment you turn it on is the low noise floor. It’s incredibly quiet. So much so that more than once, I’ve double checked to make sure RF gain hadn’t been accidentally altered as I started a field activation. I’d call CQ a few times, though, and when stations return they literally pop out of the ether. The RGO One currently has no digital noise reduction (DNR) but frankly, I don’t miss it like I might in other transceivers. Indeed, the RGO One is a radio I’ve reached for when the bands are noisy because the AGC and receiver seem to handle rough atmospheric conditions very well.

The RGO One’s built-in, top-mounted speaker provides ample audio levels for the shack, but in a noisy field environment, I wish it had a little more amplification. I’ve also used my Heil Pro headset and even inexpensive in-ear earphones connected to the front panel headphones jack in the field. The audio via headphones is excellent.

Let’s take a look at how well the RGO One performs by mode:

CW

First and foremost, CW operators will appreciate the RGO One’s silky-smooth full break-in QSK. The  RGO One employs clickless and quiet pin diode switching–a design feature I’ve become particularly fond of as traditional T/R relays can be noisy and distracting when not using headphones.

The RGO One also has a full compliment of adjustments for the CW operator including adjustable delay (default is 100ms), iambic mode, weight ratio, hand key/paddle, adjustable pitch, and sidetone volume.

The key jack is a standard three conductor 1/8” jack found on most modern transceivers. It’s located on the back of the radio.

My review unit has the optional variable width narrow filter which I highly recommend if operating in crowded conditions. I’ve used the RGO One on ARRL Field Day and found that it easily coped with crowded band conditions. Even after a few hours on the air, I had very little listener fatigue.

I also find that, as I mentioned earlier, CW signals just seem to “pop” out of the ether due to the low noise floor and excellent sensitivity/selectivity.

The RGO one also sports four CW keying memories where you can record your CQ, callsign, or even contest exchange. I’ve become incredibly reliant on memory keying to help facilitate my workflow in the field—while the radio is automatically sending my CQ or my regards and callsign to an station I’ve just worked, my hands are free to log the contact, adjust the radio, or even eat lunch!

Memory keying does require one long-press of the “6” button followed by either the “1,” “2,” “3,” or “4” button to play a message. Occasionally I won’t hold the 6 button long enough and accidentally move my frequency down one meter band since the 6 button is also the band “down” button. While it doesn’t happen often, it’s frustrating when it does but I think it could easily be fixed in the firmware as it’s really a timing issue.

SSB

Likewise, phone operators will be very pleased with the Mission RGO One. During all of my testing, I’ve only used the microphone supplied with the radio mainly because I don’t currently own another radio with an RJ-45 type microphone connector.

I do love the fact the microphone port is on the front panel of the radio—it’s very easy to connect and disconnect (in contract to the recently released Icom IC-705, for example). I’ve gotten excellent audio reports with the RGO One in SSB mode and have even monitored my own tests and QSOs via the KiwiSDR network.

Compression, gain, and VOX controls are easily accessible. One missing feature at present is a voice memory keyer. For field operators activating sites for the POTA, WWFF, or SOTA program, voice memory keying is huge as it saves your voice from calling “CQ” over the course of a few hours. I understand Boris does plan to implement voice memory keying in a future speech processor board.

AM Mode

Since the RGO One has general coverage receive and since I’m a shortwave broadcast listener, I was disappointed to find that there is presently no AM mode. Boris told me he does plan to add AM mode, “to be implemented in future versions of the IF/AF board only on RX.”

With that said, I can always zero-beat a broadcaster and use a wide SSB filter to listen to broadcasts which is more than I could do, for example, with my (ham band only) Elecraft K2.

At the end of the day, the RGO One is a high-performance, purpose-built ham radio transceiver, so the current lack of AM mode isn’t a deal-breaker for me, but I would love a wide AM filter on this rig.

ATU

The 2020 review model I received has the internal automatic antenna tuner which I feel is a worthy upgrade/addition. In the field, I’ve paired the RGO One with my Chameleon CHA Emcomm III Portable random wire antenna which requires an ATU in order to find matches across the bands. The pairing has been a very successful one because the Emcomm III can handle up to 50 watts power output in CW and covers the entire HF band when emptying the RGO One ATU.


Even though it’s a minor thing, I also like the fact that the RGO One ATU operates so quietly, even though with the present firmware it takes longer than some of my other ATUs to find a match.

Power

One thing I’ve found very useful in the field and, no doubt others will as well is the power output. In many ways, the RGO feels like a larger QRP radio (think Ten-Tec Argonaut V or VI) but it’s actually able to pump out 55 watts (often five watts more than specified). In single sideband mode, this is a meaningful amount of power output compared to, say, 5 or 10 watts. When I activate a rare park, or an ATNO (All Time New One), I’ve been taking the RGO One more times than not in order to get the best signal possible and maximum amount of contacts. Running full power, the rig never feels warm—heat dissipation is superb—and the fans on the back of the heat sink are super quiet.

I actually feel like the 50 watts of output power gives the RGO One a market niche since it sports top-shelf performance as you might expect in the venerable Elecraft K2, for example, but  not being a 10 watt or 100 watt radio, rather something in between which saves a little weight and also the need for heftier heat dissipation.

Other unique features

The RGO One has some interesting features not found in similar radios.

For one, there are no less than ten color options for the custom backlit LCD display, along with adjustable contrast and backlighting intensity.

The RGO One team also documents how to access hidden admin menus for granular adjustments to transceiver parameters, but of course you’d want to adjust those with caution and note values prior to changing them. When you receive your RGO One, Boris includes a sheet with all default values to make stepping back much easier.

Hands-on philosophy

At the end of the day, the Mission RGO One is a kit that can eventually be purchased in kit form, or as a fully assembled transceiver. It’s modular: you can add and upgrade features as you wish. Some field operators, for example, may wish to omit the ATU to save a little extra weight or cost. I actually love this philosophy and I think it’s one that’s made Elecraft such a successful manufacturer.

The process of upgrading firmware is slightly more involved than you might find with, say, an Elecraft, Icom, or Yaesu product. It’s a two stage process where one upgrades both the front panel and the main board separately. I completed a firmware update only a few weeks prior to publication. It took me perhaps 15 minutes with my PC as I followed Boris’ step-by-step instructions (http://lz2jr.com/blog/index.php/rgo-one-firmware-update-procedure/).

There is also an active email discussion group for the Mission RGO One (https://groups.io/g/RGO-ONE/) where participants share experiences, modifications, and even any glitches or bugs that are discovered. This group is closely monitored by the RGO One team, so items are addressed very quickly. I highly recommend joining this discussion group if you see an RGO One in your future.

Also, I’ve gotten great customer support from Boris (LZ2JR) and have heard the same from group members. He’s very much open to critical customer feedback.

Summary

Mission RGO One POTA

Every radio has its pros and cons. When I begin a review of a radio, I take notes from the very beginning so that I don’t forget some of my initial impressions. Here is the list I formed over the time I’ve spent evaluating the 2020 production model Mission RGO One.

Pros:

  • Excellent sensitivity and selectivity
  • Very low noise floor
  • Excellent, clean audio (see con)
  • Silky-smooth QSK
  • Full compliment of CW and SSB features and adjustments
  • CW memory keyer
  • Superb ergonomics with no need to access embedded menus for common features
  • 50 watts output power with effective quiet heat dissipation
  • Lighter weight compared with comparable transceivers
  • Direct frequency entry
  • Standard Anderson Powerpole power port on rear panel

Cons:

  • No voice keyer memory (at time of posting, but is planned in upgrade)
  • No notch or auto notch filter (at time of posting, but is planned)
  • No 6 meter option
  • No AM mode (at time of posting, but is planned)
  • Firmware updates are a two stage process
  • Would like slightly more audio amplification while using internal speaker in noisy outdoor environments

Conclusion

If you can’t tell, I’m impressed with the Mission RGO One because it does exactly what it sets out to do.  The RGO One is designed for an operator who appreciates rock-solid performance with simple, intuitive ergonomics.

While teaching an amateur radio course to our homeschool cooperative high school students last year, I picked the RGO One as the best field radio for HF demonstrations.

I’ll never forget setting the (prototype) RGO One for the first time on a folding table outside the classroom under a large tree. I had the students erect both an end-fed resonant antenna and a simple 20 meter vertical. I picked the RGO one because all of the adjustments we had talked about in the classroom—AGC, Filters, A/B VFOs, Direct Frequency Entry, Pre Amp, Attenuation—are on the front panel and one button press away.

We hopped on the air with one of my students calling CQ single sideband on the 20 meter band.  Her very first contact was with a station in Slovenia—and she simply beamed with excitement. All of my female students that term passed their Technician exam by the end of the term.

The RGO One is a very inviting radio.

I’ve had the luxury of testing, evaluating, and working with everything from one of the first prototypes to the latest updated version of the RGO One. It’s rare that I’m able to evaluate a radio over such a long period of time.

Even with the very early, bare-bones prototype, I was impressed with this transceiver’s performance characteristics. I’m not the only one either. It’s almost become routine new discussion group members join prior to receiving their radio, then announces how blown away they are with its performance. Check out eHam reviews, too—at time of posting, it’s a solid five stars at time of posting.

The RGO One reminds me of simple, classic radios of the 1980s and 90s, but underneath, it’s packing state-of-the-art performance.

Is it perfect? No radio is perfect, but I must say that for what it offers, it really hits the sweet spot for this radio operator.  It’s a joy to use.

There are still features in the works that will either be implemented with future firmware updates, or with future boards. In terms of performance and appearance, it reminds me of the Ten-Tec Eagle and Elecraft K2—both benchmark rigs in my world. And like the Eagle and K2, the RGO One is happy in the field, at home, or even on a DXpedition. It’s a simple radio that beckons to be on the air.

If you’re interested in the Mission RGO One, check the following web page for the pre-order form and pricing list. The RGO One is produced in batches, so you’ll need to reserve your model.

Click here to view the Mission RGO One order page.

Spread the radio love

Spectrum recordings with the new Belka-DX and a Zoom H1 digital recorder

I’m so pleased to see a fascinating new post from our friend London Shortwave this morning.

In his latest article, London Shortwave demonstrates how he has been making super simple spectrum recordings by pairing the new Belka-DX receiver (which has an I/Q out port) with a Zoom H1 handheld digital recorder. The recorded I/Q files are then imported into SDR# for tuning and listening.

The process is quite easy to follow and he includes a number of examples–a highly-recommended read!

Click here to read his full article.

Spread the radio love

TX Factor Episode 27

Many thanks to SWLing Post contributor, Eric (WD8RIF), who notes that the 27th episode of TX Factor was recently released. Here’s the show summary:

Another post-lockdown special? – Indeed! And we hope you are safe and well and looking forward to some TX Factor action. In this final show of 2020, we visit the home of a well-known and long-established amateur radio aficionado Don Field G3XTT. A year ago Don moved to a new QTH near Wells in Somerset, and back in March we visited him to find out how he’s settled in.

Bob and Mike get to grips with setting up an OpenSpot Gateway for mobile use.

And, we hear from RSGB General Manager Steve Thomas M1ACB on the amazing media response to this summer’s amateur radio revival during the lockdown period. All this and a free-to-enter draw!

TX Factor – Episode 27:

Click here to view on YouTube or on the TX Factor website.

Spread the radio love

Radio Waves: More Cuts to Radio Canada International, RCI Action Comments, End of Radio Disney, Changes to German Phonetic Alphabet and Is FM More Efficient than DAB?

View of the western cluster of curtain antennas from the roof of RCI Sackville’s former transmissions building. Photo from June, 2012.

Radio Waves:  Stories Making Waves in the World of Radio

Because I keep my ear to the waves, as well as receive many tips from others who do the same, I find myself privy to radio-related stories that might interest SWLing Post readers.  To that end: Welcome to the SWLing Post’s Radio Waves, a collection of links to interesting stories making waves in the world of radio. Enjoy!

Many thanks to SWLing Post contributors Kris Partridge, Gareth Buxton, Dave Zantow, and Paul R for the following tips:


Canada’s public broadcaster announces new cuts to Radio Canada International (Radio Canada International)

Officials at CBC/Radio-Canada announced a fresh round of cuts at Radio Canada International (RCI) on Thursday as part of a “major transformation” of the beleaguered international service of Canada’s public broadcaster.

A joint statement released by Radio-Canada executive vice-president Michel Bissonnette and his CBC counterpart, Barbara Williams, said the goal of the transformation was “to ensure that the service remains a strong and relevant voice in the 21st-century media landscape.”

“In its strategic plan Your Stories, Taken to Heart, the public broadcaster committed to ‘taking Canada to the world’ and ‘reflecting contemporary Canada,’” the joint statement said.

“Transforming RCI is a necessary step to allow the service to effectively fulfil the important role it must play in delivering on those commitments.

“To that end, RCI will soon be offering more content in more languages, drawing on the work of CBC/Radio-Canada’s respected news teams to reach new audiences at home and abroad.”

Earlier in the morning Radio-Canada executives held a virtual meeting with RCI employees to inform them of upcoming changes.

In all, the transformation will reduce the number of RCI employees by more than half, from the current 20 to nine, including five journalists assigned to translate and adapt CBC and Radio-Canada articles, three field reporters, and one chief editor.

As part of the announced transformation, the English and French language services of RCI will be eliminated and will be replaced by curated content created by CBC and Radio-Canada respectively.

The remaining Arabic, Chinese and Spanish services will also be reduced in size.

However, two new language services – Punjabi and Tagalog – will be added to the editorial offering presented by RCI, officials said.

RCI content will also get more visibility by being incorporated into CBCNews.ca and Radio-Canada.ca with its own portal page featuring all the languages, the statement said.

RCI apps will be folded into the CBC News and Radio-Canada Info mobile apps, while the service’s five existing apps will be deleted, the statement added.

Under the new plan, RCI’s operations will focus on three main areas: translating and adapting a curated selection of articles from CBCNews.ca and Radio-Canada.ca sites; producing a new weekly podcast in each RCI language; and producing reports from the field in Chinese, Arabic and Punjabi.

“This transformation will help bring RCI’s high-quality, relevant content to more people around the globe and allow them to discover our country’s rich culture and diversity,” the statement said.

The union representing Radio-Canada employees lambasted the move as a “rampage.”

“It feels like Groundhog Day with more cuts to RCI under the guise of transformation,” said Pierre Toussignant, president of Syndicat des communications de Radio-Canada (SCRC).

In 2012, CBC/Radio-Canada slashed RCI’s budget by nearly 80 per cent, forcing it to abandon shortwave radio broadcasting altogether. The cuts also resulted in significant layoffs and the closure of RCI’s Russian, Ukrainian and Portuguese language services.[]

‘Modernizing’ RCI to death! (RCI Action)

On December 3, 2020, Canada’s national public radio and television broadcaster CBC/Radio-Canada announced “a major transformation” of Radio Canada International (RCI) titled “Modernizing Radio Canada International for the 21st century”. And if you didn’t know anything about the toxic relationship between the two, you would really think this was great news.

After all the budget cuts the national broadcaster has imposed on RCI (for example an 80 % cut in 2012) the news this time is more languages, greater visibility, and an expanded editorial line-up.

Let’s take these “improvements” one at a time.

How has CBC/Radio-Canada decided to give “greater visibility” for RCI’s Internet content? They’re going to bury it in inside the CBC and Radio-Canada websites, and not allow RCI to continue on a site that has existed since 1996.

In this same announcement, CBC/Radio-Canada says it’s adding complete sections in Punjabi and Tagalog to the existing services in English, French, Spanish, Arabic and Chinese. In fact it’s adding one “field” journalist to work in Punjabi, and one in Tagalog – not whole sections.

As far as the Spanish, Arabic and Chinese services which each have three seasoned experienced presenter-producers offering tailored content for their target audiences outside Canada, well, they’re all fired. What will remain is one “journalist” per language, who will be obliged to translate texts given to them in English and French.

And now we come to the sections working in Canada’s official languages of English and French. Again, each of these services has three seasoned experienced presenter-producers offering tailored content for an international audience that needs explanations that the domestic service is not obliged to do. So what will Canada’s Voice to the World be obliged to do in this “major transformation”? Fire all six producers and have an editor at CBC, and one at Radio-Canada, choose some stories, and place it on the “RCI website” which is just a section of the CBC and Radio-Canada websites. Yes, the ones that give RCI “greater visibility”.

The CBC/Radio-Canada announcement speaks glowingly about how RCI has provided a Canadian perspective on world affairs, but then starts skidding into talking about “connecting with newcomers to our country”, “engaging with its target audience, particularly newcomers to Canada”, and making this new content “freely available to interested ethnic community media.” Certainly sounds like CBC/Radio-Canada is intent on servicing ethnic communities in Canada.

But there’s a problem. That’s not RCI’s mandate. And CBC/Radio-Canada has no right to change that mandate. Because Canada’s Broadcasting  Act,  Article 46 (2), makes it a condition of the national public broadcaster’s licence to provide an international service “in accordance with such directions as the Governor in Council may issue.”

And the latest Governor in Council, Order in Council, PC Number:2012-0775, says Radio Canada International must “produce and distribute programming targeted at international audiences to increase awareness of Canada, its values and its social, economic and cultural activities”.

This latest announcement by the CBC/Radio-Canada is, unfortunately, yet another in a string of actions over the last 30 years to eliminate Canada’s Voice to the World.

After failing to shutdown the service in 1990, 1995 and 1996 when pressure from listeners from around the world, and from Canadian Members of Parliament and Senators stopped the closure, the national broadcaster went about dismantling RCI one section after another, one resource after another in a death by a thousand cuts.

This assault on RCI really started in earnest in 1990 when Canada’s Voice to the World was a widely popular and respected international service of 200 employees, broadcasting in 14 languages heard around the world. The 1990 cut removed half the employees, and half the language sections. Over the years, under the guise of streamlining and improving the service, it’s been one cut after another. With this year’s announcement RCI will have a total of nine employees!

Not satisfied with cutting resources, CBC/Radio-Canada has also continually tried to undermine RCI’s international role.

When in 2003 a Canadian parliamentary committee agreed with the RCI Action Committee, in emphasizing RCI’s important international role and suggested more resources should be given to RCI, CBC/Radio-Canada responded by removing two key corporate policies that specifically outlined the necessity for producing programmes for an international audience, again, despite an obligation under the Broadcasting Act.

The reductions in resources, the limiting or decreasing of RCI’s outreach, culminated in 2012 when CBC/Radio-Canada announced it was taking RCI off of shortwave radio broadcasts which had been the main way of communicating to the world since 1945.

This decision deliberately ignored the 2003 Order in Council that specifically obliged CBC as part of its licence to have RCI broadcast on shortwave. Two months after protests by the RCI Action Committee highlighted the illegality of this move, the Canadian Heritage Minister at the time, changed the Order in Council, eliminating shortwave from RCI’s obligations.

This whole sorry tale underlines a key problem facing Radio Canada International:

A domestic national broadcaster is deciding whether or not Canada should have an international voice to the world, and how well it should be funded.

Clearly however, the decision of whether Canada has a Voice to the World and how well it should be funded, should be a decision made by Parliament.

In the meantime, Canadian Heritage Minister Steven Guilbeault should tell CBC/Radio-Canada that it is not allowed to make this latest policy change. Then he should freeze any changes to the service until there is a serious renewal of the Voice of Canada, one that will give it financial and political protection from a toxic relationship with the national broadcaster.[]

Radio Disney, Radio Disney Country to End Operations in Early 2021 (Variety)

Radio Disney and Radio Disney Country are shutting down early next year.

Disney Branded Television president Gary Marsh announced the news Thursday, which impacts 36 part-time and full-time employees. The move comes as Marsh’s division looks to emphasize the production of kids and family content for streaming service Disney Plus and the linear Disney Channels.

Radio Disney first debuted in Nov. 1996 as a terrestrial broadcast network, aimed at kids, who would pick music playlist by calling a toll-free phone request line. The station was key to amplifying a bevy of musical artists, including the Jonas Brothers, Miley Cyrus, Selena Gomez, Demi Lovato, Hilary Duff, Aaron Carter and others.

Radio Disney Country launched in 2015 as a digital platform, expanding two years later with two Los Angeles terrestrial stations.[]

Germany to wipe Nazi traces from phonetic alphabet (BBC News)

Germany is to revamp its phonetic alphabet to remove words added by the Nazis.

Before the Nazi dictatorship some Jewish names were used in the phonetic alphabet – such as “D for David”, “N for Nathan” and “Z for Zacharias”.

But the Nazis replaced these with Dora, North Pole and Zeppelin, and their use has since continued with most Germans unaware of their anti-Semitic origin.

Experts are working on new terms, to be put to the public and adopted in 2022.

The initiative sprang from Michael Blume, in charge of fighting anti-Semitism in the state of Baden-Württemberg, backed by the Central Council of Jews in Germany.

The job of devising new terms for the problematic letters is now in the hands of the German Institute for Standardization (DIN).

The commonly-used equivalent in the UK is the Nato phonetic alphabet, with terms such as “F for Foxtrot, T for Tango”. But many English speakers also use terms like “D for Dennis, S for Sugar” on the phone.[]

Click here for the Newsroom audio via BBC Sounds.

How much energy is used to deliver and listen to radio? (BBC Research and Development)

Is FM radio more energy-efficient than DAB? Do transmitters or audio devices consume the most electricity? What effect will switching off certain radio platforms have on energy use? As part of our work to improve the environmental impact of BBC services, we now have the answers to these questions and more.

Today, we are publishing our research which explores the energy footprint of BBC radio services, both as it stands now and how it may change in the future. This work is the first of its kind in analysing the novel area of radio energy use and forms an extension to the research we released back in September looking at the environmental impact of BBC television.

In our study, we considered the energy use across all available platforms, namely AM, FMDAB, digital television (DTV) and via internet streaming services (such as BBC Sounds), revealing which ones have the largest footprints. We also compared energy use at various stages in the radio chain – not just looking at what the BBC is directly responsible for, such as preparation (playout, encoding and multiplexing) and distribution (transmitters and internet networks), but also in the consumption of our content by audiences. This highlighted the key energy hotspots in the BBC radio system and where best to focus our efforts if we want to reduce our energy footprint.[]


Do you enjoy the SWLing Post?

Please consider supporting us via Patreon or our Coffee Fund!

Your support makes articles like this one possible. Thank you!

Spread the radio love

Video: Pairing the AN-200 loop antenna with the Icom IC-705

Many thanks to SWLing Post contributor, Dennis Dura, who shares the following video featuring the Tecsun AN-200 on the Waters & Stanton YouTube channel:

I told so many over the years that I honestly think the AN200 is one of the most useful and effective mediumwave antennas you can purchase. It’s portable and it pairs so easily with most any radio.

Retailers:

Spread the radio love

Radio Waves: Arecibo Failure Caught on Video, Heathkit Employee Reminisces, Radio at 100 Series, and FCC to Require Email on Applications

Arecibo Observatory’s 305-meter telescope in November 2020 (Credit: University of Central Florida)

Radio Waves:  Stories Making Waves in the World of Radio

Because I keep my ear to the waves, as well as receive many tips from others who do the same, I find myself privy to radio-related stories that might interest SWLing Post readers.  To that end: Welcome to the SWLing Post’s Radio Waves, a collection of links to interesting stories making waves in the world of radio. Enjoy!

Many thanks to SWLing Post contributors Ned Wharton, Pete Eaton, Zack Schindler, and Dave Zantow for the following tips:


NSF releases footage from the moment Arecibo’s cables failed (ARS Technica)

Today, the National Science Foundation released video taken at the moment the Arecibo Radio Observatory’s cables failed, allowing its massive instrument platform to crash into the dish below. In describing the videos, the NSF also talked a bit about the monitoring program that had put the cameras in place, ideas it had been pursuing for stabilizing the structure pre-collapse, and prospects for building something new at the site.

A quick recap of the collapse: the Arecibo dish was designed to reflect incoming radio radiation to collectors that hung from a massive, 900-ton instrument package that was suspended above it. The suspension system was supported by three reinforced concrete towers that held cables that were anchored farther from the dish, looped over the towers, and then continued on to the platform itself. Failure of these cables eventually led to the platform dropping into the dish below it.

[…]The video of that collapse comes from a monitoring system put in place in the wake of the cable failures. Due to the danger of further cable breaks, the NSF had instituted no-go zones around each of the three towers that supported the cables. With no personnel allowed to get close enough to inspect the cables, the staff started monitoring them using daily drone flights, one of which was in progress during the collapse. In addition, a video camera was installed on top of the visitor’s center, which had a clear view of the instrument platform and one of the support towers.

Continue reading full article.

Heathkit: An Employee’s Look Back (Electronic Design)

Lessons of a successful electronic business—an interview with Chas Gilmore, former Heath executive.

For those of you who do not know or remember, Heath Company was the largest kit company in the world. Heath designed and put practically every type of electronic product into kit form. Its products, called Heathkits, were exceptionally popular and many are still in use today.

Over the years, Electronic Design has published many Heathkit-related articles and blogs. Recently, I had a chance to talk with Chas Gilmore, who was a Heath executive. For those of you who fondly remember Heathkit and miss its products, here’s a look back at this amazing company and the lessons it offers.

Chas, what was your affiliation with Heath?

A recent physics graduate, I joined Heath in 1966 as an engineer in the Scientific Instruments department. This was a new group designing laboratory instruments supporting the Malmstadt/Enke, Electronics for Scientists program. The kit business was making great strides.

The audio department was about to introduce the AR-15 FM receiver/amplifier. It had rave reviews, putting Heath in the top tier of the Audio/HiFi market. At the same time, the Ham (amateur radio) department was updating the phenomenally successful SB-line of an HF SSB receiver, transmitter, and transceiver, and modernizing the popular $99 single-band SSB transceiver line[]

Radio at 100 & Roots of Radio Series (Radio World)

Zack writes:

Found this interesting series at Radioworld called “Radio at 100”. It is 29 different articles about the history of broadcasting in the USA. A lot of your readers might enjoy these;
https://www.radioworld.com/tag/radio-at-100

Another great series at Radioworld that your readers might be interested in “Roots of Radio”:

https://www.radioworld.com/columns-and-views/roots-of-radio

ARLB038 FCC to Require Email Addresses on Applications (ARRL Bulletin 38 ARLB038)

Amateur radio licensees and candidates will have to provide the FCC with an email address on applications, effective sometime in mid-2021.

If no email address is included, the FCC may dismiss the application as defective.

The FCC is fully transitioning to electronic correspondence and will no longer print or provide wireless licensees with hard-copy authorizations or registrations by mail.

A Report and Order (R&O) on “Completing the Transition to Electronic Filing, Licenses and Authorizations, and Correspondence in the Wireless Radio Services” in WT Docket 19-212 was adopted on September 16. The new rules will go into effect 6 months after publication in the Federal Register, which hasn’t happened yet, but the FCC is already strongly encouraging applicants to provide an email address.

When an email address is provided, licensees will receive an official electronic copy of their licenses when the application is granted.

The Report and Order can be found in PDF format online at, https://www.fcc.gov/document/fcc-adopts-electronic-licensing-report-and-order

Under Section 97.21 of the new rules, a person holding a valid amateur station license “must apply to the FCC for a modification of the license grant as necessary to show the correct mailing and email address, licensee name, club name, license trustee name, or license
custodian name.” For a club or military recreation station license, the application must be presented in document form to a club station call sign administrator who must submit the information to the FCC in an electronic batch file.

Under new Section 97.23, each license will have to show the grantee’s correct name, mailing address, and email address. “The email address must be an address where the grantee can receive electronic correspondence,” the amended rule will state. “Revocation of the station license or suspension of the operator license may result when correspondence from the FCC is returned as undeliverable because the grantee failed to provide the correct email address.”
NNNN
/EX[]


Do you enjoy the SWLing Post?

Please consider supporting us via Patreon or our Coffee Fund!

Your support makes articles like this one possible. Thank you!

Spread the radio love

How to Build a Simple Linear-Loaded Dipole for Low-Noise Shortwave Radio Listening

Many thanks to SWLing Post contributor and RX antenna guru, Grayhat, for another excellent guest post focusing on compact, low-profile urban antennas:


A linear loaded dipole for the SWL

by Grayhat

What follows is the description of an antenna which may allow to obtain good performances even in limited space, the antenna which I’m about to describe is a “linearl loaded dipole”(LLD) which some call the “cobra” antenna due to the “snaking” of its wires
The arms of the antenna are built using 3-conductors wire (which may be flat or round) and the 3 conductors are connected this way:

That is, connected “in series”, this means that, the electrical length of the antenna will be three times its physical one; this does NOT mean that the antenna will perform like a single wire of the same (total) length, yet it allows to “virtually” make it longer, which in turn gives it good performance even with relatively short sizes. Plus, the distributed inductance/capacitance between the wires not only gives it a number of “sub” resonance points, but also helps keeping the noise down (in my experience below the noise you’d expect from a regular dipole).  At the same time it offers better performances than what one may expect from a “coil loaded” dipole. Plus, building it is easy and cheap and the antenna will fit into even (relatively) limited spaces (a balcony, a small yard and so on…).

Interested–? If so, read on and let me start by showing my (short – 9mt total) LLD installed on a balcony:

Here it is in all its “glory”–well, not exactly–I fiddled with it lately since I’m considering some mods so the tape isn’t correctly stuck and it has been raised and lowered quite some times, but in any case that’s it.

Bill of Materials

Here’s what you’ll need to build it (the links are just indicative, you may pick different stuff or buy it locally or elsewhere).

  • Some length of 3-conductors electrical wire which will fit your available space (pick it a bit longer to stay on the safe side), it may be flat or round, in my case I used the round type since it was easily available and cheap: https://amzn.to/3g2eZX3
  • A NooElec V2 9:1 BalUn–or, if you prefer you may try winding your own and trying other ratios. I tested some homebuilt 1:1, 1:4 and 1:6 and found that the tiny and cheap NooElec was the best fitting one): https://amzn.to/3fNnvce
  • A small weatherproof box to host the BalUn: https://amzn.to/33vjZy3
  • A center support which may be bought or built. In the latter case, a piece of PCV pipe with some holes to hold the wires should suffice. In my case I picked this one (can’t find it on amazon.com outside of Italy): https://www.amazon.it/gp/product/B07NKCYT5Z
  • A pair of SMA to BNC adapters: https://amzn.to/37krHwj
  • A run of RG-58 coax with BNC connectors: https://amzn.to/2JckHcR

Plus some additional bits and pieces like some rope to hang the antenna, some nylon cable ties, a bit of insulated wire, duct tape and some tools. Notice that the above list can be shortened if you already have some of the needed stuff and this, in turn will lower (the already low) cost of the antenna.

Putting the pieces together

Ok, let’s move on to the build phase. The first thing to do will be measuring your available space to find out how much wire we’ll be able to put on the air; in doing so, consider that (as in my case), the antenna could be mounted in “inverted Vee” configuration which will allow to fit the antenna even in limited space.

In any case, after measuring the available space, let’s subtract at least 1m (50cm at each end) to avoid placing the antenna ends too near to the supports. Also, if in “inverted Vee” config, we’ll need to subtract another 50cm to keep the feedpoint (center/box) away from the central support.

Once we’ve measured, we may start by cutting two equal lengths of 3-conductor wire. Next, we’ll remove a bit of the external sleeve to expose the three conductors and then we’ll remove the insulator from the ends of the three exposed wire (and repeat this at the other end of the cable and for both arms).

The resulting ends of each arm should look somewhat like in the example image below

Now we’ll need to connect the wires in series. We’ll pick one of the cables which will be the two arms of our antenna and, assuming we have the same colors as in the above image, we’ll connect the green and white together at one end and the black and green together at the other end. Repeat the same operation for the second arm and the cables will be ready.

Now, to have a reference, let’s assume that the ends of each arm with the black “free” (not connected) wire will go to the center of our dipole.

Leave the two arms alone for a moment, and let’s install the balun inside the waterproof box. To do so, we’ll start by cutting a (small) hole through the single rubber cap found at one side of the box, then insert the cap reversed, so that it will protrude to the inside of the box and not to the outside. Slide the balun SMA connector through the hole so that it will protrude outside the box.

Now use a marker to mark the balun position and remove the balun from the box. Pick a piece of wood/plastic or other insulating material, cut it to size (refer to marking and to balun size) and drill four holes matching the one found on the balun board. Slide four screws through the holes and lock them with nuts, the screws should be long enough to extrude for some mm. Now insert the balun in the screws using the holes present on the balun board and lock it with nuts (be gentle to avoid damaging the balun). At this point, add some “superglue” to the bottom of the support we just built, slide the balun SMA connector through the rubber cap hole we already practiced, and glue the support to the bottom of the waterproof box.  Wait for the glue to dry.

Just to give you a better idea, see the photo above. That’s a photo of the early assembly of my balun. Later on, I rebuilt it as described above (but took no pics!), the image should help you understanding how it’s seated inside the box–by the way in our case it will be locked by the screws to the plastic support we glued to the box.

While waiting for the glue to dry, we may work on the dipole centerpiece.

If you bought one like I did, connecting the arm “black” (see above) wires should be pretty straightforward. If instead you choose to use a PVC pipe you’ll have to drill some holes to pass and lock the wire so that the strain will be supported by the pipe and not by the wire going to the balun box. In either case, connect a pair of short runs of insulated wire to the end (black) wire coming from each end. Those wires should be long enough to reach the balun wire terminal block inside the box.

Assuming the glue dried, it’s time to complete the feedpoint connection.

Bring the two wires coming from the centerpoint inside the waterproof box. Pick one of the wire terminal blocks which came with the balun (the “L” shaped one should be a good choice) and connect the wires to it. Then, slide the block in place until it locks firmly. After doing so, close the box and screw the SMA-BNC adapter onto the SMA connector coming from the balun. Our centerpiece and arms will now be ready, and will be time to put our antenna up!

I’ll skip the instructions about holding the arm ends and the centerpiece up, since I believe it should be pretty straightforward. Just ensure to put the antenna as high as possible and, if you have room make the arms as long as possible. In my case, due to my (self-imposed) limitations, the antenna was installed on a balcony. The arms have a length of about 3.5m each and the feedpoint (in the image above) sits at about 9m off the ground.

The more acute readers probably noticed those “blobs” on the coax, they are snap-on ferrite chokes I added to the coax (there are more of them at the rx end) to help tame common mode noise. I omitted them from the “BoM” since they may be added later on.

Anyhow, now that you have your LLD up it will be time to give it a test! In my case, I decided to start by running an FT8 session to see what the antenna could pick up during 8 hours, and the result, on the 20 meters band, is shown on the following map (click to enlarge):

Later, that same antenna allowed me to pick up signals from the Neumayer station in Antarctica–not bad, I think!

Some final notes

While running my “balcony experiment”, I built and tested several antennas, including a vanilla “randomwire”, a dipole, and a T2FD.

Compared to those, the LLD offers much less noise and better reception on a wide frequency range. By the way, it won’t perform miracles, but it’s serving me well on the LW band, on most ham bands, and even up to the Aircraft bands–indeed, was able to pick up several conversations between aircraft and ground air traffic control.

All I can suggest is that given a linear-loaded dipole is so simple, quite cheap, and may fit many locations, why don’t you give it a spin–?  🙂

Spread the radio love