Tag Archives: Yaesu FRG-7

Kostas improves the contrast on his FRG-7 digital display

Many thanks to SWLing Post contributor, Kostas (SV3ORA), for sharing the following guest post which originally appeared on his radio website:


FRG-7 digital display contrast improvement

by Kostas (SV3ORA)

The FRG-7 digital by Marcel Jacobs PA8MA, is a very well thought modification KIT for the Yaesu FRG-7 receiver. It really adds to it one of the things it misses (and it misses a lot) to become a more “serious” receiver in the modern era, the digital frequency readout and S-meter. If you are like me and enjoy classic radio gear, but you do not want to compromise much the every-day usability, I recommend you this KIT. I have to say here that, the first thing you would want to do if you use the receiver for SSB, is to perform my SSB-related mods as well.

When I installed this KIT on my FRG-7 The first thing I did not like about it, was the very bright display which blasts your eyes with light especially at night on a low-lit shack. Not only that, but your eye will condinuously focus on the bright display and you loose the magic of the rest of the radio controls and displays. I wanted the digital display to be one of the parts of the radio and not the major thing that my eyes will look all the time. Marcel was smart enough to include 2 brightness levels in software. The low brightness setting does not actually change the backlight of the display, it just changes the graphics in more dim colors. As a result in either setting, the backlight color is very bright and this decreases contrast a lot. The background of the numbers in the display has a blue-ish color and not true black. Not only that, but the edges of the display, are visible too. I have solved all of these problems with a simple modification to the KIT.

The picture above, shows the display after my modification. The picture is taken on a dim-lit shack using my phone, with no further image processing. What you see in this picture, is exactly what it looks in reality, after my modification. Notice how the background of the display, remains pure black and the numbers and graphics of the display do not blind you anymore and are of the same brightness as the rest of the original backlit graphics of the radio. This allows your eye to wander around to the rest of the nice radio backlit things, without focusing all the time on a bright display. This is very relaxing to the eye and the brain as you scan for stations. You actually only look at the digital display when you want more accuracy. Compare this nice display contrast with the one presented on Marcel’s manual and you will notice the difference.

The modification is really simple and it does not need a schematic. It is just a 22k potentiometer, connected as a variable resistor like shown in the picture. I just cut the second cable (from the left), of the ribbon and then soldered the variable resistor there. That’s it. Depended on the light conditions in which you operate the receiver and on your personal preference, you can set the brighness from full to very dim. In the software setting, set the brightness to maximum. Then use this variable resistor to decrease it to your desired level.

Spread the radio love

Radio Waves: International Symposium Focuses on Broadcasting, Last Morse Station, Yaesu FRG-7 Digital Frequency Kit, and Remembering Bob Heil,

Radio Waves:  Stories Making Waves in the World of Radio

Welcome to the SWLing Post’s Radio Waves, a collection of links to interesting stories making waves in the world of radio. Enjoy!

Many thanks to SWLing Post contributors Paul Jamet, Bob Butterfield, and NT for the following tips:


International symposium: Université Toulouse Capitole, 14 and 15 November 2024

From COVID-19 to armed conflicts: radio faced with a multiplicity of crises

https://radiography.hypotheses.org/files/2023/12/Appel-a-communication-Colloque-international-Radio-et-crises-Toulouse-2024-version-anglaise.pdf

Deadline: April 25th, 2024

America’s Last Morse Code Station (The Atlantic)

Maritime Morse code was formally phased out in 1999, but in California, a group of enthusiasts who call themselves the “radio squirrels” keeps the tradition alive.

Calling all. This is our last cry before our eternal silence.” With that, in January 1997, the French coast guard transmitted its final message in Morse code. Ships in distress had radioed out dits and dahs from the era of the Titanic to the era of Titanic. In near-instant time, the beeps could be deciphered by Morse-code stations thousands of miles away. First used to send messages over land in 1844, Morse code outlived the telegraph age by becoming the lingua franca of the sea. But by the late 20th century, satellite radio was turning it into a dying language. In February 1999, it officially ceased being the standard for maritime communication.

Nestled within the Point Reyes National Seashore, north of San Francisco, KPH Maritime Radio is the last operational Morse-code radio station in North America. The station—which consists of two buildings some 25 miles apart—once watched over the waters of the Pacific and Indian Oceans. Both KPH sites shut down in 1997, but a few years later, a couple of radio enthusiasts brought them back to life. The crew has gotten slightly larger over the years. Its members call themselves the “radio squirrels.” Every Saturday, they beep out maritime news and weather reports, and receive any stray messages. Much of their communication is with the SS Jeremiah O’Brien, a World War II–era ship permanently parked at a San Francisco pier. [Continue reading, noting that much of The Atlantic’s content is behind a paywall…]

Yaesu FRG-7 Digital Frequency and S-meter Readout Kit

Many thanks to SWLing Post contributor, Bob Butterfield, who writes:

Readers who own a Yaesu FRG-7 and are interested in a digital frequency readout/S-meter kit that replaces the original analog S-meter may be interested in this item from Marcel Jacobs, PA8MA, Netherlands. It is available on eBay:

https://ebay.us/ji2zp7 [Note: this eBay partnership link supports the SWLing Post.]

I have not personally tried out this unit, however, it does look pretty slick. Further information can be found in the FRG-7 groups.io user group.

A video is also available on YouTube:

Audio Innovator Bob Heil Dies (Radio World)

Gave a unique sound to Frampton and was known in radio, audio and ham radio

Bob Heil has died, according to the company he founded. He was 83.

“Bob fought a valiant, year-long battle with cancer, and passed peacefully surrounded by his family,” Heil Sound posted on Facebook.

“Driven by a lifelong passion for sound, Bob’s pioneering work revolutionized how concertgoers experienced live sound.” [Here’ his official obituary.]

Heil was the inventor of the famous Heil Talk Box used memorably by musicians like Joe Walsh, Peter Frampton, Slash, Richie Sambora and others. He was invited to exhibit his innovations at the Rock and Roll Hall of Fame. He also was an active member of the amateur radio community.

In 2022 Bob and Sarah Heil transferred ownership of their company to President/CEO Ash Levitt and Director of Operations Steve Warford, Radio World reported at the time. “Sarah Heil has retired, but Bob will continue to do outreach work and product design within the amateur radio space under the title Founder and CEO Emeritus,” it stated then. [Continue reading…]


Do you enjoy the SWLing Post?

Please consider supporting us via Patreon or our Coffee Fund!

Your support makes articles like this one possible. Thank you!

Spread the radio love

Guest Post: Review of the Electronic Specialty Products – Model DD-103 Universal Digital Dial

Many thanks to SWLing Post contributor, Bob Butterfield, who shares the following guest post:


Review of the Electronic Specialty Products – Model DD-103 Universal Digital Dial

by Bob Butterfield

I recently brought out of storage my Yaesu FRG-7 Communications Receiver to use “in the shack” once again.  I have always regarded the FRG-7 as a capable receiver but just did not have space as my radios co-exist with part of my daughter’s over-flowing stuffed animal collection–among other things.  After a couple of dozen members of the plush collection were relocated, I now had room for another receiver!  I checked the FRG-7 out carefully and found everything was functioning well, except for a modification I made decades ago which was the installation of a 100 kHz crystal calibrator kit inside the receiver.

I am the original owner of this FRG-7 which is an early production unit (the one without the small fine tuning knob).  I had always desired an external digital frequency display for this radio and thought now is the time.  I did some research, visited various radio forums, and decided on purchasing an Electronic Specialty Products (ESP), Model DD-103 Universal Digital Dial.  This unit is not cheap, US$140, plus $15 shipping, but seemed to fit my needs.  If technically inclined, one could possibly build an external display for themselves at lower cost.  What may be of interest to many concerning the DD-103 unit is that it comes pre-programmed for dozens of transceivers and receivers (to include the FRG-7).  Plus, if your radio is not pre-programmed it can be set up manually.

The DD-103 is an attractive compact external unit measuring 2”H x 6”W x 4”D with a very easy to read backlighted LCD (white on blue).  The unit comes with connecting cables, U.S.-type power supply, and instruction manual.  In my opinion, despite its size, this is one solid and well-built unit.  As per the ESP web site, new units are not stocked but are assembled upon order.  After ordering I immediately emailed ESP with my receiver make and model (I would recommend this for all buyers).  My unit arrived in a little over two weeks and I received a separate sheet accompanying the unit with specific instructions for my receiver.  Hook up was a breeze.  All that was needed was to set a few DIP switches, connect one lead to the indicated test point on the identified board, and the other lead to chassis ground (alligator clip leads are provided).  The connection to the display is made with the included RCA cable.  I made one simple installation modification, installing a RCA female/RCA female bulkhead connector on the rear panel of the FRG-7 to allow for quick disconnect.

The DD-103 display is programmed into 1 MHz increments.  To operate, you select the MHz range you want (for example 9 MHz) on the DD-103.  On the FRG-7, I then tune its pre-selector and the same desired MHz range, and finally tune in the frequency and watch the DD-103 display change accordingly.  The operational design of the DD-103 fits nicely with the Barlow-Wadley circuit design of the FRG-7.

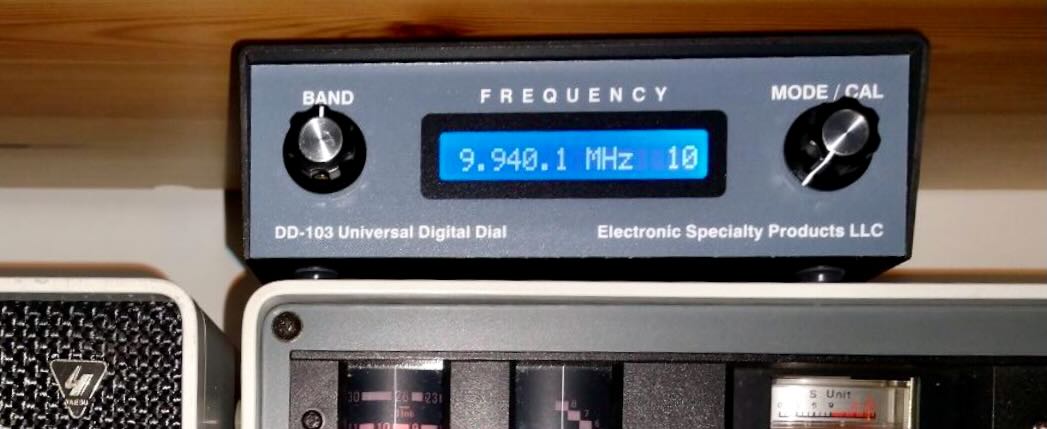
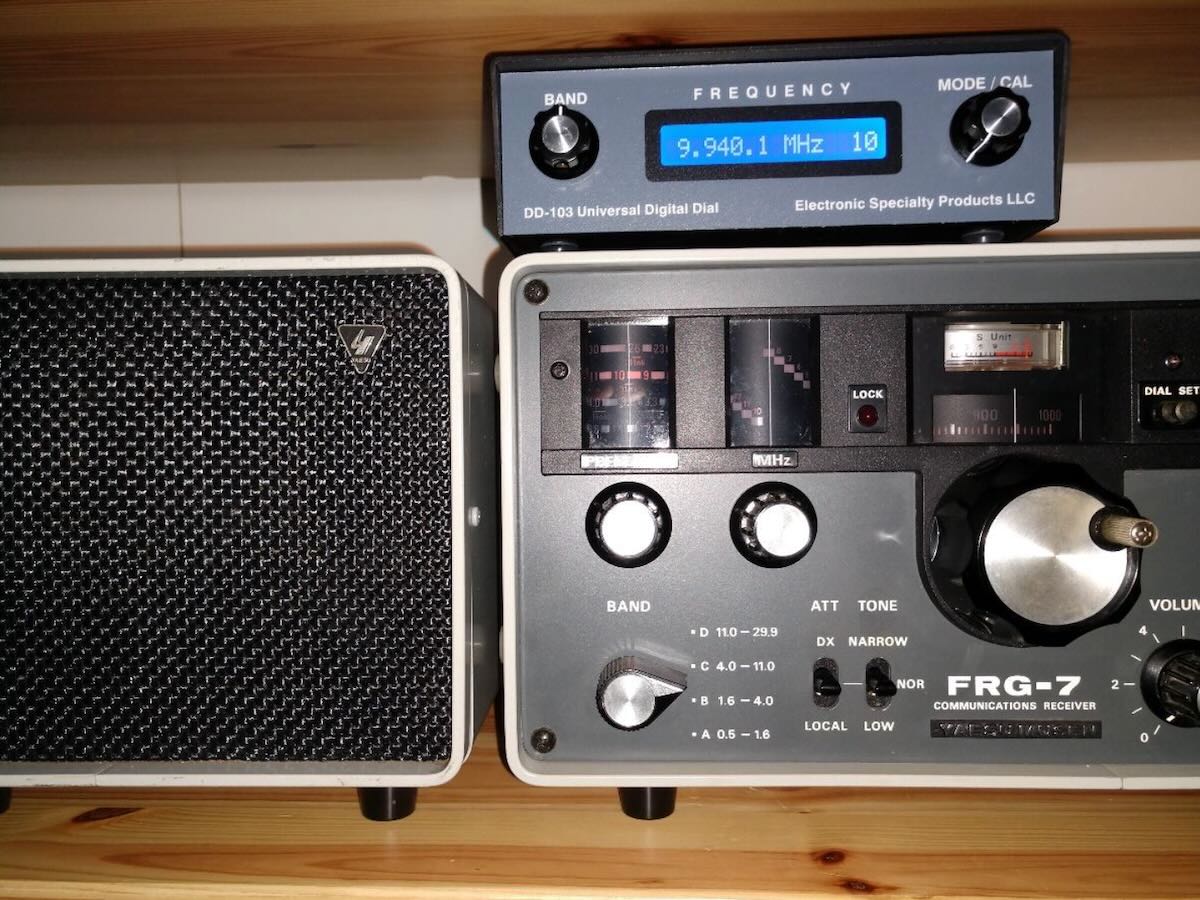
A key feature of the DD-103 display is that it reads the entire frequency (e.g., 9.940.1 MHz) so you always know where you are with just one look.  In addition to AM mode the DD-103 can be further programmed for CW, LSB, and USB modes, as well as 10 Hz or 100 Hz resolution.  As stated in the unit’s manual, it can also be calibrated on each frequency range so as to correct IF amplifiers that are a little off or errors associated with aging receiver crystals, if applicable.

It is nice to have my FRG-7 up and running again and utilizing the new external numeric frequency readout.  Truthfully, I have been reminded just how good the FRG-7 is.  Though it does not have as many features, it holds its own when put up against my other classic receivers (JRC NRD-545, JRC NRD-535D, and ICOM R-75).

I must say I am quite happy with the Electronic Specialty Products DD-103.  The unit has good accuracy and stability as it utilizes a TCXO reference oscillator.  If I had to nit-pick about anything, I would likely point out that the on/off switch is on the back of the unit.  If your radio is in a confined space this possibly could cause operational issues for you.  Also realize that for the most part this unit is kind of a “one size fits all” package and it would not surprise me if certain receivers or transceivers might require lengthening of the connecting cable.  All in all this professional looking unit is a simple to use, simple to install, easy to read, designed well, and I think worth the cost.  For anyone else who is thinking about adding a digital frequency readout to a vintage radio, you may want to give this model due consideration.

Bob Butterfield

Photo of my FRG-7 with the DD-103 on top:

Web site for Electronic Specialty Products: http://www.electronicspecialtyproducts.com/dd103.html

Disclaimer: I have not been compensated in any manner in regards to this unsolicited review and purchased the DD-103 unit with my own funds.

Spread the radio love

How to install a mechanical SSB filter on the Yaesu FRG-7

Many thanks to SWLing Post contributor, Kostas (SV3ORA), for sharing the following guest post which originally appeared on his radio website:


How to install a mechanical SSB filter on the Yaesu FRG-7

by Kostas (SV3ORA)

The Yaesu FRG-7 is a general coverage MW/SW receiver that uses the Wadley Loop system for stabilizing the frequency tuning. The receiver has a good sound on AM mode, that reminds me the tube receivers sound. However, on sideband mode, it is pretty much useless. The IF ceramic filter that is used, does not have enough selectivity to reject the opposite sideband. No matter if the front panel mode selector switch states USB/CW and LSB, these just shift the BFO, nothing more. The receiver is a DSB set not SSB. A cheap way you can accomplish single signal sideband reception with the FRG-7 is described in this link. Whereas it works, it increases the audio bandwidth of the signals to the high pitch.

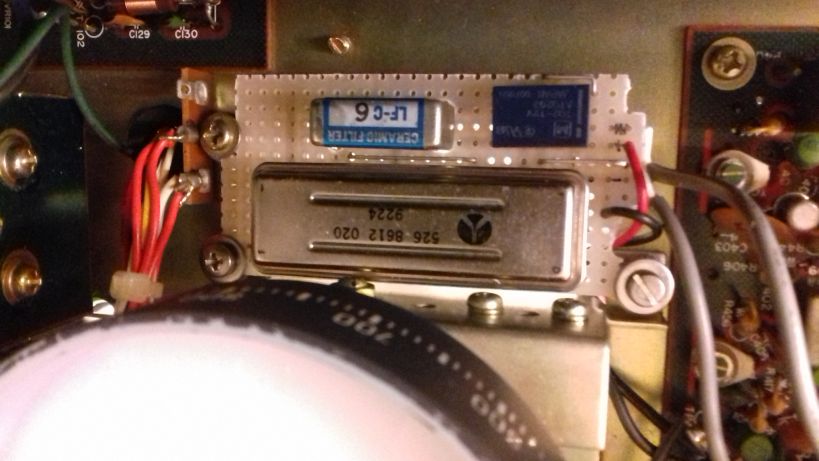
A better approach is to install an additional mechanical filter to the receiver. This of course requires expensive 455KHz mechanical filters, but if you have one in hand or if you are willing to pay for the improvement in performance, then this is the recommended option. But you can’t just desolder the ceramic filter of the receiver and solder a mechanical filter in place. On AM mode, you need wider bandwidth, but on SSB mode you need narrower. So both filters must be in place and a selection must be done in each mode. Thankfully, this modification is pretty easy on the FRG-7 and it does not require any modification of the external appearance of the radio.

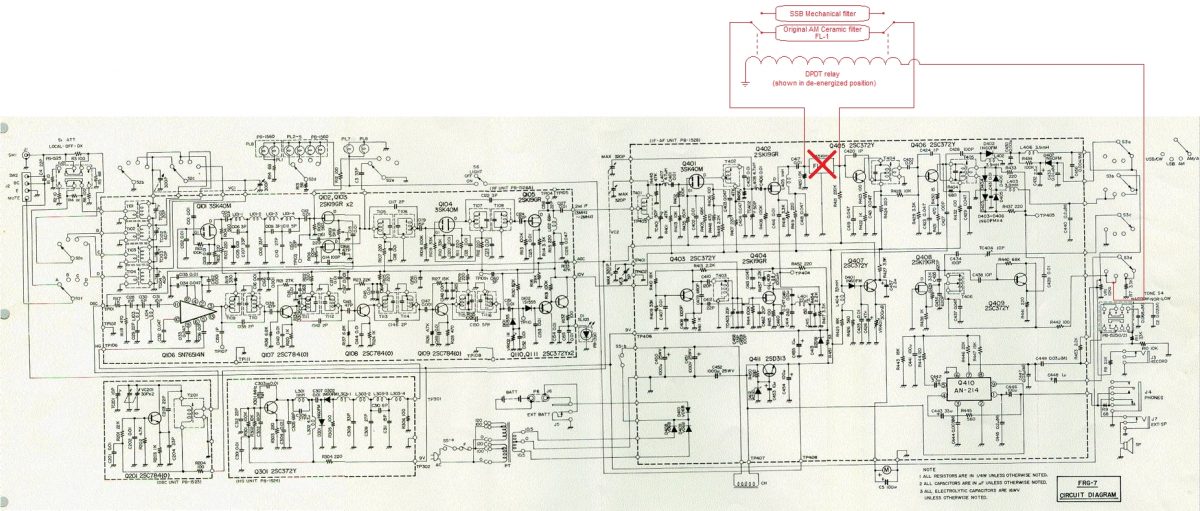
The schematic of the FRG-7 is shown above. Everything with red color, are part of the modification. The modification is pretty straight forward. You have to desolder the original ceramic filter from the FRG-7 PCB and install it on a separate PCB along with the new 455KHz mechanical filter. To select between the two filters, a 9-12v DPDT relay can be used and it must be connected as shown in the schematic. The power for the relay coil is derived from one section of the mode switch (S3d). On USB or LSB modes, the BFO is energized and this power is also used to energize the relay, which in turn switches to the narrow mechanical filter on these modes.

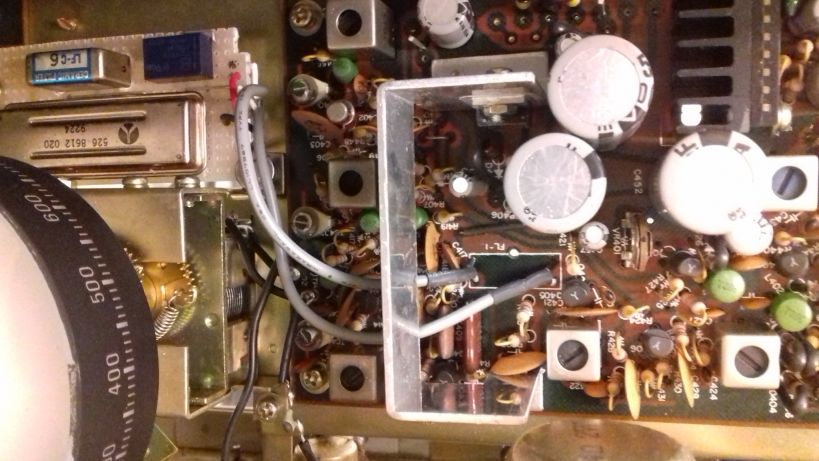
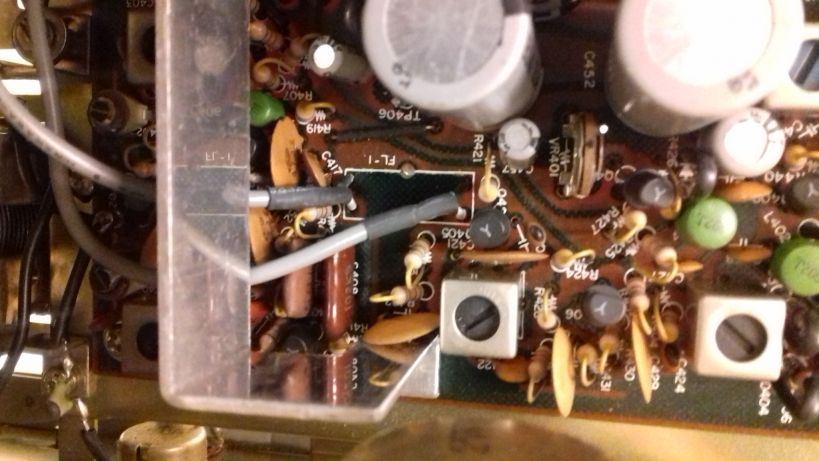
A good place for the new PCB that accommodates the filters, is just below the main tuning dial of the receiver. There is a hole there and three screws, which can be used to also hold this PCB in place. I needed to replace these screws in mine with longer ones, because I used spacers to prevent the PCB from touching the chassis. But this is optional.

Two small pieces of coaxial cables are used to connect the new PCB to the pads of the ceramic filter, that has been now removed from the original PCB of the receiver. Ground these cables on both ends.

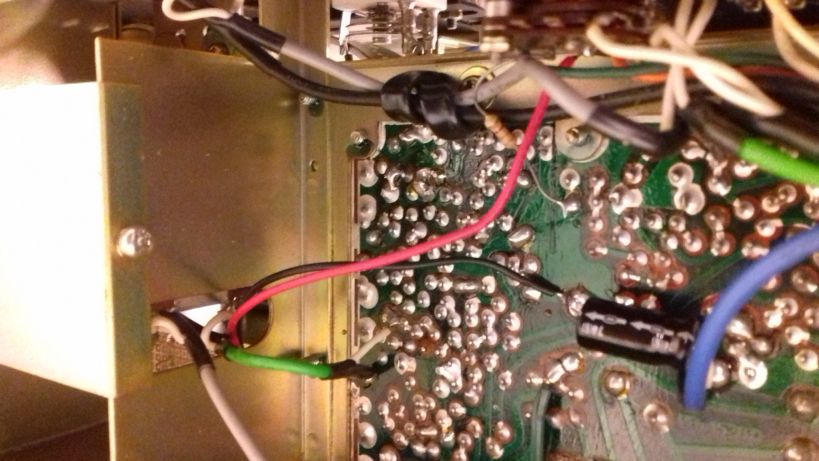
The power cables for the relay coil (shown with red and black in the picture above), are passed below the PCB to the chassis opening and through a hole to the bottom of the original PCB of the receiver. The ground wire is soldered to the filter ground point and the red wire is soldered to the mode selector switch S3d. S3d is the outer wafer onto the switch. Use a multimeter to find the contact of the switch that has VCC when the mode is switched to USB or LSB. This is the point where you want to connect the red wire.

After installing everything, you should perform an alignment of the TC404 and the T406 in the BFO section as described in the manual. This requires a frequency counter, but I did my alignment by simply adjusting the two controls by ear, until I got roughly the same pitch on LSB and SSB audio bandpass. These controls interact, so you have to do a bit of back and forth in both of them. It is very easy.

After installing the modification and aligning the receiver, the result is pretty obvious. No more DSB reception, SSB signals are received just once in the dial and their bandwidth is limited as it should on SSB. The mechanical filter I had, was a bit narrow (2.1KHz) so I can also hear a bit os “seashell” sound on SSB, but SSB voice signals are perfectly understood. It is interesting that the audio volume between the ceramic filter and the mechanical filter was just about the same, which indicates that there is no additional loss in the newly installed filter. Another interesting thing is that there was no need for any impedance matching using active devices or transformers on the mechanical filter. It worked just by directly connecting it. Neither it’s loss, not it’s response seems to be affected by any possible impedance mismatches.

Note that Collins produced both symmetrical and asymmetrical mechanical filters (yes they used two filters, one for USB and one for SSB in some of their gear). My filter is a symmetrical one (same roll-off response curve on both sides of the filter passband). If you use an asymmetrical filter, expect a bit different pitch when switching from LSB to USB and vice versa. Not a huge problem, but just a note.

By performing this simple modification, you will end up with an FRG-7 receiver that is trully selective, allowing for real SSB reception. Most importantly you do not ruin the appearance of your precious FRG-7, but just improving it’s performance. This modification would probably be appreciated much when deciding to sell your FRG-7 to someone else.


Thank you for sharing this practical and affordable project with us, Kostas!

Post Readers: Check out this project and numerous others on Kostas’ excellent website.

Spread the radio love

Kostas’ Yaesu FRG-7 adjustment that improves opposite sideband rejection

Many thanks to SWLing Post contributor, Kostas (SV3ORA), who shares the following video and writes:

In this 7.8Mb video (attached) is my solution for “converting” the Yaesu FRG-7 for single signal reception on SSB:

Not a mod actually, no additional filters, no soldering of any kind. Just tune the BFO on USB and on LSB a bit far away from the 455KHz ceramic filter (using the transformer for LSB and the capacitor for USB, as the manual states). As the video shows, this provides the near to
carrier selectivity to cut off the unwanted sideband.

The price you pay is more high frequencies (but in the wanted sideband) and a bit attenuated low frequencies as the filter is effectively shifted to higher frequencies. Very high frequencies cut-off is helped by the tone control of the receiver to some point.

This is a cost-free mod and requiring even no soldering skills, neither any mod to the receiver. Now as you tune the bands in SSB and CW, you do not hear the same signal twice. On AM mode nothing changes, since the BFO is switched off in this mode.

Many thanks for sharing this, Kostas! This seems like a simple adjustment for one of my all-time favorite receivers!

Post readers: Check out Kostas’ website for more modifications, ideas and radio projects.

Spread the radio love

What are your Sunday radio plans?

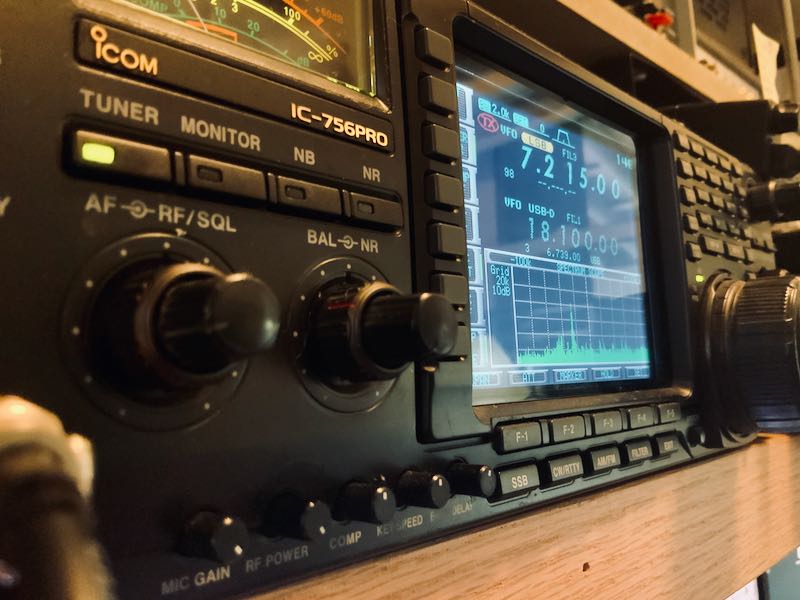
Icom IC-756 Pro Transceiver Dial

I had planned on today being a rather laid-back Sunday with a good book lined-up and lots of radio time. Instead, my wife has convinced me to work on a home project this afternoon. That’s okay, because it is a project I’d like to get out of the way and the weather today is ideal.

Still, this morning, I’ve been hunting a few Parks On The Air (POTA) stations with the ‘756 Pro to help park activators along with their numbers. I try to do this when I can because I’m typically the activator and I truly appreciate logging well over my ten required stations for a valid field activation.

After the project this afternoon, I also plan to hit the 31 meter band and lower, catching a few broadcast stations and soaking in the shortwaves most likely with my RSPdx and HF+ Discovery SDRs.

It won’t be all SDR, though! I’ll be busy doing band-scans with my beloved Yaesu FRG-7 (Frog 7) while my SDRs record audio and spectrum.

Post readers: What are your plans today and this week?  Please comment!


Do you enjoy the SWLing Post?

Please consider supporting us via Patreon or our Coffee Fund!

Your support makes articles like this one possible. Thank you!

Spread the radio love

Listener Post: Fabien’s love of radio which lead him to collecting

Fabien’s radio story below is the latest in our series called Listener Posts, where I place all of your personal radio histories.

If you would like to add your story to the mix, simply send your story by email!

In the meantime, many thanks to Fabien who writes:


I’ve been a radio listener since the age of 14. I was an SWL and a listener of local VHF free stations too.

In the beginning, my receiver was a poor radio-cassette, with a little segment of the shortwave bands. I used it for two years.

Then, for 16th birthday I received a Philips AL 990 shortwave receiver.

It was a great receiver because the sound was clear and it was easy to identify the stations when listening with my usual headphones–even those broadcasts with very weak signals and an unidentified language. The negative of this receiver was the frequency was not easy to see/read and I was at the same display for hours.

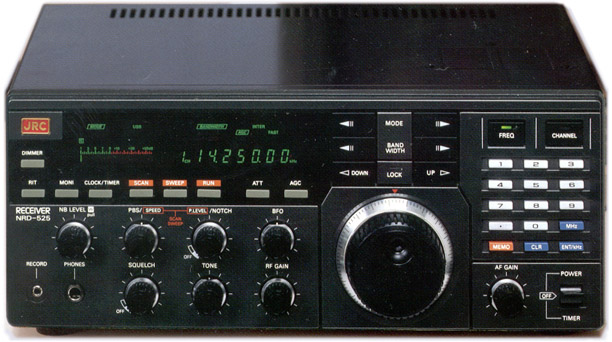
After my school period, I worked for two years and with my savings I was able to buy a JRC NRD 525 in Swizterland, where this receiver was less expensive and easier to find than in my country of France at the time.

The Japan Radio Company NRD 525 receiver. Photo: Universal Radio

The good with the NRD 525 is that it was easy to tune to a frequency, easy to read the display and easy to connect the receiver to another unit for decoding RTTY signals with an old computer monitor and a small EPSON dot printer.

I was in paradise!

But the NRD 525 has a problem with its sound. Even with my best headphones, I was not able to understand the station voices when the signal was poor and the language was not mine, so it was difficult to have sufficient details to make a good reception report for sending it proudly to the logged radio station.

My solution was strange but the only one possible : I searched for rare signals with the NRD 525 and after I found them, listened to those signals with the AL 990 and my headphones.
With this solution, I was able to send a lot a reception reports and receive some beautiful QSLs from official, pirate and clandestine stations (clandestines were my favorites).

This SWL period was until 1988. In 1988 I was obliged to move from my city to a new location where it was more difficult to be a SWL. The following years, I was more a BCL (Broadcast Listener) than an SWL.

I did BCL DX until 1999, and after 1999 most of my radio listening time was only BCL easy listening, without looking for weak signals.

Because of the Internet, online SDRs, and the closing down of a lot of broadcasters, I’m less  interested in contact stations directly, save from time to time. For me, the chase of weak signals was the most important part; now we can listen to a station via the Internet (online on a website or with a SDR online)…even the pirates stations.

My actual interest today is to have all of the receivers I was dreamed about when I was a teenager. In 2020, at 53 years old, I am now more a collector of receivers than a real BCL. I like all electronics, including many hifi systems/components and radio items.

I also love black and white film photography/laboratory too and I collect stickers from French radio stations.

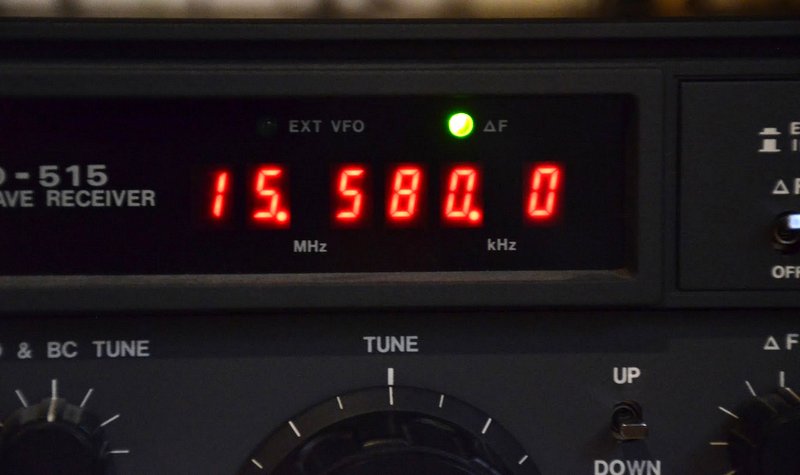
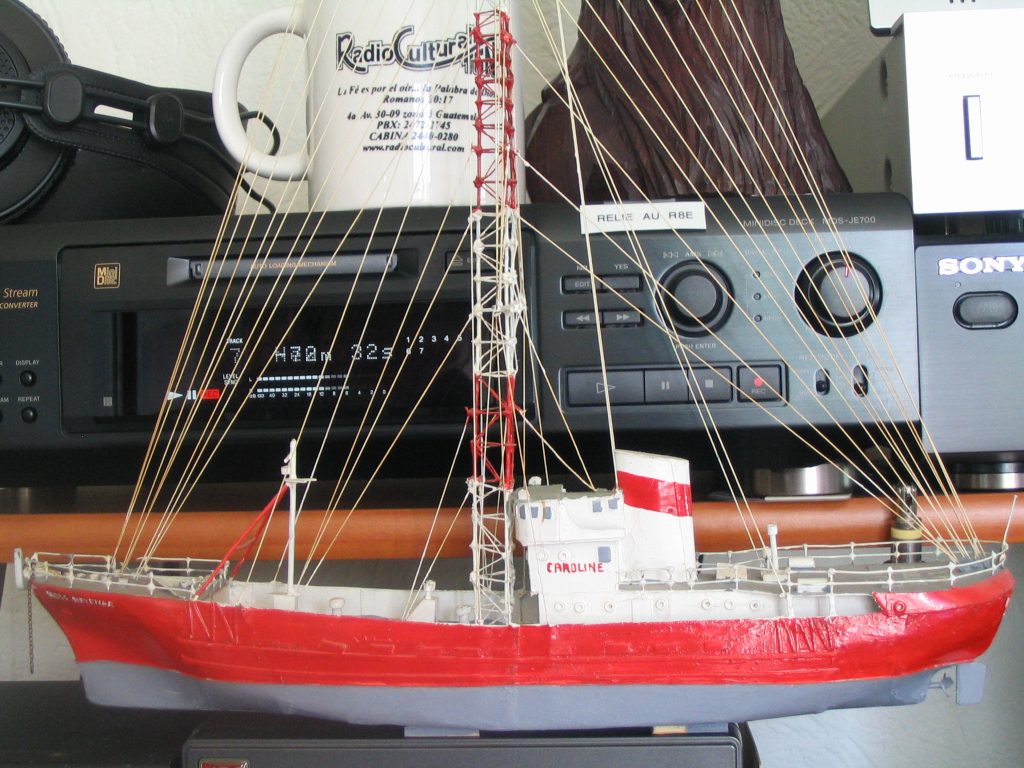
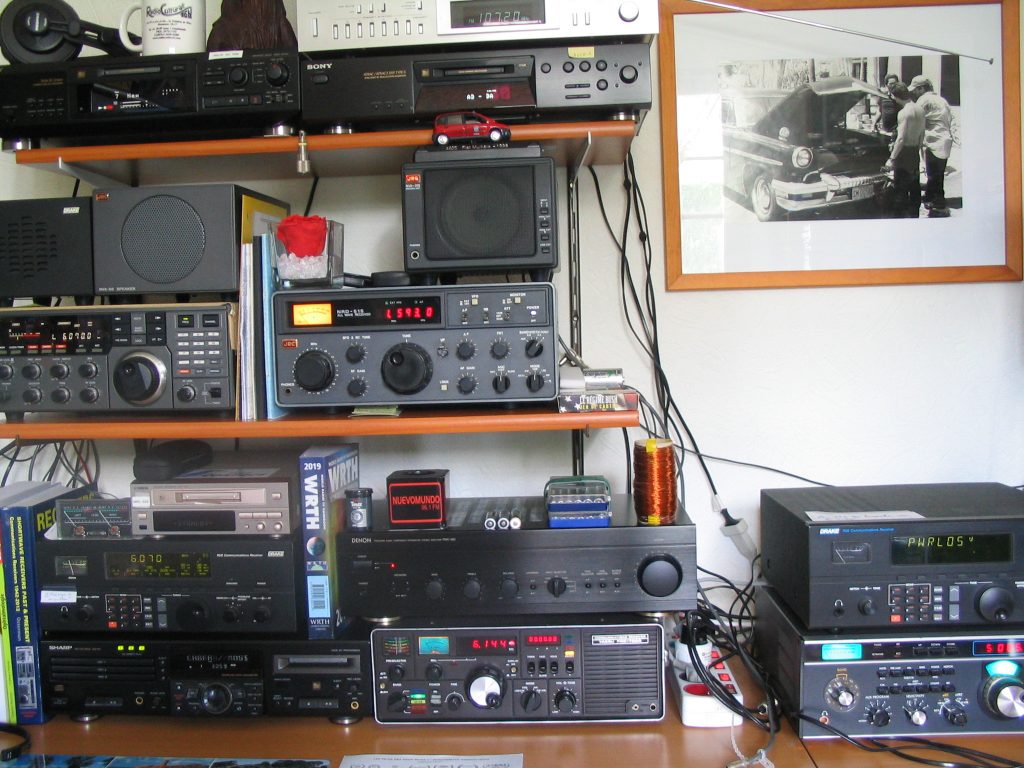
Here are two pictures of part of my actual listening post. On one, you could see a model boat of the famous offshore radio station ” Radio Caroline “.

My favorite shortwave receivers are the Drake R8-E (European version of the R8), the BEARCAT DX-1000 and the Yaesu FRG-7.

My favorite receiver for synchronous detection reception is the SONY ICF-2001D (the European version of the ICF 2010).

To receive mediumwave stations, I prefer my JRC NRD 515 connected with an Australian active loop antenna.

For travel, I use a small Lowe HF 150.

For VHF FM-commercial band, I use my Grundig Satellit 500 and a Sony ICF 6800W.

Some of my best souvenirs/memories of SW reception are Radio La Voz de Alpha 66 (USA), Radio Venceremos (El Salvador), Radio Botswana, Radio Bardaï (Tchad or Libia), Radio RFO Tahiti, and Radio Bandeirantes (Brasil).

My regrets from the years 1981-1988 are not being able to receive the signal of Radio BHUTAN and the signal from The Faklands Islands.

I don’t like to travel outside my beloved country, but for the pleasure of visiting some radio stations, I made an effort and I traveled to Phnom Penh (Cambodia), La Habana (Cuba), San Salvador (El Salvador) and Ciudad Guatemala (Guatemala).

Truly Yours,
Fabien SERVE, in France


Thank you, Fabien, for sharing your story! You’ve added some truly classic receivers to your collection over the years!  I love the Radio Caroline model too! 

I encourage other SWLing Post readers and contributors to submit their own listener post! Tell us how you became interested in radio! 

Spread the radio love