By Jock Elliott, KB2GOM
A software glitch at a power station, a tree branch rubbing against a transformer, a geophysical incident, a weather event, even a civil society misadventure . . . It doesn’t take much for things to rapidly go to blazes. So what do you need when Really Bad Things happen?
Back in the 1970s, Colonel John Boyd, an air warfare strategist, came up with the idea of the OODA loop. Originally designed for air combat, the OODA stands for: Observe, Orient, Decide, Act. In other words, see what’s going on, understand how it relates to your situation, figure out what to do, then do it. OODA . . . got it?
So when really bad stuff happens, once you get clear of immediate physical danger (if any), you (or me or anyone involved) need to do your OODA loop: see what’s going on, understand how it relates to your situation, figure out what to do, then do it.
And to execute your OODA loop, you need information, right?
Soooo, when the lights are out, the internet is down, and maybe cell phones aren’t working, you need an emergency radio to find out what’s going on. Rob, W4ZNG, endured three weeks without electricity on the Mississippi gulf coast as a result of Katrina. In Rob’s case, during Katrina, all of the local broadcasters were wiped out. There was a local low-power FM broadcaster who got permission to increase power to 1,000 watts and was broadcasting where to get food and water. There was a New Orleans AM station that was on the air, but all of its coverage was “New Orleans-centric.” After a few days, some local FM broadcaster, working together, cobbled together a station that they put on the air and began broadcasting news. Rob also began DXing AM stations at night to get additional news. I don’t think it is an exaggeration to say radio was Rob’s lifeline to what was going on.
So, at the most basic level, an emergency radio needs to receive AM and FM stations. If you live in the U.S. or Canada, you also want NOAA weather radio channels, and, if things are really horrible, the ability to receiver shortwave radio might be useful.
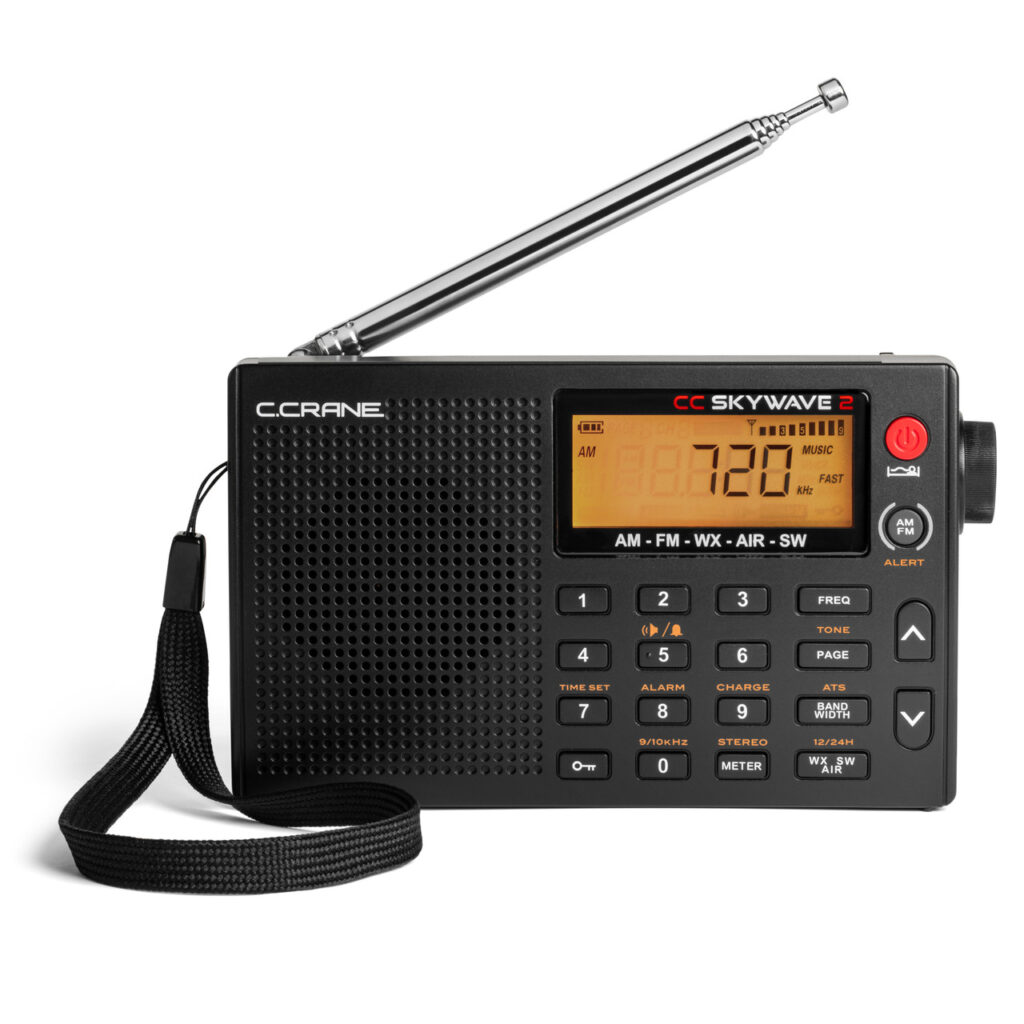
Recently I had a look at an excellent candidate for an emergency radio. CCrane has brought out a new and improved version of their super-versatile pocket-sized Skywave radio, and they sent me one for review without charge.
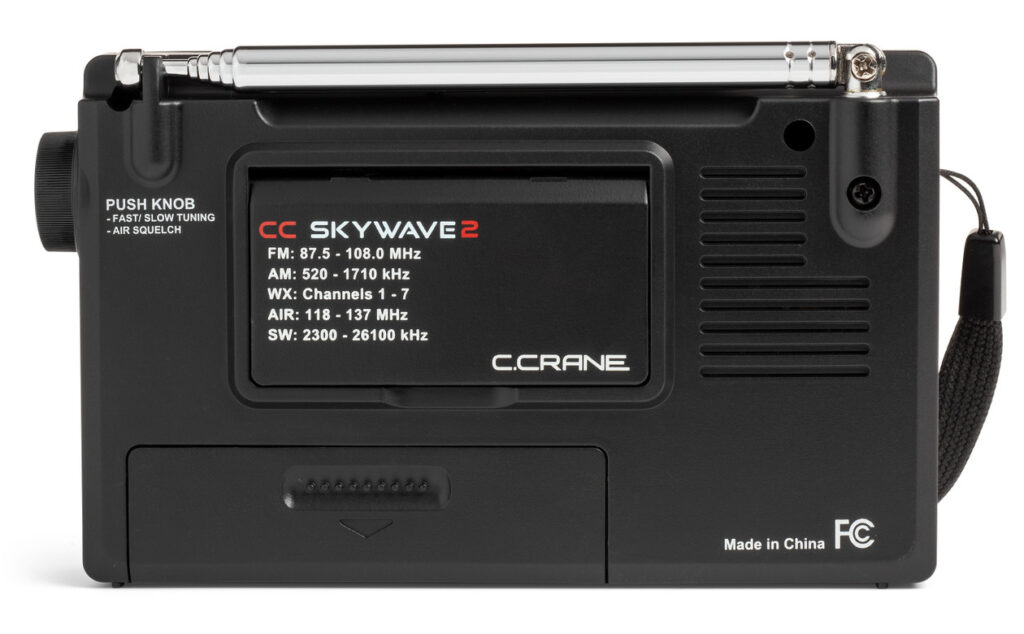
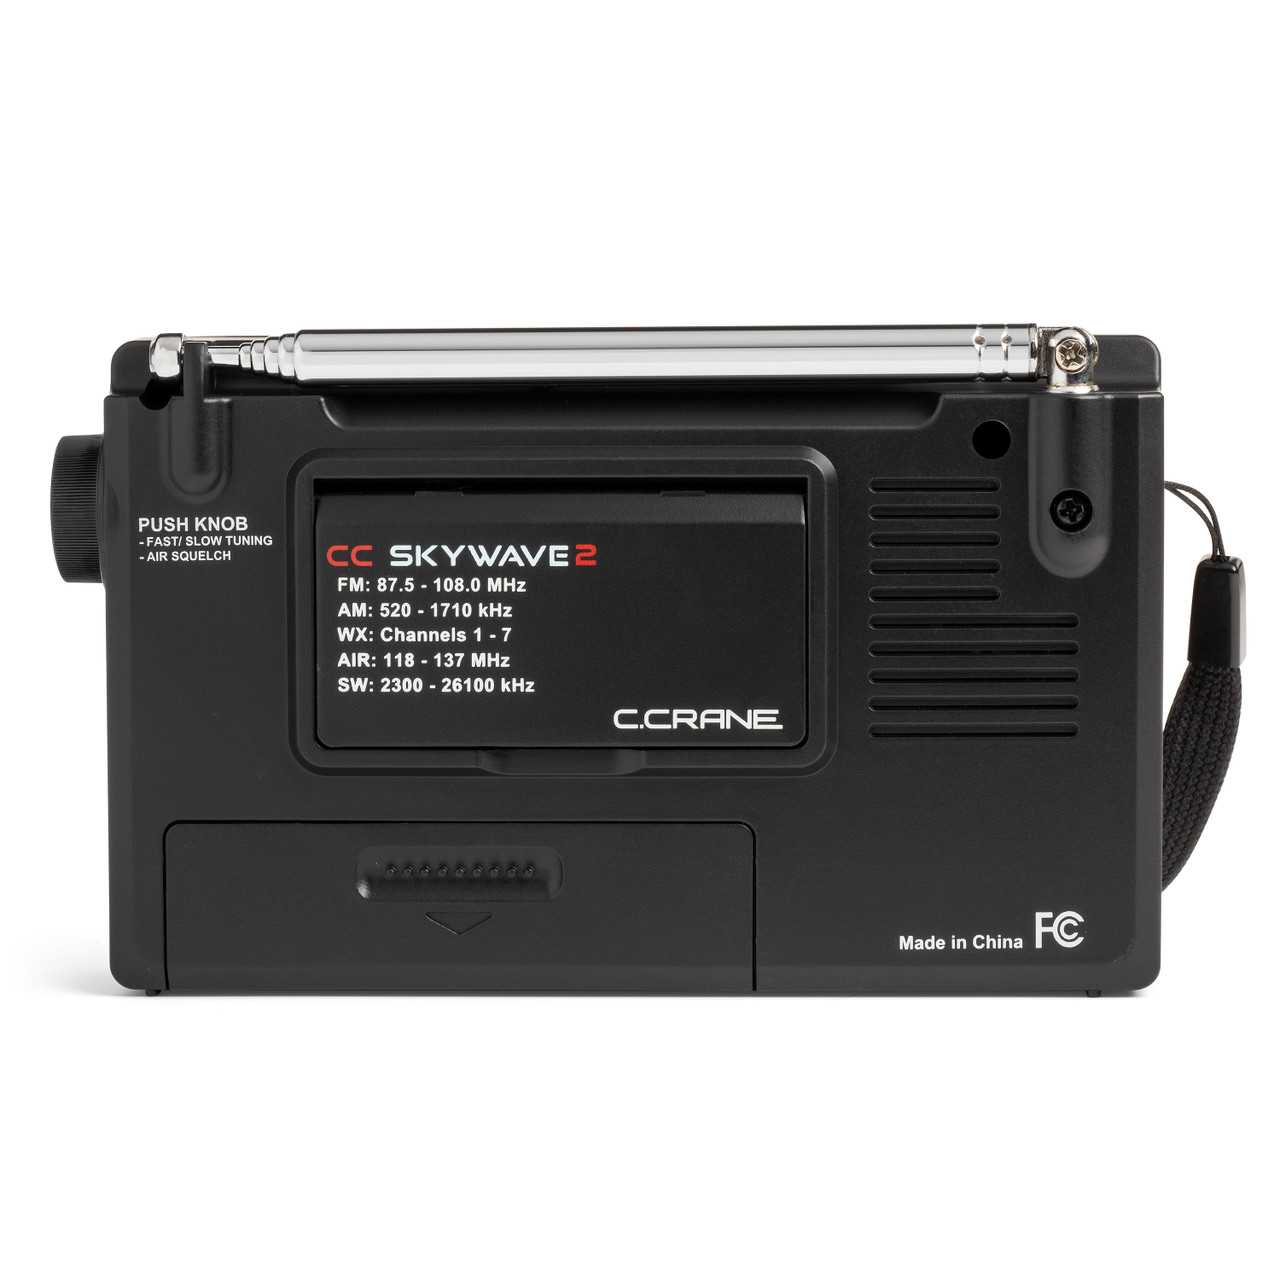
The new radio, the CC Skywave 2, covers FM from 87.5-108.0 MHz, AM from 520-1710 kHz, National Weather Radio Channels 1-7, air band from 118-137 MHz, and shortwave from 2300 to 26100 kHz. Small enough to fit in a shirt pocket, the Skywave 2 measures 3 inches high, 4.75 inches wide, and 1.1 inches deep and weighs about five and one-half ounces before you insert 2 AA batteries. (It can also be run off an optional CCrane power adaptor that can charge optional NiMH batteries. The manual warns: DO NOT USE LITHIUM BATTERIES).

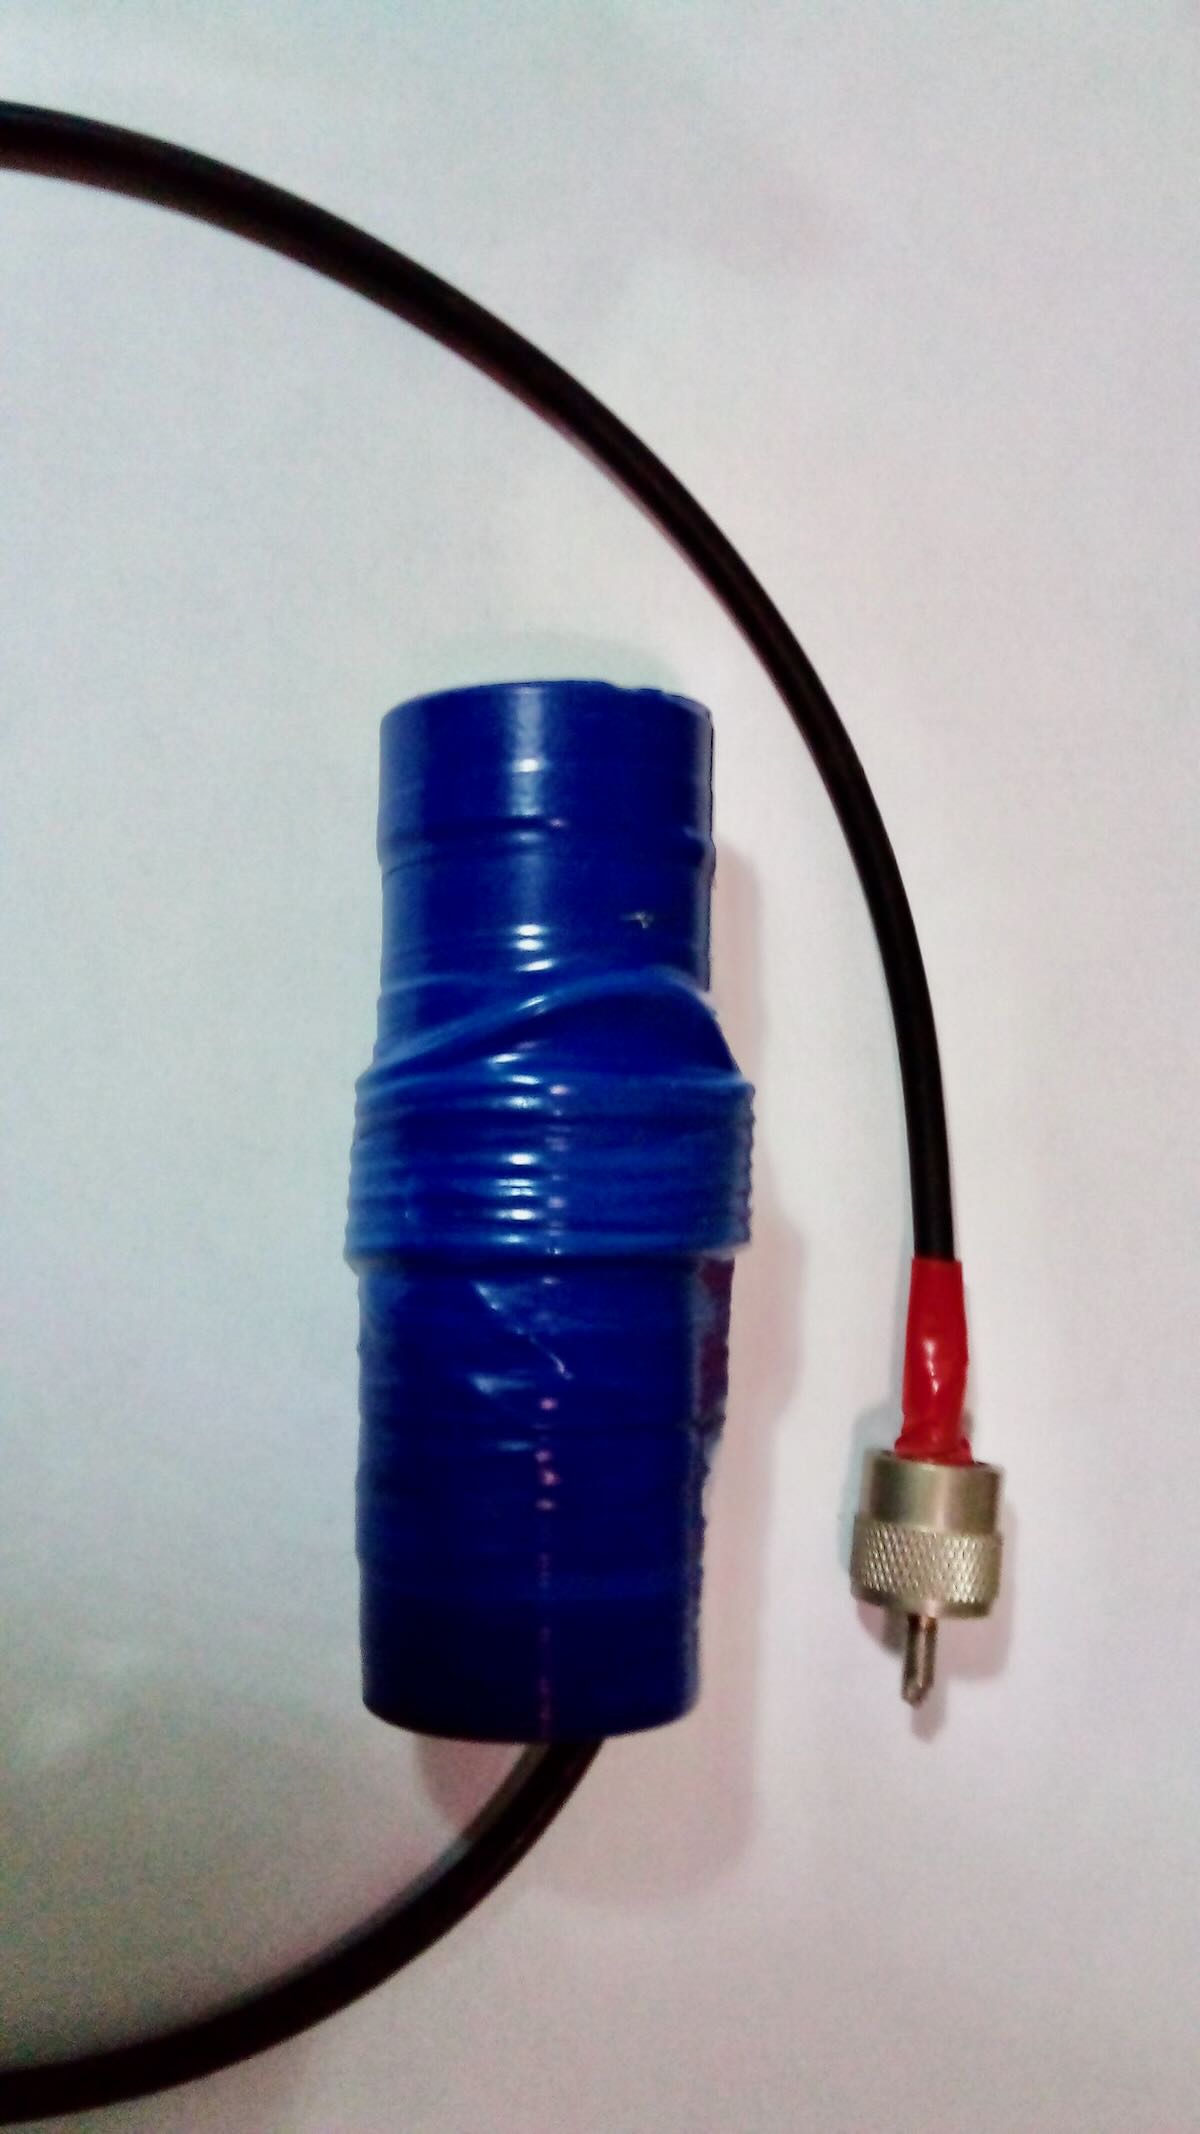
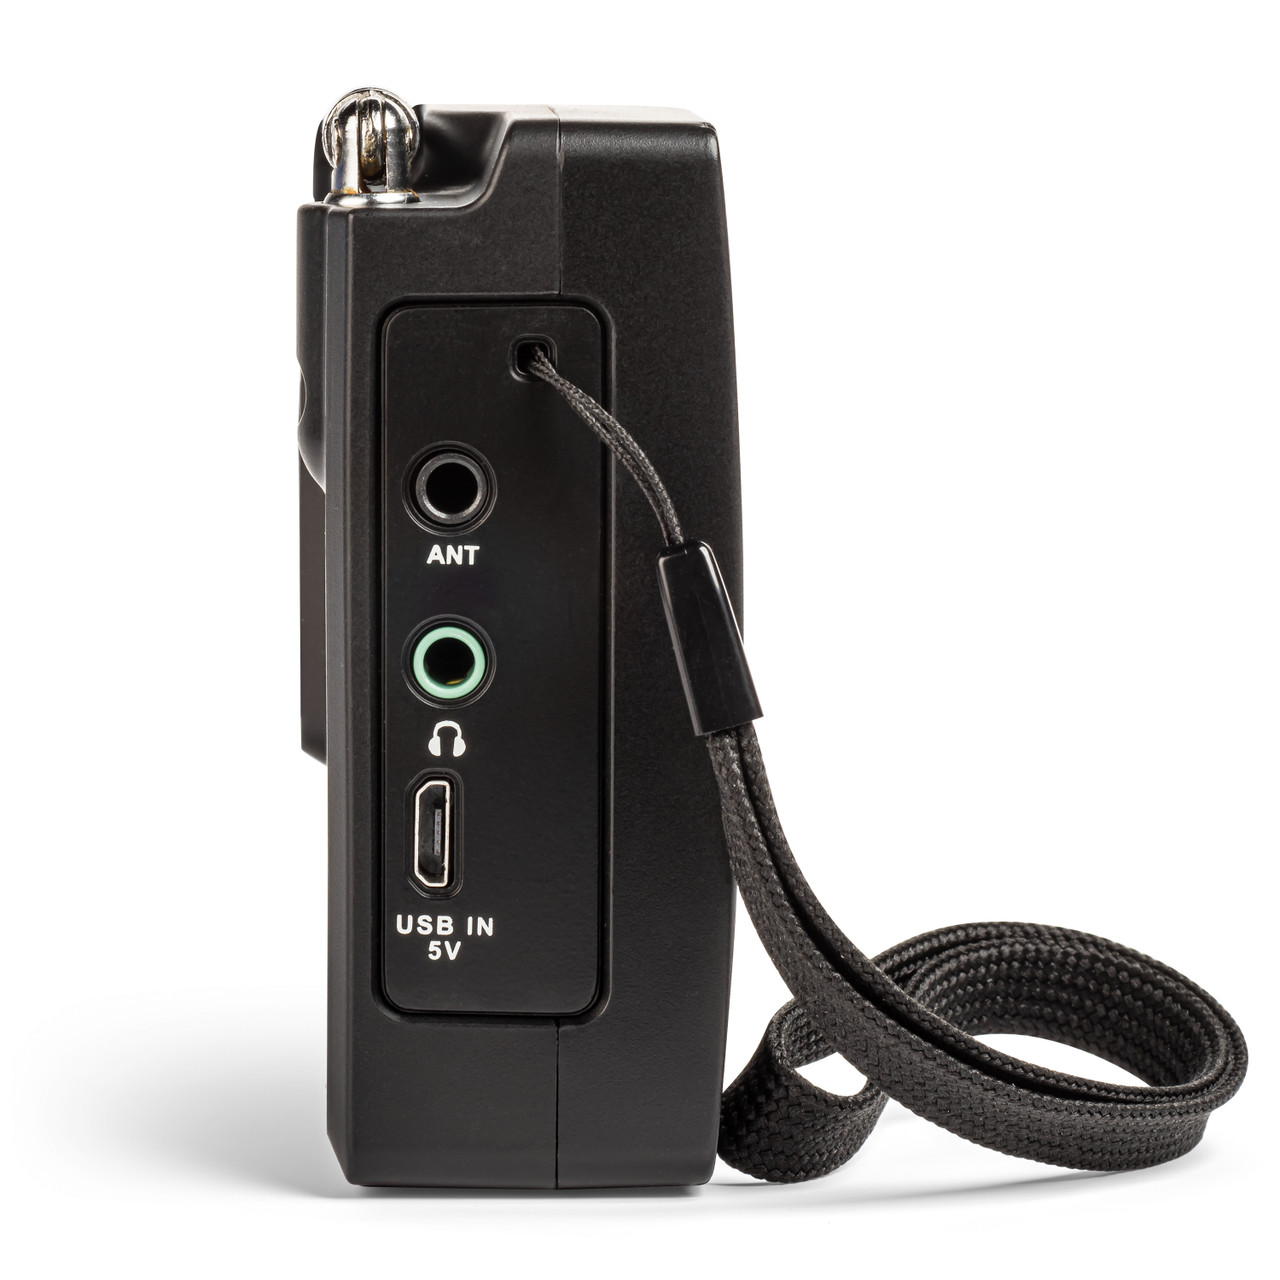
According to CCrane, improvements to the Skywave 2 include a new micro-USB connector for external power and battery charging, a better speaker with slightly more amplification, circuit noise reduction, long feet for better stability, and a socket for plugging in an optional wire antenna adaptor available from CCrane.
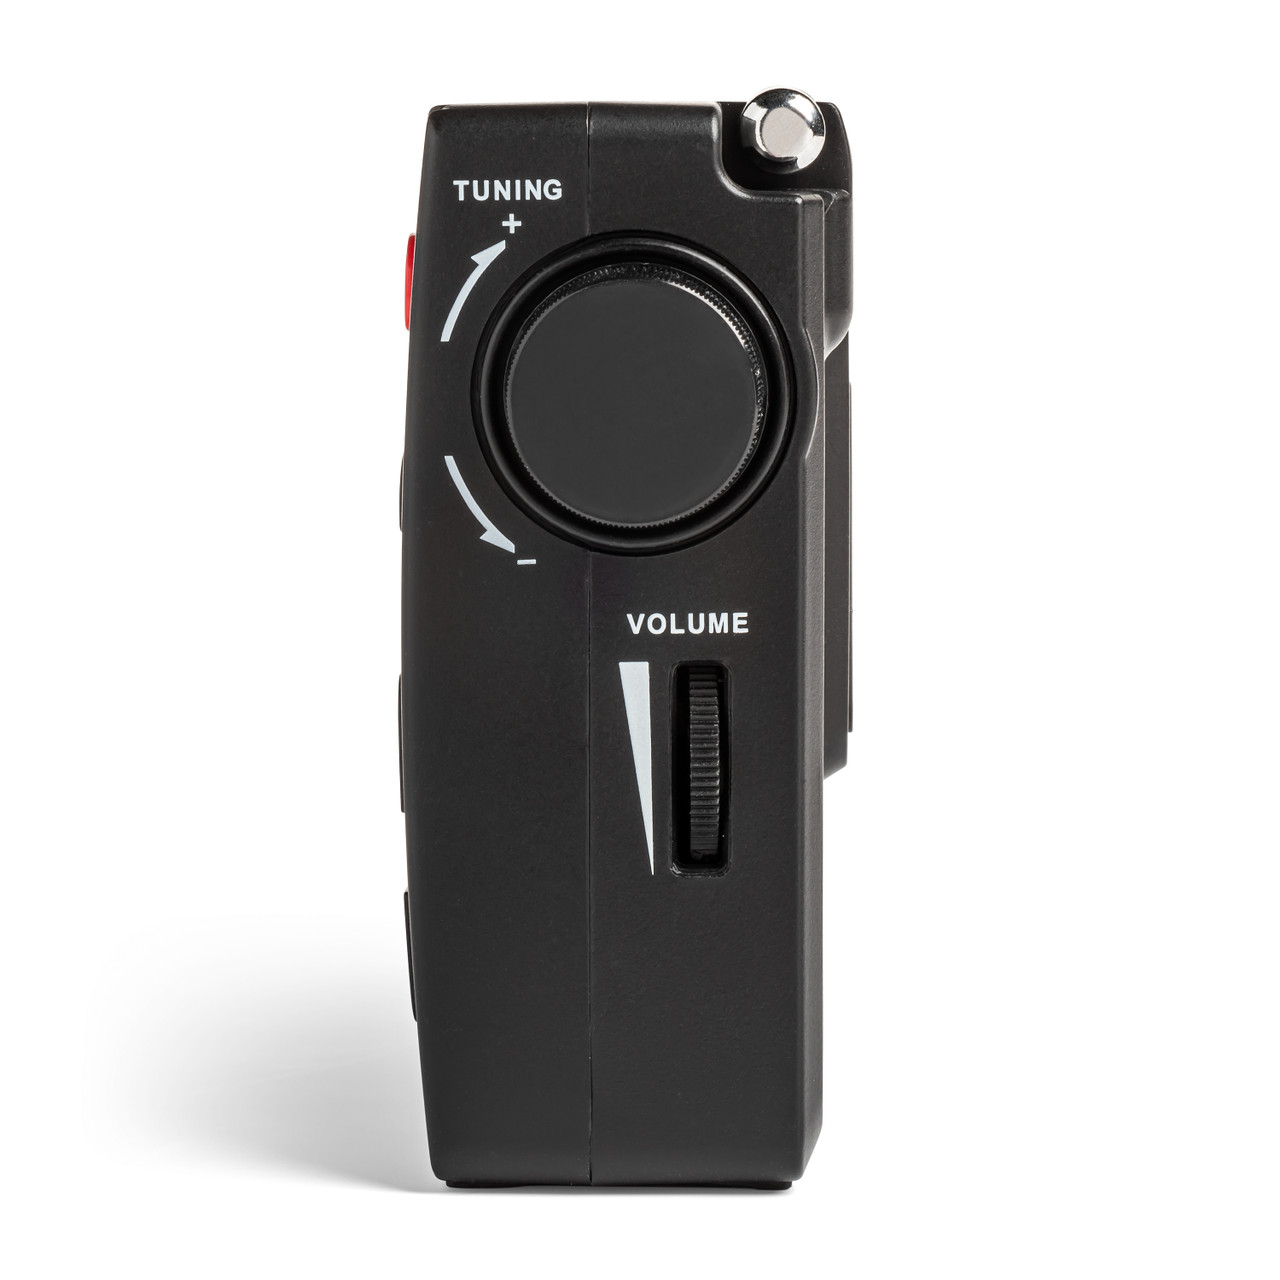
I found the Skywave 2 really easy to operate. At the simplest level, select a band, then press one of the up or down buttons, and the Skywave 2 will scan to the next strong station. There is also an ATS (automatic tuning system) that programs all receivable AM, FM, or shortwave stations to memory buttons. Just select the band you want (AM, FM, or shortwave), press the ATS button, and the ATS system will scan the entire band and automatically set all available stations in sequence 1-10. If there are more than 10 stations are available, then the remaining stations will be stored on the next memory page and so forth. Each band has its own set of memories.
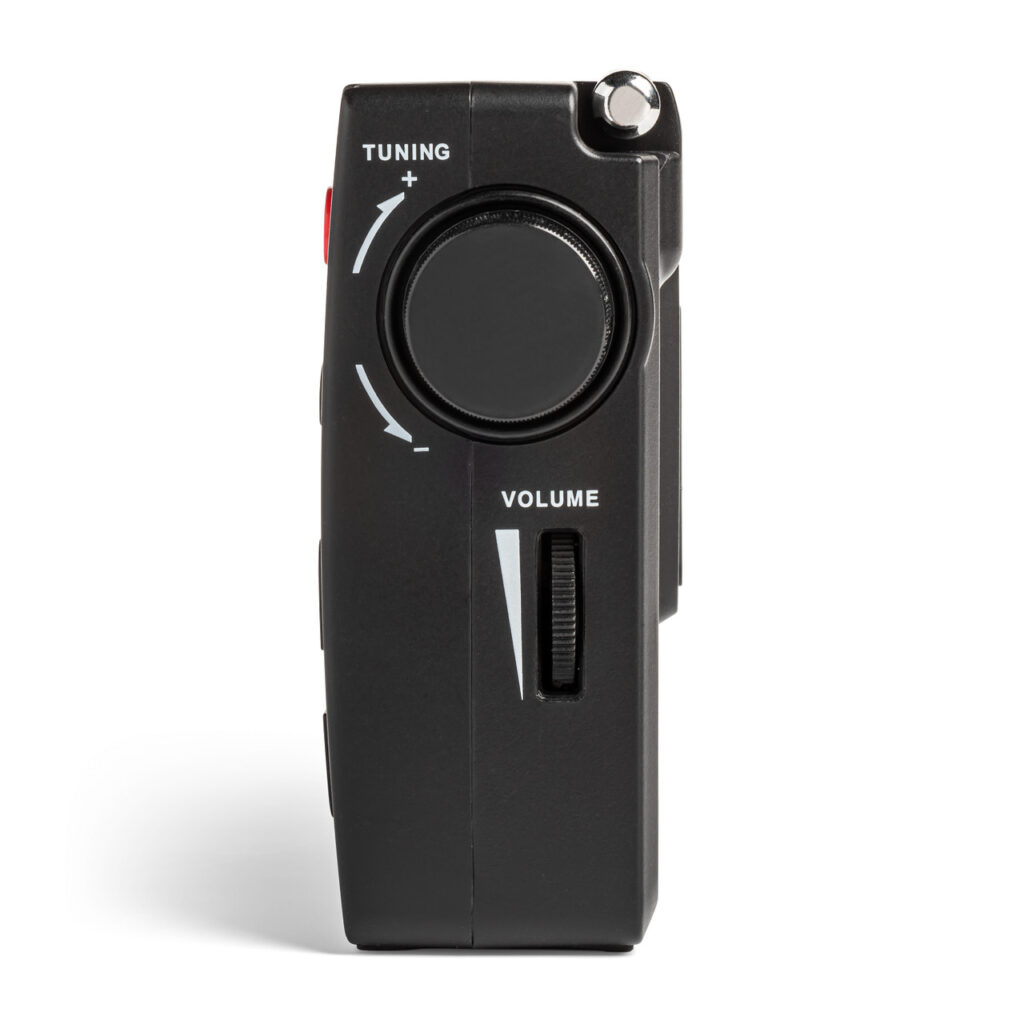
Everything is clearly labeled, and a gold label above a button indicates that if you press and hold that button, the function labeled in gold will be activated. If you want to directly enter a frequency (once you have selected the band you want), you must press the FREQ button first, then punch in the numbers. Otherwise, pressing any of the number buttons will activate the memory assigned to that number. To store a station in memory, press and hold any number button for two seconds.
Although I have no equipment for formally measuring things like ultimate receiver sensitivity, I found the performance on all bands to be typical of what I have come to expect of CCrane radios: excellent.
Full points to CCrane for writing a superb manual. In fact, I’ve found that the manuals for all the CCrane radios I have owned or tested have been well-written. I don’t know who is writing those manuals, but a big thumbs-up for clear manuals that are easy to use. The Skywave 2 manual even includes a section on “Hidden Settings” . . . ya gotta love it! Well done.
One other thing deserves mention: the Skywave 2 comes with CC Buds Earphones. I found they fit my ears comfortably and sound great . . . waaay better than the cheap-o earbuds I bought at a big box store.
The bottom line is: the Skywave 2 is a pint-sized powerhouse, and I can easily recommend it for anyone who needs an emergency radio, a travel radio (it has an alarm you can set), a weather radio with alert, or an ultralight MW DXing radio, or who simply wants to have a lot of fun with radio in a small, easy-to-handle package (An aside, listening to air band is pretty entertaining).
I found the performance to be excellent (for the radio’s size) on all bands, comparable to the CCrane Skywave SSB 2 that I own. In addition, with the new model (and the optional adapter), you can now plug in an external long-wire antenna for longer-range reception. That’s just great and could prove really useful.
The chief difference between the Skywave 2 and the Skywave SSB 2 is that the Skywave SSB 2 receives single sideband signals, making it possible for the listener to hear amateur radio and utility signals (like transoceanic flight control) that operate in upper or lower sideband mode. In addition, the SSB 2 includes (as well as the radio, carry case, and ear buds) a shortwave antenna and the CC wire terminal antenna adapter. In addition, the SSB 2 also has some software capabilities not available on the Skywave 2. For example, on the SSB 2, the Automatic Tuning System can also be used on the AIR band, and once AIR band frequencies have been stored, the SSB 2 can scan them. You can find my review of the Skywave SSB 2 here: https://swling.com/blog/2022/11/checking-out-the-new-c-crane-cc-skywave-ssb-2/
To conclude: I sincerely hope you never have to “do” your OODA loop, particularly not when things are going to blazes, but if you do, the CCrane Skywave 2 just might be helpful in getting the information you need. And, in the meantime, it is a very enjoyable radio to use, and I can recommend it without reservation.
Click here to check out the C. Crane CC Skywave 2 at C. Crane.
For more of my musings regarding the CCrane Skywave radios, please consult: