Tag Archives: General Coverage Transceiver Review

Guest Post: Mark’s review of the Yaesu FT-891 as shortwave broadcast receiver

Many thanks to SWLing Post contributor, Mark Hirst, who shares the following guest post:


Using the Yaesu FT-891 for SWLing

by Mark Hirst

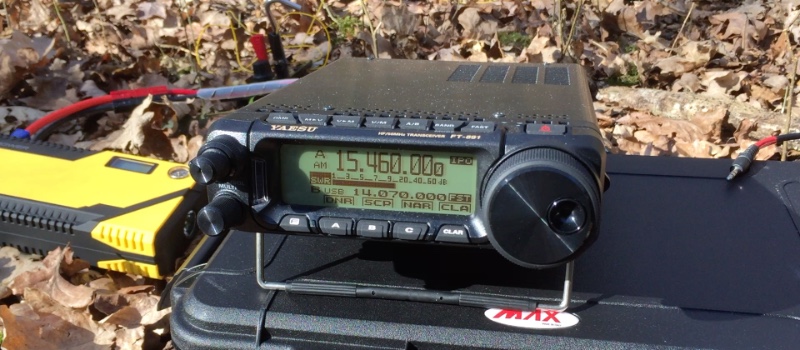
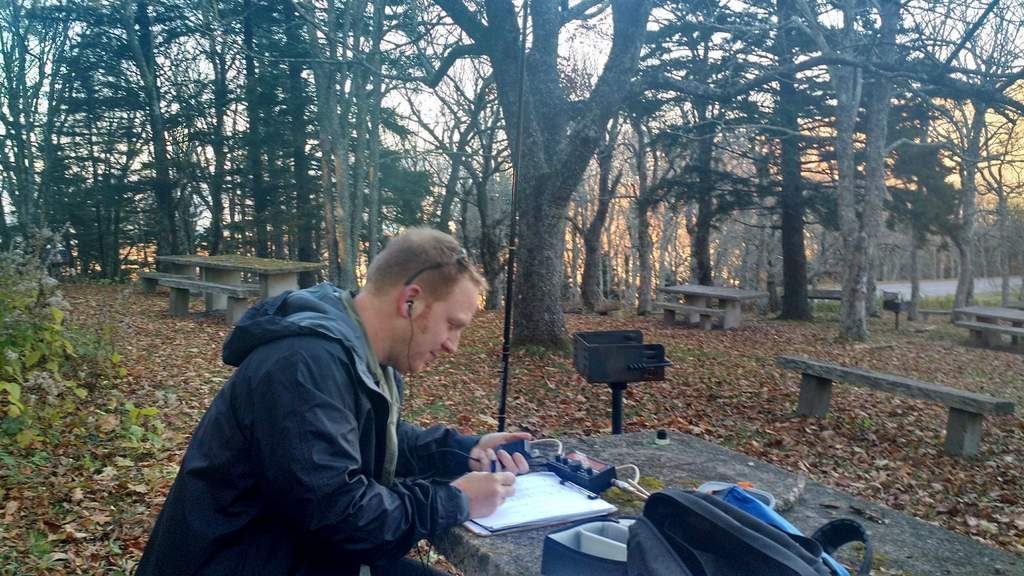
Woodland Operation in North Hampshire

Introduction

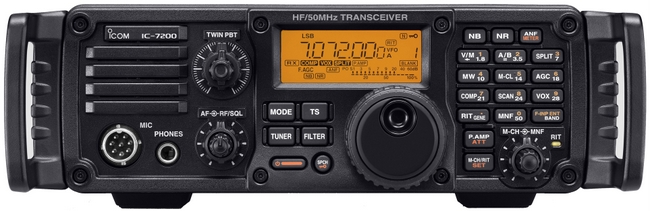
While I have a small collection of portable shortwave radios for outdoor listening, I’ve been looking to fill a gap in my amateur radio lineup for a while. Outdoor operation has become important in recent years as solar cycle conditions deteriorated along with rising levels of QRM in urban neighbourhoods. The ICOM IC–7200 with Wellbrook loop stays at home fighting a losing battle with PLA noise, while the very portable FT–817ND does occasional data modes contacts and outdoor listening. Somewhere in the middle, the FT–891 promised to provide a modern and more powerful data modes station, a radio to take on holidays, needing external batteries, but portable enough for walks into the country side. Earlier this year, I bought one new from my local ham radio store, and what follows are my findings and observations so far on shortwave listening.

Audio Characteristics

I’ve accumulated hundreds of recordings of VOA Radiogram and Shortwave Radiogram since 2013, so a recent woodland expedition with the FT–891 was an opportunity to compare a recording made with it against those of other radios I’ve used.

The most striking difference is the lack of frequencies in the lower part of the audio spectrum along with a distinct cut off at around 5kHz.

This is easily visualised in the following comparison between the FT–891 and the Tecsun PL–680. Note the conspicuous pillar associated with MFSK32 from these Shortwave Radiogram broadcasts, and interfering RTTY on the FT–891 recording:

Audio Frequency Analysis

While this audio profile may not be to everyone’s taste, the extra sparkle yields voice audio that is clear and distinct. I find those low frequencies make the audio muddy and tiring to listen over long periods, so I’m quite happy with this.

When listening to speech based broadcasts through the top mounted speaker, the audio is also precise and intelligible, and provides more than enough volume.

You can judge for yourself from this 2 minute video I made recently:

Headphones, External Speakers and Recording

You also have the option of connecting an external speaker or headphones to a socket on the side of the radio. Be aware that the audio level is different for headphones, and is controlled by a small switch hidden behind the front panel. I expect people may go for one option such as headphones and then stick with it, rather than continually detaching the front of the radio and moving the delicate switch back and forth.

If you turn the volume right down you will hear a hiss, although its really only noticeable if you face the speaker directly and get close. Listening outdoors with the sounds of nature around you? It’ll be fine. There’s no way to avoid it with headphones of course, with forums suggesting inline resistors or high impedance headphones as solutions.

Audio recordings can of course be taken from the headphone socket, but you will get better results from the data port on the back. I use a UD04YA cable which provides 3.5mm audio in and audio out jacks, plus a USB cable to provide PTT functionality. It’s meant for data modes operation with the FT–817, but I have used it successfully with the FT–891 for PSK contacts using fldigi, eliminating the need for CAT control through a second cable to the radio’s USB port.

Customising for SWL

The advanced manual for the FT–891 helpfully provides a section called ‘Tools for Comfortable and Effective Reception’, so I began configuring the radio using the guidance there.

First up was re-configuring the front panel RF/Squelch knob to only control RF gain (Menu 05–05). I use the same configuration on my FT–817ND to dial back RF gain, allowing the AGC to pick up the slack.

Next was enabling the awkwardly named Insertion Point Optimisation (IPO) which switches out the pre-amplifier. It’s interesting to note that this setting can be associated with a stored memory channel, which became relevant later when I used CAT control to program some favourite frequencies.

The radio has an attenuator, although I’ve not found a need for it so far.

The AGC can be configured as Auto, Fast, Mid, and Slow. Since it is not a ‘set and forget’ setting like the RF control or IPO options, it might be a good candidate for assigning to one of the three user definable buttons below the LCD screen.

Audio can be fine tuned using four menu options (06–01 to 06–04) to control high and low frequency cutoff, but after some experimentation I have turned these options off.

As an aside, I found the LCD backlight, button illumination and TX/Busy lights too bright for indoor use, so dialed them back to their minimum values.

Listening Tools

The radio provides some additional tools as part of its IF DSP. The features of particular interest are Digital Noise Reduction (DNR), Noise Blanker, IF Notch Filter, Digital Notch Filter, and Narrow IF filter. Contour, IF Bandwidth, and IF Shift are not available in AM mode, and you must resort to SSB to get them. More about SSB in a moment.

Out of this wide array of options, I’ve only explored Digital Noise Reduction and the Narrow IF filter so far, as they offer fairly immediate gains without too much configuration.

Narrow filter simply reduces the total IF bandwidth from 9kHz to 6kHz, which gives some immediate relief to higher frequency noise. In tougher conditions at home tackling QRM, the harsher sound it causes has sometimes been counter productive.

At the outset, it’s obvious that the DNR capability of the FT–891 is a powerful feature. Rather than providing a level of processing that varies from a little to a lot, the radio provides 15 different ‘algorithms’ which can be selected for best results. This means you will tweak the DNR setting to address signals on a case by case basis.

Comparing it with the IF noise reduction of my ICOM IC–7200, the ICOM has a scale of diminishing returns as the DSP level is turned up, whereas the FT–891 seems to start strong and it’s more about picking the algorithm that sounds best.

After testing the DNR on AM broadcast stations away from the noise at home, voice audio sounds distant and words can be clipped, which is fine for SSB amateur radio contacts, but makes me think it’s not a feature of first resort when trying to improve broadcast reception. In those circumstances, the narrow filter might be a better option.

The Trials of Single Side Band

On the matter of SSB and using it to combat adjacent or co-channel signals, the radio offers a single SSB option in the mode menu, picking USB or LSB for you automatically based on the current band. When tackling broadcast band interference however, you want the option to go in either direction. The radio also changes the current frequency by 700Hz when SSB is selected, which then has to be corrected with the main dial.

You would begin by switching to SSB mode by pressing and holding the band button. If you’re lucky, the default setting is the one you want.

If it isn’t, activate the settings menu with a long press of the F key, go to the menu option SSB BFO (11–07), select it and use the multi-function knob to change the mode away from Auto to LSB or USB.

As you are doing this, the VFO will change to LSB or USB too. Leave the setting on the option that suits your needs.

If you exit the menu option without saving (pressing F), the mode will remain changed, but the override is not saved. This can be a useful quirk because next time you turn the radio on, it will be back in auto mode.

If you commit the override by pushing the multi-function knob instead, the radio will stay in manual mode until you remember to return to the menu and restore automatic behaviour again.

It’s a needlessly complicated system, as I discovered recently while recording another Shortwave Radiogram broadcast. Even after testing the procedure previously for this article, the radio was determined to stay in LSB no matter what.

Memory Programming

Since the radio has no keyboard for direct frequency input, an early priority for shortwave listening was to program some of the 99 memories available. My plan was to have some favourite broadcast stations, along with WX, Volmet, GMDSS, and some data mode frequencies. To handle ad-hoc stations however, I wanted a way of moving quickly across the main shortwave bands without excessive use of the main tuning dial or multi-function knob.

Taking the official definitions of the broadcast bands between 60m and 16m, and combining those with frequency schedules, I came up with a series of frequencies 150kHz apart across each of those bands, guaranteeing that no broadcast was more than 150kHz away.

The combined list of favourites and the 150kHz stepping stone frequencies resulted in 70 memory channels in total. As I wanted to apply alphanumeric tags to those channels, and didn’t relish the prospect of entering them manually, my next port of call was the CAT control manual to see how those memories could be set programmatically.

While there is commercial software available for the FT–891, I only needed to set up the memory channels, so decided to adapt some PowerShell I’d written for another radio, sending the necessary serial port commands to configure my list.

Now that is done, I can fast travel using the stepping stone memories to the closest point in a band, then use the fast mode of the main tuning dial to move quickly to my final destination.

The following table lists my current stepping stone channels in kHz:

60m 49m 41m 31m 25m 22m 19m 16m
4750 5900 7200 9400 11600 13570 15100 17480
4900 6050 7350 9550 11750 13720 15250 17630
5050 6200 7500 9700 11900 13870 15400 17780
7650 9850 12050 15550 17930
7800 15700

Memory Access

An obvious way to access the memories is to toggle memory channel mode with the V/M button, then cycle through the memories using the multi-function knob. Depending on your memory choices, you will hear relays clicking as the radio jumps back and forth between widely spaced frequencies and bands. You will also need a good memory of your memories, so you know which way to turn the multi-function knob.

An alternative and perhaps faster method is to press the M>V button. This brings up a multi-line listing of memories that can be scrolled through using the multi-function knob. Pressing the M>V button again copies the selected memory to the VFO and leaves you in VFO mode. This avoids the radio flipping across bands and the associated relay activity.

Although it is not documented, if you push the multi-function knob on a selected memory channel in the multi-line listing rather than using the M>V button, the selected memory is activated and the radio is left in memory channel mode displaying the memory tag.

Disabling Transmit

At the time of writing, I haven’t discovered a way of formally disabling transmit, and the minimum transmit power goes no lower than 5W. Since my main interests are around shortwave listening, utility stations and an occasional data mode QSO, I have not fitted the microphone to the radio. In that configuration at least, there is no danger of me manually transmitting into a receive antenna by accident.
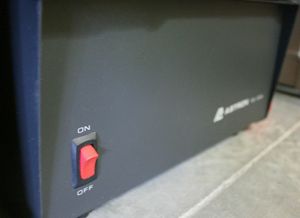
Outdoor Power

Reports vary on the power consumption of the FT–891. It certainly isn’t as high as the 2.0A documented in the user guide.

While some sources claim values in the region of 1.0A, my power supply shows around 0.4A at 13.8V when receiving a typical HF broadcast. You will notice where some of that power goes quite quickly, as part of the radio gets warmer.

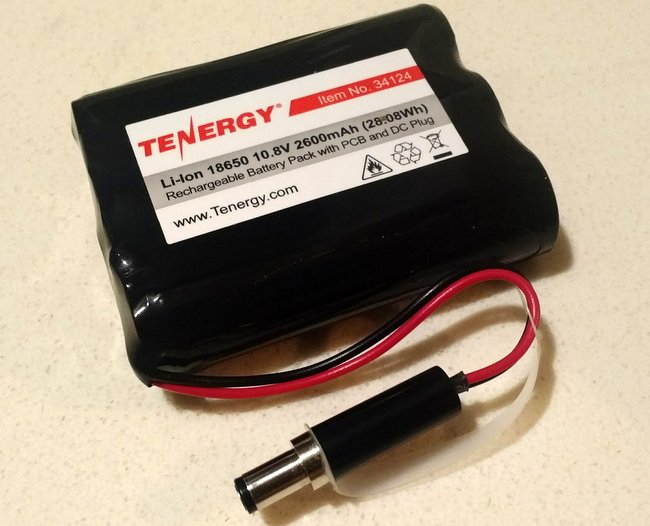
To save weight, my preferred power supply in the field is usually a lithium battery designed to jump start smaller engined cars. This versatile 12V battery also supplies 5V USB power to phones and tablets, and can even charge laptops.

In Conclusion

Control ergonomics and screen size are factors that can detract from shortwave listening on these kinds of radios, with smaller speakers and menu options for features normally at your fingertips.

Despite this, I’m happy with the audio, and I like the emphasis on mid-range frequencies in its audio spectrum. The digital noise reduction is impressive and can tackle significant QRM environments, but for outdoor listening may not be your first port of call.

Memory presets can make tuning less laborious, while assigning key listening tools to the customisable front panel buttons should reduce the need to access menus. I may consider defining some stations with known co-channel issues to memory with preset LSB and USB variations, to allow rapid responses to interference in future.

In good conditions, I suspect there is little difference between the FT–891 and FT–817ND for general listening. The FT–817ND has produced some of my best recordings of Shortwave Radiogram. The newer radio however brings many advanced tools to bear on more difficult signals, while its band scope and full sized VFO tuning dial enable desktop style shortwave exploration.

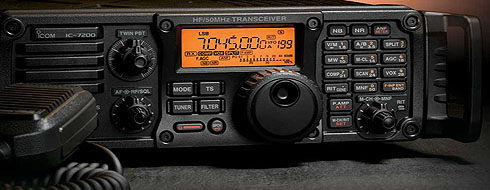
The ICOM IC–7200 is constrained by interference at home, biding its time for when the solar cycle swings back. When it’s been out on field days, it has always been a strong performer for broadcast listening. All the important controls are upfront, but is not a trivial thing to transport on foot. While the FT–891 has impressive DNR chops, I think I prefer the ability of the IC–7200 to apply noise reduction in incremental steps. Perhaps the algorithm approach will grow on me in time.

Any amateur radio operator using the FT–891 should have no trouble using it for shortwave listening. It attracts a lot of positive reviews for its ham radio capabilities, and it looks like those features carry across for listening to the world too.


An excellent review, Mark! Thank you for sharing. 

The Yaesu FT-891 must be the most popular HF transceivers Yaesu sells today. So many of its users rave about its performance and audio characteristics. Mark, thank you for sharing your experience with the FT-891 as an SWL!

Click here to check out the affordable IP67 rated case Mark uses to house his FT-891.

Spread the radio love

Final review of the CommRadio CTX-10 QRP general coverage transceiver

Earlier this year I published what I called an “initial” review of the CommRadio CTX-10 QRP transceiver, promising an eventual final review. The reason for this is that I sensed there were important CTX-10 updates on the horizon, and I wanted to re-evaluate the rig once the upgrades had been implemented through firmware.

This final review builds upon the initial review––think of it as the  second installment, or “Part 2″––so if you’re considering the purchase of a CTX-10 and haven’t read the previous post about it, please do read the initial review first.

Upgrades

As anticipated, via simple at-home firmware updates, since my initial review the CTX-10 has now been upgraded and tweaked a number of times. [Click here to view all of the documented firmware updates and notes at CommRadio.]

I’ve been very pleased with the attention CommRadio has paid to their customer feedback on some of the most important requests.

Instead of reiterating what I wrote in the initial review, I’ll jump straight into the upgrades.

Operating split

At time of posting my initial review, the CTX-10 didn’t have A/B VFOs. This was my primary gripe about the CTX-10, because without A/B VFOs, there was no way to operate split, which meant that you could not work DX stations that use split to manage large pileups. This is actually a really important feature for a QRP radio because during split operation, a pileup is pulled apart across a few kHz of bandwidth, thus giving a 10-watt signal a better chance of being heard through a collection of legal-limit signals.

On June 10, 2019, CommRadio released a firmware package that added A/B VFOs and the ability to operate split to the CTX-10.

Even though there are only a limited number of buttons on the front panel, it’s incredibly simple to enter into split mode:

  1. Chose the frequency and mode;
  2. Hold the STEP button for one second or more, then release. You’ll then see a split display indicating the TX and RX frequencies.
  3. Use the left arrow key [<] to toggle between them.

I do like the clear TX and RX lines, which leave no doubt in the user’s mind what the frequency used for transmitting and receiving is. On some radios, this can be a bit confusing.

Split operation is simple and effective, thus I consider this issue fully resolved.

ATU flexibility

In my initial review, I noted that the CTX-10 ATU needed near-resonant antennas for the ATU to make a strong 1:1 match. Indeed, a number of times I actually used a near-resonant antenna in the field––the EFT Trail-Friendly, for example––and the ATU couldn’t get below a 3:1 match. For what it’s worth, CommRadio states that the CTX-10 can easily handle 3:1.

Making a Parks On The Air activation at Tar Hollow in Ohio.

CommRadio has made modifications to the ATU function, improving the performance of the antenna-tuner algorithm, which had a significant impact on 80 and 60 meters. I’ve also had better luck with a number of field antennas I’ve tried on 40 and 20 meters. Is it as good as the Elecraft KX-series ATUs? No.

Having a built-in ATU on the CTX-10 is certainly a valuable feature in the field. When I need to match a challenging antenna with the CTX-10, I bring my Emtech ZM-2 manual tuner along for the ride.

SSB operation?

There still is no way to adjust the microphone gain control nor microphone compression on the CTX-10. Much like a military or commercial radio, the CTX-10 is optimized for just one style of mic: in its case, the modular MFJ-290MY or Yaesu MH-31A8J handheld mic.

The CTX-10 microphone input has a limiting pre-amplifier with built-in compressor and ambient noise gate–in short, the CTX-10 handles all microphone settings automatically.

Through firmware updates, a number of positive adjustments have been made to the microphone settings:

  • the microphone-decay timer has been tweaked so that audio clipping is less of a concern
  • audio clarity and gain have been improved
  • audio power has been improved resulting in .5 to .75 watts of additional peak power
  • microphone audio leveling has been improved
  • VOX attack and decay timing has been improved

These are all welcome adjustments.

I would note here, though, that if you plan to use a mic other than the MFJ-290MY or Yaesu MH-31A8J handheld mics, you will have a limited means of adjusting the mic parameters unless you have an external mic EQ. A number of readers, for example, have asked about using their Heil boom headset with the AD-1-YM cable adapter on the CTX-10. Boom headsets are a wonderful tool for field operation because they free your hands to log contacts. As for using boom headsets on the CTX-10, since I don’t have the appropriate adapter, I can’t speak to this. But since you can’t control mic gain, it might take time to learn how to position the boom mic and adjust your voice level for optimum performance.

CW operation

As mentioned in our initial review, the CTX-10 does not support QSK/full break-in operation. Rather, the CTX-10 uses a traditional relay for switching between transmit and receive.  During CW operations, you’ll hear a relay click when switching from TX to RX and back again.

The CW hang time delay on the CTX-10 is not currently adjustable. For high-speed CW ops that prefer a faster relay recovery, I suspect this could be an annoyance.

There have been recent CTX-10 firmware upgrades that have helped solve issues found with CW keyer timing in early units. I found the timing issues were mainly present while sending high-speed CW (25 WPM+). My buddy Vlado (N3CZ) put the CTX-10 through some high speed tests, and was pleased with the results overall.

I will reiterate here that the CTX-10 lacks other controls many CW operators appreciate. Currently, the CTX-10 lacks a sidetone control; as a result, you cannot change the sidetone volume/tone, nor can you turn it off. I continue to hope that CommRadio will fix this quirk via a future firmware upgrade.

The CTX-10’s built-in CW keyer does not currently support iambic keying. Meaning, when both levers of a dual paddle are closed simultaneously (squeezed), it will not send a series of alternating dots and dashes. I imagine this could be addressed in a future firmware update.

Additionally, without re-wiring your paddle, you can’t change which side of your paddle sends ‘dits’ and which sends ‘dahs.’  A minor con, for sure–still, most modern QRP transceivers allow you this flexibility.

Revisiting the basic feature set

Let’s be clear: as I stated at length in my initial review, the CommRadio CTX-10 was designed around simple operation, like one might expect from a military or commercial channelized radio. I know ham radio operators and preparedness enthusiasts who prefer this approach to gear design, and they will appreciate this CTX-10 design philosophy.

Still, the CTX-10 lacks many of the features and adjustments you’d typically find on a QRP transceiver in its price class. Instead, the CTX-10 was designed to handle many of these adjustments automatically.

The CTX-10 still has no separate RF gain control. The CTX-10’s RF gain is directly tied to the three AGC settings (slow, medium, and fast). While I believe it does a fine job of adjusting RF gain, I do ride an RF gain control a lot during noisy summer conditions, and miss this feature.

The CTX-10 still has no passband (PBT) control, notch filter, or noise blanker––all features I’d normally expect in a QRP radio at this price level.

There are no CW (os SSB) memory keyers. I wouldn’t expect these, as I believe only the Elecraft KX2 and KX3 sport this feature in this price class of QRP radios.

Also, the ARRL lab reports of the CTX-10 are found in the July 2019 issue of QST (Bob Allison, WB1GCM) noted:

Though adequately sensitive, its third-order IMD and blocking gain compression dynamic ranges, as measured in our laboratory, are more suited to casual operation with antennas of modest gain.

Even with the AGC disabled, one or more strong, adjacent signals will result in the reduction of speaker volume, and I was unable to measure the reciprocal mixing dynamic range (RMDR).

The dynamic range was reported as 58 dB, which is a very low number. Blocking was 65 dB.

Update, 25 Nov 2020: Rob Sherwood recently tested and added the CTX-10 to his receiver test data table.

Out of his comprehensive table which includes vintage radios, the CTX-10 scored the lowest of all of them sorted by third-order dynamic range narrow spaced. It is literally at the bottom of his list: at time of posting, number 146 out of 146 tested radios. Rob concluded that an out-of-passband signal that is approximately S9 will start blocking the radio. Click here for his full notes (PDF).

The CTX-10 doesn’t really have the tool set or receiver performance to cope well with contests or DX conditions.

Please note: as with most firmware-based radios, some missing features could potentially be added in future firmware upgrades. If one of these items is keeping you from purchasing the CTX-10, please contact CommRadio and inquire.

Is the CTX-10 for you?

The CTX-10 on air at the W4DXCC conference

With the most recent upgrades, CommRadio has solved the major issues that kept me from recommending it in my initial review. I still feel there are more capable portable transceivers for the $1,000 US price. 

The addition of split operation was especially key for me, as I do operate split. The more nuanced adjustments to the CW keyer, an extra feature to prevent the radio from accidentally turning on while in transit, and the adjustments to the mic algorithm, all make this radio more pleasant to operate at home or (especially) in the field.

As I mentioned in the initial review, the CTX-10 owner is one who operates casually and values a very simple, straightforward radio.  Those who want a sturdy, no-frills, set-it-and-forget-it rig. If that’s you, take a closer look at the CTX-10: it may just suit your needs if you’re not planning on using it on Field Day or during RF-dense contest environments.

If, however, you’re looking for a full-featured QRP radio with many of the features and nuanced adjustments you’d expect in the shack, check out the Yaesu FT-818, Elecraft KX2, Elecraft KX3, lab599 TX-500, or the Icom IC-705. All of these rigs are excellent.

The two major advantages of the CTX-10 over competitors are:

  • the ability to charge the internal batteries from almost any voltage source, and
  • a higher TX duty cycle (without needing to add external heat sinks).

I believe the CTX-10 will have appeal for radio enthusiasts who value these characteristics:

  • All-in-one-box portability with no extra wired accessory components
  • Best-in-class internal battery life
  • Best-in-class intelligent battery charging
  • Digital modes like FT-8 and the ability to operate them in the field from internal batteries for extended periods of time
  • Very few manual adjustments
  • Broadcast listening, as the CTX-10 is also a broadcast receiver
  • Best-in-class hardware

The CTX-10’s overall construction and components are, as I’ve said, near mil-spec. While the CTX-10 isn’t weatherized or waterproof––no more than any of its current competitors (save the TX-500)––the construction is top-shelf, for sure. It should run for decades without need of repair.

Although I can’t recommend to the CTX-10 for serious radio operators, it is built like a tank, and has a simple feature set for field operation. It’s also designed and manufactured right here in the USA. All the better.

Click here to check out the CTX-10 at CommRadio.

Click here to check price and availability at Universal Radio.


Do you enjoy the SWLing Post?

Please consider supporting us via Patreon or our Coffee Fund!

Your support makes articles like this one possible. Thank you!

Spread the radio love

Initial review of the CommRadio CTX-10 QRP general coverage transceiver

[Update: Please note that we’ve now posted a final review of the CTX-10 which builds upon the review below. Think of of the final review as the  second installment, or “Part 2? of this review. If you’re considering the purchase of a CTX-10 please read this initial review first.]

In the past two years few QRP transceivers have generated the interest of the CommRadio CTX-10. I’ve gotten no fewer than two dozen emails from readers asking about the CTX-10 after learning I had one here at SWLing Post HQ.  And, I’ll freely admit, I was among those people who couldn’t wait to give this promising little radio some on-air time––and, as a result, a proper evaluation.

The CTX-10 arrives in this simple box.

Everything included in the CTX-10 box.

There are a few reasons why the CTX-10 has stirred up so much excitement. Firstly, the CTX-10 transceiver is based on the excellent and well-regarded CommRadio CR-1/CR-1A receiver. Click here to read our review in a new window.

Fans of the US-made CR-1 and CR-1A appreciated the approach to the CommRadio design: simple operation, clever engineering, near-mil spec components and construction, superb receiver characteristics, as well as excellent audio. The classic CR-1 has all the essentials––multiple modes, filters, and the like––yet offers relatively few features when compared with other tabletop radios in its price class. It’s a simple get-on-the-air rig that feels like it’s engineered to last forever.  Indeed, its design approach reminds me of the Lowe receivers of days gone by.

Another reason for the unusual level of interest is that the CTX-10 has been in the works for a long time. It was first announced over two years ago in October, 2016, and only started shipping in July/August 2018.

Since then, there have been very few CTX-10 reviews posted…hence all of the email questions.

In early October 2018 Don Moore, President of CommRadio, sent me a loaner CTX-10 which I’ve been using regularly since, testing all aspects of this little 10-watt transceiver.

Even though I’ve had the radio for a while, I plan to post a final CTX-10 review in the SWLing Post in coming months. As you may know, I typically only keep a review unit two months before publishing an evaluation, so why the delay?  In short: I feel like the CTX-10 has some important updates/upgrades that need to come down the line, and I’m allowing time for these to be developed and tested before I issue a full and final review. So, if this is a rig that interests you, you’ll want to stay tuned for that.

In fact, due to a couple of quirks that only affected the first twenty production units, CommRadio has already replaced my initial review unit. I’ll detail these quirks below.

In the meantime, what follows is an initial review of the CommRadio CTX-10 with the most current firmware as of time of posting (1311). This review format is a departure from previous reviews as I’m only focusing on the pros and cons that might help future CTX-10 owners make a purchase decision.

Consider this initial review just a taste of the CommRadio CTX-10, not the full course.

CTX-10: The Pros

First of all, much like the CR-1 and CR-1A, the CTX-10 is an all-in-one unit that takes fewer than five seconds to get on the air if you have an antenna at the ready. Seriously. Other than a key, and/or microphone and antenna, there are no other external attachments needed. It’s field-ready from the moment you remove it from the package.

True story: it took me all of thirty seconds to remove the CTX-10 from the box, plug in a key, an antenna, and have it on the air.  This is a major pro, in my radio world.

ATU

The CTX-10 has a built-in automatic antenna tuner that seems to do a great job making 1:1 matches on near-resonant multi-band antennas. I have a large horizontal multi-band delta loop here at the QTH, and the CTX-10 does a fine job finding a match on most ham bands.

Can it match the performance of the Elecraft KX-series ATU? I haven’t done an A/B comparison yet, but I don’t expect so—not on random wire antennas, at least. I do think, however, it will easily match any proper field antenna you pack in your go-kit.

Another minor plus worth mentioning? The ATU is very quiet in operation.

Internal batteries

The CTX-10 ships with three built-in #18650 3.7V 2600 mAh rechargeable Li-ion batteries that are user-replaceable. These are high-capacity cells—in fact, the same type of cells used in the Tesla Model S.

But how do they work? In short: brilliantly. They power the CTX-10 for a much longer period of time than the battery pack in my Elecraft KX2.

After a full charge, these cells will support casual operation for up to eight hours. If you’re using the CTX-10 in a contest or on Field Day where operation is intense––that is to say, near-constant transmitting––it should last the better part of an hour. Don Moore actually produced a video early on of the CTX-10 running a full 10 watts and transmitting dits in CW for forty solid minutes before the batteries depleted to the point of shutting down. That’s certainly a new benchmark for portable rigs with internal batteries.

The CTX-10 has an intelligent charger that will recharge the internal cells when any voltage over 5 VDC is applied. This means, in a pinch, even a typical USB charger will work. If the power supply can deliver up to ten watts, it’ll charge the batteries rapidly––anything below that will take a longer.

Elecraft KX2 (left) and the CommRadio CTX-10 (right)

I also own the Elecraft KX2 and have used it in the field more than any other portable transceiver I’ve owned up to this point.

The KX2’s battery charging routine is more involved than that of the CTX-10. The KX2’s pack must be removed from the radio (by opening the bottom plate of the chassis with two thumb screws, and unplugging the coaxial connector), then it must be hooked up to an external battery charger, charged, and then re-inserted in the KX2.

In contrast, the CTX-10 only requires plugging it into a power source that can provide anything from 5 – 20 VDC––in other words, pretty much any power source. All of the intelligent charging is built into the CTX-10.

Without a doubt, the CTX-10 has the most robust and well-designed internal battery charging system I’ve ever found in a portable radio. Period.

Best-in-class duty cycle

If you’re a fan of FT-8 and other high-duty cycle digital modes, you’ll be very pleased with he CTX-10.

Like many other hams, I was bitten by the FT-8 bug. FT-8 is an amazingly efficient digital mode that somehow manages to defy propagation—even when transmitting at low power. In the past, I’ve worked all time new countries on five watts!

The CTX-10 back panel.

At home, I designated the Elecraft KX3 as my primary FT-8 rig. First time putting it on the air, I found to be fairly effortless. However, after operating perhaps 15-20 minutes, I found that power levels decreased significantly. This is because taxing the finals with FT-8 produces a lot of heat, and the KX3 protects the finals by lowering the output power. KX3 owners wishing to play FT-8 for extended periods at 10 watts or higher know how important it is to purchase an aftermarket heatsink to give the KX3 more transmitting time.

The CTX-10, in contrast, needs no aftermarket additions—if anything, it’s over-engineered. The entire chassis of the radio is essentially a heat sink, and because of this, it requires neither additions nor a fan to cool the finals, leading to comparatively effortless operation. Plus, as a result, operation is completely quiet.

In short? No overheating finals with the CTX-10: it’s an FT-8 beast!

Receiver performance

Overall receiver performance is what I expected: nearly identical to the CommRadio CR-1/CR-1a receiver series with the added benefit of an internal ATU that helps tweak the antenna match on the ham bands.

Simple operation

You can tell that CommRadio has a legacy in designing equipment for the military, as well as for commercial and aviation industries. The CTX-10 smacks of a channelized commercial radio. There are relatively few features and adjustments as compared with, say, the Elecraft KX2 or the LnR LD-11. For those who like basic controls, the CTX-10 should please. On the other hand, if you like more granular control of your transceiver, you might prefer more refinements.

Quality engineering and construction

Like the CR-1A, the CTX-10 enclosure is aluminum with machined aluminum knobs. The boards and internal components are near (if not) mil-spec––brilliant quality that is found in few other radios.

The OLED display is easy to read at any angle and under almost any conditions you might experience at home or in the field––truly best-in-class in this regard. It is a relatively small display, but crisp and high-contrast, so quite easy on the eyes.

The circuit boards inside are of the highest quality, and so are the components. Don Moore sourced them from the same suppliers he uses for commercial-grade equipment.

My good friend, Vlado (N3CZ)––radio engineer and repair technician––took a look inside the CTX-10 chassis; he was sincerely impressed by the quality of the construction and board design. It’s worth noting that Vlado isn’t easily impressed, as he looks at the internals of commercial and military grade communications equipment every day: thus it says something that he remarked on this rig’s quality.

CTX-10: The cons

I’ve covered the obvious positives, so what about the negatives?

What follows are the cons I’ve noted while operating the CTX-10.

Keep in mind, some of these cons may disappear with future CTX-10 firmware updates. Again, I plan to hold off on my full and final CTX-10 review until I feel CommRadio has essentially finished planned upgrades.

At least for now: only one VFO

[Update: A/B VFOs and split operation were added to the CTX-10 via a firmware update in 2019. Please read our final review for details.]

Herein lies my biggest gripe with the CTX-10 and what I would consider a glaring omission on a $1,000 modern SDR transceiver.  However, it’s worth noting that CommRadio has committed to address this in an update–see below.

At time of posting, the CTX-10 doesn’t have A/B VFOs like almost all modern transceivers––certainly like all of its direct QRP competitors, like the Elecraft KX2/KX3, LnR LD-11, and Yaesu FT-818/817ND.

So, how does a lack of two VFOs impact operation? First of all, there is no way to operate split on the current version of the CTX-10. Ouch.

The first time I put the CTX-10 on the air it was at the QTH of Vlado (N3CZ). We put the CTX-10 on 40 meters, and one of the first stations we heard was in Vanuatu, due to a brilliant opening into the Pacific. Vlado was positive he would work them with 10 watts on his 40M Steppir Yagi––I was, too. This being the first time either of us attempted DX on the CTX-10, we plugged in Vlado’s Bencher paddles and quickly tried to sort out where the DX station was working his pileup.

It was then we realized that the CTX-10 had no second VFO to work split, and, hence, we couldn’t work the Vanuatu station––because, like pretty much any desirable DX, he was operating split. Frankly, I was in disbelief and quickly downloaded the latest CTX-10 manual to find out how to engage split, but there was no mention of it in the manual.

The only other option was to operate split using a RIT control to shift the receive frequency. Again, we couldn’t locate a RIT control and a search of the manual proved no mention of RIT because, alas, there is no RIT control.

Again, we couldn’t work Vanuatu on the CTX-10 because, like all good DXers, the Vanuatu team were operating split.

Update: CommRadio has informed me they will be adding A/B VFOs as soon as possible, certainly before the 2019 Hamvention in mid-May, but hopefully sooner.

Update 2: Split operation added June 2019. Please read our final review for details.

Features may be too basic for some ham radio operators

It’s no secret: most of us hams like to fiddle with controls to tweak a transceiver’s performance. This is why ham radio transceivers often feature even more controls than their commercial/military counterparts.

The CTX-10 support feet are easy to flip up. The operating angle is excellent.

Still, some operators do appreciate a simpler rig, as they prefer simply to get on the air and get the job done. I appreciate this, too, especially when engaged in field operations where I’m less inclined to tinker with settings. So there’s some appeal in the CTX-10 approach.

At present, the CTX-10 feature set is very basic. Here’s a list of common controls the CTX-10 lacks––many that I’d typically expect in a radio of this price class:

No RF Gain control. The CTX-10’s RF gain is directly tied to the three AGC settings (slow, medium and fast). I know operators who never reach for the RF gain control, but I do, especially in the summer when it’s such an effective tool to lower QRN levels and help DX pop out of the background.

No microphone gain control. The CTX-10 lacks a mic gain control. The microphone input has a limiting pre-amplifier with built-in compressor and ambient noise gate. Problem is, at present, these settings are fixed and cannot be manually adjusted by the user. The CTX-10 was designed to work with handheld mics positioned closely to one’s mouth. Early feedback from users indicated that the CTX-10 was a little too aggressive, cutting off speech; a recent update did address this concern. Some users might never notice the lack of a mic gain control if they stick with the suggested modular MFJ-290MY or Yaesu MH-31A8J handheld mic. Personally, though, I like having a little more control of my microphone performance.

Keep in mind, there’s a plus side to the CommRadio ANG (Ambient Noise Gate): extended battery life. If you have the microphone keyed down, yet aren’t speaking for longer than a second or two, the output will be gated OFF, preventing background ambient noise from being transmitted. The on/off gating happens very quickly and isn’t noticeable.

The CTX-10 currently has no passband (PBT) control, notch filter or noise blanker.

Microphone compression is also pre-configured, and there’s currently no way to manually adjust it. This is a design choice typical of commercial communications gear.

No QSK/full break-in operation. The CTX-10, like the LnR LD-11, uses a traditional relay for switching between transmit and receive. Some CW ops like to hear the received audio between the dits and dahs of their sent CW. Elecraft radios, for example, use PIN diode T-R switching to eliminate relays during QSK. The CTX-10 uses a relay, so during CW operations, you’ll hear the relay click when switching from TX to RX and back again. This isn’t a problem for me, as I rarely set my CW rigs for full break-in, but the CW hang time delay on the CTX-10 is not currently adjustable. For high-speed CW ops that prefer a faster relay recovery, I suspect this could be an annoyance.

Limited CW adjustments. The CTX-10 lacks other controls many of us CW operators appreciate. Currently, the CTX-10 lacks a sidetone control––you cannot change the sidetone volume, nor can you turn it off. I believe CommRadio plans to fix this quirk in a future firmware upgrade. Additionally, you (currently) can’t change which side of your paddle sends dits and dahs without re-wiring your paddle. A minor con, for sure. Still, most modern QRP transceivers allow you to change this from the radio––I imagine CommRadio could add this feature in the future if their customers want it.

In addition, when operating the built-in CW keyer at speeds north of 25 words per minute, both Vlado and I noticed that immediately following a TX-RX-TX relay recovery, CW keyer timing was a little flaky. We assumed there was a problem with our paddles (perhaps dirty contacts?), but that turned out not to be the problem. Difficult to characterize, but essentially: immediately after a TX-RX-TX relay recovery, it’s hard to form a word correctly. The letter “Y” might come out as a “K” or “X” and  a “Q” might come out as a “Z.” Both Vlado and I believe this might have something to do with keyer timing, which is possible. Nonetheless, I’m confident this can be fixed with a firmware update. In addition, we worked my friend Mike (K8RAT) and while he had very positive comments about the CW tone in general, he did notice truncated elements following a TX recovery. He also noticed an occasional slight tone spike on the first element which seems to coincide with an audio pop we hear in the sidetone. Note: CommRadio fixed this issue in a 2019 firmware update. Read our final review for details.

Accident-proof ATU activation. As with the CR-1A receiver, most of the CTX-10’s features and options are controlled by accessing the menu system by pressing the volume control knob. To make ATU activation easy, CommRadio place the ATU function first in the menu––with one knob press, the ATU item appears, and with one more press the ATU activates and tries to find a match. Engaging the ATU, in my opinion, is just a little too easy. With two presses of the volume knob, the ATU engages––great, but I find this happening by accident simply by normal handling of the radio. Instead of two short presses to engage ATU, I feel it might be best when making one short then one long press.

One other minor note: the CTX-10 ATU configuration cannot be adjusted manually like it can on the Elecraft KX series ATU.

No keylock to prevent powering up and engaging ATU. The CTX-10 does have a keylock to prevent the encoder from shifting during operation (a great feature for FT-8, for example), but it lacks a keylock to prevent the main power button from being pressed and turning on while in transport. Even more worrisome would be turning on the unit and engaging the ATU while in a pack––I’m guessing this could eventually damage the radio’s finals. The current solution for this? CommRadio suggests tying a shielded wire around the post of the volume control. This prevents accidental pressing while in transport and the CTX-10 ships with one of these around the volume knob (to prevent it turning on in shipment). I feel a more elegant solution would be to design it so that, in order to power up the CTX-10, you’d press two buttons simultaneously: for example, the volume control and the STEP buttons. I’ve make this suggestion to CommRadio. Update: Via a 2019 firmware update, CommRadio added a feature that automatically turns off the radio if accidentally turned on during transport. This is not a keylock and will not prevent the ATU from activating of the power button is accidentally pushed twice, but it will prevent the radio from being powered on in a pack until the batteries have been depleted.

Minor concern: no noise reduction control. In truth, this is a very minor con in my opinion. I’m not a big user of DSP noise reduction, but some users expect it on modern transceivers. I feel like the CTX-10’s receiver is well-balanced so I wouldn’t reach for a noise reduction control under normal operating conditions.  That said, since there is no manual RF gain control, a variable noise reduction control could come in handy when QRN is heavy.

Size comparison: My ultra-compact C. Crane CC Skywave SSB sitting on top of the CommRadio CTX-10.

Minor concern: limited power output levels. This is a very minor gripe for me, but again could be important for other ops. At present, the CTX-10 has only three power output levels: 1, 5, and 10 watts. Thus for low-power contests, there is no way to lower the CTX-10 below one watt and no adjustment to zero watts. A couple of years ago my radio club had a DXCC 500 mW challenge to see who could work 100 countries with 500 mW or less. Most other modern QRP transceivers in this class have more nuanced control of power output and can be set to 1/2 watt.  At present, the CTX-10 cannot. This is truly a minor complaint––perhaps only important to 10% of CTX-10 owners at best––but I’m willing to bet this could be added via a firmware upgrade.

Early production run quirks now resolved

Fortunately, however, the CTX-10 is listening to their market, and has resolved a number of early production run quirks. My initial evaluation loaner unit was serial number #19. Turns out, some of the first production run units (including mine) had a couple of hardware quirks. CommRadio has replaced or fixed these issues when customers report them, and units currently in inventory aren’t affected. I list them here simply to document:

  • Resolved: Intelligent charger whine. When charging the internal Li-Ion cells, my evaluation unit produced a high-pitched audible whine. I measured the audio frequency with a simple smartphone app and determined that it hovers around 10.5 kHz. The replacement unit doesn’t have this problem.
  • Resolved (or repairable): Internal speaker distortion. The internal speaker on some of the early units was prone to vibrate against the bottom plate of the radio’s chassis. This produced a buzzing distortion on loud sounds or when the volume was increased above, say, 50%. Again, this only affected some of the initial production run units. The fix for this is quite easy, and either CommRadio will do this for you or you can do it yourself and get a warranty extension, so if you find this to be a problem with your early unit, contact CommRadio.

Conclusion

To my knowledge, the CTX-10 is CommRadio’s very first ham radio transceiver.  But it’s not the company’s first foray into transceiver equipment, as they’ve a solid history in commercial, aviation, and military electronics.

My biggest criticism of the CTX-10 is that I feel it should have never been released without A/B VFOs. Fortunately, this was addressed in a 2019 firmware update. I trust this company, so I know they will follow through; I’ve even offered input on how split operation might be implemented with the A/B VFOs. Personally I wish the rig sported a little more in the way of CW controls, mic gain, and an RF gain control, too––but that’s my preference, controls I like to use. Again, the CTX-10 feature set might be a little too thin––too simplistic––for some hams.

That said, I never expected the CTX-10 to have the number of features that, say, the KX2 has––the CTX-10 isn’t intended to be a “Swiss Army Knife” radio like the KX2/KX3. In fact, CTX-10 development actually began around the same time the KX2 was introduced to the market, and its introduction didn’t deter CommRadio.

CommRadio firmly believes that the CTX-10 will still have appeal to current KX2/KX3 owners and QRPers who value their design philosophy of simplicity. And, what’s more…they have a point.

So, who is the CTX-10 for?

When I check out a new-to-the-market radio like the CTX-10, I always try to sort out who the customer is––what type of ham radio operator would reach for the CTX-10 over other transceivers.

After having spent the past few months with the CTX-10, I can tell you that the CTX-10 owner is one who values a very simple, straightforward radio––one that appears and functions more like a commercial or military channelized set. Perhaps someone who began operating in a commercial, military, or aviation field, and/or who likes the “get on and get the job done” approach.  Someone more interested in making contacts than in radio operations and refinements. Those who want a sturdy, lasting, no-frills, set-it-and-forget-it rig. If that’s you, take a closer look at the CTX-10–it may just suit your needs to a T.

The CTX-10’s overall construction and components are, as I’ve said, near mil-spec. The CTX-10 isn’t weatherized or waterproof––no more than any of its competitors––but the construction is top-shelf, for sure. It should run for decades without need of repair.

The whole body of the CTX-10 is essentially a heat sink.

I believe the CTX-10 will have strong appeal for radio enthusiasts who value:

  • All-in-one-box portability with no extra wired accessory components
  • Best-in-class internal battery life
  • Best-in-class intelligent battery charging
  • HF packs
  • A high duty cycle and no cooling fan noise or third-party heat-sink add-ons
  • Digital modes like FT-8 and the ability to operate them in the field from internal batteries
  • The equivalent of a simple portable military/commercial set
  • Robust audio from a radio’s internal speaker or headphones
  • A well-balanced receiver with few manual adjustments
  • Broadcast listening (the CTX-10 is also superb broadcast receiver)
  • Best-in-class hardware

The CTX-10 is built like a tank, and has brilliant receiver characteristics. It’s also designed and manufactured here in the USA, and I find it’s easy to get good support from CommRadio.

I will add that CommRadio has been very receptive to my constructive and frank criticism. A good thing, in my book, as lesser companies might take offense or simply be dismissive.

If you’ve been waiting to purchase the CTX-10, I hope I’ve given you enough information that you can make a decision.

If you have any specific questions, please contact CommRadio or comment, and I’ll do my best to answer. I hope to post a few videos of the CTX-10 in action within the next few weeks when my rather busy schedule permits.

Please click here to read our final review of the CommRadio CTX-10.

Click here to view the CommRadio CTX-10 at CommRadio and at Universal Radio.

For a full list of CTX-10 features and specs, I would encourage potential owners to download and read the CTX-10 Operator’s Manual, available on the CommRadio website.


Do you enjoy the SWLing Post?

Please consider supporting us via Patreon or our Coffee Fund!

Your support makes articles like this one possible. Thank you!

Spread the radio love

A review of the Elecraft KX2 general coverage QRP transceiver

The following review first appeared in the November 2016 issue of The Spectrum Monitor magazine.


elecrat-kx2-review

The Elecraft KX2 tuned to Radio Australia.

It’s not every day that I get exciting news about the production of a new radio.

It was two days before the 2016 Dayton Hamvention–the day before the Four Days in May QRP conference–as I was eating lunch en route to Ohio, that I received the news: Elecraft had just announced a new transceiver, the Elecraft KX2.

Elecraft being known for their exceptional products, I thought instantly, hmmmm, this could be interesting.  I immediately dropped everything and contacted Elecraft, asking, “When can I see this new rig?”

Wayne Burdick (N6KR) of Elecraft kindly sent me a few specs, and the following day, I previewed the KX2.

What is the KX2?

In short: the KX2 is a feature-rich pocket QRP transceiver. For those who are familiar with the Elecraft product line, it’s like a KX3 (feature rich portable rig) in a KX1-sized (much smaller, handheld/pocket) package.

The Elecraft KX2 (left) and KX1 (right)

The Elecraft KX2 (left) and KX1 (right)

The day before the Dayton Hamvention, Elecraft allowed me to snap some photos, ask some questions, and generally give their new little rig a once-over.  After holding their new offering in my hand–it’s slightly narrower, if a bit thicker, than a paperback book–was already tempted to plunk down $749 for the KX2 right then and there.

Comparing the size of the Elecraft KX3 (top) and KX2 (bottom) at Elecraft's Dayton Hamvention booth.

Comparing the size of the Elecraft KX3 (top) and KX2 (bottom) at Elecraft’s Dayton Hamvention booth.

So, what what stopped me? For one, I was less than two weeks away from taking a two month trip in Canada, and already had an (embarrassingly) large number of radios to take along. I also had a few other reviews in the works and needed to finish them prior to evaluating the KX2.  And–let’s face it–that kind of cash is significant to a reviewer like me.

Yet there was another consideration–two, actually: I already own both the KX1 and KX3 transceivers, and like them very well. Come on,  I chastised myself, as I continued to admire the latest Elecraft in its tiny package. Wouldn’t a KX2 be rather…redundant?

Nonetheless, in August I took the plunge and ordered a KX2. Perhaps it was a leap of faith…or a momentary lapse of judgement that led me down temptation lane. At any rate, I had been doing enough NPOTA activations that I fell for the idea that I could potentially have the advantages and performance of the KX3 in an even smaller, even more portable, package.

Would there be buyer’s remorse? The only way to tell, obviously, was to put the KX2 on the air.

Learning my way around the KX2

I imagine a lot of new KX2 owners will be Elecraft veterans like myself. Once you’ve used Elecraft equipment for a while, you begin to understand how the company designs their menu trees and functions. In other words, once you’ve experienced the Elecraft ecosystem, moving from one radio to another becomes easier.

The KX2's on-board microphone is located on the left side of the front panel and works very effectively especially in an HT configuration.

The KX2’s on-board microphone is located on the left side of the front panel and works very effectively especially in an HT configuration.

I approached the KX2 with confidence, having owned the similar KX3 for three years and the K2, K1 and KX1 for many years.

 The left side of the KX2 is where all connections are located, save the antenna connector.

The left side of the KX2 is where all connections are located, save the antenna connector.

The BNC antenna jack is located on the right side of the KX2.

The BNC antenna jack is located on the right side of the KX2.

I plugged the KX2 into my power supply, main antenna, and powered it up by pressing the Rate and A/B buttons simultaneously (a clever keylock method). The KX2 defaulted to the 20-meter band. I started tuning around and quickly realized that the SSB mode was set to the lower instead of the upper sideband. No problem, I thought, and instinctively pressed and held the MODE button to switch from LSB to USB. This is where I found the first difference between KX2 and KX3 functions. Pressing and holding mode button on the KX3 toggles USB/LSB, but on the KX2 it enters the frequency memory store mode.

I tinkered with the KX2 MODE button to no avail, so reached for the KX2 owner’s manual, fortunately a well-written tome. Turns out, to switch between USB/LSB, you:  enter the KX2 menu system, select the ALT MD entry, then switch the “alternate” to the “normal” SSB band mode, which moves it to USB on the 20-meter band.

A number of functions accessed on the front panel of the KX3 require using the menu system on the KX2. RF Gain is another example of this, as I discovered pretty quickly.

This got me thinking.  I don’t envy the folks at Elecraft who have to sort out the ergonomics and functionality on a radio as small as the KX2. I decided I’d better check out the owner’s manual and familiarize myself with the functions I use the most in the field.

Elecraft manuals are superb; they're spiral bound, easy to read and comprehensive.

Elecraft manuals are superb; they’re spiral bound, easy to read and comprehensive.

I must say, Elecraft has done an admirable job of keeping the most essential functions on the face of the radio and tucking the less-used functions into the background of their menu system [Not to suggest access is ever complicated, considering that you just 1) enter the menu, 2) select the function, and 3) change the parameter…that’s it.]  No doubt, the reason for their success is the fact that their key designers, like co-founder, Wayne Burdick (N6KR), actually operate radio in the field–they get it.

Speaking of the field, that’s exactly where I wanted to take the KX2 to test, since that’s clearly where the rig’s designed for use. Note here that this is not a base rig: its size and features lends itself very well to a pack radio–one I wanted to keep packed and at-the-ready!

Packing up…

Prior to receiving the KX2, of course, I did some pack research (those of you who know me know that I’m a bit of a pack geek).

Elecraft was actually selling two models of a LowePro pack that fit the KX2 exactly: the ViewPoint CS 40 and ViewPoint CS 60. Though I searched far and wide, I couldn’t find a pack from some of my favorite manufacturers (such as Spec-Ops Brand, Red Oxx, and Tom Bihn) that has the right amount of padding, exact space and fit for the KX2, as did the CS 40 and CS60. So I purchased the larger CS 60–the larger of the two packs.

kx2-lowe-cs60-bag

My Elecraft KX2 kit then consisted of the following:

  • The Elecraft KX2, with internal battery and ATU options
  • An LnR Precision EFT Trail-Friendly antenna (purchased at the Dayton Hamvention)
  • An assortment of relevant connectors and adapters
  • An Elecraft hand mic, borrowed from my KX3
  • A CW paddle (the KXPD2)

All of this–save  fishing line, weight, six-foot coax cable and clipboard–were protected by the compact and perfectly portable LowePro ViewPoint CS 60 padded case, and fit it like a glove. I tucked the whole kit quite conveniently into my 20-year-old Dana Design lumbar pack.

The only way to know if the kit was complete, was to take it to the field. Nothing like trial by fire.

NPOTA: National Parks On The Air

Elecraft-KX2-Clipboard-NPOTA

My first NPOTA activation with the KX2 field kit was at the Carl Sandburg Home in East Flat Rock, NC.

After hiking about twenty minutes to my trail location and setting up the station, which I found to be a fairly simple process, I realized that the KX2 is so compact that it easily fit on the clipboard I was using to hold my log sheets. Thus, the clipboard instantly became my laptop operating table.

As soon as I sat down in my folding chair, I turned on the KX2, set the frequency to 14,286 kHz, and pressed the ATU button, which gave me a 1:1 match (since the EFT is resonant).

Next, I recorded my CQ call into the KX2’s built-in voice keyer by:

  1. pressing and holding the MSG button,
  2. assigning the voice message to “memory allocation 1” by pressing the PRE (1) button,
  3. pressing XMIT to start the recording,
  4. reading off my CQ call, thus: “CQ, CQ, CQ, this is K4SWL calling CQ for National Parks on the Air…”, and
  5. pressing XMIT again to stop the recording.

Then, I started calling CQ by simply pressing the MSG button and selecting my message stored in memory allocation 1 by pressing and holding the PRE (1) button.

By pressing and holding the PRE (1) button, I initiated a loop-playback of my CQ call where my KX2 would transmit my call from memory.  Then I waited a few seconds to listen for any replies, and played it again. (In loop-playback mode, I’d learned that the KX2 will repeat my CQ call until I interrupt it by pressing a button or keying my mic.)

It’s a brilliant and easy function which saves my voice. By automatically calling CQ, it  gives me an opportunity to answer questions from curious passersby who were naturally fascinated by a guy sitting on the side of a trail, talking into a little box connected to a tree-branch suspended wire.

In the end, I didn’t even need to use the voice keyer that much. I worked my minimum of ten stations within six minutes! Of course, I continued to call CQ until I worked everyone in the pile-up (including stations from California, Nebraska, Kansas, Texas, and Mexico–thanks, folks!).

Result?  Wow.  That first field experience at the Carl Sandburg home couldn’t have gone better. And the KX2 had quite a lot to do with that outcome–both in function and form-factor.

Since then, I have taken the KX2 on more than twenty NPOTA field activations, and my compact field kit is making impromptu activations a breeze. Indeed, by the time you read this review, I’m guessing I’ll have added a dozen more NPOTA activations with the KX2 field kit.

[Update: At time of posting this review, I have a total of 54 NPOTA activations–almost forty have been made with the KX2.]

Internal battery option

Activating PK01 (The Appalachian Trail) with the KX2

Activating PK01 (The Appalachian Trail) with the KX2

One of the things that make the KX2 so easy to set up is the fact it can run quite effectively on a high-capacity internal LiPo battery pack.

kx2-battery

The KX2’s 10.8V 2600 mAh LiPo battery

On one particular set of activations, while returning from the W4DXCC conference in late September, I activated several sites, including a couple of “two-fer” sites, just during my drive home. I only used the KX2’s built-in battery to power the rig. I was on the air almost three full hours of fairly intense transmitter use (repeating my CQ call through the voice keyer). The KX2 was able to pump out a full 10 watts of power for a little over one hour, then as the voltage dropped, it reduced output to 5 watts.

I feel like this is impressive performance from such a small battery pack. It’s a little pricey (at $84.90 US for both the battery and external charger), but very much worth the cost if you’re splurging for a KX2, anyway.

View of the Elecraft KX2 battery compartment. Note the speaker wires which attach the two halves of the chassis.

View of the Elecraft KX2 battery compartment. Note the speaker wires which attach the two halves of the chassis.

One complaint: I’m not crazy about the fact that the LiPo battery must be removed from the KX2 in order to be charged. To gain access to the battery, you loosen the two thumb nuts on either side of the KX2, then carefully open the back compartment. You must be careful because two speaker wires are attached to the back panel which holds the internal speaker; if you yank it open, you could disconnect the speaker.

I’ve read a report from an NPOTA activator who said that, in the process of multiple openings/closings of the back plate, the speaker wires have rubbed bare spots on the insulation. He used black electrical tape to fix the problem. So far, I haven’t noticed this, but I certainly see how it could happen with time.

Operating a NPOTA "two-fer" under the Blue Ridge Parkway and in the Great Smoky Mountains National Park.

Operating a NPOTA “two-fer” under the Blue Ridge Parkway and in the Great Smoky Mountains National Park.

In the end, I give Elecraft a little grace on this point. After all, this is the first transceiver they’ve ever produced that doesn’t have a kit form, plus they’re trying to satisfy the needs of battery and charging circuit while keeping costs down, as well as make everything fit in an almost paperback-sized enclosure.  Frankly, this works fine.  I don’t mind the extra care required because, in the end, having such a capable internal battery outweighs any inconvenience of charging at home.

Elecraft, if there’s a way to reinforce the speaker wires, that would likely help.

KXAT2 Internal ATU Option

I ordered the KXAT2 internal ATU option with my KX2. Having used the KX3 internal tuner for years, I guessed this might be an excellent ATU, as well.

And it is. In the field, I’ve used a variety of wire antennas, and the KX2’s internal ATU has matched them beautifully.

So, exactly how good is the KXAT2? The following story will give you an idea.

I brought my KX2 along to the W4DXCC conference in late September. The conference has a club station that consists of two Icom IC-7300s which are hooked up to a variety of antennas. During the conference, my buddy WD8RIF was activating a particularly rare NPOTA site. My only chance of working him was on 40 meters.

Conference attendees took turns operating the KX2.

Conference attendees took turns operating the KX2.

Unfortunately, out of all of the self-supporting antennas erected on site, none were resonant below the 20 meter band. I had no means to properly hang my 10/20/40 meter EFT Trail-Friendly antenna at the hotel, so out of desperation, I tried to load a 20 meter hex beam on 40 meters at QRP power using the IC-7300 and its internal tuner. In short, the IC-7300’s ATU couldn’t find a match and refused to transmit.

But I had my KX2 in my field pack. I set up the KX2, connected it to the 20M hex beam, tuned it to 40 meters, and hit the ATU button.  The KXAT2 promptly found a 1:1 match!

Using the Elecraft KX2 on 40 meters at the W4DXCC conference while attached to a 20 meter hex beam.

Using the Elecraft KX2 on 40 meters at the W4DXCC conference while attached to a 20 meter hex beam.

Granted, we were only operating 10 watts, but even the IC-7300’s internal ATU wouldn’t work at that same power level.

In short, if you plan to operate portable with the KX2, do yourself a favor and order the KXAT2 internal tuner, as well. Clearly, it’s ability to match is impressive.

KXPD2 keyer paddle option

Elecraft also sells a small, attachable paddle that is custom-made for the KX2–it’s called the KXPD2 keyer paddle.

elecraft-kx2-kxpd2-paddles

I had not planned on acquiring a KXPD2 as I’m not the biggest fan of paddles that are attached directly to radios. I did, however, think back to my KX1 and the many times I operated CW while holding that little rig in my hands. To be clear, though, the KX1 paddles are primitive in comparison to the KXPD2, which has adjustable contact spacing and even built-in allen wrench storage.

One night at my local radio club, I passed the KX2 around with the KXPD2 attached and received a number of positive comments about it. I find it a pleasure to use, too, and lightyears better than my KX1 paddle.

In the field, I personally find the two thumb screws which attach the KXPD2 a little small to turn fluidly. This is due, primarily, to the fact I have bigger fingers. Steve (WG0AT) experienced the same problem, and came up with a creative solution: silicone rubber tape. He simply wrapped the tape around the thumb screws, giving them a larger tactile surface area. I’ll try this with my KXPD2 paddle screws, as well.

The KXPD2 is a brilliant little key, I must admit. I say this even though I feel the $109.95 price is rather high. Still: it’s a quality little product and I’ve been very pleased with its smooth action and precision. And, oh, yeah–a bonus–it will fit my KX3 as well!

General coverage receiver

In August, Elecraft pushed out a Beta firmware release on the KX2 which included AM mode. Following this release, I received a number of inquiries from SWLing Post readers asking for a comparison and audio samples.

Elecraft-KX2-Voice-Of-Greece-AM-Mode

At the time, I had the excellent LnR Precision LD-11 transceiver in the shack, so I thought I’d do a quick audio comparison with the KX2 since both price points are similar and both are transceivers with AM mode.

I set the LD-11 to a bandwidth of 9.6 kHz, and the KX2 to 5 kHz: the widest AM filter settings of each. Keep in mind, of course, that this is was not an apples-to-apples comparison, but it did showcase each radio’s potential AM audio fidelity.

To make the playing field as even as possible for these two disparate units, I tuned both rigs to the Voice of Greece on 9420 kHz around 00:30 UTC. VOG’s signal was strong into North America.

I made the following recordings with my Zoom H2N digital recorder, feeding in-line audio patched from each radio’s headphone jack. I tried to balance the audio levels between the two rigs as closely as possible to one another.

The LNR Precision LD-11

LNR-Precision-LD-11-AM-Mode-Voice-Of-Greece

Click here to download the audio.

The Elecraft KX2

Elecraft-KX2-Voice-Of-Greece-AM-Mode

Click here to download the audio.

The Elecraft KX2 in “Delay” audio mode

Elecraft-KX2-Delay-Audio-AM-Mode

Click here to download the audio.

The results from both radios are duly impressive. Since the LD-11’s bandwidth can be widened to 9.6 kHz, strong signals like this one sound pretty darn amazing. In truth, I actually prefer a filter width of about 8.2 kHz on strong signals, but VOG was wide enough to justify 9.6 kHz.  I believe the LD-11 would rival many dedicated tabletop receivers.

The Elecraft KX2, in normal audio mode, sounds flatter and narrower than the LD-11 of course, but still remarkably pleasant–a surprise, considering its limitations.

In the KX2’s “delay” DSP audio mode–available when headphones are used–the signal sounds much wider than 5 kHz, though the effect adds a little graininess to the audio. That’s okay, however; I appreciate having the “delay” audio option in my tool bag.

In the past several months, I’ve used the KX2 for shortwave broadcast listening, and each time I’ve been happy with it. It’s an exceptionally sensitive and selective receiver, with a stable AGC, thus would please the most dedicated DXer. Does it have the audio fidelity of the Drake R8B? No way. But its audio is very good, nonetheless, and it can dig weak DX out of the noise as well as any of my dedicated receivers.

After all, this is a ham radio transceiver, not a broadcast receiver, so I’m impressed that it can double as both.

Mediumwave reception?

While HF reception is very good, Elecraft is the first to tell you that KX2 mediumwave reception is strictly limited, and indeed rather poor:

“Sensitivity rolls off significantly below 3.0 MHz due to protective high-pass filtering. Preamp-on MDS is typically -105 dBm at 1.5 MHz, and -80 dBm at 1.0 MHz, sufficient for emergency AM broadcast signal copy.”

So, don’t plan on doing any mediumwave DXing with the KX2. It is sensitive enough, however, that I can receive strong local stations reasonably well.

Summary

elecraft-kx2-white-bkgrnd

Every radio has its pros and cons. When I begin a review of a radio, I take notes from the very beginning so that I don’t forget my initial impressions and observations. Here’s the KX2’s list, from the first moments I turned it on, to the present:

Pros:

  • Excellent sensitivity and selectivity
  • All modes: SSB, AM, CW, and Data (with built-in PSK/TTY decode/encode)
  • A convenient portable package for the field with needed options:
    • Built-in ATU option
    • Optional internal LiPo battery (see con)
    • With telescopic whip, the KX2 can be used as an HT via the internal microphone
    • Very quick deployment in the field
    • Built-in voice and CW keyer
  • Excellent general coverage receiver; AM mode effective for shortwave broadcast listening
  • Backlit display is easy to read in both shack and field
  • Numeric keypad for direct frequency entry
  • Considerate use of multi-function controls
  • Free and easy firmware updates via supplied software
  • Elecraft support and customer service

Cons:

  • Battery must be removed to charge; battery removal requires careful consideration of speaker wires (see pro)
  • Downward-facing speaker not ideal in the field unless back leg is used to raise off of surface
  • Price (shipped) exceeds $1,000 when loaded with ATU, battery, and external charger
  • Poor mediumwave/AM broadcast band reception (con) by design (pro)

Let’s be frank here: the cons I’ve listed above are rather nitpicky.

I suspect Elecraft will work on a better solution for the speaker wire (for those of us using the internal battery) or else KX2 users will come up with a creative modification.

In a perfect world, I also wish the KX2 were somewhat weather-proof or water-resistant. A couple of times, I’ve been operating in the field when rain caught me off guard. I feel like the KX2 is pretty vulnerable, so I either pack up the radio and stop operating, or I seek shelter if it’s available. It wouldn’t take a lot of moisture to penetrate the KX2 and there’s no way I’m letting rain ruin my rig. But I’m guessing weatherproofing would add significant cost.

So, did I experience any buyer’s remorse after purchasing the KX2?

Not in the least.  Between us, kind reader:  the KX2 has been a difficult rig with which to find fault. Price and inherent compromises for portability aside, there are really no serious negatives about this radio in my book. It suits my purposes very well.

Activating the Blue Ridge Parkway (PK01) with the Elecraft KX2 and "Silver Tip" 20 meter vertical. An effective combo!

Activating the Blue Ridge Parkway (PK01) with the Elecraft KX2 and “Silver Tip” 20 meter vertical. An effective combo!

Yet we reviewers cringe when our reviews appear this “glowing.”

I’m not a fanboy of any brand. I love to see companies introduce successful original products. I believe companies like Elecraft, CommRadio, LnR Precision, Elad, Icom, Yaesu, Kenwood, SDRplay, and the like are healthy for our hobby.

Competition and innovation are worthy friends.

Elecraft pushes our ham radio hobby forward, and it’s innovations like the KX2 that make our radio market and our hobby a dynamic and inventive space.

To be clear, I know the KX2 didn’t come out of nowhere. It’s the culmination of many iterations of Elecraft transceiver designs over the past eighteen years. Elecraft has taken feedback from customers, made notes, and improved their products with time, and it shows in this little rig.

The Elecraft KX2 is clearly a product of iterative agility.  It will, no doubt, be a market success.

I remember when Elecraft co-founder Wayne showed me the KX1 many, many years ago at the Dayton Hamvention. He told me that the KX1 was a step toward the perfect portable radio he’d dreamed of as a kid. The KX2 is simply that–and a profound upgrade of the KX1.  But more to the point, it might have been the portable of which I dreamed, too.

Check out the KX2 on Elecraft’s website: http://www.elecraft.com/KX2/kx2.htm

Spread the radio love

The best general coverage transceivers for shortwave listening

This article originally appeared in the May 2014 issue of The Spectrum Monitor Magazine.


Icom-IC7200

The Icom IC-7200 has an excellent general coverage receiver

Like many amateur radio operators, I became interested in HF radio because of my real passion for shortwave radio listening. During my first fifteen years as an SWL, I relied on portable receivers, in my case, the Zenith Transoceanic, Realistic DX-440, and Grundig YB 400. The Zenith was my home radio; I traveled with the DX-440 and YB400. I felt like I had the world at my fingertips.

In the mid 1990s, as an undergraduate, I decided that I would pursue my ham radio license–while on my student budget, I dreamed about upgrading to a proper tabletop receiver like a Kenwood, Icom, JRC or Drake. But when I found out the real cost of buying an HF transceiver (gasp!) I realized that all of my resources would go into a transceiver, and the receiver would just have to wait.

The Icom IC-735 general coverage transceiver

The Icom IC-735 general coverage transceiver

Then, as I was studying for my license in 1997, ham buddy Eric McFadden (WD8RIF) invited me over to his house to test drive his Icom IC-735 transceiver. Eric, along with another friend/elmer, Mike (K8RAT) encouraged me to look for a used IC-735 for an affordable first HF radio.

I recall very well tuning around the ham bands at Eric’s QTH and being most impressed with how the IC-735 seemed to pull signals out of the static. It was my first time ever tuning a tabletop rig, and I was instantly hooked. Later, I asked Eric if the ’735 could also tune in shortwave radio broadcasters? His energetic response: “Sure! The ‘735 is general coverage,” then demonstrated by tuning to the 31M band.

Needless to say, I was absolutely amazed by the number of stations one could hear on this ham radio transceiver. Of course, its sensitivity surpassed anything I had ever owned, especially considering that the rig was hooked up to a proper outdoor wire antenna. I realized then that a ham radio transceiver and receiver–in the same radio–were within my financial grasp.

So, what is “general coverage”––?

A ham transceiver with “general coverage” means that the receiver portion of the radio is not limited to the ham bands only; these receivers typically receive between 100 kHz and 30 MHz (i.e., the full medium and shortwave radio spectrum). Many transceivers, starting in the 1980s, employed a general coverage design as a feature of the radio. Some radios implemented general coverage receiving better than others. In most cases, there was a compromise to performance when the receiver was opened to general coverage reception, so many manufactures held to a ham-band-only platform to optimize performance where hams sought it most. Today, receiver architecture can better accommodate general coverage without compromising sensitivity and selectivity on the ham bands.

Still, in 1997, my Icom IC-735 met all of my ham radio and SWLing expectations. For years, in fact, it was my main SWLing rig. Was the IC-735 as good as a proper tabletop receiver? No. The truth is that its filters and performance were most favorable for the ham radio bands. But as I mentioned, this compromise is much less profound in current transceiver design, and general coverage is status quo.

Benefits of general coverage

Apps like Amateur Radio Exam Prep make exam practice easy and convenient

Apps like Amateur Radio Exam Prep make exam practice easy and convenient

While the benefit of having a transceiver that can tune the full broadcast band may seem obvious, there are two reasons I always have at least one general coverage transceiver in my radio arsenal:

  1. Since I like to travel and save space, a small general coverage transceiver (e.g., the Elecraft KX3) kills two birds with one (portable) stone;
  2. If an emergency, such as a dire weather event were to occur, general coverage will allow me the ability to monitor international broadcasters and local AM (mediumwave) stations while still performing any emcomm (emergency communications) duties.

Another advantage to owning a proper HF transceiver is that, if you currently do not hold an amateur radio license, this may just be the push you need to get your ticket! All you’ll need to do is take two multiple choice tests (Technician and General) to unlock the full potential of your HF transceiver, and you’ll soon enjoy hamming it up with the rest of us.

Cons of general coverage

As I mentioned, general coverage transceivers can present something of a compromise in performance; after all, the rig’s main duty is to perform on the ham bands. Here are a few compromises to be aware of:

  • With a few exceptions, purchasing a ham transceiver is pricier than purchasing a comparable dedicated broadcast receiver
  • AM filters are often much narrower than broadcast receiver filters
  • In many radios, you may be faced with a choice of optimizing filter selections for ham radio use (SSB or CW) or broadcast use (wide AM filters, etc.)
  • Older general coverage transceivers (circa 1980s and 90s) may have somewhat compromised ham band receive performance
  • Some general coverage transceivers may actually lack AM mode. All broadcast reception will basically be tuned via SSB (or better known as ECSS)
  • General coverage transceivers typically lack synchronous detection

Another consideration: while anyone can purchase a general coverage ham radio transceiver, until you hold an amateur radio license with HF privileges, you cannot legally transmit using your radio. I doubt that any readers would consider doing this intentionally, but again your radio is designed to transmit, so this could be done accidently especially if you’re not familiar with transceiver functions. Transmitting unintentionally can have more than legal repercussions: 1) if you transmit with a mis-match between your transmitter and antenna, you could harm the finals in your transceiver; 2) you could damage your radio and/or antenna if using a receive-only antenna (like a mag loop); and 3) you could even receive RF burn. To avoid this, and make it foolproof, search the web for modifications to temporarily disable “transmit” on your radio if indeed you never intend to transmit.

A note about power supplies

My trusty Astron Power Supply

My trusty Astron Power Supply

Unlike stand-alone receivers, most general coverage transceivers require an external DC power supply. If you do not have a power supply, you will need to fit this into your budget. Power supplies can be costly, but also an investment in longevity. With a little knowledge up front, you can be selective and save on your power supply purchase. As I have been using the same power supply (an Astron RS-35A) since 1997, I turned to my friend Fred Osterman, president and owner of Universal Radio, for suggestions on power supplies currently in production.

Fred pointed out that if your only goal is to power a transceiver for the receive function, there is no need to invest in an expensive power supply. He suggests a reliable, regulated power supply, such as their popular $35 (US) Pyramid PS-4KX: at 3.5 amps; indeed, the PS-4KX will be more than enough power for any transceiver in receive mode.

Of course, if you plan to transmit at full power–and unless you have a QRP radio–you will need a power supply that can handle the load. For this purpose, Fred suggests two excellent options:

Again, I’ve had my trusty Astron RS-35A since 1997, so once you’ve invested in a good power supply, you should be all set for many years–and radios–to come.

My old 1 amp regulated laptop power supply is more than adequate for SWLing on the Elecraft KX3

My old 1 amp regulated laptop power supply is more than adequate for SWLing on the Elecraft KX3

Transceivers: Good bets for $1,600 US or less

There are dozens of general coverage transceivers currently on the amateur radio market. Indeed, I don’t believe there are any rigs now in production that do not have a general coverage receiver, or at least the option to add it. Prices vary greatly, but I will assume that most SWLs that are considering the leap into amateur radio will want a radio that costs less than the price of a tabletop radio/transceiver combo. Just to keep things simple, we’ll limit our list to $1,600 US or less, beginning with the least expensive option.

Alinco DX-SR8T ($510 US)

The Alinco DX-SR8 has a detachable face plate

The Alinco DX-SR8 has a detachable face plate

The DX-SR8T ($510 US) is one of the most affordable general coverage transceivers on the market. To be clear, the DX-SR8T lacks many of the frills and features of pricier rigs, but it’s a surprisingly good transceiver and, of course, general coverage shortwave receiver. Indeed, Alinco actually markets a receive-only version of this radio (the DX-R8T, $450US); it is identical in every respect to the DX-SR8T, but simply has no transmit function.

While I have only used the DX-SR8T on a few occasions, I have spent a couple of years with the DX-R8T, and even reviewed it extensively in the SWLing Post. My DX-R8T began life as a review unit that I purchased––it was an early production unit, and even retained the transmit LED indicator found on its sibling, the DX-SR8T. Consider paying the extra $60 US for the DX-SR8T, and you’ll have a basic, full-featured transceiver.

You can purchase the IC-7200 from Universal Radio or other ham radio equipment retailers.

The Icom IC-7200 ($900 US)

The Icom IC-7200

The Icom IC-7200

The IC-7200 delivers a lot of performance for a sub-$1,000 price. Its general coverage receiver will rival that of the venerable R75, and its AM filter can be widened to 6 kHz. Ergonomics are better than average. Plus, it has Icom’s twin passband tuning: the IC-7200’s general coverage receiver actually tunes from 30 kHz all the way to 60 MHz. The IC-7200 is a fantastic value.

You can purchase the IC-7200 from Universal Radio or other ham radio equipment retailers.

The Elecraft KX3 ($900 kit; $1,000 factory pre-assembled)

The Elecraft KX3

The Elecraft KX3

The Elecraft KX3 is my general coverage transceiver of choice. There’s so much about this radio that I like: it’s nearly as compact as my portable shortwave radios, it’s a full-featured transceiver, it can operate on batteries, it has good ergonomics, and is made and supported by Elecraft, right here in the USA.

Its sensitivity and selectivity rival radios three times its price. The only negative I can point out about the KX3, in comparison with many other general coverage transceivers, is that its AM filter is limited to a width of 4.2 kHZ. When I first learned of this, I thought it would be a deal-killer for me. But I was wrong. The audio sounds much more robust and “wide” than I would ever have guessed. It’s excellent. Want more details? I made an extensive review of the Elecraft KX3 in the SWLing Post.

You can purchase the Elecraft KX3 directly from Elecraft.

Note: Elecraft tech support can instruct you in disabling “transmit” on the KX3, if you wish.

Update: Also check out the KX3’s new sibling, the Elecraft KX2.

The Kenwood TS-590S ($1,500 US)

The Kenwood 590S

The Kenwood 590S

The TS-590S has an excellent general coverage receiver and brilliant audio fidelity. With one of the lowest noise floors in the business, the 590S is well respected amongst amateur radio operators and shortwave radio listeners. If you doubt this, see how the TS-590S compares on Rob Sherwood’s receiver test data page.

You can purchase the Kenwood TS-590S from Universal Radio or other ham radio equipment retailers.

Updates

[June 13, 2020] Since originally publishing this article, a number of general coverage transceivers have hit the market. Many of them are very affordable.  Here’s a short list of additions:

Looking to spend a little more?

Icom-IC-7600

The Icom IC-7600

If you happen to be a ham looking to upgrade their transceiver for benchmark performance, you may be willing to dedicate more funds to your purchase. My buddy, Dave Zantow (N9EWO), a discriminating reviewer for the late great Passport To World Band Radio, is very pleased using his Icom IC-7600 for broadcast listening. He told me recently, “[The IC-7600 is] not perfect, of course, but does perform near excellent and also has a great display [with] a very useful spectrum scope.” Dave has a full review of the IC-7600 posted on his website.

The Ten-Tec OMNI VII

The Ten-Tec OMNI VII

I have also been impressed with the superb broadcast reception of the Ten-Tec OMNI VII ($2,800 US), Ten-Tec Eagle ($1,800 plus wide AM filter) and Orion series transceivers. While the OMNI VII and Orion II will set you back more than $2,000, used original Orions can be found for $1,800 and even less. Ten-Tec still services all of their radios at their headquarters in Sevierville, Tennessee.

Used transceivers

If you would like to save some money, consider searching the used market for one of the radios mentioned above. Alternatively, look for some of these select transceivers that are no longer in production, but are known to have capable general coverage receivers (do note that what follows is simply a selection, not a comprehensive list):

Keep in mind, when you purchase a quality used radio, you can get excellent value for the performance it will reward you. The flip side of this, though, is that if you purchase a radio that hasn’t been in production for over a decade, the chances of finding replacement parts become more difficult with each passing year.

For more hints on purchasing a used rig, check out our Marketplace page.

With the option wide AM filter installed, the Ten-Tec Eagle makes from an amazing broadcast receiver. They are available new from Ten-Tec, but can also be found used.

With the option wide AM filter installed, the Ten-Tec Eagle makes from an amazing broadcast receiver. They are available new from Ten-Tec, but can also be found used.

Summary

If you plan on investing in a fine communications radio, it may be best to economize by investing in a good general coverage transceiver. For the prospective ham, the leap from a tabletop receiver to a fine general coverage transceiver may be less than $300. To prove my point, if an SWL planning to get a ham ticket asks about buying the venerable Icom R75, I would encourage spending $250 to get the Icom IC-7200, instead.

Indeed, with modern receiver architecture, there is little reason not to invest in a good general coverage receiver that you can also use to communicate all over the world when you get your ham ticket. And, need I add, it’s fantastic fun for the money.

If you would like to learn how to become a ham radio operator, check out this great introduction at the ARRL website.

Do you have a radio suggestion that I did not mention?  Please comment!

Spread the radio love