Tag Archives: POTA

lab599 Discovery TX-500: Hiking into Pisgah National Forest for a little field radio fun

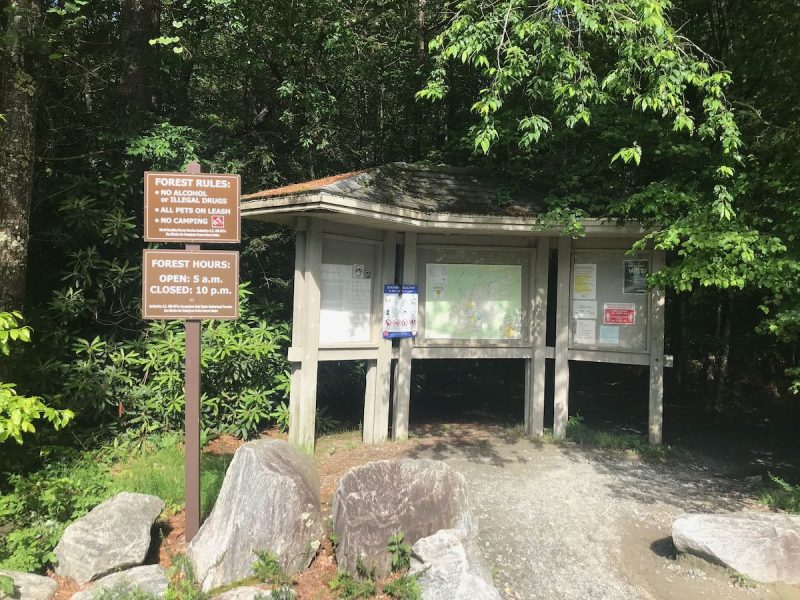
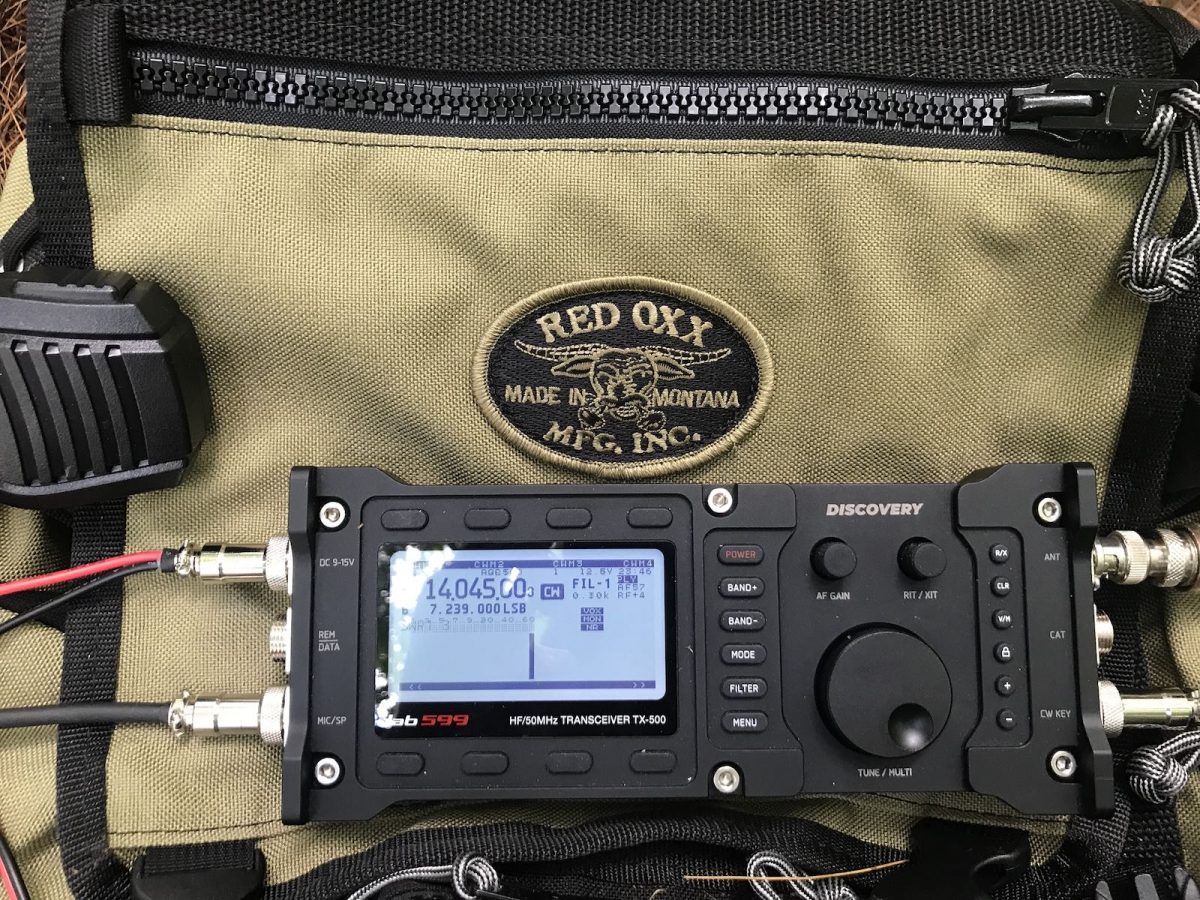
Yesterday, I hit the field again with the lab599 TX-500 Discovery. This time, I wanted to give the radio a proper shake-out by hiking to my location with the entire station in my pack.

This TX-500 transceiver is on loan, so I haven’t built a custom field kit for it like I have with my other radios. To be on the safe side, I packed the rig and all of its accessories in my Red Oxx C-Ruck pack.

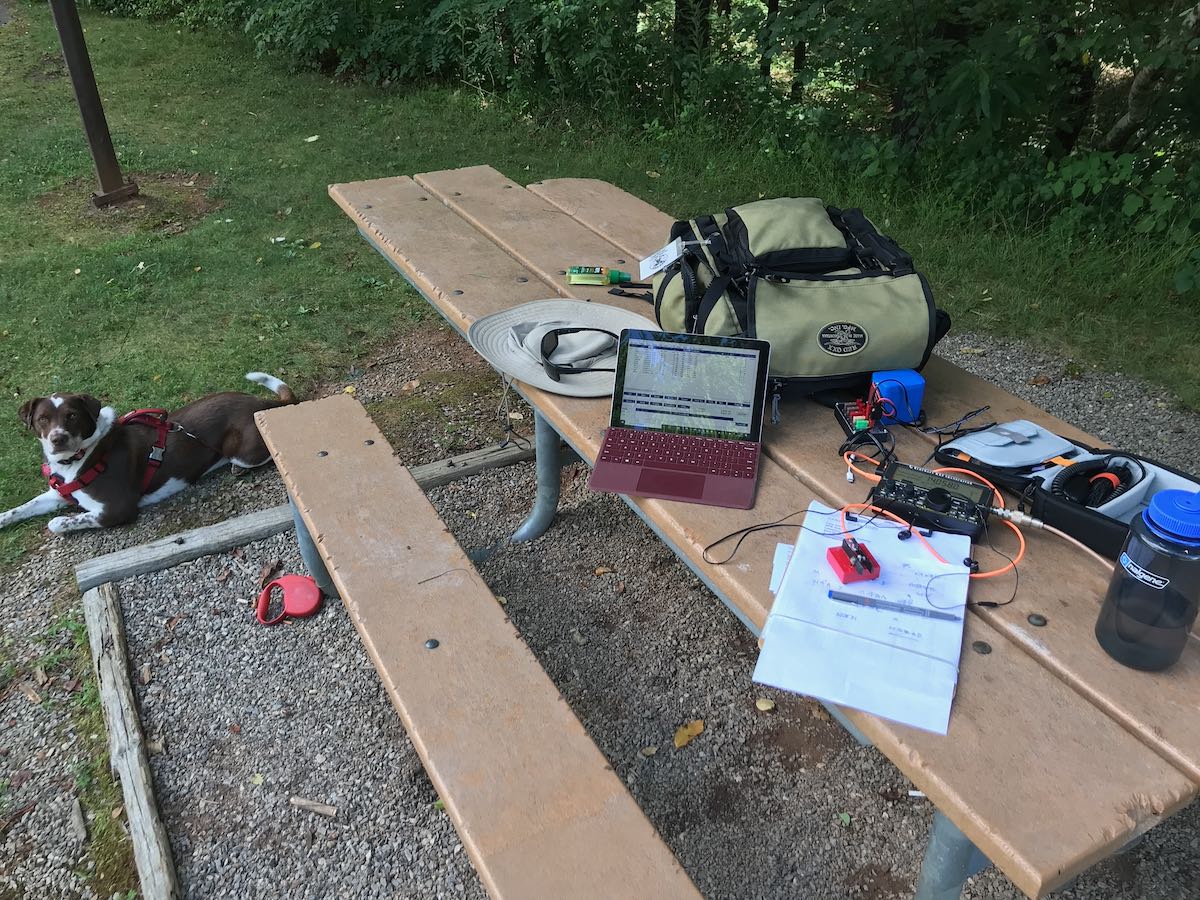
The C-Ruck is loaded with three antennas, two LiFePo batteries, DC distribution panels, extra adapters/connectors, and essentially everything I need to handle pretty much any field situation. I take it on every field activation when I can afford the space in my car/truck because it’s so complete and stocked, it’s like a mini shack in a bag complete with tools I might need in the field.

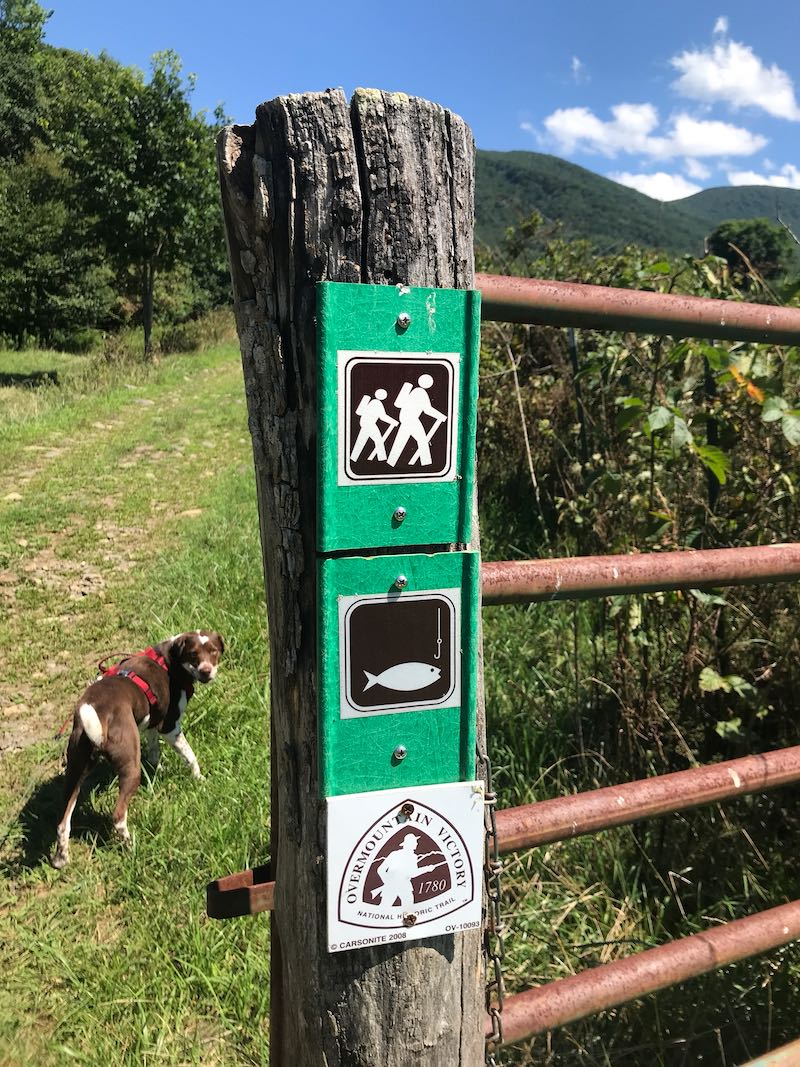
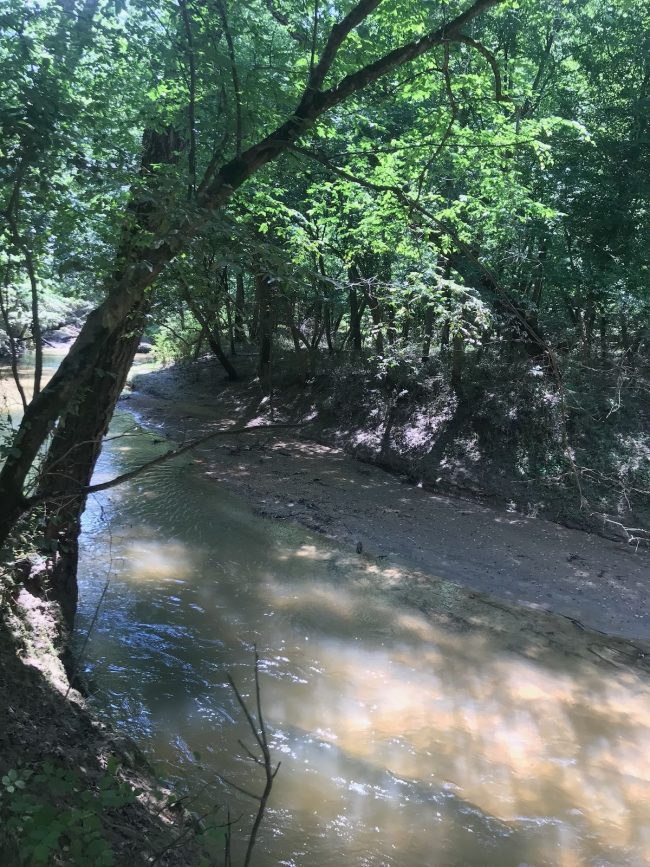
This radio bag was total overkill for a quick day hike into Pisgah National Forest and I did remove a few heavy items like a larger battery, my Wolf River Coils TIA vertical, and other extra accessories. But at the end of the day, my four-legged hiking partner (Hazel) and I both agreed that I would kick myself if I arrived on-site and realized I was short, say, one PL-259 to BNC connector.

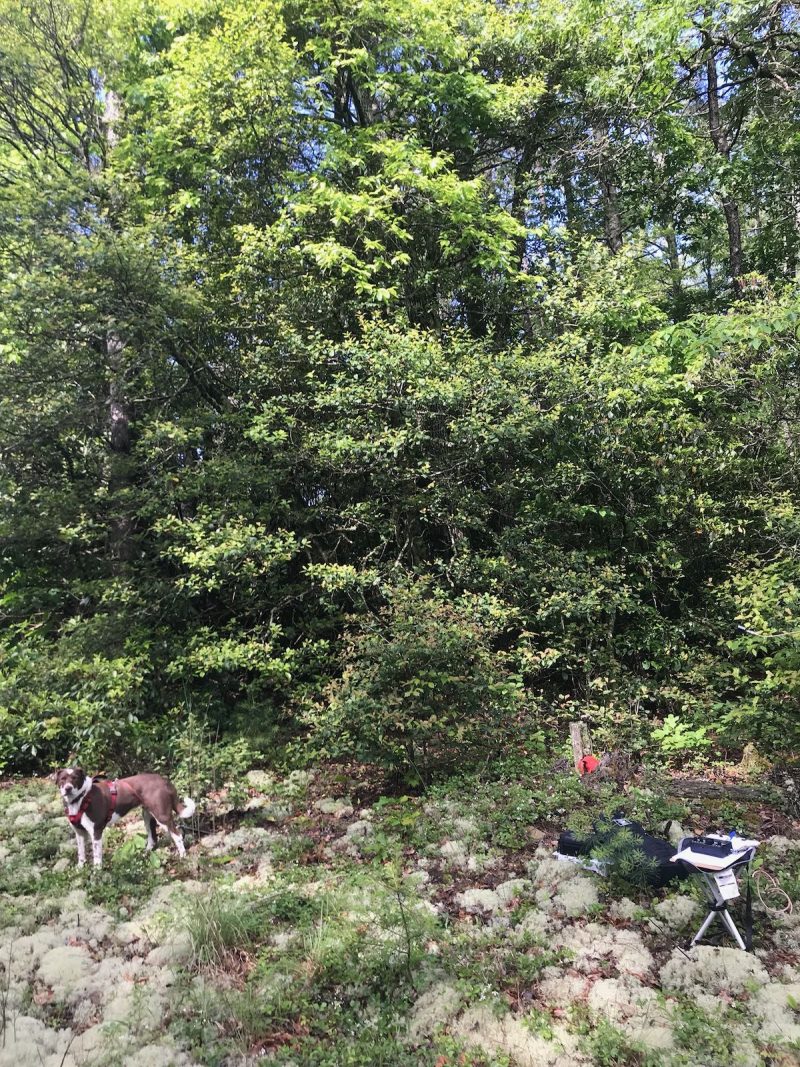
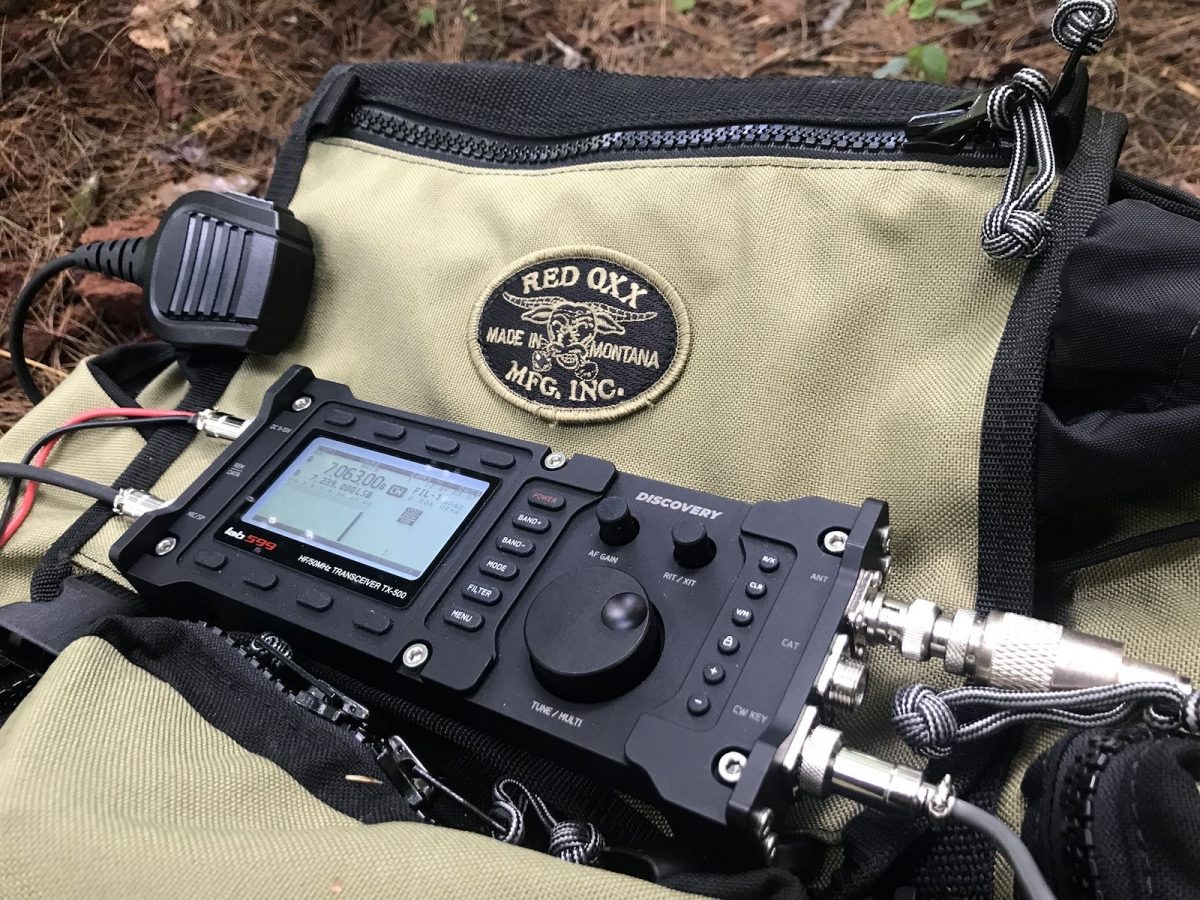
Turns out, the C-Ruck was just what the doctor ordered. The TX-500 is so compact, it fit in the C-Ruck’s top flap pocket that holds my logging notepad. I used that top flap to strap down my folding three legged stool for the hike.

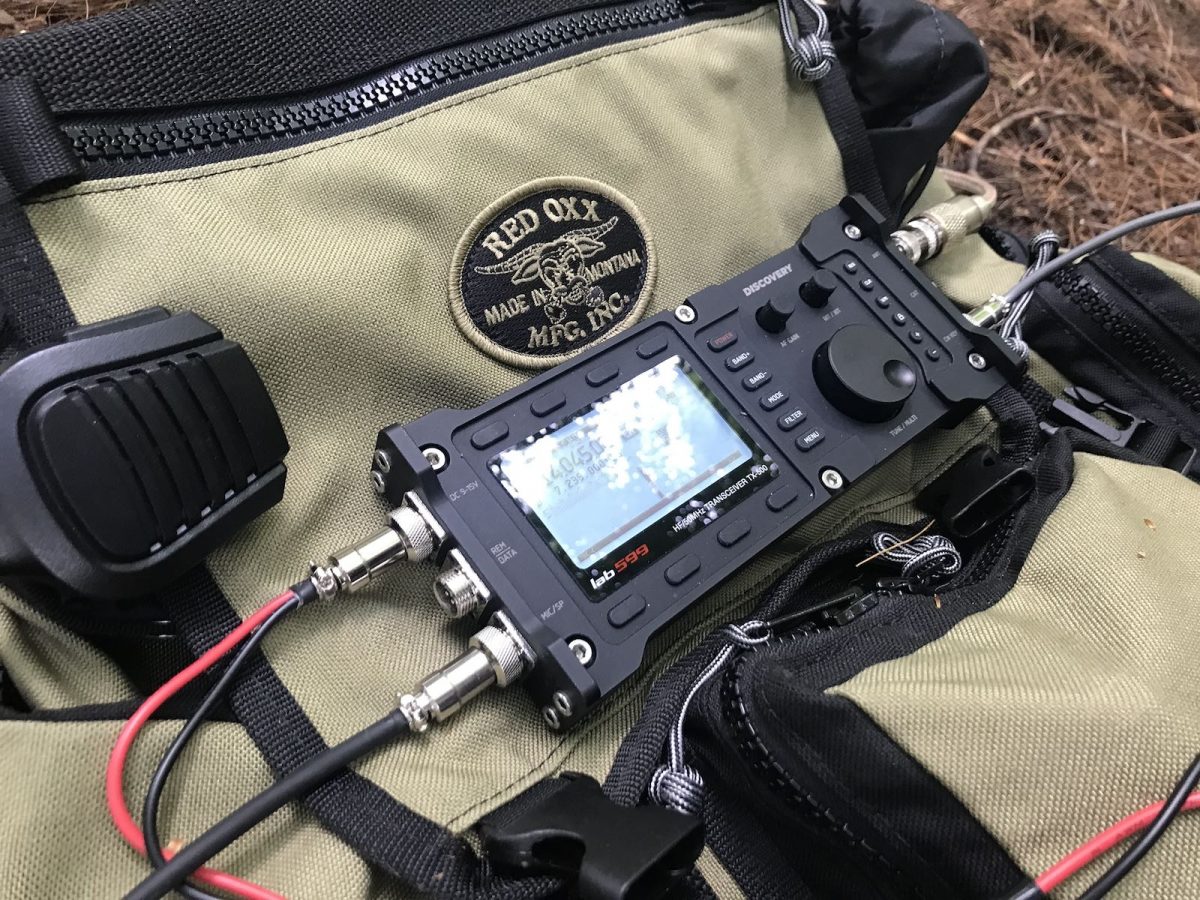
The best part was the C-Ruck made for a perfect field table! The front pocket of the pack (which contains supplies like a first aid kit, emergency tarp/sleeping back, protein bars, etc.) propped the TX-500 in place.

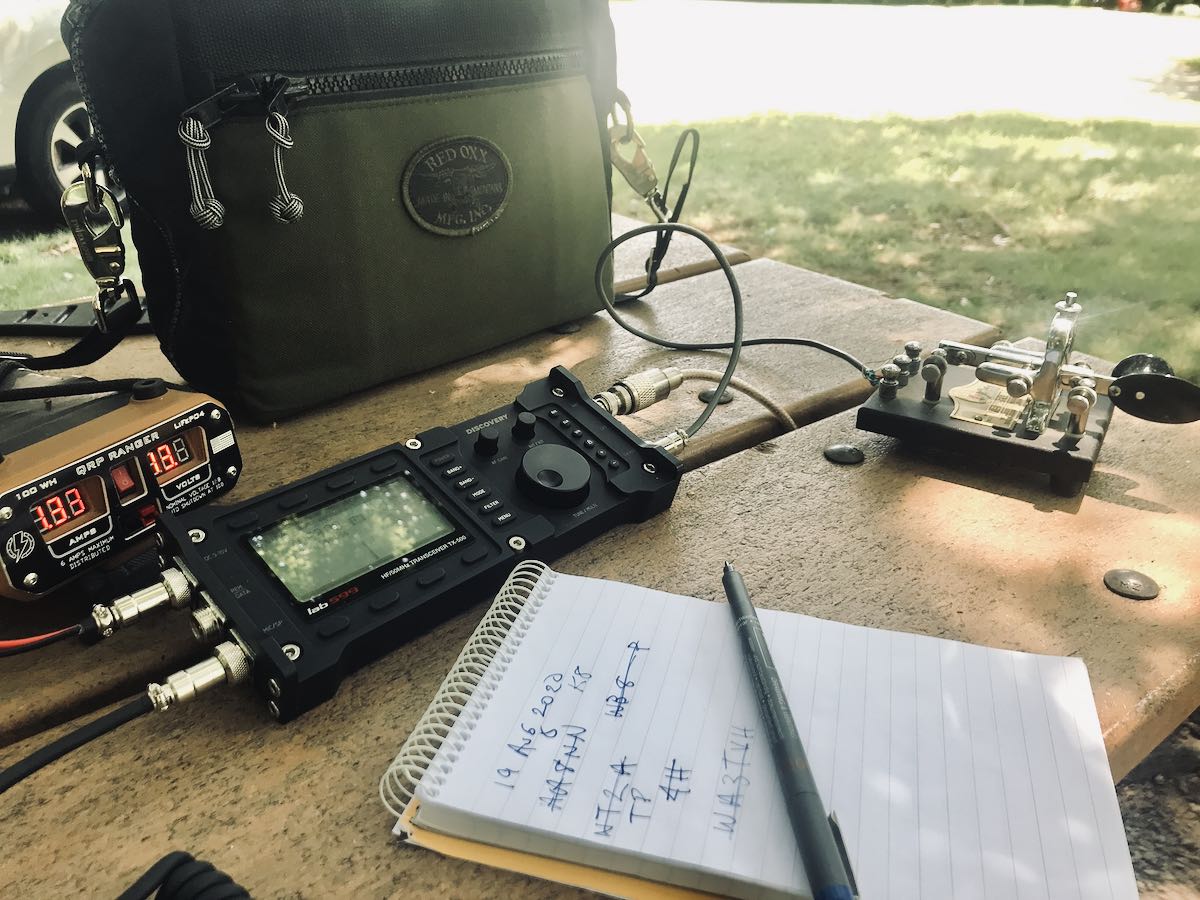
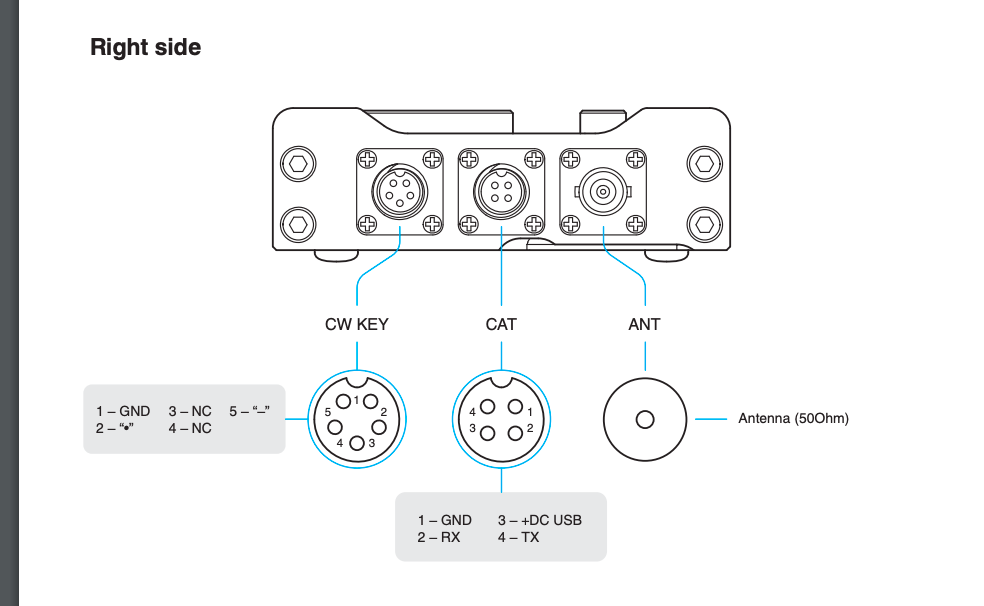
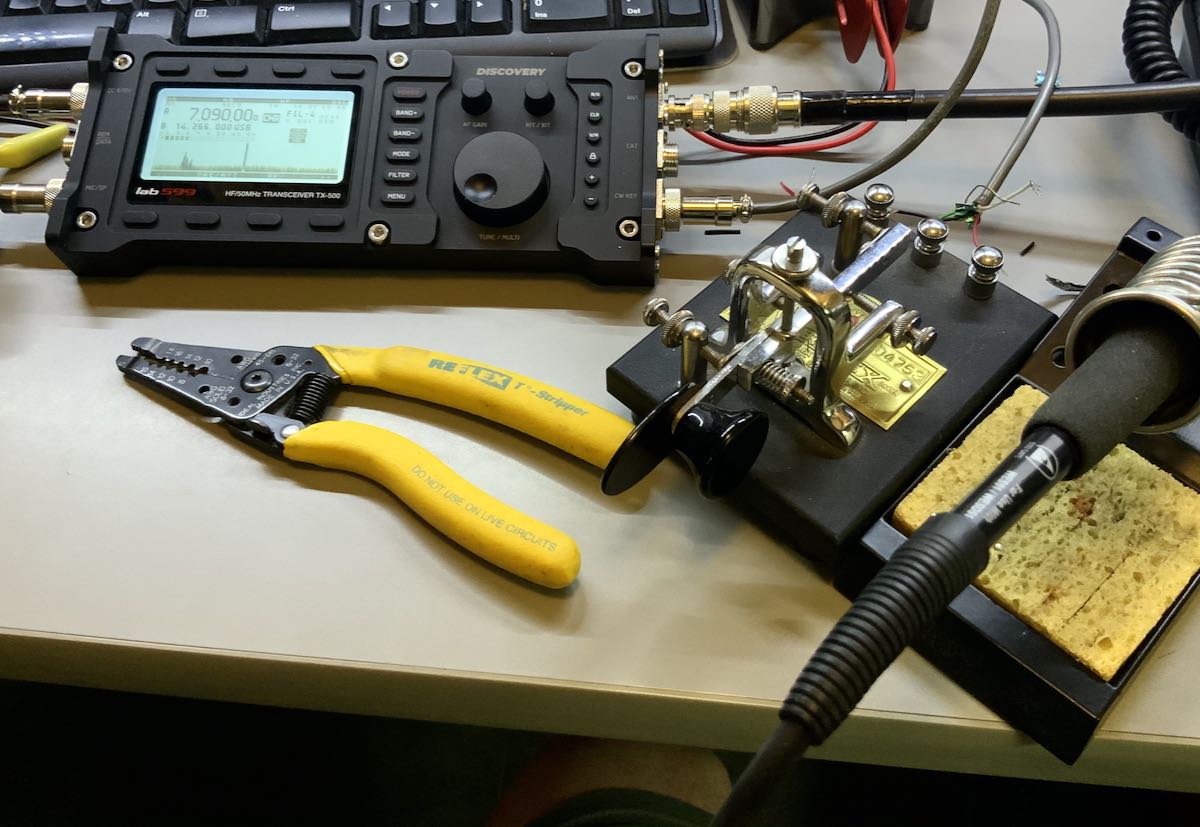
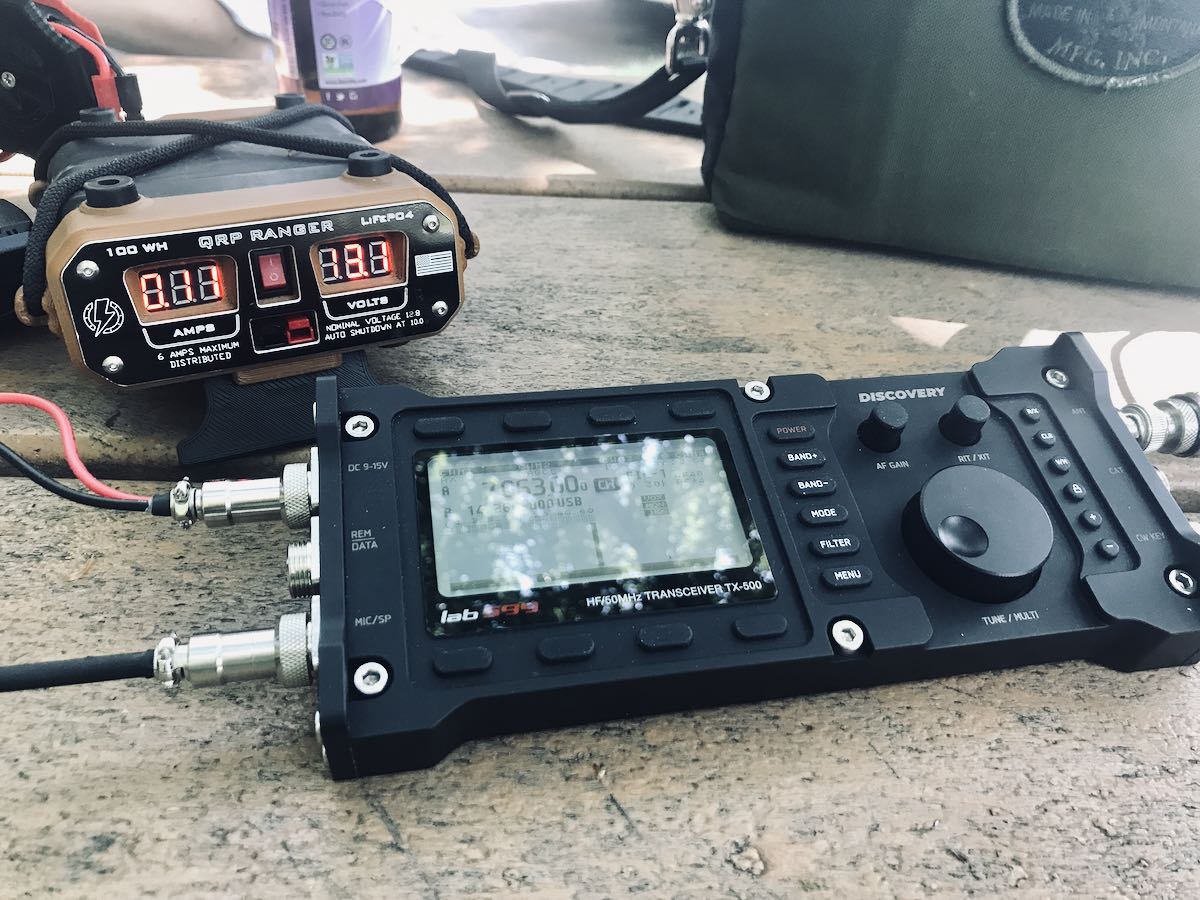
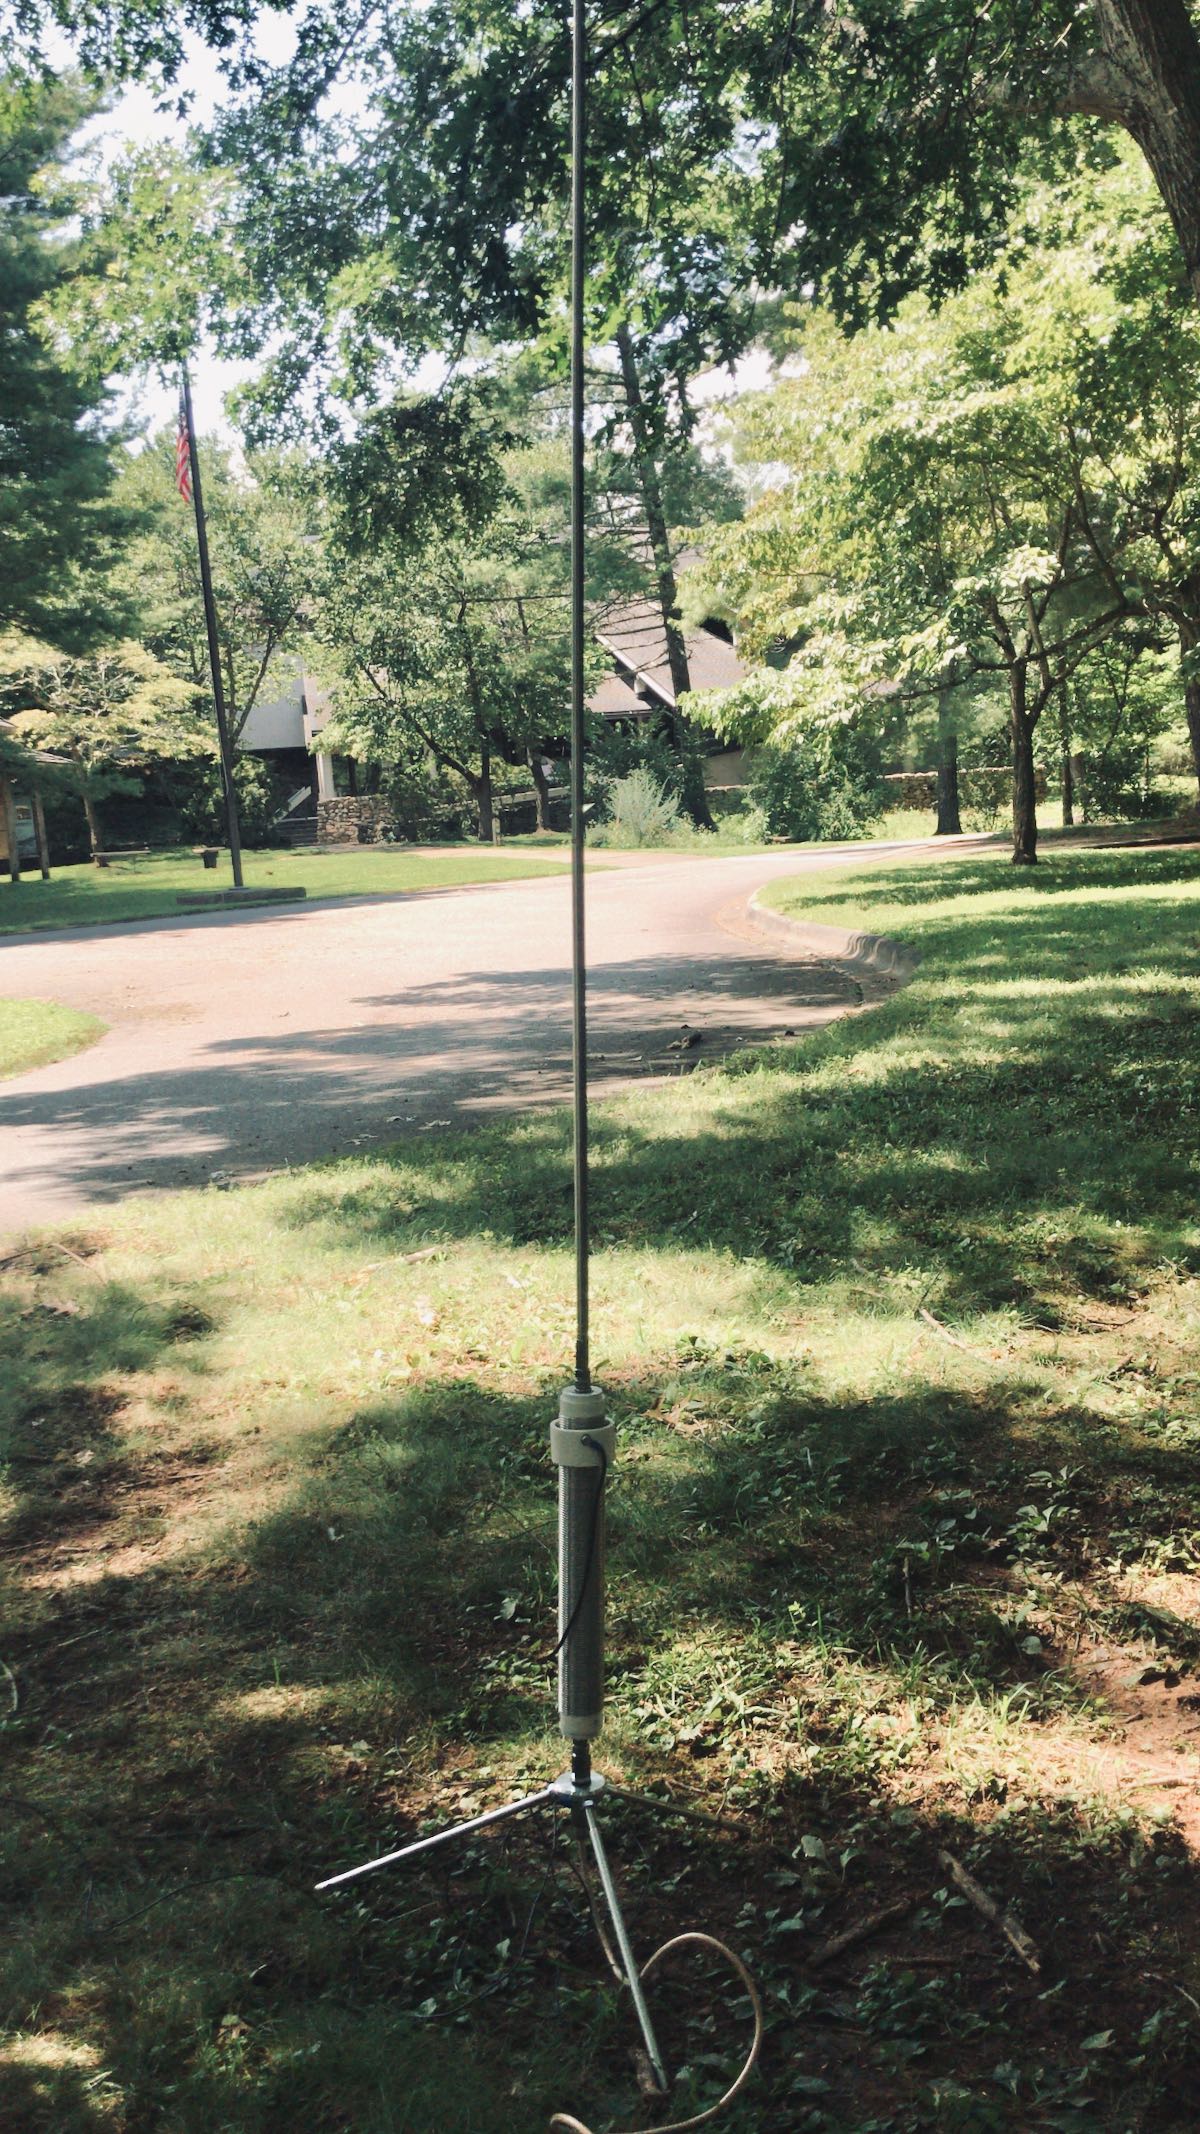
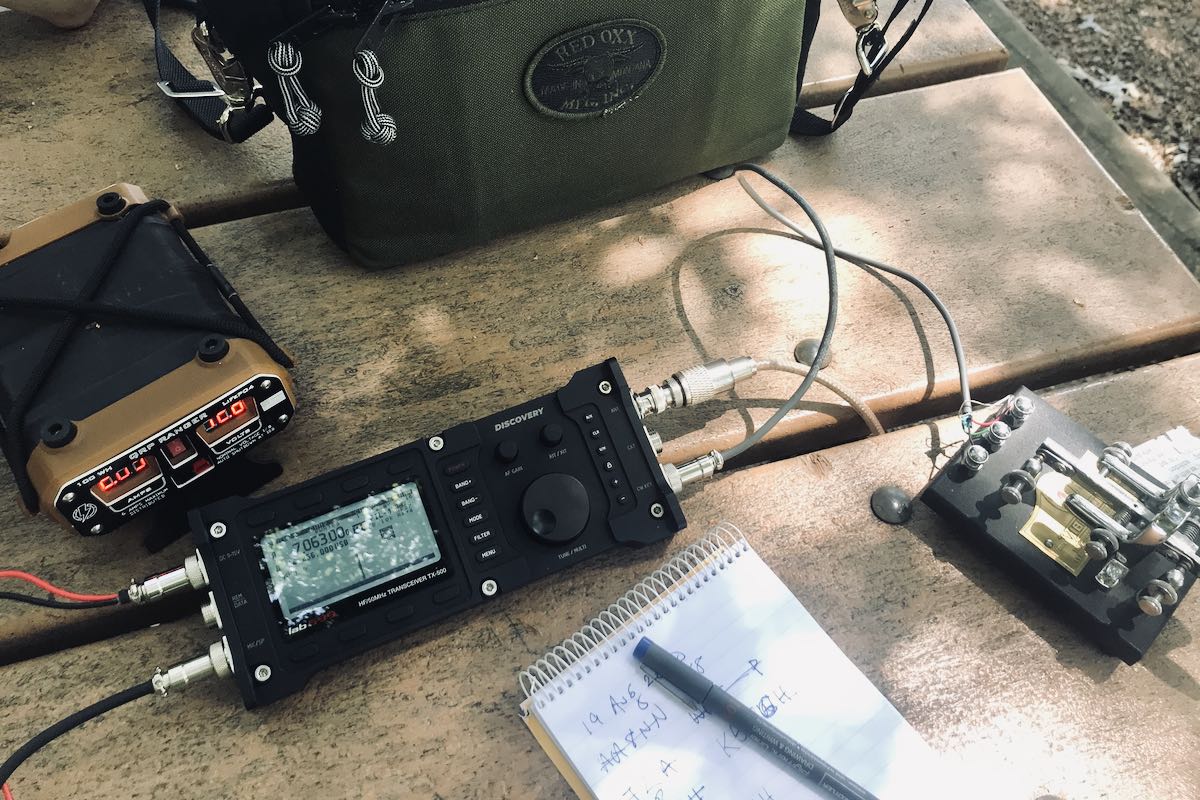
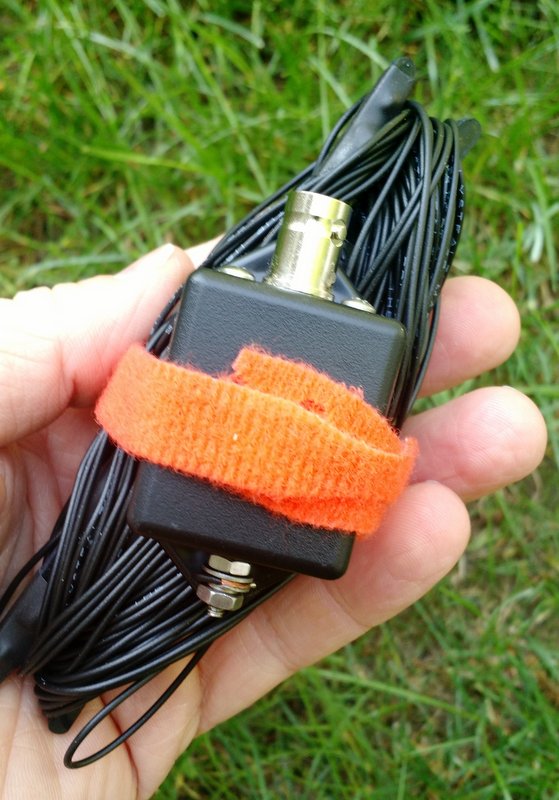
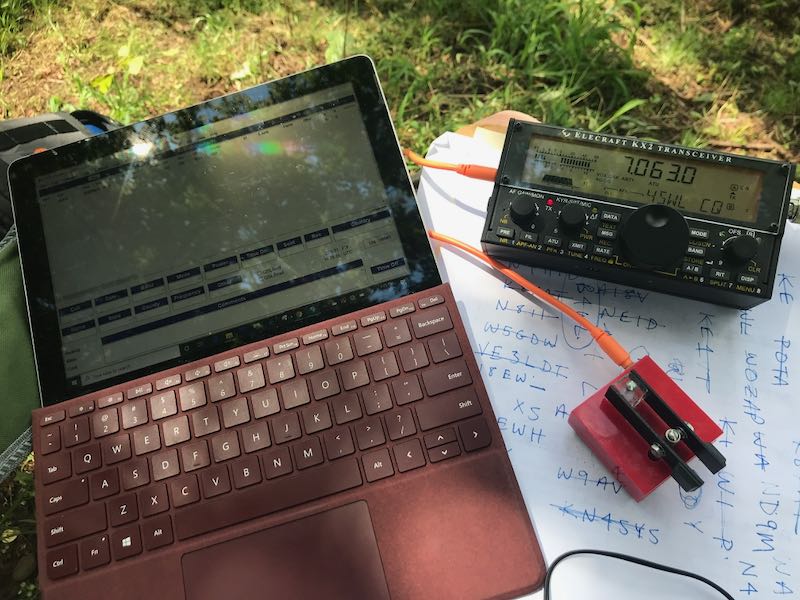
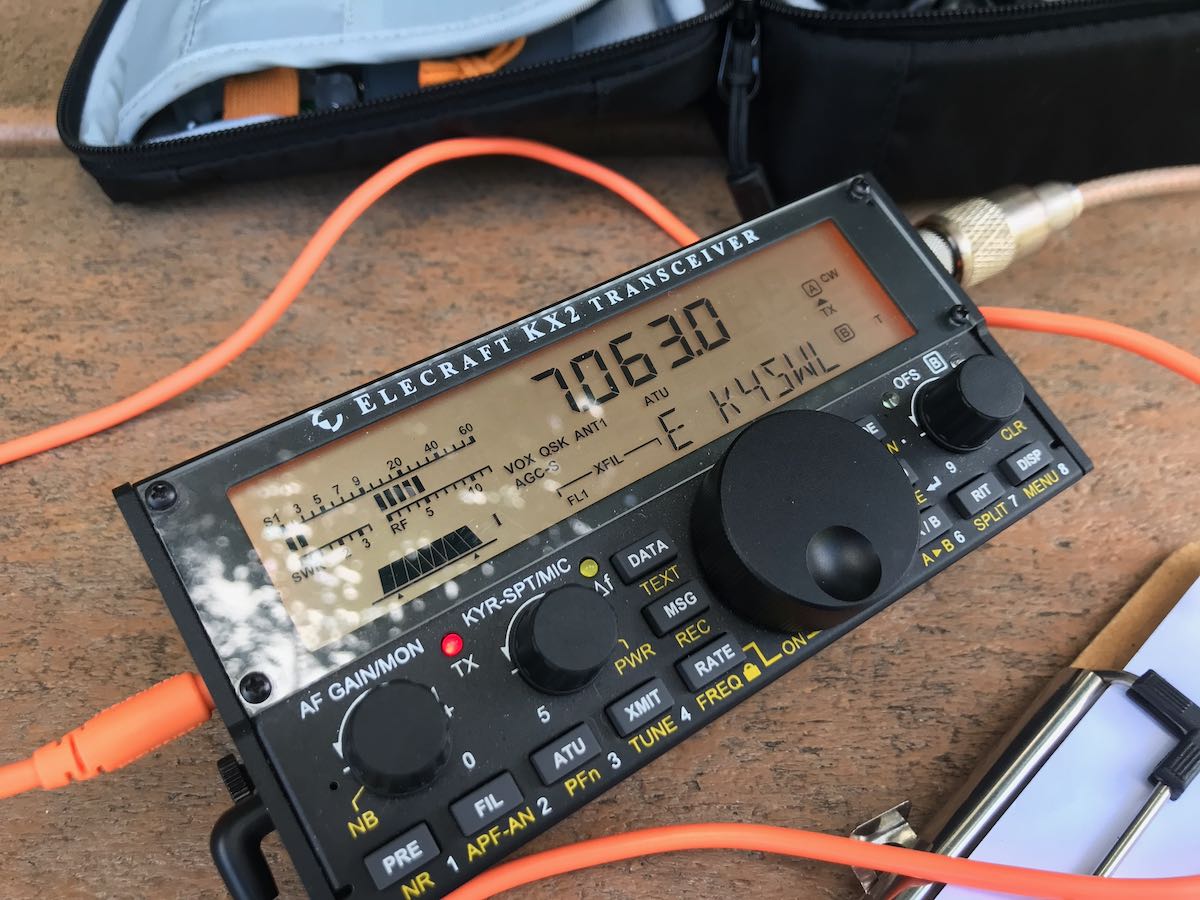
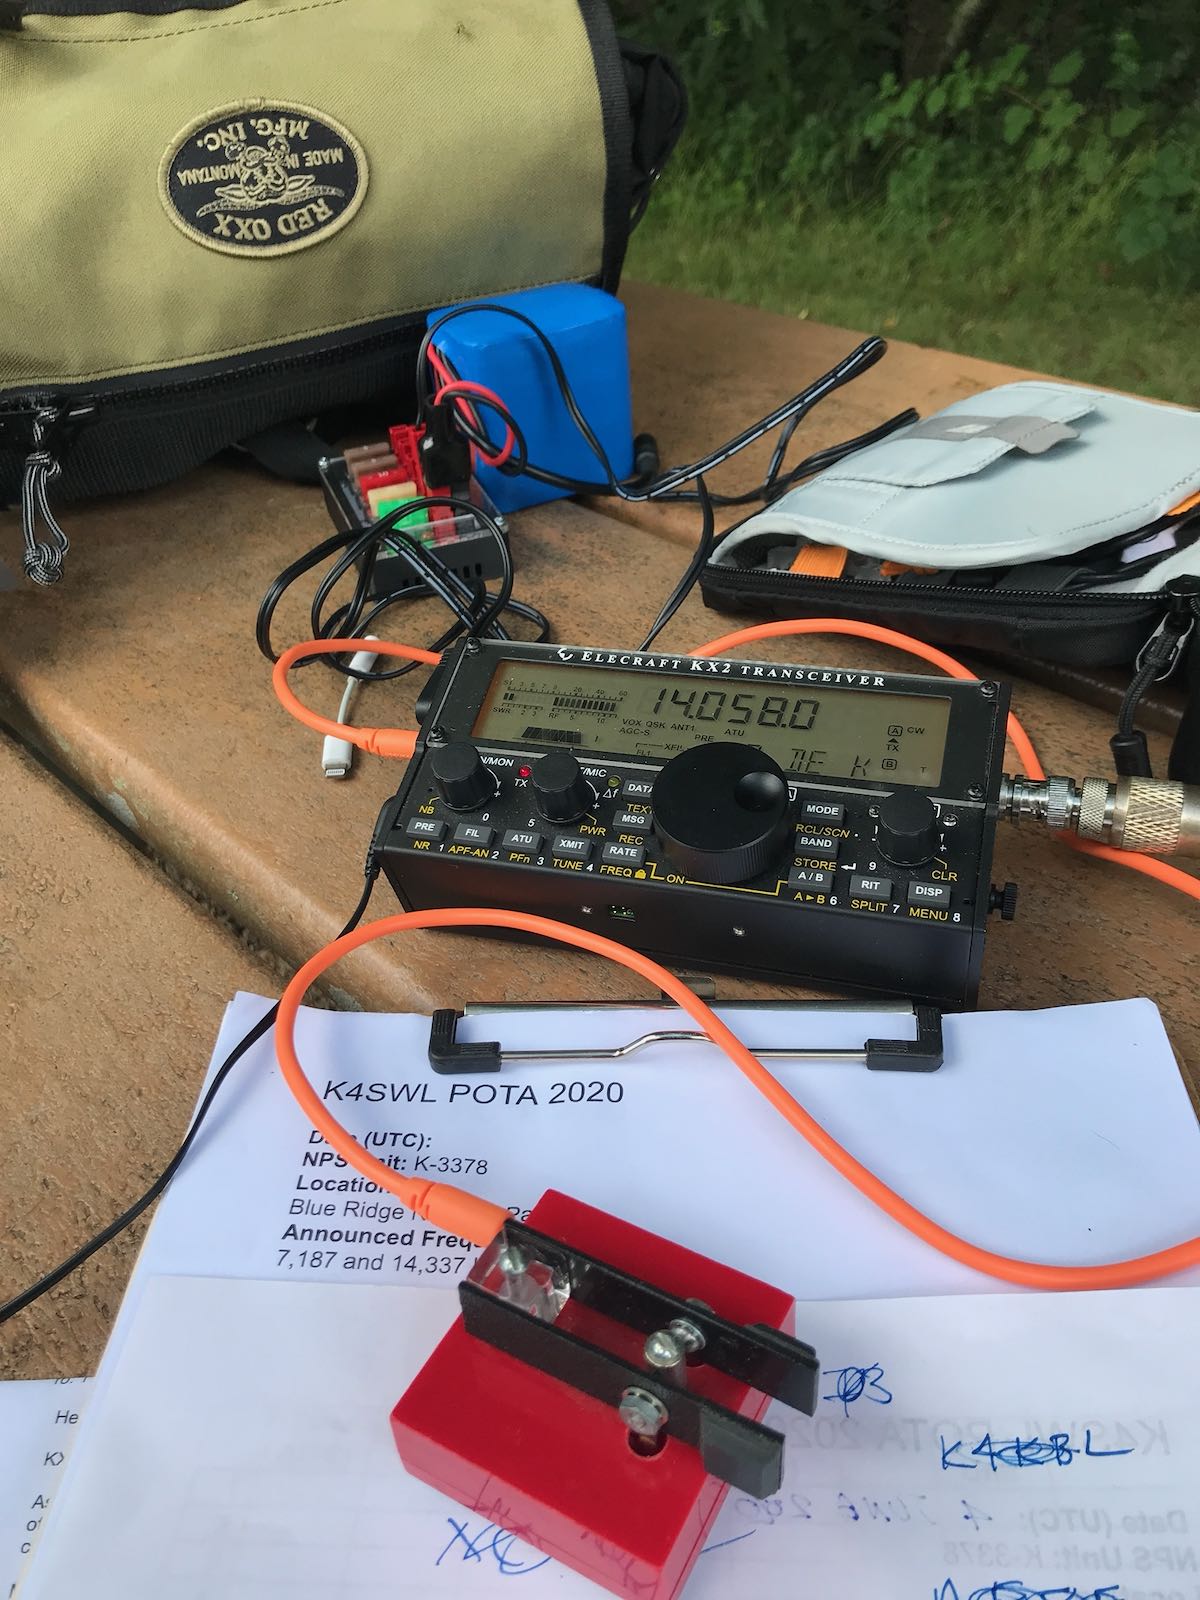
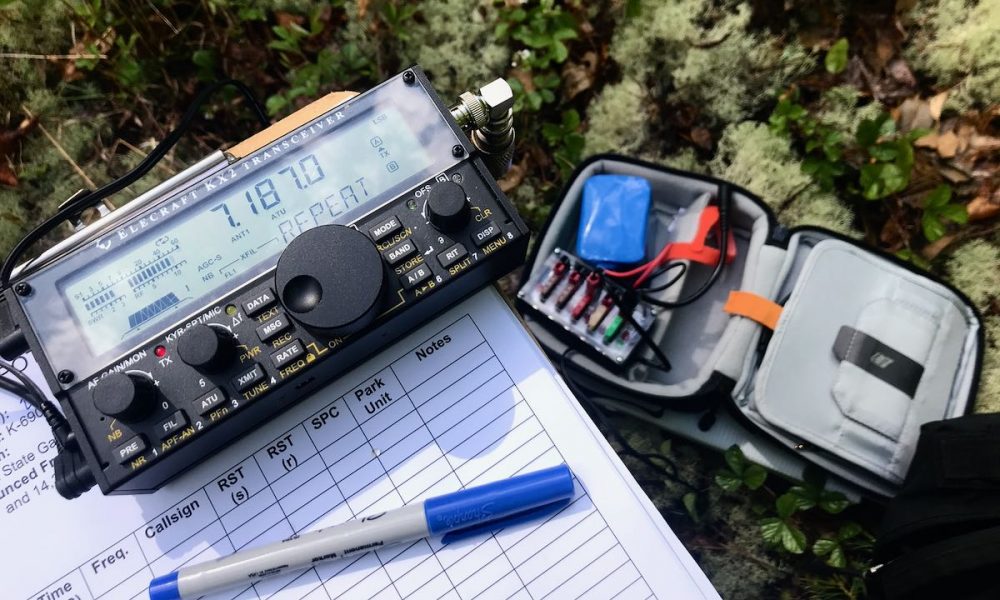
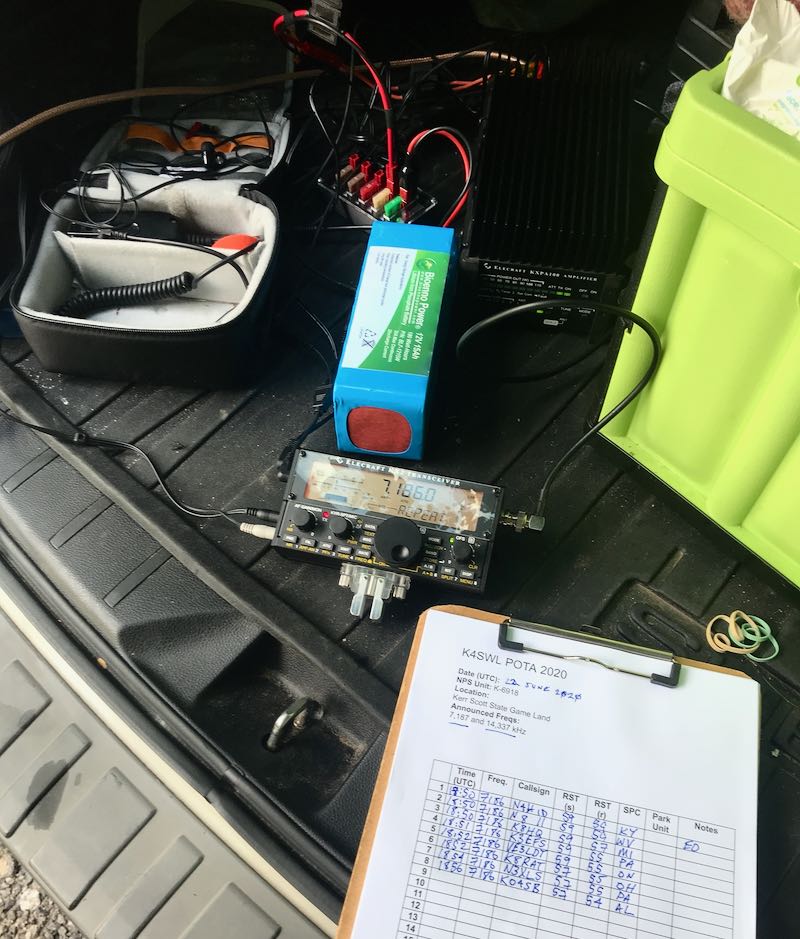
After finding a nice spot off-trail, I set up my EFT Trail-Friendly end fed antenna in short order, plugged it into the TX-500, plugged in my 6 aH Bioenno LiFePo battery, the TX-500 Speaker/Mic (which conveniently clipped o the C-Ruck top flap), and finally my homebrew CW key cable.

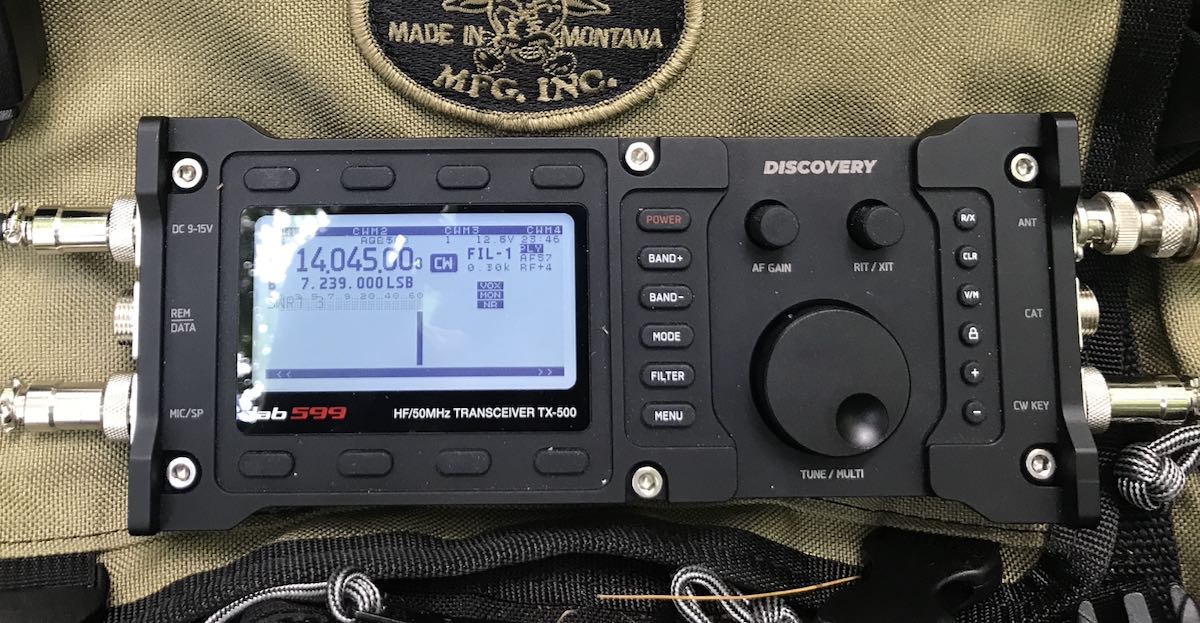
Since I had no mobile Internet service at this site–no surprise–I started the activation in CW which gave me the best opportunity to be auto-spotted by the Reverse Beacon Network (RBN) and for CW hunters to find me on the announced frequency via the POTA site.

I started calling CQ and was instantly rewarded with a string of contacts on 40 meters.

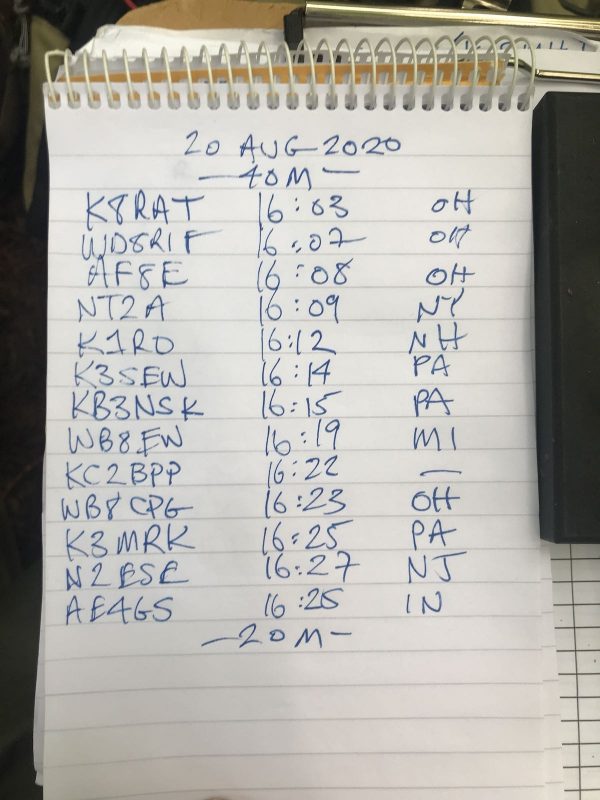
After working that small pile of hunters, I moved up to the 20 meter band, started calling CQ, and made this short video:

Shortly after making this video, I heard thunder nearby and had to pack up. I’d hoped to work a few stations on 20M in CW, then switch over to SSB and work more. I’m willing to tempt fate when it’s just rain, but I don’t play with lightening.

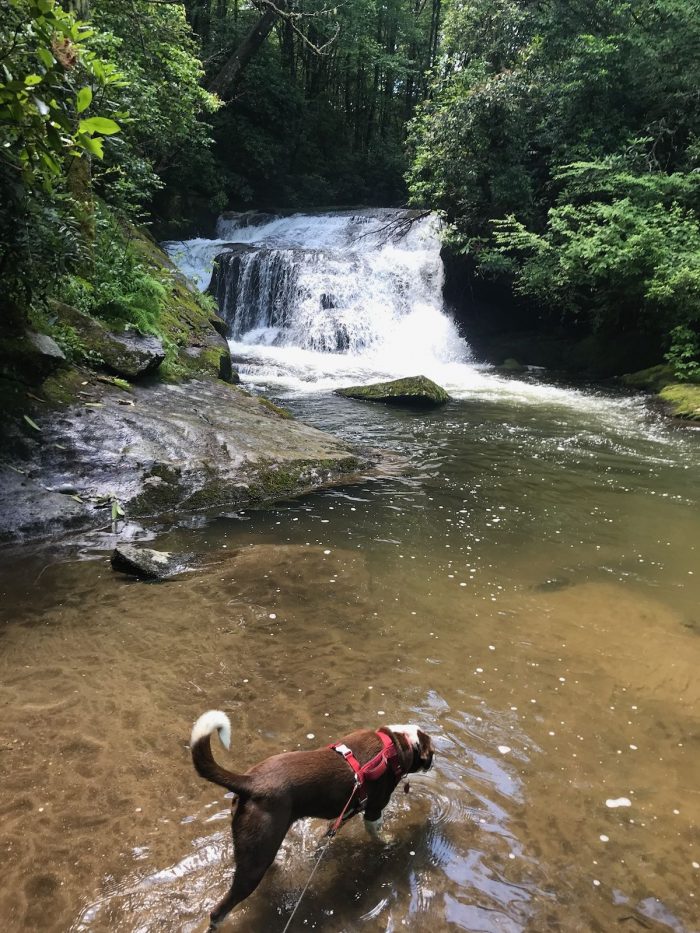
All in all, It was a very pleasant–although short–activation. Hazel and I really enjoyed the hike. Frankly both of us love any excuse to hit the trails or parks.

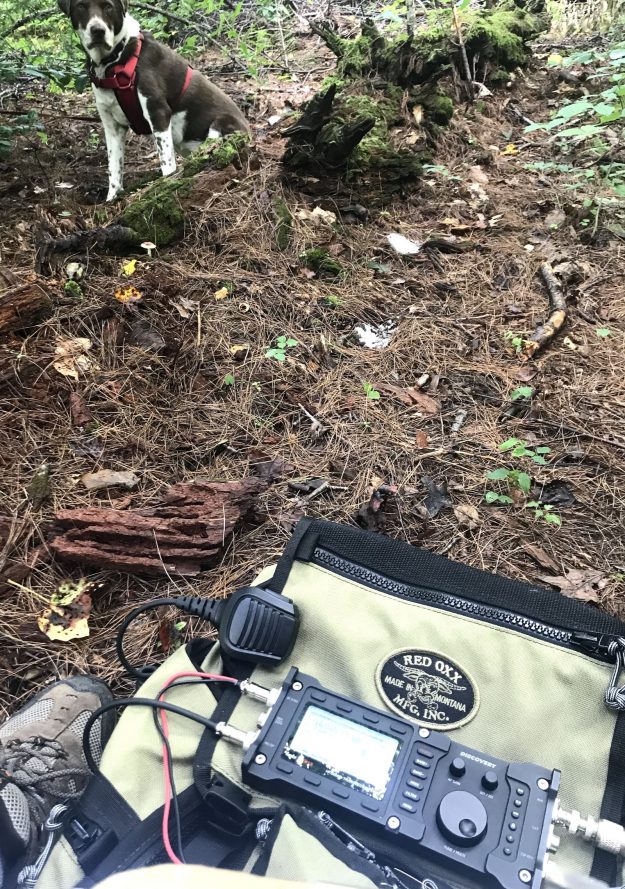
Hazel was more interested in squirrels than DX.

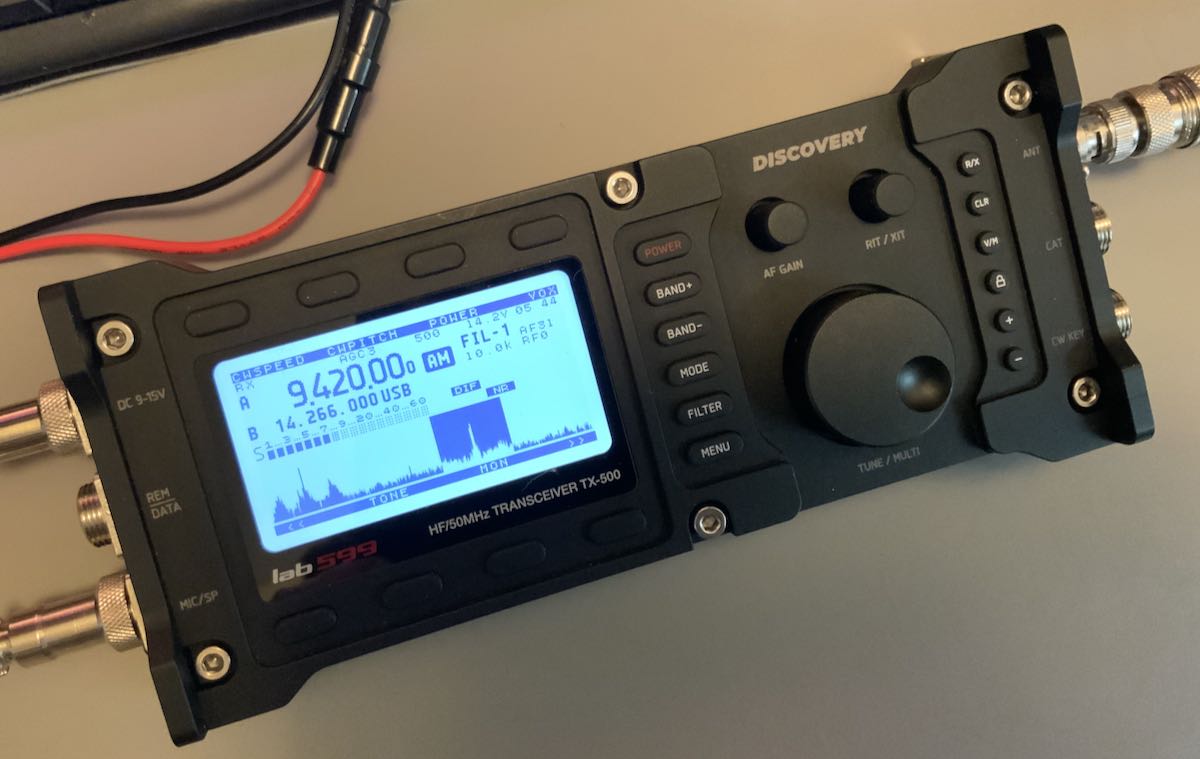
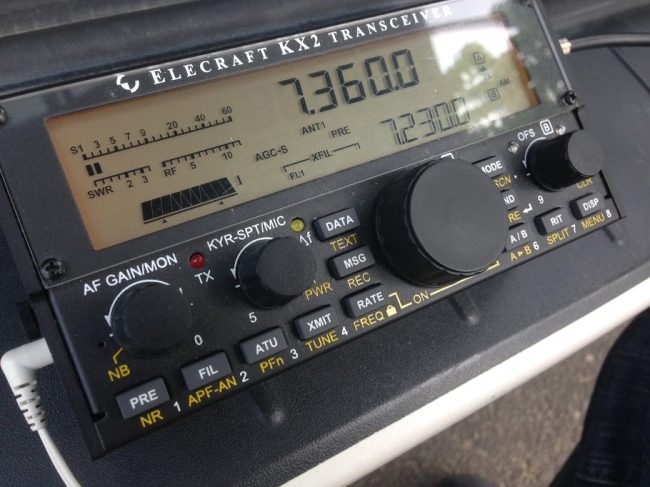
I’m finding that the TX-500 is a very sturdy and capable field radio with fantastic ergonomics.

This morning, I pulled out the scales and found that the radio, speaker/mic, and power cable all weigh in at 1 pound 9 ounces. That’s a lightweight kit by any standard.

Easy on batteries

Also, the TX-500 only seems to need about 110-120 milliamps of current drain in receive. That’s an impressive number for sure–right there with the benchmark Elecraft KX2. I’m pretty sure I could operate for hours with only my 6 aH LiFePo battery pack.

More to come

I still have the TX-500 for a week and hope to continue taking it to the field. I had planned to go out again today, but the weather forecast is dismal. Instead, I’ll chase some parks here in the shack!


Do you enjoy the SWLing Post?

Please consider supporting us via Patreon or our Coffee Fund!

Your support makes articles like this one possible. Thank you!

Spread the radio love

Let’s hit the field with the new lab599 TX-500 Discovery QRP transceiver!

Yesterday, I took delivery of a lab599 TX-500 Discovery QRP transceiver. Many thanks to Josh at Ham Radio Crash Course for shipping it here and Ham Radio Outlet for trusting me with this fine machine for the next couple of weeks.

I’ve been looking forward to this day for months–indeed, nearly a year.

A few initial impressions…

I won’t lie: the TX-500 is a gorgeous little transceiver and it’s solid.

The form factor is even a little smaller and lighter weight than I had imagined. I thought the multi-pin connectors on the side panels were the same size as, say, an XLR connector. Turns out, they’re much smaller and quite easy to use.

To put the TX-500 on the air, you’ll need to connect a minimum of three things: the power cable (terminated with Anderson Power Poles on the battery side), an antenna (BNC), and the speaker microphone. The TX-500 has no built-in speaker.

That’s all you’ll need if operating SSB. If operating CW, of course you’ll need to connect your key, but you’ll still need the speaker/mic connected for audio. That does make for quite a few things connected to the radio all at once.

The backlit display is high-contrast and easy to read indoors and in full sunlight. (And yes, that’s the Voice of Greece!)

In the spirit of full disclosure, I am not a fan of speaker microphone combos, but I’ll readily admit that the one with the TX-500 is about as good as they come. It feels durable and produces serious volume. The audio fidelity is obviously built around voice and CW, so it’s not ideal for HF broadcast listening, although it does have an external mono speaker port on the side of the mic.

If I owned this TX-500, I would order another speaker/mic 6 pin connector and build a headphone cable for broadcast listening and CW use. An easy fix.

For SSB though? The provided speaker/mic works. Indeed, it works quite well in the field because it’s so easy to hear.

There’s so much more to this radio, but I’ll save that for future posts and my full review. Let’s talk code…

Attaching a key

This morning, the first thing I did was fire up my soldering iron and make a CW paddle cable. (I hope HRO doesn’t mind–I didn’t exactly think to ask. Come to think of it, let’s just keep this between us, ok?). I soldered three wires to the supplied 5 pin connector (pins 1, 2, and 5).

To keep things simple, I hooked the TX-500 up to my Vibroplex single lever paddle which sports three terminals, making it easy to connect to the CW cable pigtail. Plus, heck, any excuse to play with the Vibroplex, right!?

CW

I was so eager to see how the TX-500 would perform on CW, that immediately after hooking up the key the first time, I checked POTA spots and worked two stations (WR8F in Ohio and NG5E in Texas) in rapid succession. Here’s a video of the exchange with NG5E:

Note that I used my iPad to make this video and, for some reason, the mic accentuated the clicking/clacking of my Vibroplex key. It’s not normally that pronounced. 🙂

CW memory keying

One of my complaints about the TX-500 when I read the final feature list a couple weeks ago was that it lacked CW memory keying. To me, this was a major negative because many POTA and SOTA activators rely on CW keyer memories to help with their logging workflow in the field. I certainly do.

lab599 must have been listening because I found out last week that they implemented CW memory keying in the most recent beta firmware update. Woo hoo!

I was sent the firmware file and this morning had no issues installing it in the TX-500 with the firmware application/tool.

After I sorted out how to record and play back the CW memories using the top row of function buttons, I was ready to hit the field!

I packed the TX-500, and headed to the Blue Ridge Parkway for a POTA activation!

CW POTA activation

I only had a brief period of time to fit in an activation today, so I kept it simple by going to the Folk Art Center which has a number of picnic tables. A park ranger once asked that I not hang an antenna in a tree at this particular site, so I used my Wolf River Coils TIA portable vertical antenna.

The Wolf River Coils TIA

Truth is, I feel like I always get more mileage out of a wire antenna than a vertical when running QRP, but I worked with what I had.

I started calling CQ on 7063 kHz and within 10 minutes worked five stations.

The CW memory keyer worked well. There is currently a two second delay before the TX-500 begins transmitting, but I’m guessing that can be fixed in a future firmware update.

Here’s a short video of the TX-500 memory keyer in action:

The TX-500 uses a relay to switch between transmit and receive, so you can hear clicking in the background. I had the recovery time set to the shortest interval which resulted in the maximum amount of clicking. Good news is the TX-500 body is so solid, the clicking is quite soft and muted–about the softest clicking I’ve ever heard in a transceiver. You could, of course, minimize relay clicks by setting the T/R delay to a higher number.

I’m very impressed with the TX-500’s low noise floor and filtering. Signals just seem to pop out of this thing.

I played radio for a while longer but was eventually chased off by a thunderstorm.

I must admit: for the first time, I wasn’t terribly worried if it started raining and the radio got a bit wet. The TX-500 is weather-resistant so can certainly cope with a sprinkle.

More to come!

I’ve set a personal goal to take the TX-500 to the field seven days in a row. I’m not entirely sure that’s realistic as I see the amount of thunderstorm activity in the forecast. Still, one must have goals, right? Plus, any excuse to hit the field and play radio!

Please comment if you have questions about the TX-500. I’ll do my best to answer as many as I can!


Do you enjoy the SWLing Post?

Please consider supporting us via Patreon or our Coffee Fund!

Your support makes articles like this one possible. Thank you!

Spread the radio love

Take the field and abandon the radio noise!

The most common complaint I hear from new SWLing Post readers is that they can’t hear stations from home on their receivers and transceivers. Nine times out of ten, it’s because their home environment is inundated with man-made electrical noises often referred to as QRM or RFI (radio frequency interference).

RFI can be debilitating. It doesn’t matter if you have a $20 portable radio or a $10,000 benchmark transceiver, noise will undermine both.

What can you do about it?

Since we like to play radio at home, we must find ways to mitigate it. A popular option is employing a good magnetic loop receive antenna (check out this article). Some readers find noise-cancelling DSP products (like those of bhi) helpful when paired with an appropriate antenna.

But the easiest way to deal with noise is to leave it behind.

Take your radio to a spot where man-made noises aren’t an issue.

Field radio

If you’ve been reading the SWLing Post for long, you’ll know how big of a fan I am of taking radios to the field–both transceivers and receivers. Not only do I love the great outdoors, but it’s the most effective way to leave RFI in the dust.

Sunday was a case in point (hence this post).

Let’s be clear: I blame Hazel…

Last week, I did a Parks on the Air (POTA) activation of Hampton Creek Cove State Natural Wildlife Area in Tennessee. It’s a beautiful area with a fantastic hiking trail (the Overmountain Victory Trail) in a relatively remote/rural area.

About 5 minutes before Hazel’s cow patty fun.

My family had a great time at the site–we enjoyed a picnic and I played radio–but Hazel (our trusty canine companion) decided to roll in a cow patty during our hike. Hazel thought it smelled wonderful. Her family? Much less so. And all five of us were staring at a two hour car ride together.

Fortunately, my wife had a bottle of bio-degradable soap we use while camping, so I washed Hazel in Hampton Creek. (Turns out, Hazel didn’t mind that nearly as much as getting washed at home in the tub.)

In all of the commotion I forgot to take my EFT Trail-Friendly antenna out of the tree. Doh!

The EFT Trail-Friendly antenna is incredibly compact and quite easy to deploy.

The EFT is my favorite field antenna for POTA activations. It works so well and is resonant on 40, 20 and 10 meters. With an ATU, I can also tune any bands in between. I’ve deployed this antenna at least 130 times in the field and it was still holding up.

I was bummed. Hampton Creek is nearly a four hour round-trip from my home. Was it worth the trip to rescue my antenna?

Fast-forward to Sunday: my amazing wife actually suggested we go back to Hampton Creek Cove on Sunday and also check out nearby Roan Mountain State Park. Would my antenna still be in the tree? Hopefully.

Whew! Still hanging out!

Fortunately, my antenna was still hanging there in the tree as I left it the week before. I was a little concerned the BNC end of the antenna may have gotten wet, but it was okay.

Mercy, mercy, so little noise…

I turned on my Elecraft KX2 and plugged in the antenna. Oddly, there was very little increase in the noise level after plugging in the antenna. That worried me–perhaps the antenna got wet after all? I visually inspected the antenna, then pressed the “tune” button on the KX2 and got a 1.4:1 SWR reading. Then I tuned around the 40 meter band and heard numerous loud stations.

What was so surprising was how quiet the band was that day (this time of year the 40M band is plagued with static crashes from thunderstorms).

Also, there were no man-made electrical noises to be heard.  This allowed my receiver to actually do its job. It was such a pleasure to operate Sunday–no listening fatigue at all. Later on, we set up at Roan Mountain State Park and did an activation there as well. Again, without any semblance of RFI.

When I’m in the field with conditions like this, I always tune around and listen to HF broadcast stations for a bit as well. It’s amazing how well weak signals pop out when the noise floor is so incredibly low.

It takes ten or so minutes to set up my POTA station in the field, but if you have a portable shortwave radio, it takes no time at all. None. Just extend the telescoping antenna and turn on the radio.

Or in the case of the Panny RF-2200 use its steerable ferrite bar antenna!

If you’re battling radio interference at home, I would encourage you to survey your local area and find a noise-free spot to play radio. It could be a park, or it could be a parking lot. It could even be a corner of your property. Simply take a portable radio outside and roam around until you find a peaceful spot with low-noise conditions. It’s the most cost-effective way to fight RFI!

Post readers: Do you have a favorite field radio spot? Do you have a favorite field radio? Please comment!

Also, check out these articles:

Spread the radio love

Any advice on compact Lipo batteries, in-ear earphones with volume control, and portable amplified speakers?

The MTR-3B 3 band transceiver is about the size of a pack of playing cards.

SWLing Post readers: I originally published the following post on QRPer.com. I thought I might share it here on the SWLing Post as well since we’ve so many readers who regularly use compact battery packs, earphones, and portable speakers. I’m looking for some advice as I build a super-compact SOTA/POTA field kit around the Mountain Topper MTR-3B. If interested in helping me sort this out, read on:


I received my Mountain Topper MTR-3B last week, and I’ve already taken it on a POTA activation.

POTA Park Hampton Creek Cove

Last weekend, I decided to break it in on a POTA “two-fer” site: Hampton Creek Cove State Natural Area (K-6246) and The Overmountain Victory Trail (K-4577) in Tennessee. Hampton Creek Cove was actually an ATNO (all time new one) so it was a trial by fire!

POTA Park Overmountain Victory Trail

In short, the MTR-3B was marvelous. I’m so impressed.

As I mentioned in a previous post, I’m building a full SOTA/POTA activation kit for the MTR-3B. I already have a kit built around my KX2 and I don’t want to “borrow” any items from it (so I’m not surprised later in the field when an item is missing).

The TalentCell Rechargeable 12V 3000mAh Lithium Ion Battery Pack is the little black box.

For this activation, I powered the MTR-3B with this inexpensive 12V battery pack a friend recommended on Amazon.com (affiliate link). The battery pack is almost identical in size to the MTR-3B and works perfectly. The battery, charger and cable all set me back a whopping $25.

I also used my Whiterook paddle (which needs new paddle arms at this point) but that will soon be replaced with a set of N0SA portable paddles I recently ordered.

Since the MTR-3B has no volume control, I used a pair of 20 year old Sennheiser earphones I bought when I lived in Munich. These have been in a drawer for ages because I now prefer using in-ear earphones with silicon earpieces for better comfort and sound isolation. But the Sennheisers have one thing none of my other earphones sport: in-line volume control.

While the earphones worked well for this activation, I’d still prefer a set of in-ear earphones with in-line volume control. Any suggestions from MTR-3B owners? Also, I’d like a compact amplified speaker with volume control to carry as an option when needed. If you can recommend one, please comment!

I’m writing an article for The Spectrum Monitor magazine about portable power later this year. I noticed that a number of MTR-3B owners swear by 11V rechargeable Lipo cells that are used in the RC and drone markets. Many have a similar compact form-factor as the common 9V battery. I understand, however, some of these cells need special chargers and equipment to balance them.

I would appreciate any and all information about these batteries.

In the meantime, Rich (N8TGQ), recently shared a pic of his Mountain Topper portable pack. Check it out:

MTR Kit

I think it’s brilliant how he’s mounted everything on a compact plastic cutting board inside the case. Rich says that what he loves about this set-up is that everything is there, ready to go–simply plug in the antenna!

Please comment or contact me if you have any suggestions as I build out a compact MTR-3B kit!

Spread the radio love

Parks On The Air: Finally biting the CW bullet!

I mentioned in a previous post that one of my Social DX goals was to activate a Parks On The Air (POTA) site in CW (Morse Code).

Mission accomplished!

Yesterday, I mustered up the nerve and drove to the Blue Ridge Parkway (site K-3378 in POTA).

My wife and kids were knee-deep in another project so I planned to go solo until my dog, Hazel, caught wind I was leaving with my radio backpack in-tow. Always ready for a hike or road trip, she jumped in the car the moment I opened the door.

I’ll admit it: I was nervous. I had the same jitters I had the first time I spoke in front of a large crowd.

In the end, though, I really had nothing to fear. The POTA community is a very kind, courteous, cohesive and supportive group of radio operators.

I picked the Blue Ridge Parkway as my first site not only because it’s so convenient to where I live, but it’s also one of the most activated parks in the POTA program. I knew a BRP activation wouldn’t attract a mad pile-up of park hunters because everyone in POTA has this one in the books already.

My full radio kit–including my KX2 transceiver, KXPA100 100W amplifier,  two antennas, Heil headset, two battery packs, chargers, and all accessories–is packed in my Red Oxx C-Ruck and always ready for action. I grabbed the full kit, although in truth I only needed the KX2, my CW paddles, coax cable and antenna.

Conditions were rough yesterday. Propagation was pretty good, but there were pop-up thunderstorm everywhere in the region, so the bands were very noisy with constant static crashes. Herein lies one of the great things about CW: you can use a filter width so narrow that it doesn’t affect you as much as it does operating phone.

Because I had limited operating time, I deployed the Wolf River Coils TIA portable antenna. It takes me all of 4 minutes to set up.

I got on 40 meters, started calling “CQ POTA” and the next thing I know I had 13 stations logged.

My nerves dissipated quickly after I logged the first couple of contacts and I was even looking forward to stations answering my call. The operators were also incredibly patient with me and two of them even followed me to higher bands and made contact there.

Hazel the dog staring at my portable logging computer.

Hazel was a bit upset this activation didn’t include a hike, so several times she insisted on “helping” with the logs as I sweated it out!

All-in-all, I logged 17 stations in one hour on three bands using about 10 watts of power.

Elecraft KX2 Whiterock CW paddles Red Oxx C-RuckI deployed my station quickly, and I packed it up quickly. A pop-up thunderstorm, once again, chased me off the air. That’s okay, though, because I was already feeling pretty chuffed about bagging my first CW activation.

If I’m being completely honest here in front of my community of radio enablers, as soon as I arrived back home, I started mentally putting together a super-compact CW activation kit built around an LnR Precision MTR3B transceiver. I’ve always wanted one of these little CW-only transceivers to carry in my EDC bag for impromptu field radio fun, but never could justify it. Until now! 🙂


Do you enjoy the SWLing Post?

Please consider supporting us via Patreon or our Coffee Fund!

Your support makes articles like this one possible. Thank you!

Spread the radio love

Upping my CW pile-up game with Morse Runner

I mentioned in a previous post that I’ve been practicing my CW (Morse Code) skills in an effort to build confidence to do a Parks On The Air (POTA) CW activation.

But how in the world do you practice handling a CW pile-up without actually going on the air–?

I’m glad you asked!

My DXing and contest friends have often touted an amazing free PC application developed by Alex Shovkoplyas (VE3NEA) called Morse Runner.

Morse Runner’s goal is simple: teach you how to manage a CW pile-up.

In short? It’s incredibly effective!

When you start a Morse Runner session, the application emulates the sound and atmosphere of the HF bands in CW mode (meaning, a narrower filter setting). It’s very convincing.

Instead of using a key to send a CQ, the Morse Runner interface emulates a contest logging system where a computer generates your CQ and sends the signal report you record for a station.

Screenshot of Morse Runner (click to enlarge)

You simply set a few parameters like your call sign, max CW speed, pitch, and bandwidth, then press the “run” button and call CQ by pressing the F1 key on your keyboard.

Within a few CQ calls, you’ll hear anywhere from one to several stations answer your CQ (depending on your settings). Your job is to then start logging those stations accurately from the pile-up. If you reply with an incorrect call, the other station will repeat their call until you correct it.

Morse runner has band condition settings you can select like: QRN, QRM, Flutter, QSB and–yes–even LIDs.

Quite often I’ll accurately reply to a weak station and they’ll send “AGN?” and I repeat their report until they copy it.

Morse Runner is so convincing that when I’m in the middle of a big pile-up, I honestly forget I’m communicating with a computer application! I get some of the same excitement and the–let’s be frank–anxiety I would get on the air during a live CW pile-up.

If you select the “LIDs” Band Conditions setting, it’ll crack you up with how accurately it portrays annoying operators who either deliberately or unintentionally try to interfere!

Here’s sample audio from a session this morning:

The screen shot above shows the settings I used for this very tame session with no large pile-ups. If you’re a seasoned CW contester, pump up the speed and the activity level then you’ll feel like you’re on the Heard Island DXpedition!

In short: Morse Runner is giving me the courage to do my first CW park activation. I highly recommend it!

Click here to check out Morse Runner and download.

Spread the radio love

Radio in the field: Two new POTA activations this weekend!

This past weekend my wife suggested that I do a Parks On The Air (POTA) activation. I think she wanted me out of the house so that she could prepare a birthday and Father’s day surprise with my daughters.

Of course, I happily obliged. My motto in French: “Profitez-en bien!” or “Make the most of it!”

Hazel (our dog) made it crystal clear she wanted to join me as well. She’s a great hiking companion and also watches out for black bears while I operate in the forest!

DuPont State Game Land (K-6902)

I decided to activate the DuPont State Game Land which was about a one hour drive from my house. Not only was it a new park for me, but it was also an ATNO (All-Time New One) for the POTA program.

I arrived onsite around 10:15 AM local and the parking lot for the forest trail heads was already packed.

It was a gorgeous day and this part of the DuPont Forest is well-known as a great mountain biking spot. I was very lucky to find a place to park.

We’re still in full social distancing mode in North Carolina due to Covid-19, so I had no desire to be anywhere near other people. Hazel and I went off-trail and hiked in about 1/4 of a mile to a nice clearing.

I set up the EFT Trail-Friendly end-fed antenna and operated with the Elecraft KX2.

I called for quite some time before I was spotted in the POTA system. After being spotted, I quickly racked up more than the required 10 contacts for the activation to be considered valid.

Although the weather was amazing and my antenna deployment was near-ideal, the bands were rough and unstable, so it was challenging.

Hazel and I packed up, moved out, and made a detour to visit a waterfall near a site I hope to activate in the near future. Here’s a short video:

Kerr Scott State Game Land (K-6918)

Since Sunday, I’ve been visiting my hometown to help my parents with a few projects.

Yesterday, I had a four hour break in the day and decided to, of course, benefit from the beautiful weather and activate another new-to-me site. (Can you tell I’m addicted to POTA?)

I picked the Kerr Scott Game Land because it was “only” a 50 minute, rather scenic, drive.

It was quite easy finding a spot to park.  Like most game lands, though, you must be prepared to go through off-road conditions. Part of the driveway into the site was incredibly muddy and definitely required at least all-wheel drive.

I set up my station in the shade and easily deployed the end-fed antenna once again.

Lesson learned

This activation of Kerr Scott Game Land taught me an invaluable lesson: if you don’t have a “spot” of your activation on the POTA site, it’s like you don’t exist.

The POTA spotting network (much like popular DX spotting networks and clusters) is simply amazing. As a POTA hunter, you open the spots page and you’ll see a list of all of the current operators, their park numbers, and frequencies where last heard.

As an activator, your number one priority when you find an available frequency and start calling CQ is to be spotted on the POTA network.

If I have good mobile phone coverage at my site, I self-spot on the network. Within a few seconds of the spot posting, I’ll typically have a pile-up of a few operators trying to reach me.

If I have cell phone service, but no data, I’ll text my good friend Mike (K8RAT) and ask him to spot me on the network.

Kerr Scott, like most game lands, however, had no mobile phone service whatsoever, so I had no way to self-spot. In fact, this particular site was a good 15 minute drive from the nearest cell phone signal.

I called CQ for 30 to 40 minutes on my announced frequency, at the announced time, but not one single op come back to me.

Since I had just driven 50 minutes to reach this site, there was no way I was going to give up so easily. I had already set up my station in the trunk/boot of my car, so I simply secured it, disconnected the antenna and tied it to a tree branch (so it wouldn’t be in the way), and drove 15 minutes to a spot where I could send a quick message to Mike.

When I got back to the Kerr Scott, I hooked up the antenna, made one call, and had a pile-up of five operators I worked in rapid succession. In fact, I had my required 10 contacts within 8 minutes.

I do wonder how some of the most adventurous POTA activators manage to post spots while in remote areas. It’s such a key component of having a successful activation, I wonder if they use a satellite phone or satellite messaging device to text a friend for help. (If you’re a POTA or SOTA activator, I’d welcome your comments here!)

At any rate, I was very pleased to hammer out an activation so effortlessly once I was spotted on the network.

The CW secret weapon

I should add here that CW activators have a secret weapon that’s incredible effective: the Reverse Beacon Network (RBN).

As a CW operator, the POTA spot system will read your callsign from the RBN as long as you have made an announcement on the POTA website in advance or have already been spotted to the POTA website. All you have to do is set up your station at the site and call CQ: the POTA system will auto-generate an accurate spot for you based on the frequency from the RBN.  It’s incredibly effective and more than enough reason for me to think I should start doing CW activations.

I can operate CW–in fact, I routinely make CW contacts in POTA and in other contests. However, I’m not quite brave enough to call CQ from a POTA site and work my way through even a modest pile-up.

I need to practice CW more, and I will!

This week, I also take delivery of my Wolf River Coils TIA antenna. I’m looking forward to having the TIA as an option when I need a self-supporting antenna that’s quick to deploy and can handle up to 100 watts when needed.

Post readers: Did you play radio in the field this weekend? I’d love your comments–especially if you simply took a receiver outdoors to enjoy some noise-free broadcast listening!


Do you enjoy the SWLing Post?

Please consider supporting us via Patreon or our Coffee Fund!

Your support makes articles like this one possible. Thank you!

Spread the radio love