Shortwave listening and everything radio including reviews, broadcasting, ham radio, field operation, DXing, maker kits, travel, emergency gear, events, and more
Many thanks to SWLing Post contributor, Neil Goldstein, who shares the following guest post which originally appeared on his blog, Fofio:
Radios I Have Known #2 The old, the new, and the Select-A-Tenna
by Neil Goldstein
L-R: Select-A-Tenna, Tivdio V-115, Sony ICF-5500W
After promising this series a year and a half ago, I finally have started digging through the collection, and will start posting about once a week. The radios, and accessories may not have anything in common (as seen in this post), but were all acquired because they were in some way interesting, or sentimental to me. Here’s the first three:
Select-A-Tenna
One of the original air-core tunable AM antennas. You just put this near the radio and peak it for reception. I was watching for one of these in good shape, and not overpriced, and they have been in and out of production over the years. This one is from a later production run as can be seen by the extended AM range (1700). Jay Allen reviewed the S.A.T by comparing the the TERK Air Core antenna not long ago here: https://radiojayallen.com/select-a-tenna-vs-terk-am-advantage/ The TERK reviewed well, and looks more modern, but I wanted the classic cheesy art-deco looking S.A.T.
Tivdio V-115
I won’t post a long, boring review here. Many have already reviewed this radio. All I can say is that if you like small, decent-sounding transistor radios, you will not be disappointed. If you are expecting top-shelf performance, and perfect ergonomics, then you you may not be happy, but for around $19 you really should be happy with this little gem. A great little radio at a great price and the most impressive thing here is the sound. The radio has a small passive radiator like the Meloson M8, and M7, and really surprises me. It can also be used as an amplified speaker, and has a micro SD slot for using it as a standalone MP3 player. Grab one!
Sony ICF-5500W
Most transistor radio collectors know this radio. It’s a classic for sure, but I have to give a little background on why I wanted one. When I was about 12 years old, I had a few analog SW portables, but nothing with direct frequency readout. Panasonic had introduced it’s series of direct-readout radios, the RF-2200, 2800, and 4800, and Sony was competing with the ICF-5900W. Dad acknowledged the quality and technology of these radios, and told me that if I saved most of the money by working for him, he may help me get one. The 2800, and 4800 were way out of reach, but one Sunday in the local paper, a department store in Kingston (Britt’s, which was Newberry’s answer to Macy’s) had the 2200 advertised for $138.88. I had been flip-flopping between the Sony and the Panasonic for weeks, but that was the clincher.
The radio is still in use. My sister in law has it. I had given it to my late brother Paul at some point and she still uses it as her main radio.
Why this Sony though? I still want a 5900W. When I saw this one come up at an auction, I recognized the shape it was in. The ICF-5500W was the companion radio to the 5900W. AM/FM and VHF Hi (with a basic, but functional squelch control). The 5500 and 5900 are a monument to Sony design at the time. The pop-up antenna (which still works flawlessly), The separate Bass, Treble, and Loudness controls, The overall quality of sound and function, all of this is an example of what Sony was producing at the time. I think their modern small electronics are a shadow of what they were capable of years ago. This thing still sounds great and performs well next to my modern DSP radios. I still would love to get a pristine 5900W but they usually fetch premium dollars. Maybe someday.
Bravo Sony, but where did you go?
More to come!!
Thanks for sharing, Neil! I, too, have the Tivdio V-115 and the Sony ICF-5900W.
The ‘5900W is a gem of a solid state receiver. It has brilliant AM broadcast band reception and rich audio. I need to open my ‘5900W and clean all of the contacts since some of the sliders are scratchy. It’ll make for a nice rainy day project!
We look forward to your next installment! Post Readers: be sure to check out Neil’s blog, Fofio!
Many thanks to SWLing Post contributor, Charlie Liberto (W4MEC) for the following guest post:
Vintage receiver frequency counter…sort of
by Charlie Liberto (W4MEC)
You probably know what a log book is, and maybe a logarithm, but do you know what a ‘Logging Scale’ was meant for? If you are a modern SWL’er, and have a receiver built in the last 40 years or so, you probably don’t have that mysterious 0 to 100 range on your dial, as shown at the top of the picture of the Hallicrafters S20-R main dial, and you may not have a dial at all, peering without question at a digital display of your received frequency.
The Logging Scale on older and vintage receivers had two functions: to let you find a station you might be looking for, when you knew the frequency it would be on, and to determine the frequency of a station, but you had to have known references. How to do that on those old scales that may have had 50 kHz or even 500 kHz hash marks between whole Megahertz numbers, or in that era, KC or MC numbers? The process is fairly straight forward, but did require you to know the operating frequency of at least 2 stations on the band of interest, and the closer they were to the mystery frequency, the better.
Let’s say you are looking for WLMN that is supposed to begin its operation day on 6025 kHz. and your receiver has a mark every 250 kHz between 5 and 7 MHz, that’s pretty iffy as to setting the dial. Now, you know that station WABC is on 5500 kHz, and station GXYZ is on 6525 kHz, so, tuning in WABC you note what number the pointer on the dial is over on the logging scale, maybe it is 40. Then you tune to GXYZ and you find it on 70 on the logging scale. The known difference in frequency between WABC at 5500 kHz and GXYZ at 6525 is 1025 kHz, and the logging scale number difference is 40 to 70 or 30 divisions. Take the 1025 kHz separating your two known stations, divided by the 30 logging scale divisions and you get 34.167 kHz per division. Some more math, the station you are looking for, WLMN is on 6025 kHz, which is 525 kHz away from WABC at 5500 kHz., divide 525 kHz by the logging scale frequency versus division number of 34.167 kHz which equals approximately 16. Take that 16, add it to WABC logging scale number of 40, and you should expect to hear WLMN on logging scale 56 on the dial.
Of course you can flip this process around. If you heard WLMN, but did not know it’s frequency, the same procedure worked backwards to interpolate the logging scale 56 into kHz, added to the WABC frequency/log number, or subtracted from GXYZ numbers, and you would figure out WLMN was on 6025 kHz.
What did this process do? It ‘calibrated’ your receiver dial to known checkpoints by using known frequencies of stations, such that you had a better idea of where you were frequency wise, but it did have it’s limitations. Older receiver dials usually had the lower frequencies divisions of a band close together, and as you tuned to higher frequencies on the same band, hash marks for frequencies got farther apart, while the logging scale stayed linear. This was because builders used the simpler straight line capacitance variable capacitor for tuning, instead of the straightline wavelength or straight line frequency style which would have made the dial more linear. If you used two stations on the low end to set a logging scale reference, chances are it will be quite a bit off in the frequency versus logging scale number on the high end of the dial. So, if you could find two stations that bracketed the one you were examining, that would assure the most accuracy.
After all that, you are probably saying thank God and a lot of engineers for a digital readout.
Thank you, Charlie, for an excellent tutorial and example of using dial logging. I’ve had a number of vintage radios over the years with logging scales and it took some digging to discover how they worked. While digital radios make the process as easy as pie, vintage radios are worth the extra effort!
Many thanks to SWLing Post contributor, Chris Smolinski, who shares the following guest post. Note that this post has also been published on Chris’ excellent blog, Radiohobbyist.org:
Listening To Pirate Radio Stations from South America
by Chris Smolinski
Looking for a new DX challenge? In addition to shortwave pirate stations in the USA, and Europe (Europirates as we call them), there’s a relatively new group of pirate radio stations being heard in North America, those from South America.
It’s really only been the previous year that we’ve confirmed that there’s a significant number of pirate radio stations in South America that can be received here. Radio Pirana has been known for some time, and I believe thee were a few reports of it, and at least one other station that I cannot remember the name of, but that’s about it. For years there have been logs of very weak UNID stations heard on the 43 meter band (6800-7000 kHz), presumed to be pirates of some sort, and it is possible some of these were South American pirates.
Most of these stations use homemade transmitters, often of the “Lulu” design, with a IRF510 or similar MOSET RF final stage. That means they are generally in the 15 or 20 watt carrier range, although some are higher power. That also means that unless otherwise noted, all of these stations use AM mode, and in general the frequency is highly variable, easily varying 100 Hz or more from night to night, or even during transmissions.
One important caveat: Since most of these stations use relatively low power, and due to the long distances involved, signal levels are generally weak, although occasionally when conditions are excellent (especially if there’s grayline propagation), they can put in stronger signals. I am fortunate to live in a rural area with relatively low noise/RFI levels, and have several high end receivers and large antennas. My primary setup for catching these stations is a netSDR receiver and a 670 foot Sky Loop antenna. You’re going to want to use the best receiver and antenna you can for catching these stations, you’re not likely to have good (or any) results with a portable SW radio, RTL dongle, or small/indoor antenna. Also, I record the entire 43 meter band nightly on my netSDR, and then go through the recordings each morning. This lets me catch stations that may only appear for a brief period of time. That said, you can still hear them with a reasonable HF setup, although it may take persistence, checking each night, until conditions permit reception.
It’s well worth checking the Latin American Pirate logging forum on the HF Undergroundwebsite, to see what is presently being heard. The HF Underground is the best way to keep up to date with the hobbyist radio scene in general, with dedicated forums for North American Pirates, Europirates, and of course radio in general.
And for those of you into collecting QSLs – many of these stations are reliable QSLers!
In general, the easiest station to hear is Lupo Radio from Argentina. It is on the air most evenings on 6973 kHz in AM mode. At least at my location, it puts in the strongest and most reliable signal. Usually in the SIO 222 to 333 range, sometimes stronger. There are frequent IDs. I use Lupo Radio as a “beacon” to gauge how good conditions are to South America on 43 meters.
Another station that is often on the air is RCW – Radio Compañía Worldwide from Chile. They use 6925.13 kHz, and their carrier is more stable and usually on this offset frequency, which makes it easier to determine that it’s likely you’re hearing them vs a US pirate station.
New to the scene is Radio Marcopolo on 6991 kHz.
Also new to the scene is an as yet UNID pirate from South America on 6934.9 kHz. I have received them for several weeks now in the local evenings, usually starting around the 2300-0300 UTC window. They put in a respectable signal (relatively speaking), strong enough for Shazam to ID songs. They have frequent breaks in their transmission, with the carrier often going off and on many times during a broadcast. They also occasionally transmit audio test tones, and sometimes seem to relay audio from licensed stations in Argentina such as Radio El Mundo. This could be someone testing a new transmitter? A new mystery to solve!
Radio Dontri is somewhat unique in that they use USB mode, on 6955 kHz. They also send SSTV, which is sometimes easier to receive than music, and helps to verify that you’re actually hearing them, vs a US pirate on 6955. They tend to drift a lot, however, which can make decoding the SSTV transmissions challenging.
Outside the 43 meter band, there is Rádio Casa 8000 kHz. I have only received weak carriers from this station, although partly that may be because I do not frequently check for it, and it does not turn up on my overnight SDR recordings.
Radio Triunfal Evangélica is other station outside of the 43 meter band, they use the nominal frequency of 5825 kHz, often closer to 5824.9 kHz. Again I have only received a carrier from them. As the name implies, they are a religious station, affiliated with a church.
Now that we’ve talked about the pirate stations from South America, we should probably mention things you are likely to hear that are not pirates. Specifically, what we call Peskies (or Pesky as the singular), short for pescadores, the Spanish word for fishermen. Peskies generally use LSB mode, and can be heard on many frequencies in the 43 meter band, engaging in QSOs. Years ago, pirate listeners started to call these stations pescadores, since some of them were indeed fishermen, and could be heard discussing related matters. It might be better to think of most of them as freebanders/outbanders, much in the tradition of those transmitting on 11 meters. There’s a logging forum on the HFU dedicated to Peskies, if you’re interesting in learning more about them.
Occasionally they use AM mode. We’ve logged several on 6965 kHz (+/- of course), that at first were thought to be pirates. But they never transmitted music, and after some discussions with DXers in South America, it was determined that they were more properly considered peskies.
Many thanks, Chris, for sharing this excellent guest post with us! Until the Winter SWL Fest last week, I had no idea South American pirates were on the rise–what a great opportunity to catch interesting DX!
Many thanks to SWLing Post contributor, Sandipan Basu Mallick (VU3JXD), who shares the following guest post:
Dear Thomas,
On the even of World radio Day, 10 DXers of Kolkata, India gathered while the radio enthusiast around the world are coping with bad news for the hobby.
In this regard, please find a guest post written by fellow DXer and Amateur Radio Operator Dr Supratik Sanatani (VU2IFB):
Why are Kolkata DXers upbeat on World Radio Day 2018?
DXers gathers to celebrate World Radio Day 2018 at Kolkata Maidan
A small group of ten DXers gathered in a Kolkata Maidan tent on the eve of World Radio Day 2018. They were very upbeat while worldwide radio enthusiasts have to cope up with bad news for the hobby. In the last few years stations after stations had closed down and so had iconic radio clubs like Danish Short Wave Club and periodicals like Monitoring Times. Broadcasting mega corporations like VOA and DW have reduced their presence in the airwaves to a faint whisper compared to their former roar.
Why are the Kolkata DXers upbeat in 2018? AIR Kolkata which was the first transmitter of the AIR network beginning from 1926 as erstwhile Indian Broadcasting Corporation had gone nearly silent few years ago with woes from aging valve tube transmitters. Then there was the assault of the tropical storm Aila which had brought down one of its mw antenna towers. The situation is entirely different today.
There are brand new solid state DRM capable mw transmitters in place which are blaring out Kolkata A 657 kHz and Kolkata B 1008 kHz signals at signal levels which dare to compete with the FM stations. Rightfully the two iconic stations have been rechristened “Gitanjali” for Kolkata A and “Sanchaita” for Kolkata B both named after famous works of the noble prize winning prolific author poet composer and painter Rabindra Nath Tagore. In the outskirts of the city AIR Maitri 594 kHz 1000kw which is a external service Bengali broadcast to neighbouring Bangladesh proudly blares its signals across the wave. AIR Maitri was made possible by the personal enthusiasm of the former Chairman of Prasar Bharati, the holding corporation of All India Radio and Doordarshan TV, Mr Jwahar Sircar who hails from the city.
In this meeting there were veteran DXers such as Babul Gupta and Sudipto Ghosh who have had their first QSL in the late 60s to the early 70s, sitting side by side with Abhijit Dutta who started MW listening in Siliguri. When he moved to Kolkata Abhijit came across Kallol Nath who started DXing only a couple of years ago. Kallol introduced Abhijit to the joy of shortwave listening and that is why he was there at the meet. Kallol in this meet narrated how his Tecsun PL660 was bugged by technical glitches and had to be serviced twice in the warranty period by shipping it all the way to the vendor at Singapore. With his receiver Kallol, from his high rise apartment in the heart of Kolkata has to still climb to its roof for better reception. That is when the veterans lamented the rise of manmade radio frequency interference (RFI) from the array of household and community sources which bug the Short Wave DXers today. The present sunspot low is also a big obstacle before the new entrants to the hobby.
While the conventional radio stations are dwindling, the profile of SW and MW DXer is also changing. Debanjan Chakrabarti is a case in point. Starting from a conventional DXer he is now an avid radio collector. He is also a licenced radio amateur (VU3DCH) .His collection sports the iconic radio sets such as the Yaseu FRG 7 which was the apple of the DXers eye in the early eighties. A visit to Debanjans shack is like a trip to the museum of DXing from early 80s. Now a licenced radio amateur Debanjan is presently toying with the idea of adding a hybrid transeceiver to his collection. This would be a radio set sporting both tubes and transistors,
A distinct shift in profile of the Kolkata DXer is that many of them have either acquired or are in the process of getting their radio amateurs licence. Sandipan Basu Mallick (VU3JXD) is one such who was one of the organisers of this small gathering. The meet was graciously hosted by the veteran technical DXer Sudipto Ghosh (VU2UT). Sandipan is active in Short Wave DXing over 2 decades and recently local VHF bands and Hamsphere as well.
Babul Gupta after his years of Short Wave DXing is active in Hamsphere. I owe Babul Gupta (VU3ZBG) a QSL because he received my only transmission from my BITX made from my (VU2IFB) location at South of Kolkata to his place some 30 km away at North 24 Parganas. Most of the former SWL only Dxers have their call signs even though the activity level is abysmally low ranging from a a couple of contacts to no
contact.
The icing in the cake of this meet was the presence of the veteran homebrew radio amateur Atanu Dasgupta (VU2ATN). His conversation with the group was indeed a technical orientation programme for the semi advanced to the advanced DXer. His emphasis was focussing on basics and keeping the target small – “start with a small project like power supply or a grid dip meter” was his advice to the group. His brief presentation on the powerful history of innovative home brewing in amateur radio in this city from Anadi Ganguly (VU2GE) to Ganesh Banerjee (VU2LL) to Amal Piplai (VU2AT) was an eye-opener for most in this group. Atanau Dasguptas suggestion to those planning for the amateur licence was to aim for the general category because the restrictive category is too restrictive and does not permit Morse. His suggestions and narrative were so useful that that they have been documented in a separate blog page.
An invitee, though not a DXer himself, who could not make to the meet due to previous commitment was Bamaprasad Mukherjee. Mr Mukherjee is a writer for children’s magazines in Bengali. One of his articles which in the late nineties appeared in Bengali children’s monthly “Anandamela” was extremely popular and introduced many a DXers from the city who are very active today. Mr Mukherjee is planning to write another feature on the hobby of DXing, which surely will bring in more enthusiasts to this hobby.
The Kolkata DXers have much to cheer on World Radio Day 2018
Compiled by Dr Supratik Sanatani (VU2IFB) on World Radio Day, February 13, 2018
Many thanks to SWLing Post contributor, Mario Filippi (N2HUN), who shares the following guest post:
Battery Testers; Don’t Get Caught Without One!
by Mario Filippi, N2HUN
(All photos by author)
Ever consider what life today would be like without the humble dry cell battery? Old timers know the term “dry cell” as opposed to “wet cell.” The dry cell is your garden variety battery for sale composed of a semi-dry composite or paste of chemicals designed to make electrons flow when the circuit is complete, such as in flashlights, radios, remotes, watches, etc. “Wet cells” on the other hand have fluids, such as sulfuric acid that work in conjunction with lead plates. But let’s stay with dry cells for now. Walk into any house and you’ll find some form of battery powering a plethora of devices that contribute to the quality of daily life. In short, life without the humble battery would be unfathomable.
Electronic Menagerie: Radios, Timepieces, Flashlights, Remotes, Test equipment, Mouse.
Batteries, like humans, unfortunately expire due to age or use. True, they toil tirelessly while out of sight and mind, hidden behind plastic compartment panels somewhere in the bowels of a device and for the most part are ignored or taken for granted. That is until the device they are powering ceases to function. We’ve all been there and done that countless times in our lives with an array of consumer products. Most instances of battery failure tend to occur at the most inconvenient times, that is when the device they are powering is needed most (a corollary of Murphy’s Law hi hi). A good example is the toolbox flashlight. It can sit amongst the tools quietly and ready to go (at least in our minds) until we switch it on while working in some dark, cramped location. Or late at night when under the covers and the bedside shortwave radio starts spewing out distorted audio. To boot, the radio’s convenient dial light is too weak to determine where you are in the shortwave spectrum.
Motley Crew of Cells in Author’s Armamentarium Awaiting Call to Duty.
Well, all is not lost my fellow hobbyists; it is time to do some cell (dry cell that is) soul searching and plan for future failures. I propose a useful acquisition for the home, shack, Go-Bag (or what have you) that won’t break the bank; a simple battery tester that’ll be the end to your power problems.
At this QTH an AMPROBE BAT-200 was purchased a few years back from Amazon and has proved its worth and utility many times over. This simple tool, which ironically needs no batteries, will test many of the common batteries around the shack and home such as AAA, AA, C, D, 9V, and button batteries.
Pocket-size BAT-200. A Snap to Use.
Since purchasing the BAT-200, life in the battery cosmos has become a lot less complicated. Armed with one of these, you can immediately rule out battery failure when troubleshooting myriad devices. You can also test outdated batteries to determine their status.
Flashlight, Magnifying Light, and Head Lamp…
…Test meter…
…And Various Remotes Use A, AA or Button Batteries.
AA Battery from Remote Tests “Good.”
An item such as the BAT-200 can be found for less than five dollars if you shop around, and will pay for itself by taking the guesswork out of the bad battery scenarios. You’ll wonder how you ever did without one!
Thank you very much for sharing this post, Mario!
At the SWLing Post HQ, we keep all of our loose batteries in a “battery box.” All new cells stay in the packaging where we mark the date purchased (although many alkaline cells now have a “best by” date). We recently pulled all of the loose/orphan batteries out of the box–there must have been 40+–and tested the voltage of each one. I used the test meter from my toolbox to do this, but I’ve just ordered one of the BAT-200 chargers from Amazon and will now keep this in the battery box permanently.
Many thanks to SWLing Post contributor, Dan Robinson, who shares the following guest post:
ICOM’s IC-R8600: Can this mega-radio stay in the ring with big gun “legacy” receivers when it comes to shortwave band reception?
by Dan Robinson
When ICOM rolled out its new wideband receiver, the IC-R8600, I immediately took an interest in it. I have been primarily a hardcore DX’er and SWL and avoided purchasing wideband receivers, including the predecessor IC-R8500, because they were limited in areas such as selectivity.
My experience with ICOM includes owning a IC-R71A and R72, both of which I found to be strong performers, as well as a IC-R75. The R75 as everyone knows established a reputation as an excellent receiver that delivered bang for the buck, including for example 1hz readout and extreme stability.
In its design decisions with the 8600, ICOM clearly intended to hit it out of the park, taking a huge step from the 8500. That can be seen in the amazing color 4.3 inch LCD display with fairly fast spectrum scope and waterfall displays, coverage from 10 kHz to 3 gHz, decoding capability in multiple protocols, (Baudot RTTY, D-STAR™, NXDN™, dPMR™, DCR (Digital Communication Radio) and APCO P25, and the combination of SDR and superheterodyne circuitry, with 2000 memories.
The new Icom IC-8600 at the 2017 Hamvention
At this point, there have been numerous reviews of the 8600, and videos are all over YouTube showing the basics of its operation and features. It has numerous flexibilities selected from the front panel and within the menu system. The ability to record directly to SDHC cards eliminates the need to attach an external solid state recorder (over the course of my DX career I accumulated many of these). I can’t say enough about this capability which automatically keeps fully labeled logs.
Other features include ICOM’s wonderful Twin Passband Tuning, combined with the ability to adjust filters 1/2/3, adjustable attenuation, Digital AFC, tone controls, noise blanker digital noise reduction, speech enunciator, main tuning dial tension adjustment, synchronous L/U/Double sideband, adjustable panel brightness . . . in short, just about everything one would think should be included in a 21st century receiver of this kind, ICOM put in the 8600. The firmware update released recently (1.30) added the capability to use the radio’s IQ output with HDSDR software, which means that the receiver is now not only a standalone but also functions easily with a PC.
Since the 8600 has been on the market for some time now, I discussed with Thomas Witherspoon of SWLing Post, the idea of obtaining an 8600 for the specific purpose of comparing it to some of the top receivers in my collection.
JRC NRD-515
At the current time, that list includes a JRC NRD-545, the Drake R-8 (original version purchased in 1993), JRC NRD-515, Watkins Johnson 8718A/MFP, Cubic R-2411, and a McKay Dymek DR-33C. All of the radios in my shack use a Wellbrook 1530 loop, fed through a RF Systems DA-8 Distributor/Amplifier which maintains signal levels from all outputs.
Watkins Johnson 8718A/MFP
A surprising outcome of my comparisons of the 8600 to these radios is that my appreciation of the qualities of these older receivers was actually re-ignited–so much so that some that had been on my ‘to sell’ list are now back in the ‘keepers’ column. This is not as much a criticism of the 8600, as it is a reaffirmation of the quality that was built in to some of the great receivers of yesteryear.
Because my collection actually extends across 2 or 3 rooms, moving the 8600 away from my central receiver “stack” was not possible, so testing comparisons were limited to the sets mentioned above. I would have liked to compare the 8600 with, for example, some classic tube receivers (HQ-180A, Eddystone 830/7), but they have been mostly inactive and located away from incoming antenna inputs.
Here in Potomac, MD outside of Washington, DC, the addition of the Wellbrook a few years ago, after years suffering with long wires, fundamentally changed a difficult situation. Signals were boosted, noise reduced. I wish things had continued this way. Unfortunately about a year ago, my area began to be plagued by a troubling ignition-type buzz, source unknown, targeting 11,500 to 12,100 khz though noticed elsewhere in the shortwave bands. It has continued, usually worse in summer than in winter.
I begin with this to underscore what I noticed as a high point for the 8600: its Noise Blanker and digital noise reduction are in my opinion quite effective, so much so that when properly adjusted, they can eliminate troublesome ignition-type noise. While NR is useful, as noted in other reviews it needs to be used carefully so as not to introduce too much digital suppression.
Here is an example of NB and NR in use against severe ignition-type noise at my location:
In August of 2017, I had my first experience tuning a 8600 at a DXpedition in Ohio.
So, I had a basic grasp of the various controls — the A/B/C knobs, and the menu system. When I received my review unit from ICOM last November, I was up and running quickly, but still puzzled over some aspects of the receiver’s operation.
Thanks to Dave Zantow who alerted me to a possible issue involving firmware 1.30 which appeared to introduce an increase in audio harshness (ICOM has been alerted to this). Dave also had suggestions (see his full review of the 8600 and other receivers on his site) about audio adjustment and speakers, and tweaking of the front display to make maximum use of the Peak and Waterfall settings. Dave emphasizes that careful adjustment is required of the 8600’s tone controls and AGC decay settings to get the most out of the receiver.
Because it is among the receivers in my shack in close proximity to the 8600, I chose to perform a number of tests comparing the ICOM to the Japan Radio Company NRD-545. As everyone knows, the 545 was the last in JRC’s prosumer line of receivers. It is feature-rich — JRC threw everything into this receiver. But one issue followed JRC receivers through the 5xxxx series — noisy audio. After finally acquiring a 545 some years ago (a high serial number unit formerly owned by the late Don Jensen) I jumped on that bandwagon of criticisms about the 545’s audio. However, in terms of sensitivity and numerous tools to hear and process signals, the receiver remains among my favorites, and this remains the case after my comparisons with the 8600.
When I compared signals heard by the 8600 with the 545, I found that while the JRC does have that ‘DSP’ sound, it was in many situations actually clearer than the ICOM. That was the case even when following advice on adjusting the 8600’s tone controls and AGC. The following two videos compare the 545 and 8600 on 5,905 khz and 17,655 khz. A third shows the receivers on 6,040 khz demonstrating effectiveness of their notch filtering capabilities:
My next comparison was the Drake R8. Little can be said about the Drake R8xxxx series of receivers that hasn’t been said. That superb Drake audio, established with the R8 and continued through the R8B, puts these receivers at the top of the heap and makes stations stand out. So, it’s little surprise then when compared to the 8600, which is an SDR in the HF range up to 30 mhz or so, the R8 still sounded superior on many, though not all, stations. Use of the SYNC mode (not adjustable on the original R8, but was on the R8A/B) also improves recoverable detail on the Drake.
The following video shows the 8600, 545 and finally the R8 on 5,995 khz (Mali), and the three receivers compared on 9,650 khz (Guinea), and a third comparing the 8600 with the full range of receivers in my main receiver stack, tuned to 9,415 khz which at the time was China Radio International.
Despite what some critics have said, I believe that the 8600’s synchronous detection modes are actually pretty good, helping with fading and stabilizing signals. I think the ICOM’s sync is certainly superior to what I experienced with the IC-R75. I would rate the SYNC on the AOR 7030+ superior to the 8600, with the NRD-545 a bit behind the 8600.
Acquired about 2 years ago, my AOR-7030+ is a late serial number version of this fantastic receiver. If I were to sell every radio in my shack but 5, the 7030 would not leave. Put simply, it is among the top shortwave receivers ever made, with off-the-charts audio, and if one has the rare NB7030 card, amazing notch and other capabilities. Comparing the 7030 to almost any other shortwave receiver ever made is like putting a Ferrari on the track with the competition. The audio, and reception tools are just that good.
At the same time, in the 8600 ICOM has produced a receiver that has as many of the essential tools required to manipulate and clarify signals as exist. The twin passband tuning continues to be superb. Being able to vary bandwidth in conjunction with the PBT, and do so even in SYNC mode, further enhances reception powers. Combine this with the ability to actually see signals on the 8600’s beautiful color LCD — we’re getting pretty close to the ultimate receiver (though I would love for someone to drop the successor to ICOM’s IC-R9500 on my front doorstep).
The following videos compare the 8600 to the same full range of receivers, ending with the Watkins Johnson 8718A/MFP, all tuned to 5,935 khz, followed by a comparison of receivers tuned to 5,000 khz
In the following videos, I compare the 8600 to other receivers 11,810 khz (BBC) which shows
the superb audio of the Drake R8xxxx series, yet the 8600 does quite well, and another video
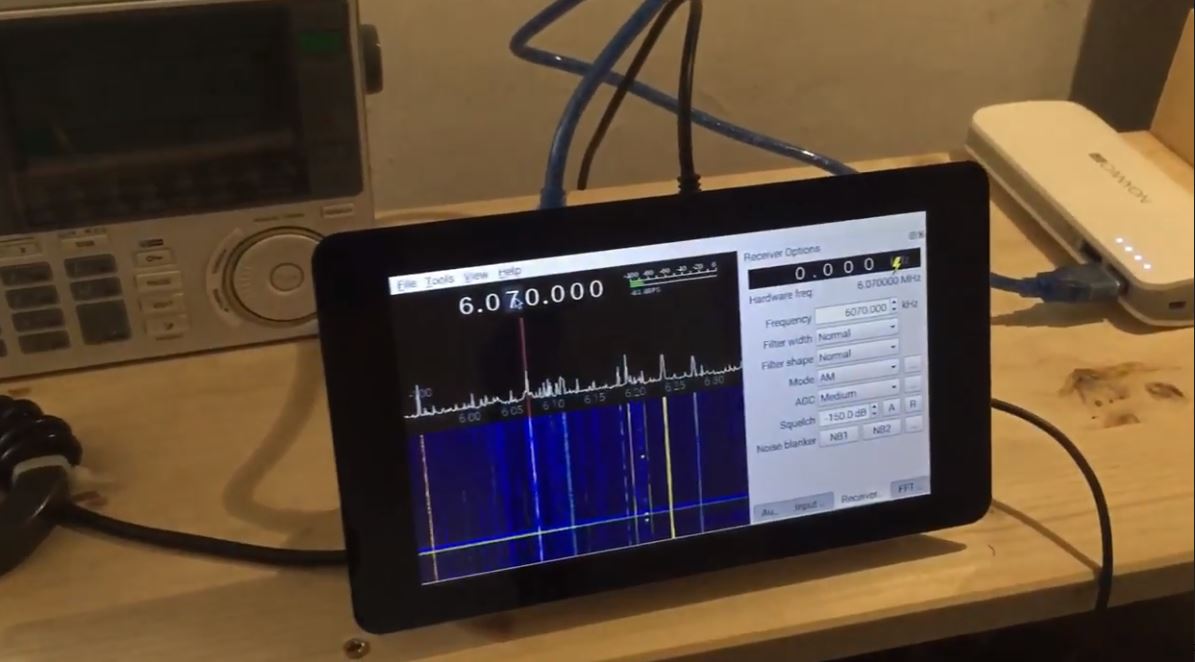
compares the 8600 with the 545 and R8 tuned to 6,070 khz.
In the months that I have had the 8600, I did some comparisons with other receivers, among them my Watkins Johnson 8718A/MFP, which you saw in several videos. WJs prior to the 8711/HF-1000s were built like boat anchors and are QUIET. WJ, Cubic and similar sets manufactured for government and intelligence agencies, shared superb sensitivity, and most cases, excellent audio.
Comparisons of the 8600 on shortwave frequencies had the so-called Premium radios out front. The ICOM clearly shined when it comes to modern signal processing and adjustment tools such as PBT, Notch, and infinitely variable selectivity.
Summary
So, here’s a summary of my impressions after weeks of testing the ICOM IC-R8600 against some of the top gun receivers of yesteryear.
The 8600 scores a 10 on reception tools that are useful — though not crucial in these days of waning shortwave broadcasting activity — in producing and processing listenable audio: Twin PBT, Notch and Auto-Notch, Variable Bandwidths (though limited at the high end to 10 kHz), Pre-Amp and Attenuation, and that beautiful color LCD that allows one to see signals.
Predictably, the 8600 doesn’t blow away premium receivers that were manufactured to pick up the signal equivalent of butterflies and targeted government and spy agencies, and it also does not out-perform a range of other classic receivers whose reputations are well-established.
From a sensitivity and audio perspective, there is no real competition with the Drake R8, which time and time again excels in producing superior easy-to-listen audio. And the same holds for the AOR 7030+.
JRC’s NRD-515 more than holds its own and in many cases exceeds the 8600 in signal sensitivity, and producing listenable audio, despite its selectivity limitations.
The NRD-545 — maligned by critics for its DSP audio, often produced highly-listenable audio even in comparison with the 8600. The ICOM and the 545 share features that provide tremendous flexibility, the tools required to slice and dice signals. If the JRC NRDxxx receivers were the modern equivalent of such boat anchor classics as the Hammarlund HQ-180A, the 8600 is certainly at the top of the heap when it comes to having those same tools in a 21st century receiver.
Audio Samples
I performed some additional audio only tests between the 8600 and NRD-545 on several frequencies. In each, I carouseled from wide to narrow on the 8600, and did the same on the NRD-545. Here are the results:
You may have noticed that while on some examples the 8600 appears to sound better, the 545, with DSP technology born in the 1990’s is more than competitive with the ICOM.
Conclusion
In conclusion, with the 8600 we have a receiver that tunes up to 3 gHz, with highly flexible color scope, usable with HDSDR, with every tool imaginable for sifting through signals from 10 kHz up to 30 MHz, which is the area I have focused on for decades.
ICOM’s superb Twin PBT knocks out interference and narrows the heck out of any signal, with highly adjustable notch capabilities, customizable bandwidth functions, and what I consider to be highly effective noise blanking and noise reduction. Add to this 2,000 memory channels, multiple antenna inputs, adjustable attenuation and AGC and you have far more than what is needed given the current state of shortwave broadcasting.
Here’s the tough question: Would I recommend that a shortwave listener focused on what remains of listening in the SW bands purchase a 8600? Or to put it another way: Is the 8600 that much of a better radio in the SW spectrum? The answer has to be no.
Numerous receivers from the classics to even the latest portables with multiple selectivity flexibility (see the XHDATA D-808 or Eton Satellit) work for that. The used market overflows with superb HF communications receivers. Any of the Drake R8xxx series receivers, available on the used market for $400 to $1,000, now constitute overkill when it comes to reception in the MW to 30 mHz range.
But if you can project someday to having the time and patience to apply yourself to what is available above 30 MHz, and have the appropriate antenna(s) for those ranges, then by all means, the 8600 is the radio for you. It is the Babe Ruth’s bat of the receiver world — AND it has numerous flexible tools (though one wishes that ICOM had included DRM capability).
As I finalized this review, I continued to wrestle with the decision of purchasing the 8600 that was so generously provided by ICOM. You won’t read here what my final decision was–but anyone who is interested can contact me in coming days and weeks to learn the answer.
Last minute update Just before this review went to press, I discovered an issue of concern: when the 8600 was left on overnight, or for any period of multiple hours, upon awakening from “sleep” (screen off) mode, nothing but distortion is heard from the speaker. The only solution was to perform a POWER OFF/POWER ON, after which normal audio was heard. This issue was I brought to the attention of ICOM.
I want to thank Ray Novak and Faheem Hussain of ICOM for providing the 8600 used in this comparison, and for their patience as I encountered several delays completing my review and getting to print. And thanks to Thomas Witherspoon without whose initial encouragement, this review would not have been possible.
Dan, thank you for an amazing IC-R8600 review and comparison with your benchmark commercial grade receivers! Thanks for taking the time to make thorough comparison video and audio recordings. Your guest posts are always most welcome on the SWLing Post!
Many thanks to SWLing Post contributor, TomL, who shares the following guest post:
Backpack Shack 2.0
by TomL
Like Audiophile speakers, it could be said that “antennas are forever”. They tend to not become obsolete like all of our favorite electronic gear (a good one is worth the trouble). And antennas don’t care if the signals are digital or analog formats. They are “Digital Ready” (LOL)!
Retain the broadband design of the amplified loop on a sturdy form
Shrink the size to fit into a backpack without heavy stand or long pole
Build a modular platform that would allow quick setup
Be something durable that can last me 20+ years of use
Allow the loop to be rotated and tilted by hand
Be easy to hook up to any kind of radio
and later on, Enhance the design as a true Ferrite Sleeve Loop
The Backpack: The existing photo backpack was slightly too bulky. Found on Amazon was an Adidas Excel II XXL backpack on special sale with plenty of tall compartments and minimal padding. It is surprisingly roomy and comfortable to wear with springy shoulder straps and padded mesh backside!
Sturdy Basic Form: The Backpack Shack loop was originally built on 14-inch quilters loops (three of them) in a parallel configuration. I thought to simplify the whole thing and just use one wide loop. But what should I use for a sturdy form? The quilters loops were too flimsy and PVC pipe was too heavy. I stumbled upon a nice company called FlexPVC which allows sales to the public of various kinds of PVC pipe. Their Thinwalled Air Duct PVC looked promising. It is thinner than regular PVC but having standard inside dimensions and comes in custom-cut lengths. I decided 10-inch diameter would fit best inside the Backpack. FlexPVC even sends you a small booklet of the U.S. Constitution and the Bill of Rights with your order! 🙂
Thinwalled PVC form
The “length” as they call it would be my form width for the copper strip. I thought 3-inch would be nice but decided 4-inch was better. Supposedly, the aperture + the width of the “radiant element” is the main design consideration for loop performance. So, I figured that as wide an element as I could get away with was better.
Stable Mounting: Now, how to mount this thing! I eventually went back to my photographic web links and found nice rig equipment for video cameras. The typical construct is made of 15mm tubes of aluminum or carbon fiber (CF) and fit into adapters that allow attachment to other adapters or clamps. Non-metallic CF seemed ideal, so, I ordered a whole bunch of items from eBay to experiment piecing together two 10-inch CF tubes mounted inside the PVC form. Then, I attached two 15-inch CF tubes to the bottom of the PVC with something called a “Cheese Rod” that has multiple holes. Those two tubes are attached to another “Cheese Bar” which is attached to a second Cheese Bar on a cheap two-axis tripod head. This is a simpler photo version with quick release plate that locks pan-tilt separately and only cost $16.
Cheese Rod attached to bottom of PVC
Pan-tilt head assembly with Quick Release plate
For the base, I had an unused Sirui T-2005X 5-Section Aluminum Travel Tripod going to waste, so it was pressed into service. Very good tripod: can hold 26 lbs. (forged aluminum, not cast aluminum), legs can flare out for stability, and folds to 14.5-inches. Now, everything could come apart and fit into the Excel II Backpack!
Critically, the video rig standardization in the DSLR industry allows me to pick and choose parts from any cheap manufacturer but end up with a system that looks and feels coherent, is both sturdy and light, and can come apart if needed. Also, the pan-tilt photo head is really easy to work to get maximum peak or null out of the loop when mounted to a camera tripod.
CF Problem: CF tubes have no internal threads like that of aluminum tubes. So, I attached two, small 3/8-1/4 inch tripod adapters to the ends of a 3/8-inch oak dowel inside each CF tube destined for the inside of the PVC (ridiculously, I used up almost a whole bottle of super glue to get these 4 tiny pieces to attach to the oak dowels). This is definitely a weakness of my design but I could not figure out any other way to get the CF to mount inside the PVC form. Then, added to this is something wonderful I found at Ace Hardware called “speed nuts” to help push ipwards against the incoming stainless steel socket head screws of exact length. With jam nuts, internal lock washers, wing nuts, and strategic use of Thread Locker Blue, I finally had enough confidence that this thing would hold together!!
Speed Nuts pushing upward against incoming screws
Super-glued 3/8-1/4 inch adapter on end of oak dowel inside CF tube
Bottom assembly (Cheese Rod, Cheese Bar, and 15mm Clamp screwed together + wires to a BNC connector)
Ferrite Sleeve Loop: Halfway through this project, I became determined to use the ferrite bars and rods I had purchased from eBay mid-summer 2017 to turn this antenna into a real Ferrite Sleeve Loop but with a broadband design (At that time, I ended up purchasing the very last quantities of 62x12x4mm ferrite bars from the Lithuanian eBay seller, just because they were becoming scarce plus some other 8mm ferrite rods). The Thinwalled PVC is 5mm thick, perfect for this type of application. The video equipment could handle the extra weight. I had just enough ferrites to line the inside of this PVC form with two bars side-by-side all the way around the inside (plus some shorter ferrite rods at the top and bottom). Some quick setting JB WELD Kwik Weld epoxy made quick (and permanent) attachment of these ferrites to the inside of the PVC. Now, the bars stick out from the PVC form by about ½-inch on each side, so I do have to be careful it does not get abused and chip off any of the exposed ferrite.
Soviet ferrite bars and rods, 400 ui (initial permeability).
Note: Using Gary DeBock’s Performance estimate (diameter * length), this calculation predicts that this FSL 10.75-inch loop should perform similarly to Gary’s 10-inch models using 140mm long Russian ferrite bars (mine probably performs less than his since I am not using carefully tuned (to Mediumwave) litz wire on higher permeability 1500 ui ferrites like he does).
Preamplifier: I believe one advantage of building a portable, table-top loop antenna like this is that all the connections are short. This allows me to use a Preamp right at the connection point of the loop. Indeed, this was critical since passive testing (no Preamp, nor ferrites) found that this loop is somewhat deaf at the MW frequencies and uninspiring on the SW bands. This was true even when connected to Antenna A of my SDRPlay RSP-2 and the internal Low Noise Amp cranked all the way up. So, I ordered the DX Engineering RPA-2 Preamp. This adds to the weight somewhat since I also needed a 12V battery supply using a 10-cell holder of NiMH AA batteries and 2.1mm plug.
The question arises that I “should” impedence-match the output of the loop before anything else to increase “maximum gain”. Well, for one thing, a tuner or matching balun would just introduce loss as soon as the wire comes out at the base of the antenna. The slight net increase in gain does not seem worth it; the signal/noise ratio rarely changes when introducing a device that is meant specifically for matching a transmitter to a load. Receiver circuits don’t care as long as there is enough signal to process. That is what the Preamp is for. The Preselector is for rejecting out-of-band (i.e., increasing signal/noise ratio + eliminate overloading the electronics).
Preselector: Now that the signal level was satisfactory, I added on the Cross Country Preselector, which I like very much since it is passive, lightweight, and well made. I had looked at other amplified preselectors but found the schematics showing the preselector came first in the path. I needed the preamp first, so that is how I ended up with separate units. In fact, the reverse configuration performs with worse signal/noise ratio because of the loss inherent in the preselector. In this case, it is definitely needed to amp the loop first with a high quality preamp (high IP3 rating)!
Automatic Bypass: The Cross Country unit has a great feature in the “off” position as an automatic bypass. This feature is very important since I do not need a Preselector in the circuit all the time. The bypass feature also allows the RSP-2 to monitor a large swath of spectrum without having the Preselector cut the bandwidth. The DX Engineering RPA-2 Preamp also has a circuit bypass when the power is off – very nice feature! So, I can keep all the antenna wires connected if I don’t want to use either device on a certain band – necessary for my broadband antenna design and use with an SDR.
Modular Portability: Another advantage of a table top loop is portability. Because of the modular design, I can put this into checked baggage (except for the AA batteries and laptop) and have it available for DXing in unexpected places. It could be useful when traveling and I cannot string wire into a tree but want something better than a whip antenna on a small radio. Everything fits into the bag and can be setup on a balcony, inside a car with a sunroof, or on a park picnic table.
A third advantage is that a short antenna could be clamped to one of the tubes and then connected directly to Antenna B of the RSP-2 for listening to higher frequencies (like a Comet W100RX). This expands the usefulness of this project as a platform for multiple antennas!
Finished Loop and accessories assembled together
Performance: Good on MW and very good on Shortwave. It is not in the league of Wellbrook antennas but it is useful as long as the RSP-2 LNA is kept down around -7 on MW and -4 on SW, else it overloads. The photo gear makes it easier to use than the original loop. I found that one side has a slightly larger receiving lobe than the other which is OK in practice. The null is very sharp and takes a little finesse to null out an offending station by almost 20 dB on MW and 15 dB on SW (the photo head can lock in place). It is handy to have the pan-tilt arm point directly at a station to maximize the null since the arm is mounted perpendicular to the loop. I will look for a clear plastic bag to cover the antenna and electronics to use in wet environments.
A larger loop would work better but this one is to use wherever I can. Also, my work laptop is noisey and shows birdies and spikes here and there on the bands, so I added a large ferrite bead to the USB computer end which helps. But I don’t have to use an SDR, I just have to change a connector and radio. It was expensive and fun to build – I guess I am just LOOPY!
Happy Listening,
Tom Lebryk
Appendix I, Field Recordings 27-Jan. 2018 between 21.26-22.36 UTC:
Note 1: All Transmitter locations referenced from web site short-wave.info at time of recordings
Note 2: My location in a shelter at Dick Young Forest Preserve (41.84334, -88.38133)
Note 3: Moderate but declining solar wind with no flares, Kp Index = Calm (1)
9.420 MHz – Voice of Greece booming in like it was next door:
10 AA Powerex Precharged NiMH batteries for the Preamp + 10x AA snap battery holder + CCTV 2.1mm snap plug
1 Cross Country Preselector
1 SDRPlay RSP-2 with SDR Console software on Lenovo laptop
1 Belkin USB printer cable with large ferrite bead looped through 3 times on computer end
1 Sirui T2005X travel tripod
1 Adidas Excel II XXL backpack (gaudy Solar Orange color!)
Velcro brand 7/8” x 23” One-Wrap velcro strips
Plus shielded cables, BNC and SMA adapters, Thread Lock Blue, tie wraps, rubber bands, super glue, JB WELD Kwik Weld epoxy, speed nuts, jam nuts, acorn nuts, wing nuts, internal lock washers, nylon nuts and screws, and 1/4”-20 socket head screws of various lengths as needed.
What a brilliant project, Tom! What I love is the fact that you consider your unique requirements prior to starting a project and base your design on your specific needs. Additionally, you see each design as an iteration. Fantastic job! No doubt, you’ll log numerous hours with this antenna in the field! Thank you for sharing your detailed design notes, process, list of materials and even audio clips with us.