Category Archives: Reviews

Moshe’s early birthday gift: a Philips 90AL765

Philips-90AL765-FrontSWLing Post contributor, Moshe, writes:

After reading your post about your Panasonic RF2200 pre-birthday present, I decided I want to do the same. The radio I chose has a story behind it…

My Grandfather had the same exact radio. I used to play around with the radio as a child, (especially with the shortwave bands, looking for number stations…). When my Grandfather died, about 23 years ago, the radio disappeared.

I decided this is the radio I want for my birthday. I could not remember the maker of the radio, nor it’s model, but I remembered how it looked.

I spent many days looking for all variations like “portable transistor radio” and so on, until I found a photo on the Internet: I was looking for a Philips 90AL765 radio.

I found it on Ebay. A very kind seller from Australia had it.
I purchased and receive the radio on the 26th of June (my birthday was the 12th of July). As soon as I got the radio, I opened it up; it needed cleaning (the case itself and the contacts).

Philips 90AL765-Back

After cleaning the contacts and washing the case, the radio runs (and looks) like new. I thought I would have to recap the radio, but it sounded perfect and without even a hint of hum, so I left it as it is.

It has the volume and tone knobs missing, but it can be operated with no problem. Sound quality is amazing (I added a video of the radio playing All India Radio on 6155 kHz)–it works very well on all bands and is very sensitive. By ear, the bandwidth sounds like 8 kHz or more. Radio bands are: MW, SW (2 bands) And FM.

The shortwave band is divided in two: SW1: 2.3MHz- ~7.4MHz, SW2: ~9.4MHz- 22.5MHz. For fine tuning on shortwave, the radio has a “Fine Tuning” control, which is a potentiometer connected to a varicap.

If you place the control in the middle (It lacks a detent spot) and tune in a station, this control will put you spot-on (the receiver is very stable).

Some info about the radio: According to Radiomuseum.org, the radio is dated to 1977, and was made in Austria (mine and my Grandfather’s were made in Singapore).

It contains 13 transistors, 3 of them are can transistors (not plastic).

Tuning is slide ruler type, and the only connection is A DIN5 for recording (wired for mono).

Philips 90AL765-Back2The radio can be operated from 4 D cells, or directly from AC (in the picture you can see the transformer). It can be operated from 230V or 120V. Note that if you move the plastic pin cover from the left pin to the right one, the center pin remains visible at all times. Also you will have to move the plastic cover piece on the back to the left.

The Ferrite is 14cm long, the telescopic antenna is 79cm fully extended, and it has an elbow joint that allows you to place the radio in your lap and still the antenna will point up with no problem. Only thing is that if the antenna is extended, the handle cannot change position since the antenna is in the way.

Philips 90AL765-Side

Width of the radio itself is 29cm (31cm with the handle and the knobs).
Depth is 7cm.
Height is 16.5cm (21cm with the handle).

All in all, it is a very fine radio and I love it!

Moshe, thanks so much for sharing your story!

Perhaps, one of the true virtues of sites like eBay is that they allow us to search the world for somewhat obscure devices that have such a strong family and nostalgic connections. Congratulations on your find!

Spread the radio love

Initial review of the Sangean ATS-405

Sangean-ATS-405-Box

Just last week, I received the new Sangean ATS-405 on loan from Universal Radio. Though I’ve only had the radio for a week, I thought I’d share a few un-boxing photos (by request) and my initial impressions/review of this radio.

Unboxing

Sangean-ATS-405-OpenBoxThe ATS-405 comes with a thick owner’s manual (in five languages), a 7.5 volt AC adapter, and a soft radio case. The package does not contain rechargeable batteries nor a clip-on wire antenna (like many Tecsun products do, for example).

Sangean-ATS-405-OpenBox-2

Overall, the packaging accommodates the radio and accessories efficiently and would probably ship safely even if the carrier doesn’t handle it with particular care.

Sangean-ATS-405-OpenBox-3The first thing I noticed about the ATS-405 is the near-identical design and layout Sangean has used in their design of past shortwave radios. If you’re a Sangean fan, you’ll find all of the functions, buttons, and labels pretty much in the same place; virtually no learning curve.

Performance: first impressions

Sangean-ATS-405

After unboxing the ATS-405, I installed a fresh set of AA batteries in it and turned on the radio…

Display

Like most Sangeans, the display is crisp, clear and can easily be read straight-on or at low angles, like when the radio is resting on its back stand, for example. If you look at the display from a higher angle, however, you’ll find that the LCD digits nearly disappear.

Sangean-ATS-405-Display

Back-lighting is perfect: it’s soft and consistent across the display, very much like the ATS-909X.

Audio

Audio from the internal speaker is good. It’s in the same league with most similarly-priced competitors.

Receiver performance

Keeping in mind that I’ve only logged a few days of listening time on the ATS-405, I do have some initial impressions about receiver performance across the bands:

Sangean-ATS-405-RightSide

Right side view (click to enlarge)

FM

On a positive note, I believe FM performance is quite good. Perhaps not in the same league with my PL-660 or PL-680, but still the Sangean offers above-average sensitivity. I was able to pick up my distant benchmark FM stations with ease, though to help with the signal lock, I had to switch from stereo to mono reception.

AM/Mediumwave

AM reception is a bit of a mixed bag. I find that the ‘405’s overall sensitivity and selectivity are quite good for broadcast band listening.

When I first tuned around on the AM broadcast band, however, I found the noise floor a little too high. Regardless of whether I was tuned in to a station or not, there was an ever-present high-pitched hiss, like static. It was quite disappointing, especially since I read a review by Jay Allen that really complimented the AM performance on the ATS-405.

I trust Jay’s reviews, however, so I promptly contacted him. Jay pointed out that the problem may be that I was listening in the default “wide” filter setting on AM. And indeed, he was right–though I had changed filter settings a few times while tuned to local stations, I had moved it back to wide and didn’t make note of this. (The ATS-405, by the way, has three filter settings: wide, medium and narrow.)

Sangean-ATS-405-LeftSide

Left side view (click to enlarge)

But the wide setting is really too wide, and was certainly the source for the bulk of the high-pitched hiss I heard. The best filter setting for most broadcast band listening is the middle position, which sounds like a 5-6 kHz filter. In the middle position, noise is decreased significantly. I also believe selecting the “music” audio tone setting helps dissipate some of the noise.

Regarding the noise floor: to be clear, I still feel like the noise level is slightly more noticeable, to my ear, on the ATS-405 than on the PL-660, PL-600, and PL-310ET when band-scanning or weak signal listening. This is most likely some internally-generated noise that somehow still meets Sangean’s engineering spec.

Local AM stations sound fantastic, and the ATS-405 can detect all of my benchmarks. AM audio fidelity is better than that of my PL-660 and, even, PL-310ET. When locked on a local station, the noise floor also seems to disappear. For some reason, I even find that the ATS-405 does a better job receiving local AM stations from indoors–even near noisy electronics–than other sub-$100 portables with which I’m familiar.

Uh-oh, birdies

The most disappointing discovery I made on the Sangean’s AM broadcast band is that it has DSP birdies. Birdies are internally-generated noises resulting from the outputs of the oscillators that form part of the DSP receiver circuit. While almost all receivers do have birdies somewhere in the receiver’s reception range, radio engineers try to keep them out of the way of the important parts of the band.

Unfortunately, my ATS-405 has strong DSP birdies on 800 and 1600 kHz. This is a big negative for me, since my favorite regional AM broadcast station is located on 1600 kHz (WTZQ). Rather than attempting to describe what the birdies sound like, here are a few audio clips that will give you an idea–I start with 1350 AM, which has no birdies and is representative of good AM reception:

WZGM 1350 kHz (broadcast sample with no birdie):

800 kHz (birdie on frequency with no broadcast signal):

WTZQ 1600 kHz (birdie on broadcast signal):

The ATS-405’s birdies almost sound like a jamming signal on 1600 kHz.  Indeed, if this station were only located on a different frequency, I’m sure it would be quite audible on this radio…too bad.

Birdies on 800 and 1600 kHz may very well be deal-breakers for many of us. Again, since one of my favorite regional independent broadcasters is on 1600 kHz, it’s a deal-breaker for me.

Jay specifically mentioned a lack of birdies on the AM broadcast band in his review. It could very well be that he doesn’t hear them on his particular receiver–variations in quality control on a radio production line are certainly a real phenomena (the Grundig G3 is a case in point). This could indicate that some units may have pronounced birdies while others don’t. If you purchase an ATS-405, I would check to see if your unit has birdies after powering it up.

When I contacted an engineer for Sangean North America, and described my listening experience, he confirmed that he believed these are, indeed, DSP birdies. I may ask Sangean if they can send another ATS-405 for comparison.

On a more positive note, I checked harmonics in the HF/shortwave bands and heard no DSP birdies there.

Country of origin?

Sangean-ATS-405--BottomView

Bottom view with charge and keylock mechanical switches (click to enlarge)

One additional question I posed to Sangean: where is the ATS-405 made? One reader told me the radios are produced in both Taiwan and China. Thinking variations in quality control may be accounted for by two different production lines, I checked my radio to see where it was made. Unfortunately, my unit has no mention of country of origin; not on the radio, the box, the manual, behind the battery cover, nor on the back stand. It’s possible it could be marked internally, but I didn’t want to take apart a receiver I’ve been loaned.

Sangean came back with a firm answer:

“I can confirm that the ATS-405, along with all our radios, are manufactured in China. We have an office in Taipei for engineering, sales, marketing and customer support.”

Not a big surprise here; I expected China was the country of origin.

To sum up AM performance: if you aren’t bothered by the birdies on 800 and 1600 kHz, or if your unit isn’t producing them, you’ll find the ATS-405 a capable little AM broadcast band receiver.

Shortwave

Our HF propagation conditions since last Friday (when I first turned on the ATS-405) have been poor. Other than a few short band openings, I’ve struggled to hear anything other than the normal blow-torch broadcasters we hear in North America. Still, bad propagation conditions are actually good for reviewing some aspects of a shortwave receiver, so I used the opportunity.

In terms of sensitivity on the shortwave bands, I think the ATS-405 is mediocre. It lags behind my Tecsun PL-660, PL-600, PL-310ET, and CC Skywave. Adding a clip-on wire antenna to the telescoping whip (there is no aux antenna port) does help in terms of sensitivity.

Since I do most of my listening on the shortwave bands, this, too, is a deal-breaker for me. If you primarily listen to stronger shortwave stations, or spend most of your time on the FM/AM bands, then you might still consider the ATS-405.

The ATS-405’s selectivity seems to be on par with my other DSP-based portables. In truth, though, band conditions have been so unfavorable, I don’t feel like I’ve had ample opportunity to test selectivity. I’ll likely follow up this initial review with an update.

And as on medium wave, the noise floor on the shortwave bands seems a little high to me–especially with the filter set to the “wide” position.

Cool, innovative features

While I clearly haven’t been wowed by the ATS-405’s shortwave performance, I have been more favorably impressed with some of its innovative features: specifically, the ability to control squelch, tuning mute, and soft mute.

Sangean-ATS-405-KeypadUsing the menu button (see image above), you can engage or disengage the tuning mute and soft mute by pressing the “2” or “3” buttons on the keypad, then using the tuning up/down buttons to toggle these features on and off. Squelch works the same way, using the “1” button and volume control to set the threshold.

This menu control works regardless whether the radio is turned on or off.

Of course, by using the menu button and the keypad, you can also control the ‘405’s tuning steps, AGC, clock, and backlighting functionality; each of these are marked in green next to the appropriate button on the keypad (see image above), a very useful feature.

I wish other radio manufacturers would give users the ability to control some of the DSP chip’s built-in functionality, as the ‘405 does with the muting–especially since over-active soft muting has been the downfall of several DSP-based radios. Thanks for trail-blazing, Sangean!

Summary

Invariably, all radios have strengths and weaknesses; here is a list of my notes from the moment I put the ATS-405 on the air:

Pros:

  • Improved features and controls:
    • Soft Mute
    • Tuning Mute
    • Squelch
    • AGC
  • Crisp, clear display
  • Good travel size, similar to the Grundig YB400
  • Good AM/mediumwave sensitivity
  • Three audio/tone settings: Music, Norm, and News
  • Good FM sensitivity
  • Dedicated mechanical switches for keylock, audio tone, FM stereo/mono, and charging.

Cons:

  • Lackluster shortwave sensitivity
  • DSP Birdies on 800 and 1600 kHz
  • Higher SW/AM noise floor (especially in wide filter setting)
  • No tuning wheel
  • No AUX antenna port
  • No shortwave SSB reception (AM only)
  • No audio line-out port

I’m going to hold onto the Sangean ATS-405 for a few more weeks, as I’d like to give it a more thorough test on the shortwave bands. I hope to follow up with a post offering a few representative recordings.

Sangean-ATS-405

My nutshell opinion of the ATS-405 so far is that it’s a decent little radio with a lot of functionality and features for a rig in its price class. But overall, its performance seems to me rather mediocre. If you primarily listen to FM, you’ll be pleased. If you’re a mediumwave listener, you’ll be pleased only if you don’t mind the 800/1600 kHz DSP birdies. If you’re primarily a shortwave listener, you’ll need to carry a clip-on wire antenna to bring the sensitivity up to the level of similarly-priced receivers.

In short, I do want to like this radio unreservedly. But it appears that Sangean may need to pull up its socks on their quality control.  Readers: please comment if you’ve purchased the ATS-405–I’m very curious to learn whether there are QC discrepancies in performance from one unit to the next.

PLEASE NOTE: After publishing this following review, Sangean kindly agreed to dispatch a second unit for comparison. 

Click here to read my update to this ATS-405 review.

Follow the tag ATS-405 for updates.

Sangean ATS-405 Retailers:

Many thanks to Universal Radio for supplying this radio, on loan, for review!

Spread the radio love

SDRplay RSP: I bit the bullet!

SDR-PLay-RSPThere’s a danger in doing radio reviews: sometimes, you get attached to the radio.

This was the case with the SDRplay RSP. SDRplay sent this radio to me on an extended loan and I’m grateful for the many months they’ve let me keep this in my shack and test drive it with various SDR applications.

My RSP review has been published in The Spectrum Monitor and now here on the SWLing Post. There was no need for me to keep it in the shack any longer, but as I reached for the return box, I simply couldn’t let the RSP go.  Instead, I reached for my wallet, contacted SDRplay and paid for it.

I have no buyer’s remorse. The RSP is an amazing little SDR and so very affordable. At $149 US, it costs less than two of the latest portables I’ve purchased. As my review states, it packs maximum performance for its price class.

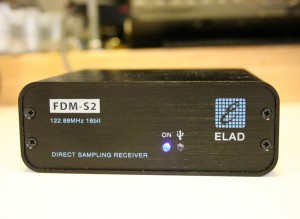
The RSP will become one of my travel SDRs since it’ll fit so easily in my radio go-bag. This will take a little pressure off of my Elad FDM-S2, which I like using in the shack and on extended vacations.

I can pack the SDRplay RSP with confidence when I’m doing one-bag, international travel, knowing that if it were to get lost or stolen, I’m only out $149. Plus, to a potential thief, the RSP box simply doesn’t look expensive.

When I have a little time, I plan to pair the SDRplay RSP with my Raspberry Pi. Of course, I’ll report on my progress.

Have any readers combined the Raspberry Pi and the RSP? If so, please comment!

Spread the radio love

A review of the SDRplay RSP software defined receiver

The following review originally appeared in the May 2015 issue of The Spectrum Monitor magazine.


SDPlay-RSP

Good things often come in small packages.  But not all of these things are…well, affordable.

Ironically, earlier this year, just after I began to evaluate and review the superb TitanSDR Pro, a robust military-grade SDR, I was approached by the UK-based manufacturer of the SDRplay RSP software-defined radio and asked to review their receiver. I was instantly intrigued––and, truth be told, just a bit amused, considering the difference between these two receivers.  And what, exactly, separates the SDRplay RSP from the TitanSDR? At least $1350.

The SDRplay RSP is one of the recent generation of economical wideband SDRs based upon innovative, inexpensive chipsets; in the RSP’s case, based upon the Mirics MSI3101 SDR chip, and a MSI001 tuner.  Priced at a mere $149 US (plus shipping), the SDRplay RSP is one of the least expensive, yet full-featured SDRs which actually include the HF bands and below, and which require no extra upconverter. Preliminary reviews of the SDRplay RSP were quite positive, so when the folks at SDRplay requested that I review an RSP on loan, I immediately seized the opportunity.

Unboxing and connecting

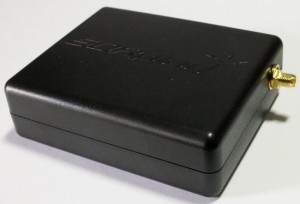
My review unit of the SDRplay RSP has blue ends caps and an F style connector. All current production units have the new back case and SMA connector.

My review unit of the SDRplay RSP has blue ends caps and an F style connector. All current production units have the new back case and SMA connector.

My SDRplay RSP arrived in a modest well-padded box. And what was inside? Only the SDRplay RSP and a small F-to-BNC adapter. You’ll need to supply a USB cord, as it’s not provided by SDRplay. If you’re like me, though, you already have a number of these around; I prefer USB cables with ferrite chokes (click here for an example).

Note that shortly after I received my review unit, SDRplay made two design changes to the RSP:

1) the F style antenna jack has been replaced with the more common SMA connector, and 2) the chassis color has been changed to black.

SDRplay-RSP-USB

There are only two ports on the RSP: the antenna port, and on the other side of the box, a USB B-Type port (see photo above). Connecting it to your computer and antenna are a cinch.

The RSP’s chassis is made of a strong, lightweight plastic. A very simple design, and one that, I expect, would easily survive the rigors of my favorite brand of one-bag air travel to international DX destinations.

Software Installation

Unlike many of the other SDRs I’ve reviewed in the past (see the Elad FDM-S2 and TitanSDR), the SDRplay RSP does not come with a proprietary (OEM) SDR application. Meaning, the SDRplay company does not make their own SDR application that controls the RSP. Instead, SDRplay provides an API to allow application and demodulator development. There are already plug-ins for third-party SDR applications (like SDR# and HDSDR, for example); once installed, these plug-ins create an excellent compatibility bridge with the RSP.

But note that since the SDRplay RSP relies on third-party applications, the installation process isn’t exactly plug-and-play; you must typically download USB drivers, then the SDR application of your choice, and finally (typically) a dedicated plug-in for the software. Yet it’s not a complicated process by any means; SDRplay’s website has links to all of the necessary downloads (http://www.sdrplay.com/downloads.html) and installation manuals (http://www.sdrplay.com/documentation.html). No intimidation factor here.

Advantages and disadvantages of third-party applications

I should also note that I’ve always been a fan of SDR manufacturers offering open compatibility with third-party applications; in fact, when hardware manufacturers have approached me in the development stages of product design, I always suggest they leave room for third-party development.

HDSDR-SDRplay-RSP-CHU-Canada

HDSDR running the SDRplay RSP (Click to enlarge.)

Why? First, as free SDR apps are so widely used in amateur, scanner, as well as shortwave radio circles, there is already a very large user-base for support when you have compatibility issues. Additionally, third-party applications often work on multiple platforms, like Windows, OSX, Linux and even Android/iOS; OEM application tend to work only on Windows OS. Secondly, if you’re already using, for example, HDSRDR to control a radio, adding the SDRplay RSP is very easy, and as a bonus, you’ll already be familiar with the user interface––there’s hardly any learning-curve involved. Finally, I find I’m much less concerned about product obsolescence when hardware is designed to work in such an open-development environment, thus indicating greater potential for forward-compatibility.

Of course, on the flip side, not having an OEM application means that troubleshooting is often more difficult. If you encounter a problem you’ll have to determine whether the problem lies with OS, computer/tablet, USB driver, SDR application, or hardware––or whether the problem is in a combination of two or more of these, or the communication between them.

Fortunately, I’ve been very pleased with the SDRplay support team; this group has promptly addressed any questions or concerns I’ve had. Moreover, the RSP also has an active forum of users (http://www.sdrplay.com/community/).

Scope of review

In most reviews, I focus the majority of my SDR review upon the pros and cons of the application’s user interface.  In this case, since the SDRplay RSP is using widely-distributed third-party applications, I can focus primarily on the SDR’s performance, instead.

The SDRplay RSP is currently compatible with the following third-party SDR applications:

The ExtIO screen--available in your application of choice via the RSP plugin--allows you to change the RSP's IF Bandwidth/Mode, LNA GR Threshold, Mixer and ADC settings.

The ExtIO screen–available in your application of choice via the RSP plugin–allows you to change the RSP’s IF Bandwidth/Mode, LNA GR Threshold, Mixer and ADC settings.

Indeed, when I asked the SDRplay support team about a comprehensive list of supported SDR apps, they responded:

“We should be compatible with any SDR application that supports the EXTIO library––this is what we are using for SDR# and HDSDR. [We] should also be compatible with any Linux application that uses the gr-osmosdr interface library (such as GQRX and Gnu-Radio).

We have just released it and I’m in the process of writing up the installation instructions. We have also had this running on a Raspberry Pi 2.”

…A Raspberry Pi 2 application? I, for one, can’t wait to try this in the near future––!

For this review, I used two favorite apps with which I’m familiar: SDR# and HDSDR.

SDR-Sharp-SDRplay-RSP-CHU-Canada

SDR# running the SDRplay RSP (Click to enlarge.)

Wideband

I should note here that the SDRplay RSP also has an exceptionally wide frequency range covering from 100 kHz to 2 GHz, with only a narrow gap between 380 MHz and 430 MHz. With the appropriate software, you can use the RSP for a number of applications, for example, scanning, FM DXing, and possibly even radio astronomy.

Performance

So, how about receiver performance?

I’ll going to cut to the chase here: For the $149 price tag? I’m very impressed.

Keep in mind, this is the first SDR I’ve ever reviewed––or even spent more than a few hours exploring––that costs under $400. My only other experience with a low-cost SDR was a few hours spent with the Funcube Dongle Pro+––a popular wideband SDR dongle that also covers the HF spectrum. Frankly, I was disappointed with the Funcube Dongle Pro+, which I found subject to unwanted noises and even some imaging, which I assumed might be indicative of this class of SDR. Fortunately, I’ve not experienced this sort of thing with the SDRplay RSP.

In short: I fully expected $149 performance out of the RSP, but was very surprised to find performance on par with a receiver two or three times this cost.

So for comparison purposes, I chose the Elad FDM-S2 as the benchmark. I currently have three other SDRs in my shack, but the FDM-S2 is the next-lowest in price (currently listed at $539). But to be quite clear: the FDM-S2 is a pretty high benchmark, as I consider it a superb receiver for its price class.

When I first turned on the RSP and tuned through the HF bands, I was quite amazed at the relatively low noise floor of this receiver. Stations seemed to “pop” out of the static. I had assumed that the SDR# application had some sort of DSP noise reduction engaged, but this proved not to be the case––I confirmed the same low noise floor level via the HDSDR application.

SDRplay actually gave the RSP to me on an extended loan, so I’ve had the opportunity to use it both in quiet winter conditions and more unsettled, noisier conditions indicative of spring and summer here in the US. I used the RSP almost exclusively for two weeks in an effort to uncover its most notable strengths and weaknesses. But by the end of the two-week period, I began to suspect that the RSP might actually have sensitivity on par with my other SDRs.  To answer this question, I turned to A/B comparisons with the FDM-S2.

Sample audio

I believe the following is a good representative comparison between the SDRplay RSP and the Elad-FDM S2.

The following recordings are of Radio Riyadh on 15,225 kHz.  Riyadh’s signal is quite weak and voice levels are barely above the noise floor. Both the Elad FDM-S2 and SDRplay RSP (via HDSDR) were set to a slow AGC, AM sync, and a 8.2 kHz bandwidth.

First, the Elad FDM-S2:

Now the SDRplay RSP:

In this representative sample––and pretty consistently throughout all my comparisons––the FDM-S2 was able to pull voice and music out of the noise better than the RSP. In weak signal DXing, this is important, especially when you’re listening for a station ID.

So would I ever replace my FDM-S2 with the RSP? No.

Still, for a $149 receiver? This performance is most impressive! The RSP is only a little less sensitive than my much pricier SDRs.

Summary

SDRPlay-RSP (1)

Invariably, all radios have strengths and weaknesses; here is a list of my notes from the moment I put the RSP on the air:

Pros:

  • Excellent performance for price
  • Good sensitivity and selectivity
  • Low noise floor
  • Compatible with multiple open source SDR applications
  • Very wide frequency range (frequencies above 30 MHz not tested in this review)
  • Works with multiple operating systems
  • Selectable USB/LSB sync detection via supported third-party applications
  • 8 built-in switched preselectors that cover various portions of the RSP’s entire bandwidth
  • Compatible with a number of excellent third-party SDR applications (see con)
  • One of the few low-priced SDRs that doesn’t require a converter for HF coverage
  • Exceptional value

Cons:

  • No OEM SDR app (see pro) SDRuno is now SDRplay’s OEM/native application for the RSP line
  • Some moderate overloading on very strong stations (though a little tweaking of SDR applications settings can largely remedy this)
  • Via the current offerings from third-party apps, no multi-channel audio recordings SDR Console allows for multi-channel recordings with the RSP

Conclusion:

SDRplay Above PictureI walked into this product review expecting to be…well, disappointed. As I have some benchmark SDRs on my desk at all times, I hadn’t investigated inexpensive SDRs because I felt they would simply be redundant.

Fortunately, the SDRplay RSP really impressed me from the beginning with its low noise floor, variable IF bandwidth options, and relative ease of installation. Since the RSP only requires one USB cable for both data and power, it’s also an ideal portable SDR.

Up to this point, I’ve always hesitated suggesting that those interested in a beginner’s SDR invest in any sub-$200 SDR, unless they simply want to get their feet wet and aren’t interested in performance. But at $149 US––the price of a good shortwave portable radio––I can confidently recommend at least the SDRplay RSP to those readers who want to start out with a good-quality rig. Indeed, for many, it might out-perform other receivers in their shack.

I see the RSP having a place in my shack as well, especially on my portable shortwave listening adventures. If you’re looking for a quality first SDR, or, like me, are interested in a supplemental or remote receiver that won’t break the bank, the RSP is just the ticket. And at just $149, you simply can’t lose.

Meanwhile, what’s next for me? I plan try the RSP via the Raspberry PI 2 and my newly acquired Dell Venue 8 tablet.

The SDRplay RSP can be purchased directly from SDRplay via their online store: http://www.sdrplay.com/purchase.php

Resources:

Spread the radio love

A review of the TitanSDR Pro software defined receiver

TitanSDRPro-2

The following review originally appeared in the May 2015 issue of The Spectrum Monitor magazine.


It’s no secret…I’m a bit of an SDR geek. Yes, after discovering the power of software-defined radios a few years ago, I’m hooked: SDR listening represents nearly 95% of my home listening and monitoring. And I love it.

As a result, I’m always looking at new SDR technologies to note advances that could improve both my at-home and on-the-road listening––not to mention, satisfy my appetite for spectrum and broadcast recordings.

A few months ago, I heard about a new military-grade SDR called the TitanSDR. Being eager to check it out, I reached out to the Italy-based manufacturer, Enablia; they kindly lent me a TitanSDR Pro for review.

TitanSDR back panel (Photo: Enablia)

TitanSDR back panel (Photo: Enablia)

But here I must insert a disclaimer. Even though I love SDRs, I always find myself hesitating slightly when it comes to writing a review of one––simply because, when compared with tabletop and portable radios, SDRs tend to be so very complex. While I’m fairly well versed in what to expect of an SDR application, the learning curve (and sometimes even installation curve) can be formidable. And the TitanSDR seemed especially daunting: since it’s designed for heavy, full-duty, multi-channel SIGNET and military use, I expected to need a at least a few days to both install the device and, more significantly, to learn the ropes of the application which drives the SDR.

Fortunately, my fears were unfounded. The TitanSDR and I were in sync almost before I knew it, hinting favorably about an accessible user interface.

First impressions

The TitanSDR ships in a box with the following components: the Titan SDR “black box” receiver, a TitanSDR installation DVD, a printed installation manual, a USB memory stick with a license key, USB cable with chokes on both ends, and a separate regulated power supply.

Not purely a plug-and-play device, the TitanSDR requires a proper three-step installation. Fortunately, the installation manual walks you through the process, which is actually quite simple. Within a mere five minutes, I had the TitanSDR installed and on the air.

The TitanSDR application

The application which runs an SDR is your interface to all of the radio’s capabilities. A top-notch SDR paired with a confusing SDR application will greatly diminish usability and, frankly, sheer enjoyment.

Fortunately, this is where the TitanSDR comes up trumps. To be clear: the TitanSDR has one of the best user interfaces of any SDR I’ve ever tested. While SDR interfaces are subjectively evaluated––some prefer a more dense, involved GUI––I always appreciate simplicity and overall usability over lots of (visible) bells and whistles.

Click to enlarge

Click to enlarge

I’m especially impressed with how easily the TitanSDR app is designed to cope with multiple band windows, both wide and narrow, while many SDR manufacturers struggle with making an intuitive interface for merely one wideband and one narrowband window, each.

The user interface is divided into three major components: the panoramic scope, the wideband scope, and the narrowband scope. Let’s take a look at each.

Panoramic Scope

TitanSDR Panoramic Scope. Click to enlarge.

TitanSDR Panoramic Scope. Click to enlarge.

When you first open the Titan application and connect the SDR, the panoramic display, which spans the top of the window, comes to life. If hooked up to an antenna, you’ll see spectrum peaks across the display, but you’ll hear no audio because you must first select a wideband and then a narrowband window.

Wideband Scope

At the upper left portion of the panoramic scope, you’ll find a button that allows you to add a wideband selection/channel. After clicking the “add” button, you’ll need to choose the width of your wideband slice. Your choices:

  • 2.1875 MHz
  • 1.875 MHz
  • 1.5625 MHz
  • 1.25 MHz
  • 937.5 kHz
  • 625 kHz
  • 312.5 kHZ

After selecting your wideband width, the wideband scope will appear with the spectrum and waterfall in action. At this point, you’ll still hear no audio, but you’ll see a wideband swatch of frequency represented by your selection.

TitanSDRPro-WidebandWindow

New wideband selections default with a beginning frequency of 0 kHz. To place the wideband selection into the part of the shortwave spectrum you want to hear or record, you simply click and drag the appropriately colored wideband swatch within the panoramic display to the part of the HF spectrum you wish to monitor.

Selecting a Wideband

Selecting a Wideband channel size. Click to enlarge.

Your first wideband selection is labeled in red, the second in green, third in blue, fourth in purple. While there are limits to the number of wideband selections you can make, based on the total bandwidth of your selections [the TitanSDR owner’s manual provides a matrix of possible combinations], each is readily identifiable by color in the panoramic display.

After you’ve created a wideband selection and placed it where you’d like to listen, you’ll now need to make a narrowband selection in order to begin tuning and listening.

Narrowband Scope

Creating a narrowband channel is similar to creating a wideband channel: at the top of the wideband scope window, simply click on the “add” button, and then click within the wideband scope spectrum display to place the narrowband channel where you want it.

TitanSDRPro-Narrowband-USB

Once placed, this new narrowband scope will be visible in the lower right portion of the TitanSDR application window. You’ll also hear audio for the narrowband selection.

The narrowband selection defaults in USB mode, but you can quickly change modes by selecting one from the panel above the narrowband spectrum. Your choices:

  • USB
  • LSB
  • AM
  • CW
  • NFM
  • FSK
  • DRM (built-in, no separate license needed)
  • eUSB
  • eLSB

Tuning

After using the TitanSDR for only a couple of days, I found I was quite comfortable tuning through the bands. Every SDR application has its own quirks; the TitanSDR app gives you several tuning options.

TitanSDRPro-NarrowBandWindow

Within a narrowband window, you may tune by:

  • Clicking the center of the shaded area (representing the frequency and mode you are monitoring) and moving it within the NB spectrum display
  • By manually keying in the frequency within the frequency display window
  • By placing the cursor within the frequency display and using the scroll wheel of your mouse to increase and decrease frequency increments
  • By using hot keys: “Ctrl + K” to increase frequency, “Ctrl + J” to decrease frequency

Tuning within the wideband scope is as simple as clicking and dragging the narrowband shaded area.

Of course, wideband areas can be moved to different parts of the HF spectrum by simply clicking on the shaded wideband area within the panoramic scope and moving it to a different location. But you can only do this if there are no active narrowband channels within the selected wideband channel.

With the ability to load multiple wideband channels with multiple embedded narrowband channels, you might think tuning and manipulating the various channels would get confusing. But this is just not the case. Herein lies the excellent user design behind the TitanSDR.

SelectingANBchannel

The software engineers at Enablia obviously put time into designing their application for users who routinely use multiple channels. Each channel is clearly color-coded across the scopes, and selecting them is a simple process: one of four wideband channels via the panoramic display, and one of many narrowband channels via the wideband display. Indeed, TitanSDR produced a brief video (http://youtu.be/XDdilGykSuY) describing how to use the TitanSDR application interface. The concept of selecting and manipulating the various channels is so easy, I actually knew how to do it prior to receiving and installing the software…and all from this eleven-minute video tutorial.

Without a doubt, the TitanSDR user interface is one of my favorites among the numerous SDRs I’ve evaluated.

Speaking of multiple channels, if you have a particular combination of wideband and narrowband channels that you like to load each time, you can save the full configuration and reload it at startup, preserving every frequency and channel. Brilliant.

Recording

For shortwave archivists (like the author of this review!), the TitanSDR is very enticing. Even the most basic version of the TitanSDR allows for 4 wideband channels and 8 narrowband channels of simultaneous recording. This means that you can record a wideband channel and as many as eight individual live broadcasts consecutively. While rarely needed, it’s an impressive feature. Quite often I’ve wanted to record as many as three broadcasts simultaneously; my WinRadio Excalibur, for example, allows for as many as three consecutive broadcast recordings, but limited within a 2 MHz bandwidth. The TitanSDR has no such limitation. You could load four wideband channels across the spectrum––say, one within the mediumwave band, one on 41 meters, one on 31 meters, and one on 10 meters––and record or listen to up to eight individual broadcasts within those channels. The TitanSDR pro will even allow for up to 40 consecutive narrowband channels of recording.

The record and schedule functions are most accessible in the narrowband scope window (above) and the wideband scope window.

The record and schedule functions are prominent in the narrowband scope window (above) and the wideband scope window.

What’s more, the TitanSDR has one of the most versatile automatic file naming systems I’ve ever used. Not only can it embed the date, frequency, and mode, but also the start time and end time. It also has a user-defined string which allows for more file name customization. And another nifty feature: the Titan can be set to embed either local or UTC time in the filename.

Yet another feature the archivist in me delights in? You can schedule narrowband and wideband recordings within the application––no need for an external program or macro.

Missing features?

As a product designed specifically for military and government applications, the Titan application currently lacks many of the features you might expect in a $1000+ software defined receiver. The version of the TitanSDR application (at time of publishing this review) lacks a variable notch filter, 90 second waterfall review, and an embedded time stamp––features one might well expect from a receiver in this price class.

Prior to publishing this review, I contacted Enablia with a list of features I thought should be included, and they agreed that these features should be added to appeal to the ham radio and shortwave listening customer base. Indeed, within a matter of two weeks, I was sent a new version of the Titan application with the addition of a number of keyboard shortcuts that I recommended. A few weeks later, I received another update which included the ability to set the maximum size of spectrum recording “chunks” to anything between 50MB and 2GB. Enablia plans to add more of the features for the radio hobbyist in time, but after this review has been posted.

If you’re seriously considering purchasing the TitanSDR, you might contact Enablia first to see if and/or when these features are to be added. I’m confident they will be added in time.

Summary

TitanSDRPro

When I begin a radio review, I keep a checklist of pros and cons as I discover them to remind myself of my initial discoveries.

Here’s my list from the TitanSDR:

Pros:

  • Superb sensitivity and selectivity
  • No less than 16 preselectors (hardware)
  • Brilliant application user interface, one of the best I’ve encountered
    • Simple controls, logically laid out
    • Effective selection system to move between narrow/wide band windows
    • Customizable waterfall and spectrum displays
    • Frequency display can be set to Hz, kHz or MHz
    • Full panel configuration with multiple custom wideband and narrowband channels can be saved and loaded in the future
  • Recording functionality
    • Up to one spectrum recording can be made, while four wideband windows may be open
    • Between 8-40 AF/Audio recordings can be made simultaneously live or from wideband recordings
    • File naming convention automatic with excellent customization options
    • Full recording scheduling in both wide and narrow bands
    • Spectrum recordings can be parsed to anything between 50 MB to 2 GB each, or left to grow to without a size ceiling; like other SDRs, recording chunks are played consecutively
  • Excellent overall build quality
  • SDR application very stable and quick to load
  • Supplied power supply is regulated and quiet
  • TitanSDR application updates are simple to install
  • Enablia support has been responsive

Cons:

  • Both the TitanSDR and TitanSDR Pro are pricey for most radio enthusiasts
  • Missing some features that would be expected in a radio of this price class (though Enablia have confirmed these features may be added in future updates):
    • No notch
    • No waterfall review
    • Neither embedded time code nor memory labeling in spectrum display
  • Windows/PC only (not supported by OS X or Linux)

Conclusion

TitanSDRPro-3

No doubt, I’m impressed with the TitanSDR, performance-wise. It’s as sensitive and selective as any SDR I’ve ever tested. Serious weak-signal DXers will be pleased with this rig.

Of course, there’s the daunting price tag of the TitanSDR, which makes it clear that this was a receiver designed for government and commercial use: the basic version of the TitanSDR retails for 1380 EUR, the TitanSDR Pro for an even heftier 1970 EUR.

This pricing places it well above the Microtelecom Perseus, WinRadio Excalibur and Elad FDM-S2, all of which can be purchased for $1000 or less.

Who might benefit from the extra cost of the TitanSDR? Those who need a receiver with a very robust front end. With no less than 16 pre-selectors, the TitanSDR is a great choice for those living in the vicinity of blowtorch radio stations. If you’re looking for a stable, easy-to-use flagship SDR with a rock-solid application to support it, you might just splurge on this impressive SDR.

I always ask myself at the end of a review if I would purchase the equipment I’ve spent a couple of months evaluating. I can honestly say that if I had the money, I would not hesitate to purchase the basic version of the TitanSDR. With its four wideband and eight narrowband channels, it would more than suit my receiver needs as a broadcast archivist.

1,380 EUR buys the basic version of the TitanSDR – With four WB (Wideband) channels, eight NB (Narrowband) channels (to be allocated on WB channels) and VAC (virtual audio) interfaces to third party SW decoders, this is a solid and adaptable SDR.

1,970 EUR buys the TitanSDR Pro – With four WB channels, 40 NB channels (to be allocated on WB channels), VAC interfaces to third party SW decoders, basic LAN control and plug-in software interfaces (by LAN Ethernet) to software decoders CODE300-32 by Hoka Electronic (http://www.hoka.net/products/code300-32.html) and Krypto500 by Comint Consulting (http://www.comintconsulting.com/k500.html), this SDR can sing and dance.

View TitanSDR purchasing information and options on Enablia’s website: http://www.enablia.com/titansdr-receiver.html

Spread the radio love

Improving audio fidelity with JBL C2PS monitor speakers

JBL-Monitor-Speakers

Last year at the W4DXCC conference in Sevierville, Tennessee, I spent some quality time with Bob Heil (K9EID). Bob is the mastermind behind Heil Sound as well as the host of HamNation, a show devoted to all aspects of amateur radio––yet this job description only scratches the surface of Bob’s fascinating career.

Bob Heil (left) me (right)

Bob Heil (K9EID, left) and yours truly (right) at the 2014 W4DXX conference in Sevierville, TN

One thing is for sure, however: there are few people in the radio industry who truly understand audio as profoundly as Bob Heil, so when he announced that he would host a forum at the W4DXCC to assist amateur radio operators in improving their received (and transmitted) audio, we were all ears, and signed right up.

Early in the forum, Bob described a set of self-powered and relatively affordable JBL monitor speakers that he highly recommended for amateur radio use. Everyone in the room noted the model number of the speakers, myself included.  So imagine my dismay after the convention when I simply couldn’t find my notes…

Thankfully, my buddy Gary Wise (W8EEY) recently jogged my memory. Gary purchased a set of JBL monitors and matching wall-mount brackets from Amazon, and has them hooked up to his Flex Radio FLEX-6700 SDR.  Gary tells me he’s very pleased with the set-up.  Here are the links:

Bob also suggests adding a small mixer to system, something like this Behringer Xenyx 802 or the XENYX502 (both of which are on my current wishlist).

Bob invited me to speak on HamNation about shortwave radio. I may take him up on the offer…well, as soon as I overcome my videophobia, that is.  At any rate, if you’ve not seen it, HamNation is certainly worth checking out.  And in all things radio, Bob Heil’s is a name to know; click here to visit Heil Sound.

Spread the radio love