Tag Archives: Amateur Radio

Take the field and abandon the radio noise!

The most common complaint I hear from new SWLing Post readers is that they can’t hear stations from home on their receivers and transceivers. Nine times out of ten, it’s because their home environment is inundated with man-made electrical noises often referred to as QRM or RFI (radio frequency interference).

RFI can be debilitating. It doesn’t matter if you have a $20 portable radio or a $10,000 benchmark transceiver, noise will undermine both.

What can you do about it?

Since we like to play radio at home, we must find ways to mitigate it. A popular option is employing a good magnetic loop receive antenna (check out this article). Some readers find noise-cancelling DSP products (like those of bhi) helpful when paired with an appropriate antenna.

But the easiest way to deal with noise is to leave it behind.

Take your radio to a spot where man-made noises aren’t an issue.

Field radio

If you’ve been reading the SWLing Post for long, you’ll know how big of a fan I am of taking radios to the field–both transceivers and receivers. Not only do I love the great outdoors, but it’s the most effective way to leave RFI in the dust.

Sunday was a case in point (hence this post).

Let’s be clear: I blame Hazel…

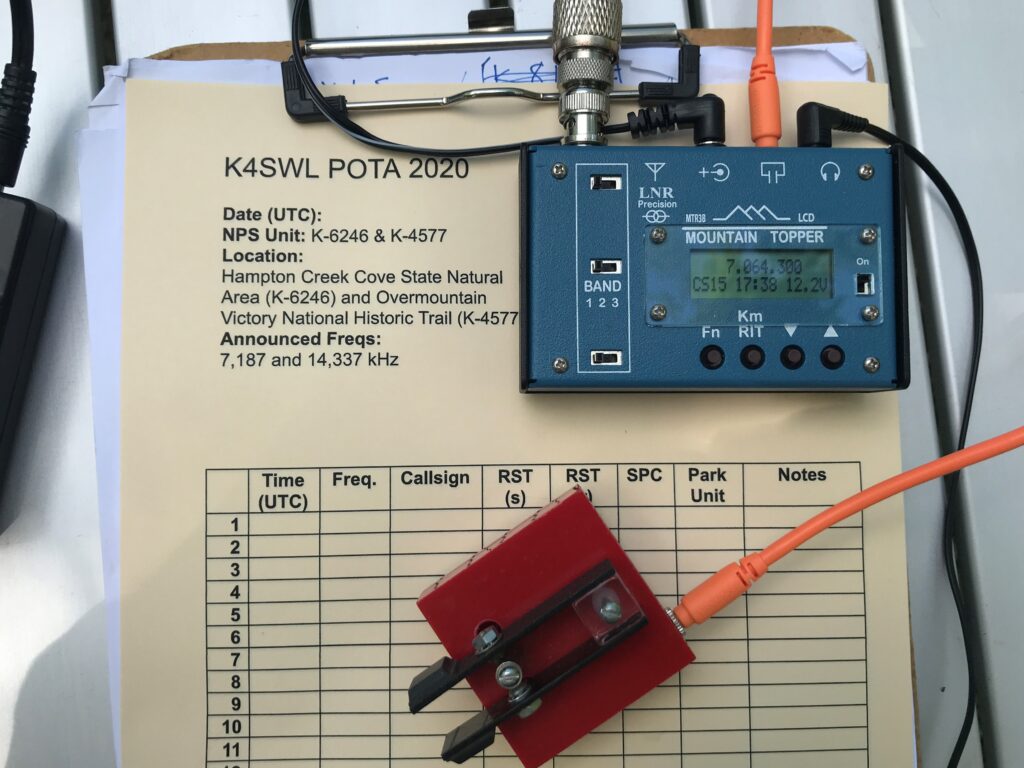
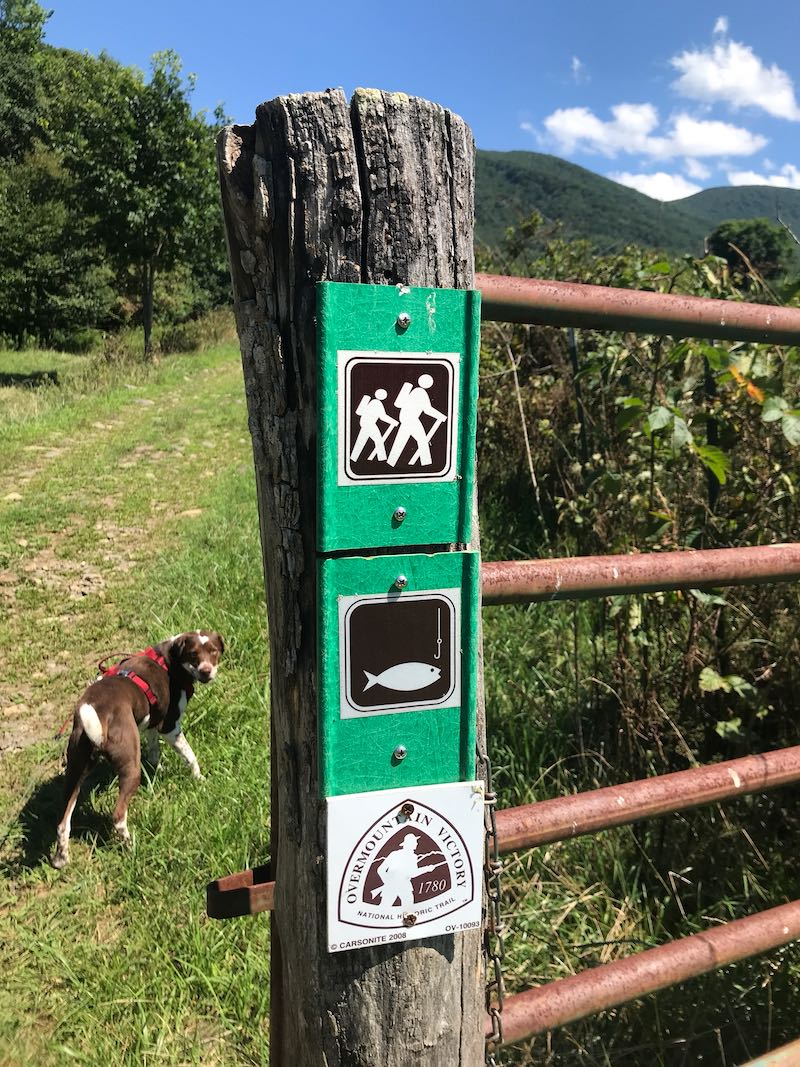
Last week, I did a Parks on the Air (POTA) activation of Hampton Creek Cove State Natural Wildlife Area in Tennessee. It’s a beautiful area with a fantastic hiking trail (the Overmountain Victory Trail) in a relatively remote/rural area.

About 5 minutes before Hazel’s cow patty fun.

My family had a great time at the site–we enjoyed a picnic and I played radio–but Hazel (our trusty canine companion) decided to roll in a cow patty during our hike. Hazel thought it smelled wonderful. Her family? Much less so. And all five of us were staring at a two hour car ride together.

Fortunately, my wife had a bottle of bio-degradable soap we use while camping, so I washed Hazel in Hampton Creek. (Turns out, Hazel didn’t mind that nearly as much as getting washed at home in the tub.)

In all of the commotion I forgot to take my EFT Trail-Friendly antenna out of the tree. Doh!

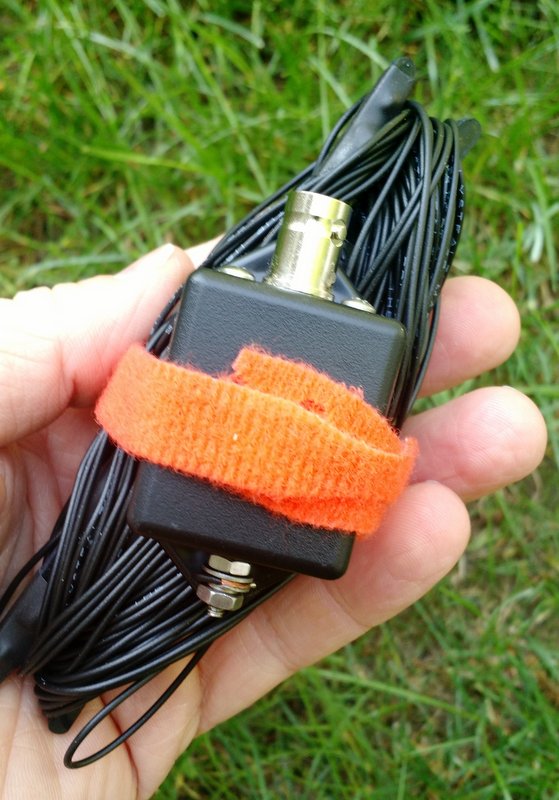
The EFT Trail-Friendly antenna is incredibly compact and quite easy to deploy.

The EFT is my favorite field antenna for POTA activations. It works so well and is resonant on 40, 20 and 10 meters. With an ATU, I can also tune any bands in between. I’ve deployed this antenna at least 130 times in the field and it was still holding up.

I was bummed. Hampton Creek is nearly a four hour round-trip from my home. Was it worth the trip to rescue my antenna?

Fast-forward to Sunday: my amazing wife actually suggested we go back to Hampton Creek Cove on Sunday and also check out nearby Roan Mountain State Park. Would my antenna still be in the tree? Hopefully.

Whew! Still hanging out!

Fortunately, my antenna was still hanging there in the tree as I left it the week before. I was a little concerned the BNC end of the antenna may have gotten wet, but it was okay.

Mercy, mercy, so little noise…

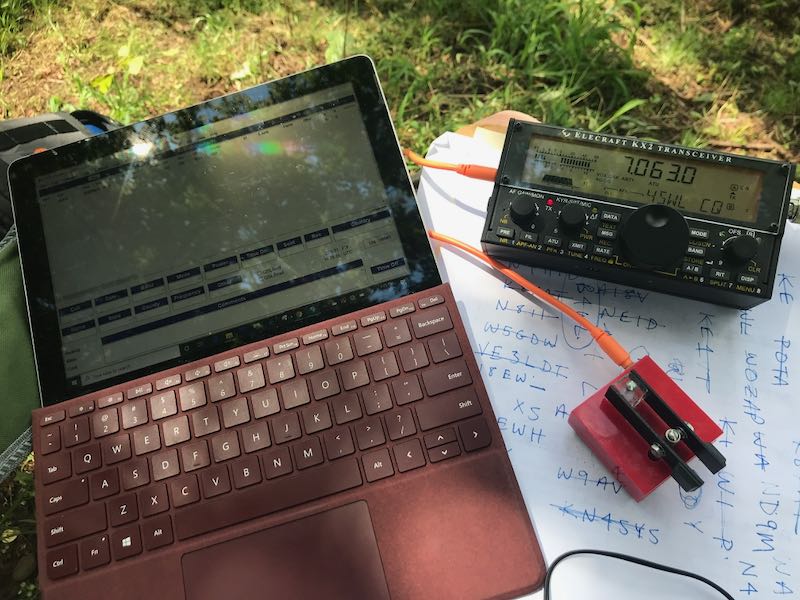
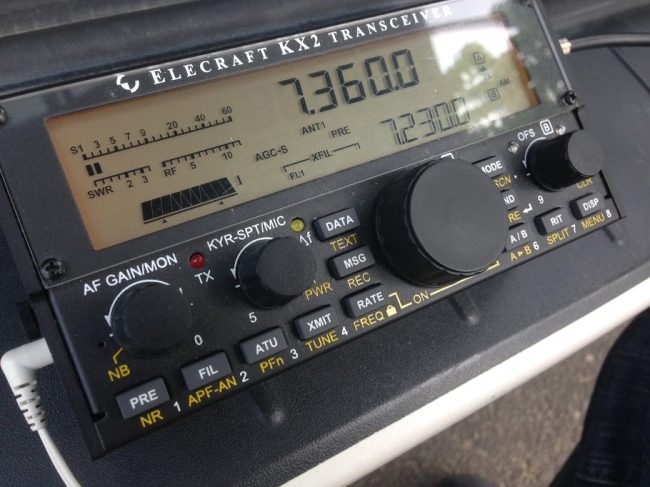
I turned on my Elecraft KX2 and plugged in the antenna. Oddly, there was very little increase in the noise level after plugging in the antenna. That worried me–perhaps the antenna got wet after all? I visually inspected the antenna, then pressed the “tune” button on the KX2 and got a 1.4:1 SWR reading. Then I tuned around the 40 meter band and heard numerous loud stations.

What was so surprising was how quiet the band was that day (this time of year the 40M band is plagued with static crashes from thunderstorms).

Also, there were no man-made electrical noises to be heard.  This allowed my receiver to actually do its job. It was such a pleasure to operate Sunday–no listening fatigue at all. Later on, we set up at Roan Mountain State Park and did an activation there as well. Again, without any semblance of RFI.

When I’m in the field with conditions like this, I always tune around and listen to HF broadcast stations for a bit as well. It’s amazing how well weak signals pop out when the noise floor is so incredibly low.

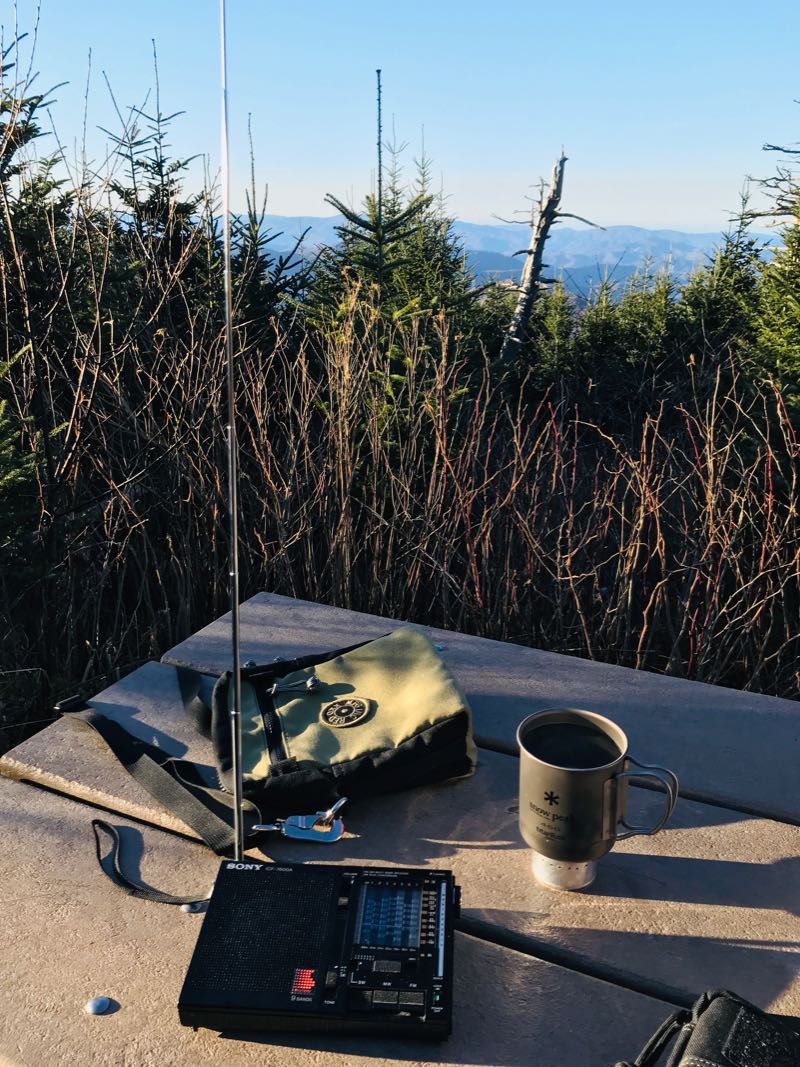
It takes ten or so minutes to set up my POTA station in the field, but if you have a portable shortwave radio, it takes no time at all. None. Just extend the telescoping antenna and turn on the radio.

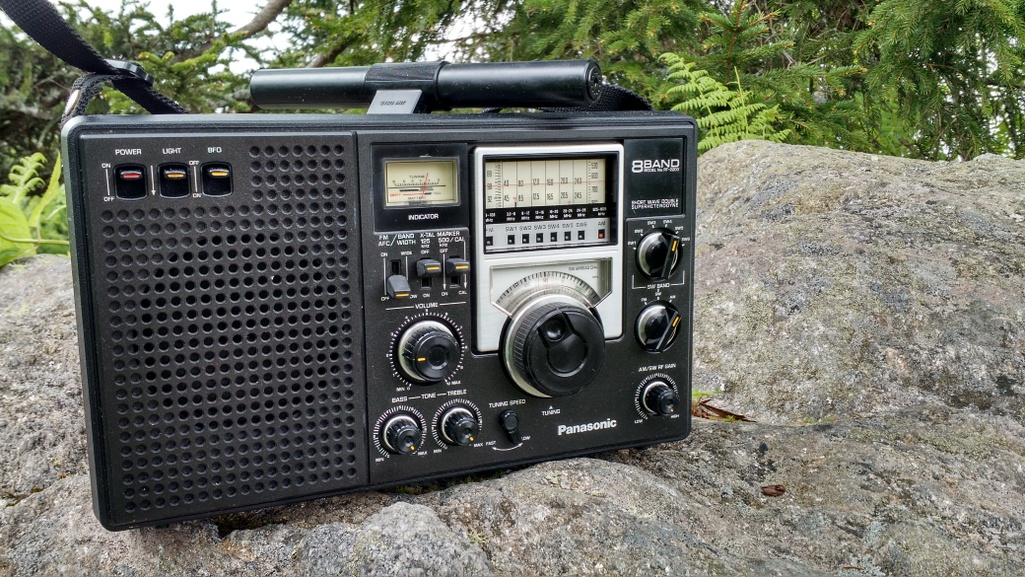
Or in the case of the Panny RF-2200 use its steerable ferrite bar antenna!

If you’re battling radio interference at home, I would encourage you to survey your local area and find a noise-free spot to play radio. It could be a park, or it could be a parking lot. It could even be a corner of your property. Simply take a portable radio outside and roam around until you find a peaceful spot with low-noise conditions. It’s the most cost-effective way to fight RFI!

Post readers: Do you have a favorite field radio spot? Do you have a favorite field radio? Please comment!

Also, check out these articles:

Spread the radio love

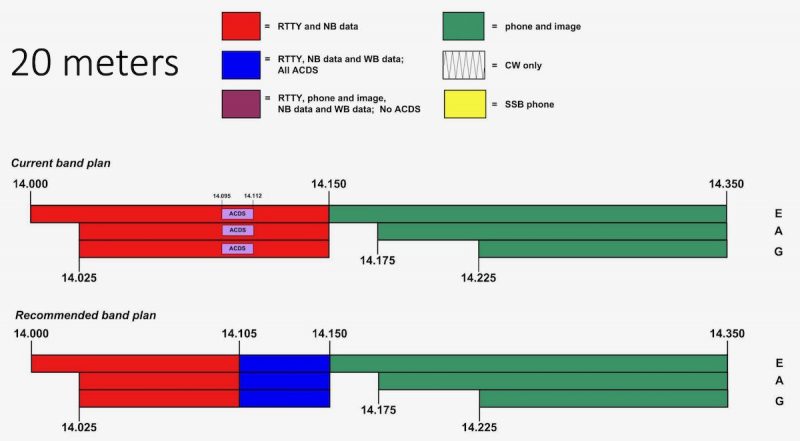
New Technician HF Privileges Defined: ARRL board accepts final recommendations of the Band Planning Committee

(Source: ARRL News)

During this session, the [ARRL] Board took the following actions:

Accepted the final recommendations of the Band Planning Committee. Committee chair and ARRL First Vice President Mike Raisbeck, K1TWF, introduced the motion to adopt the plan. An earlier draft of the plan was introduced at the Board’s in-person January meeting. After the January Board meeting, the Committee received and considered hundreds of comments from interested amateurs. The final band plan can be viewed on the ARRL website.

The new plan only applies to the HF band and makes no changes to 160 and 60 meters. A couple other notes from the accepted plan:

  • No changes to CW allocations throughout all amateur bands
  • RTTY and all other narrowband, non-ACDS modes permitted wherever data
    modes are allowed

As you read through the changes, keep in mind that the new plan addresses expanded Technician HF privileges and also re-defines ACDS (Automatically Controlled Digital Stations) allocations among other modifications.

Technicians will be happy to note they’ll have new phone and image privileges on 80 meters (3,900 – 4,000 kHz), 40 meters (7,225 – 7,300), and 15 meters (21,350 – 21,450 kHz).

Click here to download a PDF of the accepted (final) proposed plan.

Spread the radio love

Adding CW mode to the EA3GCY DB4020 Dual-band 40 and 20M QRP Transceiver Kit (Part 2)

Many thanks to SWLing Post contributor, Frank (ON6UU), who shares the following guest post which expands upon his previous DB4020 article:


The EA3GCY DB4020 transceiver now has CW mode

by Frank Lagaet (ON6UU)

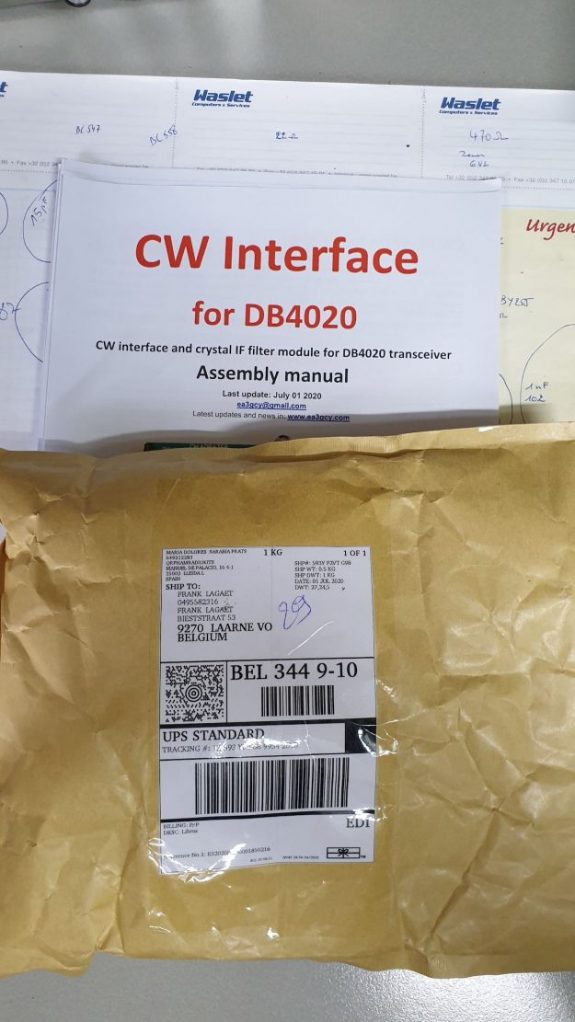
After telling you all about the DB4020 SSB build I’m here with the CW part of the kit,  let’s say this is part 2.  At a certain moment Javier let me know the CW interface kit was ready for shipment and some week later it was delivered to my QTH.

Again, a well packed kit arrived in a brown envelope, components and boards well packed in bubblewrap.  I found even a board I did not expect which can hold a push button,  a switch and the connector for your morse key.  Javier thinks of everything it seems!

Unpacking the bubblewrap gave me this result,  all components in 2 bags.  In the bigger bag another 2 bags with 2 printboards,  one for the CW interface,  one for the CW filter.  Great !!  Checking the material bill resulted in all components there,  another thumbs up.

I started, of course, immediately building it because I wanted CW in the transceiver as soon as possible.  I don’t do much in SSB mode anymore and I already started missing CW on the DB4020,  so I started my KX3 to listen to while I was populating the boards.  I never thought CW was going to have this impact on me! …. ..

I started building the CW interface,  again starting with all small items.  I soon saw that the 2 relays which need to be soldered in were ideal to protect all components when the board is upside down, so I soldered them in very quickly.  I then soldered in all other components ending with the elco’s.

Next phase was the CW filter.  This board is small and came together in a blink of an eye, no problems there, the long legs of the 3 and 4 pin headers went in last.

The following day, I made all wire connections and soldered a 13pin connector,  leaving one pin out since I want to have the option to choose the width of the CW signal I’m listening to.  By cutting the FL CW + pin and adding an additional switch, I have now 500Hz or 2400Hz.  Great option, for very little effort and simple.  Another thumbs up here.

Now it was simply a matter of inserting the sub boards in the main board and all should be working.  And it did!  Hurray!  The 500Hz filter works perfectly,  filtering away all above or below stations nearby my operating frequency.

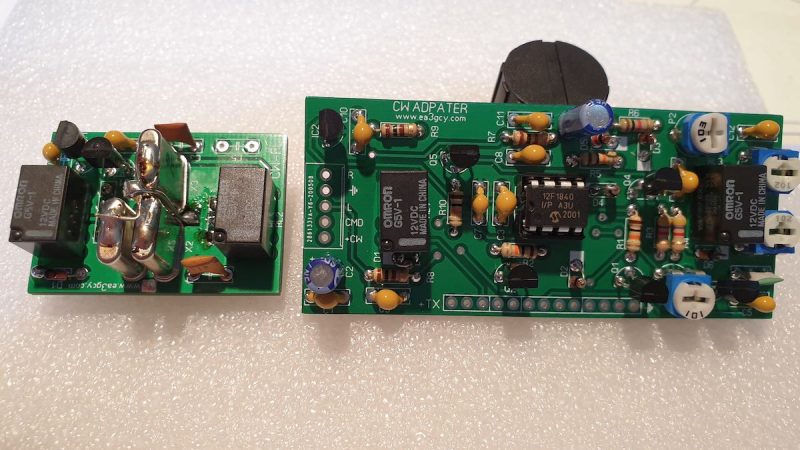
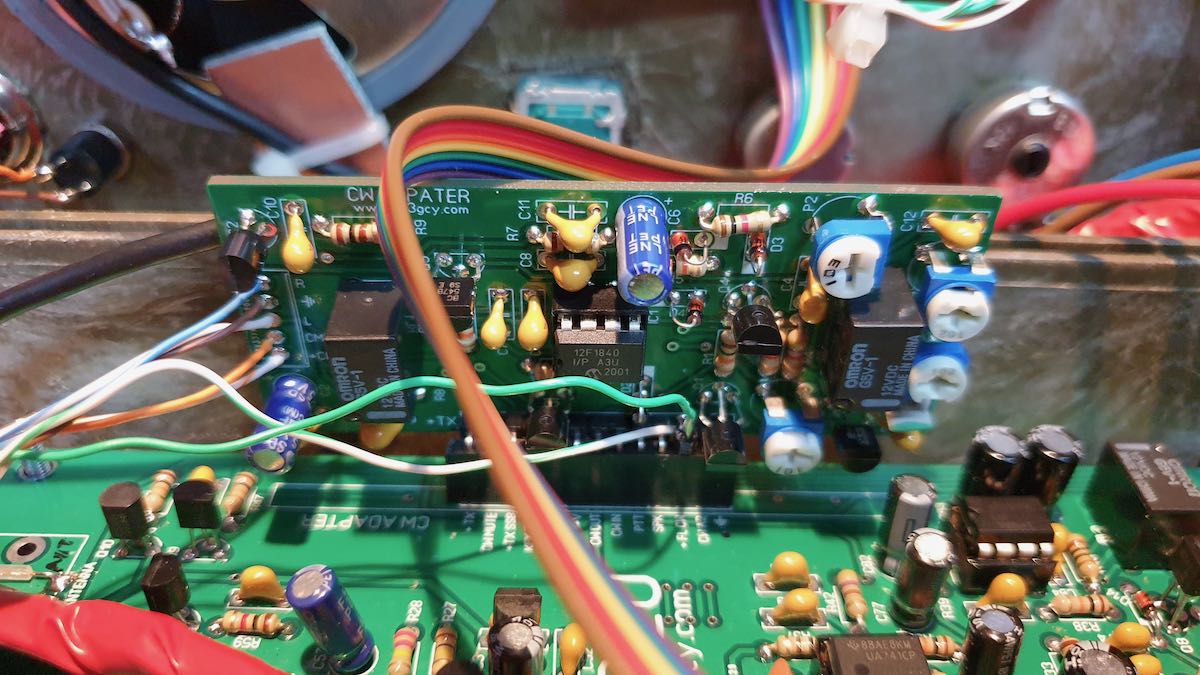
This is the result of the soldering work,  2 small boards which need to be inserted in the main board:

The CW interface still needs the 13pin header of which I cut one pin and mounted a switch to have the 2400Hz width.

The IC you see in the middle of the CW interface is the KB2 keyer which gives you several functions like 4 memories and beacon mode.  The 4 potmeters are used to set the level on 40 and 20 meters,  to set the delay between TX and RX switchover and to set side tone monitor level.   The keyer also provides functions as keyer mode A or B,  straight key function and can be set for speeds between 1 and 50WPM.   WPM speed can be set in 2 different ways.  Handy!

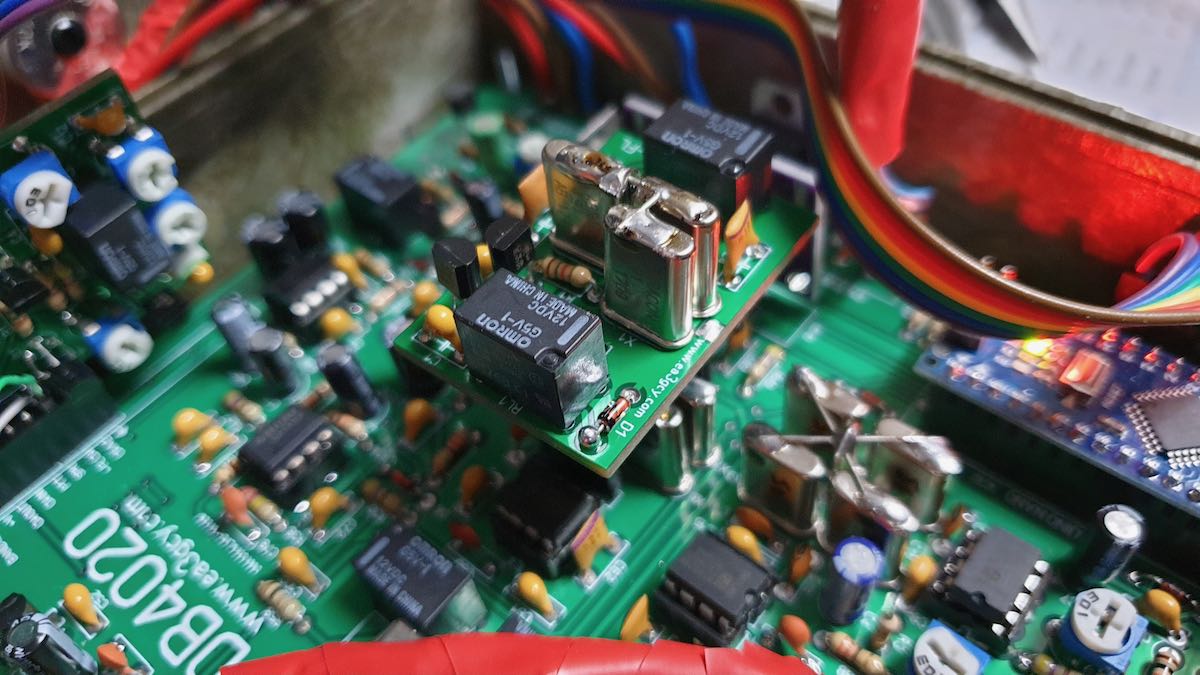
Here a picture of the CW filter inserted on the main DB4020 board.

The CW interface is inserted at the side of the main board,  notice the 2 wires which go to the switch to allow switch-over between 500 and 2400Hz.

(Wiring still needs to be cleaned up in this picture.)

Finally, the result:  a good working multimode QRP transceiver with 2 bands.  It should be possible to make close to medium range with it as well as DX,  even with QRP power.

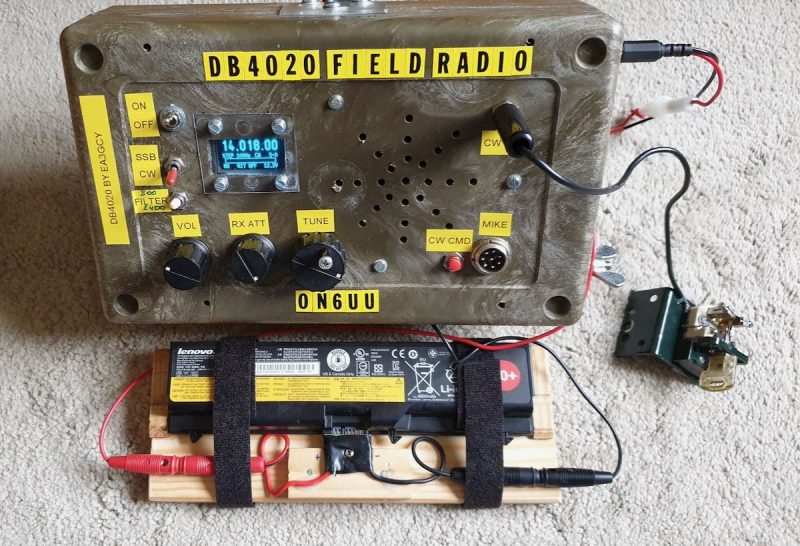
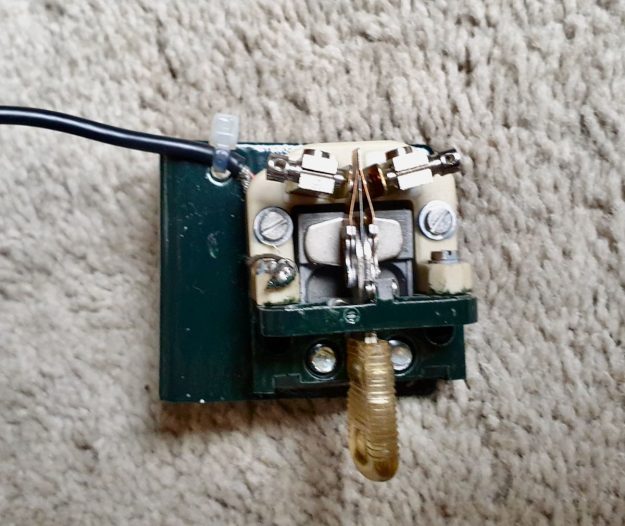
And while I was building I also made a new key for this radio,  it is made out of a relay and cost nearly nothing,  looks good doesn’t it ?  hihi.

Homebrew key

The key, when in practiced hands (fingers hi), can do 50 WPM without a problem. My friend HA3HK does without blinking an eye at 40WPM with this kind of key and tells me that he can go faster if needed.  Me? I’m going it a bit slower.

Battery pack

As this radio is only using little power (0.4A in RX,  1 to 2A in TX depending the power you set it) I thought,  let’s make a battery pack for the radio.

The first plan was installing it in the box.  I did not do that because the batterypack is also powerful enough to feed my KX2 and other QRP transceivers. Since I can use it with all of them, a loose battery works out better for me.

I started with an old laptop which had a broken screen and some other malfunctions,  but still had a good battery,  although I needed the battery connector of course.  A piece of wood to mount the connector on was my next goal.  And since I still have another laptop using the same batteries, I can charge the battery without problems.  Simple, but good and it weighs much less than a gel cell battery.

The battery provides me with 12.5V and some 5Ah.  Enough to last for hours on RX and for sure good enough to activate 2 SOTA sites in one day.   It doesn’t look great but works great– that is what matters and to test it was more then good.  Next will be getting the battery pack in a nice box.  Better to re-use stuff than throwing it away I’m thinking.

I need to do something about the cover of the OLED display,  there is still some work there to make it look nicer.

Some video can be seen on YouTube :

Finallym I’d like to thank you all for reading my articles about the DB4020. I had big fun soldering, tinkering with the box, making the key, and batteryholder/batterypack.  My Hungarian friend HA3HK told me it looks a bit like a spy radio. …. ..

I also include one more time the link where you’ll find this kit :

https://www.qrphamradiokits.com/

73 TU ee

Frank

ON6UU


Thank you so much, Frank. No doubt, you had a lot of fun putting this excellent little kit together.

Implementing a filter switch was a fantastic idea and, obviously, not terribly difficult to do.

Based on the videos, the DB4020 has a low noise floor and very good receiver characteristics. I’m impressed that the CW portion of the radios has so many features as well, such as a memory keyer and beacon mode.

I also love how you reused that 5Ah laptop battery! I think that could almost give you a full day of SOTA activations at those consumption levels!

Thanks again for sharing this with us, Frank! We look forward to your future articles!

Spread the radio love

A Field Day weekend of rain, shine, battery power, pile-ups, and radio improvisation

If you’ve been reading the SWLing Post for long, you’ll know that I’m a big fan of portable radio gear. Whether it’s a portable receiver, an SDR, or a ham radio, I believe radios are made to be taken outside––rain or shine; hence I love programs like Parks On The Air (POTA ) and Summits On The Air (SOTA), and I’ve always loved ARRL Field Day.

Of course, this ARRL Field Day was a bit different than years past due to Covid-19––there were more individuals on the air with their own Field Day stations, while there were relatively few clubs on the air. Typically, the opposite is true.

This year I’d planned to operate from the field at various POTA locations in western NC; some contenders were the Blue Ridge Parkway, Pisgah National Forest, and Mount Mitchell State Park. In the past few years, my buddy Vlado (N3CZ) and I––with spouses in tow––hit the field together, but this year he was out of town, and I planned to go solo.

I plotted a few hours of Field Day time at Craggy Gardens on the Blue Ridge Parkway. The night before, I had my antennas and the Elecraft KX2, KXPA100, Heil Pro Headset, and 15 aH LiFePo battery (all packed in my go-packs, of course), in the car and ready to go.

Saturday morning.  I woke expecting fairly nice weather: partly cloudy with a chance of showers. Turned out, it was chilly, gusty, with total cloud cover and fairly constant rain. I’ll admit, it dampened my enthusiasm for Craggy, because while it’s a gorgeous site, it’s well above 5000′ ASL, thus the winds up there can be seriously gusty and the weather can turn on a dime.

So, I decided to put up my feet in the shack  and operate class 1E, meaning on emergency/battery power.

I started calling CQ at the start of Field Day and, to my surprise, worked a constant pile-up for nearly an hour. Within that fairly short space of time I found I’d already collected about 90 or more stations on 40 meters.

After that, I hunted and pounced for maybe an hour, then took a break; later that night, I operated intensively again for 30 minutes or so.  Had I been at a Field Day site, I would have been a much more dedicated operator, but frankly, I’m not even sure I plan to send in my logs. Still, it was fun.

My set up on a damp picnic table at the Craggy Gardens Picnic area.

Sunday morning.  The weather was much more pleasant from the get-go, with sun and wind, though thunder showers were in the forecast. Around 11:00 or so, my wife suggested we pack up and head to Craggy Gardens for a little radio fun followed by some lunch and hiking.

We reached the site–it was beautiful, but ominous. Thick fog and Saharan dust (no kidding) covered the site and surrounding mountains.  Still, I set up the station and my new Wolf River Coils TIA portable vertical.

My daughter and I deployed the TIA vertical in a matter of 5 minutes.

I think I logged two stations before the misty clouds rolled up all around me; then (remember that change-on-a-dime weather?) a sudden––and torrential––downpour came from nowhere. My wife snagged all she could carry and ran for the car, and I quickly covered my gear with my raincoat and packed everything in my packs as soon as possible. I had to make two trips to the car to pack everything, and needless to say, with my raincoat in the service of my equipment, I was drenched to the skin. I literally looked like I had jumped into a lake with my clothes on.  Fortunately my gear––at least, the important gear––was only a bit damp, but internally fine. Herein lies one of the great things about being a pack geek: quality packs tend to be water-resistant, if not fully waterproof.

But. If I’m being completely honest, I’ll admit I was a bit miffed that I got so little radio time before the heavens opened. We knew there would be a risk of bad weather and, frankly, other than the hassle of packing and unpacking, we actually acknowledge the entertainment value of a little WX from time to time. After all, this is the hazard of operating under a wide open sky.

My wife, sensing my disappointment, suggested we go to another site to play a little radio, but at that point I just wasn’t feeling it. What I felt instead was the damp…wringing wet-level damp…and my spirits were dampened. too. I suggested we make our way back.

En route, I saw a sign for the Zebulon B. Vance Birthplace––a historic site that I knew was a POTA entity. I’d completely forgotten about this site, and decided to make a detour so I could scope out the site for a future activation. By now I’d warmed up a bit, and a bit of lunch helped revive my flagging spirits.

Turns out the site’s visitor’s center is closed on Sunday, but the gates are open so the public can enjoy the grounds. We drove up to their covered picnic area, although the cover was now peace of mind only, as the sun was again making an appearance. The setting was…well, ideal. And here I was. How could I not go ahead and activate this POTA site?

Zebulon B. Vance Birthplace (K-6856)

It was windy but warm, and while my wife spread out the packs, lunch cooler, and jackets to dry, I, too, found I was no longer dripping. By the time I set up the Wolf River Coils TIA vertical and my KX2/KXPA100, the togs were fairly dry, and indeed I was quite comfortable again. I hopped back on the air and worked a number of stations in short order, easily logging the ten needed to confirm the park activation.

The Wolf River TIA is outstanding in its field (sorry!)

Later, I discovered that the site was an “All-Time New One” (ATNO) in the POTA system. A bittersweet discovery, in a way, because Field Day is not the best time for POTA hunters to log a new site. Still, I wasn’t even calling CQ with POTA in mind; I just worked Field Day stations and had a great time.

Just as I finished, there was yet another downpour, but as the picnic area where I’d set up was covered, I no longer feared my gear getting soaked. This time, it was a sudden loud clap of thunder that gave me my cue to pack up quickly!

Still, all in all, I was very pleased with my weekend Field Day chase, and it was worth dodging rain storms for it. Sure, I would have loved to play radio at Craggy Gardens for a couple hours, but it was a pleasant surprise to fit in an ATNO activation before the end of the day. I’d have never guessed the Vance site was an ATNO, since it’s so accommodating and accessible. Indeed, I’ve discovered that, at this stage in POTA, most of the sites that haven’t been activated are either newly-incorporated into POTA or are very inaccessible. If you missed me there on Field Day, no worries: I plan to head out there again in the very near future.

Oh, and I did learn one more thing over the weekend: the Wolf River Coils TIA vertical antenna is incredibly easy and speedy to deploy. I’m very pleased with this recent acquisition!

Parkway and parks? I’ll be back soon. My radio’s already packed.

Did you participate in Field Day or put your receivers to the test by trying to log exchanges between stations?  Please comment!


Do you enjoy the SWLing Post?

Please consider supporting us via Patreon or our Coffee Fund!

Your support makes articles like this one possible. Thank you!

Spread the radio love

Radio in the field: Two new POTA activations this weekend!

This past weekend my wife suggested that I do a Parks On The Air (POTA) activation. I think she wanted me out of the house so that she could prepare a birthday and Father’s day surprise with my daughters.

Of course, I happily obliged. My motto in French: “Profitez-en bien!” or “Make the most of it!”

Hazel (our dog) made it crystal clear she wanted to join me as well. She’s a great hiking companion and also watches out for black bears while I operate in the forest!

DuPont State Game Land (K-6902)

I decided to activate the DuPont State Game Land which was about a one hour drive from my house. Not only was it a new park for me, but it was also an ATNO (All-Time New One) for the POTA program.

I arrived onsite around 10:15 AM local and the parking lot for the forest trail heads was already packed.

It was a gorgeous day and this part of the DuPont Forest is well-known as a great mountain biking spot. I was very lucky to find a place to park.

We’re still in full social distancing mode in North Carolina due to Covid-19, so I had no desire to be anywhere near other people. Hazel and I went off-trail and hiked in about 1/4 of a mile to a nice clearing.

I set up the EFT Trail-Friendly end-fed antenna and operated with the Elecraft KX2.

I called for quite some time before I was spotted in the POTA system. After being spotted, I quickly racked up more than the required 10 contacts for the activation to be considered valid.

Although the weather was amazing and my antenna deployment was near-ideal, the bands were rough and unstable, so it was challenging.

Hazel and I packed up, moved out, and made a detour to visit a waterfall near a site I hope to activate in the near future. Here’s a short video:

Kerr Scott State Game Land (K-6918)

Since Sunday, I’ve been visiting my hometown to help my parents with a few projects.

Yesterday, I had a four hour break in the day and decided to, of course, benefit from the beautiful weather and activate another new-to-me site. (Can you tell I’m addicted to POTA?)

I picked the Kerr Scott Game Land because it was “only” a 50 minute, rather scenic, drive.

It was quite easy finding a spot to park.  Like most game lands, though, you must be prepared to go through off-road conditions. Part of the driveway into the site was incredibly muddy and definitely required at least all-wheel drive.

I set up my station in the shade and easily deployed the end-fed antenna once again.

Lesson learned

This activation of Kerr Scott Game Land taught me an invaluable lesson: if you don’t have a “spot” of your activation on the POTA site, it’s like you don’t exist.

The POTA spotting network (much like popular DX spotting networks and clusters) is simply amazing. As a POTA hunter, you open the spots page and you’ll see a list of all of the current operators, their park numbers, and frequencies where last heard.

As an activator, your number one priority when you find an available frequency and start calling CQ is to be spotted on the POTA network.

If I have good mobile phone coverage at my site, I self-spot on the network. Within a few seconds of the spot posting, I’ll typically have a pile-up of a few operators trying to reach me.

If I have cell phone service, but no data, I’ll text my good friend Mike (K8RAT) and ask him to spot me on the network.

Kerr Scott, like most game lands, however, had no mobile phone service whatsoever, so I had no way to self-spot. In fact, this particular site was a good 15 minute drive from the nearest cell phone signal.

I called CQ for 30 to 40 minutes on my announced frequency, at the announced time, but not one single op come back to me.

Since I had just driven 50 minutes to reach this site, there was no way I was going to give up so easily. I had already set up my station in the trunk/boot of my car, so I simply secured it, disconnected the antenna and tied it to a tree branch (so it wouldn’t be in the way), and drove 15 minutes to a spot where I could send a quick message to Mike.

When I got back to the Kerr Scott, I hooked up the antenna, made one call, and had a pile-up of five operators I worked in rapid succession. In fact, I had my required 10 contacts within 8 minutes.

I do wonder how some of the most adventurous POTA activators manage to post spots while in remote areas. It’s such a key component of having a successful activation, I wonder if they use a satellite phone or satellite messaging device to text a friend for help. (If you’re a POTA or SOTA activator, I’d welcome your comments here!)

At any rate, I was very pleased to hammer out an activation so effortlessly once I was spotted on the network.

The CW secret weapon

I should add here that CW activators have a secret weapon that’s incredible effective: the Reverse Beacon Network (RBN).

As a CW operator, the POTA spot system will read your callsign from the RBN as long as you have made an announcement on the POTA website in advance or have already been spotted to the POTA website. All you have to do is set up your station at the site and call CQ: the POTA system will auto-generate an accurate spot for you based on the frequency from the RBN.  It’s incredibly effective and more than enough reason for me to think I should start doing CW activations.

I can operate CW–in fact, I routinely make CW contacts in POTA and in other contests. However, I’m not quite brave enough to call CQ from a POTA site and work my way through even a modest pile-up.

I need to practice CW more, and I will!

This week, I also take delivery of my Wolf River Coils TIA antenna. I’m looking forward to having the TIA as an option when I need a self-supporting antenna that’s quick to deploy and can handle up to 100 watts when needed.

Post readers: Did you play radio in the field this weekend? I’d love your comments–especially if you simply took a receiver outdoors to enjoy some noise-free broadcast listening!


Do you enjoy the SWLing Post?

Please consider supporting us via Patreon or our Coffee Fund!

Your support makes articles like this one possible. Thank you!

Spread the radio love

Building the EA3GCY DB4020 Dual-band 40 and 20M QRP SSB Transceiver Kit (Part 1)

Many thanks to SWLing Post contributor, Frank (ON6UU), who shares the following guest post:


Building EA3GCY’s DB4020 QRP Transceiver kit

by Frank Lagaet (ON6UU)

In May, I discovered via a newsletter that a new kit was available from Javier EA3GCY in Spain.  I was immediately sold as this was a kit from my favourite kit producer and it has 2 bands–it will also be able to do CW and there also will be a CW filter.

After building 2 MFT’s from Javier which work without problems, I needed to have the DB4020.  The MFT’s are for 20 and 40 mtrs and do DSB (double side band).  I did put them in a not-so-graceful box but they do what they are intended for which is QRP phone (SSB).   They came together without problems so I expected the same for the DB4020–I knew for sure when I saw the board:  all through-hole components (except for some capacitors which are factory soldered) and a lot of space on the board.   The board has been silk-screened with clear indications on where all components have to come and the manual has very clear instructions where each component has to be soldered with referral to a quadrant.  The manual provides a 252 quadrant page so it is a piece of cake to find where each piece goes.

What do you get?

Javier provides you with all components which need to be installed on the board and, of course, the kit board.  The components come in small marked plastic bags and all is well-wrapped up in bubble wrap.  The board is wrapped separately and that is put together with the component wrap which is then again wrapped up in bubble plastic.  All goes into an envelope.  Very well packed I must say.

Here’s a picture of the bags with components:

The silk-screened board:

I started with the resistors since that’s the easiest way. After that, I did the capacitors.  I like to solder in all flat components first, so next were the diodes and IC sockets followed by the elco’s.  The transistors were next together with all relays.  As you solder in the transistors one also has to mount the cooling heatsinks,  these cooling sinks are high and are ideal to protect the coils one has to make,  they also protect the polystyrene caps (which I always find vulnerable) when the board is upside down.

Many kit builders are afraid of winding the toroids in kits–don’t be!  It is easy.  Just take your time and follow the instructions given by Javier in the construction manual.  In this kit the builder has to wind 8 toroids:  6 are a single wire which goes through the toroid body,  1 is a toroid with 2 different windings, and 1 has a twisted pair which goes through the final toroid.  Be sure to measure the wire you need per toroid as instructed in the manual.  Javier gives some spare, so you can be sure.  You will also see that on next picture where the legs of the toroids have not been trimmed yet.  Once done I still had some centimetres of wire leftover.

Picture of the toroids ready to be soldered in:

Finally all other parts and pin headers went in,  jumpers were immediately put on where needed.

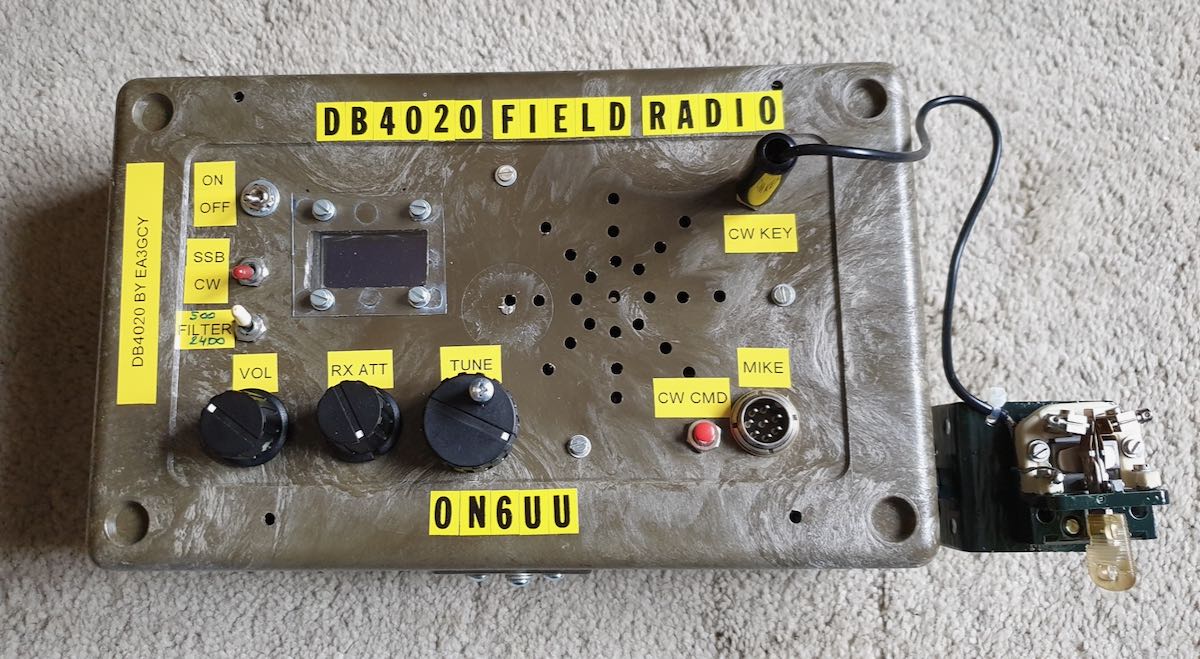
As I’m using a military-grade plastic box, I have to break-out some components like the display,  tuning encoder,  volume and rx control from the board.  I also have put an on/off switch on the box and already have the CW KEY connector ready installed. I also installed a loudspeaker in the box.  The SI5351 board and the Ardiuno Nano are the final components which go into the board after installing all wires.

Picture of the board:

I intend to attach a CW paddle to the box made out of a relay.  A HWEF tuner (from EA3GCY) which I was planning to incorporate in the box is I think a bit overkill. That HWEF tuner is already in a nice little box and would be a pity to dismantle,  also I’m running out of space in the box…  Maybe I can fit in a 9-1unun which would then give me good results on both bands…?

Maybe I will install a battery pack in the same box.

The box with board installed:

The box completed front side:

Mind you,  it still needs some additional switches for the CW part of the transceiver.

73
Frank (ON6UU)

Video


Brilliant, Frank! I really appreciate the video as well–sounds like the kit produces smooth audio and should serve you well. No doubt, that military box enclosure will survive even the roughest field conditions!

Click here to check out the DB4020 kit at EA3GCY’s store.

Spread the radio love