Tag Archives: Homebrew Mag Loop Antenna

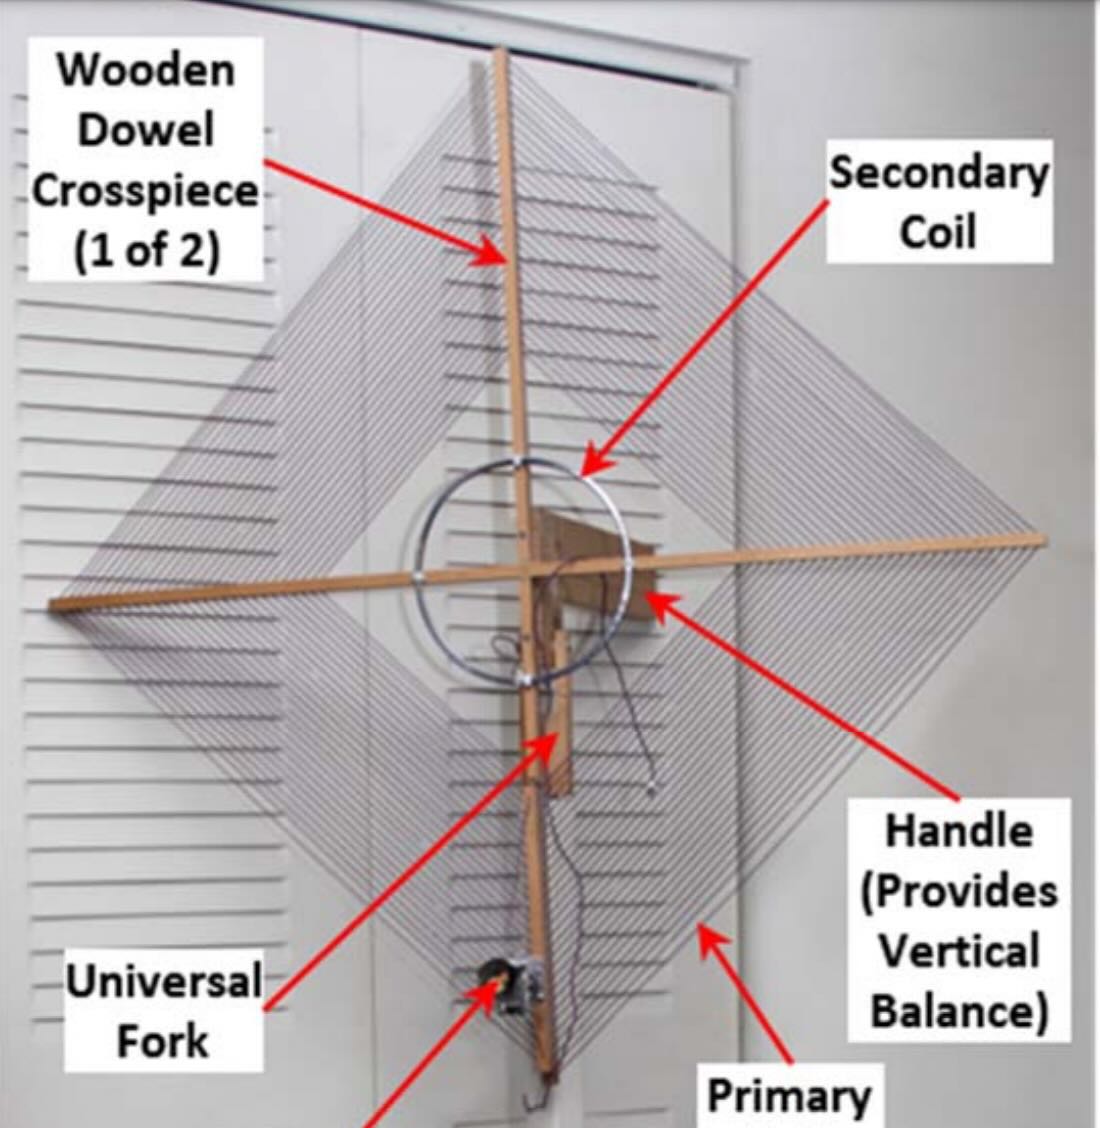
A File Worth Having: Bob’s guide to building an Electrically Small Resonant Loop Antenna for Mediumwave Reception

Screenshot

This post is short and sweet.

If you click here–Electrically Small Resonant Loop Antenna for Mediumwave Reception (PDF)–you can download a copy of Bob Colegrove’s excellent paper on the Electrically Small Resonant Loop Antenna for Mediumwave Reception.

He has actually built this antenna; it works; and he uses it often. Perhaps you might want to build one for yourself. As an added bonus, Bob is an excellent writer (in my not-so-humble opinion). What’s not to like?

— Jock Elliott, KB2GOM

Spread the radio love

Loop-On-Ground Antenna Part 3: Tom’s low-noise, low-profile, portable antenna evolves

Loop on Ground Antenna Part 3

(using multiconductor wire)

by TomL

It dawned on me recently, perhaps due to sloppy thinking or unintended distractions, that I never wrote about my modified Loop on Ground (LoG) receive antenna that I use at parks and such.  For over a year now, I have been using 3-conductor rotor wire bought cheap at the local hardware store and have wired the conductors in series.  Grayhat (Andrew) was the inspiration when he decided to create a folded dipole along the side of his house.

The usual construction of a LoG antenna for shortwave is a single wire of about 60 feet in circumference in order to not go above one wavelength for 20 meter band usage.  If you recall, going above one wavelength will start creating weird lobes in the reception pattern.  See – Loop-On-Ground Antenna Part 2.

However, I did not like this 19 foot diameter wire on the ground in public parks just waiting to be tripped over.  Like, the time when a horse got loose from its owners and almost tripped over my 60 foot wire.  I don’t think I would have liked the resulting lawsuit!

So out of fearful necessity I took some leftover RCA 3-conductor rotor wire, about 29 feet of it, and wired a loop with the conductors in series.  This gives about 81 feet of total conductive length.  But since it is folded onto itself, there is an undetermined loss of resonant length.  Callum (M0MCX) of DXCommander fame has experimented and found folded dipoles need three times more length in the folded section to reach resonance, so my loop is probably around 69 feet (electrically).  See – Fold the end of a Dipole Back – What’s Happening?.

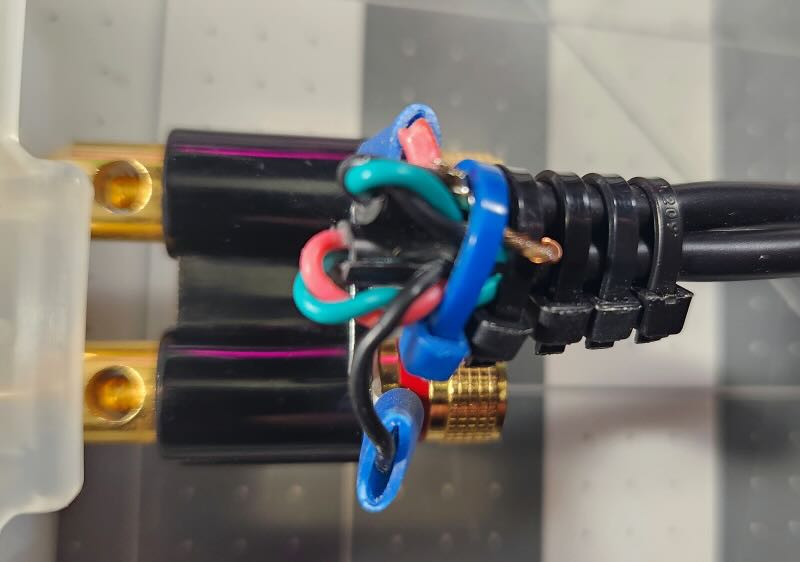
In the picture below, the black wire with Ring Terminal at the bottom goes all the way around to the other side, soldered to the green wire, which goes around and is soldered to the red wire, which goes around to the Ring Terminal at the top, plus tie-wraps to hold the wires together.

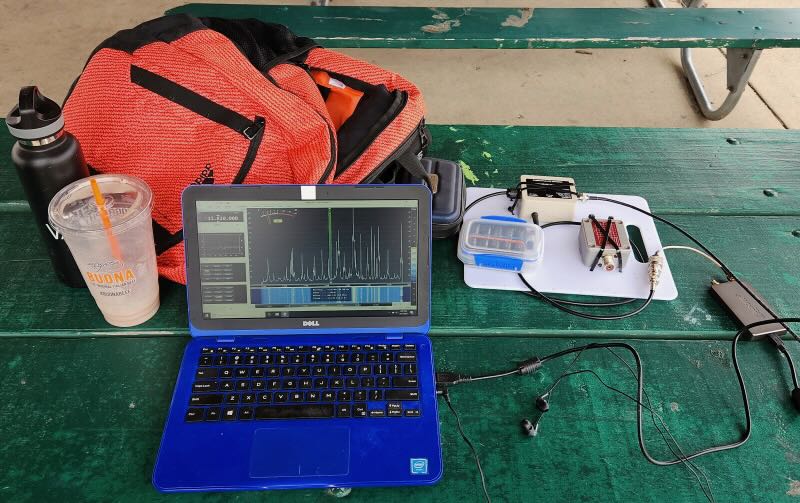
The next picture is how the Wellbrook Medium Aperture preamplifier is connected to the loop with BNC cable that goes to the 12V power injector.  I have had this Wellbrook unit for maybe 6+years with no signs of problems.  WARNING – do NOT use the Wellbrook preamplifier in the presence of high powered RF energy like your Amateur Radio antenna pumped with 1000 watts from a  linear amplifier; the Wellbrook premap might just overload and get damaged!  I did use this loop and preamplifier at last year’s 2022 ARRL Field Day and was able to get away with it because we were only using 100 watts per station.  Listening to the 9pm 3916-net trivia group was fun but I still needed to keep it away from the transmitting antennas. Continue reading

Spread the radio love

Video: Giuseppe’s “Cassette Loop” on the shortwaves with induction

Many thanks to SWLing Post contributor, Giuseppe Morlè (IZ0GZW), who writes:

Dear Thomas and Friends of the SWLing Post,

I’m Giuseppe Morlè from central Italy, Formia on the Tyrrhenian Sea…

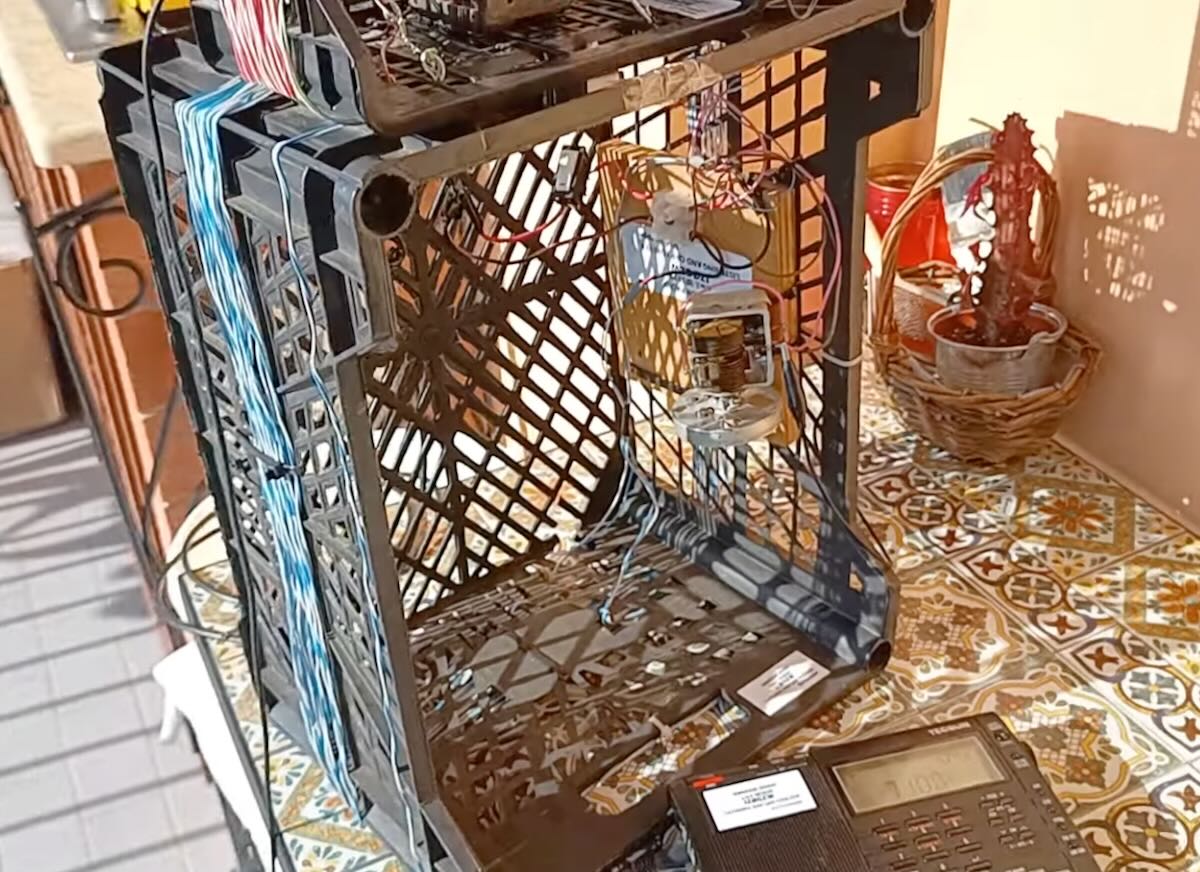
My Cassette Loop experiment this time shows how induction takes place on short waves after medium waves.

I used a smaller box as the primary antenna which, however, is pushed by the secondary one due to the induction effect generated between the two windings brought closer together.

This way, the larger loop “captures” more of the signal and sends it to the smaller cassette…

I really like working on induction… I hope you like it:

Click here to view on YouTube.

Thanks and greetings from central Italy.
73. Giuseppe Morlè iz0gzw.

Thank you so much for sharing this, Giuseppe!

Spread the radio love

Giuseppe’s Crossed Loop and the “VariabilOne”

Many thanks to SWLing Post contributor, Giuseppe Morlè (IZ0GZW), who shares the following:

Dear Thomas and all friends of SWLing Post,

I’m Giuseppe Morlè iz0gzw from central Italy on the Tyrrhenian Sea, Formia.

A few days ago at a fair for radio amateurs in Latina, I bought an excellent very large variable capacitor–those of ancient military radios–and I found a splendid antique knob with a fantastic gear ratio.

I called this VariabilOne and it consists of two sections of 250pf each. It’s very portable and can be applied to any loop with crocodile clips.

I built another cross loop made up of 2 turns the internal loop, 35 cm. and only one turn for the external loop, 40 cm.

I can tune frequencies from 3.500 to 20.0 MHz. The crossed loop is strongly directive given the two loops that work together being joined on their ends.

I have made some demonstration videos and it is a pleasure for me to share them for our entire community (see below).

Thanks to you and I wish you all the best for you and your family.
Greetings to all.
73. Giuseppe iz0gzw.

Click here to view on YouTube.

Click here to view on YouTube.

Click here to view on YouTube.

Click here to view on YouTube.

Giuseppe, thank you once again for sharing your brilliant homemade antenna projects with us. I absolutely love that monster variable cap and tuning whee! What a thing of beauty–and obviously your loop is very effective.

Thank you as always, Giuseppe!

Readers: click here to check out Giuseppe’s other antenna projects.

Spread the radio love

Giuseppe’s portable multi-loop homemade shoe rack antenna

Many thanks to SWLing Post contributor, Giuseppe Morlè, who writes:

Dear Thomas,

I’m Giuseppe Morlè iz0gzw from central Italy on the Tyrrhenian Sea, Formia.

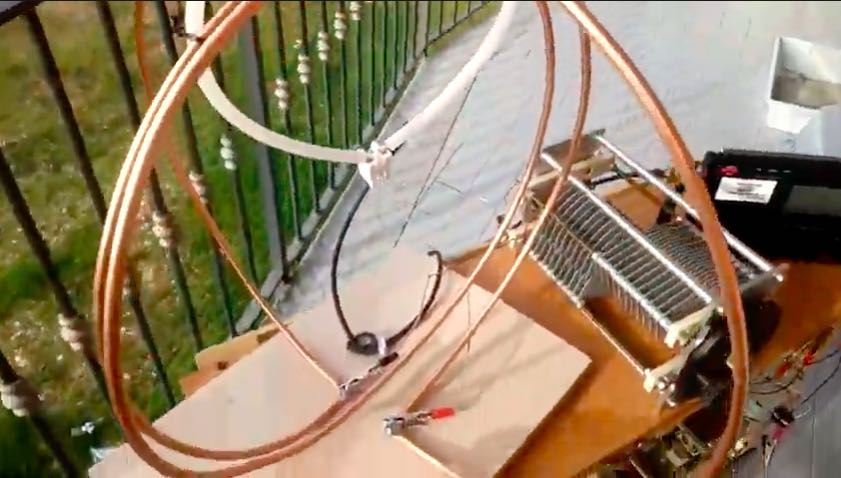
I am sending you this umpteenth project of mine built with poor materials…it is a test bench, loops / capacitors to find the best tuning.

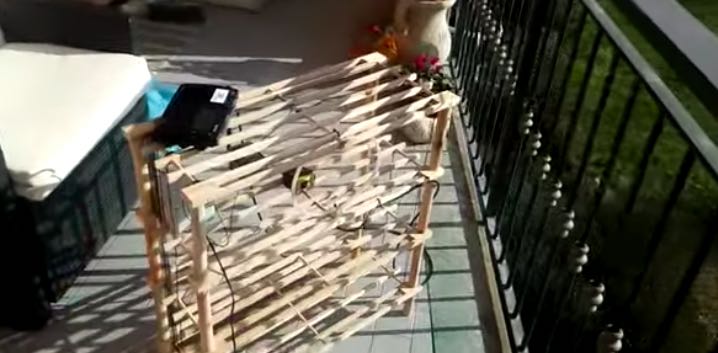
The frame is a shoe rack in beech wood, very light, to take anywhere or to try out at home.
On the frame, there are 4 different loops of different sizes and 3 variable capacitors with different capacities. Only one signal transfer link to the receiver for all loops.

With alligator plugs I can use the different combinations of loop / variable to find the best tune

This test rig can tune the whole HF frequency range and medium wave.

I’ve attached 3 videos where you can see from the beginning to the last test on the balcony of my house.

Videos

Note that the following videos are in Italian, but you can turn on closed captioning and in the settings of the video have it auto-translate into the language of choice:

Click here to view on YouTube.

Click here to view on YouTube.

Click here to view on YouTube.

All, as always, spending very little and employing used materials!

Thanks to you and a warm greeting to the whole SWLing Post community.

I remain available for any clarification.

Greetings to all and good experimentation!

Thank you for sharing this Giuseppe! I love your ingenuity and spirit of experimentation! What a fun project that obviously yields excellent results!

Spread the radio love

Grayhat’s NCPL (Noise-Cancelling Passive Loop) antenna “tweak”

My NCPL antenna

Many thanks to SWLing Post contributor, Grayhat, who shares the following modification he made to a Noise-Cancelling Passive Loop antenna last year. He’s kindly allowed me to share his notes here, but apologized that at the time, he didn’t take photos of the project along the way and recycled many of the components into yet another antenna experiment.

Grayhat writes:

Here’s a simple tweak to the NCPL, made easy for anyone. Let’s start with the commercial NooElec 9:1 balun version 1 (not 2) … made in USA.

Look at the schematic of the balun:

Cut the R1 (0 Ohm resistor – jumper) so that the center tap of the transformer won’t be connected to ground, then solder a short piece of wire to the tap.
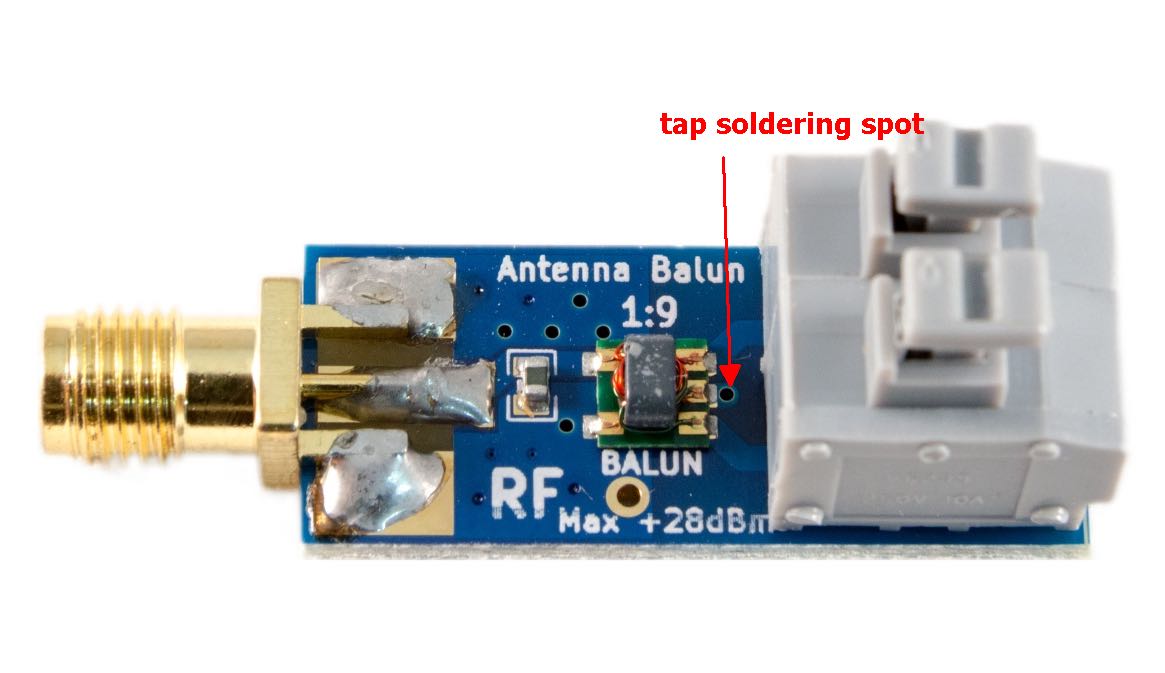
The first pic (top) shows the balun seen from top side, the arrow indicates the small hole going to the transformer tap.
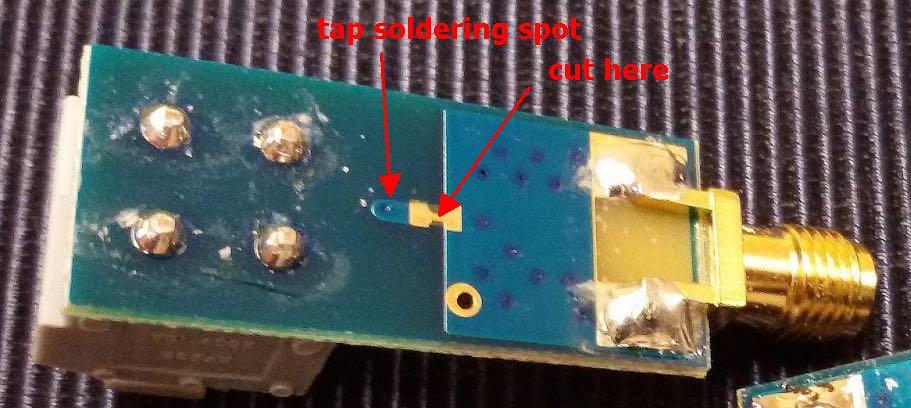
This pic shows the bottom of the board with the trace to cut and the spot for soldering the tap wire (needs cleaning with a bit of sandpaper to remove the cover paint). The solder is as easy as 1-2-3 once the trace is cut and the spot cleaned just insert a wire from the top of the board and solder it to the bottom and there you go!

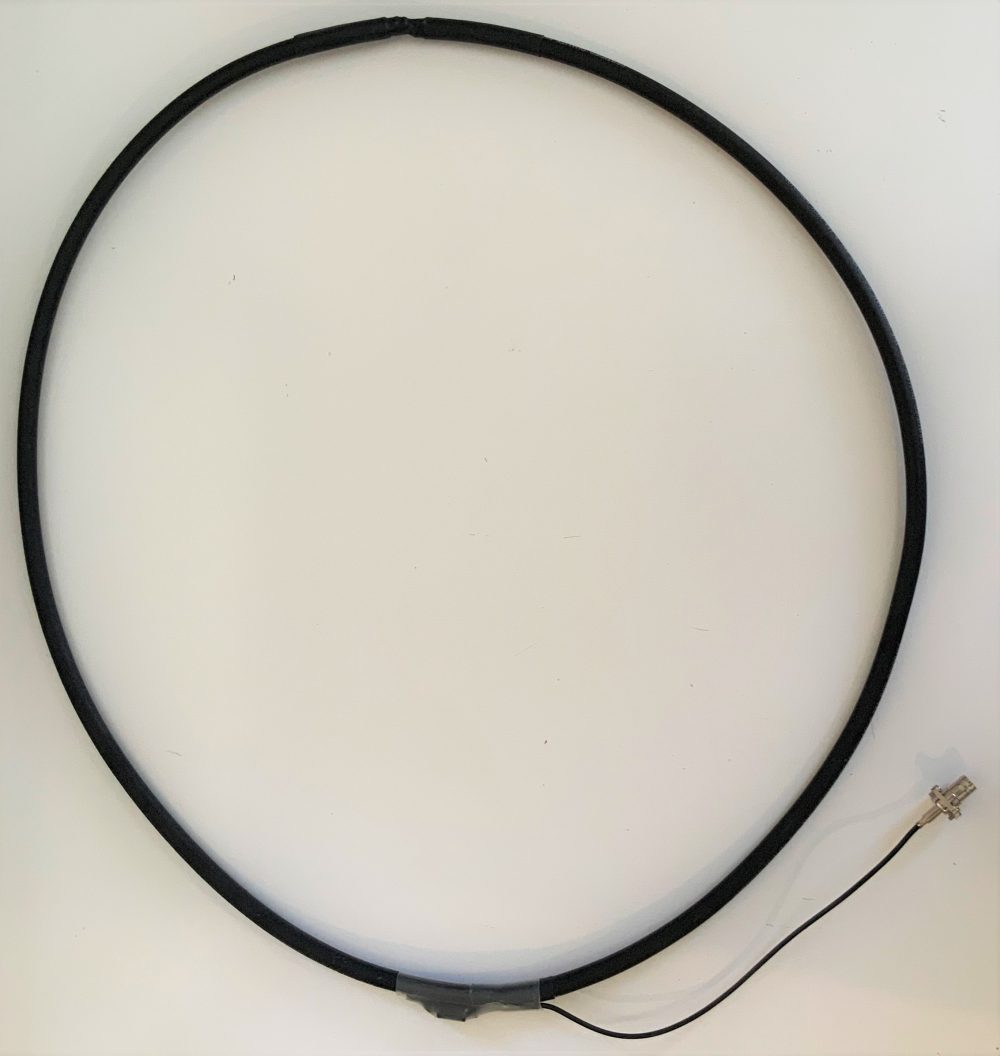
Build the NCPL using “fat” coax (RG8 will do) with the top cross connection.
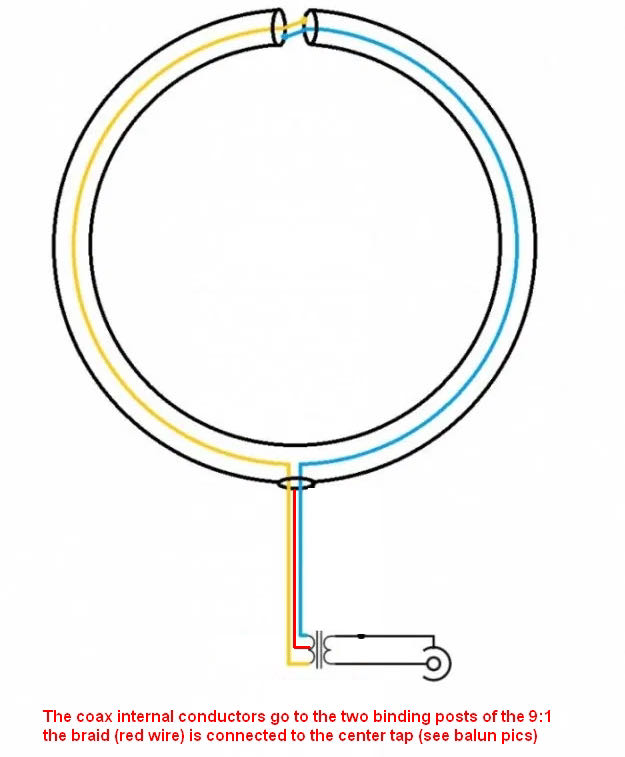
NCPL modification schematic

Side note: the top “cross connection” is the weak point, so it would be a good idea putting a short piece of (say) PVC pipe over that point, the piece will also help suspending the loop or sticking its top to the support pole, as for the feedpoint, a small electrical junction box will fit and protect the tiny balun from bad weather

Now the difference: connect the two center conductors of the NCPL to the balun input and the braid to the wire going to the center tap (as above).

Such a configuration will give some advantages over the “standard” NCPL one. The loop will now be galvanically isolated from the feedline/receiver so it will have much less “static noise.” Due to the tap, the typical 8 pattern of the loop will be preserved, this means that the loop will now have much deeper nulls.

By the way, the balun could just be wound w/o buying it. I suggested the nooelec since that way anyone with little soldering ability will be able to put it together. Oh and by the way it’s then possible adding a small preamp at the balun output if one really wants, any preamp accepting a coax input will work. 🙂

Again, if you can/want, give it a try !

Many thanks for sharing this, Grayhat! We always welcome your inexpensive, innovative urban antenna projects!

Post readers: If you have question, feel free to comment and I’m sure Grayhat can help. 

Spread the radio love

Giuseppe is impressed with the performance of his homebrew passive loop antenna

Many thanks to SWLing Post contributor, Giuseppe Morlè (IZ0GZW), who shares the following:

Dear Thomas, I’m Giuseppe Morlè from central Italy, the Tyrrhenian Sea, Formia.

Today I tested my noise canceling loop inside the radio station by comparing it to the crossed loops. Again, like my medium wave T Ferrite, this loop proved to be very quiet, practically immune to house noise.

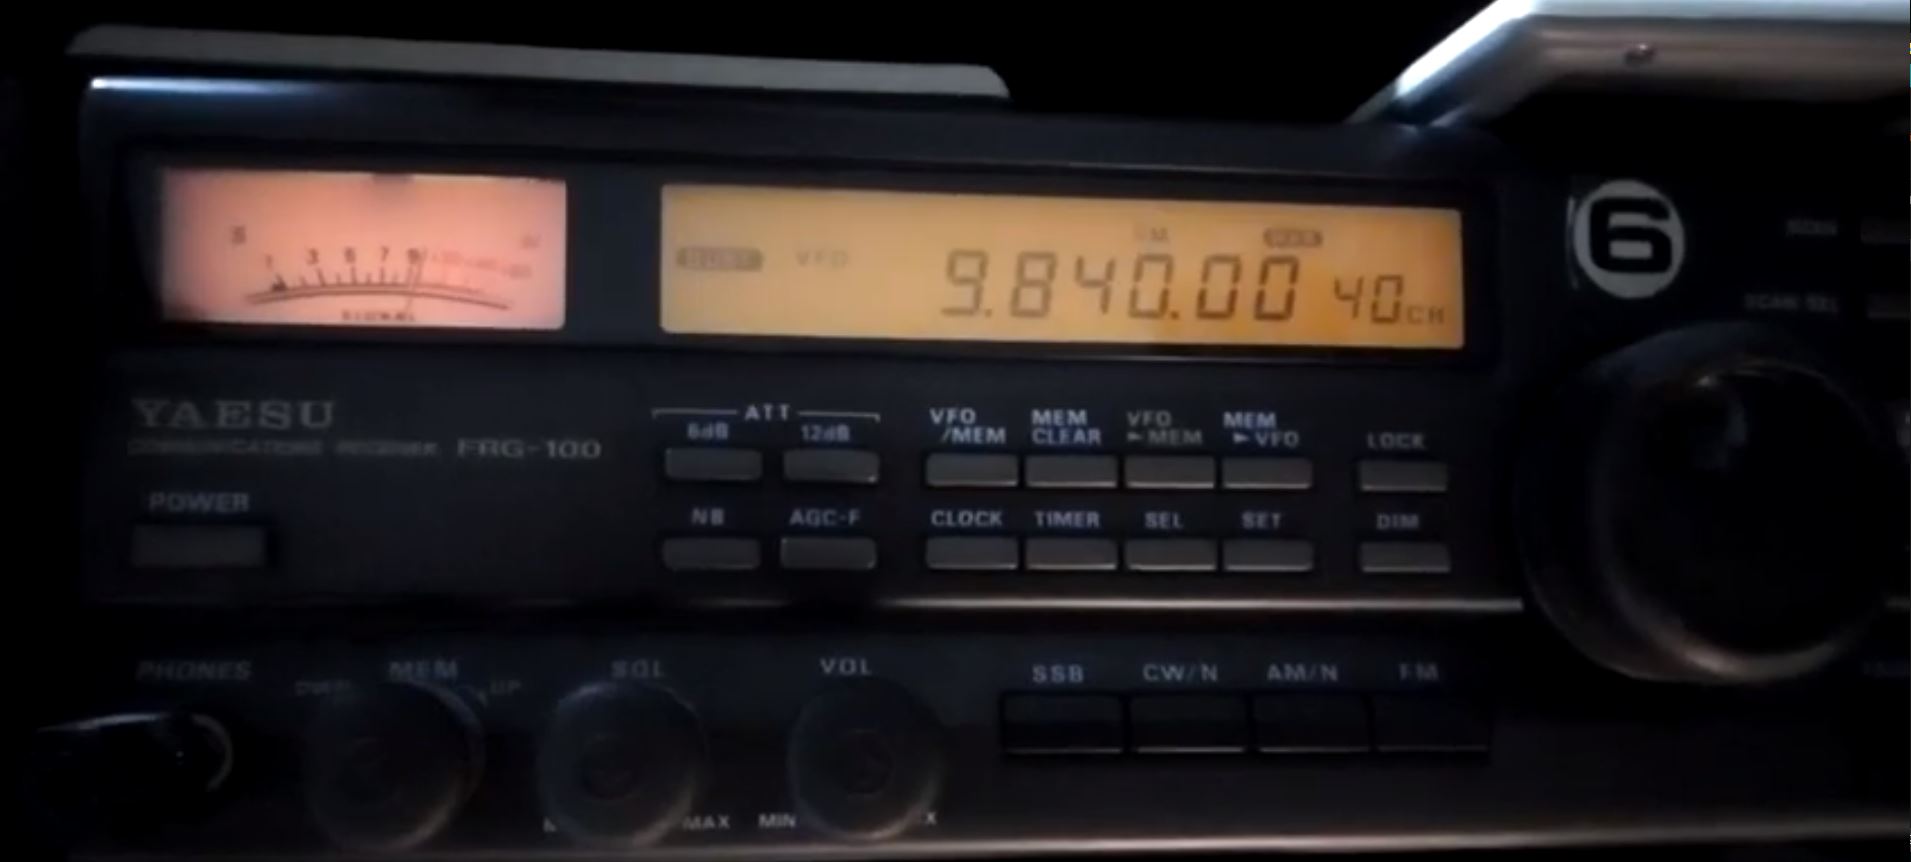
You can see my two videos about listening to the Voice of Turkey and a QSO on 40m. between radio amateurs–a test with two different powers, one high in AM and another much lower among radio amateurs.

Here are the videos from my YouTube channel:

Click here to view on YouTube.

Click here to view on YouTube.

A nice result knowing that we are receiving inside my radio station. The homebrew NCPL antenna you encouraged me to build is truly amazing.

Best wishes to you and the SWLing Post community.

73 by Giuseppe Morlè IZ0GZW.

Thank you so much for taking the time to share your thoughts and these videos with us, Giuseppe. It is very encouraging that we have some antenna options that help us cope with all of the RFI generated within our homes! Thank you again!

Spread the radio love