Many thanks to SWLing Post contributor, Don Moore–noted author, traveler, and DXer–for the latest installment of his Photo Album guest post series:
Don Moore’s Photo Album: Albania – Part One
Finding Radio Tirana
More of Don’s traveling DX stories can be found in his book Tales of a Vagabond DXer [SWLing Post affiliate link]. Don visited Albania in March 2024.
Of all the places that I’ve been to but wouldn’t have imagined visiting forty years ago, Albania is definitely at the top of the list. Yet here I am wandering around in Tirana’s coolest and most trendy neighborhood. I walk by an Argentine steak house, several Italian trattorias, a Texas cowboy-themed hamburger restaurant, and several sports bars with huge TVs tuned to football games (or soccer if you prefer). Boutique hotels, fashionable clothing stores, and shiny office buildings complete the scene. It’s just another upscale neighborhood in the global village. And it’s in Albania.
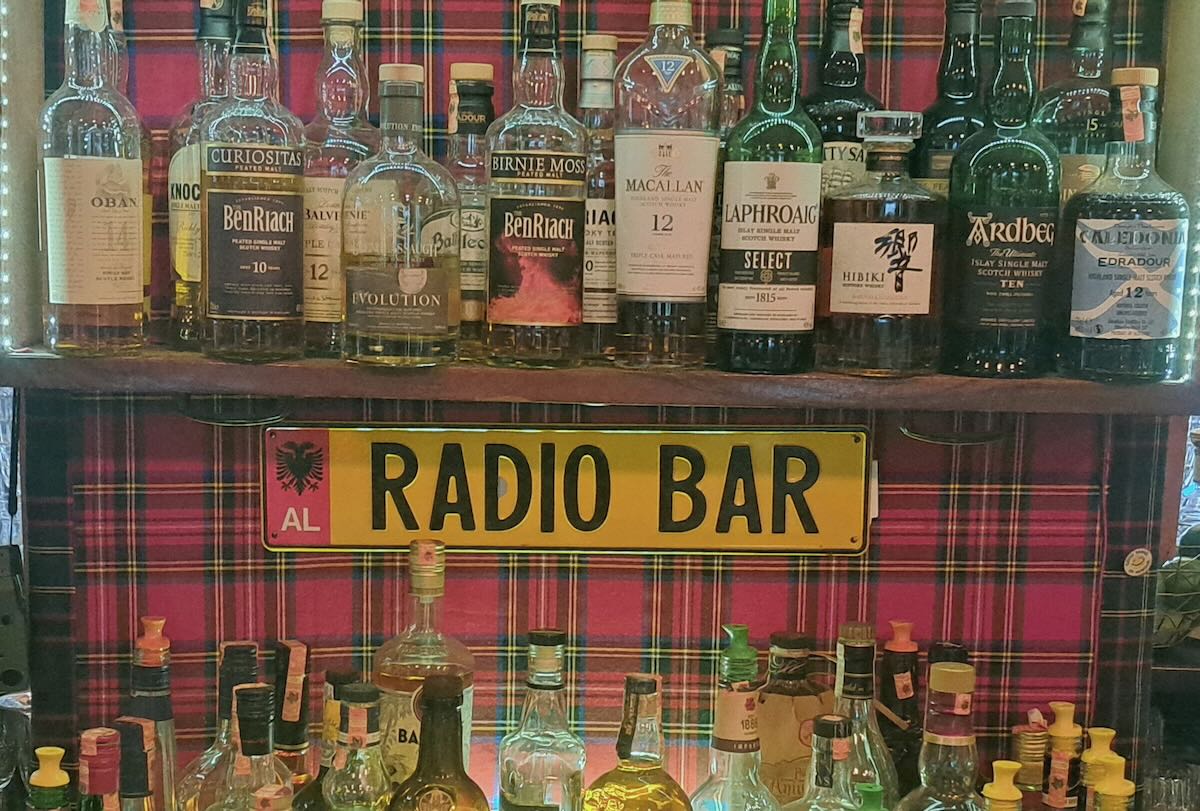
I hadn’t planned on getting an afternoon drink until the Radio Bar Tirana popped up on Google Maps. How could I not stop by a place with a name like that? The shelves behind the bar are filled with bottles of imported gin, whisky, tequila, and cognac, but I order a glass of raki, Albania’s version of the cheap firewater that every culture seems to have. It’s strong and burns my throat. No wonder Albanians have survived all that they have been through over the past six centuries. You have to be tough and resilient to drink this stuff. Or maybe it’s drinking raki that made Albanians tough and resilient.
The bar is staffed by two hipsters. I tell them about how decades ago (long before they were born) I used to listen to Radio Tirana on shortwave in the United States. They had never heard of Radio Tirana’s shortwave broadcasts and were amazed to know it was heard in the United States. I think they were also amazed that someone from outside Albania would have wanted to listen to the station during those terrible times. The bar, they explain, has nothing to do with any radio station but takes its name from the many old radios that line the walls. And it’s clear that I fit in better with the dusty wall décor than with the young bartenders or the chic patrons.
The back of the bar opens onto a large, covered patio filled with Albania’s version of smartly dressed young professionals. Late afternoon is the time to drink and to network. But the day is warm and sunny and no one wants to be inside. The main room is empty except for the bartenders and a man in the corner trying to work on his laptop despite the loud voices coming from the patio. I have the inside to myself so I wander around sipping raki, taking pictures of old radios, and remembering Radio Tirana.
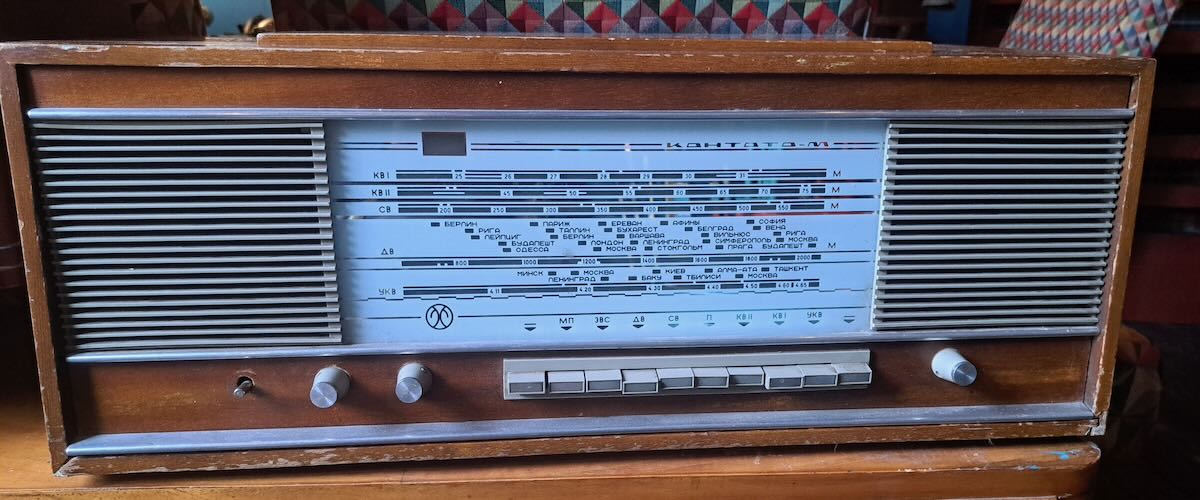
The Kantata M model radio was produced in Murom, Russia by the Murom RIP Works in the 1970s.
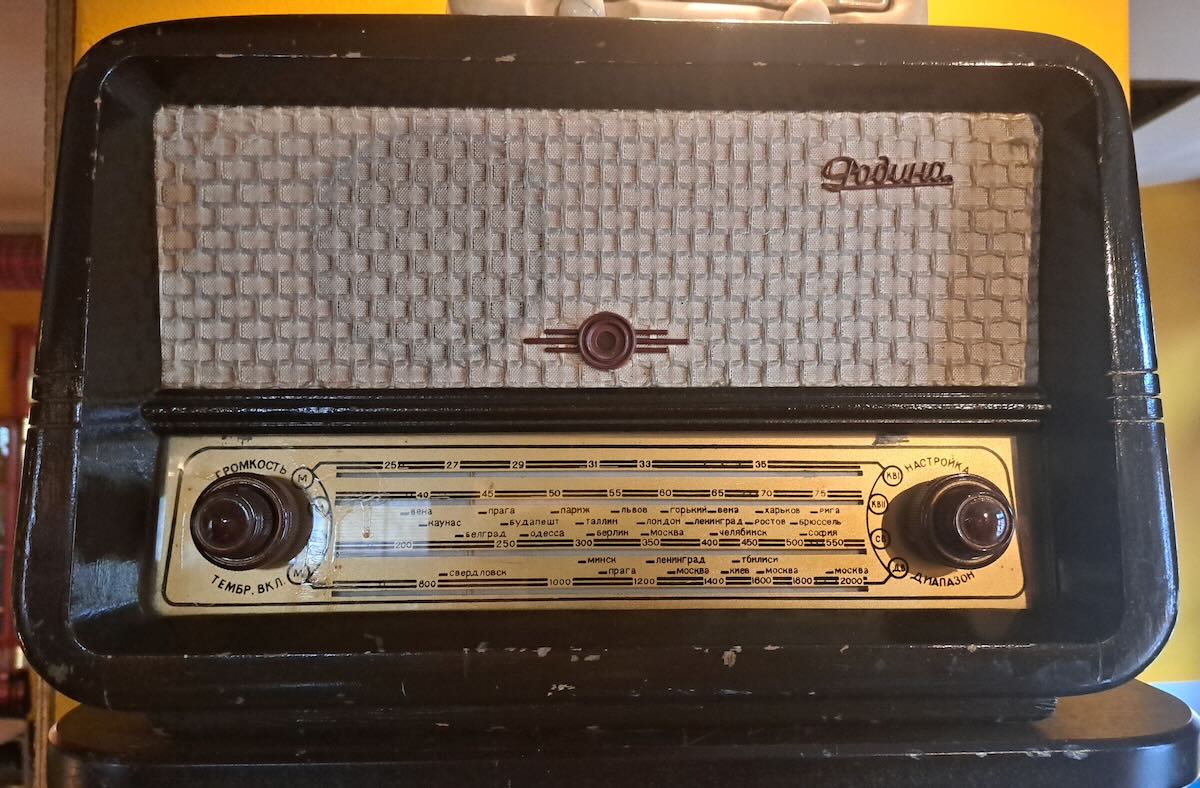
Rodina-52M receiver made in 1952 by the Voronezh Elektrosignal Radio company in Voronezh, Russia. Thank you to Anatoly Klepov and Wojtek Zaremba for their assistance in identifying these two Soviet-era receivers.
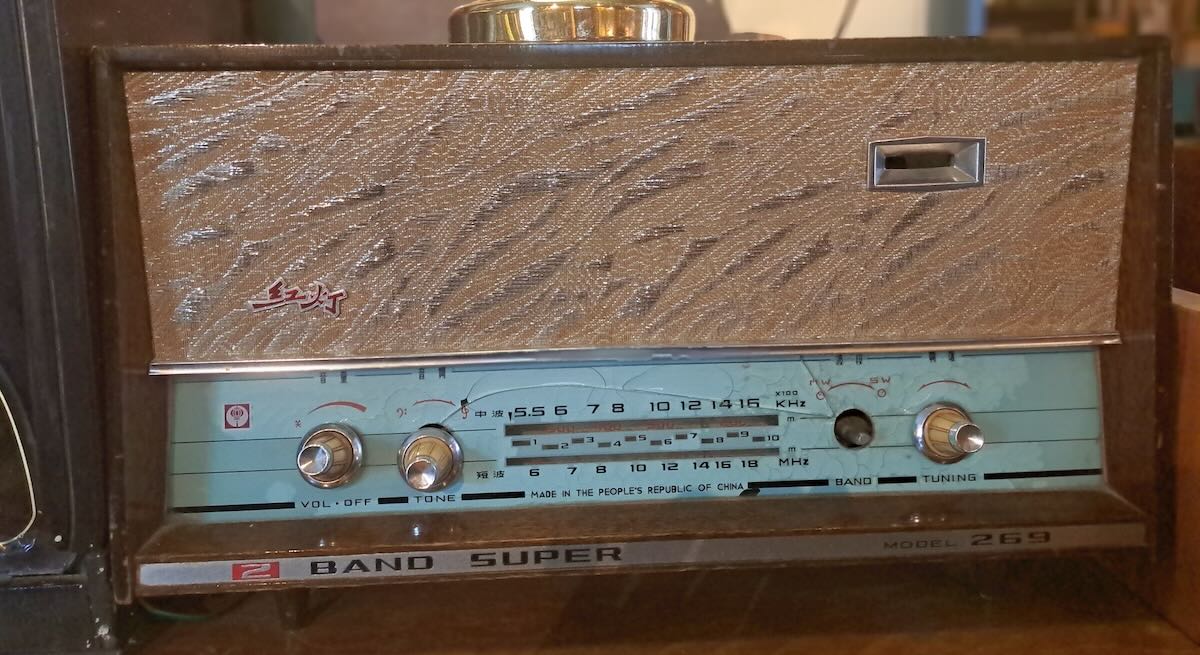
The Red Lantern Model 269 was made in Shanghai in the 1960s. It predates the General Electric Super Radio by at least fifteen years so the “2 Band Super” name was not a takeoff on the popular GE receiver.
History in a Nutshell
Yesterday, I had visited the vast National History Museum on Skanderbeg Square in the heart of Tirana. All the peoples of the Balkans had a golden age and for Albanians it was the mid-1400s. The Ottoman Empire was the strongest and most aggressive power in the region but George Skanderbeg and his successors held off the Turks for fifty years. The Turks eventually conquered Albania and much of the Balkans but the delay likely prevented them from taking even more of Europe including Italy.
The Ottomans would rule Albania for over four centuries and in that time most Albanians converted to Islam. It was the only Ottoman territory in Europe where that happened. But Albanians continued to remember Skanderbeg, the Catholic who had led the fight against the Muslim Turks, as their national hero. And they never took their Islam as seriously as most other places. That’s why they still drink alcoholic raki.
Over the centuries, the Albanians would periodically raise the double-headed eagle flag of Skanderbeg and rebel against Ottoman rule. And each time the rebellion would be brutally put down. But by the early 20th century the Ottoman Empire had been significantly weakened and Greece, Serbia, and Bulgaria had already won their freedom. In 1912 those countries went to war against the Ottomans to gain more land for themselves and as a side result Albania gained its independence. Then two years later World War I came and Albania and its neighbors were overrun by the Austro-Hungarian Empire.
When a war is over the victors usually divide the spoils and World War I was no different. Secret negotiations among the European powers included a plan to divide Albania between the new nation of Yugoslavia, Greece, and Italy. When the plans leaked out Albanians once again raised the double-headed eagle flag in defiance and this time received support from the United States. The Woodrow Wilson administration made sure that Albania would continue to exist with its pre-war borders intact.
Still, Albania’s bigger neighbors, especially Benito Mussolini’s Italy, continued to intervene in the country’s affairs. In 1928, at Mussolini’s urging, Prime Minister Ahmed Zogi declared Albania a monarchy and crowned himself as King Zog I. As the years passed King Zog came to realize that Mussolini’s plans for Albania were not friendly and he gradually distanced his government from the Italian ruler. The unmarried king also knew that his dynasty needed an heir. In April 1938, 42-year-old King Zog (a Muslim) married 23-year-old Countess Geraldine Apponyi de Nagy-Appony, a Catholic and daughter of a Hungarian nobleman and his American wife.
Meanwhile Albania was slowly entering the modern world and that included radio broadcasting. In 1937, a new radio-telephone station was installed outside of Tirana. The three-kilowatt shortwave transmitter was also used to broadcast several hours of programming per day, but it wasn’t a formal radio station. In the early 1930s several four-story Italian style villas had been built along Kont Urani Street, not far from Skanderbeg Square. In 1938, King Zog’s government confiscated one of the buildings, the Italian-Albanian Culture Center, and made it the first home of Radio Tirana. The new station was officially inaugurated by King Zog and Queen Geraldine in a live ceremony on 28 November 1938. A few months later, on 5 April 1939, the station had its first news scoop when it announced the birth of Crown Prince Leka to the world.
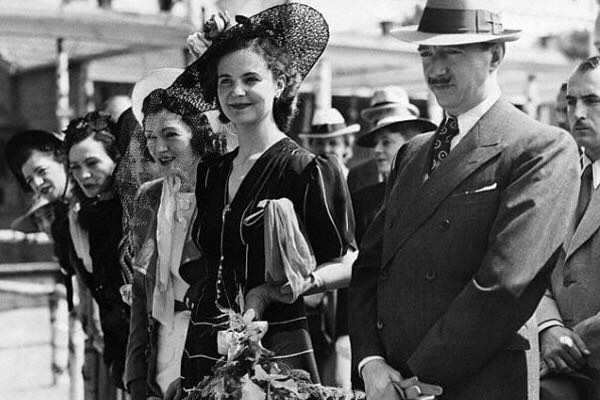
Queen Geraldine and King Zog at the 1938 inauguration of Radio Tirana.
The prince’s birth was good news for Albania, but it was a dark time in Europe. Just a few weeks earlier Adolf Hitler’s Nazi army had marched into Czechoslovakia without consequences. Not to be outdone by his German counterpart, on 7 April (two days after the prince’s birth), Mussolini invaded Albania. The Italian plans had been drawn up quickly and haphazardly and would likely have failed against a formidable opponent. But the handful of patrol boats in Albania’s navy could do nothing to stop the two battleships, six cruisers, nine destroyers, and numerous smaller ships that carried the invasion force across the Strait of Otranto. And Albania’s tiny poorly trained army was no match for the 100,000 troops that came ashore. In just a few days Albania had been overrun and King Zog and his family had fled to Greece (and eventually to England).
What happened over the next few years is a complex story. Mussolini’s goal was to turn Albania into an Italian client-state. The invaders set about to Italianize the country while also benefiting from its resources and workforce. As Radio Tirana was a key part of that process, the Italians modernized the studios, installed new antennas and transmitters throughout the country, and professionalized the programming. In order to not alienate the population, the station tried to maintain a balance between promoting Italian culture while also carrying Albanian culture and music.
Meanwhile, a resistance run by loyalists to King Zog fought back. They had some initial successes but soon the Italians quashed the movement by killing or capturing most of its leadership. They hadn’t made much effort to hide what they were doing. That should have ended the resistance but a new force, Albania’s tiny Communist Party, stepped in to fill the leadership vacuum. Unlike King Zog’s men, they already knew how to operate an underground movement. Gradually the Communists formed an effective guerilla force in Albania’s mountainous interior.
Italy’s surrender to the Allies in September 1943, should have been good news for Albania but the Nazis quickly sent in troops to take over and prevent the Allies from moving in. Their rule was more brutal than anything the Italians had done and that pushed more Albanians to join the resistance. By October 1944 the movement had grown to the point that its leaders had the confidence to launch an all-out attack on Tirana. For three weeks fighting raged back-and-forth in the city streets until on 17 November the last German troops withdrew under the cover of darkness. Tirana was once again ruled by Albanians and one of the leaders was a man named Enver Hoxha.
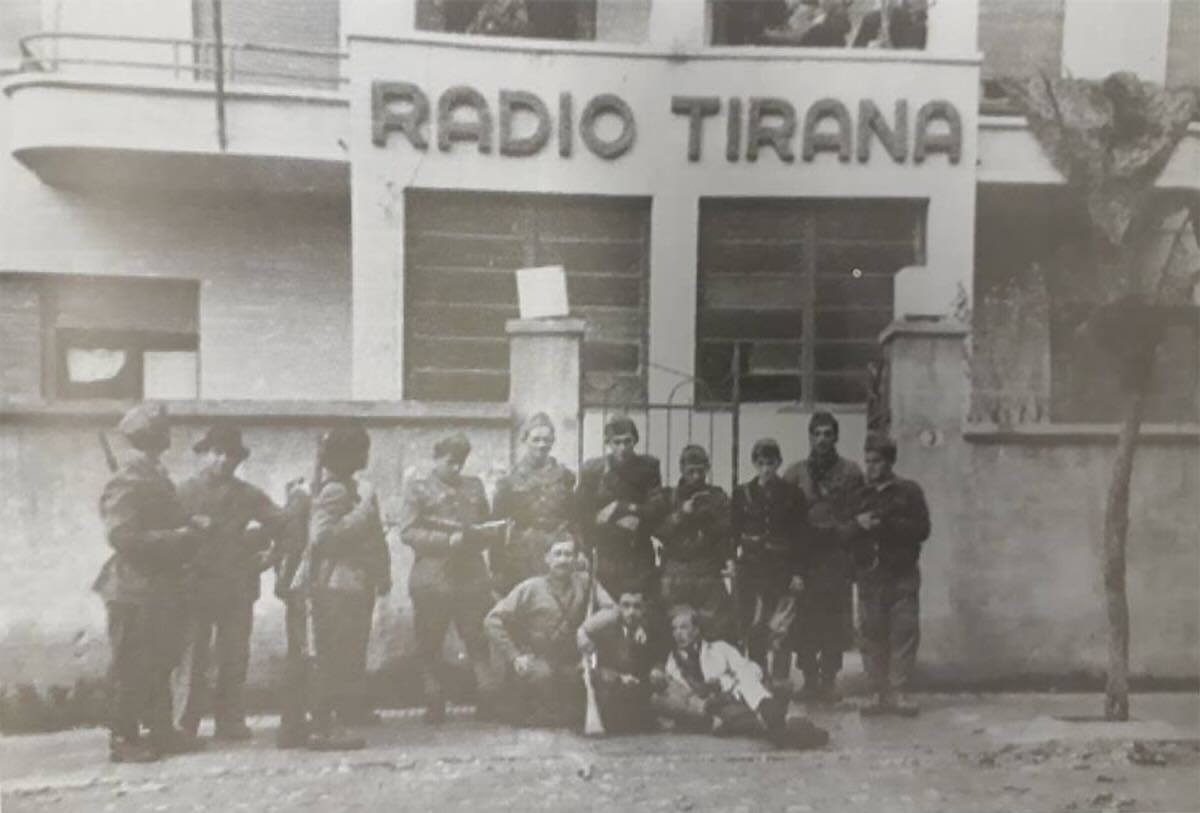
Albanian partisans in front of Radio Tirana after liberating the city. Tirana was the only European capital freed by its own partisan forces without any help from Allied armies.
Enver’s Place
My glass of raki is empty and I have all the pictures I want. I hand a generous tip to one of the bartenders. He was kind enough to move some bottles so I could get a clear picture of the “Radio Bar” sign. I continue up the street in the direction I had been heading and a block later come to my next destination, the house where Enver Hoxha lived while he ruled Albania.
The house doesn’t look at all like the sort of place a national ruler would live, let alone one who ruled with a deadly iron fist. It’s more like the kind of Frank Lloyd Wright inspired house that might be found in an upscale American suburb. Next door is the Abraham Lincoln Center, a school that teaches American English to Albanians. It’s a good thing, I think, that Enver Hoxha is dead. Enver hated the United States and he would never have been happy with these neighbors.

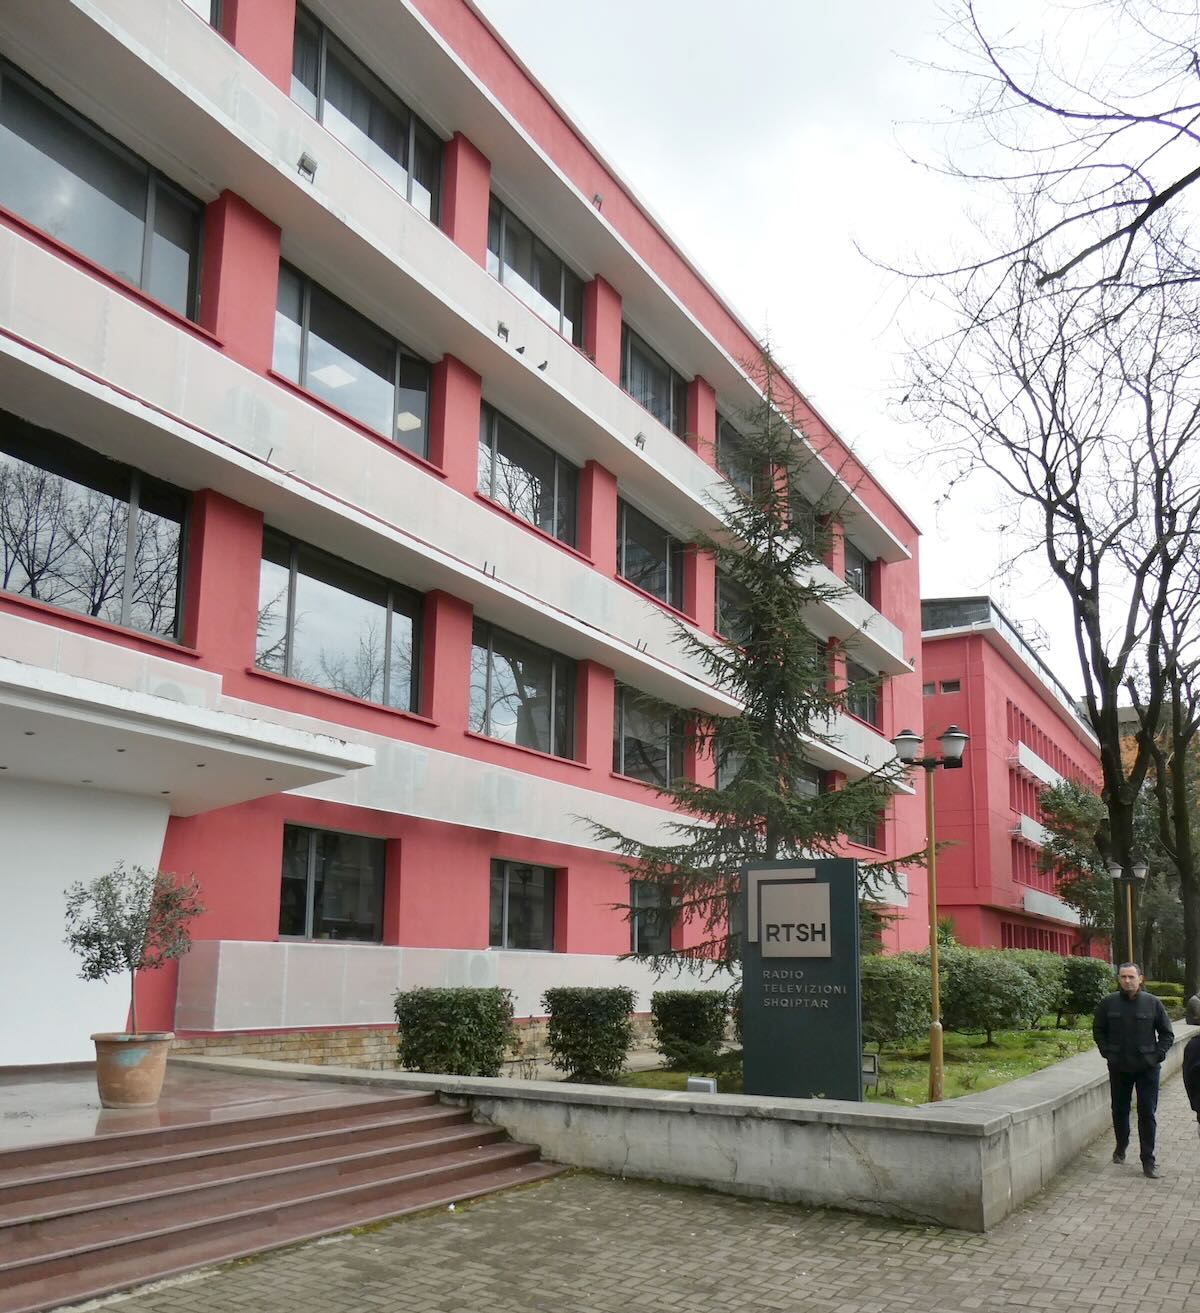
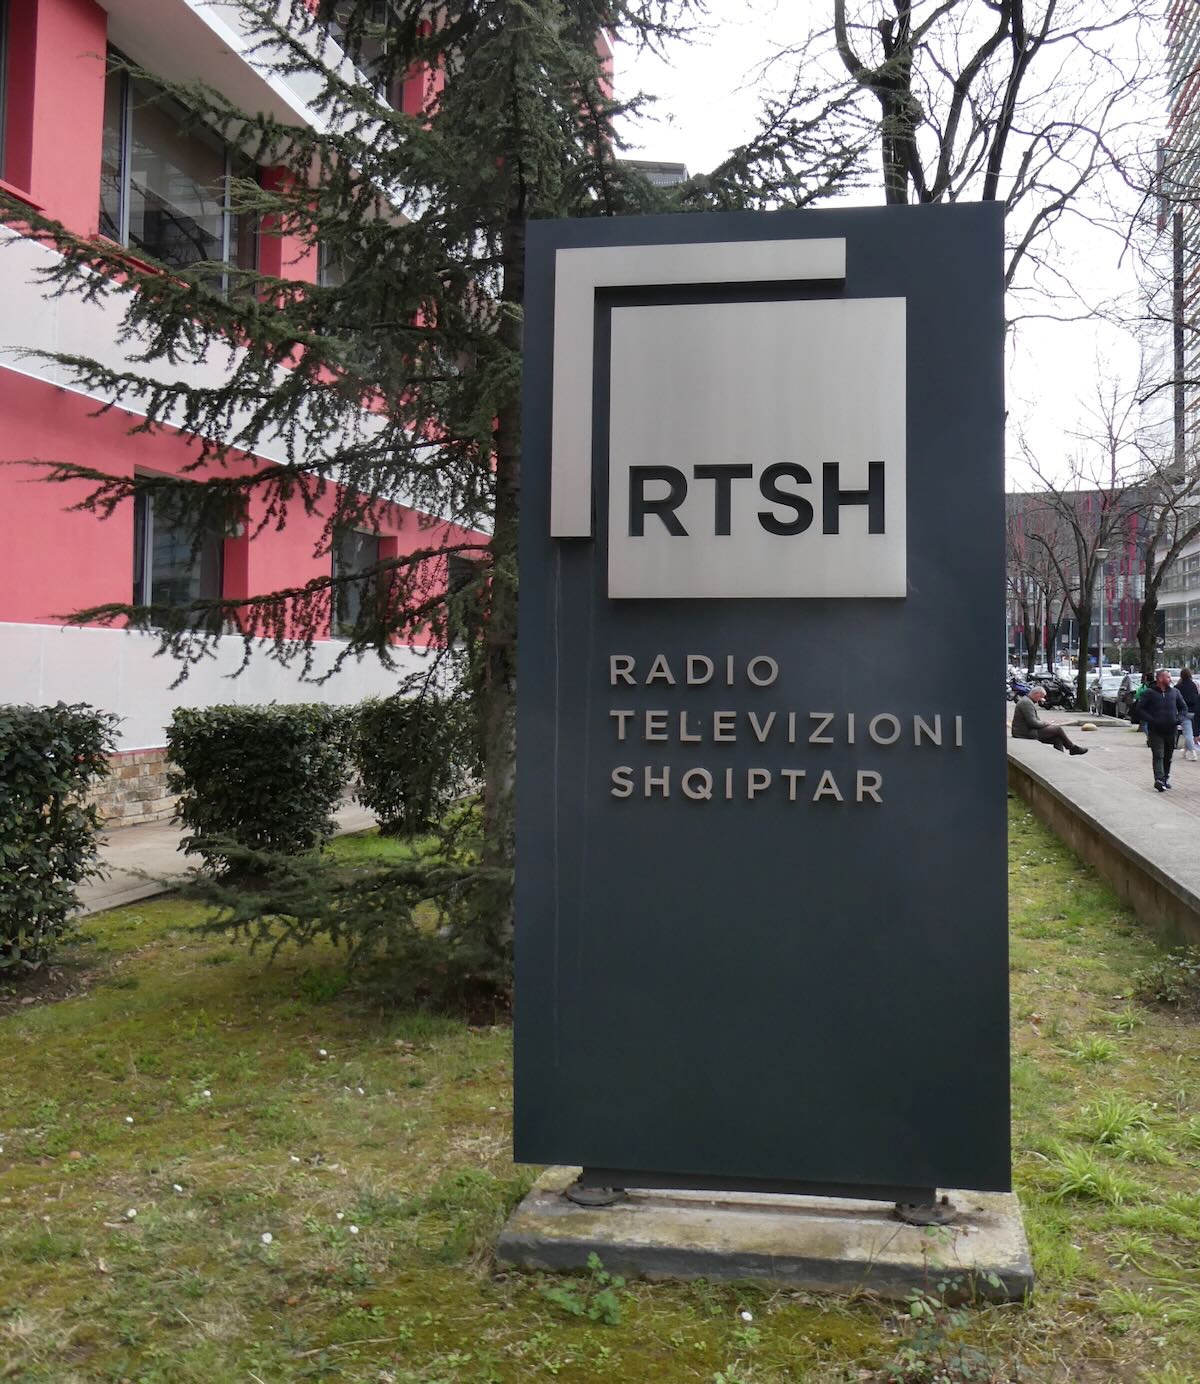
Unfortunately, the house is not open for tours so all I can do is stand outside and take pictures. As I look at the house I think back again to Radio Tirana. I hadn’t planned to visit any radio stations on this trip but the raki is still having its effect on me. Just for fun, I open up Google Maps and type in Radio Tirana. Surprisingly, I get a result and it’s only two blocks further down the same street. But the huge Radio Televizioni Shqiptar building on the corner with Rue Ismail Quemal turns out not to be the Radio Tirana building I had seen in the old picture in the national museum.
 Inside, two young women are working at the reception desk and one speaks excellent English. I explain how I used to listen to Radio Tirana on shortwave. Unlike the bartenders, she knows all about it even though she is clearly in her early 20s. She says that in those days Radio Tirana would have been broadcasting from the old building near Skanderbeg Square. I’m about to leave but then I turn around. “Does that old building still exist? I would really like to see it if it does.” Continue reading