Shortwave listening and everything radio including reviews, broadcasting, ham radio, field operation, DXing, maker kits, travel, emergency gear, events, and more
The Yaesu FT-890: One of many general coverage HF transceivers spotted in the 2017 Hamvention flea market.
Many thanks to SWLing Post reader, Joe, who writes:
I’ve been practicing for my Technician ham radio license here in the US and am ready for the test. I’m already looking at HF transceivers even though I don’t have my General license yet.
Here’s what’s important to me:
I will still do a lot of SW DX
Something that has at least decent audio
Something that isn’t too too huge; though I’m a little flexible on size
I need something that has a receiver that handles weak DX well
I’d be comfortable spending $500 any day all day no problem. Anything higher than that and I’d really have to think it’s an investment in my radio future.
Thanks for your question, Joe, and allowing me to post it here for comment as this is one I’m frequently asked.
First of all, congratulations on studying for and taking your ham radio license exam! I’m a ham and absolutely love the radio privileges my license provides.
At the same time, I’m still more of an SWL than a ham–meaning, I spend way more time chasing SWL DX than doing on-air ham operations.
With that said, I always seek radios that will serve me well as both a ham and SWL, if possible.
My humble advice
If we stick with your $500 budget strictly, then we’re certainly looking at used transceivers. That’s okay–there are many good ones on the market!
I posted the following review of general coverage transceivers a few years ago. The info in it is still very much accurate in the used market. I would suggest you give it a good review as it goes into more detail about the ins and outs of your first transceiver and the importance of leaving budget to purchase a good power supply:
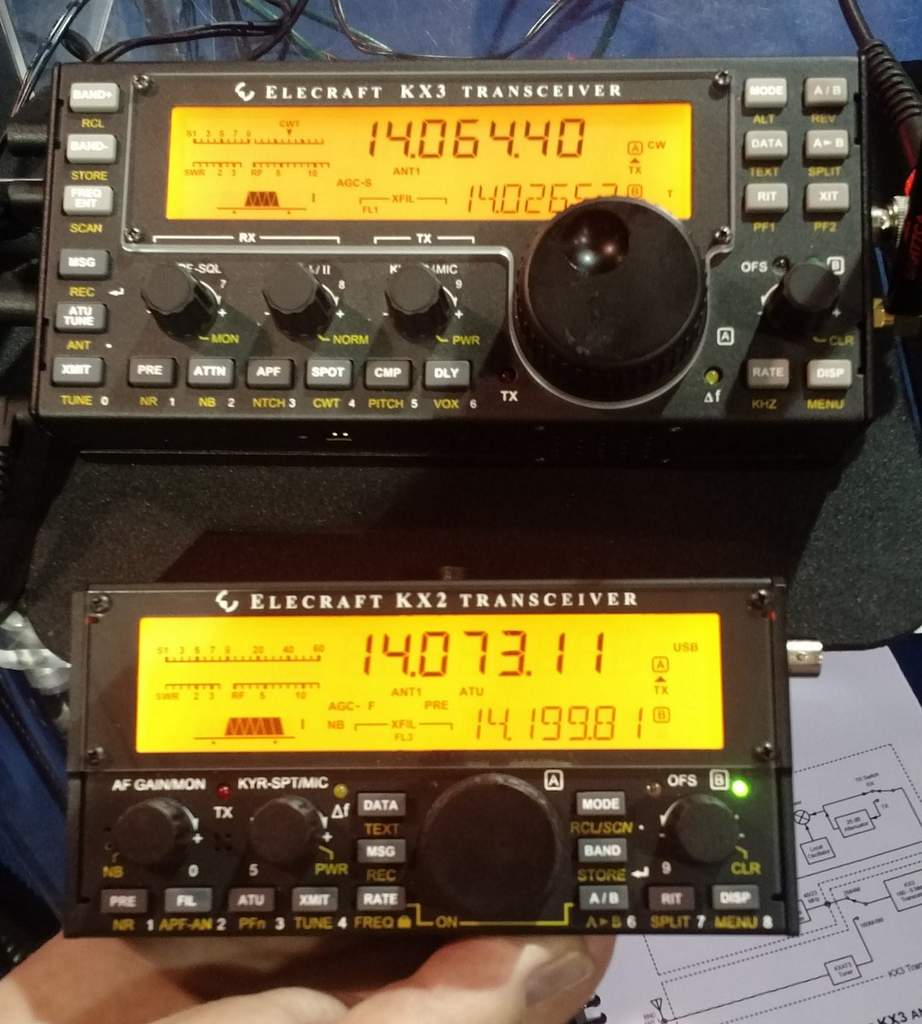
Comparing the size of the Elecraft KX3 (top) and KX2 (bottom) at Elecraft’s Dayton Hamvention booth.
You can find the KX3 used for $700-900 (depending on options). The bare-bones model of the KX2 can be purchased new from Elecraft for $749.
Of course, something to keep in mind about the Elecraft KX series transceiver is that output power is limited to 12-15 watts. Some of the general coverage transceivers mentioned in our review have a much higher 100 watt output power.
Additionally, the audio fidelity (via the internal speaker) is not as good as many other general coverage transceivers. Audio amplification is not as powerful, because both transceivers are designed to operate on a small battery pack (a major plus in my world because I love field-portable rigs).
Since I do 90% of my radio work with headphones, audio amplification is not a problem for me and I’m quite please with both KX line transceivers. Many KX series owners purchase external amplified speakers to improve audio.
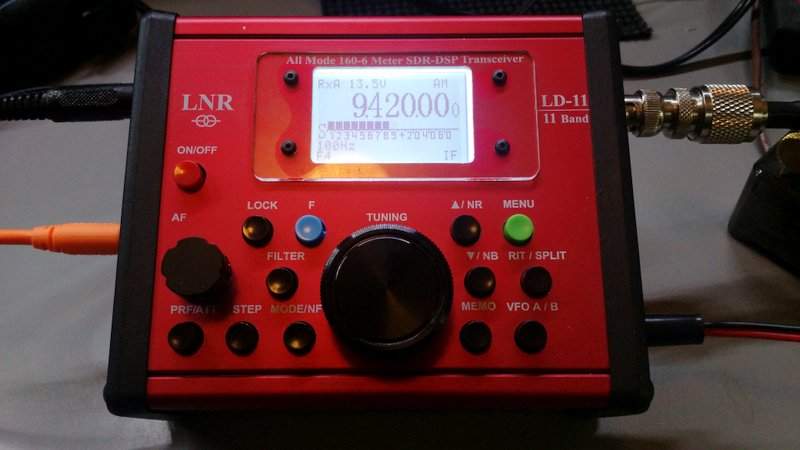
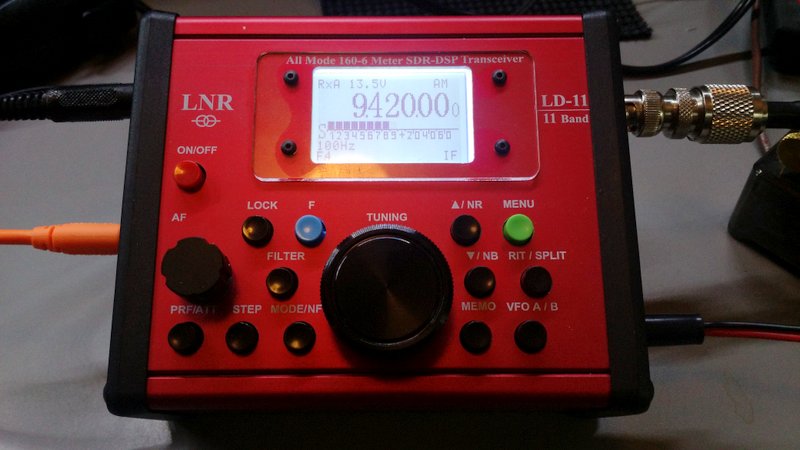
The LnR LD-11 tuned to the Voice of Greece.
While we’re looking at QRP transceivers, I would also recommend the LnR Precision LD-11. Its broadcast afidelity is even better (via headphones) than the KX2/KX3 since the AM filter can be widened to an impressive 9.6 kHz. It’s a top-notch transceiver and can be purchased new for $780 US. Click here to check out my full review of the LD-11.
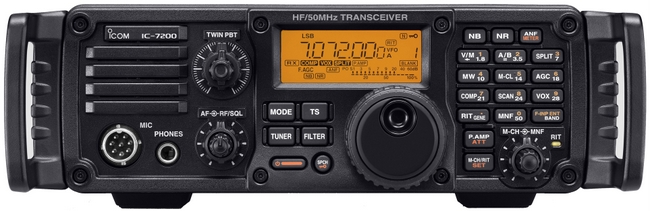
New, the IC-7200 is about $879 US, but they can be found used closer to the $650 – 750 mark. A very good value in my book. In fact, I’m very tempted to buy one as my 100 watt “shack and field” rig. It’s way more user-friendly on Field Day than my Elecraft K2/100 and, in many ways, a better option than purchasing an Elecraft amp for my KX3/KX2.
Any other good suggestions?
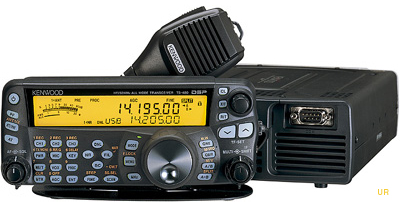
The Kenwood TS-480SAT is full-featured, small, and has a detachable face plate. A very good general coverage transceiver.
The following review first appeared in the November 2016 issue of The Spectrum Monitor magazine.
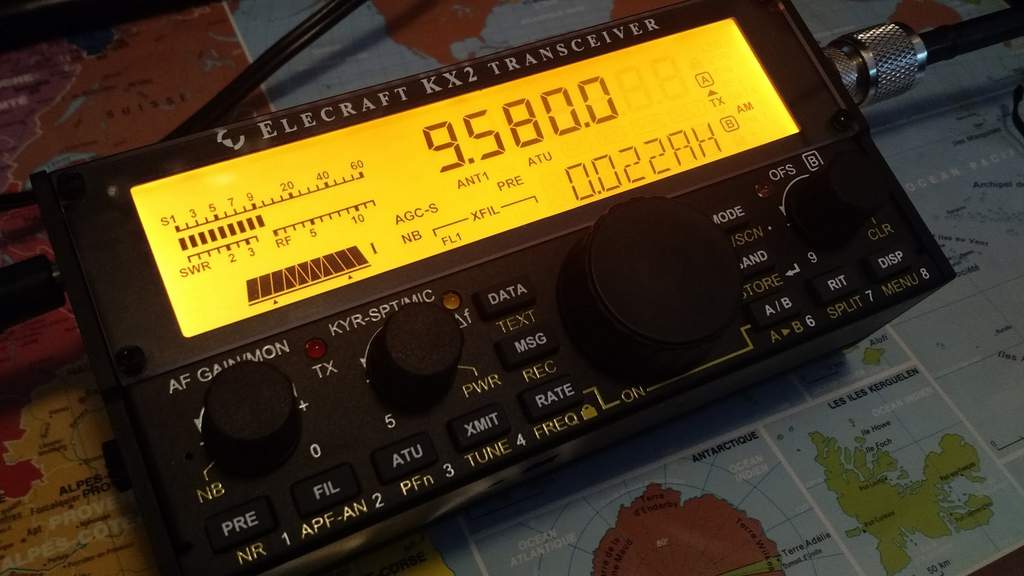
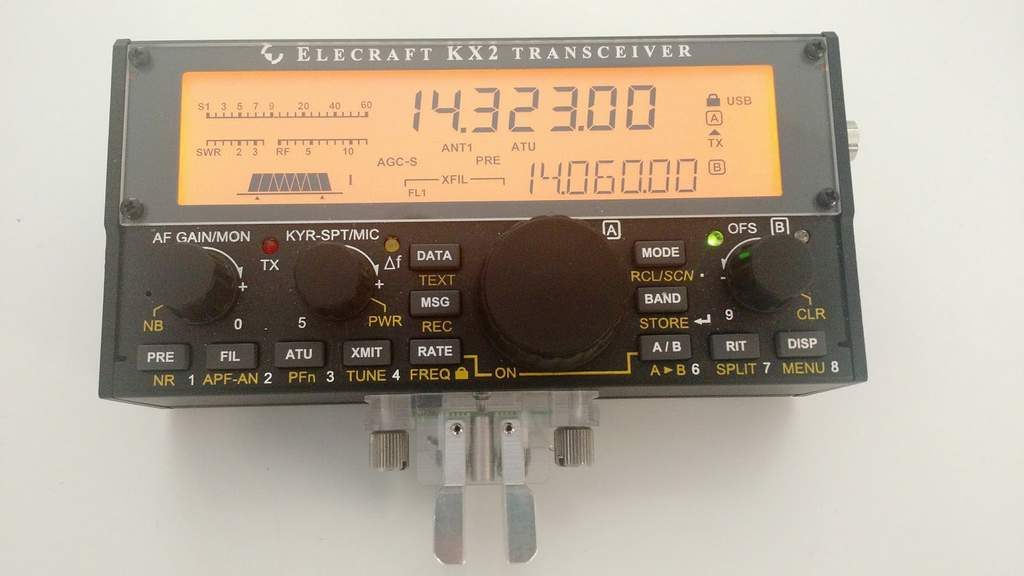
The Elecraft KX2 tuned to Radio Australia.
It’s not every day that I get exciting news about the production of a new radio.
It was two days before the 2016 Dayton Hamvention–the day before the Four Days in May QRP conference–as I was eating lunch en route to Ohio, that I received the news: Elecraft had just announced a new transceiver, the Elecraft KX2.
Elecraft being known for their exceptional products, I thought instantly, hmmmm, this could be interesting. I immediately dropped everything and contacted Elecraft, asking, “When can I see this new rig?”
Wayne Burdick (N6KR) of Elecraft kindly sent me a few specs, and the following day, I previewed the KX2.
What is the KX2?
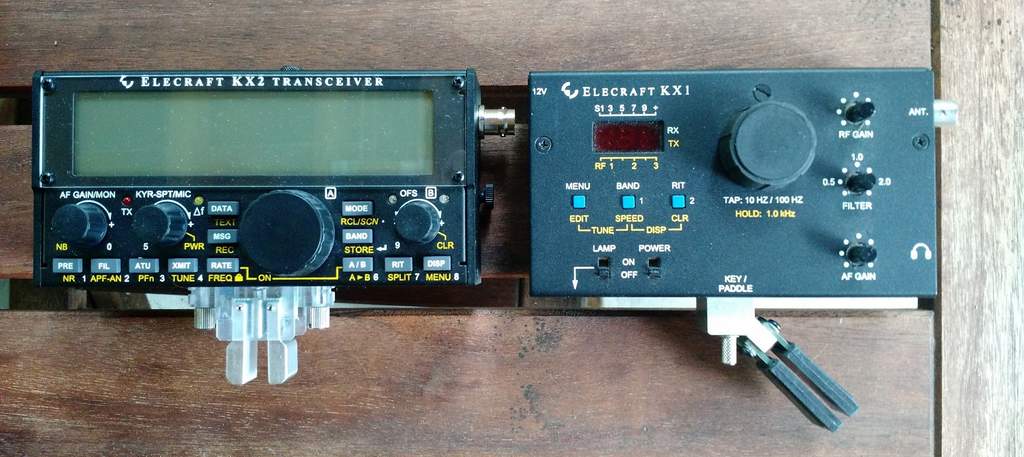
In short: the KX2 is a feature-rich pocket QRP transceiver. For those who are familiar with the Elecraft product line, it’s like a KX3 (feature rich portable rig) in a KX1-sized (much smaller, handheld/pocket) package.
The Elecraft KX2 (left) and KX1 (right)
The day before the Dayton Hamvention, Elecraft allowed me to snap some photos, ask some questions, and generally give their new little rig a once-over. After holding their new offering in my hand–it’s slightly narrower, if a bit thicker, than a paperback book–was already tempted to plunk down $749 for the KX2 right then and there.
Comparing the size of the Elecraft KX3 (top) and KX2 (bottom) at Elecraft’s Dayton Hamvention booth.
So, what what stopped me? For one, I was less than two weeks away from taking a two month trip in Canada, and already had an (embarrassingly) large number of radios to take along. I also had a few other reviews in the works and needed to finish them prior to evaluating the KX2. And–let’s face it–that kind of cash is significant to a reviewer like me.
Yet there was another consideration–two, actually: I already own both the KX1 and KX3 transceivers, and like them very well. Come on, I chastised myself, as I continued to admire the latest Elecraft in its tiny package. Wouldn’t a KX2 be rather…redundant?
Nonetheless, in August I took the plunge and ordered a KX2. Perhaps it was a leap of faith…or a momentary lapse of judgement that led me down temptation lane. At any rate, I had been doing enough NPOTA activations that I fell for the idea that I could potentially have the advantages and performance of the KX3 in an even smaller, even more portable, package.
Would there be buyer’s remorse? The only way to tell, obviously, was to put the KX2 on the air.
Learning my way around the KX2
I imagine a lot of new KX2 owners will be Elecraft veterans like myself. Once you’ve used Elecraft equipment for a while, you begin to understand how the company designs their menu trees and functions. In other words, once you’ve experienced the Elecraft ecosystem, moving from one radio to another becomes easier.
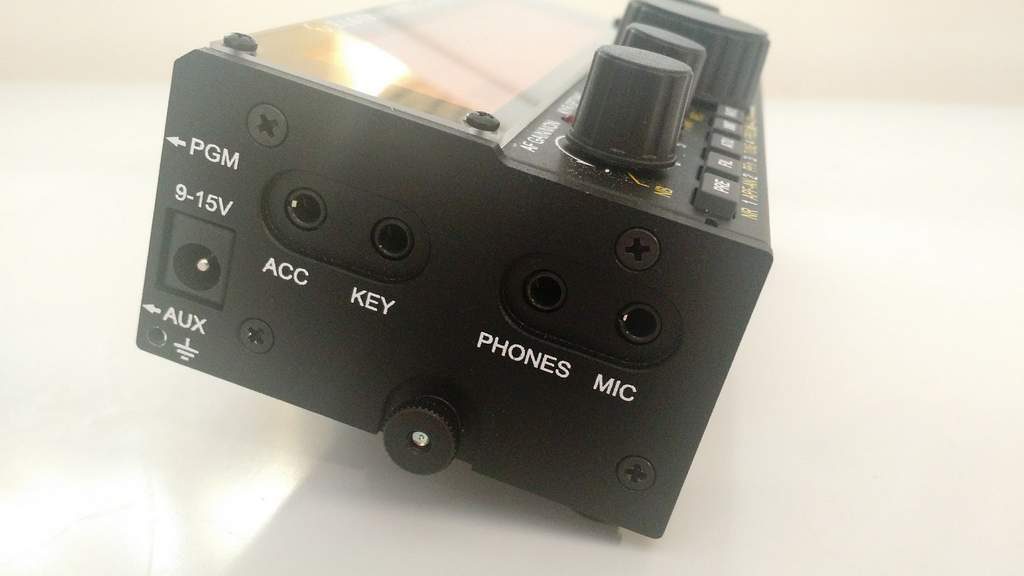
The KX2’s on-board microphone is located on the left side of the front panel and works very effectively especially in an HT configuration.
I approached the KX2 with confidence, having owned the similar KX3 for three years and the K2, K1 and KX1 for many years.
The left side of the KX2 is where all connections are located, save the antenna connector.
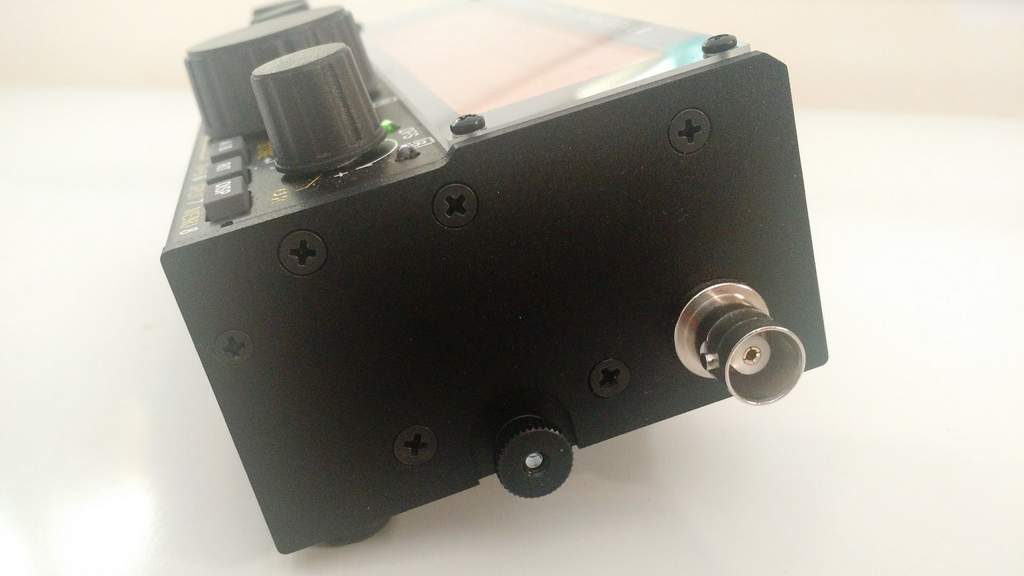
The BNC antenna jack is located on the right side of the KX2.
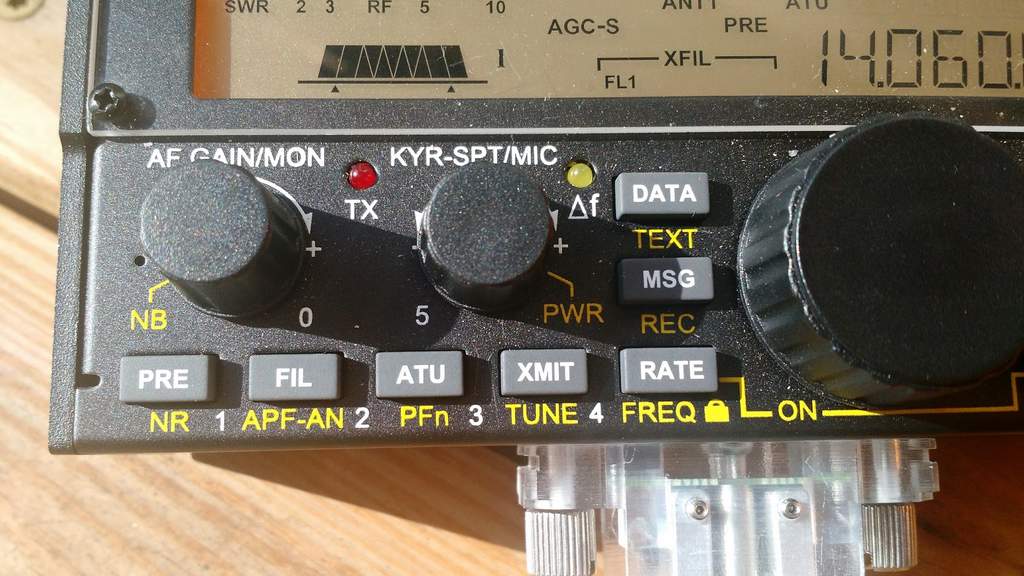
I plugged the KX2 into my power supply, main antenna, and powered it up by pressing the Rate and A/B buttons simultaneously (a clever keylock method). The KX2 defaulted to the 20-meter band. I started tuning around and quickly realized that the SSB mode was set to the lower instead of the upper sideband. No problem, I thought, and instinctively pressed and held the MODE button to switch from LSB to USB. This is where I found the first difference between KX2 and KX3 functions. Pressing and holding mode button on the KX3 toggles USB/LSB, but on the KX2 it enters the frequency memory store mode.
I tinkered with the KX2 MODE button to no avail, so reached for the KX2 owner’s manual, fortunately a well-written tome. Turns out, to switch between USB/LSB, you: enter the KX2 menu system, select the ALT MD entry, then switch the “alternate” to the “normal” SSB band mode, which moves it to USB on the 20-meter band.
A number of functions accessed on the front panel of the KX3 require using the menu system on the KX2. RF Gain is another example of this, as I discovered pretty quickly.
This got me thinking. I don’t envy the folks at Elecraft who have to sort out the ergonomics and functionality on a radio as small as the KX2. I decided I’d better check out the owner’s manual and familiarize myself with the functions I use the most in the field.
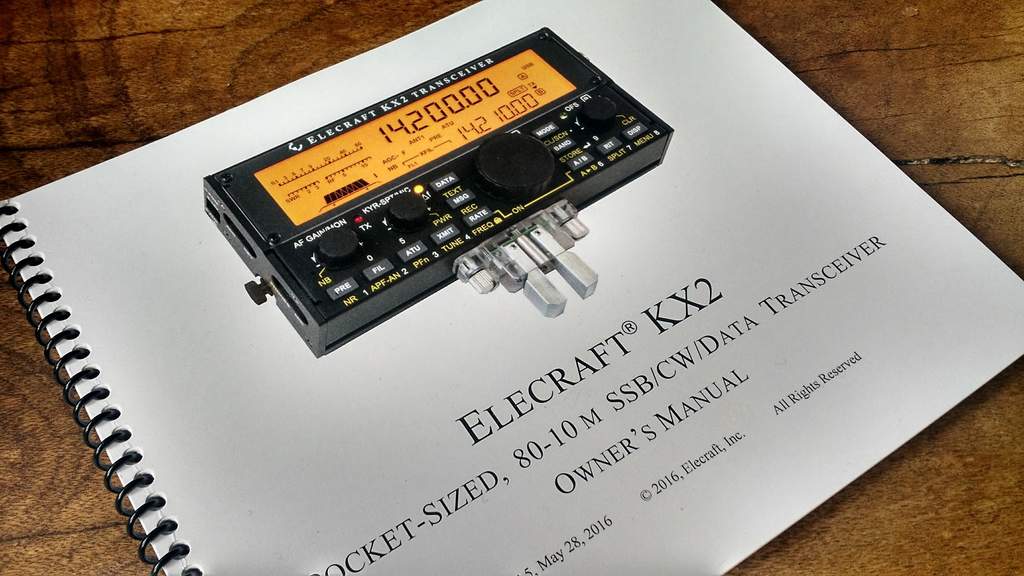
Elecraft manuals are superb; they’re spiral bound, easy to read and comprehensive.
I must say, Elecraft has done an admirable job of keeping the most essential functions on the face of the radio and tucking the less-used functions into the background of their menu system [Not to suggest access is ever complicated, considering that you just 1) enter the menu, 2) select the function, and 3) change the parameter…that’s it.] No doubt, the reason for their success is the fact that their key designers, like co-founder, Wayne Burdick (N6KR), actually operate radio in the field–they get it.
Speaking of the field, that’s exactly where I wanted to take the KX2 to test, since that’s clearly where the rig’s designed for use. Note here that this is not a base rig: its size and features lends itself very well to a pack radio–one I wanted to keep packed and at-the-ready!
Packing up…
Prior to receiving the KX2, of course, I did some pack research (those of you who know me know that I’m a bit of a pack geek).
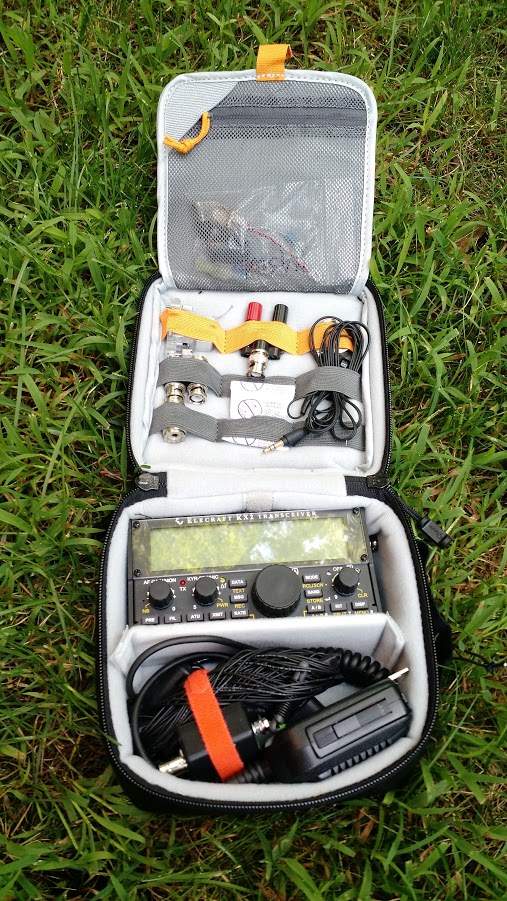
Elecraft was actually selling two models of a LowePro pack that fit the KX2 exactly: the ViewPoint CS 40 and ViewPoint CS 60. Though I searched far and wide, I couldn’t find a pack from some of my favorite manufacturers (such as Spec-Ops Brand, Red Oxx, and Tom Bihn) that has the right amount of padding, exact space and fit for the KX2, as did the CS 40 and CS60. So I purchased the larger CS 60–the larger of the two packs.
My Elecraft KX2 kit then consisted of the following:
The Elecraft KX2, with internal battery and ATU options
All of this–save fishing line, weight, six-foot coax cable and clipboard–were protected by the compact and perfectly portable LowePro ViewPoint CS 60 padded case, and fit it like a glove. I tucked the whole kit quite conveniently into my 20-year-old Dana Design lumbar pack.
The only way to know if the kit was complete, was to take it to the field. Nothing like trial by fire.
NPOTA: National Parks On The Air
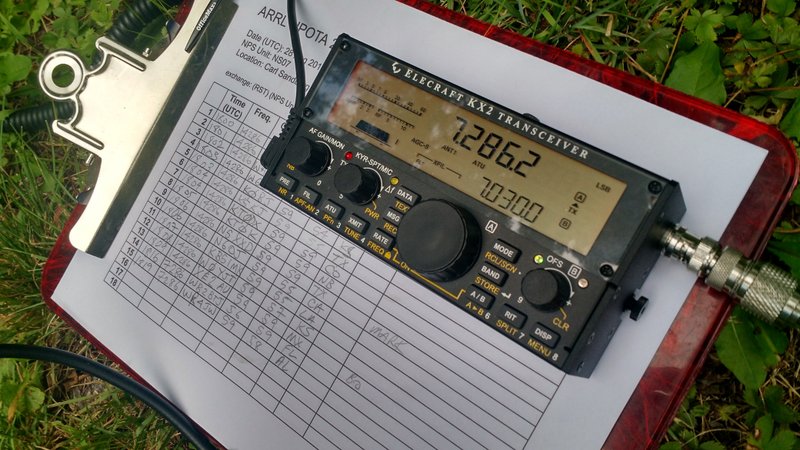
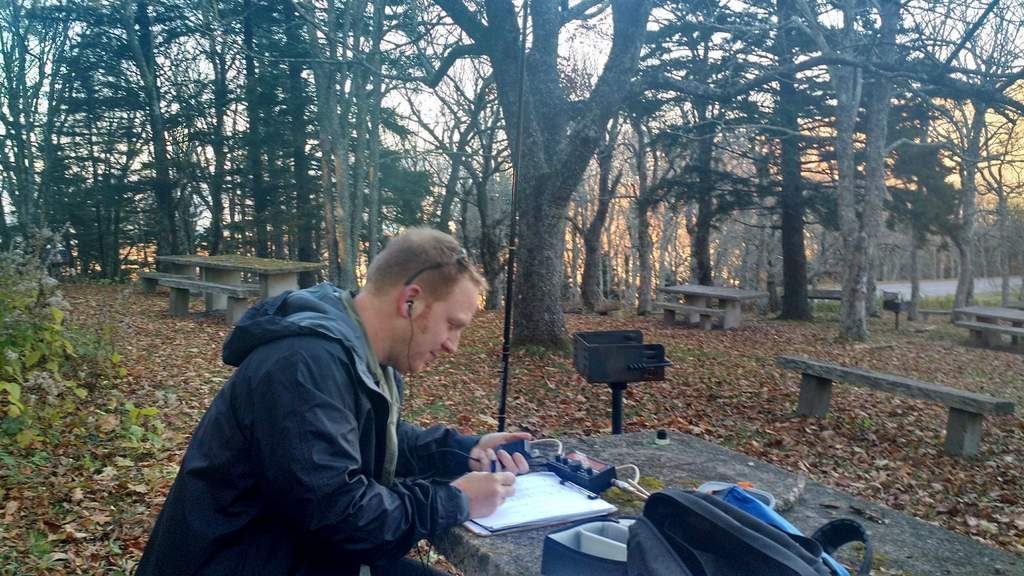
My first NPOTA activation with the KX2 field kit was at the Carl Sandburg Home in East Flat Rock, NC.
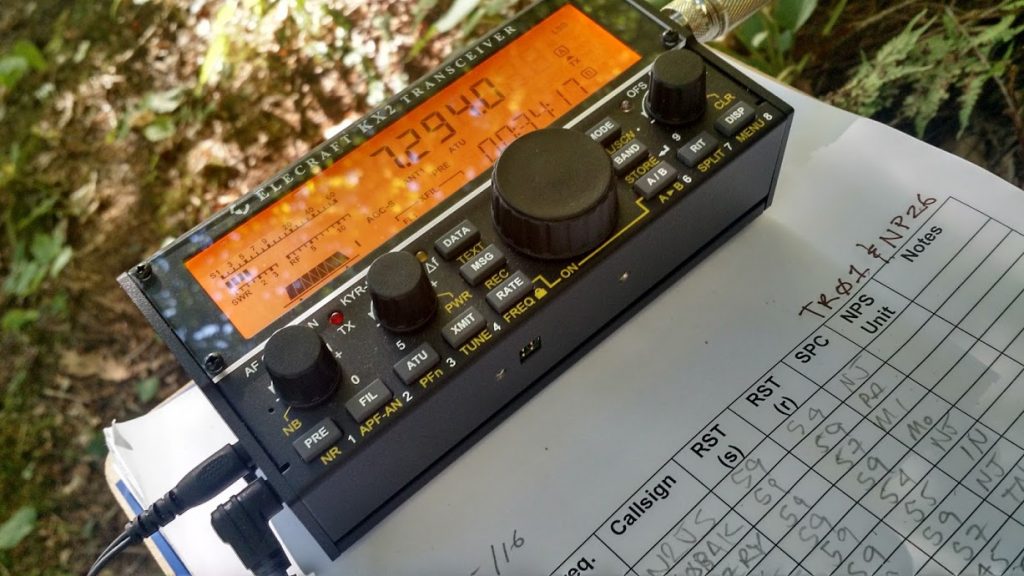
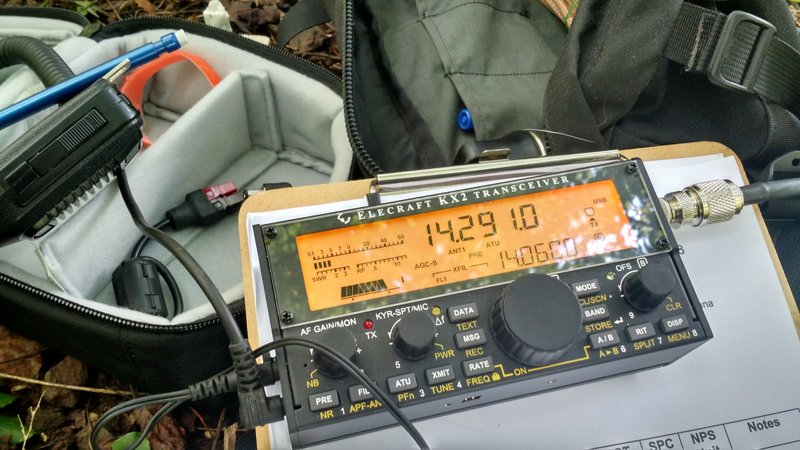
After hiking about twenty minutes to my trail location and setting up the station, which I found to be a fairly simple process, I realized that the KX2 is so compact that it easily fit on the clipboard I was using to hold my log sheets. Thus, the clipboard instantly became my laptop operating table.
As soon as I sat down in my folding chair, I turned on the KX2, set the frequency to 14,286 kHz, and pressed the ATU button, which gave me a 1:1 match (since the EFT is resonant).
Next, I recorded my CQ call into the KX2’s built-in voice keyer by:
pressing and holding the MSG button,
assigning the voice message to “memory allocation 1” by pressing the PRE (1) button,
pressing XMIT to start the recording,
reading off my CQ call, thus: “CQ, CQ, CQ, this is K4SWL calling CQ for National Parks on the Air…”, and
pressing XMIT again to stop the recording.
Then, I started calling CQ by simply pressing the MSG button and selecting my message stored in memory allocation 1 by pressing and holding the PRE (1) button.
By pressing and holding the PRE (1) button, I initiated a loop-playback of my CQ call where my KX2 would transmit my call from memory. Then I waited a few seconds to listen for any replies, and played it again. (In loop-playback mode, I’d learned that the KX2 will repeat my CQ call until I interrupt it by pressing a button or keying my mic.)
It’s a brilliant and easy function which saves my voice. By automatically calling CQ, it gives me an opportunity to answer questions from curious passersby who were naturally fascinated by a guy sitting on the side of a trail, talking into a little box connected to a tree-branch suspended wire.
In the end, I didn’t even need to use the voice keyer that much. I worked my minimum of ten stations within six minutes! Of course, I continued to call CQ until I worked everyone in the pile-up (including stations from California, Nebraska, Kansas, Texas, and Mexico–thanks, folks!).
Result? Wow. That first field experience at the Carl Sandburg home couldn’t have gone better. And the KX2 had quite a lot to do with that outcome–both in function and form-factor.
Since then, I have taken the KX2 on more than twenty NPOTA field activations, and my compact field kit is making impromptu activations a breeze. Indeed, by the time you read this review, I’m guessing I’ll have added a dozen more NPOTA activations with the KX2 field kit.
[Update: At time of posting this review, I have a total of 54 NPOTA activations–almost forty have been made with the KX2.]
Internal battery option
Activating PK01 (The Appalachian Trail) with the KX2
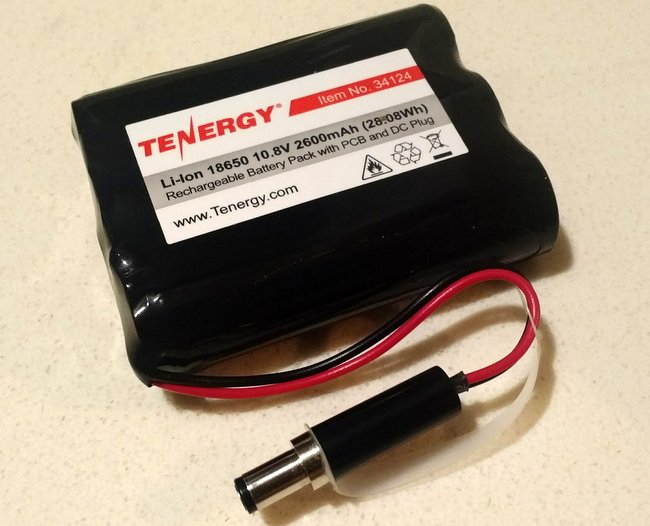
One of the things that make the KX2 so easy to set up is the fact it can run quite effectively on a high-capacity internal LiPo battery pack.
The KX2’s 10.8V 2600 mAh LiPo battery
On one particular set of activations, while returning from the W4DXCC conference in late September, I activated several sites, including a couple of “two-fer” sites, just during my drive home. I only used the KX2’s built-in battery to power the rig. I was on the air almost three full hours of fairly intense transmitter use (repeating my CQ call through the voice keyer). The KX2 was able to pump out a full 10 watts of power for a little over one hour, then as the voltage dropped, it reduced output to 5 watts.
I feel like this is impressive performance from such a small battery pack. It’s a little pricey (at $84.90 US for both the battery and external charger), but very much worth the cost if you’re splurging for a KX2, anyway.
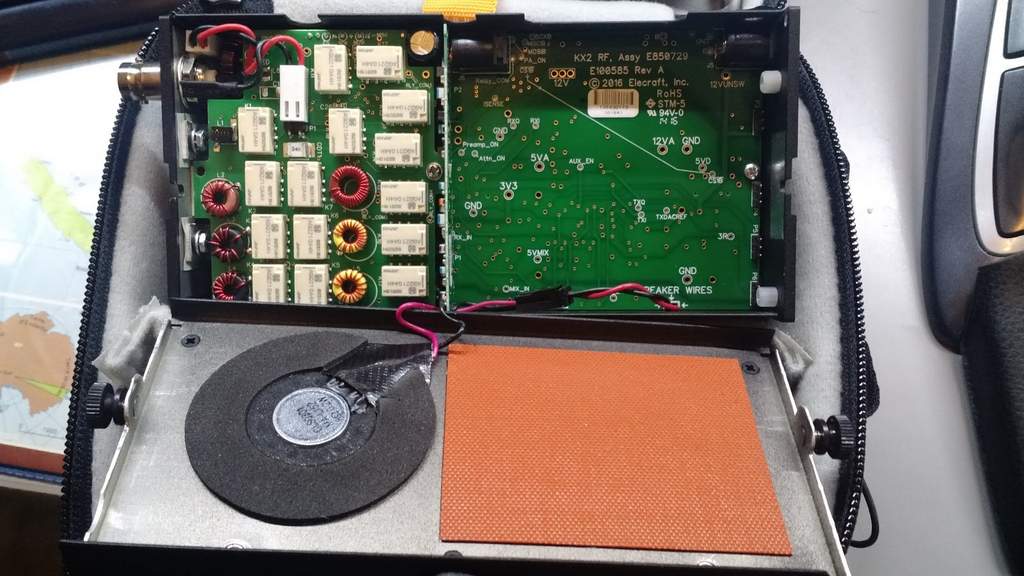
View of the Elecraft KX2 battery compartment. Note the speaker wires which attach the two halves of the chassis.
One complaint: I’m not crazy about the fact that the LiPo battery must be removed from the KX2 in order to be charged. To gain access to the battery, you loosen the two thumb nuts on either side of the KX2, then carefully open the back compartment. You must be careful because two speaker wires are attached to the back panel which holds the internal speaker; if you yank it open, you could disconnect the speaker.
I’ve read a report from an NPOTA activator who said that, in the process of multiple openings/closings of the back plate, the speaker wires have rubbed bare spots on the insulation. He used black electrical tape to fix the problem. So far, I haven’t noticed this, but I certainly see how it could happen with time.
Operating a NPOTA “two-fer” under the Blue Ridge Parkway and in the Great Smoky Mountains National Park.
In the end, I give Elecraft a little grace on this point. After all, this is the first transceiver they’ve ever produced that doesn’t have a kit form, plus they’re trying to satisfy the needs of battery and charging circuit while keeping costs down, as well as make everything fit in an almost paperback-sized enclosure. Frankly, this works fine. I don’t mind the extra care required because, in the end, having such a capable internal battery outweighs any inconvenience of charging at home.
Elecraft, if there’s a way to reinforce the speaker wires, that would likely help.
KXAT2 Internal ATU Option
I ordered the KXAT2 internal ATU option with my KX2. Having used the KX3 internal tuner for years, I guessed this might be an excellent ATU, as well.
And it is. In the field, I’ve used a variety of wire antennas, and the KX2’s internal ATU has matched them beautifully.
So, exactly how good is the KXAT2? The following story will give you an idea.
I brought my KX2 along to the W4DXCC conference in late September. The conference has a club station that consists of two Icom IC-7300s which are hooked up to a variety of antennas. During the conference, my buddy WD8RIF was activating a particularly rare NPOTA site. My only chance of working him was on 40 meters.
Conference attendees took turns operating the KX2.
Unfortunately, out of all of the self-supporting antennas erected on site, none were resonant below the 20 meter band. I had no means to properly hang my 10/20/40 meter EFT Trail-Friendly antenna at the hotel, so out of desperation, I tried to load a 20 meter hex beam on 40 meters at QRP power using the IC-7300 and its internal tuner. In short, the IC-7300’s ATU couldn’t find a match and refused to transmit.
But I had my KX2 in my field pack. I set up the KX2, connected it to the 20M hex beam, tuned it to 40 meters, and hit the ATU button. The KXAT2 promptly found a 1:1 match!
Using the Elecraft KX2 on 40 meters at the W4DXCC conference while attached to a 20 meter hex beam.
Granted, we were only operating 10 watts, but even the IC-7300’s internal ATU wouldn’t work at that same power level.
In short, if you plan to operate portable with the KX2, do yourself a favor and order the KXAT2 internal tuner, as well. Clearly, it’s ability to match is impressive.
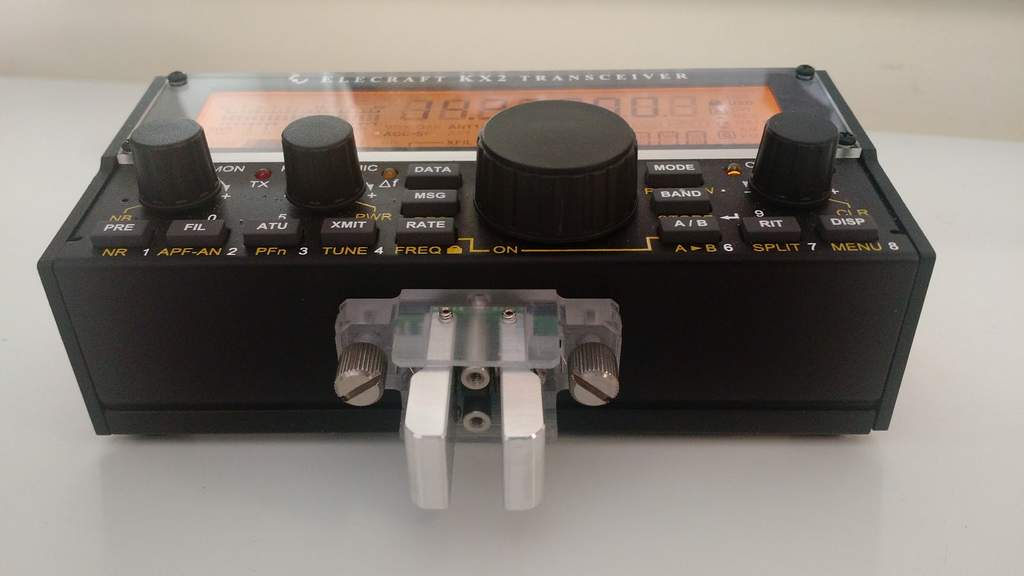
KXPD2 keyer paddle option
Elecraft also sells a small, attachable paddle that is custom-made for the KX2–it’s called the KXPD2 keyer paddle.
I had not planned on acquiring a KXPD2 as I’m not the biggest fan of paddles that are attached directly to radios. I did, however, think back to my KX1 and the many times I operated CW while holding that little rig in my hands. To be clear, though, the KX1 paddles are primitive in comparison to the KXPD2, which has adjustable contact spacing and even built-in allen wrench storage.
One night at my local radio club, I passed the KX2 around with the KXPD2 attached and received a number of positive comments about it. I find it a pleasure to use, too, and lightyears better than my KX1 paddle.
In the field, I personally find the two thumb screws which attach the KXPD2 a little small to turn fluidly. This is due, primarily, to the fact I have bigger fingers. Steve (WG0AT) experienced the same problem, and came up with a creative solution: silicone rubber tape. He simply wrapped the tape around the thumb screws, giving them a larger tactile surface area. I’ll try this with my KXPD2 paddle screws, as well.
The KXPD2 is a brilliant little key, I must admit. I say this even though I feel the $109.95 price is rather high. Still: it’s a quality little product and I’ve been very pleased with its smooth action and precision. And, oh, yeah–a bonus–it will fit my KX3 as well!
General coverage receiver
In August, Elecraft pushed out a Beta firmware release on the KX2 which included AM mode. Following this release, I received a number of inquiries from SWLing Post readers asking for a comparison and audio samples.
At the time, I had the excellent LnR Precision LD-11 transceiver in the shack, so I thought I’d do a quick audio comparison with the KX2 since both price points are similar and both are transceivers with AM mode.
I set the LD-11 to a bandwidth of 9.6 kHz, and the KX2 to 5 kHz: the widest AM filter settings of each. Keep in mind, of course, that this is was not an apples-to-apples comparison, but it did showcase each radio’s potential AM audio fidelity.
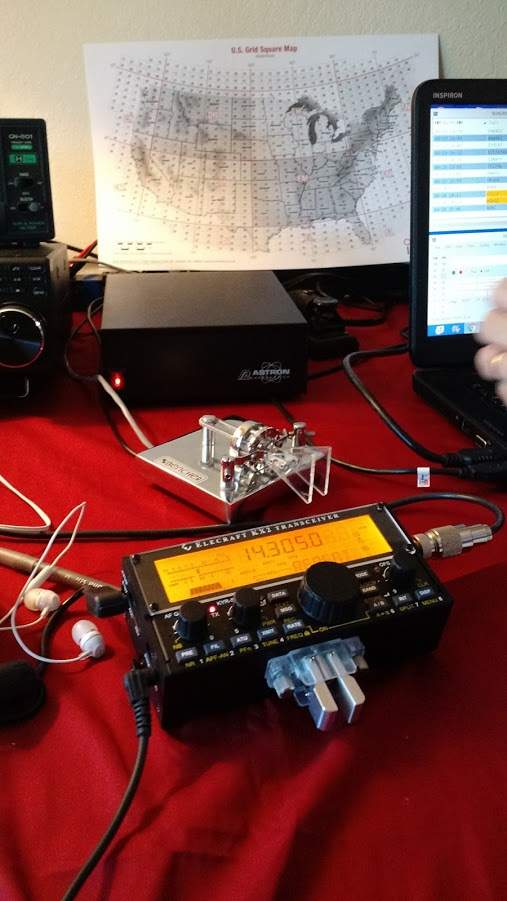
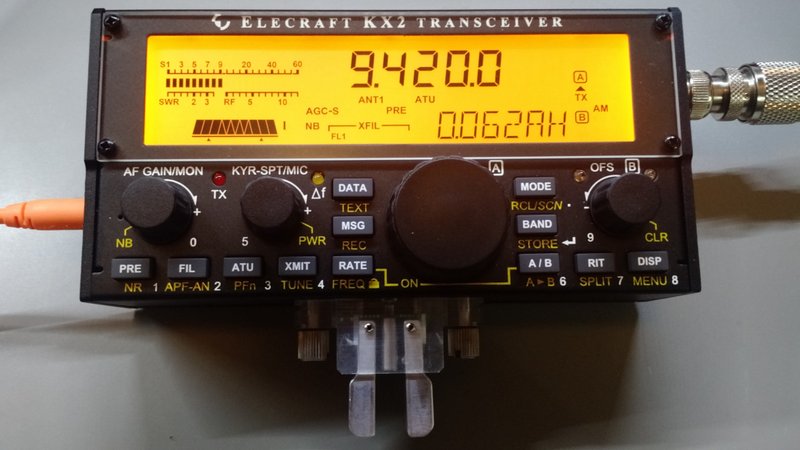
To make the playing field as even as possible for these two disparate units, I tuned both rigs to the Voice of Greece on 9420 kHz around 00:30 UTC. VOG’s signal was strong into North America.
I made the following recordings with my Zoom H2N digital recorder, feeding in-line audio patched from each radio’s headphone jack. I tried to balance the audio levels between the two rigs as closely as possible to one another.
The results from both radios are duly impressive. Since the LD-11’s bandwidth can be widened to 9.6 kHz, strong signals like this one sound pretty darn amazing. In truth, I actually prefer a filter width of about 8.2 kHz on strong signals, but VOG was wide enough to justify 9.6 kHz. I believe the LD-11 would rival many dedicated tabletop receivers.
The Elecraft KX2, in normal audio mode, sounds flatter and narrower than the LD-11 of course, but still remarkably pleasant–a surprise, considering its limitations.
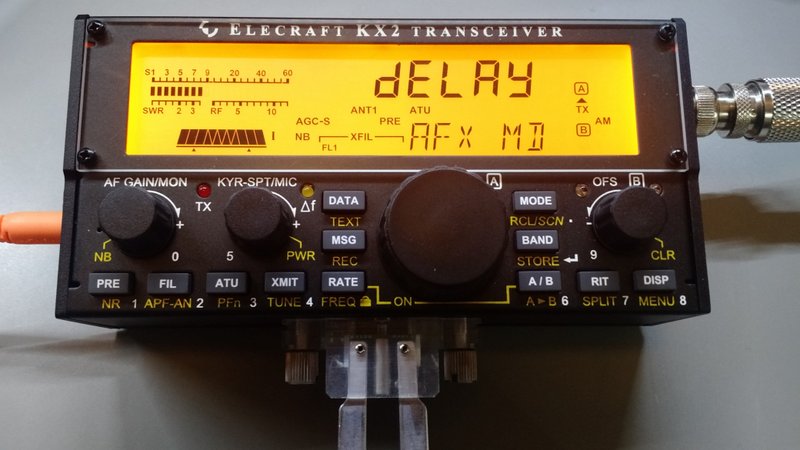
In the KX2’s “delay” DSP audio mode–available when headphones are used–the signal sounds much wider than 5 kHz, though the effect adds a little graininess to the audio. That’s okay, however; I appreciate having the “delay” audio option in my tool bag.
In the past several months, I’ve used the KX2 for shortwave broadcast listening, and each time I’ve been happy with it. It’s an exceptionally sensitive and selective receiver, with a stable AGC, thus would please the most dedicated DXer. Does it have the audio fidelity of the Drake R8B? No way. But its audio is very good, nonetheless, and it can dig weak DX out of the noise as well as any of my dedicated receivers.
After all, this is a ham radio transceiver, not a broadcast receiver, so I’m impressed that it can double as both.
Mediumwave reception?
While HF reception is very good, Elecraft is the first to tell you that KX2 mediumwave reception is strictly limited, and indeed rather poor:
“Sensitivity rolls off significantly below 3.0 MHz due to protective high-pass filtering. Preamp-on MDS is typically -105 dBm at 1.5 MHz, and -80 dBm at 1.0 MHz, sufficient for emergency AM broadcast signal copy.”
So, don’t plan on doing any mediumwave DXing with the KX2. It is sensitive enough, however, that I can receive strong local stations reasonably well.
Summary
Every radio has its pros and cons. When I begin a review of a radio, I take notes from the very beginning so that I don’t forget my initial impressions and observations. Here’s the KX2’s list, from the first moments I turned it on, to the present:
Pros:
Excellent sensitivity and selectivity
All modes: SSB, AM, CW, and Data (with built-in PSK/TTY decode/encode)
A convenient portable package for the field with needed options:
Built-in ATU option
Optional internal LiPo battery (see con)
With telescopic whip, the KX2 can be used as an HT via the internal microphone
Very quick deployment in the field
Built-in voice and CW keyer
Excellent general coverage receiver; AM mode effective for shortwave broadcast listening
Backlit display is easy to read in both shack and field
Numeric keypad for direct frequency entry
Considerate use of multi-function controls
Free and easy firmware updates via supplied software
Elecraft support and customer service
Cons:
Battery must be removed to charge; battery removal requires careful consideration of speaker wires (see pro)
Downward-facing speaker not ideal in the field unless back leg is used to raise off of surface
Price (shipped) exceeds $1,000 when loaded with ATU, battery, and external charger
Poor mediumwave/AM broadcast band reception (con) by design (pro)
Let’s be frank here: the cons I’ve listed above are rather nitpicky.
I suspect Elecraft will work on a better solution for the speaker wire (for those of us using the internal battery) or else KX2 users will come up with a creative modification.
In a perfect world, I also wish the KX2 were somewhat weather-proof or water-resistant. A couple of times, I’ve been operating in the field when rain caught me off guard. I feel like the KX2 is pretty vulnerable, so I either pack up the radio and stop operating, or I seek shelter if it’s available. It wouldn’t take a lot of moisture to penetrate the KX2 and there’s no way I’m letting rain ruin my rig. But I’m guessing weatherproofing would add significant cost.
So, did I experience any buyer’s remorse after purchasing the KX2?
Not in the least. Between us, kind reader: the KX2 has been a difficult rig with which to find fault. Price and inherent compromises for portability aside, there are really no serious negatives about this radio in my book. It suits my purposes very well.
Activating the Blue Ridge Parkway (PK01) with the Elecraft KX2 and “Silver Tip” 20 meter vertical. An effective combo!
Yet we reviewers cringe when our reviews appear this “glowing.”
I’m not a fanboy of any brand. I love to see companies introduce successful original products. I believe companies like Elecraft, CommRadio, LnR Precision, Elad, Icom, Yaesu, Kenwood, SDRplay, and the like are healthy for our hobby.
Competition and innovation are worthy friends.
Elecraft pushes our ham radio hobby forward, and it’s innovations like the KX2 that make our radio market and our hobby a dynamic and inventive space.
To be clear, I know the KX2 didn’t come out of nowhere. It’s the culmination of many iterations of Elecraft transceiver designs over the past eighteen years. Elecraft has taken feedback from customers, made notes, and improved their products with time, and it shows in this little rig.
The Elecraft KX2 is clearly a product of iterative agility. It will, no doubt, be a market success.
I remember when Elecraft co-founder Wayne showed me the KX1 many, many years ago at the Dayton Hamvention. He told me that the KX1 was a step toward the perfect portable radio he’d dreamed of as a kid. The KX2 is simply that–and a profound upgrade of the KX1. But more to the point, it might have been the portable of which I dreamed, too.
Over the past year, a number of SWLing Post readers have asked me to review the PK Loop portable magnetic loop antenna produced by Paul Karlstrand in Australia.
I finally caved in and purchased one.
I ordered the shortwave version of the loop, the C-LOOP-HDSW6-18 in early November and received it about one week later.
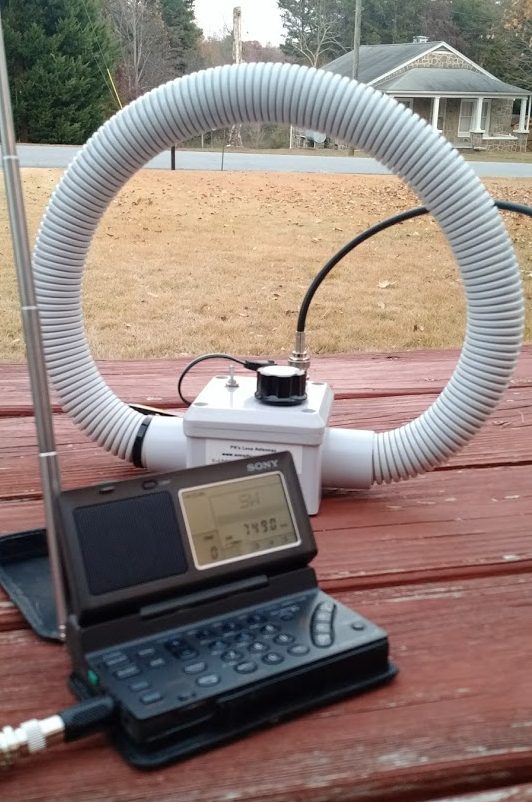
The Sony SW100 tuned to WBCQ.
I was first introduced to this antenna by SWLing Post contributor, Mark Fahey, who brought it to the SWL Fest and our 2015 PARI DXpedition.
Mark has taken his PK Loops (both the shortwave and mediumwave models) on his numerous travels around the world. He finds that they’re relatively effective portable antennas in RFI-dense environments like hotels and guest houses. They’re better at mitigating RFI than, say, portable wire antennas or telescopic whips.
Mark hooks up his portable SDR to the PK Loop and makes spectrum recordings (wideband recordings)–from, say, his hotel room in Kuala Lumpur–then takes the recording back home to listen and tune at his leisure via his laptop or tablet PC. While I’ve certainly made spectrum recordings while travelling in the past, the appeal of such a portable loop antenna is what finally caused me to pull the trigger.
Overview
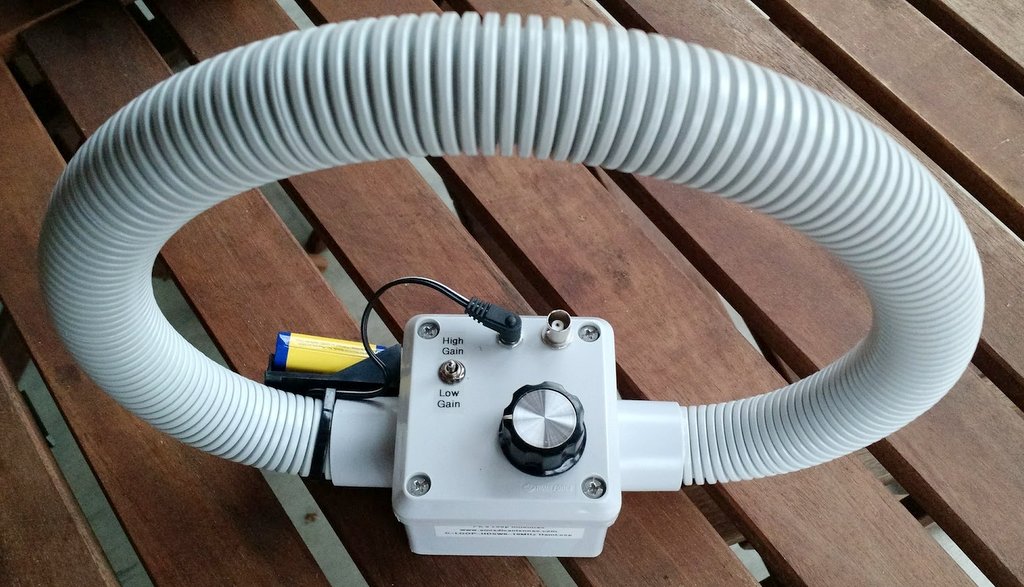
The PK Loop is a small loop antenna–measuring about 12″ in diameter. It’s encased in UV-stabilized PVC conduit and the matching box also seems to be made of PVC. It feels very durable and can, no doubt, even survive the wildest of luggage handling.
The PK Loop has an attached battery 9V battery holder, but can actually be powered by any 9-18 volt DC supply. Current consumption is less than 15 mA. On the matching box, you’ll find a tuning knob, a BNC connector, DC power in port and a HI/LOW gain switch. My loop shipped with a 2 meter BNC-BNC Cable, 3.5mm adapter, and DC Power lead to open ends.
Operation
Operating the loop is very simple:
Power the antenna with a 9V battery or other DC source
Chose either the high or low gain setting
Place it on a stable surface (height from the ground is not a critical issue, but you should avoid placing it next to noisy electronics or mobile phones)
Connect the PK Loop to your receiver’s antenna jack with the supplied cable
Turn on your receiver to the desired meter band, then adjust the loop’s tuning knob until you hear the signal level peak
Start listening, keeping in mind that as you tune around the band you may need to adjust the loop’s tuning knob for maximum gain
Loop antennas, in general, are fairly narrow-band and–unlike a Wellbrook or Pixel Loop–manual adjustments need to be made with the tuning knob to match the PK Loop as you scan across bands.
Still, I see why Mark favors the PK Loop for spectrum recordings: the bandwidth is wide enough that if I tune the loop to the middle of the 31 meter band, for example, it does a fine job covering the entire band.
On the air
My free time has been very limited since receiving the PK Loop earlier this month, but over Thanksgiving holiday, I took it to my family’s home that has relatively high RFI levels.
The following are a couple of videos I made with my Moto X smartphone. I’ll be the first to admit that these are not the best videos–I had no tripod and the Moto’s microphone leaves much to be desired–but I think you’ll still get the idea of how well the PK Loop works.
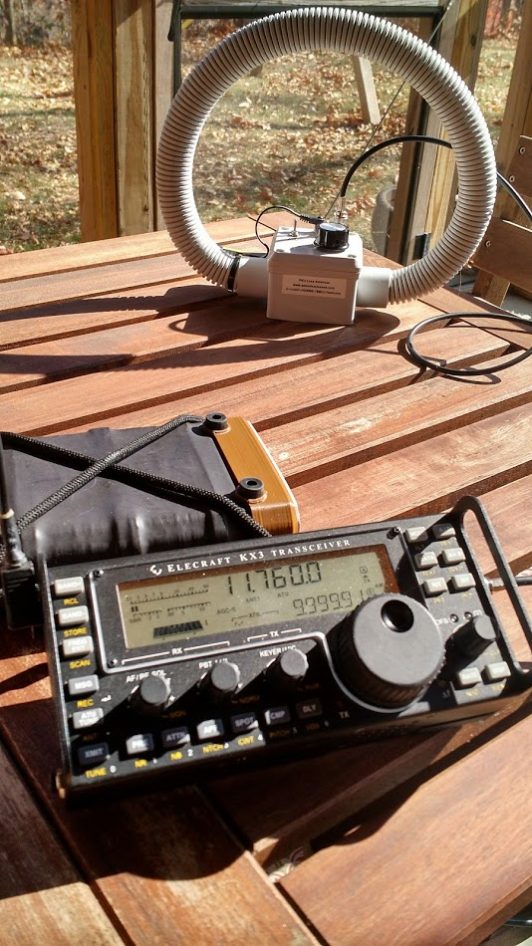
So far, I’m very pleased with the PK Loop. It does seem to mitigate noise better than other portable antennas I’ve used in the past and certainly improves my SW100’s reception. It makes SWLing with the Elecraft KX2 or KX3 easy and convenient.
One word of caution: if you use the PK Loop with a transceiver like the KX2, please turn off the ATU, and set the power level to 0W before using. The PK Loop is receive-only and will not handle any RF power.
Note that with the SW100, I have only used the PK Loop’s low gain setting. I’m a little nervous about overloading the SW100, so do not plan to use the high gain setting. The Elecraft KX2 seems happy to handle either gain setting: I imagine this will be the case with most general coverage transceivers and tabletop receivers.
More to come!
In a couple of weeks, I’ll be staying in a hotel room (likely with inoperable windows and heavy RFI) so I will attempt to put the loop through its paces and compare it with my radio’s built-in antenna. Stay tuned!
If you’ve been thinking about pulling the trigger on an Elecraft transceiver, now may be a good time. Elecraft is throwing in free accessories and free shipping on a few of their products.
I took my field kit which included the Elecraft KX2, QRP Ranger battery pack (not pictured), and EFT Trail-Friendly antenna.
Thursday, September 22, 2016
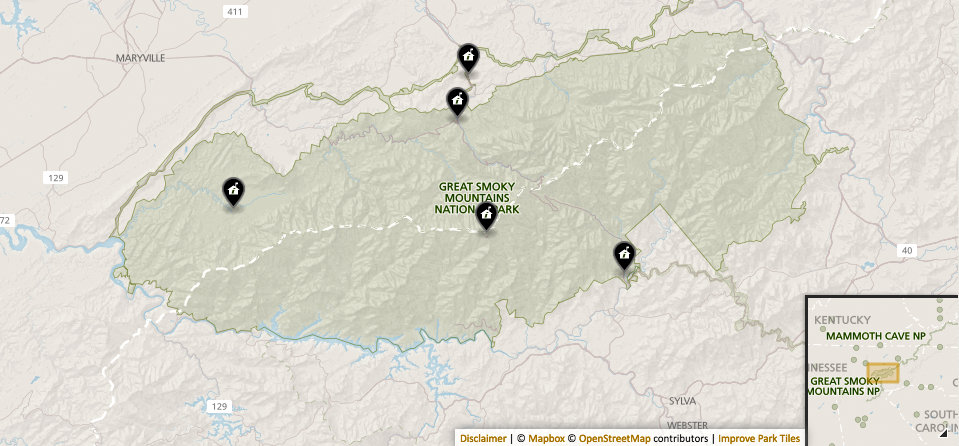
My first stop was the Ocunaluftee Visitor Center in Cherokee, NC, where I had planned the “two-fer” activation of the Great Smoky Mountains (NP26) and the Blue Ridge Parkway (PK01).
First thing I did was ask the park ranger on duty how I could find the footpath to the point where the two parks overlap. Turns out, I had at least a one mile hike ahead of me.
PK01 and NP26
I love hiking, so that wasn’t a problem.
The only problem was I hadn’t accounted for the hike in my plans, so I knew I would be a little late for the scheduled activation time.
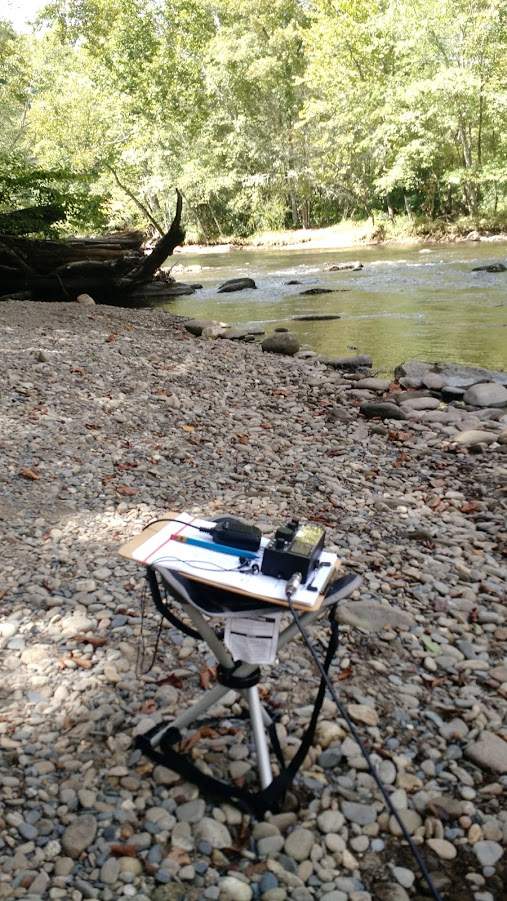
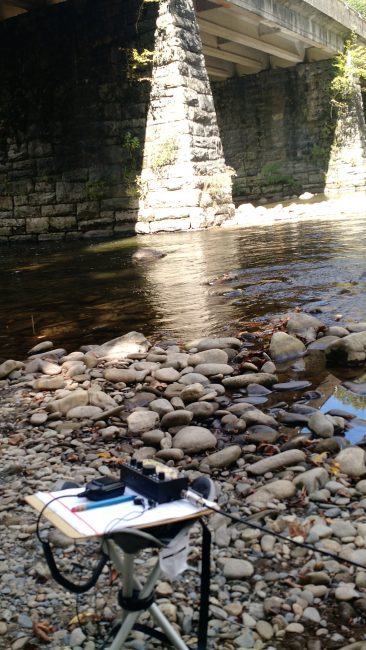
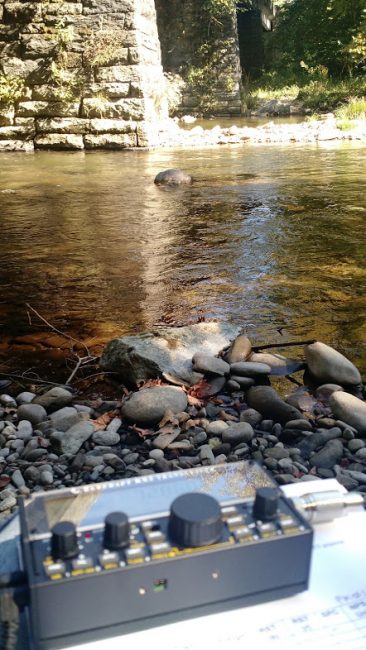
When I reached the Blue Ridge Parkway, I ventured down to the river where I found an excellent spot to set up my field kit.
Thankfully, within thirty minutes, I had logged 15 contacts. I quickly packed up and attempted to catch back up with my schedule.
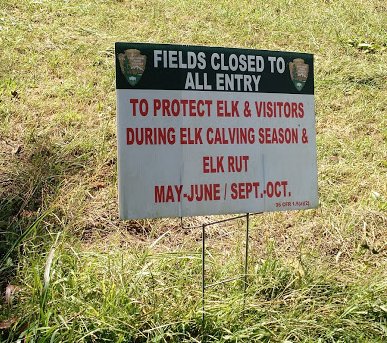
I was grateful the Elk were elsewhere Thursday!
Back at the ranger’s station, I learned that the Ocunaluftee Visitor Center is also another National Park entity: the Trail Of Tears (TR12). I had no time to deploy my station once more, but made a mental note to add it to activations on my return trip.
NP26 and TR01
Next, I hopped in my car and drove to the Newfound Gap parking area where the Appalachian Trail (TR01) crosses the Great Smoky Mountains Park (NP26).
The view there was/is amazing:
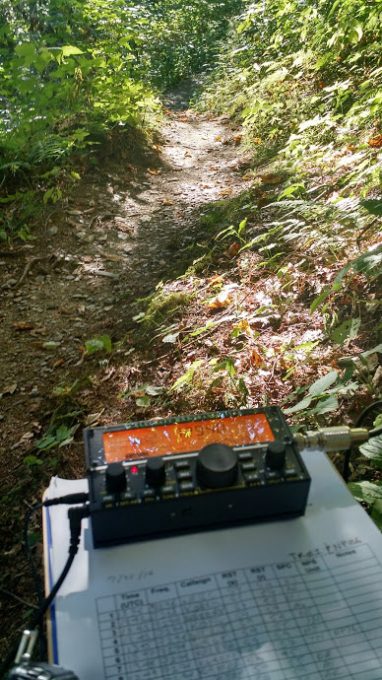
The area was packed with tourists, so I decided to hike up the Appalachian Trail (AT) to escape the bulk of the crowd.
I hiked at least one mile up the narrow and steep AT before finding a suitable spot to set up my gear. It was a tight operating spot, but I managed to hang the antenna and position myself in a way that wouldn’t block foot traffic on the AT.
I logged 18 stations in the span of about 45 minutes.
I also took several breaks to answer questions about ham radio from hikers. I was particularly happy that one family took sincere interest in what I was doing and their young kids were fascinated that I was making contacts across the globe where there was no cell phone coverage nor Internet.
I packed up at 20:30 UTC, hiked back to my car and managed to arrive at the conference center in Sevierville in time for dinner with my friends.
Sunday, September 25, 2016
My activations on the return trip, Sunday, included the same locations as Thursday.
TR01 and NP26
Instead of heading north on the Appalachian Trail, I decided to head south. I was running late to activate the site and knew if I headed north I’d have a long hike ahead of me. Once again, there were a lot of visitors at the site–many were there for a Sunday morning hike and were making their way (quite slowly) north. The southern route had no foot traffic at all, so I headed south.
I found a suitable site to set up radio, but only because the trail was so quiet I could sit in the middle of it. The entire time I operated, I only encountered one hiker who was absolutely amazed I was making contacts across the continent when he hadn’t had cell phone reception in days.
I logged 14 contacts in 45 minutes.
NP26 and PK01
Next, I headed back down the mountain to the Ocunaluftee Visitor Center to the same site where I set up before.
Unlike my Thursday activation, contacts trickled in very slowly. It took over one hour to log 11 contacts. Propagation was very strange: the only stations I worked on the 20 meter band–a total of four–were located in Idaho and Slovenia.
You can *almost* see my antenna hanging from its first location.
Once, I even re-deployed my antenna, thinking that may help. I managed to raise the entire 35′ length into an ideal tree on the bank of the river. It was completely vertical with no slope. That did, perhaps, help snag my final two contacts.
TR12
Despite the fact I was running late and I had struggled to make the minimum ten QSOs required for the NP26/PK01 activation, I decided to also attempt TR12 (Trail of Tears).
I hiked back to the Ocunaluftee Visitor’s Center and found a quiet spot, once again, near the river. I was happy with my operating location and the fact the antenna deployed with no problem.
Sadly, though, this activation was not meant to be. Even with multiple spots on the DX Cluster, I stopped operating after having only worked four stations in 45 minutes. If I hadn’t been on a schedule, perhaps I would have stayed another hour.
I didn’t let this bother me, though. I knew the TR12 activation would be a gamble and I was happy to have provided four NPOTA chasers with another NPOTA catch for the day!
All in all, I worked a total of 64 stations en route to and return from the W4DXCC conference. I call that a success, especially since I was able to enjoy some excellent hiking, scenery, weather and I even had a few opportunities to promote ham radio to the public. Of course, I feel like each time I do one of these activations, it also hones my emergency communication skills.
W4DXCC
Speaking of the W4DXCC, the conference was amazing as always and I’m happy to have been a part of it. For the second year in a row, we hosted a “Ham Radio Bootcamp”–a day-long tutorial on all aspects of ham radio. Once again, it drew a large crowd.
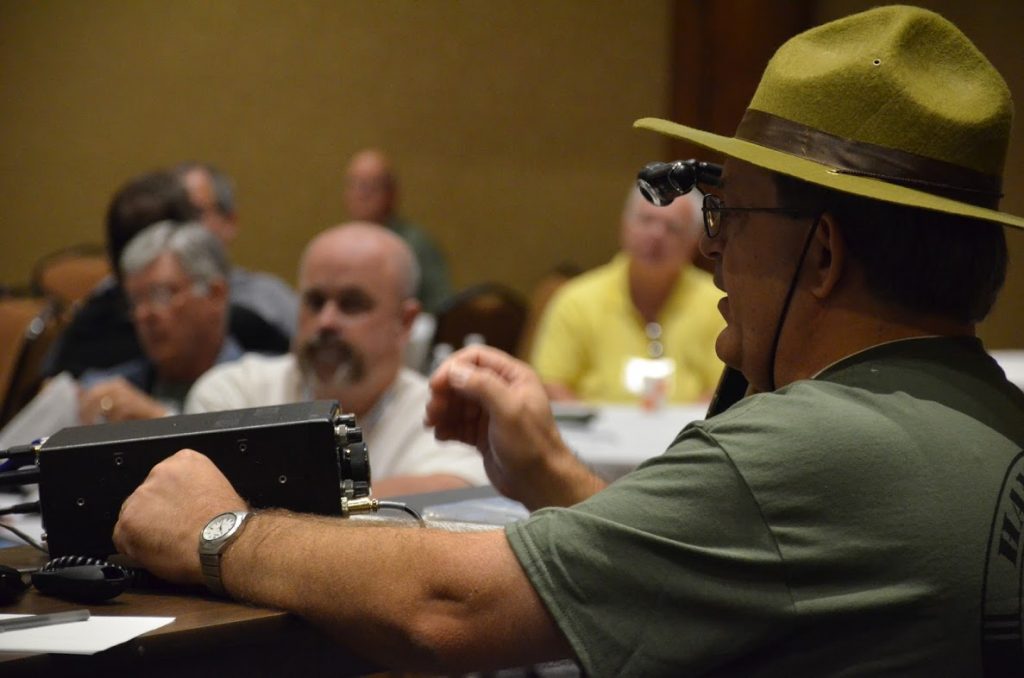
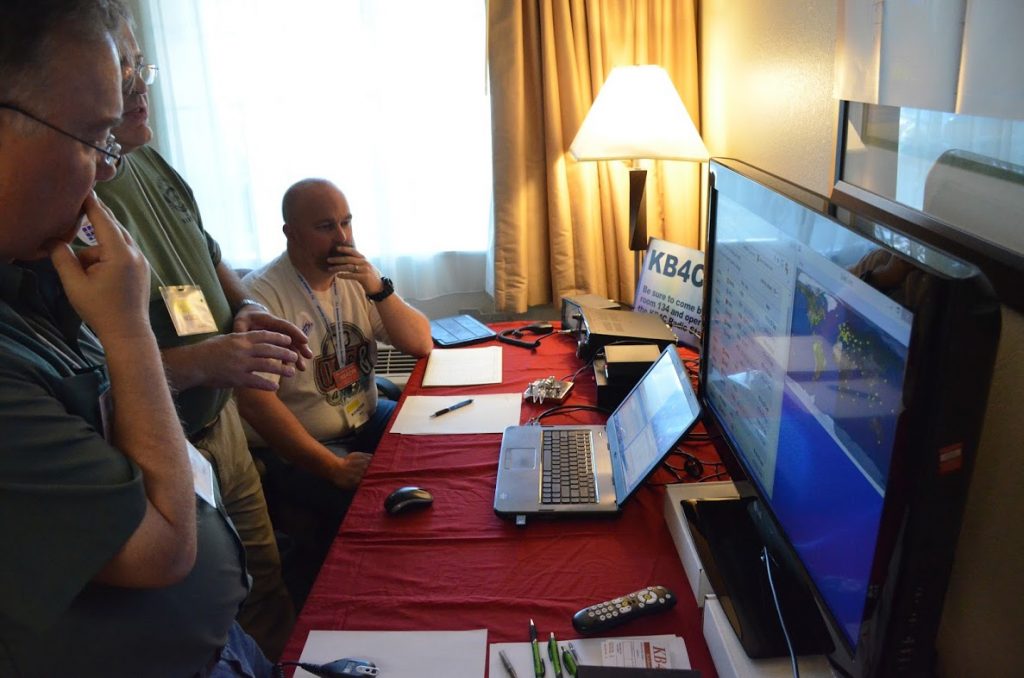
Vlado (N3CZ) demonstrating the IC-7300 functions and features at the Ham Radio Bootcamp.
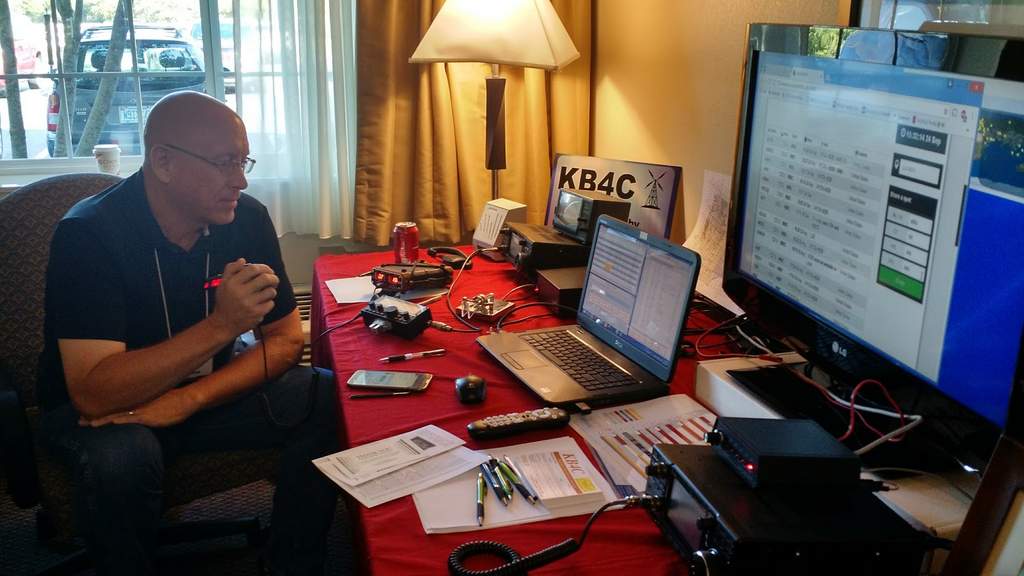
Each year, the convention operates as KB4C in a dedicated radio room. This year, we had two IC-7300 transceivers on the air simultaneously.
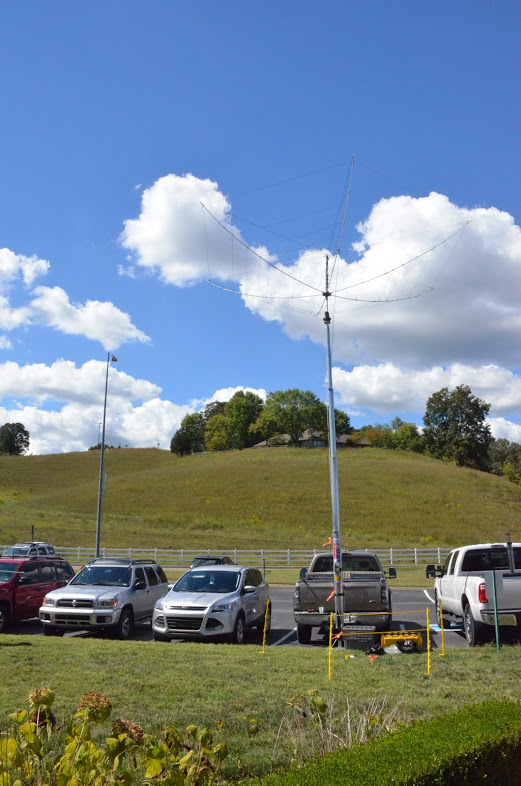
We had at least three antennas available including this excellent hex beam.
If you’re into DXing, contesting, or you’d simply like to make some new friends in the community, I would encourage you to put the W4DXCC conference in your calendar for 2017!
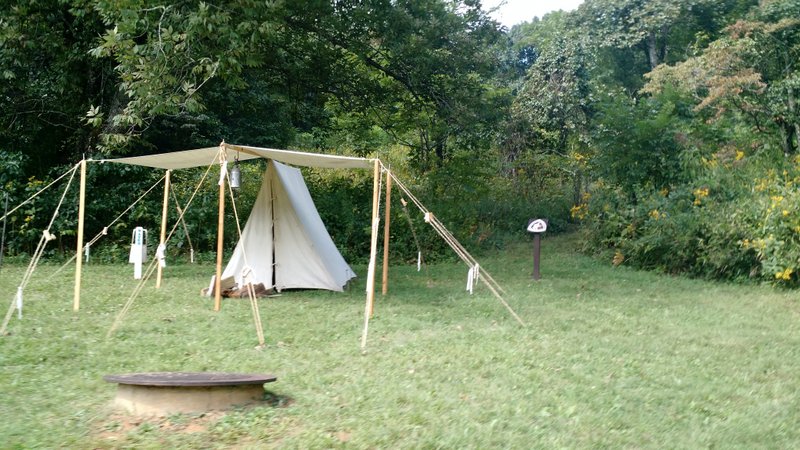
As seen from the Overmountain Victory Trail: The Revolutionary War encampment at the Museum of North Carolina Minerals.
As I mentioned in a previous post, what I love about the National Parks On The Air program is that it combines two of my favorite things: national parks and ham radio. My family visits national parks regularly, so it’s easy for me to pack a small radio, do a quick NPOTA activation all while incorporating non-radio activities that the family loves.
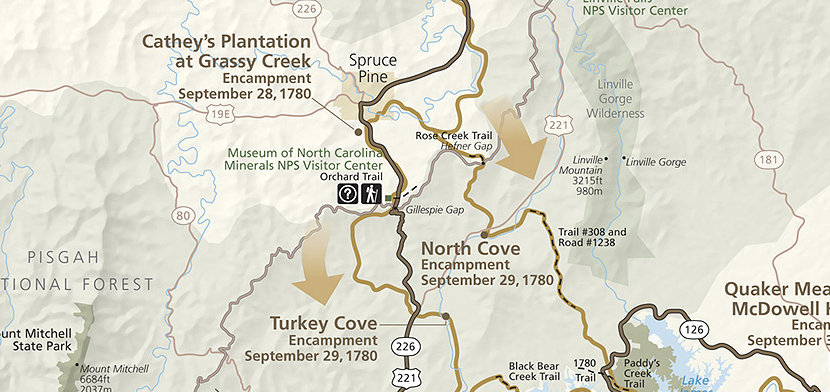
Normally, I would set up my station somewhere close to the Museum of North Carolina Minerals which is situated at the junction of these two National Park entities. Saturday, however, was a special event at the museum: a Revolutionary War Encampment.
The Museum is located at Gillespie Gap, an important stop for Revolutionary War fighters on their way to the Battle of Kings Mountain. Each September the Museum hosts an encampment of re-enactors who assume the role of the Overmountain Men, primarily Scots-Irish settlers from Eastern Tennessee and Western North Carolina who came “over the mountains” and ultimately defeated the left wing of Cornwallis’ army at Kings Mountain, South Carolina. Many historians mark this victory as the turning point in the Southern Campaign of the Revolutionary War.
My family loves living history events.
Radio time!
The Park Ranger kindly gave me permission to do the NPOTA activation, but not at the museum itself. She was trying to keep the site set in the Revolutionary War period–a ham radio operator using a portable transceiver doesn’t exactly fit that description. Instead, around 15:30 UTC, I hiked up the Overmountain Victory Trail in search of an operation site near the Blue Ridge Parkway road.
The trailhead was a little rough and overgrown. I didn’t have to trail-blaze, but I did have to wade through a lot of weeds with my gear and my canine companion, Hazel, on leash. It’s times like this I truly appreciate such a compact, lightweight, and packable station.
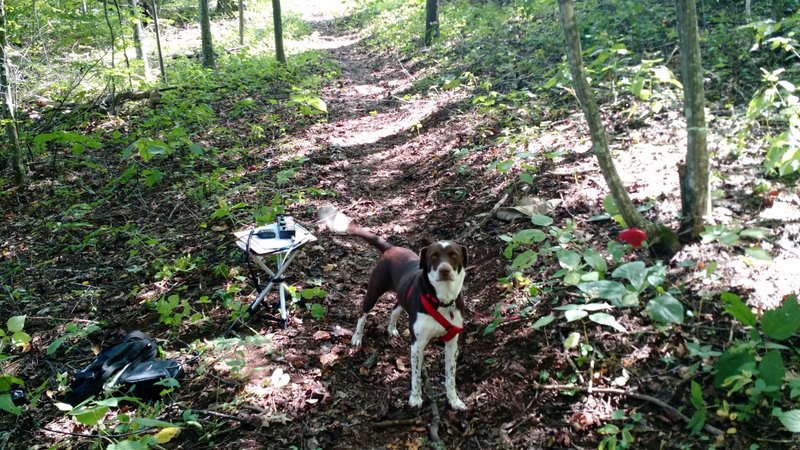
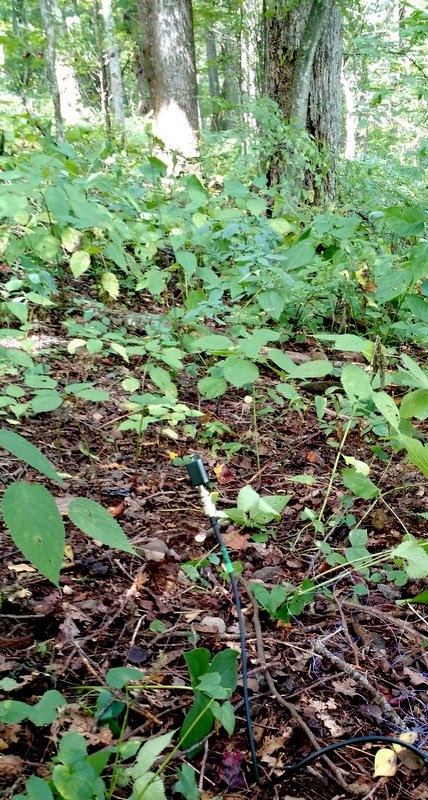
Can you find the trail in this photo?
Once we entered the woods, though, the trail improved. I found a fantastic spot to operate between the museum and the parkway.
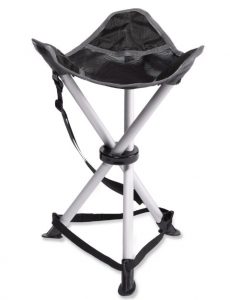
Hazel the dog is a welcome companion does a wonderful job keeping my site free of black bears. She’s patient, too. I typically tie her leash to a small stake or tree next to me and she promptly takes a nap. Here she is admiring my new REI Camping Stool:
You can see part of the EFT Trail-Friendly antenna hanging in this photo.
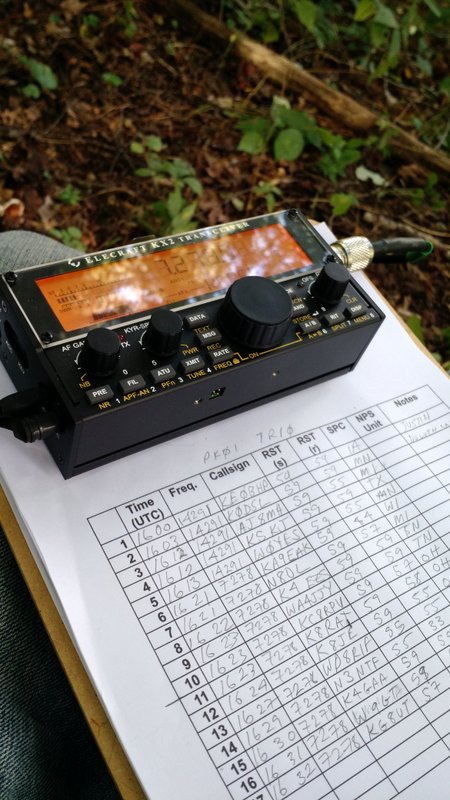
Setup was quick. I managed to raise the EFT Trail-Friendly antenna in record time. I connected the antenna to the Elecraft KX2 and was on the air, calling CQ on 20 meters in a matter of minutes. In the space of 15-20 minutes, I only managed to work a few stations on the 20 meter band even though I had been spotted several times on the DX Cluster.
I moved to the 40 meter band and logged contacts quickly, however.
My full station and my ferocious guard dog, Hazel.
Hazel, as I mentioned, is a great companion that’s sweet to everyone she meets. She’s happy to hang with me even if I’m just sitting there operating radio for an hour. She’s quiet and doesn’t bark unless she notices a true disturbance.
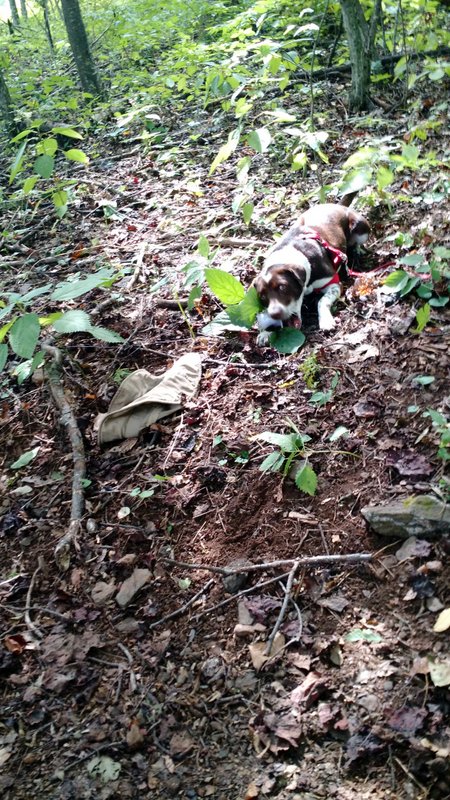
Still, Hazel does get bored. After I had logged about 20 stations, I heard her gnawing on something. I turned around and discovered that she found the reel of fishing line I use to hang my antennas.
Note to self: next time pack Hazel a bone.
She didn’t even look apologetic or guilty! Oh well…fishing line is pretty cheap to replace and I’m sure she assumed it was a chew toy I had placed there for her.
All in all, it was a very successful activation. In less than one hour, I put 22 stations in the log. The weather was perfect and the whole family had a blast.
A photo I took prior to watching a reenactment of the Battle of King’s Mountain.
What a wonderful day to play radio, take in our national parks and re-live some of our history!
I should go on the air sometime between 16:00-17:00 UTC (12:00-13:00 EDT), weather permitting.
I’ll plan to start on the 20 meter band (14286 kHz) then move to the 40 meter band (7286 kHz). If I can’t operate on those frequencies, I’ll move to something clear +/- 6 kHz or so.
Side note: yesterday, I picked up an REI Trail Stool to replace my foldable camping chair.
The camping chair is fantastic if you don’t have to lug it very far, but on long hikes it becomes heavy and cumbersome. This stool will get me off the ground and hopefully allow me to operate with the clipboard and transceiver on my lap. The REI Trail Stool weighs next to nothing.
If you’re an SWL and hear me (K4SWL) on the air, please comment! Note that I’ll be transmitting a max of 10 watts–so pretty much “flea power.” Still, in the past, I’ve worked all corners of North America and into Europe with this same transceiver/antenna combo.
Propagation conditions are pretty favorable today as well. I just hope we have no pop-up thunderstorms–I’ll most likely be near a ridge line and can’t take any chances.
If you’re a ham radio operator, I hope to log you for this activation!


 I hiked at least one mile up the narrow and steep AT before finding a suitable spot to set up my gear. It was a tight operating spot, but I managed to hang the antenna and position myself in a way that wouldn’t block foot traffic on the AT.
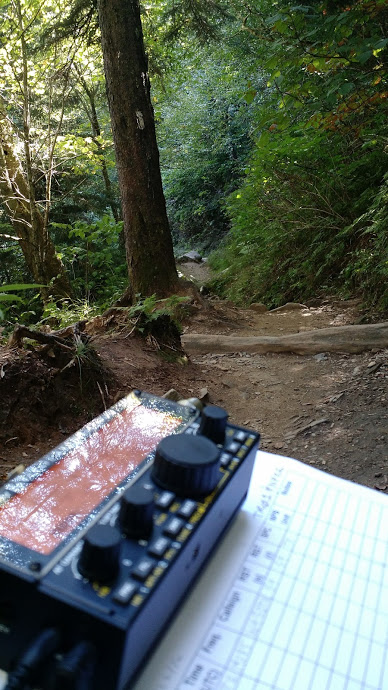


 In the space of 15-20 minutes, I only managed to work a few stations on the 20 meter band even though I had been spotted several times on the DX Cluster.