Tag Archives: SDRuno

Guest Post: Decoding WEFAX using an RSP SDR and SDRuno

Many thanks to SWLing Post contributor, Mike Ladd with SDRplay, who shares the following guest post:


Basics to decoding WEFAX using an RSP and SDRuno

by Mike Ladd

SDR I use:
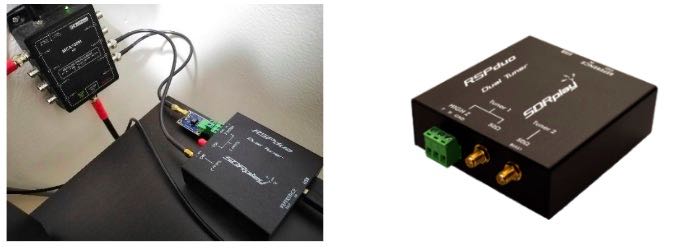
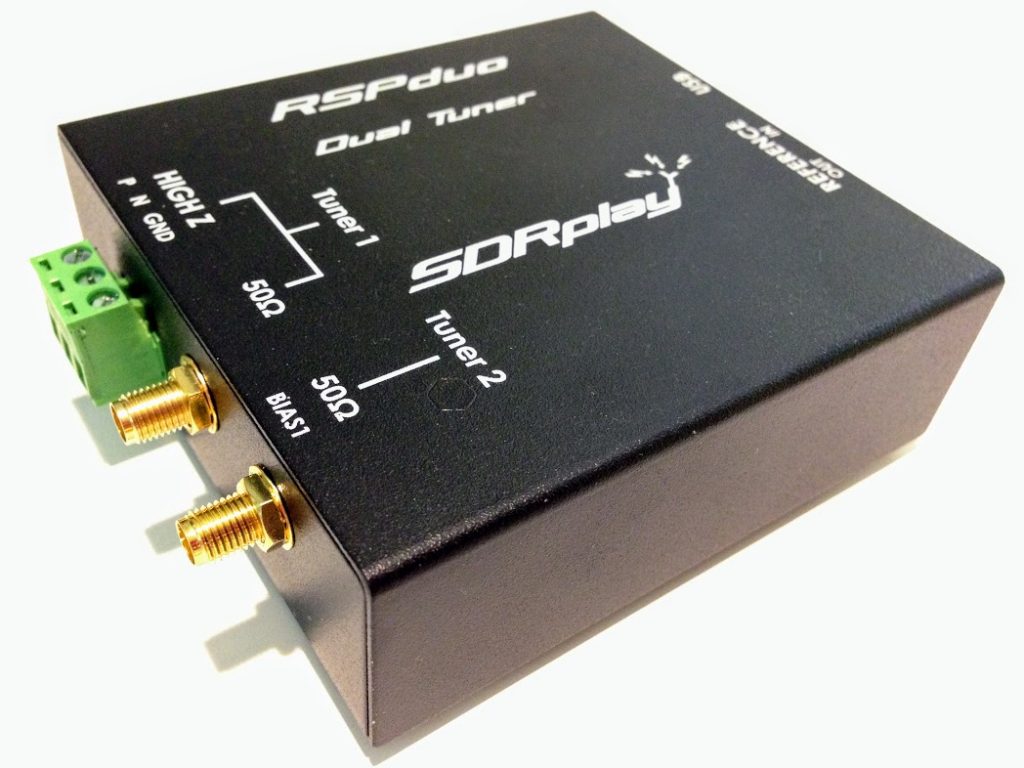
RSPduo from SDRplay using the Hi-Z input. Any model RSP’s can tune WEFAX transmissions. https://www.sdrplay.com/rspduo/

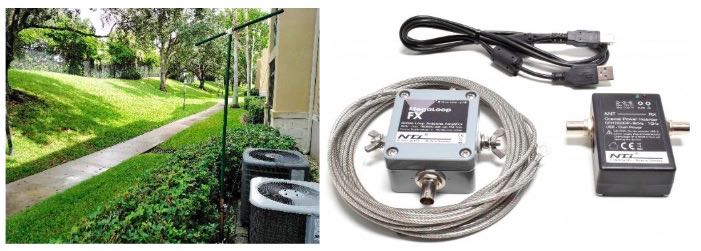
Antenna I use: Megaloop FX from Bonito. In an Inverted delta loop configuration pointed N/E-S/W. Any good antenna placed outdoors should be fine. It’s all about the SNR, not your S-meter reading. https://www.bonito.net/hamradio/en/mega-loop-fx/

Software:

SDRuno v1.32
SDRuno is an advanced Software Defined Radio application platform which is optimized for use with SDRplay’s range of Radio Spectrum Processing receivers.
https://www.sdrplay.com/downloads/

VBcable (donationware) vPack43
Transfers audio, digitally from one application (SDRuno) to another (Black Cat HF weather Fax) with zero loss.
https://www.vb-audio.com/Cable/

VAC (paid for use) v4.60
Transfers audio, digitally from one application (SDRuno) to another (Black Cat HF weather Fax) with zero loss.
https://vac.muzychenko.net/en/
https://www.sdrplay.com/docs/SDRuno_VAC.pdf

Black Cat HF Weather Fax (paid for use) beta 19
Decodes and produces images from the WEFAX transmissions from the output of SDRuno using a virtual audio cable.

Use the discount link available here
http://blackcatsystems.com/register/black_cat_hf_weather_fax_sdrplay_promo.html
https://www.blackcatsystems.com/software/hf_weather_fax.html

Black Cat Uno UDP
UnoUDP allows you control SDRuno’s VFO frequency from within Black Cat HF Weather Fax scheduler. This is done over a virtual com port pair using a virtual com port emulator. http://blackcatsystems.com/download/UnoUDP.zip

VSPE or COM0COM
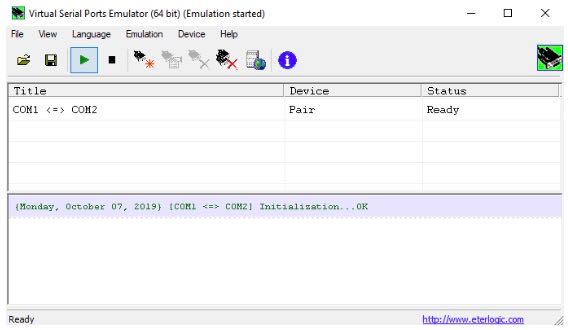
VSPE is a paid for use app. COM0COM is completely free. Either one of these applications will work. A virtual com port emulator allows you to create a virtual com port. The pair will internally link Black Cat Weather Fax decoder to SDRuno’s using UnoUDP as the transport protocol.

VSPE http://www.eterlogic.com/Products.VSPE.html
https://www.sdrplay.com/docs/SDRuno_VSPE.pdf

COM0COM http://com0com.sourceforge.net/
https://youtu.be/dZg7puQ9Ajk

Introduction:

(some text taken and edited from various website)

This document is not a definitive guide to the WEFAX protocol, the process of decoding WEFAX images or reading a synoptic weather chart https://youtu.be/kzfNSvQREu8. This is only a collection of information that I have found scatter throughout the internet and re-compiled into a document, this document. Expect typographical mistakes, inaccuracies, or omissions.

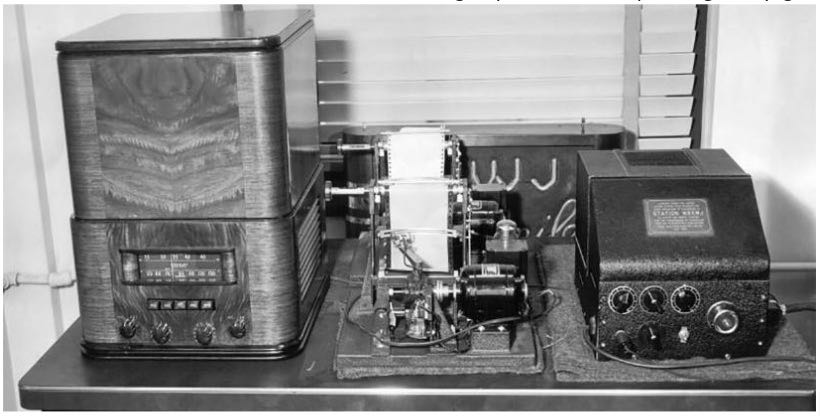
WEFAX is an analog mode for transmitting monochrome images. It was the predecessor to slow-scan television (SSTV). Prior to the advent of the commercial telephone line “fax” machine, it was known, more traditionally, by the term “radio facsimile”.

Facsimile machines were used in the 1950s to transmit weather charts across the United States via land-lines first and then internationally via HF radio. Radio transmission of weather charts provides an enormous amount of flexibility to marine and aviation users for they now have the latest weather information and forecasts at their fingertips to use in the planning of voyages.

Radio fax relies on facsimile technology where printed information is scanned line by line and encoded into an electrical signal which can then be transmitted via physical line or radio waves to remote locations. Since the amount of information transmitted per unit time is directly proportional to the bandwidth available, then the speed at which a weather chart can be transmitted will vary depending on the quality of the media used for the transmission.

Radio fax data is available from the web on sites such as the ones hosted by the National Oceanic and Atmospheric Administration (NOAA). https://tgftp.nws.noaa.gov/fax/marine.shtml Radio fax transmissions are also broadcasted by NOAA from multiple sites in the country at regular daily schedules https://www.nws.noaa.gov/os/marine/rfax.pdf. Radio weather fax transmissions are particularly useful to shipping, where there are limited facilities for accessing the Internet.

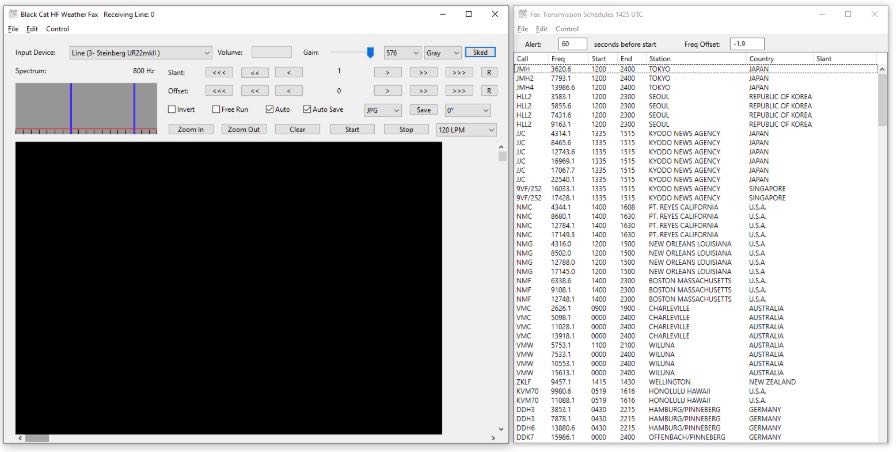
Black Cat HF Weather Fax is a program that decodes WEFAX (Weatherfax, HF-FAX, Radiofax, and Weather Facsimile) transmissions sent from fixed locations around the globe.

A fax is transmitted line by line, typically at a rate of 120 lines per minute, or half a second per line. For example, to send a weather chart, you would start in the upper left corner. You would send the value of that pixel (dot), black, white, or perhaps a shade of gray. Then you would move over one pixel to the right, and send that pixel, and so on, until you reach the edge of the chart. Then you’d move all the way back to the left edge, and move down slightly, one line, and repeat the process.

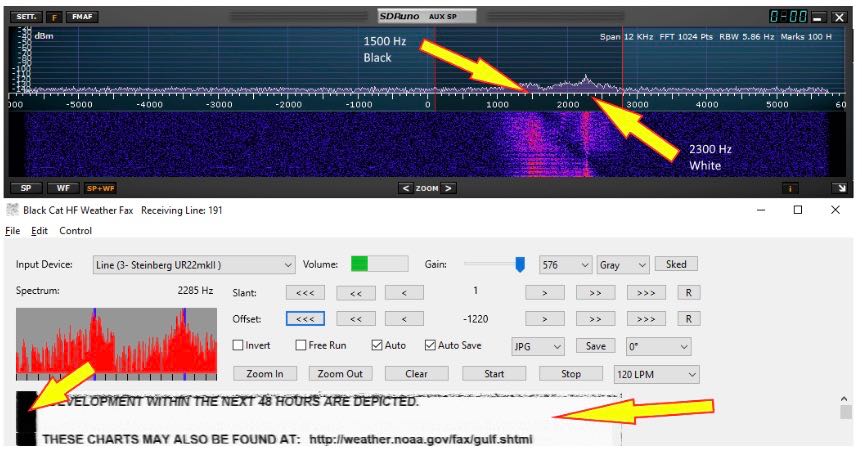
Each pixel is converted into a certain audio frequency or tone. By convention, a tone of 1500 Hz represents black, 2300 Hz represents white, and frequencies in-between represent shades of gray. So if you listen to a fax transmission, you’ll hear the different tones as each pixel is present. For example, listen to a chart with mostly white background being sent. You’ll hear mostly the high pitch 2300 Hz, and some lower (1500 Hz) blips as each black pixel is sent. When a horizontal line is sent, you’ll hear a long half second burst of 1500 Hz, since the line is all black.

The transmitting station frequency modulates the carrier. That is, when a black pixel is transmitted, the carrier shifts down 400 Hz. When a white pixel is transmitted, the carrier shifts up 400 Hz. For a medium gray pixel, it stays on the assigned frequency. This is how most fax transmissions are made. Since we’re tuning it in SSB, it sounds to us as if the station is transmitting a variable frequency audio tone. The two processes are identical. This accounts for the confusion regarding what frequency to tune the radio to in order to properly decode the fax transmission. Different stations list their frequency in different ways. It is important to remember that a black pixel produces a 1500 Hz tone, and a white pixel produces a 2300 Hz tone within the AUX SP.

The setup works as follows. SDRuno demodulates the received signal. The demodulated audio is piped from SDRuno using virtual audio cable and sends it to the HF weather fax decoder. HF weather fax decoder receives this audio from the virtual audio cable that was demodulated from SDRuno and processes it, producing a picture on the screen

HF weather fax decoder can also set the VFO (tune) frequency of the RSP in SDRuno. This is done over the virtual com port pair using the UnoUDP application as the transport.

SDRuno can internally emulate a Kenwood TS-480, UnoUDP sends the Kenwood TS-480 serial commands via UDP over the virtual com port pair in order to set the frequency selected from the HF Weather Fax Scheduler option over to SDRuno.

You will need to install and configure the following applications.

1: A virtual audio cable.

2: A virtual com port emulator (If you would like HF Weather fax to communicate with SDRuno).

3: UnoUDP (If you would like HF Weather fax to communicate with SDRuno using the virtual serial emulator).

4: HF Weather Fax.

5: A simple wire antenna placed outdoors.

Virtual Audio Cable:

A virtual audio cable allows you to pipe the audio from one application (SDRuno) into another application (a decoder like HF Weather Fax) digitally. I will assume SDRuno is already installed with your device attached and functioning properly.

You can now download a virtual audio cable package.  If you already have a virtual audio cable package installed, you can skip to the next section. If you don’t have a virtual audio cable application installed, you only need to choose one and install only one of the two that are available.

Close any running apps, install the virtual audio cable and reboot your computer. When your computer boots to your desktop, your computer will now have a virtual audio cable pair installed on the system.

You can verify it the installation by going to your Control Panel and double clicking the Sound icon. VB-Cable and Virtual Audio Cable will only install a single virtual audio cable pair, one is for the input (Recording) and one is for the output (Playback). A single pair is all that is needed (as shown below).

Virtual Serial Port:

A virtual com port emulator is only needed if you would like Black Cat HF Fax decoder the ability to tune the station in SDRuno when you double click a station name in the HF Fax Decoder scheduler.

Please use the links provided (additional PDF’s and YouTube videos) on Page 2 of this document for an installation / configuration walkthrough.

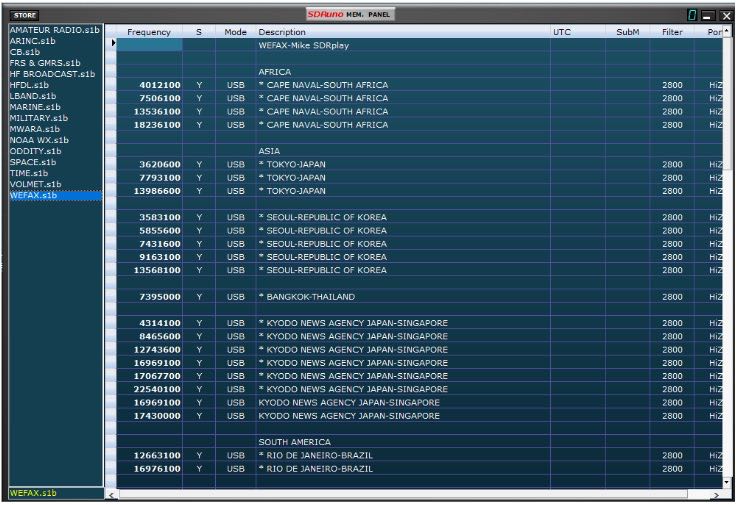
You can download my WEFAX frequency bank for use in SDRuno below should you choose not to use a virtual com port emulator. https://signalsacrossthepond.com/download/mike-kd2kog-sdrplay-complete/

Download Black Cat HF Weather Fax and UnoUDP:

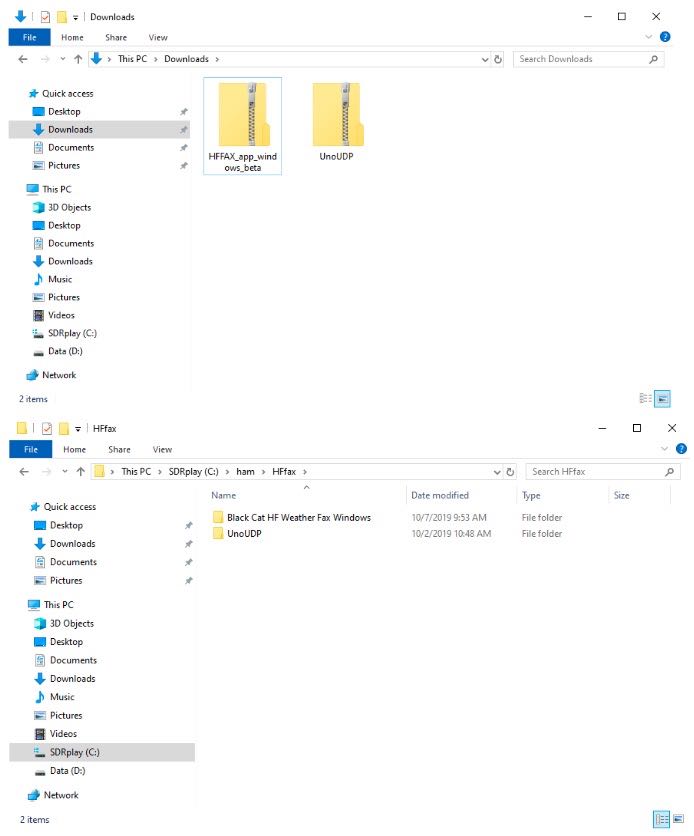
Download the latest HF Weather Fax beta package and the UnoUDP application from the link provided on Page 2 of this document. I suggest making one main folder called HFfax and two subfolders within HFfax for each of the applications. One folder is for the HF Weather Fax Decoder and the other folder is for the UNO UDP transport application.

Double click the HF Weather Fax beta ZIP file you downloaded and extract the full contents of this ZIP into the folder you created on your local drive. Right click the “Black Cat Weather Fax” EXE file and send a shortcut to your Desktop.

Double click the UnoUDP zip file you downloaded and extract the full contents of this ZIP into the folder you created on your local drive. Right click the “UnoUDP” EXE file and send a shortcut to your Desktop.

You should have two shortcuts on your desktop, One for the decoder and one for the transport app.

Black Cat UnoUDP:

HF Weather Fax needs a way to communicate with SDRuno, this is done via UnoUDP and the virtual com port emulator.

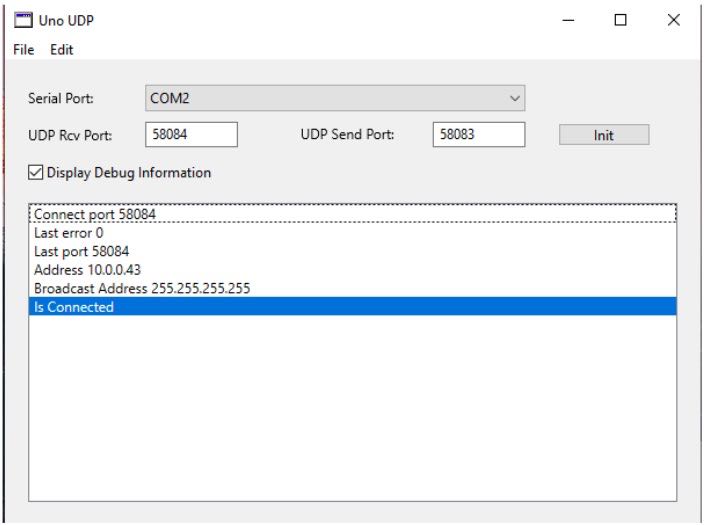
Launch UnoUDP with the above configuration. Set your UDP Receive port to 58084 and your UDP send port to 58083. UnoUDP must be left running in the background, this will control SDRuno. You can minimize the application or right click the shortcut and have UnoUDP auto minizine on launch.

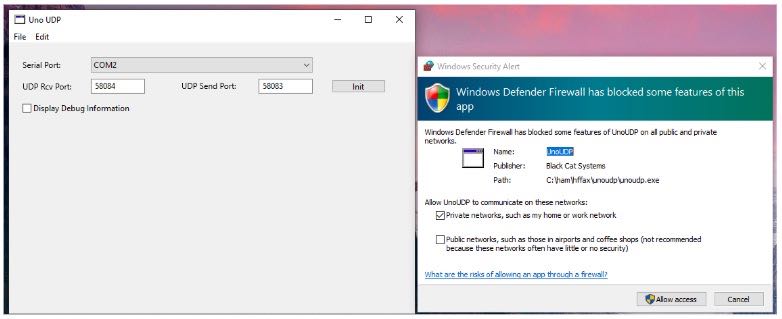
You should see a Firewall popup prompt asking permission to allow UnoUDP to pass data within the system. You must allow this traffic to pass or external control of SDRuno will not be possible from the HF Weather Fax decoder scheduler.

Assign 1 of the 2 com ports from the virtual com port emulator to UnoUDP (the 2nd com port will be assigned to SDRuno).  My com port pair is Com 1 and Com 2, SDRuno uses Com1 and UnoUDP uses Com 2.

Black Cat HF Weather Fax:

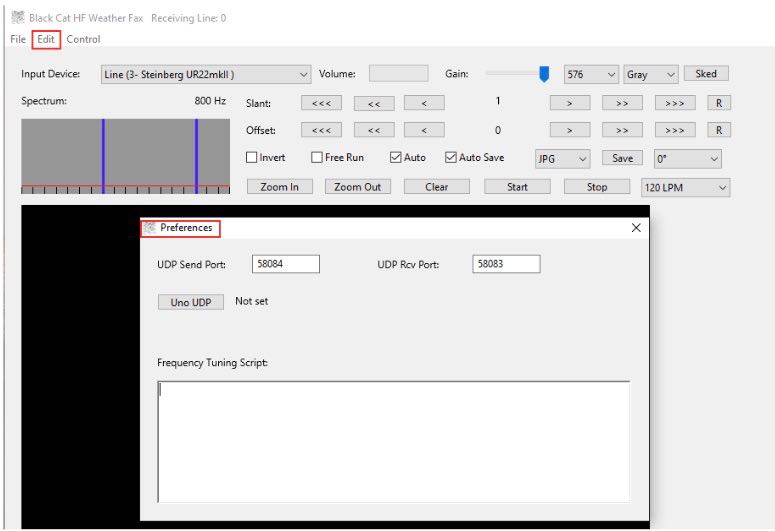
HF Weather Fax needs to be configured in order to communicate with UnoUDP, this is done via the UDP settings. Click “Edit” and “Preferences” Set the UDP Send port to 58084 and the UDP Receive port to 58083.

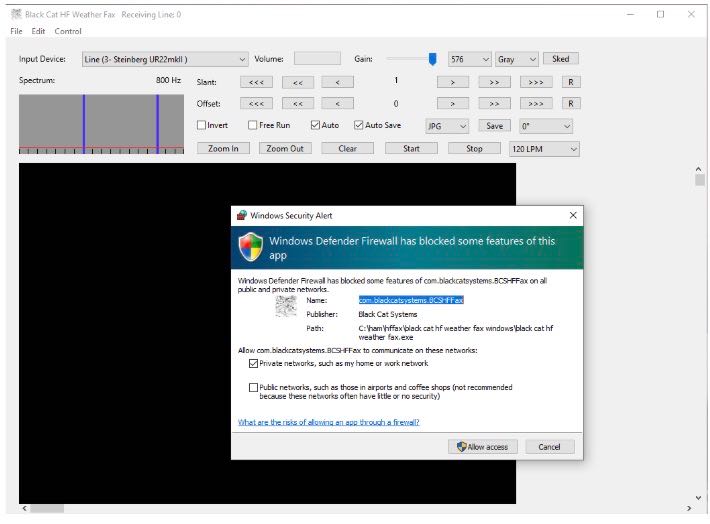
You should see a Firewall popup prompt asking permission for HF Weather Fax to pass data within your system. You must allow UDP traffic to pass or external control of SDRuno will not be possible from the HF Weather Fax decoder scheduler.

SDRuno:

SDRuno needs its Output assigned to the Virtual Audio Cable. The output can be changed via the RX CONTROL panel, clicking the SETT. button on the top left and clicking the OUT tab.

SDRuno needs a com port assigned so it can be externally controlled. The serial port is assigned via the RX CONTROL panel, clicking the SETT. button on the top left and clicking the CAT tab.

I recommend running the RSP in LOW-IF mode, this is selected via the MAIN panel. This reduces the need to track separation between the Tuned frequency and LO (local oscillator) https://youtu.be/Fsns4P3JxrM

LOW-IF mode also minizines the LO being placed outside of the desired preselect filter of the device in use, Remember the preselect filter is automatically enabled based on the LO frequency https://youtu.be/w-vkiVp7Q4E

I also recommend leaving the IF AGC enabled and placing the RF GAIN as high as possible without causing an ADC OVERLOAD warning within the MAIN panel. If an ADC OVERLOAD warning appears, back the RF GAIN down.

https://www.sdrplay.com/wp-content/uploads/2018/06/Gain_and_AGC_in_SDRuno.pdf

Your first WEFAX decode (Using UnoUDP)

Launch UnoUDP and minimize it.

Launch Black Cat HF Weather FAX.

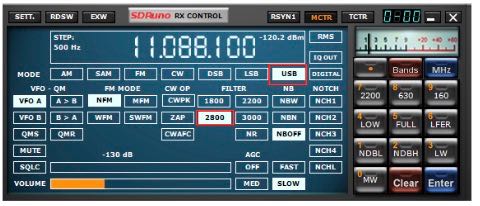
Launch SDRuno. Set the mode to USB and the filter width to 2.8k
HF weather fax will not set the mode or filter width at this time.

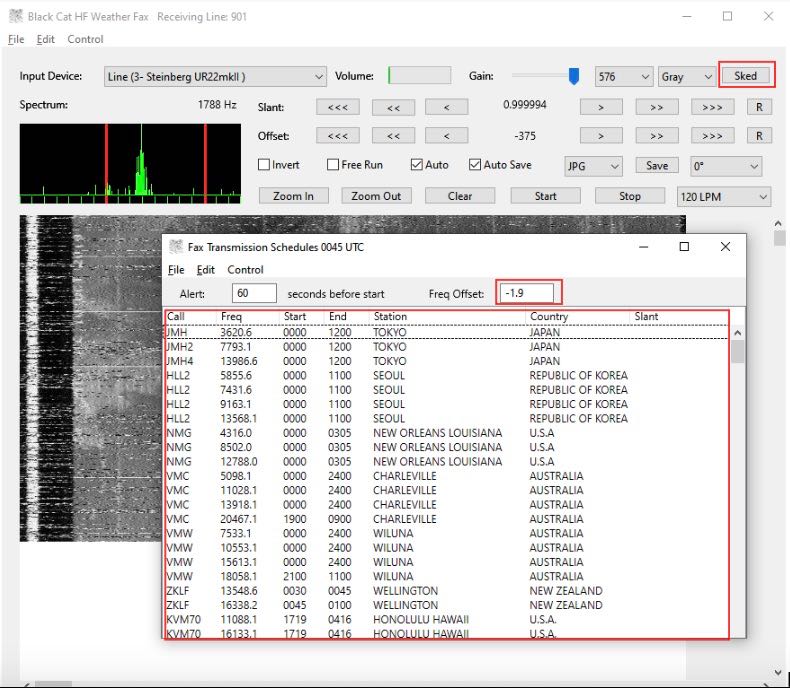
Click the Sked button in Black Systems HF Weather Fax. A current WEFAX transmission schedule will appear. Stations listed in White are either scheduled to transmit or about to transmit based on your computers clock. Stations show in Grey at the bottom of the list are currently off the air or not transmitting.

In the Freq Offset: box enter -1.9 and hit enter (Reason for this is on Page 5).

Click any of the stations listed in the Fax Transmission Schedule and it will automatically tune SDRuno to the correct frequency.

Black Cat HF Weather Fax folder will have a file named “Black Cat HF Weather Fax Docs” Please view this file to understand some of the advanced features available.

Your first decode (Without UnoUDP)

Launch Black Cat HF Weather FAX.

Launch SDRuno.

Navigate to the Memory Panel (MAIN panel and click the MEM PAN button)

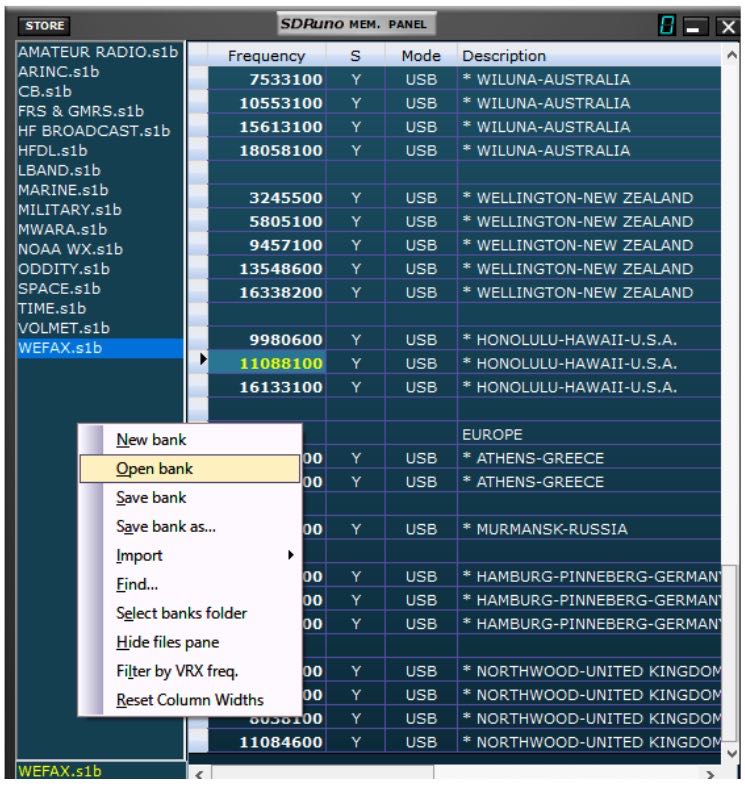
Right click the Memory panel and select “Open bank”. Navigate you C drive telling SDRuno the location of WEFAX.s1b

Double click any of the frequencies shown within the WEFAX bank and SDRuno will set the correct mode and tune that station.  My WEFAX.s1b file defaults to the Hi-Z port. If your device lacks a HI-Z input, navigate to the port section within the memory panel, double click the stations port you want to edit and change it to the correct port that’s available or in use for your device. Right click the memory panel and “Save bank” to save the changes.

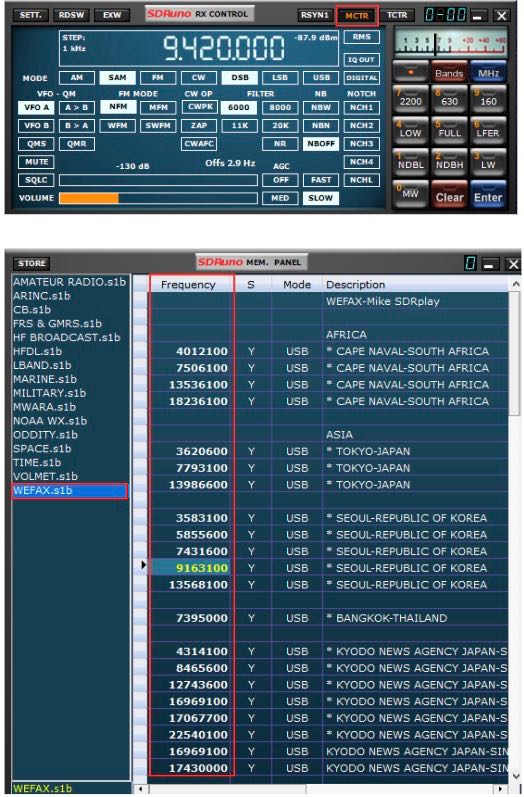
To use my SDRuno WEFAX frequency bank properly. The MCTR button must be enabled within the RX CONTROL panel, enabling this option allows you to double click and tune a station that is stored within the WEFAX bank. Make sure the LO is not locked in the MAIN panel (LO LOCK).

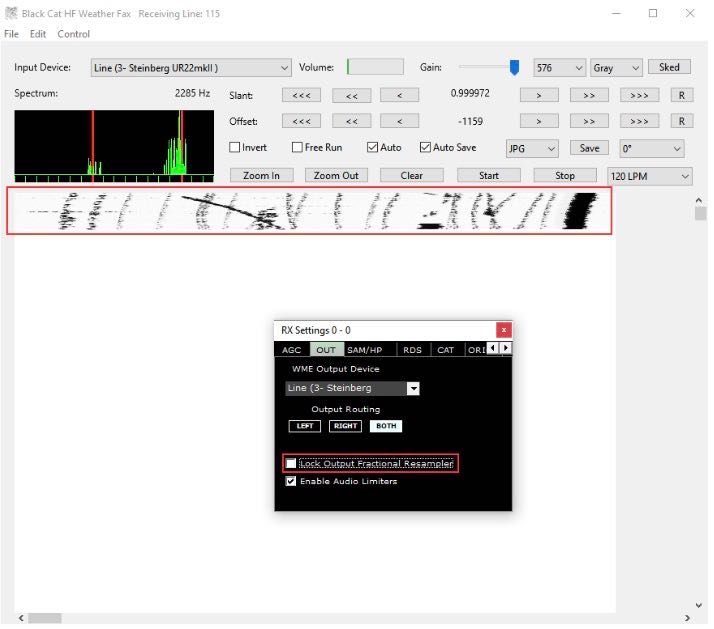
If a decoded WEFAX image looks blocky or skewed or possibly pixeled, I recommend that the lock output fractional resampler option is enabled in SDRuno. You can enable this from the RX CONTROL panel, clicking the SETT. button on the top left and clicking the OUT tab.

I hope this document helped guide you in getting started with decoding WEFAX transmissions from around the world. I am sure I missed some key features, remember this is only a primer/basics to decoding WEFAX. I do have an accompanying video located here

https://youtu.be/vAYGVimzNX8

Warmest of 73,
Mike-KD2KOG

Disclaimers

SDRPlay modules use a Mirics chipset and software. The information supplied hereunder is provided to you by SDRPlay under license from Mirics. Mirics hereby grants you a perpetual, worldwide, royalty free license to use the information herein for the purpose of designing software that utilizes SDRPlay modules, under the following conditions:

There are no express or implied copyright licenses granted hereunder to design or fabricate any integrated circuits or integrated circuits based on the information in this document. Mirics reserves the right to make changes without further notice to any of its products. Mirics makes no warranty, representation or guarantee regarding the suitability of its products for any particular purpose, nor does Mirics assume any liability arising out of the application or use of any product or circuit, and specifically disclaims any and all liability, including without limitation consequential or incidental damages. Typical parameters that may be provided in Mirics data sheets and/or specifications can and do vary in different applications and actual performance may vary over time. All operating parameters must be validated for each customer application by the buyer’s technical experts. SDRPlay and Mirics products are not designed, intended, or authorized for use as components in systems intended for surgical implant into the body, or other applications intended to support or sustain life, or for any other application in which the failure of the Mirics product could create a situation where personal injury or death may occur. Should Buyer purchase or use SDRPlay or Mirics products for any such unintended or unauthorized application, Buyer shall indemnify and hold both SDRPlay and Mirics and their officers, employees, subsidiaries, affiliates, and distributors harmless against all claims, costs, damages, and expenses, and reasonable attorney fees arising out of, directly or indirectly, any claim of personal injury or death associated with such unintended or unauthorized use, even if such claim alleges that either SDRPlay or Mirics were negligent regarding the design or manufacture of the part. Mirics FlexiRFTM, Mirics FlexiTVTM and MiricsTM are trademarks of Mirics .

SDRPlay is the trading name of SDRPlay Limited a company registered in England # 09035244.

Mirics is the trading name of Mirics Limited a company registered in England # 05046393


Do you enjoy the SWLing Post?

Please consider supporting us via Patreon or our Coffee Fund!

Your support makes articles like this one possible. Thank you!

Spread the radio love

Mike’s expanding collection of SDRplay tutorial videos

Besides making great receivers, one of the things I love about SDRplay is their focus on providing user documentation and tutorials. We’ve mentioned before that SDRplay’s Mike Ladd (KD2KOG) actively creates tutorial videos exploring a number of SDRplay topics. To date, he’s produced over 20 videos–!

If you own an SDRplay product, I’d strongly recommend checking out Mike’s video list even if you feel you’re already a pro user. The videos are easy to follow and are chock-full of SDRuno tips and tricks.

I’ve pasted the latest links to the Mike’s videos below but I would encourage you to check the SDRplay YouTube channel (link below) and this page for the latest episodes as they are regularly updated.

From the SDRplay Ham Guides page:

As SDRplay RSPs get used for more and more receiver applications, we felt we didn’t want to lose sight of the large number of people who love short wave listening and HF ham radio, so we have created “Ham Guides” as a place where we focus on providing tuition and help for all aspects of receiving radio signals at 30MHz and below. This includes set up and use of SDRuno, and tips and techniques on key related topics such as decoding, propagation and antennas.

The SDRplay Ham Guides YouTube channel can be found here, at  www.youtube.com/c/SDRplayHamGuides 

SDRplay Ham Guides complements the main SDRplay YouTube channel and all the documentation available via https://www.sdrplay.com/downloads/and the searchable resources in our Applications and Support Catalogue: https://www.sdrplay.com/apps-catalogue/

If you have ideas for what you’d like to see more of, then add your comments to the videos or email me at [email protected]

  1. This is the first video of many to follow. Showing basic operation of SDRuno using a RSP1a SDR.https://youtu.be/ngv60EWiJ3U
  2. Minimum requirements for running SDRuno.https://youtu.be/Rn3tuiIOvmM
  3. Virtual audio cable basics in SDRuno.https://youtu.be/ZF86cK5vukY
  4. Shaping the sound of shortwave broadcast stations using SDRuno.https://youtu.be/smvfCGx6zO8
  5. Using SDRuno’s built in software notch filters.https://youtu.be/5K92dG2sedw
  6. SDRuno basics, MultiPSKhttps://youtu.be/tnqfJhsvGFA
  7. SDRuno basics, Import the free EiBi HF databasehttps://youtu.be/ZJlfxaudaNI
  8. SDRuno basics, The EX CONTROL panel part 1.https://youtu.be/1XdBqXcyuzw
  9. SDRuno basics, The EX CONTROL panel part 2.https://youtu.be/H0RJVy4u5Ro
  10. SDRuno basics, My HF frequency lists part 1.https://youtu.be/KiNjsvKHVeU
  11. SDRuno basics, My HF frequency lists part 2.https://youtu.be/Rx3B-6h_CIw
  12. SDRuno basic, Decoding WEFAX using Black Cat HF Weather Fax decoder.https://youtu.be/juTdBpTDVp0
  13. SDRuno basics, Removing wide band noise.https://youtu.be/_GtozskwFAY
  14. SDRuno basics, CSV user list browser.https://youtu.be/1vu5fAjdRHw
  15. SDRuno basics, RSPduo, dual tuner mode, listening and decoding signalshttps://youtu.be/1vu5fAjdRHw
  16. SDRuno basic, VRX-Virtual receivershttps://youtu.be/ndUPm6Nccb8
  17. Why I chose a loop.https://youtu.be/XesvzZG-Mi8
  18. SDRuno basics, decoding CTCSS/DCS toneshttps://youtu.be/PM3WOMF7_eM
  19. SDRplay user support options and resourceshttps://youtu.be/nXnrBaoKKjs
  20. RSRduo with dual W6LVP loops Part 1https://youtu.be/w5SrDtUxhQU
  21. RSRduo with dual W6LVP loops Part 2https://youtu.be/ikUymHFkCcY
Spread the radio love

SDRplay RSPduo: SDRuno update now adds diversity reception!

The SDRplay RSPduo

Many thanks to Andy with SDRplay who notes:

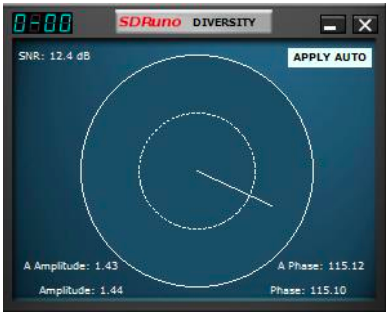
We are pleased to announce the release of v1.32 of SDRuno. The purpose of this release is primarily to add MRC Diversity functionality for the RSPduo, but it also contains other fixes and additions based on customer feedback. Diversity functionality is described on P.78 of the SDRuno User Manual.

A full list of the changes can be found in the release notes: https://www.sdrplay.com/docs/SDRplay_SDRuno_Release_Notes.pdf

Issues can be reported to us via our ticket system: https://www.sdrplay.com/support

Comments and feedback can be sent to [email protected] – emails sent to that address are usually not responded to unless we have questions, but are always read and noted.


Spread the radio love

Hamvention Highlights: Affordable diversity reception with the SDRplay RSPduo

Each year at the Dayton Hamvention I enjoy checking out the latest radio products and services. This year (2019) I found an exceptional number of innovations and will share these in Hamvention Highlights posts. If you would like to check out 2019 Hamvention Highlights as I publish them, bookmark this tag: 2019 Hamvention Highlights

Diversity reception with the SDRplay RSPduo

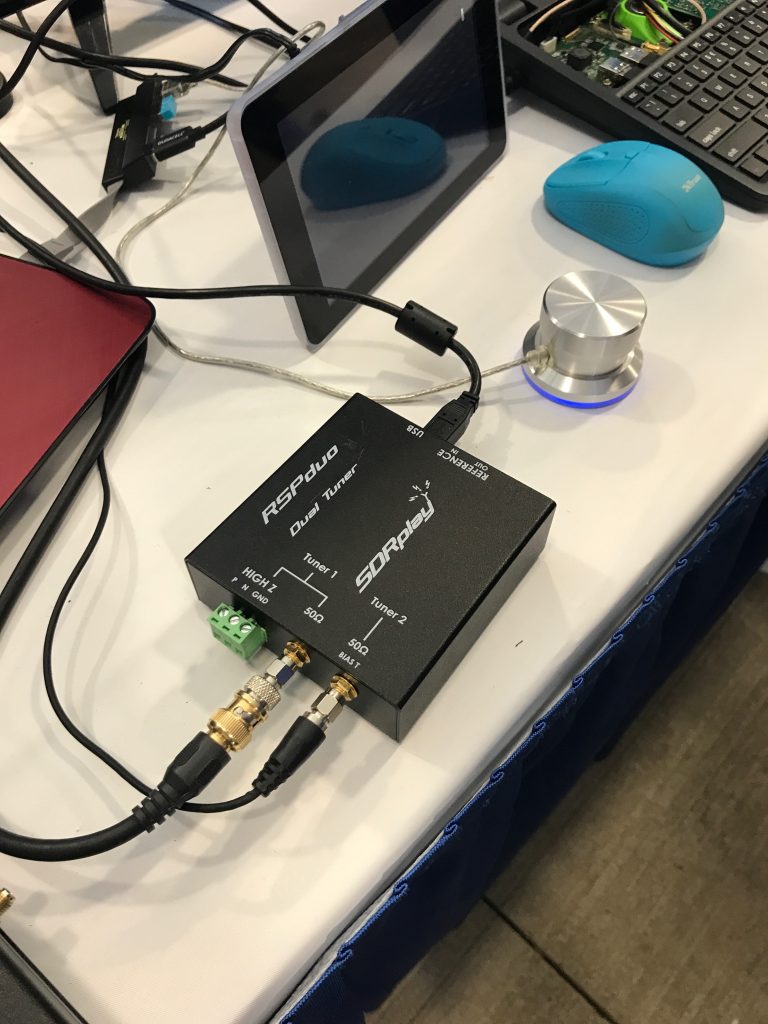
Last year, during the 2018 Hamvention, SDRplay announced the RSPduo, a 14bit dual-tuner SDR. We posted a review of the RSPduo on the SWLing Post.

At the time, SDRplay mentioned that the RSPduo could eventually be used for diversity reception.

Diversity reception is the ability to combine or select two signals, from two (or more) antenna sources, that have been modulated with identical information-bearing signals, but which may vary in their fading/noise characteristics at any given instant.

In short, diversity reception gives one a powerful tool to mitigate fading and noise, and to improve a signal’s overall integrity.

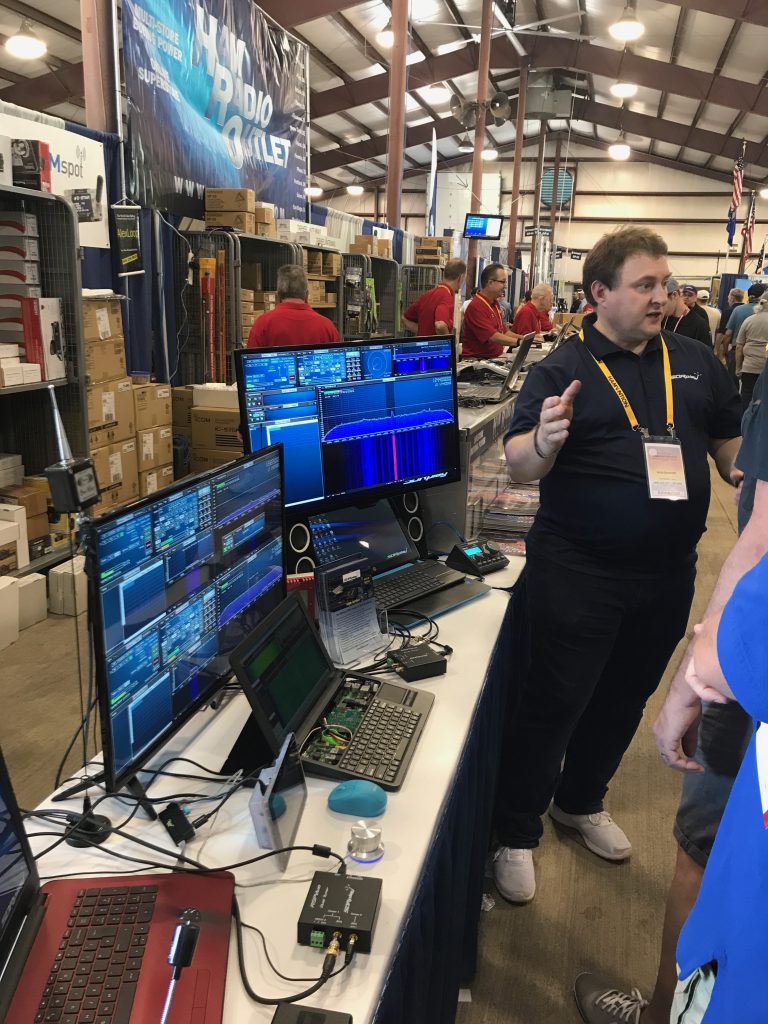
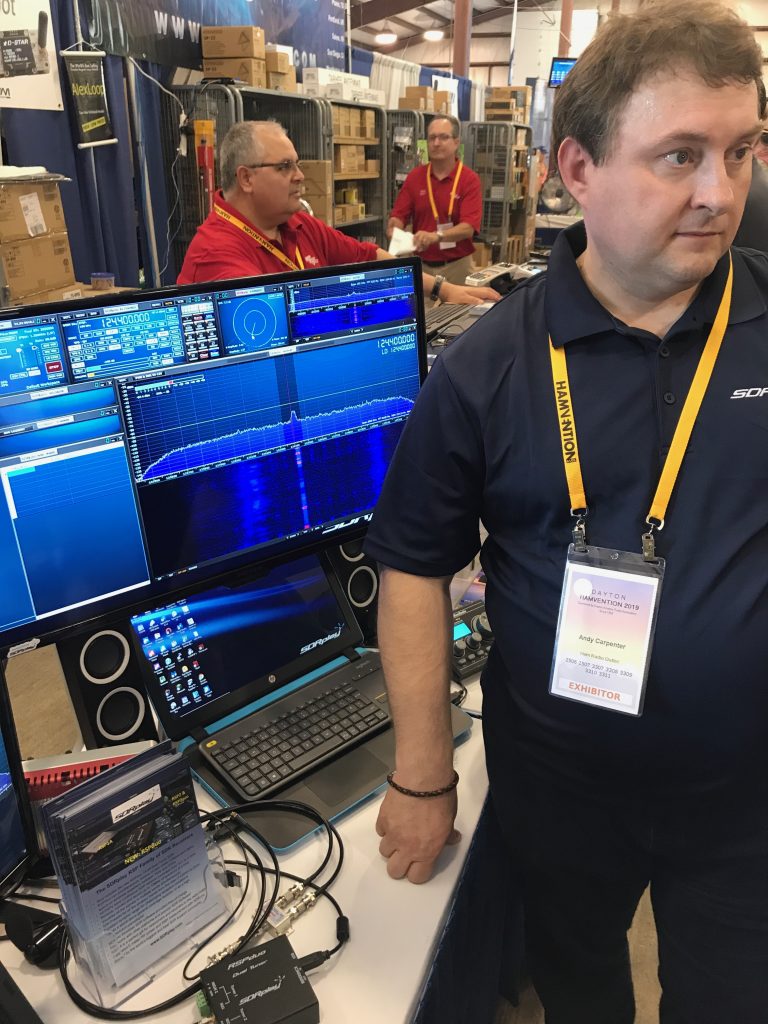
Andy and Mike with SDRplay demonstrated SDRuno’s diversity reception functionality and noted that it will soon roll out as a free upgrade to SDRuno, SDRplay’s open SDR application.

I should note here that the SDRplay booth at the 2019 Hamvention was incredibly busy—no doubt, because the RSPduo must be one of the least expensive, most accessible, ways to experiment with diversity reception. Case in point: the new Elecraft K4D transceiver will support diversity reception, but the price is about $4,700 US; the RSPduo can be purchased for $280 US.

Based on the demonstration, this feature will be quite easy to use and I love how it has been implemented in the SDRuno GUI (graphical user interface).

To learn more about the RSPduo, check out SDRplay’s website or read our review. Of course, when SDRplay releases the diversity reception upgrade to SDRuno, we will make an announcement!

If you would like to follow other Hamvention Highlights, bookmark the tag: 2019 Hamvention Highlights

Spread the radio love

Video demonstrating SDRplay remote operation

The SDRplay RSPduo

(Source: Jon Hudson at SDRPlay)

This video guide demonstrates the new RSP TCP server software which is now included in the latest Raspberry Pi SD Card image. The video shows how easy it is to set up an RSP at a remote location for access over the internet.

Click here to view on YouTube.

The video uses a Raspberry Pi at the remote location, and a Windows PC running HDSDR back at home base.

We are only demonstrating the Raspberry Pi version of the server here. Also, we are demonstrating extended mode (enabling the full RSP ADC resolution which only works with software which supports an EXTIO interface). Other (non EXTIO compatible) RTL-SDR software will also run via the server on an RSP device – but in “normal mode” meaning that the data resolution will be restricted to 8 bits.

Spread the radio love

SDRuno Version 1.3 now has Frequency Scanning feature

Many thanks to Jon Hudson with SDRplay who shares the following announcement:

SDRplay is pleased to announce the release of SDRuno v1.3. This is a major upgrade to SDRuno, which adds a number of important new features and is intended for all RSP models including the now discontinued RSP1.

Major new features include:

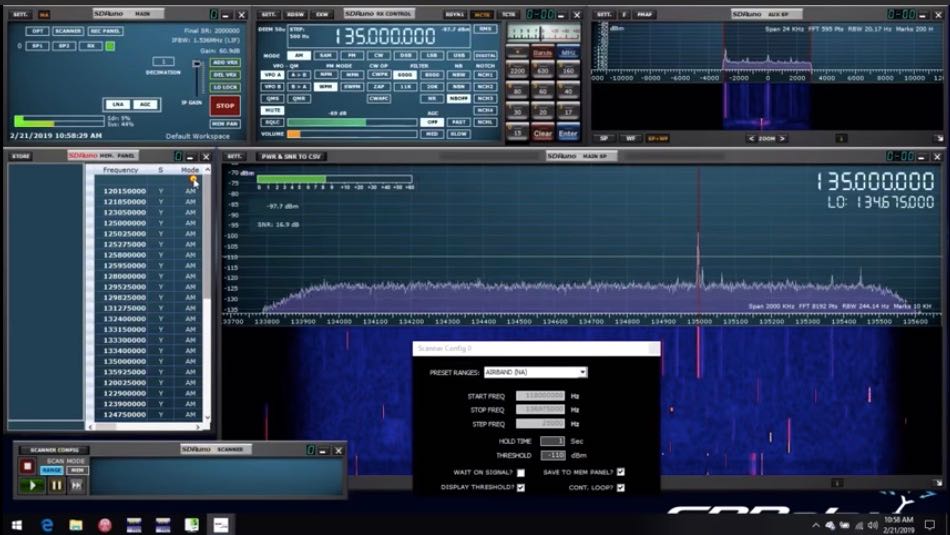
Frequency Scanning (for both frequency ranges and stored memory panel lists)
I/Q ? Audio Output (for CW Skimmer for example)
A new configurable IF AGC scheme

For a full list of additions/changes and bug fixes, please see the release notes at: https://www.sdrplay.com/docs/SDRplay_SDRuno_Release_Notes.pdf

This release of SDRuno uses a new version of the Windows Service based API (3.02) and so users that also used other applications such as dump1090 and HDSDR with the previous version of the Windows Service based API (3.01) will need to download and install the latest versions of API, dump1090 and the ExtIO plugin from our website at https://www.sdrplay.com/downloads

We have produced two new video guides which describe the use of the Frequency Scanner and I/Q Output functions. Links to these videos along with many others can be found by going to the SDRplay Applications and support catalogue on https://www.sdrplay.com/apps-catalogue/  , and on our Youtube Channel on https://www.youtube.com/c/SDRplayRSP

However, the two new videos can be viewed directly by going to:

https://youtu.be/ndMWIK1JLbQ (New Features in SDRuno 1.3 – Scanning and AGC)

https://youtu.be/w_pH56aOdE0   (SDRuno IQ output and CW Skimmer guide)

The ExtIO version of SDRuno can still be downloaded from our downloads page and is included in the SDRuno 1.22 release. Make sure to install it in a different directory to 1.3 otherwise it will stop 1.3 from working.

For any questions  or help regarding this new release, please contact SDRplay support via our dedicated support system at: https://www.sdrplay.com/support
For any other suggestions, please email [email protected]

Finally, we recommend that all users join our community forum where there is a wealth of knowledge and help available for using our products and software in a wide range of applications and circumstances. This forum can be found at: https://www.sdrplay.com/community

Spread the radio love

SDR Primer Part 2: Exploring the world of SDRs for $200 or less

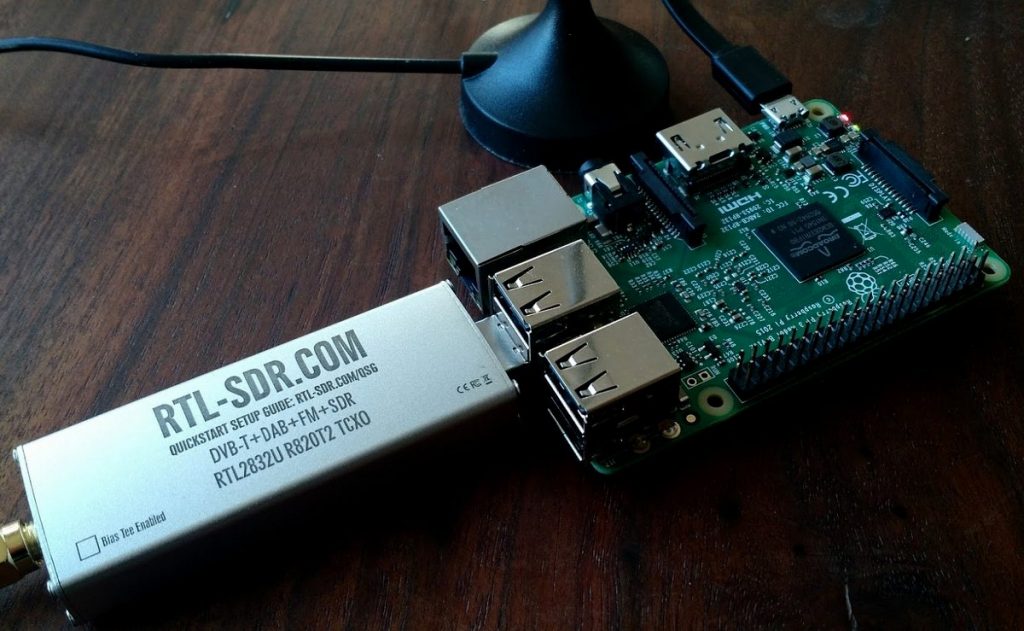
The $22 RTL-SDR paired with a Raspberry Pi and employed as an ADS-B receiver/feeder.

The following article originally appeared in the July 2018 issue of The Spectrum Monitor magazine:


Welcome back to the world of SDRs

Last month we covered Part One of our three-part primer on software-defined radios (SDRs). While last month’s Part One focused on the nomenclature and components of a functioning SDR system, Part Two will take a look at some affordable SDR station options that will propel you into the world of SDRs for less than $200 US. We’ll cover Part Three in November, and we’ll dive a little deeper into the rabbit hole and cover higher-end SDRs and ham radio transceivers with embedded SDRs.

SDRs are affordable

Photo by Kody Gautier

If there’s one thing I’d like you to take away from this part of our primer, it’s that SDRs are truly affordable. For less than the price of a typical full-featured shortwave portable, you can own an SDR that covers almost all of the listening spectrum, and that does so with excellent performance characteristics.

We’re lucky to live in a time of phenomenal radio innovation. When I first jumped into the world of SDRs, the least expensive SDR that covered any of the bands below 20 MHz was about $500. That was only a few years ago, in 2010 or so.

Yet in the past three years, affordable SDRs have become the dominant radio product on the market.  And these modestly-priced products have made the barrier of entry into the SDR world crumble overnight.

Today, even a $100 SDR has more features, more frequency range, and more functionality than a $1000 SDR from just a decade ago.  Times have changed dramatically; indeed, the pace of innovation in this craft is simply amazing.

Before we begin looking at some choice sub-$200 SDRs, I’d just like to direct your attention to the first part of our SDR Primer (click here to read). Specifically, I’d like you to note one element I discussed in that article:  the vital importance identifying your goals as an SDR owner. In other words, how do you plan to use your SDR? If you’re only seeking an SDR to listen to local ham radio repeaters, track cubesat satellites, or gather ADS-B information from aircraft, a $25 SDR will more than suffice. If you wish to use the SDR as a transceiver panadapter, or you wish to chase weak signal DX on the HF bands, then I’d suggest you invest a bit more.

I’d also like to remind you, as I noted in the previous article, that this primer will be limited in the SDRs I highlight. The reason for this is simple:  there now exists a vast ocean of SDRs on the market (just search eBay for “SDR” and you’ll quickly see what I mean) so all models simply can’t be included in this introductory foray. I’ll be focusing here on several SDRs that cover the HF spectrum and above. I’ll also focus on SDRs with which I have personal experience, and which I consider to be “enthusiast” grade among a healthy community of users. Of course, this part of the primer will only include HF-capable receivers that cost a total of $200 or less.

Let’s take a look at what’s on the market in order of price, starting with the most affordable.

$10-$25: The RTL-SDR dongle

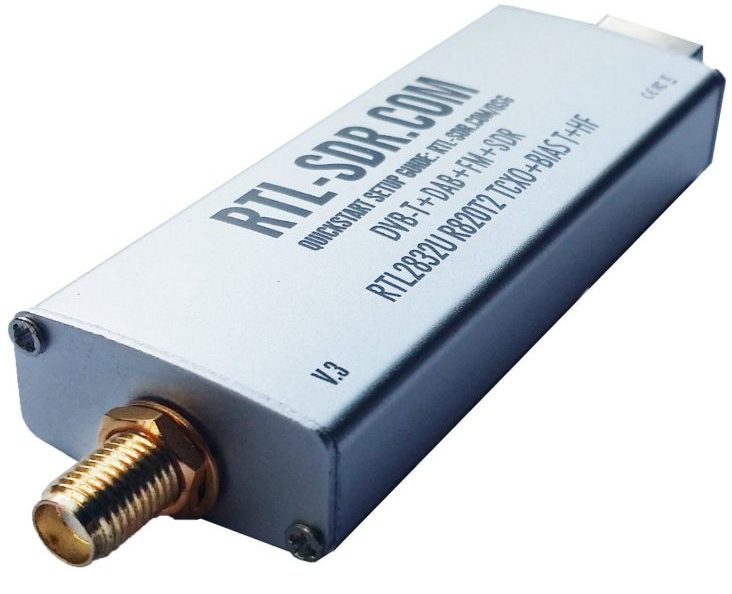
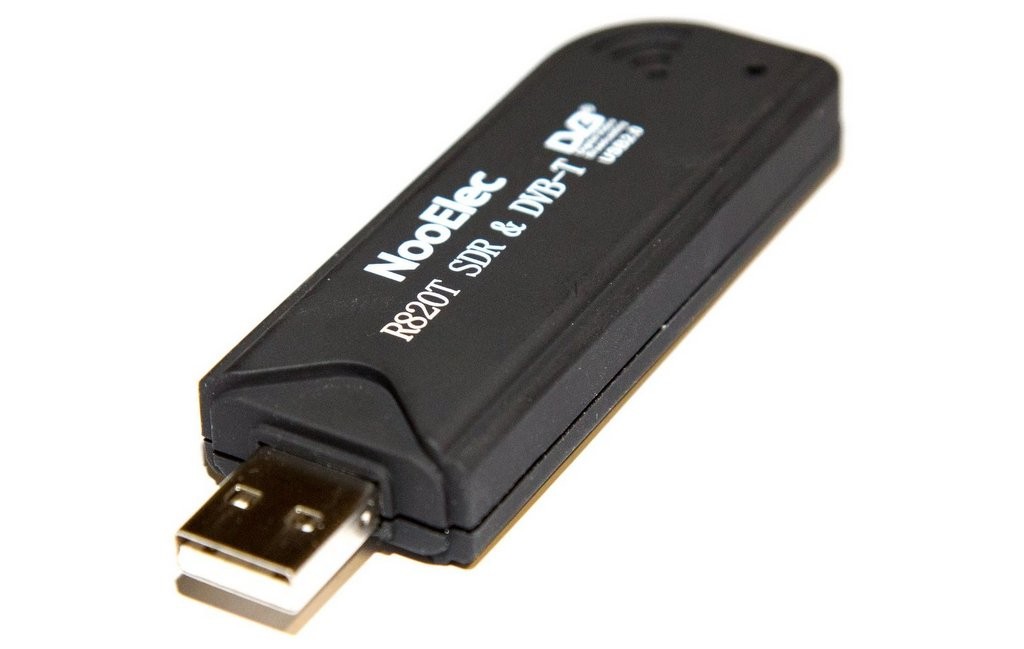
No doubt, many of you reading this primer have purchased an RTL-SDR dongle. Over the years, I’ve owned three or four of them and have even purchased them for friends. These dongles originally appeared on the market many years ago as mass-produced DVB-T TV tuner dongles based on the RTL2832U chipset. Very soon, users discovered that with just a little hacking, the dongle was capable of much, much more than its original intended purpose.

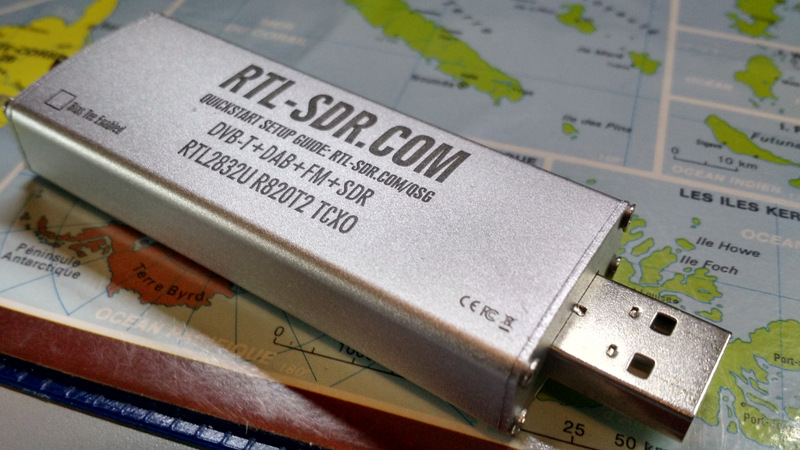
The dongle resembles a USB memory stick. On one end, you’ll find a standard USB connector.  On the other, you’ll find an antenna port, typically SMA, to which one connects an antenna. Although it goes without saying, here’s a friendly reminder: make sure you’re choosing an antenna to match the frequency range you’re exploring!

I’ve seen this older model of RTL-SDR being sold for $9 at Hamvention.

Early RTL-SDR dongles couldn’t cover the HF bands or lower, but many models can now cover a gapless 500 kHz all the way to 1.75 GHz.

So, what can you do with an RTL-SDR dongle?  In short, quite a lot! Here are a few of this simple device’s many applications and uses in our hobby.  It can:

  • become a police radio scanner
  • monitor aircraft and ATC communications
  • track aircraft with ADS-B decoding and read ACARS short messages
  • scan trunking radio conversations.
  • decode unencrypted digital voice transmissions such as P25/DMR/D-STAR.
  • track maritime boat positions like a radar with AIS decoding.
  • track and receive weather balloon data
  • connect to VHF amateur radio
  • decode APRS packets
  • receive and decode GPS signals
  • utilize its rtl-sdr as a spectrum analyzer
  • receive NOAA weather satellite images
  • and so much more––! This list is not fully comprehensive by any means.  Check out this list of projects at RTL-SDR.com.

And, of course, you can listen to any signals between 500 kHz up to 1.75 GHz––essentially, most of the radio listening landscape.

Is $25 still a little high for your budget? RTL-SDR dongles can be found for as low as $10 US, shipped, on eBay. While the cheapest of these dongles may suffice for some radio applications, I’m partial to the dongle produced by RTL-SDR.com, since they’re built in a tough metal enclosure, have thermal pad cooling, as well as extra ESD protection. Amazon has an RTL-SDR.com dongle starter package with antenna options for about $26. That’s, what, the price of three hamburgers? Two orders of fish and chips? And worth it.

Many third-party SDR applications support the RTL-SDR dongle, but my favorite is SDR# (click here to download).

So, the major pros of this little SDR are 1) obviously, the price; 2) many, many uses; and 3) the fact that it’s the most popular SDR on the market, with a massive online user base.

What about negatives? Well, to be frank––aside from the dongle’s budget-busting versatility––the fact is that “you pay for what you get.” You’re investing just $10-$27 in this receiver, so don’t expect exceptional performance especially on anything lower than 50 MHz. On HF, for example, the RTL-SDR could easily overload unless you employ external filtering.

Indeed, I’ve never used the RTL-SDR for HF DXing, but I currently have three dongles in service 24/7:  two as ADS-B receivers, and one as a receiver for the LiveATC network. And these work hard. Indeed, It’s a workhorse of a device!

I suggest you grab an RTL-SDR and use it as an accessible step into the world of SDRs, and as an affordable single-purpose tool to unlock the RF spectrum!

Click here to check out the RTL-SDR blog SDR dongle via Amazon (affiliate link).

$99: The SDRplay RSP1A

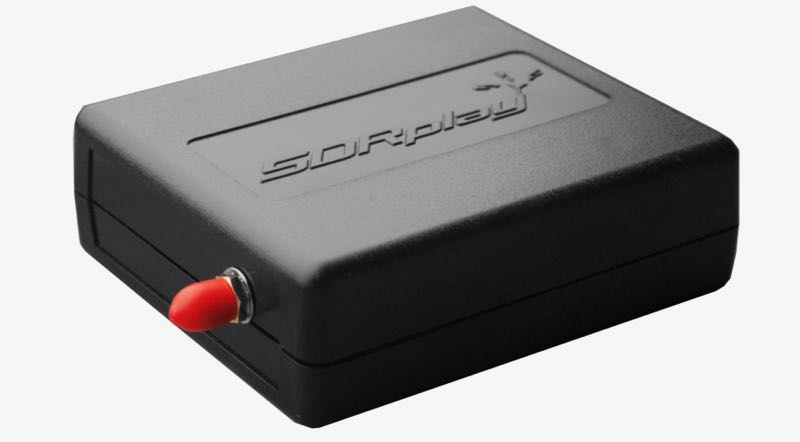
When you invest a modest $99 US (or $120 shipped), and purchase the RSP1A, you take a major step forward in the SDR world.

UK-based SDRplay is an SDR designer and manufacturer that focuses on enthusiast-grade, budget wideband SDRs. SDRplay designs and manufactures all of their SDRs in the United Kingdom, and over the past few years, they’ve developed a robust user community, extensive documentation, and, in my humble opinion, some of the best tutorial videos on the market.

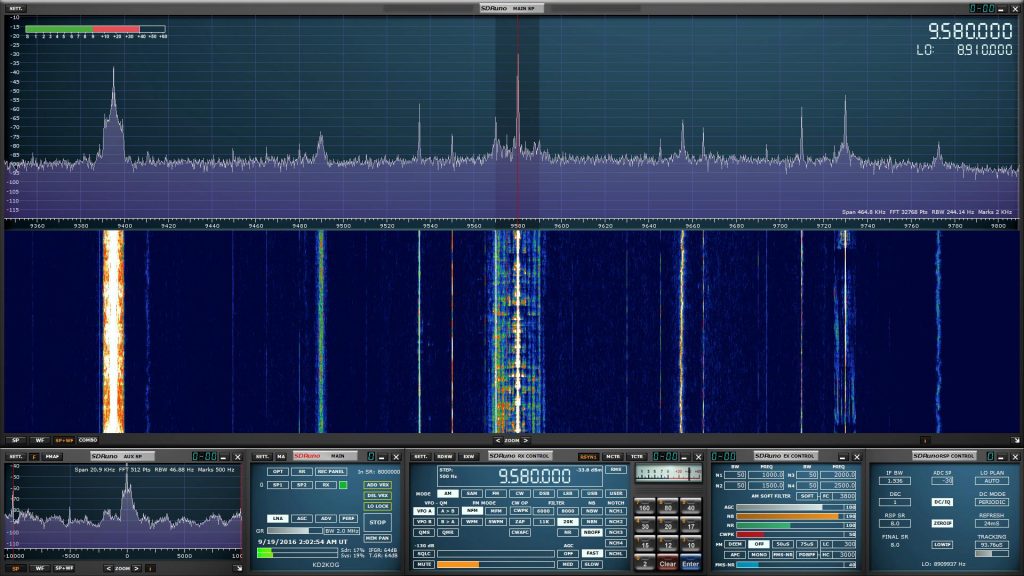
SDRuno windows can be arranged a number of ways on your monitor.

Although the RSP series SDRs are supported by most third-party SDR applications, SDRplay has their own app: SDRuno. Moreover, SDRuno is a full-featured, customizable application that takes advantages of all of this SDR’s performance potential and features. I should mention that installing the RSP1A and SDRuno is a pure plug-and-play experience:  just download and install the application, plug in the RSP1A to your computer, wait for the USB driver to automatically install, then start SDRuno. Simplicity itself.

While the RSP1A is SDRplay’s entry-level wideband SDR, it nonetheless plays like a pro receiver and truly pushes the envelope of performance-for-price, and for other SDR manufacturers, sets the bar quite high. The RSP1A is a wideband receiver that covers from 1 kHz all the way to 2 GHz; equally pleasing the longwave DXer, HF hound, tropo-scatter hunter, and even radio astronomer. This affordable SDR really covers the spectrum, quite literally. Not only does the RSP1A cover a vast frequency range, but its working bandwidth can be an impressive 10 MHz wide and via SDRuno, the RSP1A will support up to 16 individual receivers in any 10 MHz slice of spectrum. All this for $99? Seriously? I assure you, yes.

Think of the RSP1A as the sporty-but-affordable compact car of the SDR world. It delivers performance well above its comparatively modest price, and is fun to operate. In terms of DX, it gets you from point A to point B very comfortably, and is a capable receiver which will help you work even weak signals––and very reasonably!

If you’re looking to explore the world of SDRs, would like a capable receiver with great LW/MW/HF reception to do it with, but also want to keep your budget in check, you simply can’t go wrong with the RSP1A.

Check out the RSP1A via:

$167 US (125 GBP): FUNcube Dongle Pro+

Many years ago when I ventured into the world of SDRs, one of the only affordable SDRs which covered the HF bands was the FUNcube Dongle Pro+.

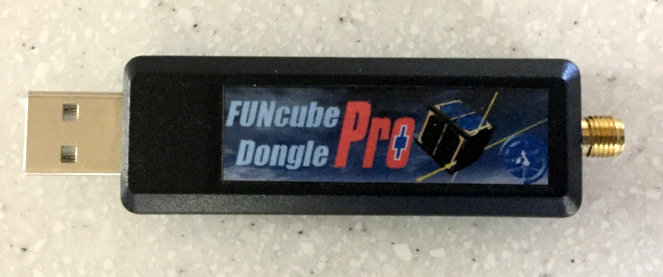
The Funcube Dongle Pro+, which resembles the RTL-SDR “stick” type dongle, was originally designed as a ground receiver for the FUNcube Satellite (cubesat) project initially made possible by AMSAT-UK and the Radio Communications Foundation (RCF). The original Funcube dongle did not cover any frequencies below 64 MHz, but the Funcube Dongle Pro+ added coverage from 150 kHz to 1.9 GHz with a gap between 240 MHz and 420 MHz.

In full disclosure, I’ve never owned a FUNcube Dongle Pro+, but I have used them on several occasions. I believe you would find that it is prone to overloading if you use a longwire antenna that’s not isolated from the dongle. In other words, during such use it seems to be subject to internally-generated noise. In my experience, the Pro+ worked best when hooked up to an external antenna fed by a proper coaxial cable.

To be clear, with the advent of SDRplay and AirSpy SDRs, the FUNcube Dongle Pro+ is no longer the budget SDR I would most readily recommend.

Still, the Pro+ is a very compact dongle that has a great history, and around 2012 really pushed the performance-for-price envelope. It still has many dedicated fans. No doubt, this product has had a huge influence on all of the sub $200 SDRs currently on the market, thus we owe it a debt of gratitude.

Click here to check out the FUNcube Dongle Pro+.

$169 US: SDRplay RSP2 & RSP2 Pro ($199):

The SDRplay RSP2 Pro

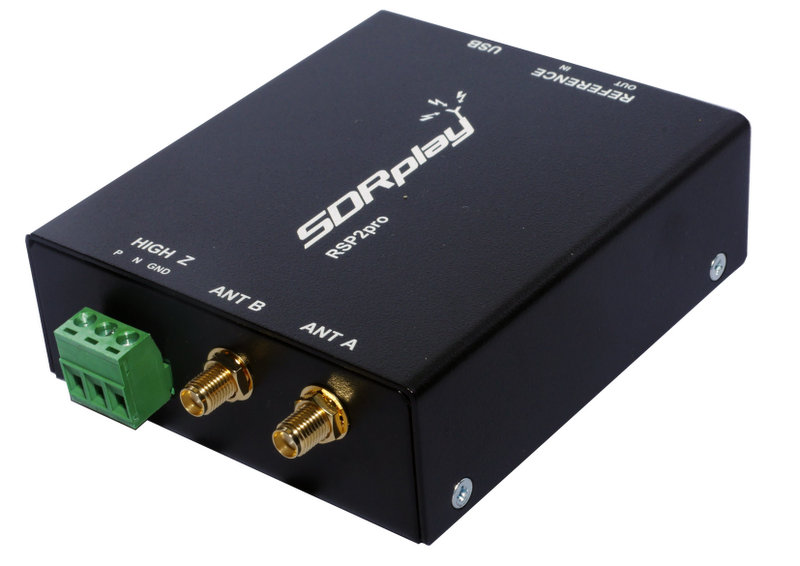
In 2016, after the remarkable success of the original RSP, SDRplay introduced the RSP2 and RSP2 Pro SDRs. The RSP2 is housed in an RF-shielded robust plastic case and the RSP2 Pro is enclosed in a rugged black painted steel case. In terms of receivers and features, the RSP2 and RSP2 Pro are otherwise identical

The RSP2 and RSP2 Pro provide excellent performance, three software-selectable antenna inputs, and clocking features, all of which lend it to amateur radio, industrial, scientific, and educational applications; it is a sweet SDR for $169 or $199 (Pro version). I know of no other SDRs with this set of features at this price point.

The RSP2 series has the same frequency coverage as the RSP1A. Of course, to most of us, the big upgrade from the SDRplay RSP1A is the RSP2’s multiple antenna ports:  2 x 50-Ohms and one High-Z port for lower frequencies.

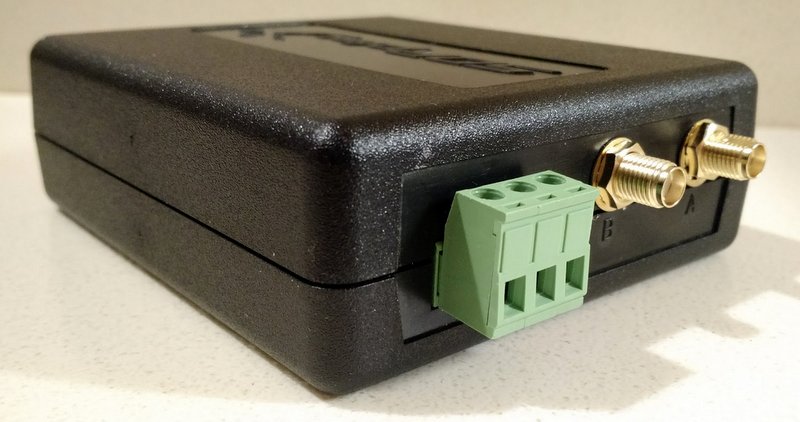
The SDRplay RSP2 with plastic enclosure.

As with all of SDRplay’s SDRs, their own application, SDRuno, will support up to 16 individual receivers in any 10 MHz slice of spectrum.

Bottom line? Since the RSP2 has multiple antenna ports––and two antenna options for HF frequencies and below–the RSP2 is my choice sub-$200 SDR to use as a transceiver panadapter. (Spoiler alert: you’ll also want to check out our summary of the recently released $279 RSPduo from SDRplay in this review or in Part 3 of our primer before pulling the trigger on the purchase of an RSP2 or, especially, an RSP2 Pro!)

Check out the RSP2 via:

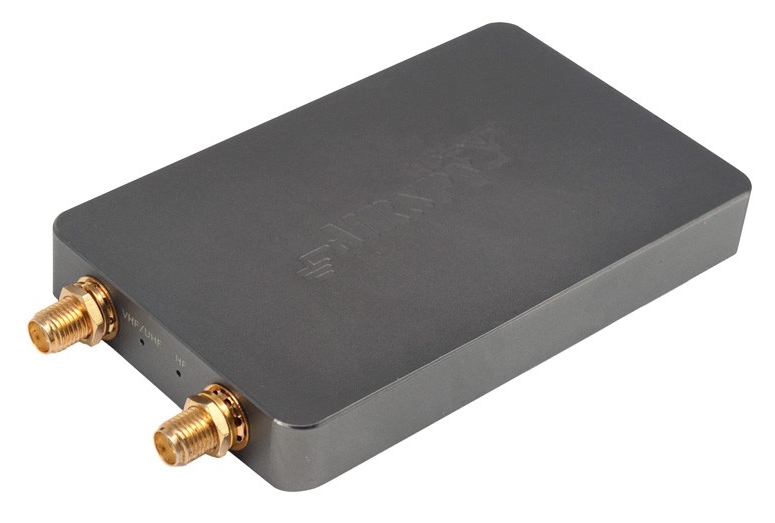
$199 US: AirSpy HF+

Sometimes big surprises come in small packages. That pretty much sums up the imminently pocketable AirSpy HF+ SDR.

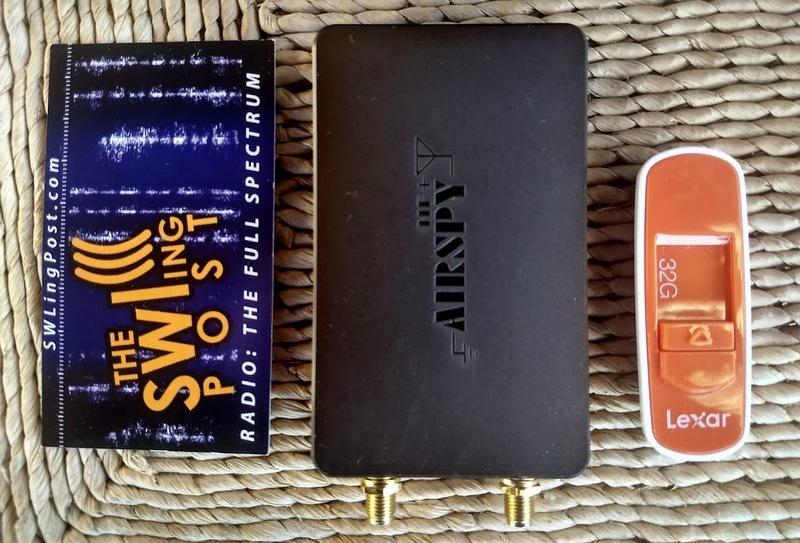
The HF+ has the footprint of a typical business card, and is about as thick as a smartphone. Despite this, it’s a heavy little receiver––no doubt due to its metal alloy case/enclosure.

AirSpy’s HF+ was introduced late 2017. Don’t be surprised by its footprint which is similar to a standard business card to its left, this SDR is performance-packed!

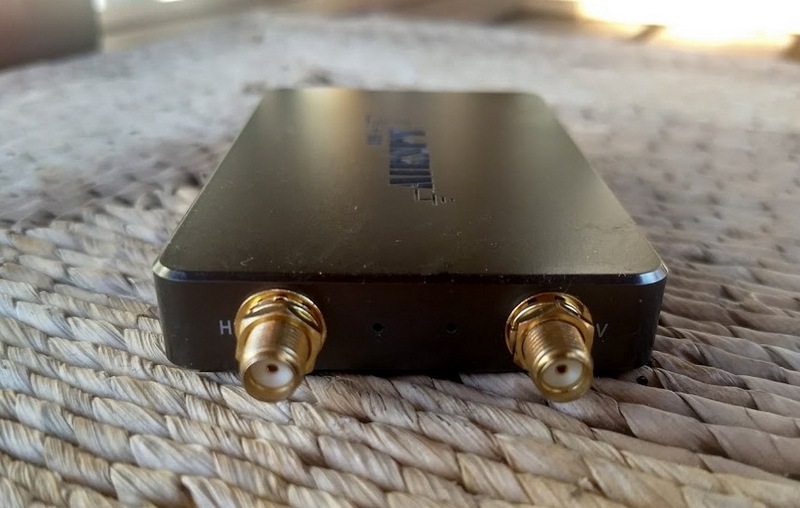
Not to dwell on its size, but other than my RTL-SDR dongle, it’s by far the smallest SDR I’ve ever tested. Yet it sports two SMA antenna inputs: one for HF, one for VHF.

The HF port is labeled as “H” and the VHF port as “V”

When I first put it on the air, my expectations were low.  But I quickly discovered that the HF+ belies its size, and is truly one of the hottest sub $500 receivers on the market! Its HF performance is nothing short of phenomenal.

The HF+ is not a wideband receiver like the FunCube Dongle Pro+ or RSP series by SDRplay. Rather, the HF+ covers between 9 kHz to 31 MHz and from 60 to 260 MHz only; while this is a relatively small portion of the spectrum when compared with its competitors, this was a strategic choice by AirSpy. As AirSpy’s president, Youssef Touil, told me,“The main purpose of the HF+ is [to have] the best possible performance on HF at an affordable price.”

Mission accomplished.  Like other SDRs, the HF+ uses high dynamic range ADCs and front-ends but enhances the receiver’s frequency agility by using high-performance passive mixers with a robust polyphase harmonic rejection structure.  The HF+ was designed for a high dynamic range, thus it is the best sub-$200 I’ve tested for strong signal handling capability on the HF bands.

You can very easily experiment and customize the HF+ as well; easy access to the R3 position on the circuit board allows you to make one of several published modifications. “During the early phases of the design,” Yousef explains, “R3 was a placeholder for a 0 ohms resistor that allows experimenters to customize the input impedance.” He goes on to provide in-depth clarification about these mods:

“For example:

  • A 300 pF capacitor will naturally filter the LW/MW bands for better performance in the HAM bands
  • A 10µH inductor would allow the use of electrically short antennas (E-Field probes) for MW and LW
  • A short (or high value capacitor) would get you the nominal 50 ohms impedance over the entire band, but then it’s the responsibility of the user to make sure his antenna has the right gain at the right band
  • A custom filter can also be inserted between the SMA and the tuner block if so desired.”

Since the introduction of the HF+, it has been my recommended sub-$200 receiver for HF enthusiasts. If you want to explore frequencies higher than 260 MHz, you’ll have to look elsewhere. Also, note that longwave reception is not the HF+’s strong suit––although modifications to R3 and future firmware upgrades might help with this! Additionally, the HF+’s working bandwidth is 660 kHz; quite narrow, when compared with the RSP series, which can be widened to 10 MHz.

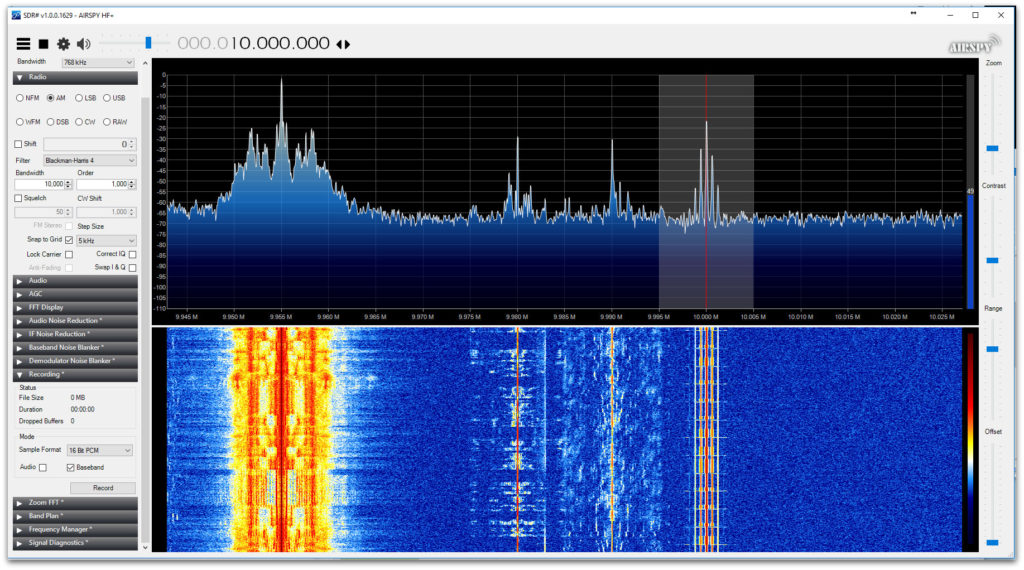
AirSpy also designed the free application SDR# to take full advantage of their receivers’ features and performance.

The AirSpy application (a.k.a. SDR#)

Installing the HF+ and getting it on the air is pure plug-and-play. While SDR# is a powerful and fluid SDR application, I actually use SDR Console more often, as it supports most of my other SDRs as well, and offers advanced virtual receiver and recording functionality.

If you’re an HF guy like me, the HF+ will be a welcome addition to your receiver arsenal. It’s a steal at $200.

Click here for a full list of AirSpy distributors.

Conclusion

If you haven’t gathered this already, it’s simply a brilliant time to be a budget-minded radio enthusiast. Only a few years ago, there were few, if any, enthusiast-grade sub-$200 SDR options on the market.  Now there are quite a number, and their performance characteristics are likely to impress even the hardest-core weak-signal DXer.

Still, some hams and SW listeners reading this article will no doubt live in a tougher RF environment where built-in hardware filters are requisite to prevent your receiver from overloading. Or perhaps you desire truly uncompromising benchmark performance from your SDR. If either is the case, you may need to invest a little more of your radio funds in an SDR to get exactly what you want…and that’s exactly where I’ll take you November in the final Part Three of this SDR primer series.  Stay tuned!

Stay tuned for more in Part Three (November). I’ll add links here after publication.

Do you enjoy the SWLing Post?

Please consider supporting us via Patreon or our Coffee Fund!

Your support makes articles like this one possible. Thank you!

Spread the radio love