Shortwave listening and everything radio including reviews, broadcasting, ham radio, field operation, DXing, maker kits, travel, emergency gear, events, and more
In recent years, RF-9000s in excellent to LNIB condition have sold for $10,000 or more.
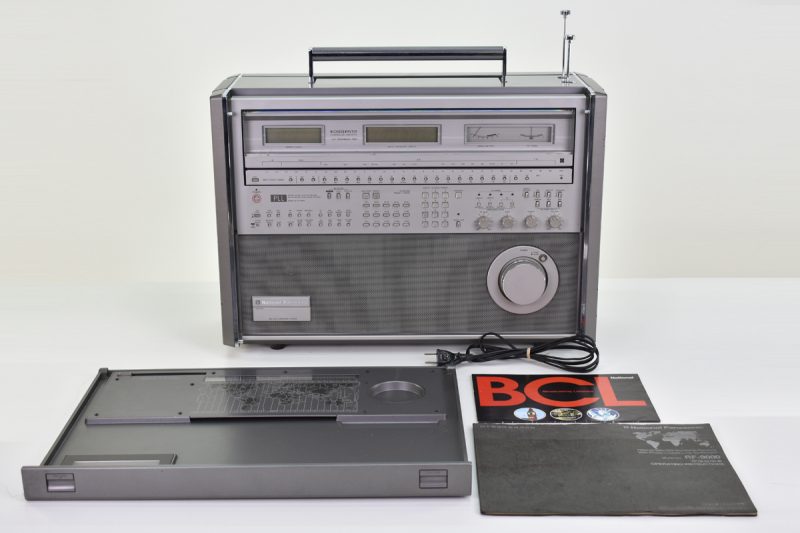
A tour d’force of technology in its day, the 9000 featured room-filling main speakers and PLL technology that was advanced for its time.
The shortwave receiver section of the 9000 was plagued by PLL artifacts which prevented the radio from achieving what it could have had this problem not been solved in advance by Panasonic engineers.
A LNIB RF-9000 that I purchased for near $5,000 sold to a Hong Kong collector for $10,000 a few years ago. While I do miss its amazing FM quality and looks, the receiver ultimately lagged behind others, such as the SONY CRF-330K and 320 in performance.
The asking price for this 9000, which appears to have cosmetic issues, is in my view high.
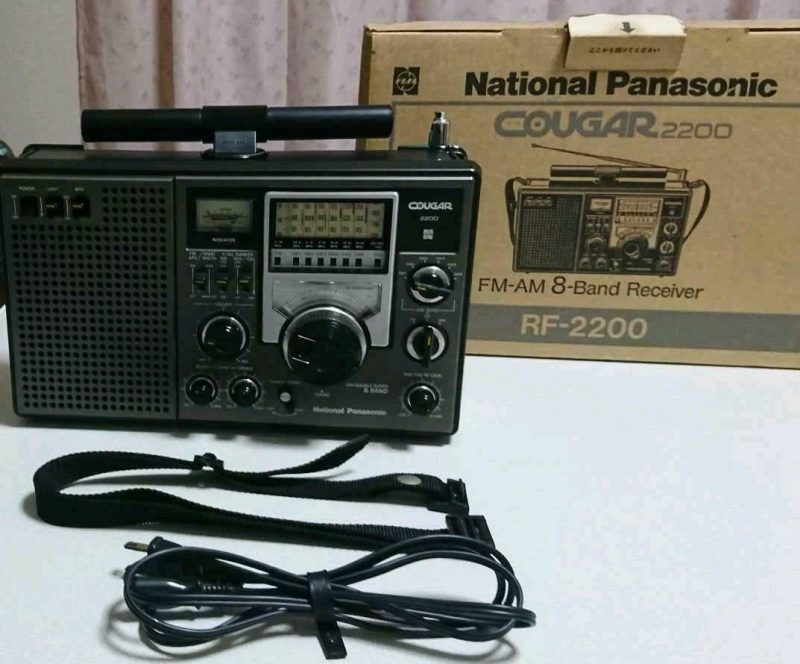
This model appears to have an original box in great shape. The price is steep, though at roughly US $563.35 as a Buy It Now listing although it does include free economy shipping from Japan. The seller also notes, “The first stage of the antenna is removed, so it is bonded.” Not exactly sure what that means and am guessing it’s a machine translation from Japanese.
Mario notes that most of the Cougar 2200s he spots on eBay are from sellers in Japan and at a recent auction one fetched $400.
Curious if any Post readers have the Cougar 2200? I’ve never seen one in real life, but I assume the differences between it and the RF-2200 or DR22 is branding and power cord? Please feel free to comment if you own one.
Andy’s article caused me (yes, I blame him) to wax nostalgic about the popular FT-817 transceiver. You see, I owned one of the first production models of the FT-817 in 2001 when I lived in the UK.
At the time, there was nothing like it on the market: a very portable and efficient HF, VHF, UHF, multi-mode general coverage QRP transceiver…all for $670 US.
In 2001? Yeah, Yaesu knocked it out of the ballpark!
In fact, they knocked it out of the ballpark so hard, the radio is still in production two decades later and in demand under the model FT-818.
I sold my FT-817 in 2008 to raise funds for the purchase of an Elecraft KX1, if memory serves. My reasoning? The one thing I disliked about my FT-817 was its tiny front-facing display. When combined with the embedded menus and lack of controls, it could get frustrating at home and in the field.
I mentioned in a previous post that I purchased a used FT-817ND from my buddy, Don, in October, 2020. I do blame Andy for this purchase. Indeed, I hereby declare him an FT-817 enabler!
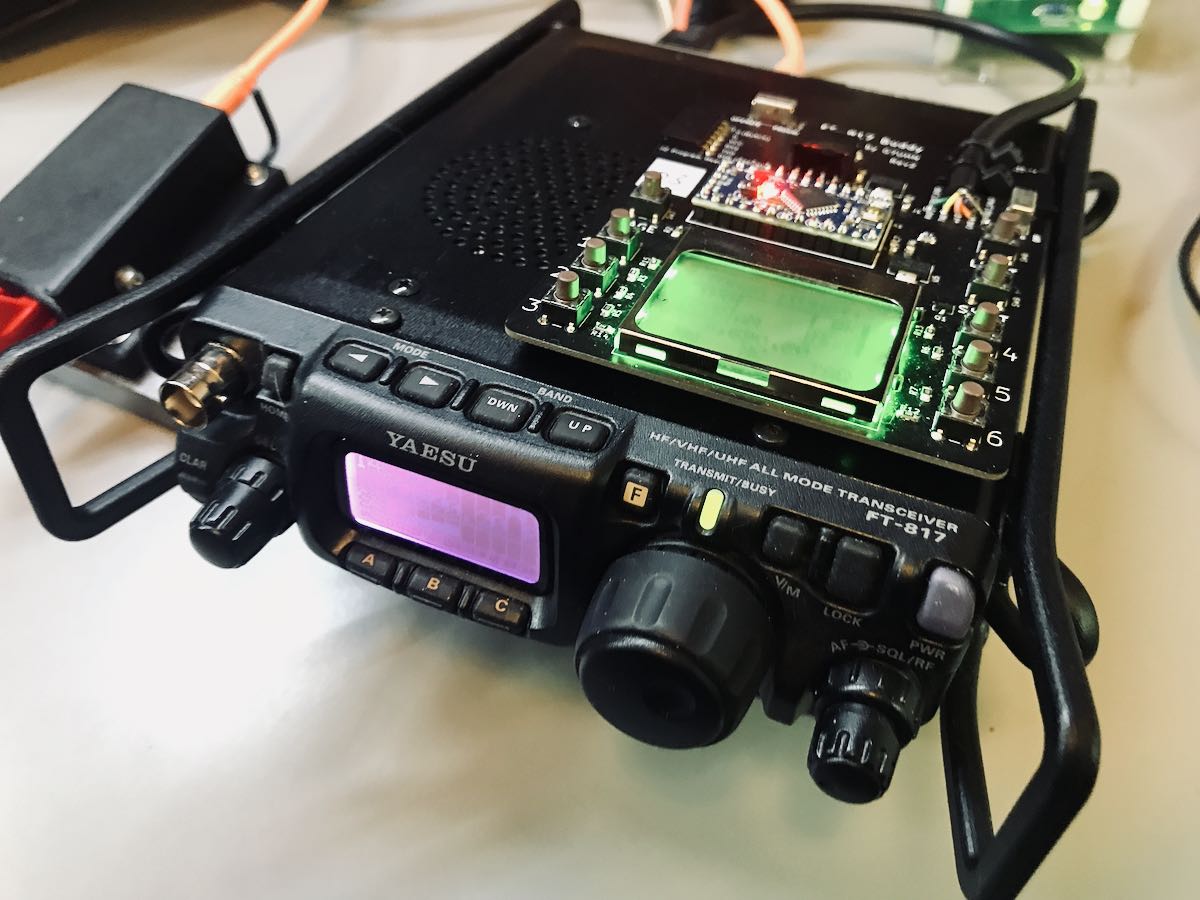
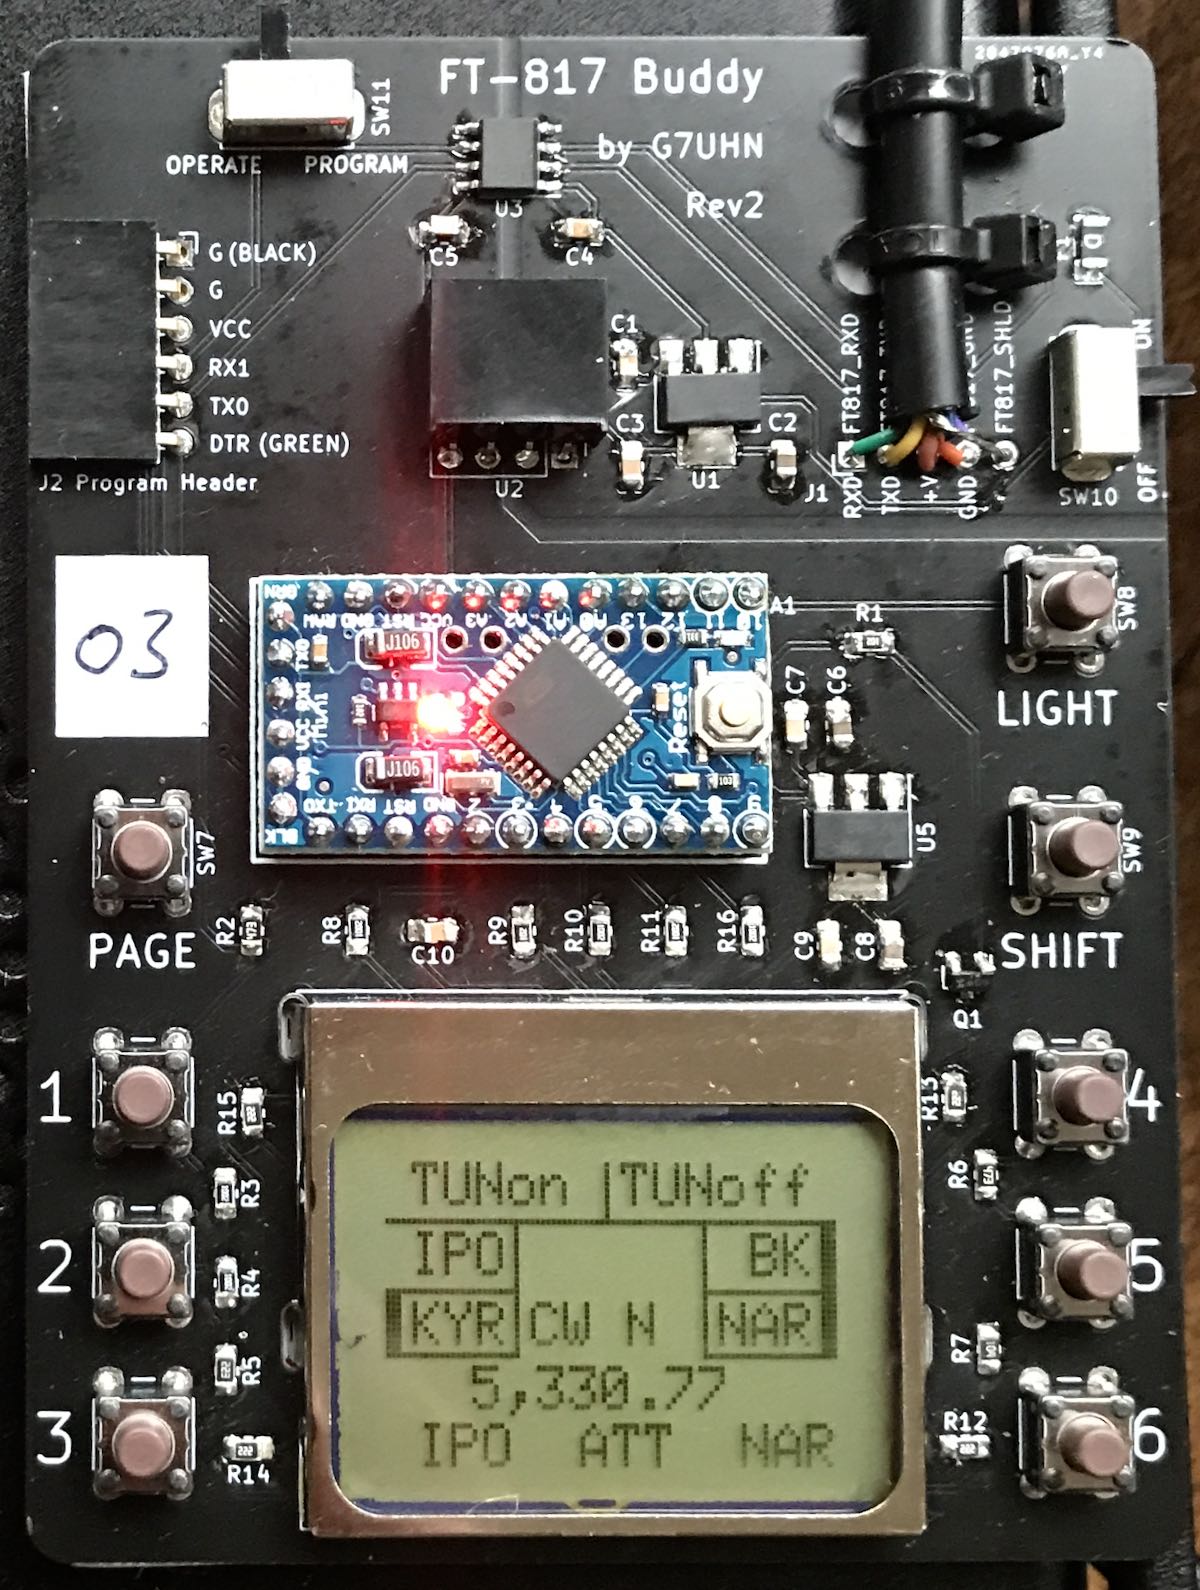
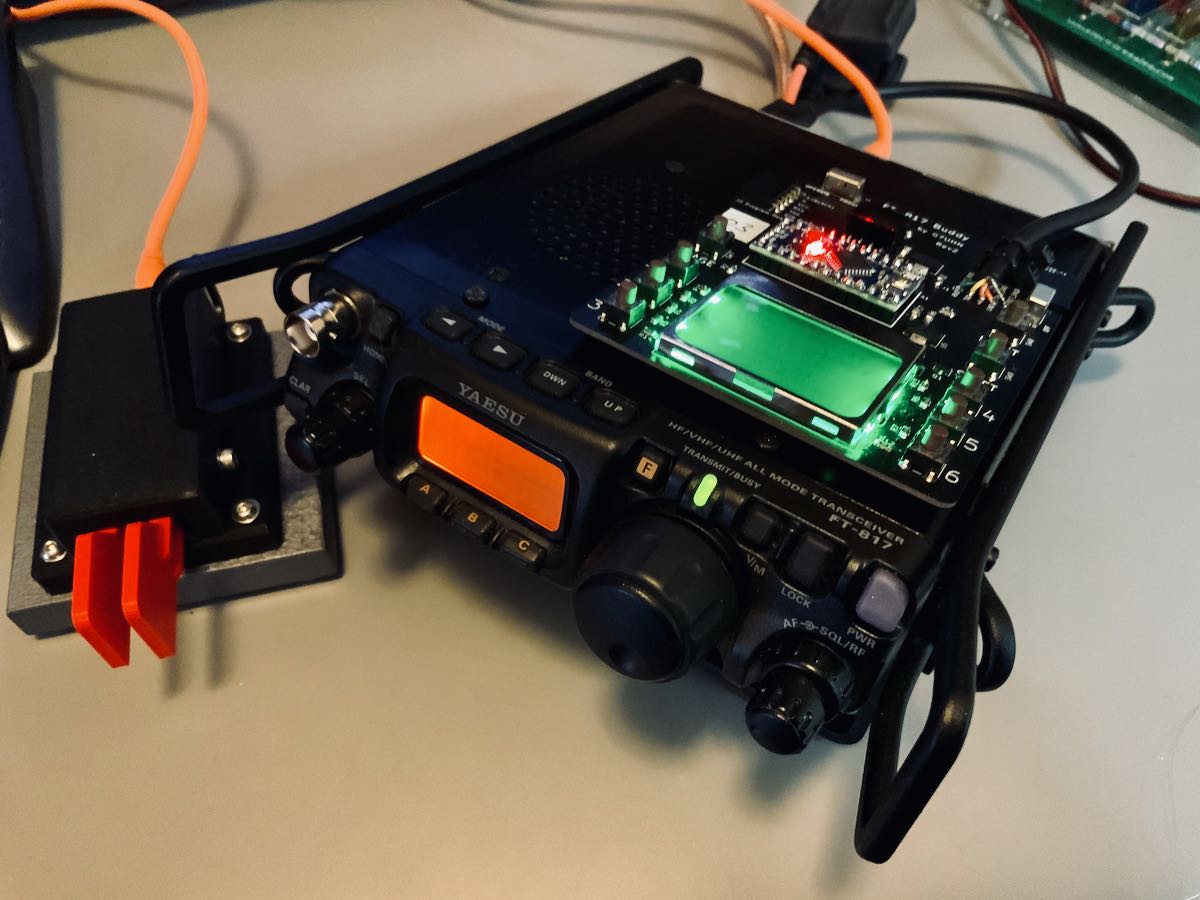
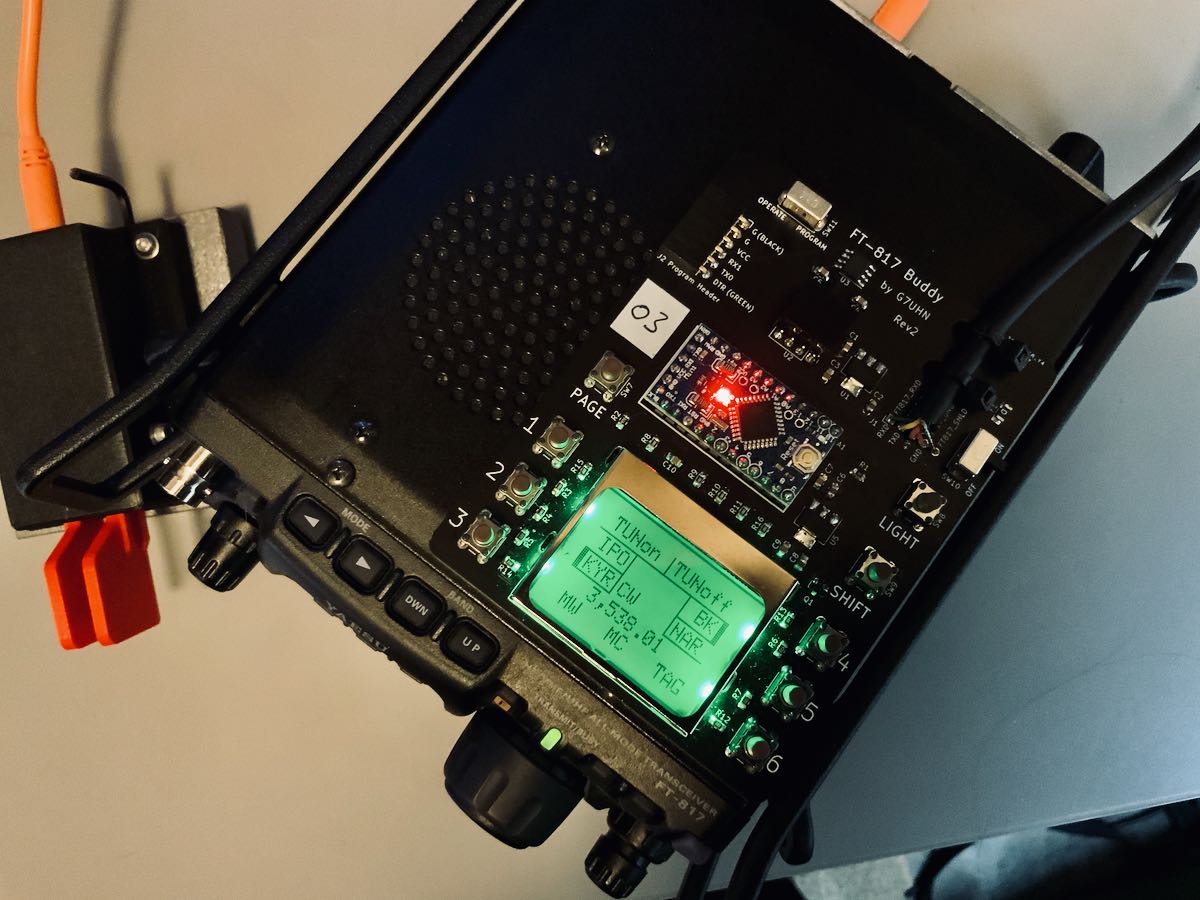
FT-817 Buddy board
When I told Andy about my ‘817ND purchase, he asked if I’d like to help him test the FT-817 Buddy board versions. How could I refuse?
Andy sent me a prototype of his Version 2 Buddy board which arrived in late November. I had to source out a few bits (an Arduino board, Nokia display, and multi-conductor CAT cable). Andy kindly pre-populated all of the SMD components so I only needed to solder the Arduino board and configure/solder the cable. I did take a lot of care preparing and soldering the cable, making sure there was no unintentional short between the voltage and ground conductors.
Overall, I found the construction and programming pretty straight-forward. It helped that Andy did a remote session with me during the programming process (thanks, OM!). Andy is doing an amazing job with the documentation.
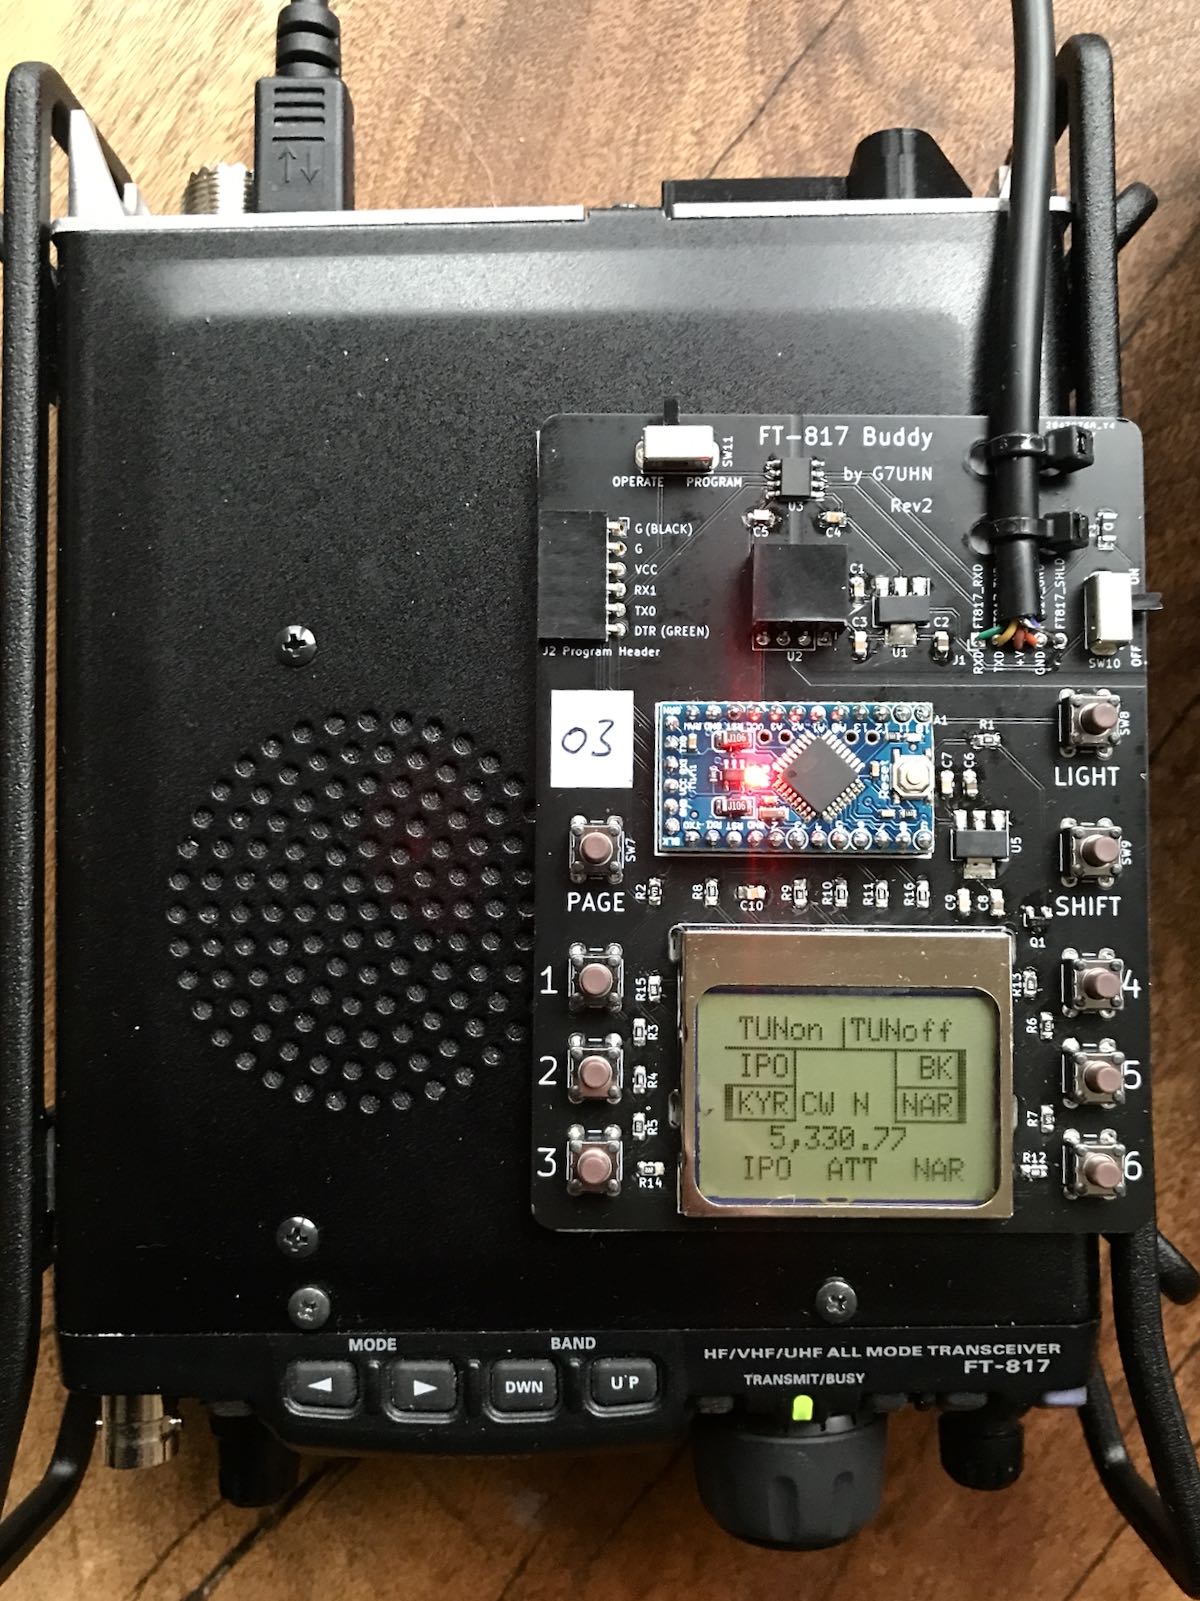
I do love how the board makes it easier to read the frequency and have direct access to important functions without digging through embedded menus. While there’s nothing stopping you from changing the program to suit you, Andy’s done a brilliant job with this since he’s an experienced FT-817 user.
The Nokia display is very well backlit, high contrast, and easy very to read.
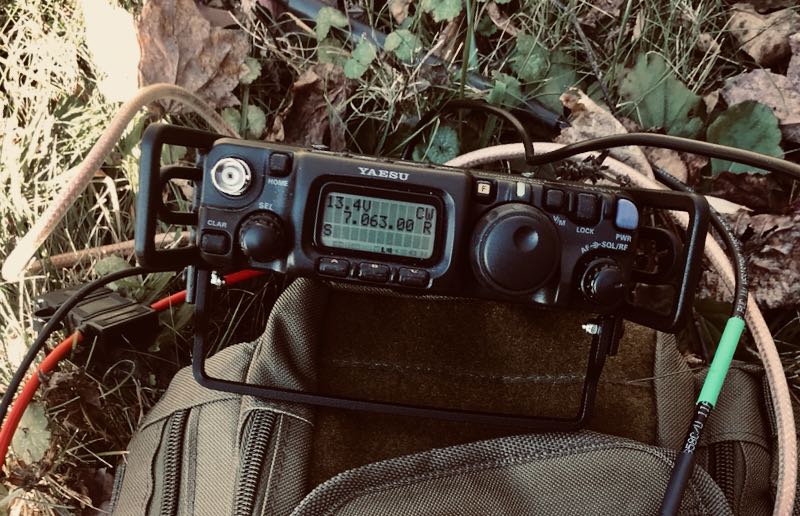
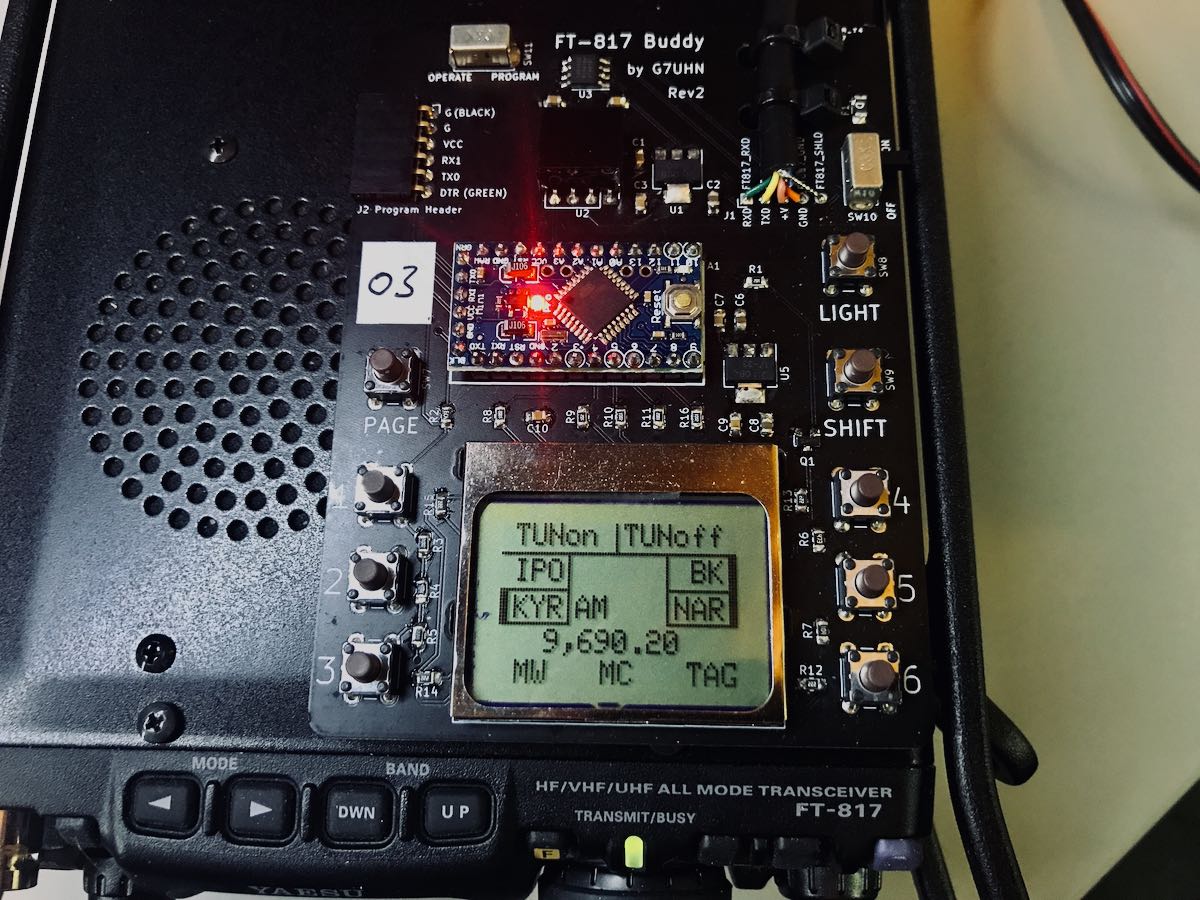
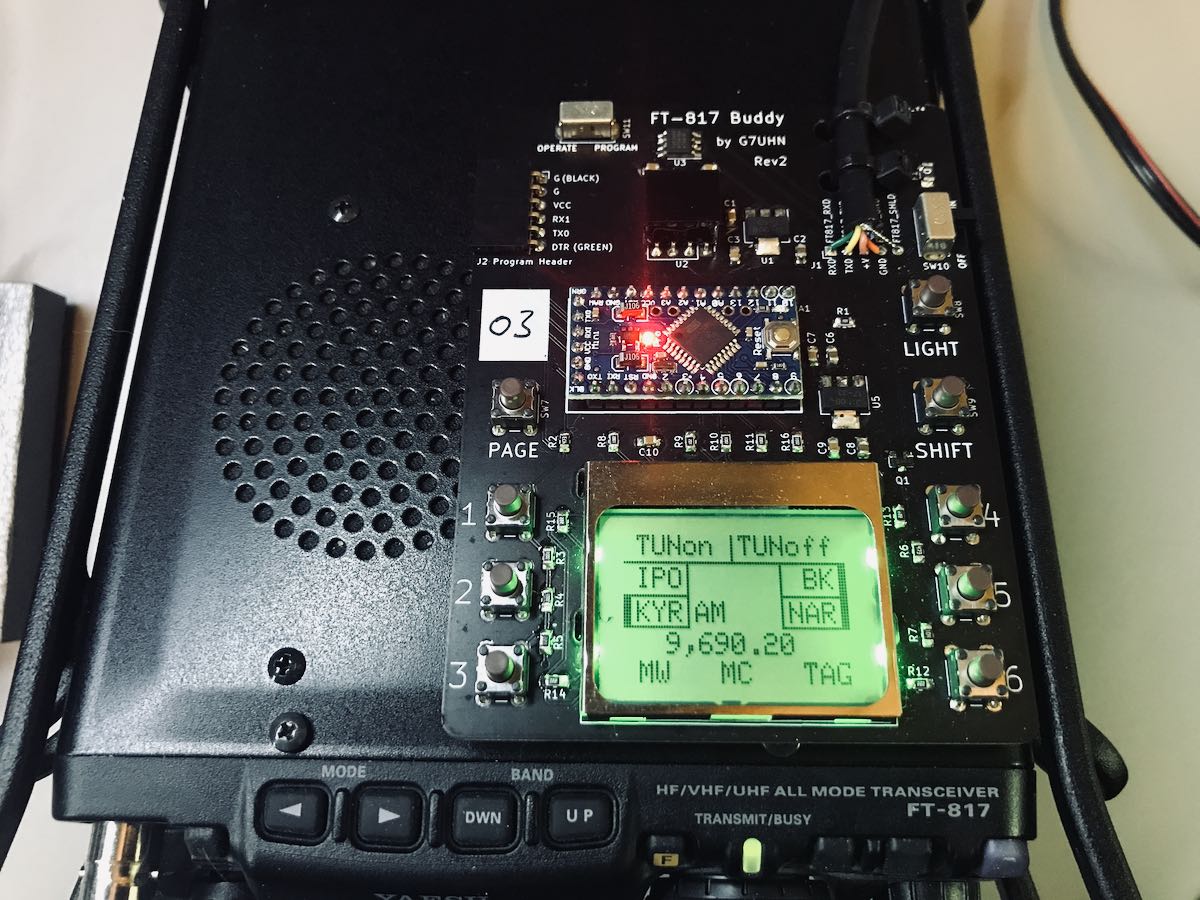
“Resistance is futile”
I mentioned on Twitter that, with the backlight on, the FT-817 Buddy makes my ‘817ND look like it was recently assimilated by The Borg.
Don’t tell any Star Trek captains, but I’m good with that.
Andy has a rev3 board in the works and it sports something that will be a game-changer for me in the field: K1EL’s keyer chip!
For more information about the FT-817 Buddy, check out Andy’s website. At time of posting, it’s not available yet, but as Andy says, “it’s nearly there!”
Of course, we’ll keep you updated here as well. Many thanks to Andy for taking this project to the next level. No doubt a lot of FT-817 users will benefit from this brilliant project!
Many thanks to SWLing Post contributor, Sorin, who writes:
Hello Thomas,
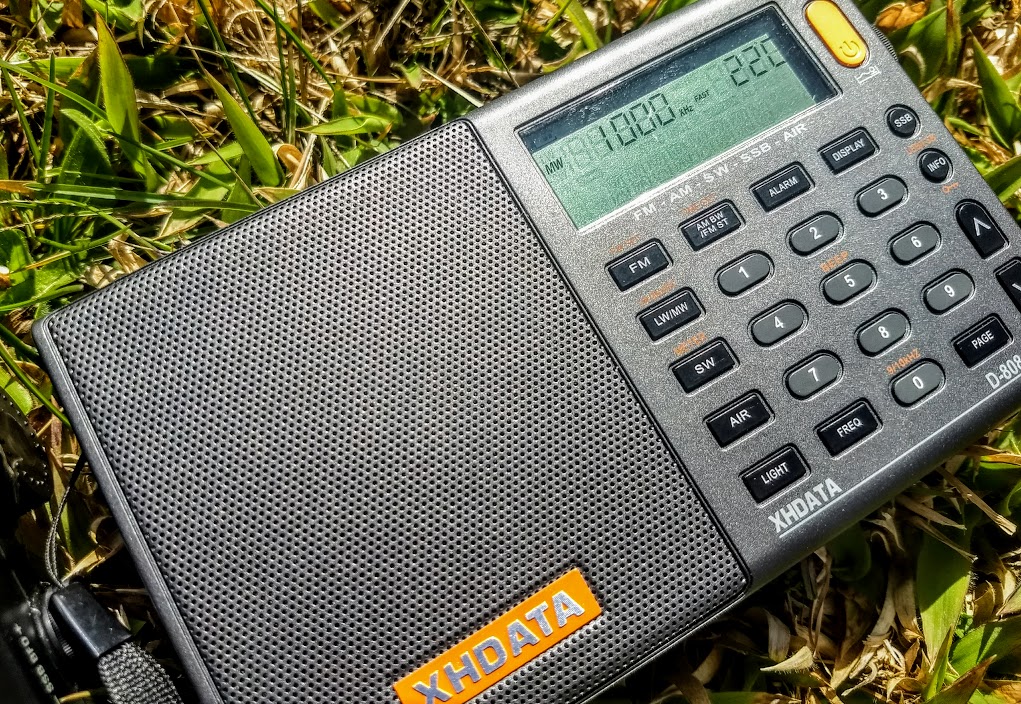
I’ve read with interest your blog and inputs about the XHDATA radio.
Now since yesterday I own such a radio, and I’ve noticed it has aspects that are superbly resolved, but I miss a complete Instruction Manual. The pdf you have there (the same as the printed one that came with my radio) isn’t describing some matters, I will highlight just those I’ve confronted:
– How do you set the local time? The manual stops at saying how to switch from Automatic (I guess from the unreliable RDS clock) to Manual. What buttons are to be pressed further to set the time ?
– How do you save radio stations beyond the 10 pcs on Page 00? Ho do you go further from Page 00 to some other ? Pressing further the Page button doesn’t change anything.
– How do you call saved stations from other pages that Page 00?
best regards,
Sorin
Thank you for your question, Sorin. I’m letting a friend borrow my D-808 so, unfortunately, don’t have it handy to confirm this for you. My hope is that an SWLing Post reader can help.
Please comment if you can help Sorin with these D-808 functions!
This morning, I’m looking at the calendar and I see and end in sight for 2020. I think most of us can agree that 2020 will be one for the history books, in large part due to the Covid-19 global pandemic which has had a pretty dramatic affect on many of our lives. It certainly brough my planned travels to a halt. I think many of us are quite happy to show 2020 the door!
As each year comes to a conclusion, I often look back at my radio activities during that year and see how it played out. I especially note the radios I used most heavily throughout the year.
Since I evaluate and test radios, models that are new to the market obviously get a lot of air time. Still, I’m also known to pull radios from the closet and give them some serous air time.
I’m very curious what radios you gave the most air time in 2020?
Here’s my list based on type/application:
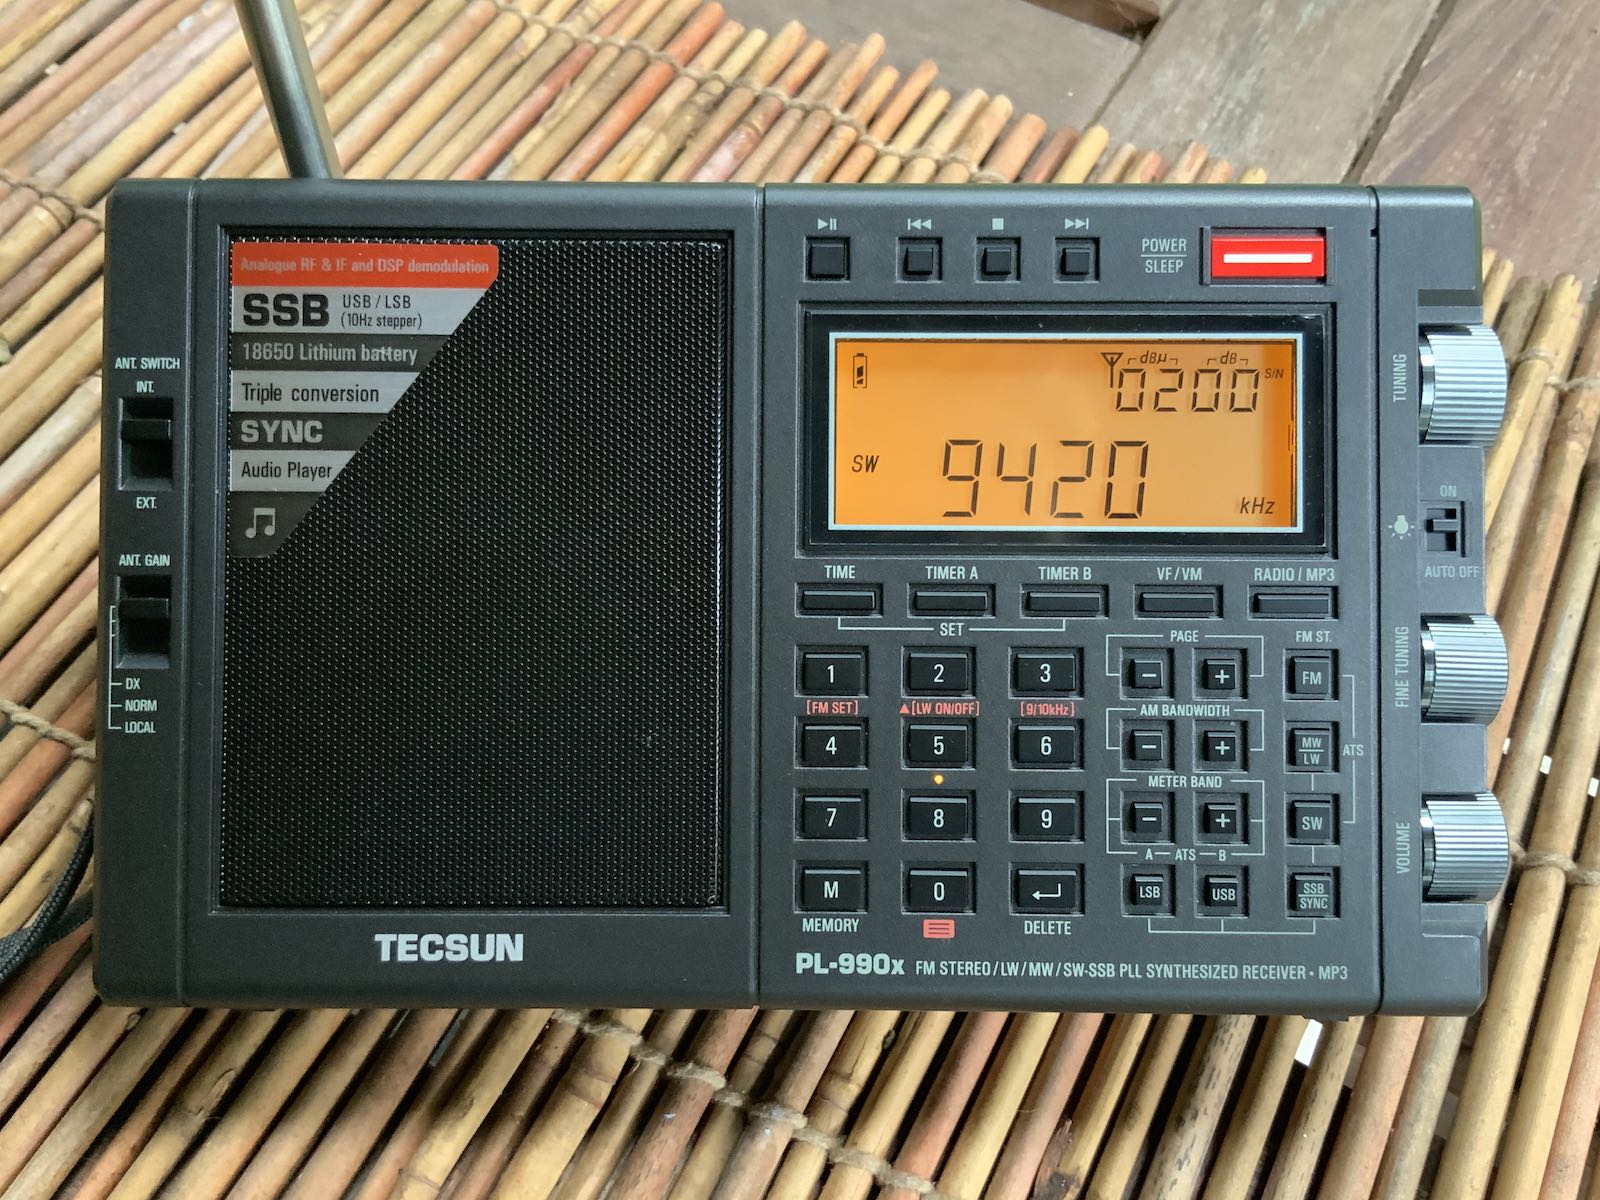
Portable shortwave receivers
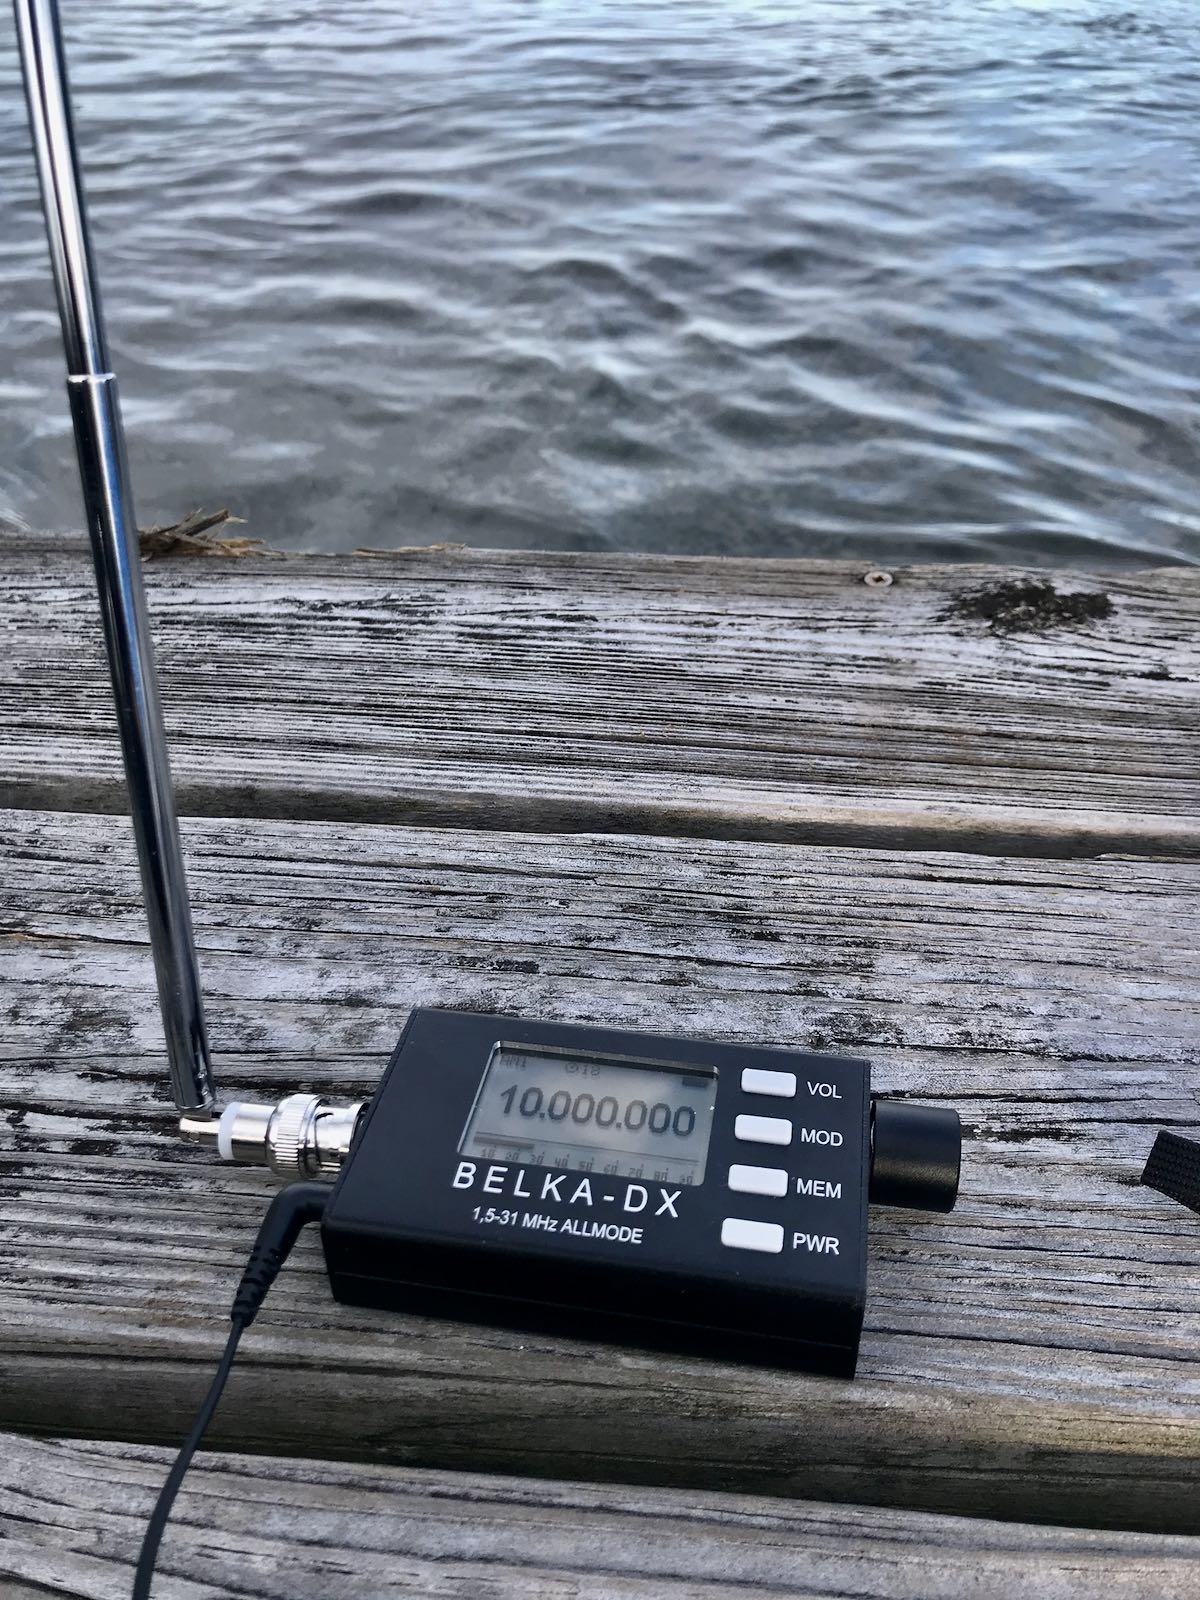
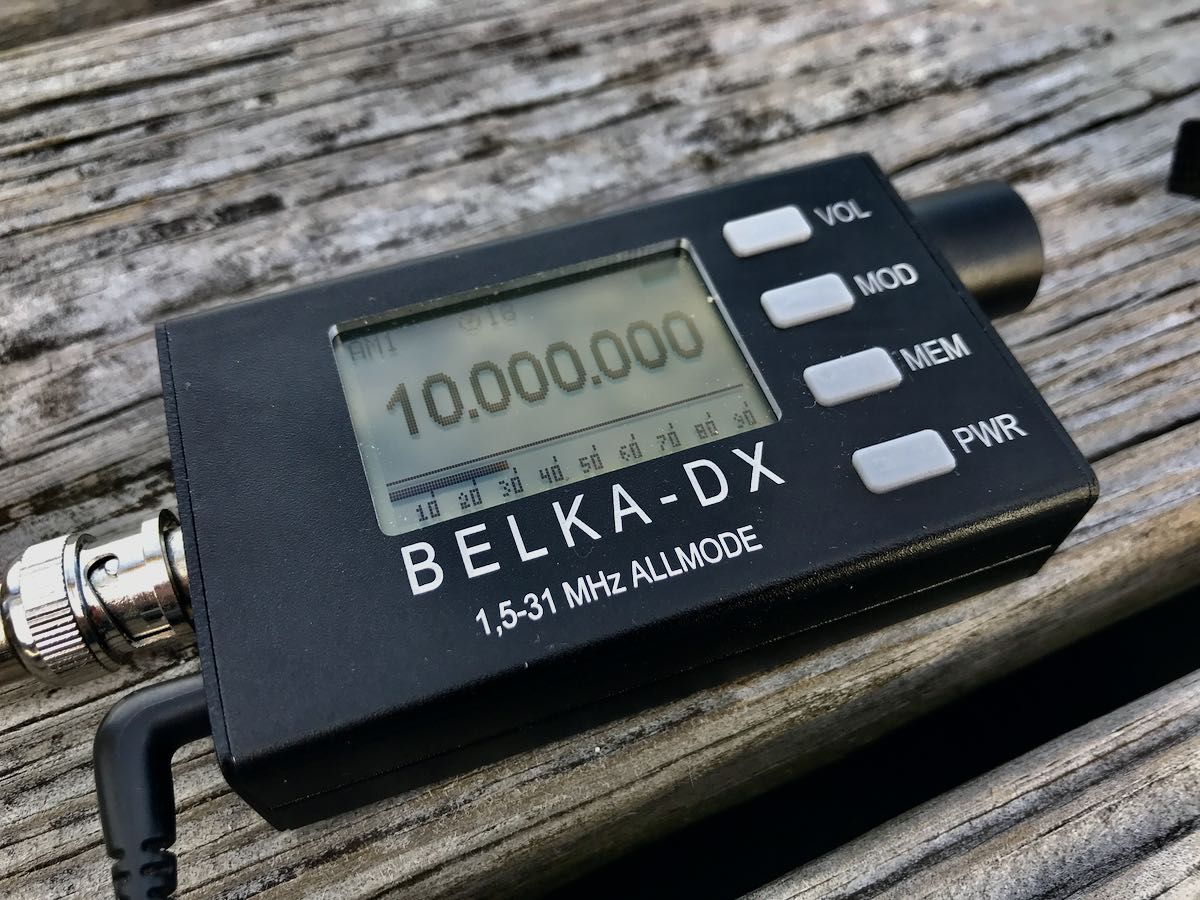
Since they’re new to the market, both the Tecsun PL-990 (above) and Belka DX (below) got a lot of air time.
I do like both radios and even took the pair on vacation recently even though packing space was very limited. I see the Belka DX getting much more air time in the future because 1.) it’s a performer (golly–just check out 13dka’s review of the Belka DSP) and 2.) it’s incredibly compact. The Belka now lives in my EDC bag, so is with me for impromptu listening and DXing sessions.
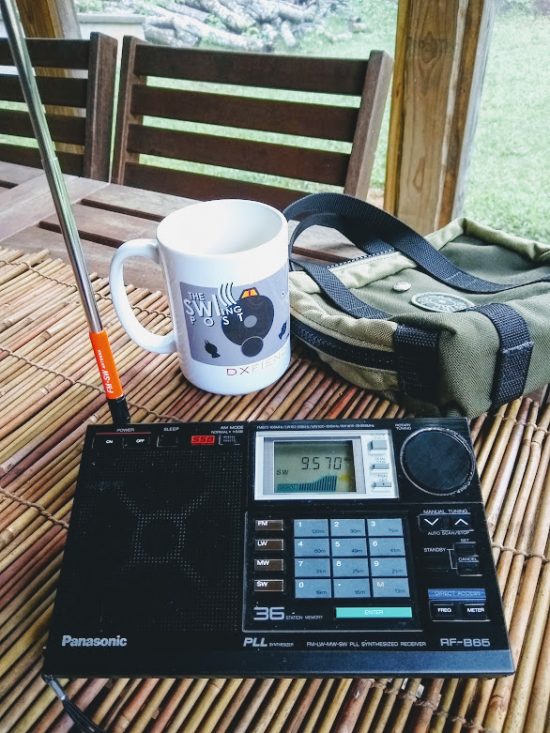
A classic solid-state portable that also got a lot of air time this year was the Panasonic RF-B65. Not only is it a performer, but it has a “cool” factor that’s hard to describe. I love it.
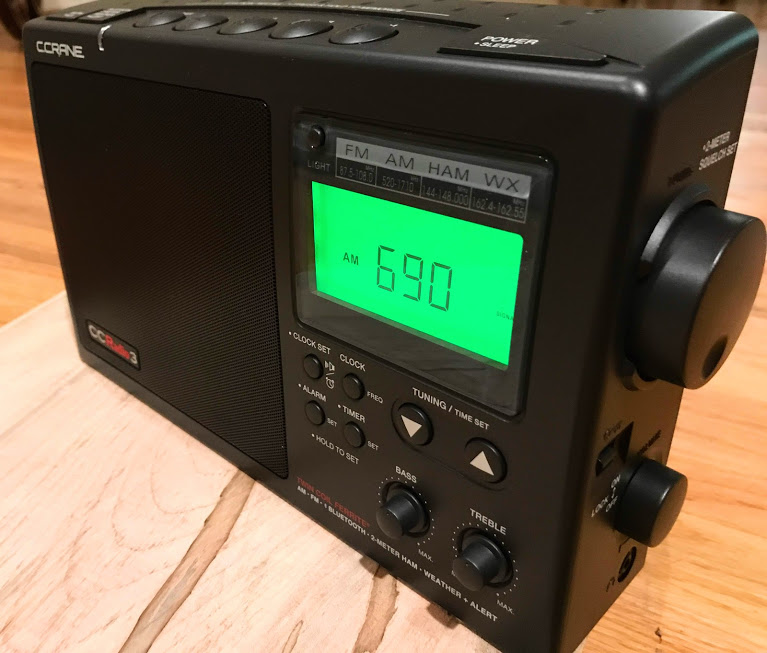
Tabletop portables
In a sense, the C.Crane CCradio3 got more play time than any of my radios. It sits in a corner of our living area where we tune to FM, AM and weather radio–90% of the time, though, it’s either in AUX mode playing audio piped from my SiriusXM receiver, or in Bluetooth mode playing from one of our phones, tables, or computers. In October, the prototype CCRadio Solar took over SiriusXM duty brilliantly. I’m guessing the CCRadio3 has easily logged 1,600 hours of play time this year.
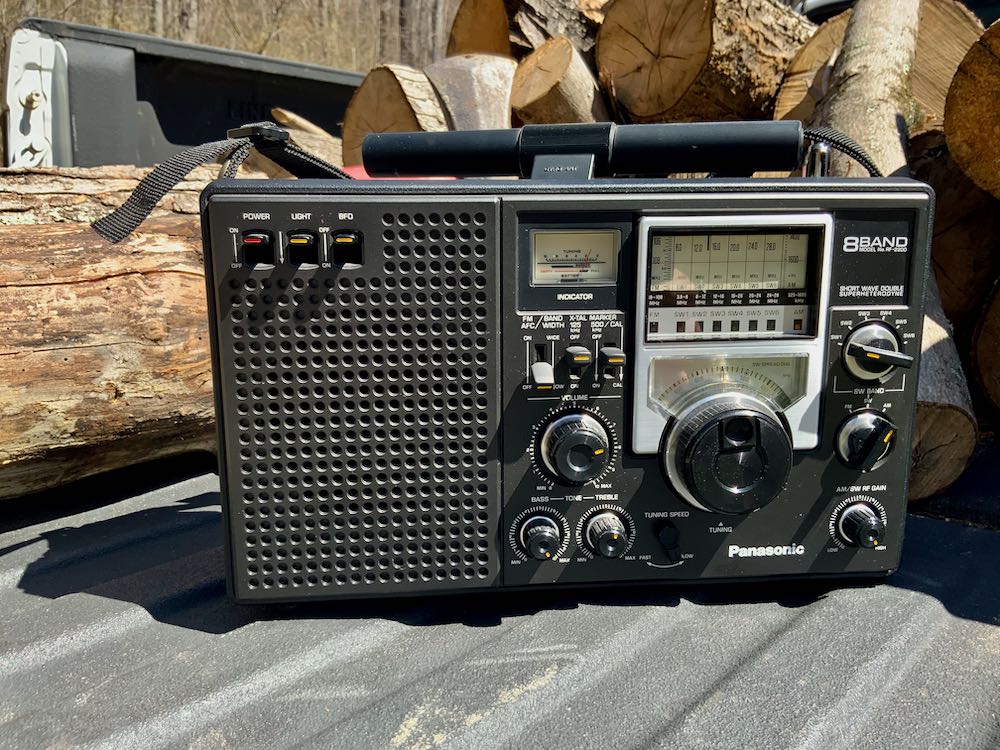
Of course, the Panasonic RF-2200 is one of my all-time favorite vintage solid-state portables, so it got a significant amount of field time.
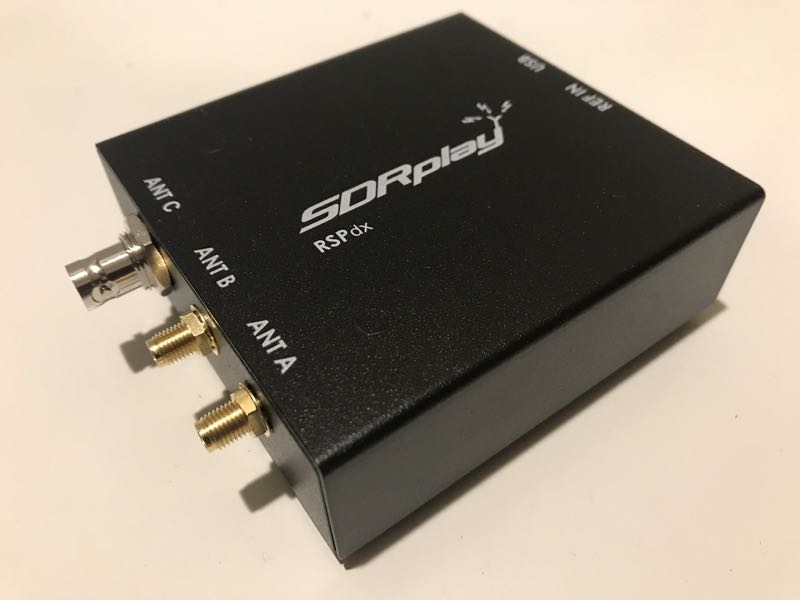
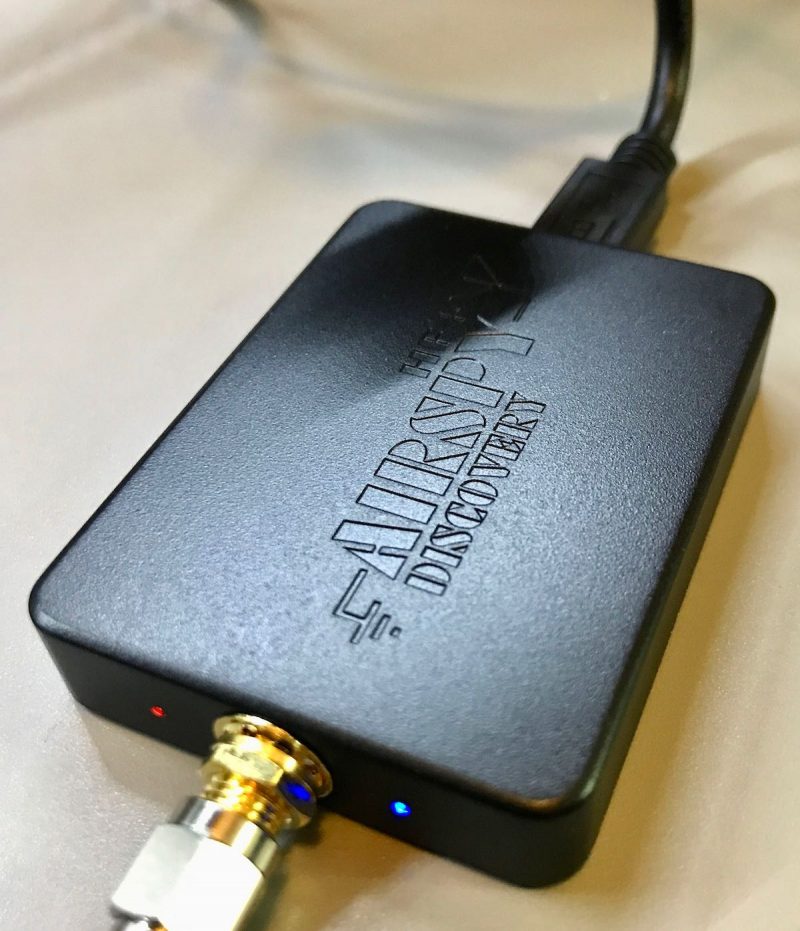
The HF+ Discovery was my choice receiver for portable SDR DXing and the RSPdx when I wanted make wide bandwidth recordings and venture above VHF frequencies.
Home transceivers
Without a doubt the new Mission RGO One 50 watt HF transceiver got the most air time at home and a great deal of field time as well. It’s such a pleasure to use and is a proper performer to boot!
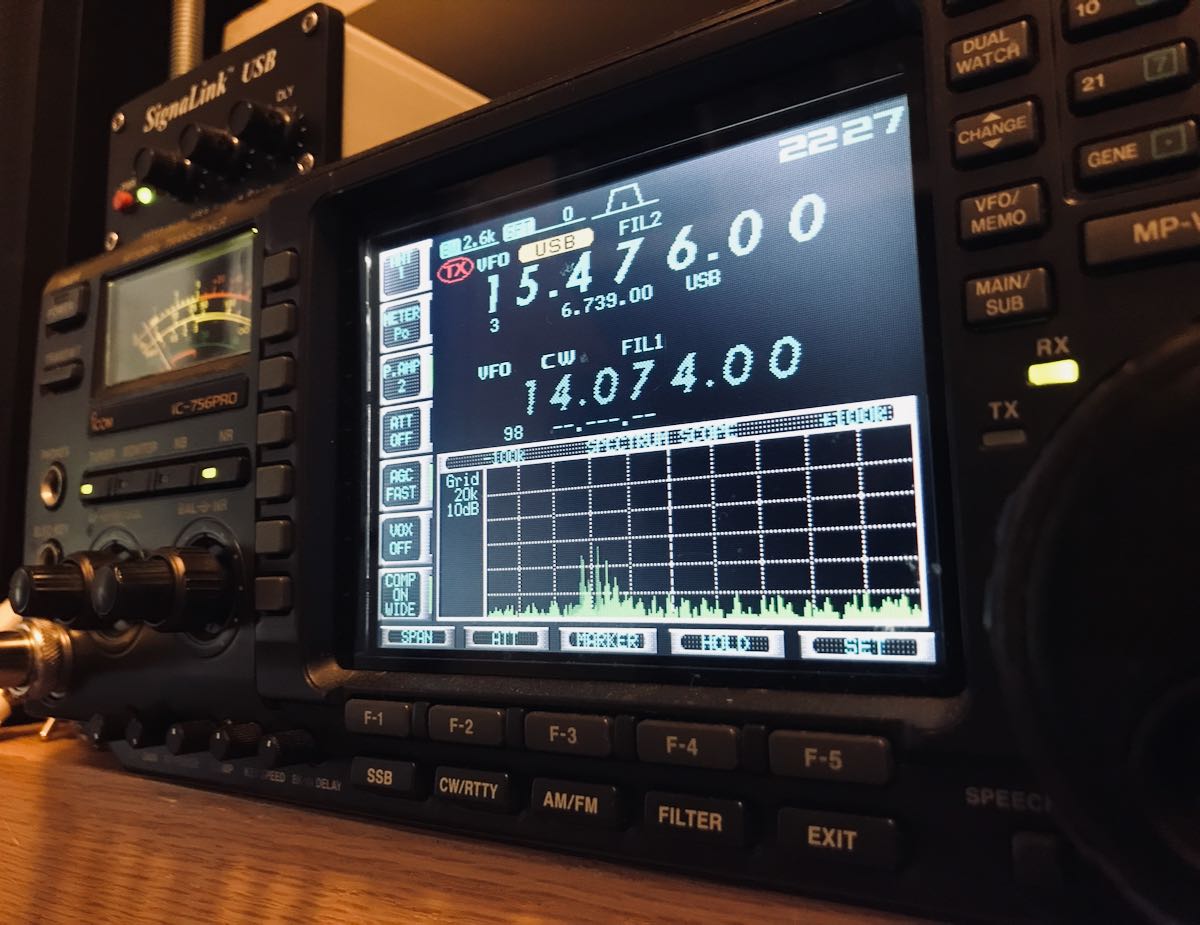
My new-to-me Icom IC-756 Pro, however, has become my always-connected, always-ready-to-pounce home 100W HF transceiver. It now lives above my computer monitor, so within easy reach. Although it’s capable of 100+ watts out, I rarely take it above 10 watts. The 756 Pro has helped me log hundreds of POTA parks and with it, I snagged a “Clean Sweep” and both bonus stations during the annual 13 Colonies event.
Field transceivers
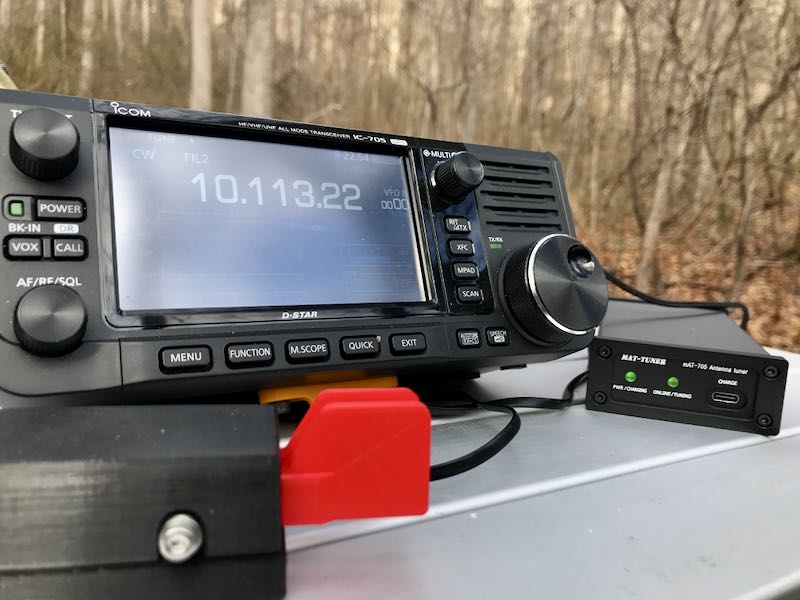
The new Icom IC-705 has become one of my favorite portable transceivers. Not only is it the most full-featured transceiver I’ve ever owned, but it’s also a brillant SWLing broadcast receiver. With built-in audio recording, it’s a fabulous field radio.
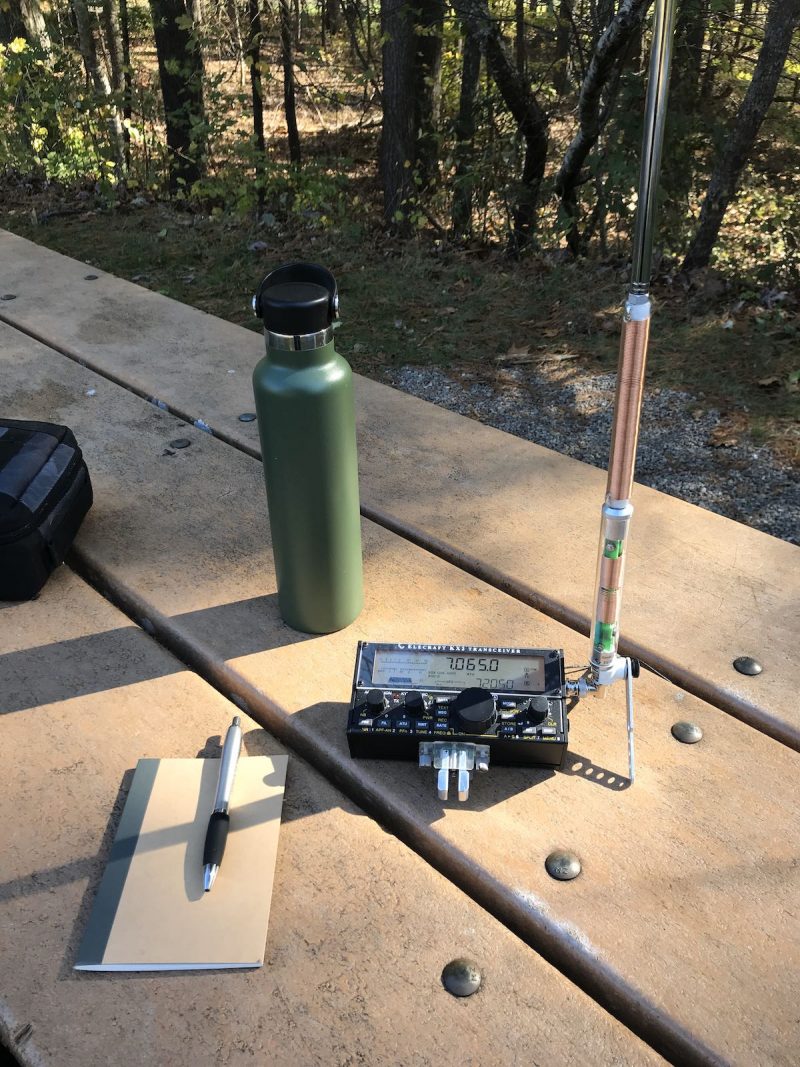
Still, the Elecraft KX2 remains my choice field radio for its portability, versatility and incredibly compact size. This year, in particular, I’ve had a blast pairing the KX2 with the super-portable Elecraft AX1 antenna for quick field activations. I’ve posted a few field reports on QRPer.com and also a real-time video of an impromptu POTA activation with this combo:
How about you?
What radios did use use the most this year and why? Did you purchase a new radio this year? Have you ventured into the closet, dusted off a vintage radio and put it on the air?
Here are my thanks to members of the Amateur Radio community and The News-Record & Sentinel for remembering the legacy of Hammarlund Manufacturing Company Incorporated. It is good to know that this part of our radio history is valued and preserved. I loved the newspaper article!
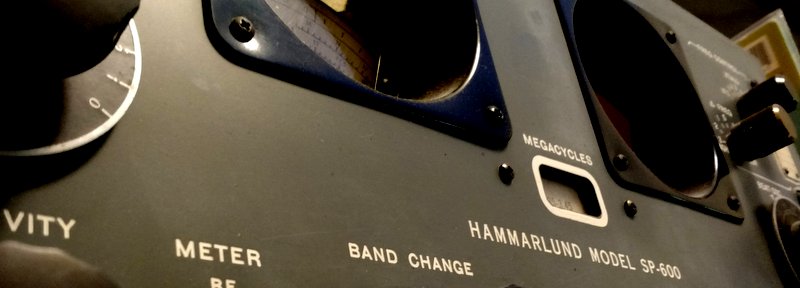
I have a few vintage Hammarlund radios including two Super-Pro models. The SP-600-JX-21 is one of my daily drivers. This relatively late production SP-600 is in stock condition with the exception of a half dozen electrolytic capacitors that I replaced mostly in the power supply. By the time this SP-600 was built in 1957 Hammarlund had replaced the short-lived black beauty electrolytes with ceramic disc capacitors. Like military and industrial users I upgraded the original nickel plated tube shields with IERC heat dissipating tube shields where possible. I also installed vintage GE No. 1847 long-life incandescent bulbs as direct replacements for the brighter (too bright, for me) No. 47 dial lamps.
Here are my two most recent reception videos of the SP-600. The first features reception of Radio National da Amazonia and the second is a brief operating demo of the SP-600. The loudspeaker used in both videos is a full-range vintage Jensen 10? with matching transformer from the 1950’s instead of a communications range speaker typically used with these radios. This makes a big difference when listening to broadcasts.
This old Hammarlund is still working pretty well.
RN da Amazonia
SP-600 operating demo
Wow! Thank you for sharing this, Dan!
I used to own an SP-600 myself and I do miss it. The only reason I sold it is I was struggling to find a spot in my very compact shack where I could keep it on the air as a daily driver, yet still have enough room to bring new radios and accessories into the shack for evaluation. Moving it around all of the time (especially higher on my radio shelves) was incredibly difficult as she’s a hefty girl indeed! I ended up selling the ‘600 to a good friend for a song. That’s okay because like you, I know he’ll keep her in prime operating condition and I can even pop by to visit when I wish! I do miss having the ‘600 in the shack, though. It was truly a champion MW receiver as well!
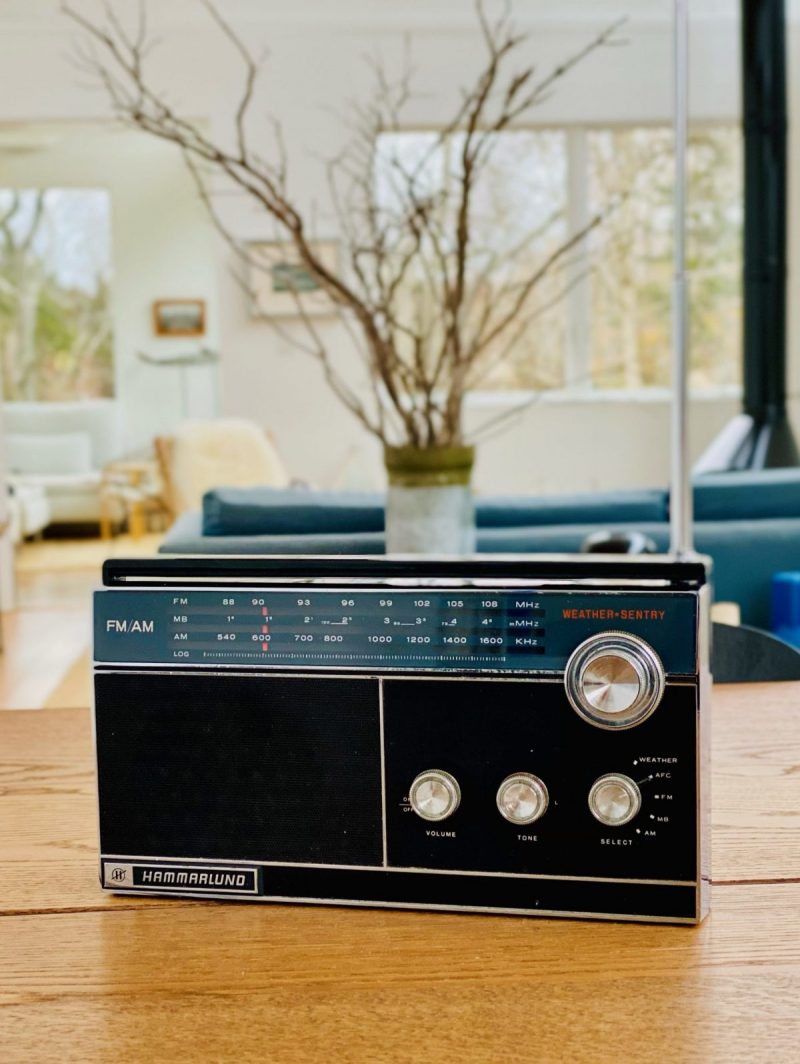
Many thanks to SWLing Post contributor, David Korchin, who needs a little advice regarding his recently restored Hammarlund HR-10:
After doing a heart transplant on my Hammarlund HR-10 Weather Sentry multi band receiver (I found a rough user on eBay and swapped out the chassis into my unspoiled case) the rig is running to spec; MW is very strong with that long bar antenna, the FM+AFC is terrific , and I’ve been sandbagging 75-80 m hams in their AM QSO’s. But the Weather band is fixed reception at 162.550 MHz—that works in New York City but the NOOA stations out here in easternmost Suffolk County NY use different frequencies. I’m wondering if the radio can be adjusted to another frequency? Or the crystal swapped?
Any ideas would be appreciated!
Please comment if you can help David sort out how he might add or modify the HR-10’s weather frequency!