Shortwave listening and everything radio including reviews, broadcasting, ham radio, field operation, DXing, maker kits, travel, emergency gear, events, and more
Although it turns out a number of SWLing Post readers were familiar with Ocean Digital and had purchased some of their radios, I hadn’t heard of them until an SWLing Post contributor encouraged the company to contact me.
I must say: all of my communications with Ocean Digital have been very positive and the company has also been very receptive to my frank feedback. All good things.
Ocean Digital reached out to me last month and asked if I would like to test their WR-23D portable radio. Why not? They dispatched on immediately from their Amazon stock here in the USA.
In the spirit of full disclosure, Ocean Digital sent this review sample to me at no cost and as soon as this review has been published (as in, right now), I’m sending it to one of our SWLing Post Patreon supporters I pick at random.
Initial impressions
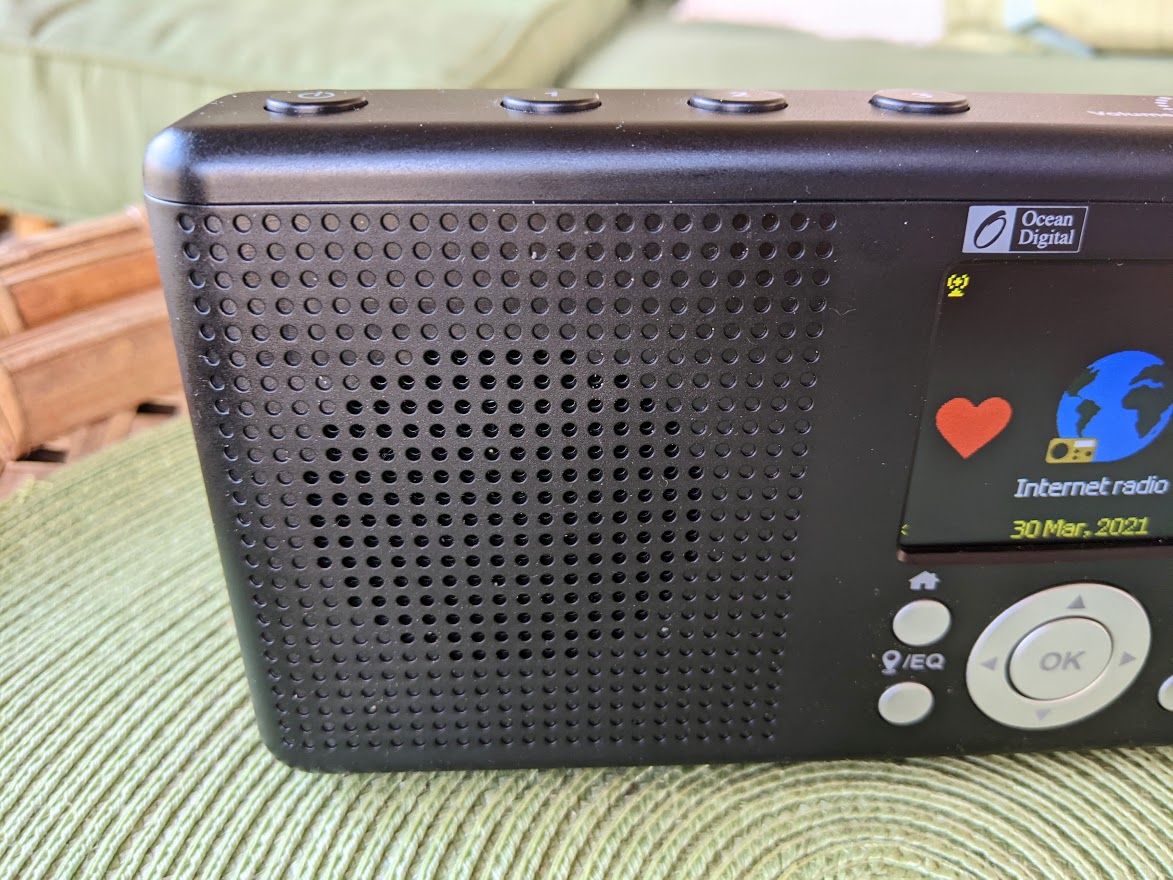
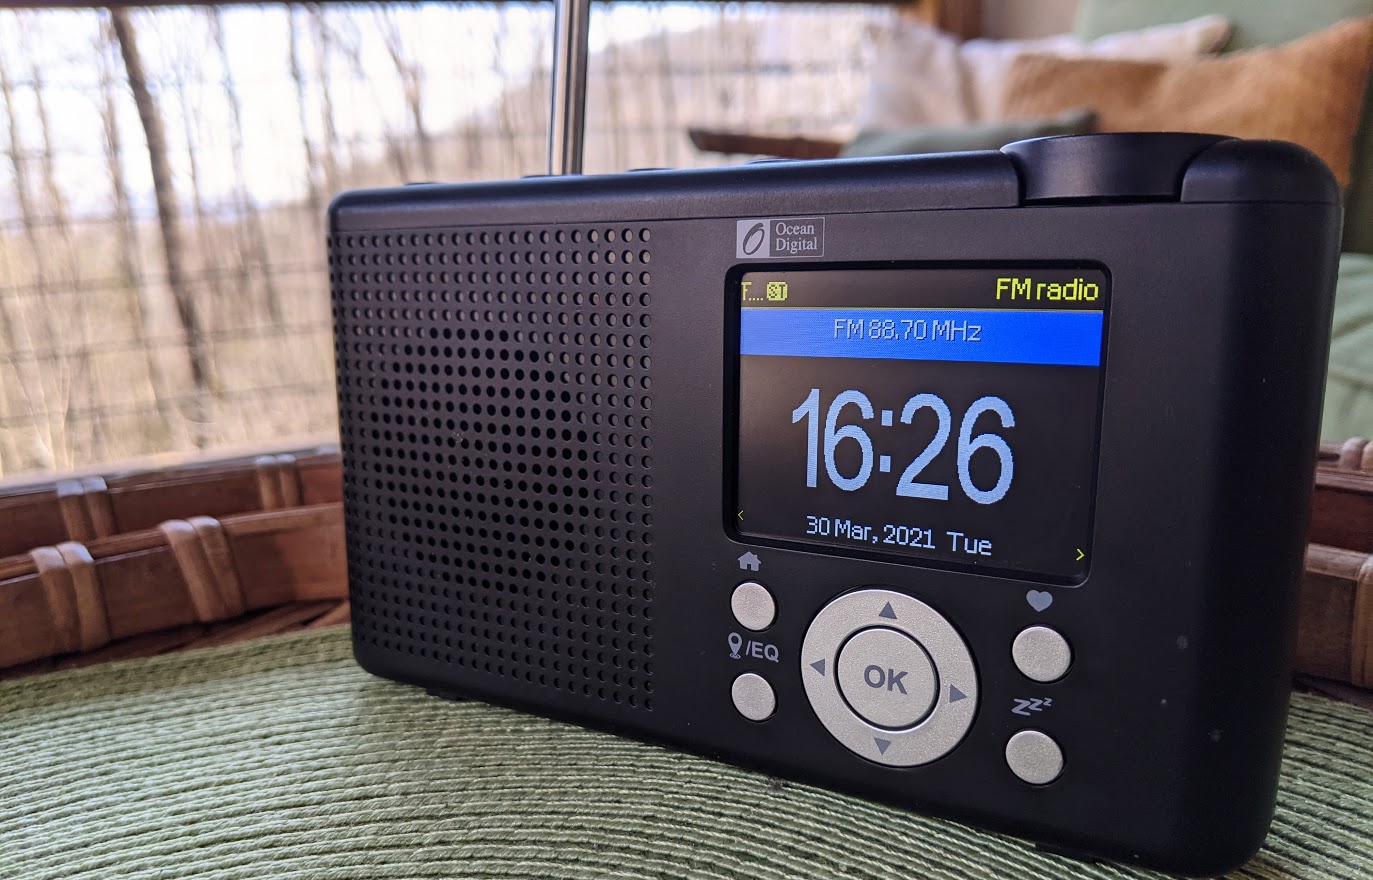
The Ocean Digital WR-23D sports an ABS plastic body that feels very solid in the hand. Indeed, some shortwave portable manufacturers should take note–the ABS structure is so solid, there’s no give when I press into the middle of the speaker grill, for example. I feel like this radio would survive falling off of a table or shelf with no problems.
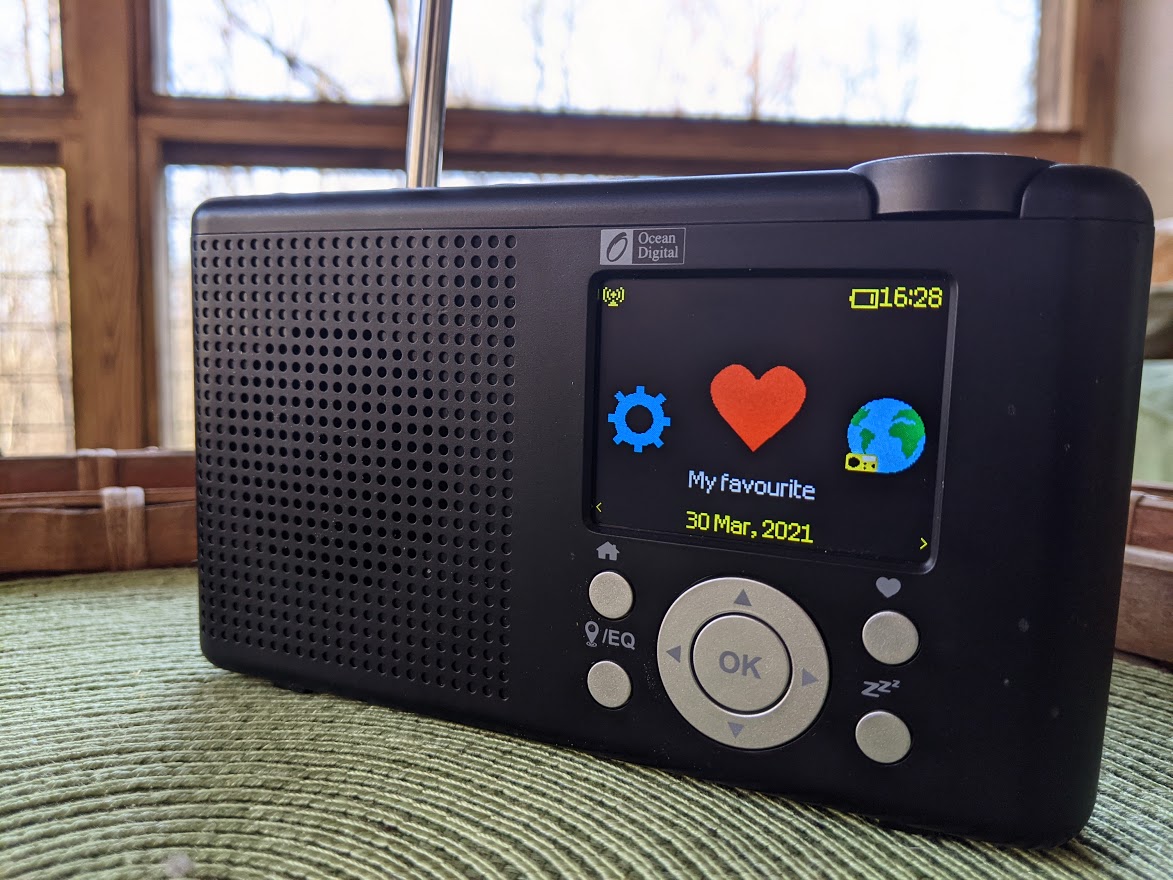
The backlit 2.4″ color display is very easy to read with crisp graphics, text, and ample contrast.
The top of the radio features a power button and three dedicated memory preset buttons. The volume control is also mounted on the top of the radio and protrudes out of the front slightly so your thumb can move it.
On the front of the radio, there are dedicated buttons for the Home screen, EQ/Local button, Favorites, and Sleep Timer.
In the center, there’s a circular navigation control and selection button.
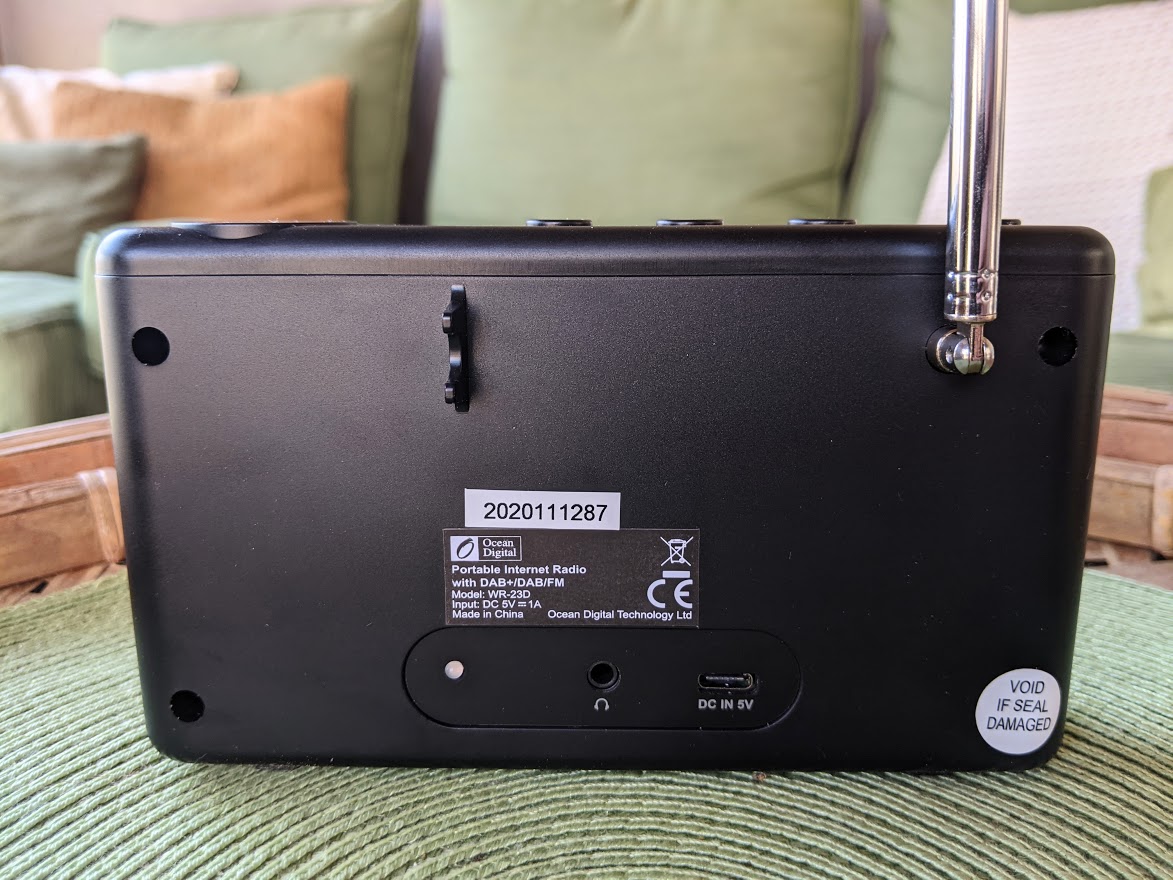
On the back of the unit, you’ll find the telescoping whip antenna for FM, DAB/DAB+, an LED indicator for charging, a 3.5mm earphone jack, and (yes!) a USB-C charging port. I’m so happy to see a USB-C port rather than the older Micro USB variety.
Sound
The front-facing speaker delivers balanced audio. There has obviously been some attention given to the speaker enclosure because it produces a bit more bass than I would have anticipated. There are 12 EQ presets you can use to tailor the audio as well. The WR-3D is not an audio powerhouse–in fact, the audio level stops short of allowing the speaker to splatter–do don’t expect a “boom box” response.
For listening to music or voice in your office, bedroom, or living room? Yeah, it’ll work a charm!
Portability
What I love about these Ocean Digital units is that they have a built-in rechargeable battery.
In my household, this is huge.
I often carry my WiFi radios around the house, moving from the kitchen, to my office, to outdoors near the wood shed (it’s the time of year I start splitting firewood again!).
I’ve found that not only does the battery power the WR-23D for many hours at a time, but the WiFi receiver in the unit is also robust enough that the radio can communicate with our router outside the house. With that said, the WiFi reception is not as good as it is with the recently reviewed CC WiFi 3 which actually sports an external WiFi RX antenna. Then again, the CCWiFi 3 doesn’t have a rechargeable battery either.
Internet Radio
The Ocean Digital WR-23D uses the Skytune radio station aggregator to search for Internet radio station streams.
In short: I like Skytune. It’s easy to search, they’ll add streams if they’re missing any, and it’s well-organized. Instead of reviewing the aggregator again, I’ll point you to the Ocean Digital WR-26 review for more detail as the navigation is identical other than the WR-23D has a nice color screen to display information.
Of course, I’m sure a number of readers have been put off by the whole idea of a dedicated Internet appliance for listening to radio in the wake of Reciva’s announced closure. For more on this topic, I’d strongly encourage you to read my thoughts in the CC WiFi 3 review (note that the CC WiFi 3 also uses the Skytune aggregator).
On Internet appliances like the WR-23D, one does worry about WiFi radio functionality failing if the station aggregator disappears. We recently posted a way you can hack some Grace Digital and C.Crane radios that use Reciva.
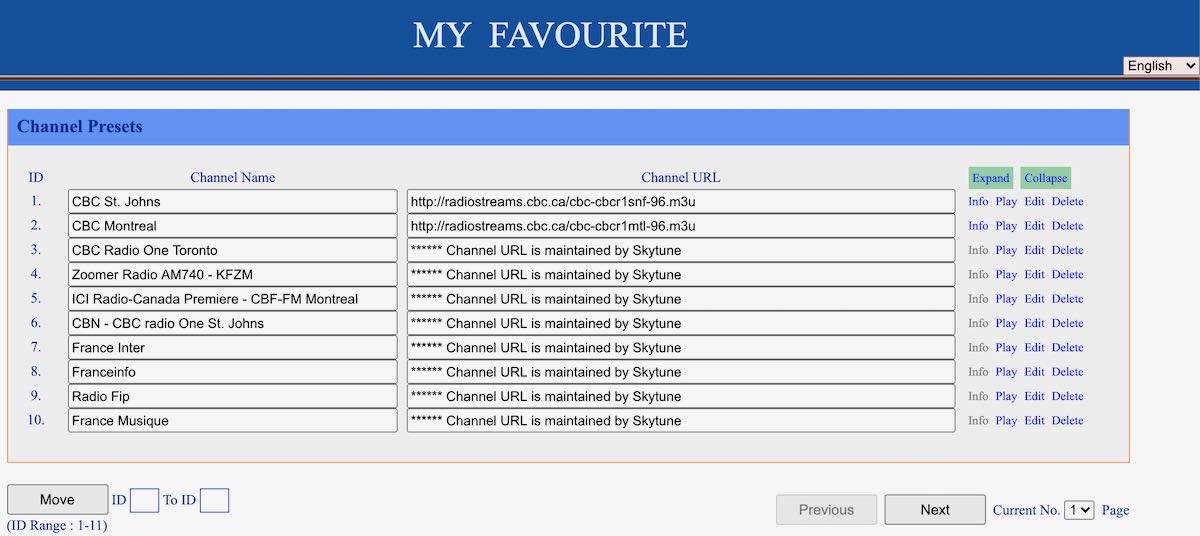
In the case of the WR-23D, WR-26, and CC WiFi 3 (basically all of the Skytune receivers I’ve reviewed) you can actually program your favorite radio stations manually. In fact, it’s very easy. You simply find the radio’s IP address on your network (the manual describes how to find this in the Configuration menu selection). Then, enter the radio’s IP address in a browser on a computer or device that is connected to the same WiFi network. You’ll get a window that looks like this where you can add your own streams, organize memories, and even perform basic control of the radio:
But, again, if the whole idea of an aggregator-tied device like the WR-23D is unappealing, I get it. You might simply pair your smartphone or tablet with a Bluetooth speaker and use a system like Radio Garden or TuneIn to cruise the world of online radio stations.
Bluetooth
Speaking of Bluetooth speaker, yes, the WR-23D is one of those, too! Simply select “Bluetooth” from the home menu and pair it with your favorite device. Couldn’t be easier!
FM radio
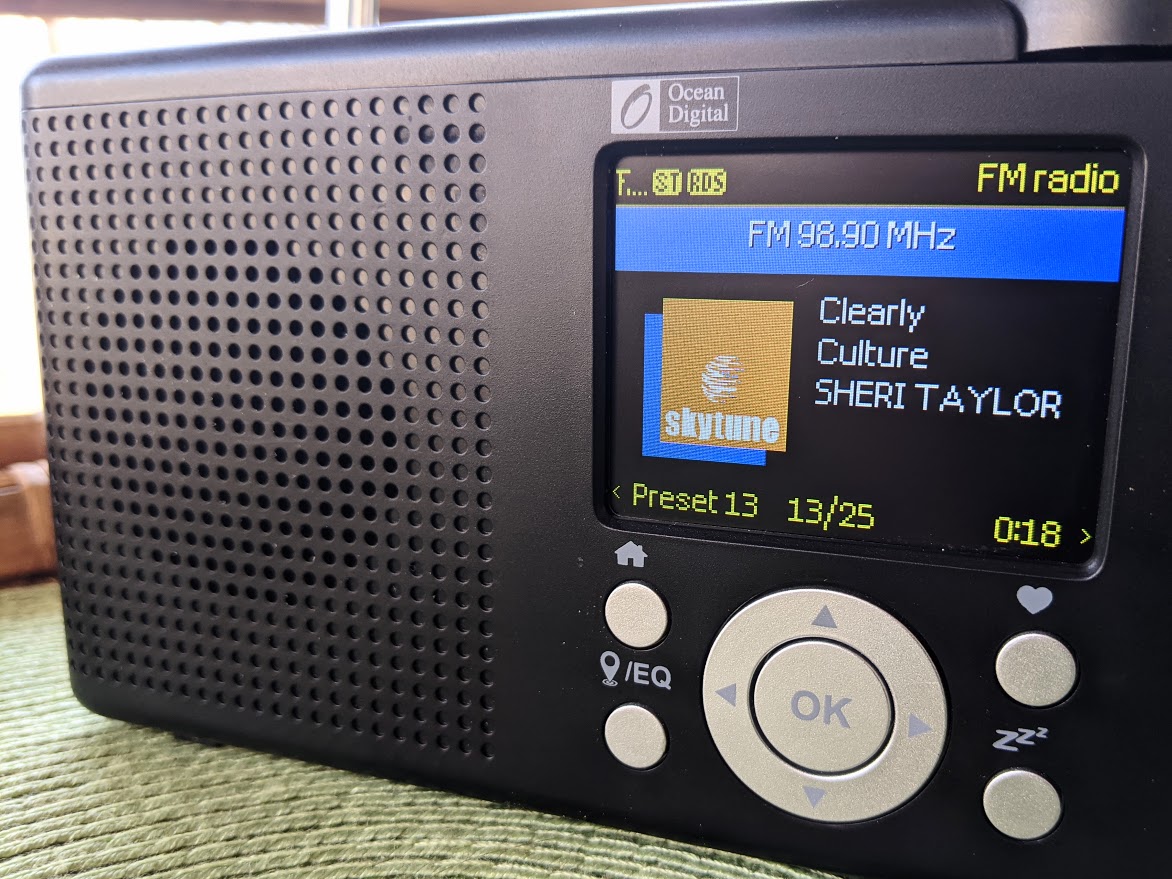
The WR-23D has a very capable FM radio. I had it scan my local FM dial and it automatically picked up all of the stations I would have expected. The radio has both auto and manual tuning.
In addition, the WR-23D displays RDS information on the screen. This is a feature I love especially when travelling as it helps me ID the station I’m tuned to.
DAB/DAB+
Unfortunately, we have no DAB/DAB+ stations in the US, so I was unable to test this functionality.
Summary
As I mentioned, I really appreciate the matte finish ABS chassis. I like to know that my portables can survive a fall.
I’ve been using the WR-23D here at SWLing Post HQ for about one month and only have a few minor/personal complaints. For example, I wish the headphone jack was on the side of the radio instead of the back. Also, I wish the telescoping whip antenna fit into a recess on the chassis rather than being fully mounted on the outside. I would like to see a fold out tilt stand on the back of the unit (I’ve actually used the antenna to prop this radio at an angle, but that’s not ideal).
If you’re looking for a truly portable WiFi radio and Bluetooth speaker with a proper FM and DAB/DAB+ receiver the Ocean Digital WR-23D is a solid choice. Amazon’s current price is $79.99 US with shipping and free returns–I feel like this is a value for all this radio has to offer.
I can say this: the SWLing Post Patron who wins this WR-23D will really enjoy it! I have.
Many thanks to SWLing Post contributor, Nick Booras, who writes:
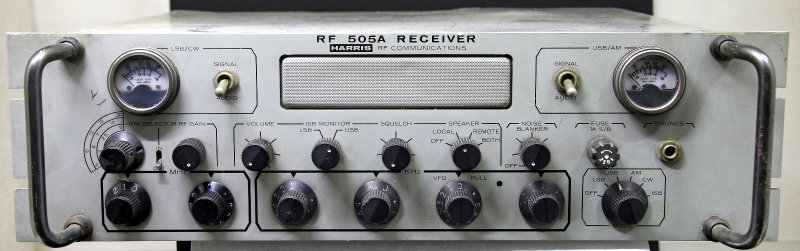
I just picked up a Harris 505A and I made a couple videos your viewers might like.
This radio is extremely sensitive as you can see in the comparison videos. I am very lucky to have picked it up. I will add that in the comparison to the Kenwood TS890 I didn’t try the 15 kHz filter on video. I did try it afterwards and I was surprised to receive the weak 6.085 signal with similar results to the 505. I thought for sure that that huge width would only let in more noise but I was wrong. I learned something new! But the 505A is still a super sweet machine.
Thank you for sharing this, Nick! What a wonderful addition to your radio collection. I’ve always loved the incredibly simple design of the 505A and have assumed it would have a very low noise floor.
Many thanks to SWLing Post contributor, Mark Hirst, who shares the following guest post:
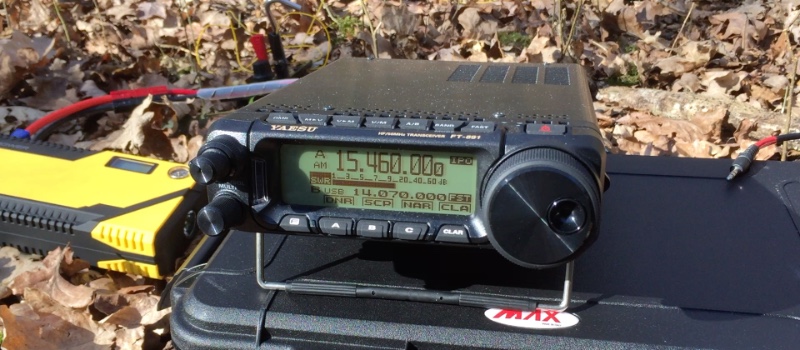
Using the Yaesu FT-891 for SWLing
by Mark Hirst
Woodland Operation in North Hampshire
Introduction
While I have a small collection of portable shortwave radios for outdoor listening, I’ve been looking to fill a gap in my amateur radio lineup for a while. Outdoor operation has become important in recent years as solar cycle conditions deteriorated along with rising levels of QRM in urban neighbourhoods. The ICOM IC–7200 with Wellbrook loop stays at home fighting a losing battle with PLA noise, while the very portable FT–817ND does occasional data modes contacts and outdoor listening. Somewhere in the middle, the FT–891 promised to provide a modern and more powerful data modes station, a radio to take on holidays, needing external batteries, but portable enough for walks into the country side. Earlier this year, I bought one new from my local ham radio store, and what follows are my findings and observations so far on shortwave listening.
Audio Characteristics
I’ve accumulated hundreds of recordings of VOA Radiogram and Shortwave Radiogram since 2013, so a recent woodland expedition with the FT–891 was an opportunity to compare a recording made with it against those of other radios I’ve used.
The most striking difference is the lack of frequencies in the lower part of the audio spectrum along with a distinct cut off at around 5kHz.
This is easily visualised in the following comparison between the FT–891 and the Tecsun PL–680. Note the conspicuous pillar associated with MFSK32 from these Shortwave Radiogram broadcasts, and interfering RTTY on the FT–891 recording:
Audio Frequency Analysis
While this audio profile may not be to everyone’s taste, the extra sparkle yields voice audio that is clear and distinct. I find those low frequencies make the audio muddy and tiring to listen over long periods, so I’m quite happy with this.
When listening to speech based broadcasts through the top mounted speaker, the audio is also precise and intelligible, and provides more than enough volume.
You also have the option of connecting an external speaker or headphones to a socket on the side of the radio. Be aware that the audio level is different for headphones, and is controlled by a small switch hidden behind the front panel. I expect people may go for one option such as headphones and then stick with it, rather than continually detaching the front of the radio and moving the delicate switch back and forth.
If you turn the volume right down you will hear a hiss, although its really only noticeable if you face the speaker directly and get close. Listening outdoors with the sounds of nature around you? It’ll be fine. There’s no way to avoid it with headphones of course, with forums suggesting inline resistors or high impedance headphones as solutions.
Audio recordings can of course be taken from the headphone socket, but you will get better results from the data port on the back. I use a UD04YA cable which provides 3.5mm audio in and audio out jacks, plus a USB cable to provide PTT functionality. It’s meant for data modes operation with the FT–817, but I have used it successfully with the FT–891 for PSK contacts using fldigi, eliminating the need for CAT control through a second cable to the radio’s USB port.
Customising for SWL
The advanced manual for the FT–891 helpfully provides a section called ‘Tools for Comfortable and Effective Reception’, so I began configuring the radio using the guidance there.
First up was re-configuring the front panel RF/Squelch knob to only control RF gain (Menu 05–05). I use the same configuration on my FT–817ND to dial back RF gain, allowing the AGC to pick up the slack.
Next was enabling the awkwardly named Insertion Point Optimisation (IPO) which switches out the pre-amplifier. It’s interesting to note that this setting can be associated with a stored memory channel, which became relevant later when I used CAT control to program some favourite frequencies.
The radio has an attenuator, although I’ve not found a need for it so far.
The AGC can be configured as Auto, Fast, Mid, and Slow. Since it is not a ‘set and forget’ setting like the RF control or IPO options, it might be a good candidate for assigning to one of the three user definable buttons below the LCD screen.
Audio can be fine tuned using four menu options (06–01 to 06–04) to control high and low frequency cutoff, but after some experimentation I have turned these options off.
As an aside, I found the LCD backlight, button illumination and TX/Busy lights too bright for indoor use, so dialed them back to their minimum values.
Listening Tools
The radio provides some additional tools as part of its IF DSP. The features of particular interest are Digital Noise Reduction (DNR), Noise Blanker, IF Notch Filter, Digital Notch Filter, and Narrow IF filter. Contour, IF Bandwidth, and IF Shift are not available in AM mode, and you must resort to SSB to get them. More about SSB in a moment.
Out of this wide array of options, I’ve only explored Digital Noise Reduction and the Narrow IF filter so far, as they offer fairly immediate gains without too much configuration.
Narrow filter simply reduces the total IF bandwidth from 9kHz to 6kHz, which gives some immediate relief to higher frequency noise. In tougher conditions at home tackling QRM, the harsher sound it causes has sometimes been counter productive.
At the outset, it’s obvious that the DNR capability of the FT–891 is a powerful feature. Rather than providing a level of processing that varies from a little to a lot, the radio provides 15 different ‘algorithms’ which can be selected for best results. This means you will tweak the DNR setting to address signals on a case by case basis.
Comparing it with the IF noise reduction of my ICOM IC–7200, the ICOM has a scale of diminishing returns as the DSP level is turned up, whereas the FT–891 seems to start strong and it’s more about picking the algorithm that sounds best.
After testing the DNR on AM broadcast stations away from the noise at home, voice audio sounds distant and words can be clipped, which is fine for SSB amateur radio contacts, but makes me think it’s not a feature of first resort when trying to improve broadcast reception. In those circumstances, the narrow filter might be a better option.
The Trials of Single Side Band
On the matter of SSB and using it to combat adjacent or co-channel signals, the radio offers a single SSB option in the mode menu, picking USB or LSB for you automatically based on the current band. When tackling broadcast band interference however, you want the option to go in either direction. The radio also changes the current frequency by 700Hz when SSB is selected, which then has to be corrected with the main dial.
You would begin by switching to SSB mode by pressing and holding the band button. If you’re lucky, the default setting is the one you want.
If it isn’t, activate the settings menu with a long press of the F key, go to the menu option SSB BFO (11–07), select it and use the multi-function knob to change the mode away from Auto to LSB or USB.
As you are doing this, the VFO will change to LSB or USB too. Leave the setting on the option that suits your needs.
If you exit the menu option without saving (pressing F), the mode will remain changed, but the override is not saved. This can be a useful quirk because next time you turn the radio on, it will be back in auto mode.
If you commit the override by pushing the multi-function knob instead, the radio will stay in manual mode until you remember to return to the menu and restore automatic behaviour again.
It’s a needlessly complicated system, as I discovered recently while recording another Shortwave Radiogram broadcast. Even after testing the procedure previously for this article, the radio was determined to stay in LSB no matter what.
Memory Programming
Since the radio has no keyboard for direct frequency input, an early priority for shortwave listening was to program some of the 99 memories available. My plan was to have some favourite broadcast stations, along with WX, Volmet, GMDSS, and some data mode frequencies. To handle ad-hoc stations however, I wanted a way of moving quickly across the main shortwave bands without excessive use of the main tuning dial or multi-function knob.
Taking the official definitions of the broadcast bands between 60m and 16m, and combining those with frequency schedules, I came up with a series of frequencies 150kHz apart across each of those bands, guaranteeing that no broadcast was more than 150kHz away.
The combined list of favourites and the 150kHz stepping stone frequencies resulted in 70 memory channels in total. As I wanted to apply alphanumeric tags to those channels, and didn’t relish the prospect of entering them manually, my next port of call was the CAT control manual to see how those memories could be set programmatically.
While there is commercial software available for the FT–891, I only needed to set up the memory channels, so decided to adapt some PowerShell I’d written for another radio, sending the necessary serial port commands to configure my list.
Now that is done, I can fast travel using the stepping stone memories to the closest point in a band, then use the fast mode of the main tuning dial to move quickly to my final destination.
The following table lists my current stepping stone channels in kHz:
60m
49m
41m
31m
25m
22m
19m
16m
4750
5900
7200
9400
11600
13570
15100
17480
4900
6050
7350
9550
11750
13720
15250
17630
5050
6200
7500
9700
11900
13870
15400
17780
7650
9850
12050
15550
17930
7800
15700
Memory Access
An obvious way to access the memories is to toggle memory channel mode with the V/M button, then cycle through the memories using the multi-function knob. Depending on your memory choices, you will hear relays clicking as the radio jumps back and forth between widely spaced frequencies and bands. You will also need a good memory of your memories, so you know which way to turn the multi-function knob.
An alternative and perhaps faster method is to press the M>V button. This brings up a multi-line listing of memories that can be scrolled through using the multi-function knob. Pressing the M>V button again copies the selected memory to the VFO and leaves you in VFO mode. This avoids the radio flipping across bands and the associated relay activity.
Although it is not documented, if you push the multi-function knob on a selected memory channel in the multi-line listing rather than using the M>V button, the selected memory is activated and the radio is left in memory channel mode displaying the memory tag.
Disabling Transmit
At the time of writing, I haven’t discovered a way of formally disabling transmit, and the minimum transmit power goes no lower than 5W. Since my main interests are around shortwave listening, utility stations and an occasional data mode QSO, I have not fitted the microphone to the radio. In that configuration at least, there is no danger of me manually transmitting into a receive antenna by accident.
Outdoor Power
Reports vary on the power consumption of the FT–891. It certainly isn’t as high as the 2.0A documented in the user guide.
While some sources claim values in the region of 1.0A, my power supply shows around 0.4A at 13.8V when receiving a typical HF broadcast. You will notice where some of that power goes quite quickly, as part of the radio gets warmer.
To save weight, my preferred power supply in the field is usually a lithium battery designed to jump start smaller engined cars. This versatile 12V battery also supplies 5V USB power to phones and tablets, and can even charge laptops.
In Conclusion
Control ergonomics and screen size are factors that can detract from shortwave listening on these kinds of radios, with smaller speakers and menu options for features normally at your fingertips.
Despite this, I’m happy with the audio, and I like the emphasis on mid-range frequencies in its audio spectrum. The digital noise reduction is impressive and can tackle significant QRM environments, but for outdoor listening may not be your first port of call.
Memory presets can make tuning less laborious, while assigning key listening tools to the customisable front panel buttons should reduce the need to access menus. I may consider defining some stations with known co-channel issues to memory with preset LSB and USB variations, to allow rapid responses to interference in future.
In good conditions, I suspect there is little difference between the FT–891 and FT–817ND for general listening. The FT–817ND has produced some of my best recordings of Shortwave Radiogram. The newer radio however brings many advanced tools to bear on more difficult signals, while its band scope and full sized VFO tuning dial enable desktop style shortwave exploration.
The ICOM IC–7200 is constrained by interference at home, biding its time for when the solar cycle swings back. When it’s been out on field days, it has always been a strong performer for broadcast listening. All the important controls are upfront, but is not a trivial thing to transport on foot. While the FT–891 has impressive DNR chops, I think I prefer the ability of the IC–7200 to apply noise reduction in incremental steps. Perhaps the algorithm approach will grow on me in time.
Any amateur radio operator using the FT–891 should have no trouble using it for shortwave listening. It attracts a lot of positive reviews for its ham radio capabilities, and it looks like those features carry across for listening to the world too.
An excellent review, Mark! Thank you for sharing.
The Yaesu FT-891 must be the most popular HF transceivers Yaesu sells today. So many of its users rave about its performance and audio characteristics. Mark, thank you for sharing your experience with the FT-891 as an SWL!
It sometimes seems that one of the biggest enemies of a radio enthusiast these days is RFI (radio frequency interference), which is to say, human-originated noise that infiltrates––and plagues––vast chunks of our radio spectrum.
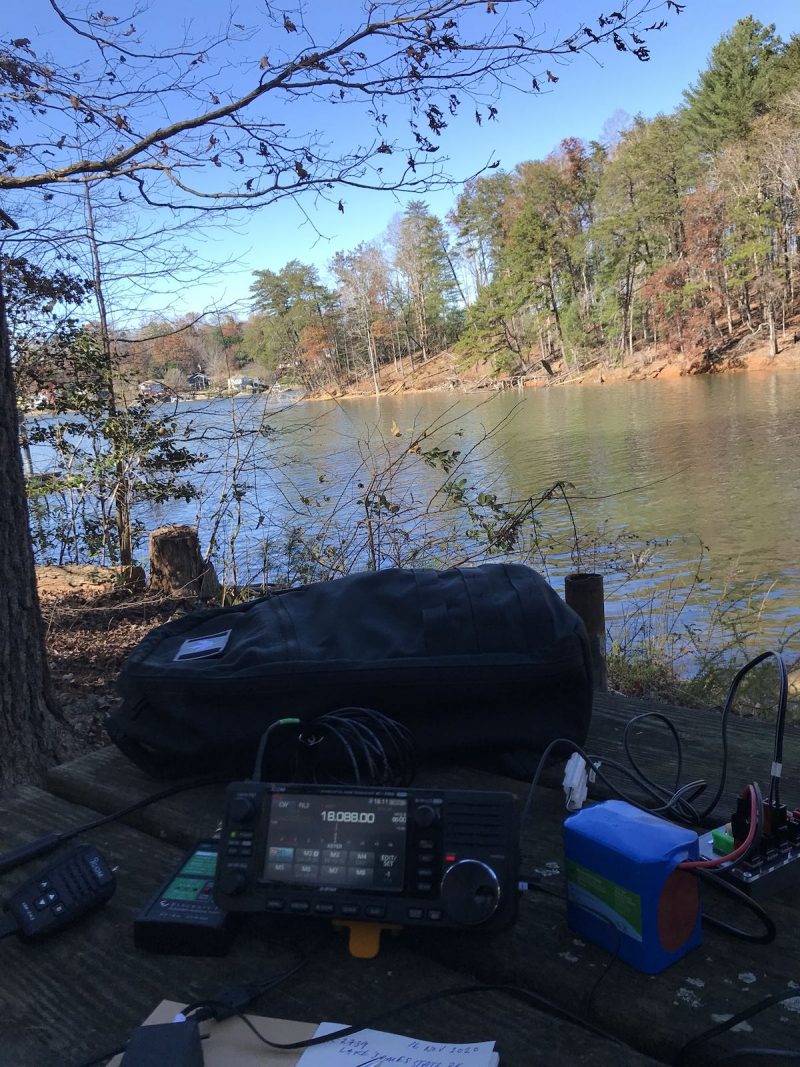
Yet I believe RFI has, in a sense, also managed to energize––and even mobilize––many radio enthusiasts. How? By drawing them out of their houses and shacks into the field––to a local park, lake, river, mountain, woodland, or beach––away from switching power supplies, light dimmers, street lights, and other RFI-spewing devices.
Shortwave and mediumwave broadcast listeners have it easy, comparatively speaking. They can simply grab a favorite portable receiver, perhaps an external antenna, then hit the field to enjoy the benefits of a low-noise environment. In that a portable receiver is something of a self-contained listening post, it’s incredibly easy to transport it anywhere you like.
Ham radio operators, on the other hand, need to pack more for field operations. At a minimum, they need a transceiver, an antenna, a power source, not to mention, a mic, key, and/or computing device for digital modes. Thankfully, technology has begun miniaturizing ham radio transceivers, making them more efficient in the use of battery power, and integrating a number of accessories within one unit.
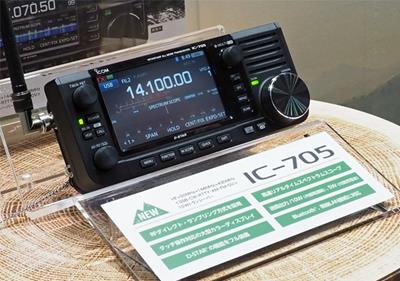
Photo from the 2019 Tokyo Ham Fair
Case in point: in 2019 at Tokyo’s Ham Fair, Icom announced their first QRP (low-power) radio in the better part of two decades: the Icom IC-705.
Introducing the Icom IC-705
It was love at first sight among fans of Icom when the 2019 announcement was made. Why? The instant thrill came courtesy of the IC-705’s resemblance––in miniature––to the IC-7300, one of Icom’s most popular transceivers of all time. Not only that, but the IC-705 sported even more features and a broader frequency range than the IC-7300. What wasn’t to love?
But of course, unlike the IC-7300, which can output 100 watts, the IC-705’s maximum output is just 10 watts with an external 12V power source, or 5 watts with the supplied Icom BP-272 Li-ion battery pack. Nevertheless, enthusiasts who love field radio––this article’s writer being among them––were very pleased to see Icom design a flagship QRP radio that could take some portable operators to the next level. Power was traded for portability, and for field operators, this was a reasonable trade.
And since, again, the IC-705 has even more features, modes, and frequency range than the venerable IC-7300, I felt it important to note them up front. Here are a few of its most notable features, many of which are not available on its bulkier predecessor:
VHF and UHF multimode operation
D-Star mode
Built-in GPS
Built-in Wifi connectivity
Built-in Bluetooth connectivity
Portable size
Battery power
The receiver design is similar to the IC-7300 below 25 MHz in that it provides a direct conversion. Above 25 MHz, however, it operates as a superheterodyne receiver. While the user would never know this in operation, it’s a clever way for Icom to keep costs down on such a wideband radio.
At time of publishing, there are no other portable transceivers that sport all of the features of the Icom IC-705. It has, in a sense, carved out its very own market niche…At least for now.
I’ve owned the IC-705 since late September 2020, and I still haven’t fully explored this radio’s remarkable capabilities. It’s really a marvel of ham radio technology, and I’m having fun exploring what it can do.
One conspicuous omission
Let’s go ahead and address this promptly. The IC-705 does have one glaring shortcoming. It lacks one feature that is standard on the larger 100-watt IC-7300: an internal antenna tuner (ATU).
To be frank, I was a little surprised that the IC-705 didn’t include an internal ATU, since it otherwise sports so many, many features. Not having an internal ATU, like a number of other general coverage QRP transceivers in its class, definitely feels like a missed opportunity. With an ATU, the ‘705 would truly be in a class of its own.
I’m sure Icom either left the internal ATU out of the plan due to space limitations––perhaps wanting to keep the unit as compact as possible?––or possibly to keep the price down? I’m not sure. At release, the price was $1300 US, which is undoubtedly on the higher side of this market segment; at that price point, it might as well have included an ATU.
With that said, not having an internal ATU is still not a disqualifier for me. Why? Because I have a number of resonant antennas I can add on when in the field, a remote ATU at home, and a couple of portable external ATUs, as well. Yes, it would be helpful to have it built in––as on my Elecraft KX1, KX2, and KX3, or on the ($425) Xiegu G90––but for me it’s not a deal-breaker.
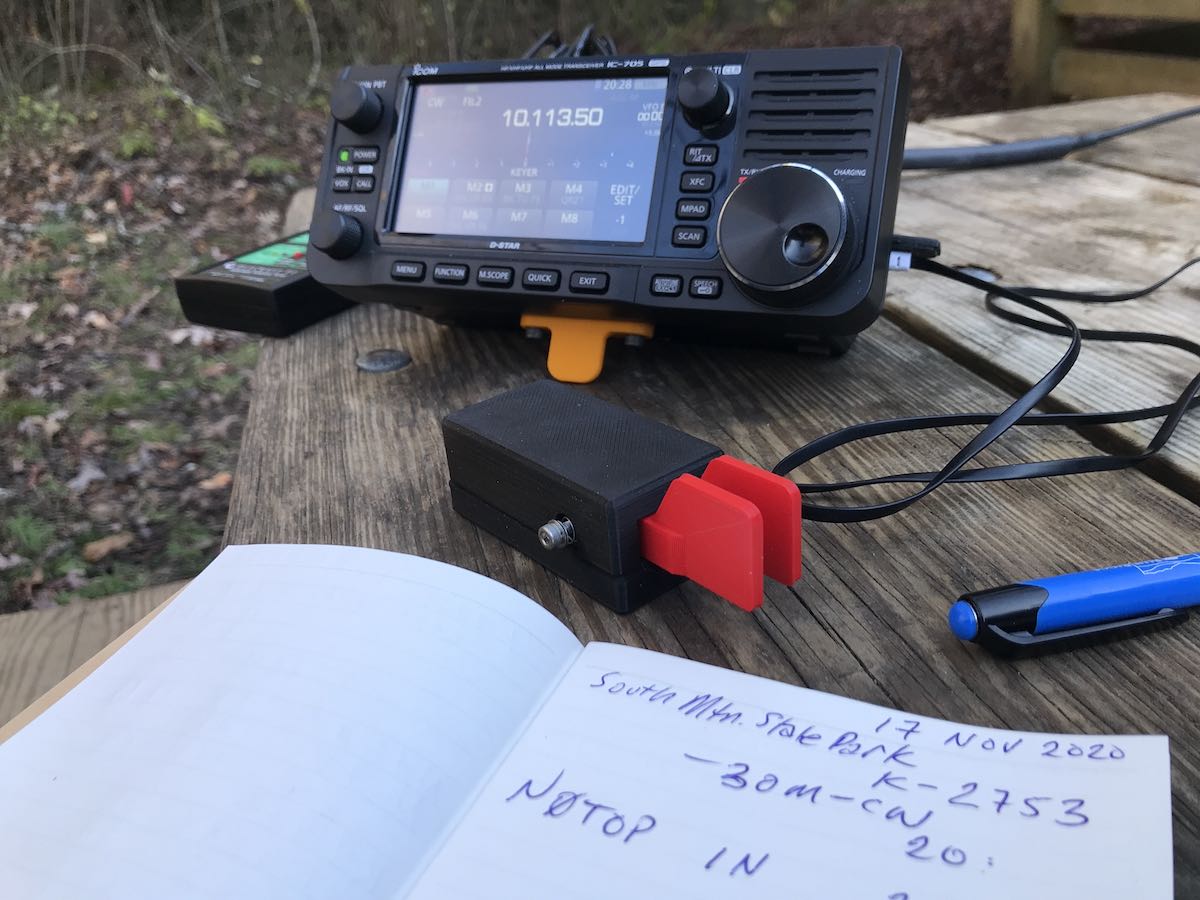
One other minor omission? A simple tilt stand or foot. I do wish Icom had included some sort of foot on the bottom of the IC-705 so that it could be propped up for a better angle of operation. Without a tilt stand or foot, the IC-705 rests flat on a surface, making its screen a bit awkward to view. Of course, a number of third-party tilt stands are available on the market. And if you have a 3D printer or access to one, you can find a wide variety of options to simply print at home. I printed this super simple tilt foot, which works brilliantly.
But why not include one, Icom?
My 3D printed tilt foot
But while the IC-705 lacks a tilt foot, it actually sports a number of connection points on the bottom, including a standard tripod mount. Thank you, Icom, for at least including that (other radio manufactures please take note)!
Initial impressions
Funny: the IC-705 is the first new transceiver I’ve purchased with a color box.
If you’ve ever owned or operated the Icom IC-7300, you already know how to operate many of the functions on the IC-705. The user interfaces on the touch screens are identical. Features that are unique to the IC-705 are easy to find and follow the same standard Icom user-interface workflow.
Having less front faceplate real estate, the IC-705 has less buttons than the IC-7300––about 11 less than its big brother, to be exact. However, the twin passband, gain, multi-function knob and encoder are in the same positions and layout as on the IC-7300.
And if you’ve never used an IC-7300 before, no worries: this is one of the more user-friendly interfaces you’ll find on a ham radio transceiver.
The build of the IC-705 is excellent. It’s not exactly hardened for the elements––there is no waterproof rating or dust rating, for example––but it gives the impression of a solid little radio, likely to withstand a bit of less-than-delicate handling. Yet even though it’s designed to be a portable field radio, I’ll admit that the front panel and especially the color touchscreen feel a little vulnerable. I do worry about damaging that touchscreen while the radio travels in my backpack.
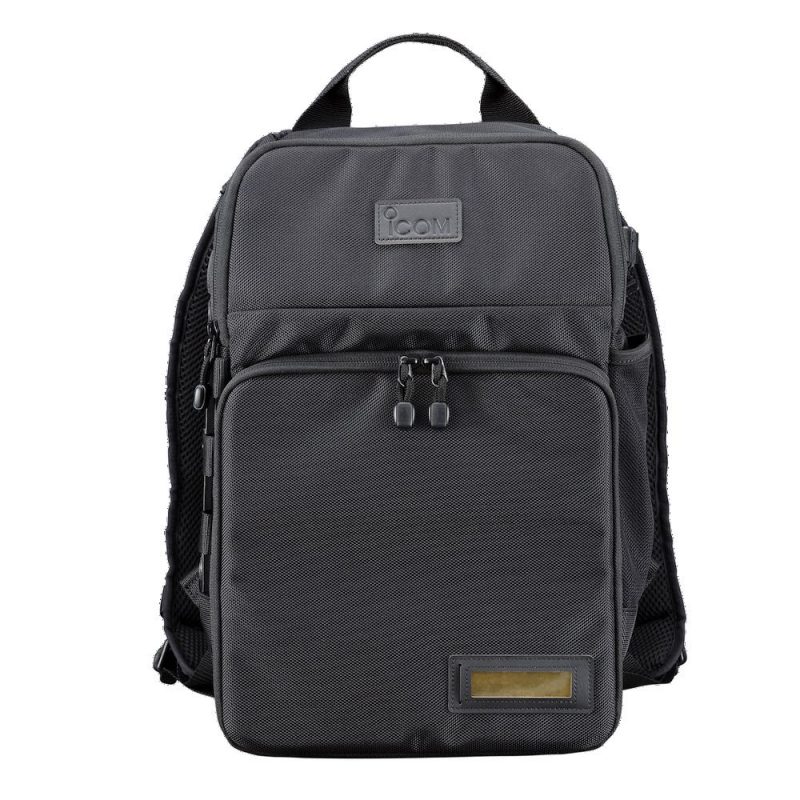
The Icom LC-192
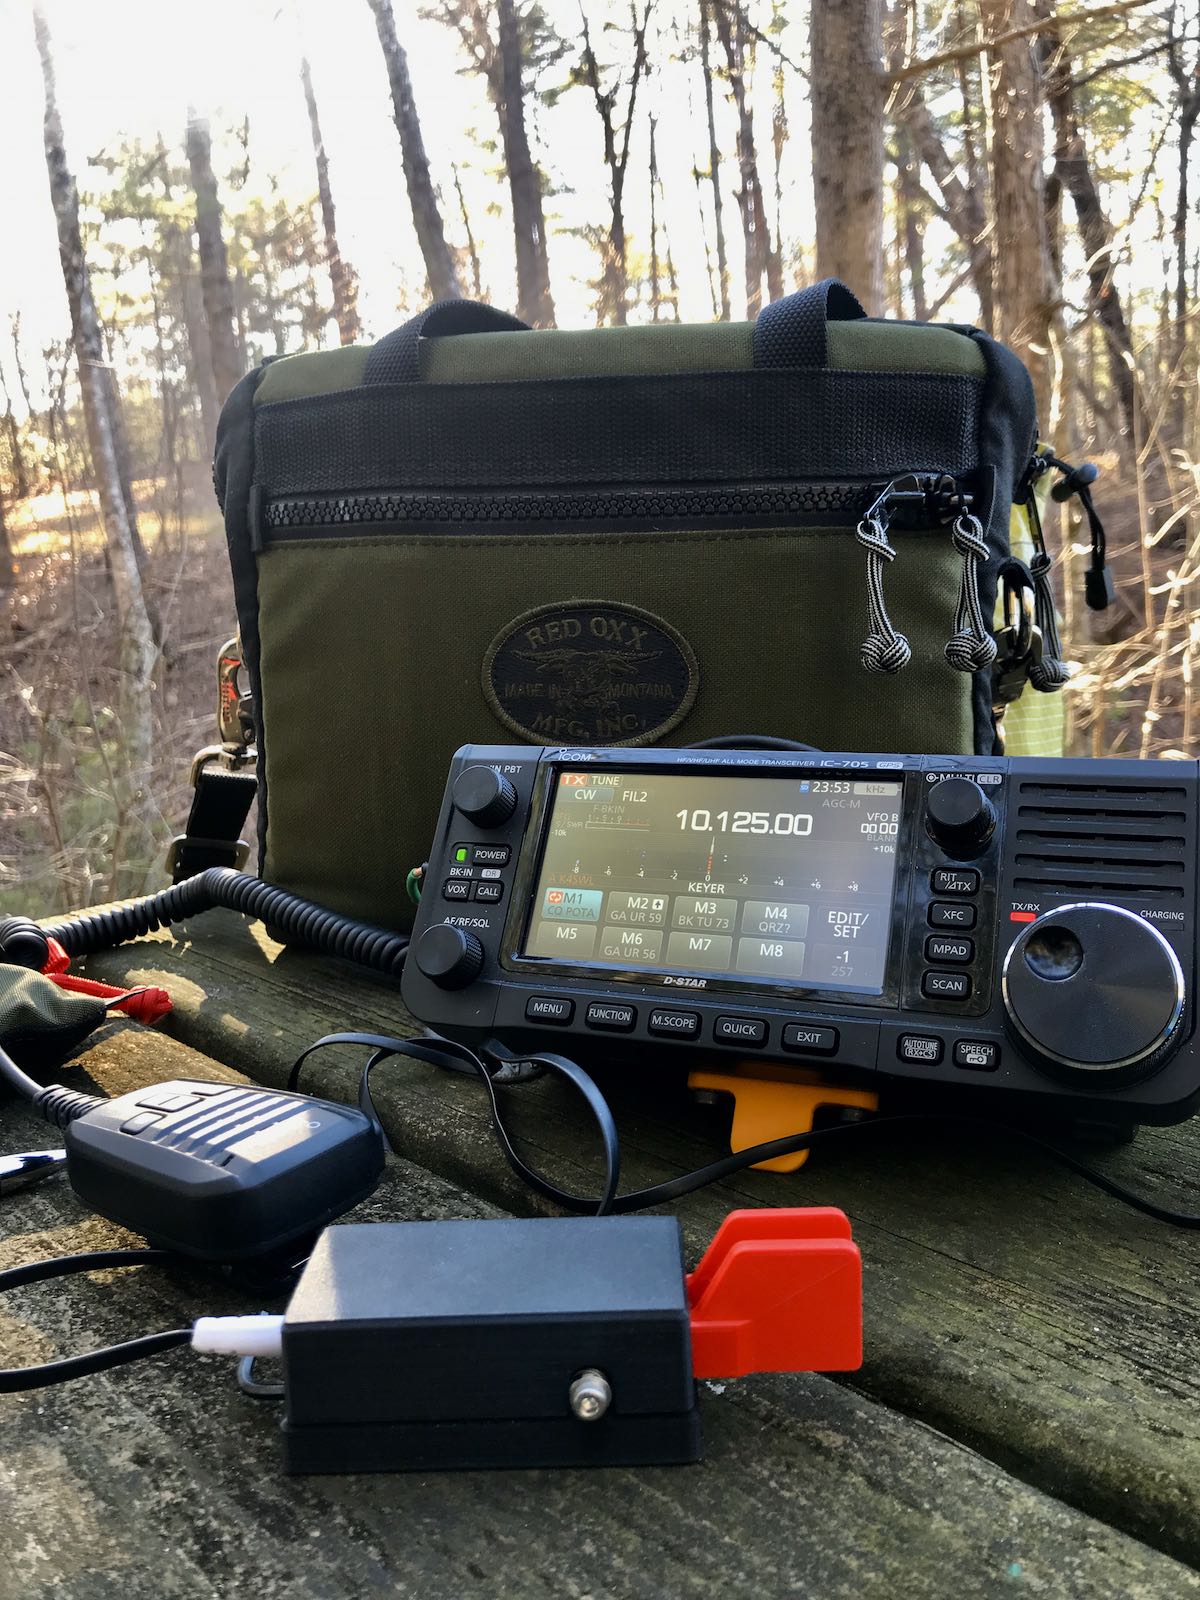
On the topic of backpacks, Icom released a custom backpack (the LC-192) specifically for the IC-705, Icom AH-705 ATU, antennas, and accessories. I did not consider purchasing this backpack, although I’m sure some operators would appreciate it, as it has dedicated compartments for supplies and the radio can be attached to the floor of the backpack’s top compartment. Again, I passed because I’m a bit of a pack fanatic and tend to grab gear that’s more tactical and weatherproof.
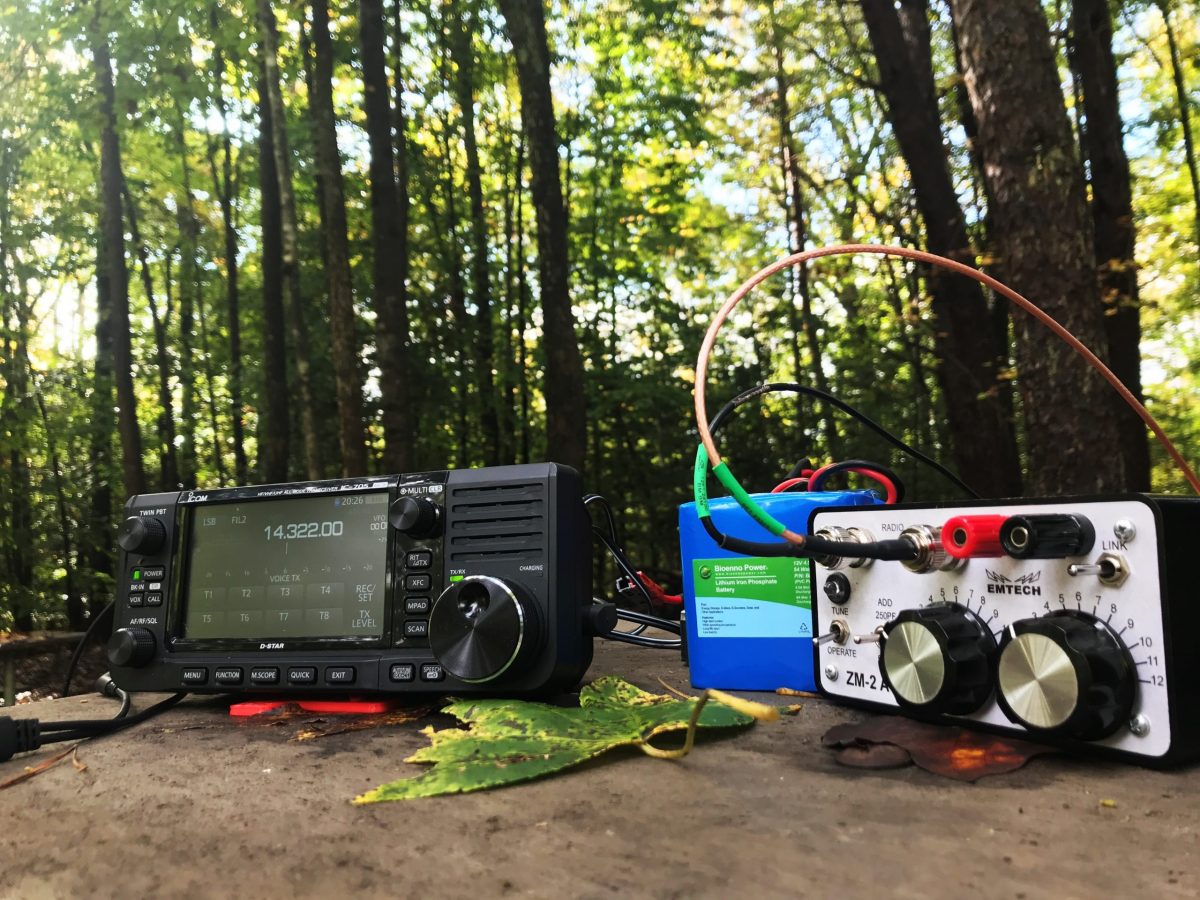
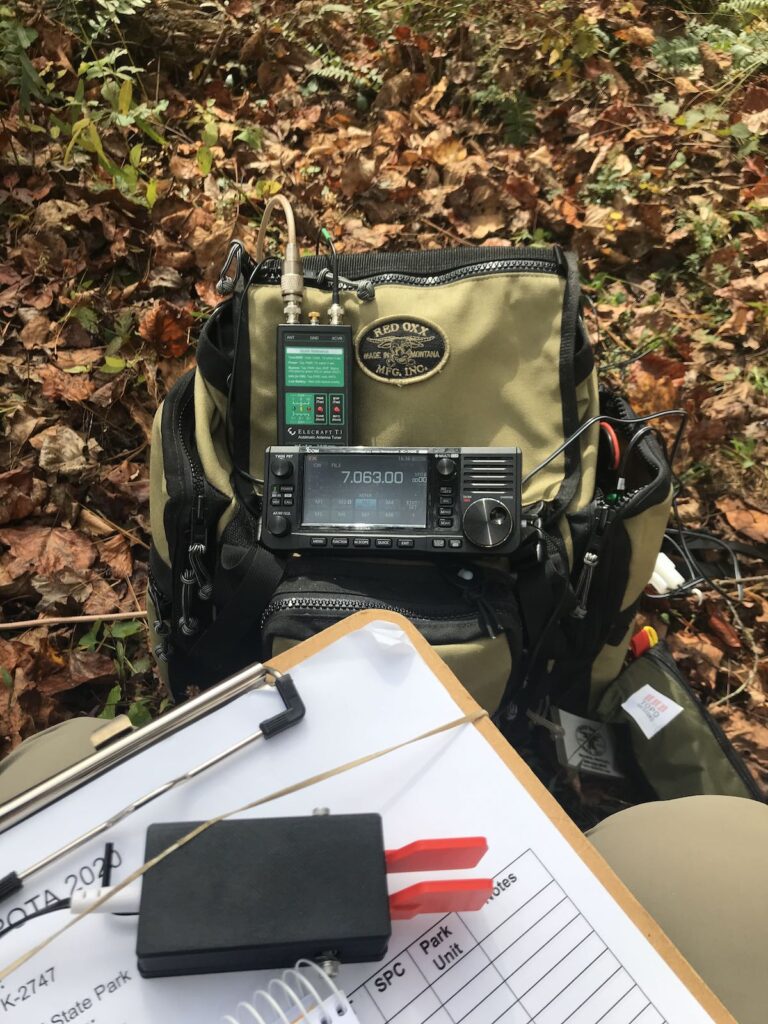
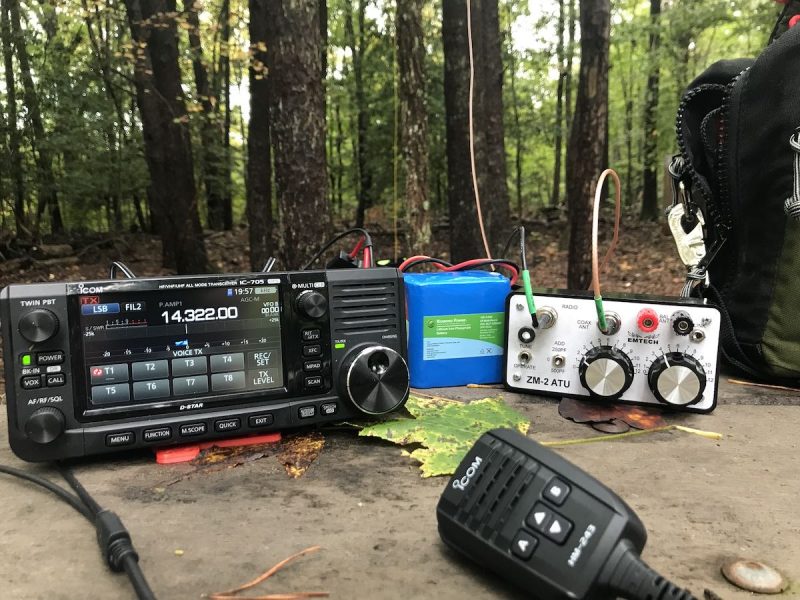
IC-705 and Elecraft T1 ATU at Toxaway Game Land
While its in my Red Oxx or GoRuck backpack, I house the IC-705 in a $14 Ape Case Camera insert. Eventually I want to find a better solution, but this does help pad the IC-705 while in my backpack and certainly fits it like a glove––hopefully protecting that touchscreen.
A number of third-party manufacturers have designed protective “cages” and side panels for the IC-705, but I’ve been a bit reluctant to purchase one because I feel they may add too much weight and bulk to the radio.
To the field!
Sandy Mush State Game Land
The day after I received my Icom IC-705, I took it to the field to activate Sandy Mush State Game Land for the Parks On The Air (POTA) program. Typically, when I review a new radio, I spend a few hours with it in the shack before taking it to the field. In this case, however, I felt comfortable enough with the IC-705 user interface, so I decided to skip that step entirely––I was eager to see if this little radio would live up to expectations.
The previous evening, I’d connected the IC-705 to my 13.8V power supply, so the BP-272 battery pack was fully-charged and attached to the IC-705. There was no need for an external battery to be connected.
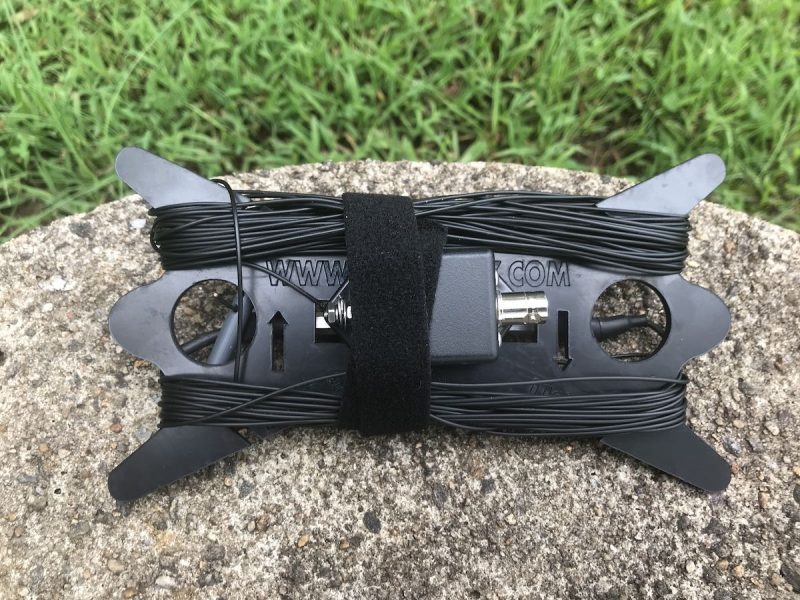
Getting on the air that day was very straightforward; indeed, the set-up couldn’t have been more simple: radio plus antenna. I connected the IC-705 to a Vibroplex EFT-MTR end-fed 40, 30, and 20-meter resonant antenna, thus an external antenna tuner was not required.
The Vibroplex/End-Fedz EFT-MTR antenna
Next, I plugged in the included speaker/mic, spotted myself to the POTA network, and started working stations. I asked for audio reports and all were very positive using only the default audio settings. Obviously, the small hand mic works quite well. I did quickly decide to unplug one of the two connectors of the speaker mic (the speaker audio side) so that the received audio wouldn’t be pumped through the hand mic, using the much better IC-705 front-facing speaker.
In the field that day, I had a few objectives in mind:
See how well the supplied hand mic works for SSB contacts, thus intended to ask for audio reports
Check out full break-in QSK operation in CW mode
Measure exactly how long a fully-charged Icom BP-272 Li-ion battery pack would power the IC-705 under intense operation
SSB
SSB at Lake Norman State Park
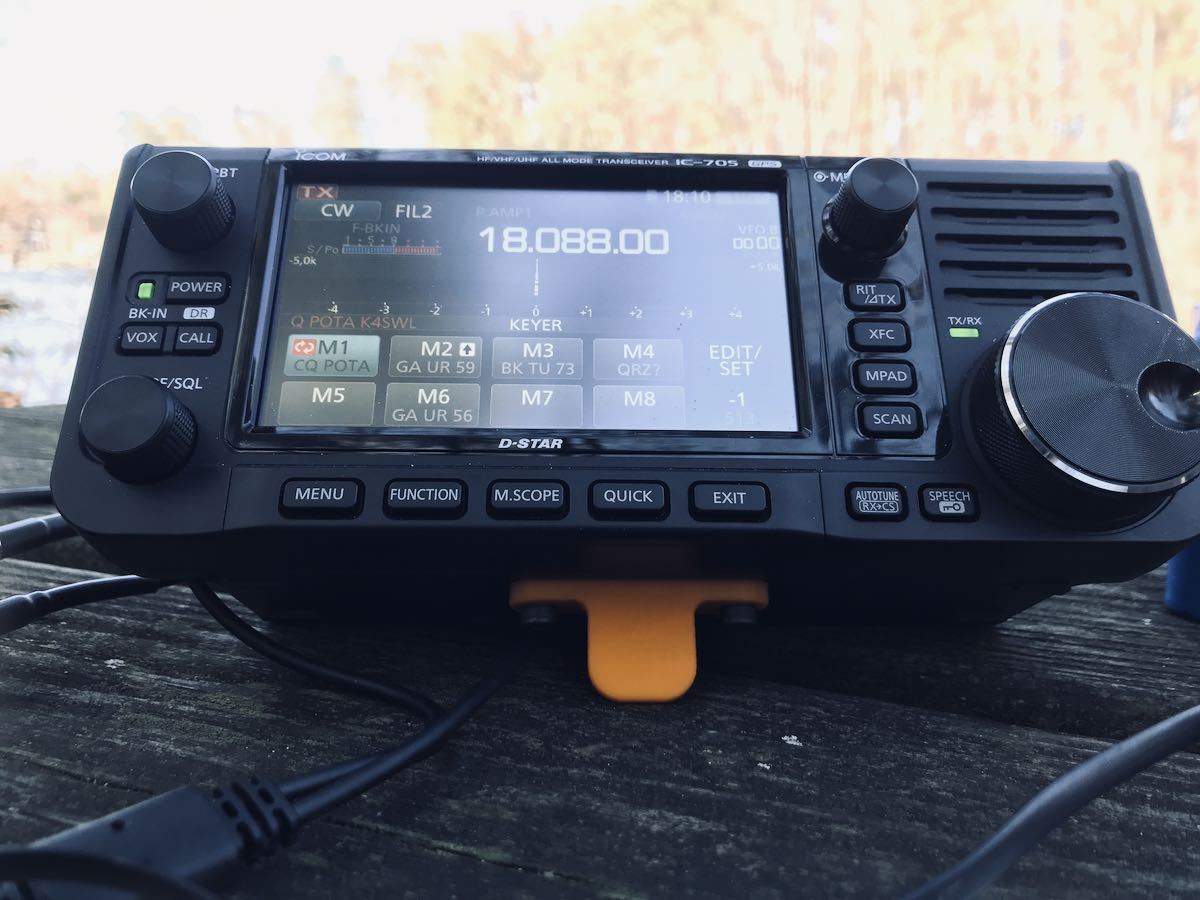
I was very quickly able to sort out how to record and use the voice memory keying features of the IC-705. There are a total of eight memory positions that can be recorded to the internal microSD card. It’s very simple to use one of the memories in “beacon” mode––simply press and hold one of the memory buttons and the recording is transmitted repeatedly until the user presses the PTT to disengage it. This is incredibly helpful when calling CQ; I typically set mine to play “CQ POTA, CQ POTA, this is K4SWL calling CQ for Parks On The Air.” I’ve also set a five-second gap between playback, allowing for return calls. As I’ve mentioned before, voice-memory keying is incredibly useful and saves one’s voice when calling CQ in the field.
The voice and CW-memory keying features of the IC-705 are robust enough that they could be used in a contest setting to automate workflow. One important note: voice-memory keying saves recordings to the internal MicroSD card. If that card is removed, formatted/erased, or if the file structure is altered, the voice-memory keyer will not recall recordings.
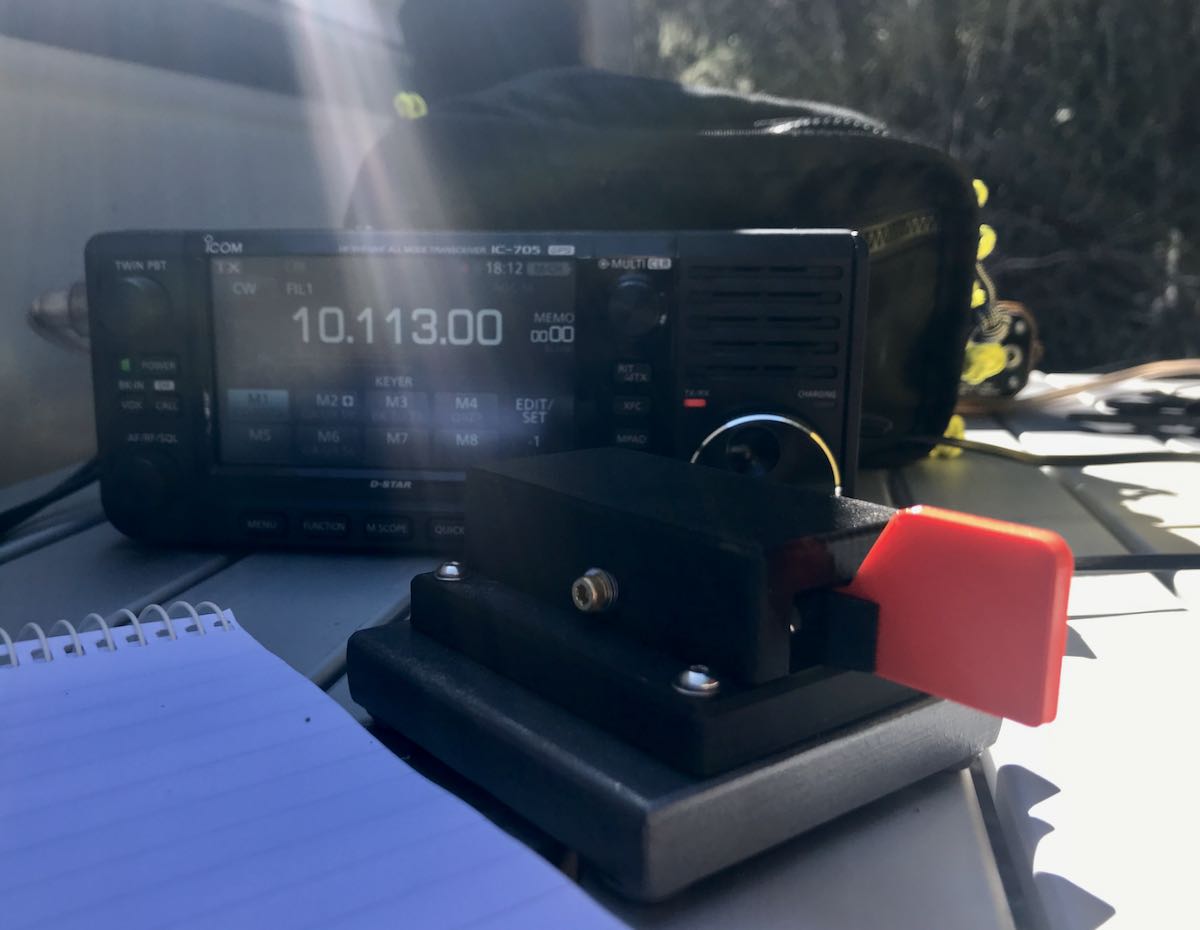
CW
CW at South Mountains State Park
Next, I plugged in my paddles and started calling “CQ POTA” in CW.
As with the voice-memory keyer, CW-memory keying was incredibly easy to set up. Once again, the user once has eight memory positions. As the keyer plays a pre-recording sequence, the IC-705 will display the text being sent.
One of the questions I’m asked most by CW operators about the IC-705 is whether the radio has audible relay clicks during transmit/receive switching. Radios with loud relay clicks can be distracting. My preference these days is to operate in full break-in QSK mode, meaning, there is a transmit/receive change each time I form a character––it allows me space to hear someone break in, but results in much more clicking.
The IC-705 does have relay clicks, but these are very light––equal in volume to those of other Icom transceivers, neither louder nor softer. These clicks, fortunately, are not too distracting to me, and to be fair, I find I don’t even notice them as I operate. With that said, transceivers like my Elecraft KX2 and Mission RGO One use PIN diode switching, which is completely quiet.
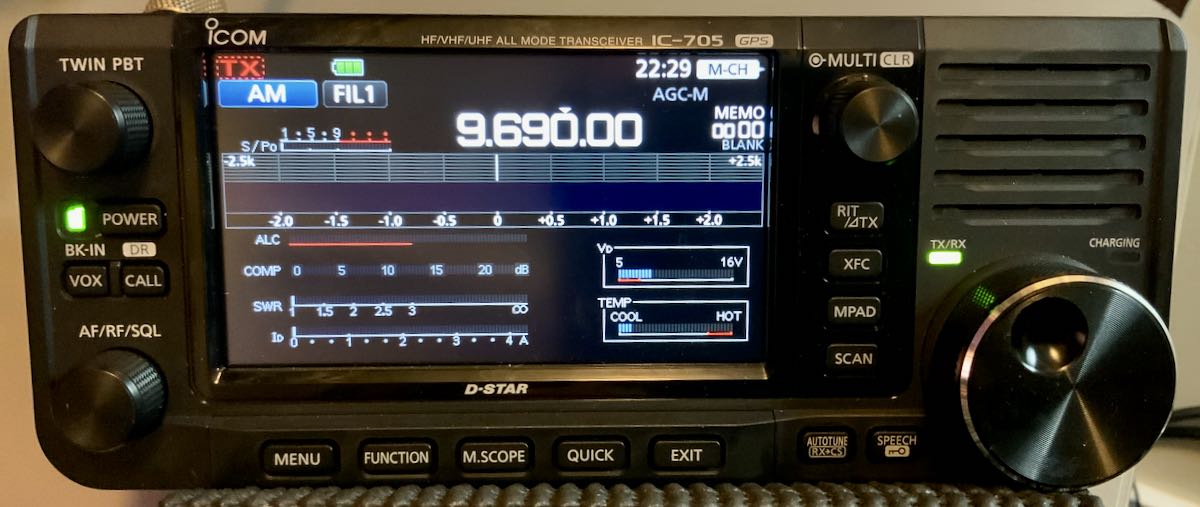
Battery Life
Tapping the battery icon will open a larger battery capacity monitor.
My third objective at the first field outing was to test how long the Icom BP-272 Li-ion battery pack would power the IC-705 while calling CQ and working stations in both SSB and CW for an entire activation.
After nearly two hours of constant operation, the BP-272 still had nearly 40% of its capacity.
I didn’t expect this. I assumed it might power the IC-705 for perhaps 90 minutes, max. Fortunately, it seems at 5 watts, one BP-272 could carry you through more than one POTA or SOTA (Summits On The Air) activation. I was pleasantly surprised.
Four months later…
POTA activation at Tuttle Educational State Forest
Since that initial field test, I’ve taken the IC-705 on easily thirty or more individual POTA activations. I’ve also used it at home to chase POTA stations and rag chew with friends.
In short, I’ve found that the IC-705 is a brilliant, robust portable transceiver for SSB and/or CW and a pleasure to operate.
Herein lies the advantage of purchasing a radio from a legacy amateur radio manufacturer: it’s well-vetted right out the door, has no firmware quirks, and is built on iterations of popular radios before it.
I’ve found that IC-705 performance is solid: the receiver has a low noise floor, the audio is well-balanced, the AGC is stable at any setting, and it’s an incredibly sensitive and selective radio.
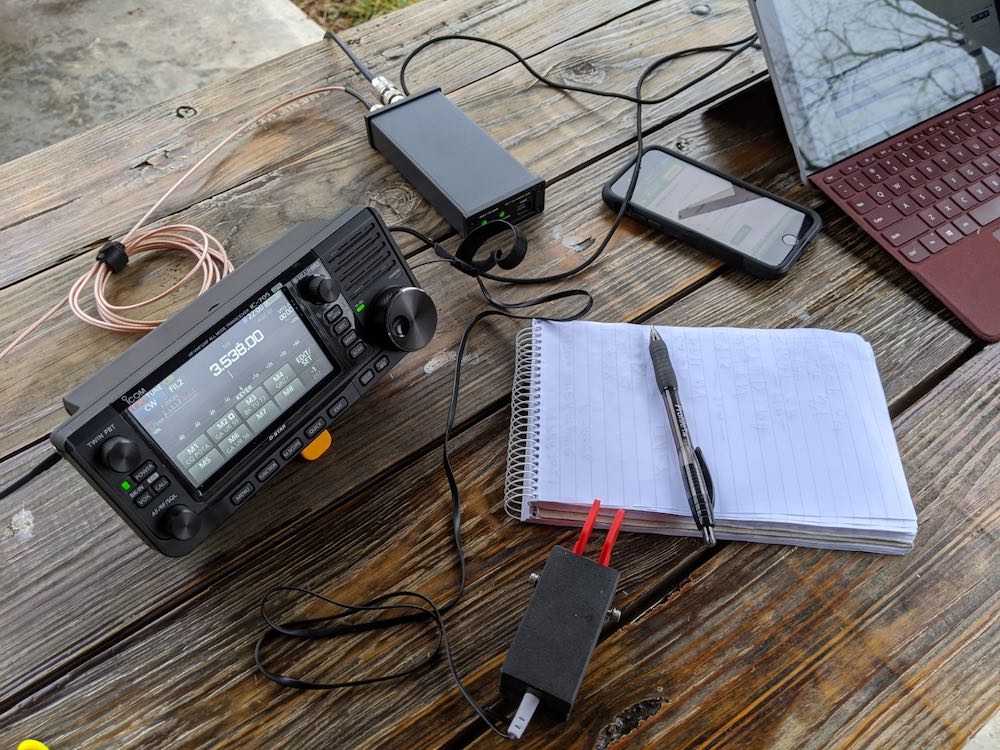
Digital modes
POTA activation at Lake Jame State Park
One huge advantage of the IC-705 is that it, like the IC-7300, has a built-in sound card for digital modes. This eliminates the need for an external sound card interface. After you’ve read the installation guide, and installed Icom’s USB drivers, simply plug the IC-705 into your computing device via USB cable and you can directly control the ‘705 with popular applications like WSJT-X.
I have not used the IC-705 for digital modes while in the field, but I have done so in the home shack. It was one of the easiest radios I’ve ever set up for FT8 and FT4.
I’m not the biggest digital mode operator, but if you are into it, I expect you’ll be very pleased with the IC-705. It must be one of the most portable, uncomplicated transceivers for digital mode operation currently on the market. I know a number of POTA activators have been using the IC-705 for FT8 and FT4.
D-Star
Being perfectly honest here, I have a chequered history with the D-Star digital voice mode. I purchased an Icom ID-51a and D-Star hotspot several years ago because a local ham pretty much convinced me it was the coolest thing since sliced bread.
And in truth? It is rather amazing.
But at the end of the day I had to admit to myself that I’m an HF guy, and found the user interface and operating procedures just a bit too other-worldly. I kept the ID-51a for perhaps a year, then sold it, along with the hotspot.
Although I knew the IC-705 had D-Star built in, I really hadn’t given it a second thought. But since I’m a reviewer, I simply had to check it out. I still had my D-Star credentials from some years ago, so I set up the IC-705 and connected the transceiver to the Diamond dual band antenna on top of my house.
Fortunately, I was able to hit our only local D-Star repeater and connect on the first go. Note that, like the ID-51a, the IC-705 can use your GPS coordinates, then automatically find the closest D-Star repeater and load the frequency and settings from the default database on the IC-705 MicroSD card.
After reviewing a YouTube video demonstration, I was on the air with D-Star and found the user interface much easier to use than that of the ID-51a. It really helps having a large touch screen.
I’ll admit it: I’m warming back up to D-Star, and I have the IC-705 to thank for that.
Some day, I plan to use D-Star on HF, as well. I acknowledge that it might take some pre-arranging, but perhaps I could even make a D-Star POTA––or better yet, SOTA––contact, if the stars align. It’s certainly worth the experiment.
Let’s talk about broadcast listening
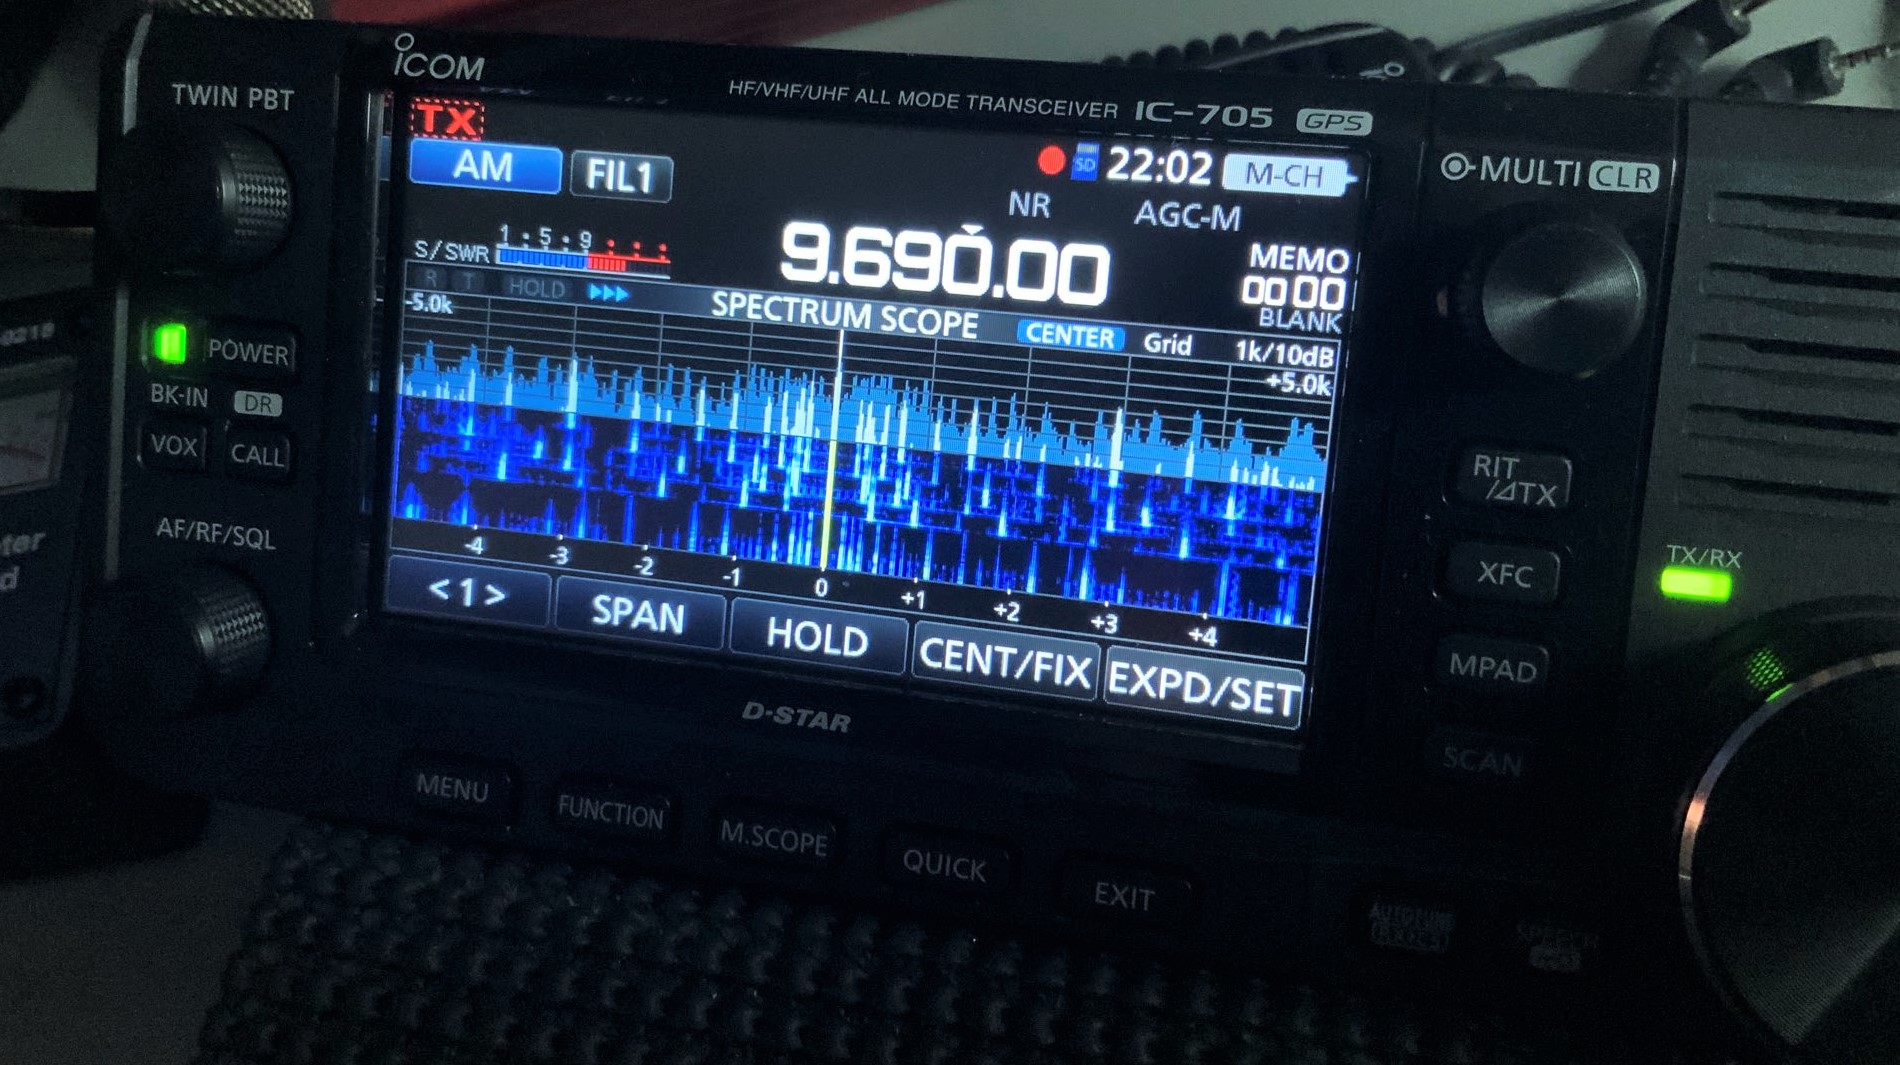
Radio Exterior de España’s interval signal on the IC-705’s waterfall display
Although I’m a pretty active ham radio operator, I’m an SWL and broadcast listener at heart. One of the appealing things about the IC-705 is its excellent receiver range (0.030-470.000 MHz) and multiple operating modes, as well as its adjustable bandwidth. Broadcast listeners will be happy to know that the AM bandwidth on the IC-705 can be widened to an impressive 10 kHz, which is certainly a stand-out among general coverage transceivers.
After turning on the IC-705 for the very first time, I tuned to the 31-meter band and cruised the dial. I felt like I was using a tabletop receiver: for such a small transceiver, the encoder is on the large side, and the controls are ergonomically designed. The spectrum display and waterfall are amazingly useful.
The front-facing speaker on the IC-705 is well-designed for audio clarity on the ham radio bands. It’s not a high-fidelity speaker, but it’s adequate and has enough “punch” to perform well in the field. Speakers on portable QRP radios are typically an afterthought and are terribly compromised due to space constraints within the chassis. The IC-705’s speaker design feels more deliberate, akin to what you might find on a mobile VHF/UHF rig. Broadcast listeners, in other words, will certainly want to hook the IC-705 up to an external speaker––or, better yet, use headphones––for weak-signal work.
While the received audio isn’t on par with a receiver like the Drake R8B, it’s pretty darn good for a portable general coverage transceiver. The audio is what I would call “flat,” but you are able to adjust the received audio in EQ settings to adjust them to your taste. Audio is well-tailored for the human voice, so I’ve found weak signal IDs are actually easy to grab on the air.
Audio samples
One of the brilliant things about the IC-705 is the fact that it has a built-in digital recorder. Both transmitted and received audio can be recorded in real time and saved to a removable MicroSD card. I made audio recordings of two broadcast stations on the 31-meter band as samples: the Voice of Greece (9420 kHz) and RadioExterior de España (9690 kHz). The Voice of Greece was moderately strong when I made the recording and Radio Exterior was quite strong. Click on the links to download the .mp3 files for each recording:
Voice of Greece
Radio Exterior de España
I’ve also used the built-in digital recorder to record long sessions of my favorite shortwave, AM, and FM stations. Even with the recorder on, I can typically achieve hours of listening on one battery charge and need no other power supply.
In short? The IC-705 makes for an excellent portable shortwave, mediumwave, and FM broadcast band-recording receiver.
Charging ahead…
The supplied BP-272 battery pack snaps snugly on the back of the IC-705
Power supply is always a concern when taking a transceiver on travels. Most transceivers need a 12-13.8 volt external supply, or an external battery, one that will eventually need to be charged.
This is not the case with the IC-705, because while it can be charged or powered via a 12-13.8V source, it can also be charged via a common 5V USB power supply. Simply insert any USB phone-charging cable into the MicroUSB port on the side of the IC-705, and it will charge the fully-depleted attached BP-272 battery pack in just over four hours.
Indeed, I traveled to visit family one week, and had plotted two park activations both en route and on the way back home. After my first activation, I quickly realized I forgot the supplied IC-705 power cord that I’d normally use to hook the IC-705 up to one of my LiFePo batteries. I was quite disappointed, expecting that I’d missed this opportunity. Then I remembered USB charging: I simply plugged the IC-705 up to my father’s phone charger, and in four hours, the battery was completely recharged.
To my knowledge, there are no other transceivers that have this capability without modification. A major plus for those of us who love to travel lightly!
Summary
POTA activation at the Zebulon Vance Historic Birthplace
Every radio has its pros and cons. When I begin a review of a radio, I take notes from the very beginning so that I don’t forget my initial impressions. Here’s the list I formed over the time I’ve spent evaluating the Icom IC-705.
Pros:
Frequency range
TX: 160 – 6 meters, 2M, 70cm
RX: 0.030-470.000 MHz
Modes include SSB, CW, AM, FM, DV, RTTY
4.3 inch color touchscreen that’s (surprisingly) readable in full sunlight
Multiple means to power/charge:
Icom BP-272 battery pack (supplied) for 5 watts output
Can be charged via 12V power supply or
5V USB phone charger with standard MicroUSB plug (admittedly, I wish they would have adopted now standard USB-C rather than MicroUSB)
Angled speaker/mic connectors can be challenging to insert as they are too close to the recessed area behind front face, especially for those with larger fingers and/or if in chilly conditions in the field
MicroSD card also difficult to access––I use needle-nose pliers to remove and insert
Conclusion
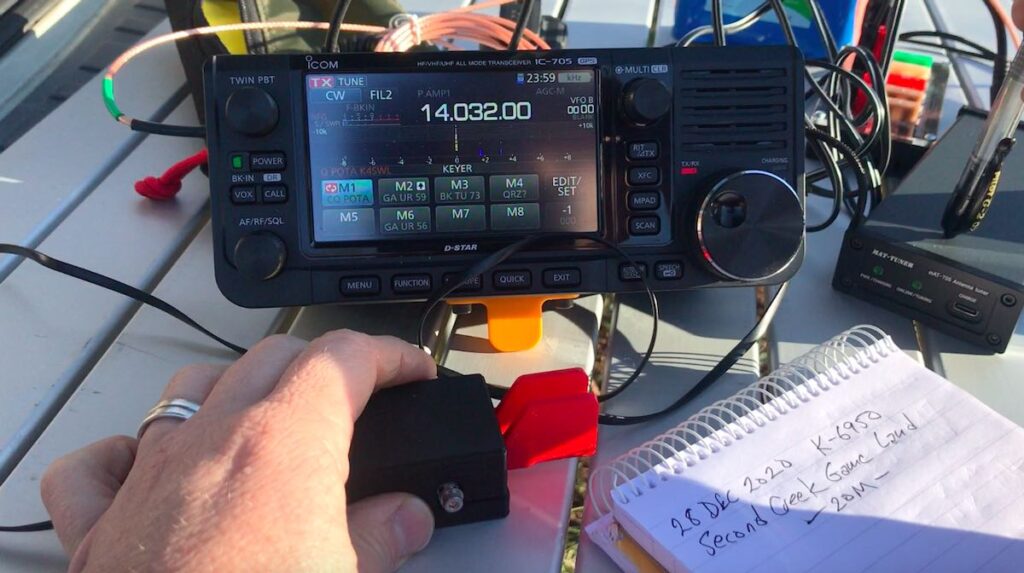
POTA activation of Second Creek Game Land
I purchased the Icom IC-705 with the idea that I would review it and then sell it shortly thereafter. Much to the dismay of my (rather limited) radio funds, I find that I now want to keep the IC-705…indefinitely.
I didn’t think the IC-705 would fit into my QRP field radio “arsenal” very well because I tend to gravitate toward more compact radios that I can easily operate on a clipboard on my lap when necessary. My Elecraft KX2 (TSM November 2016), Elecraft KX1, LnR Precision LD-11 (TSM October 2016), and Mountain Topper MTR-3B probably best represent my field radio interests.
But I’m loving the versatility and overall performance of the IC-705. It’s providing an opportunity to do much more than most of my QRP radios allow.
Here are just a few of the things I’ve done with the IC-705 thus far:
Activated numerous parks in SSB and CW
Connected to a local D-Star repeater and talked with a fellow ‘705 owner in the UK
Listened to ATC traffic (and recorded it)
Listened to NOAA weather radio
Listened to and recorded local FM stations
Enjoyed proper FM DXing
Recorded GPS coordinates during a POTA/WWFF activation
Made numerous digital mode contacts by connecting the IC-705 directly to my Windows tablet
Made a 2-meter SSB contact
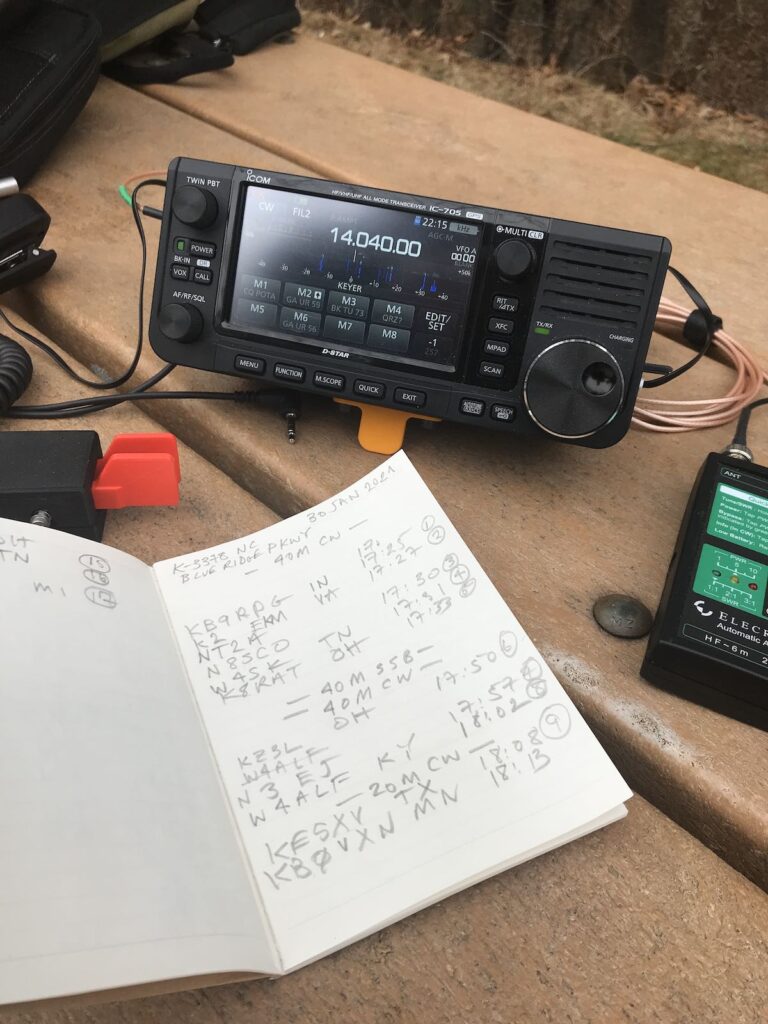
POTA activation of the Blue Ridge Parkway
Indeed, there are more features on this transceiver than I can fully cover in one review; truly, I consider that a very good thing.
So if you’re looking for a portable transceiver that can truly take you on a deep dive into the world of QRP HF, VHF, UHF, and even satisfy the SWL in you, look no further than the Icom IC-705.
Well played, Icom.
More Icom IC-705 articles, information, and resources:
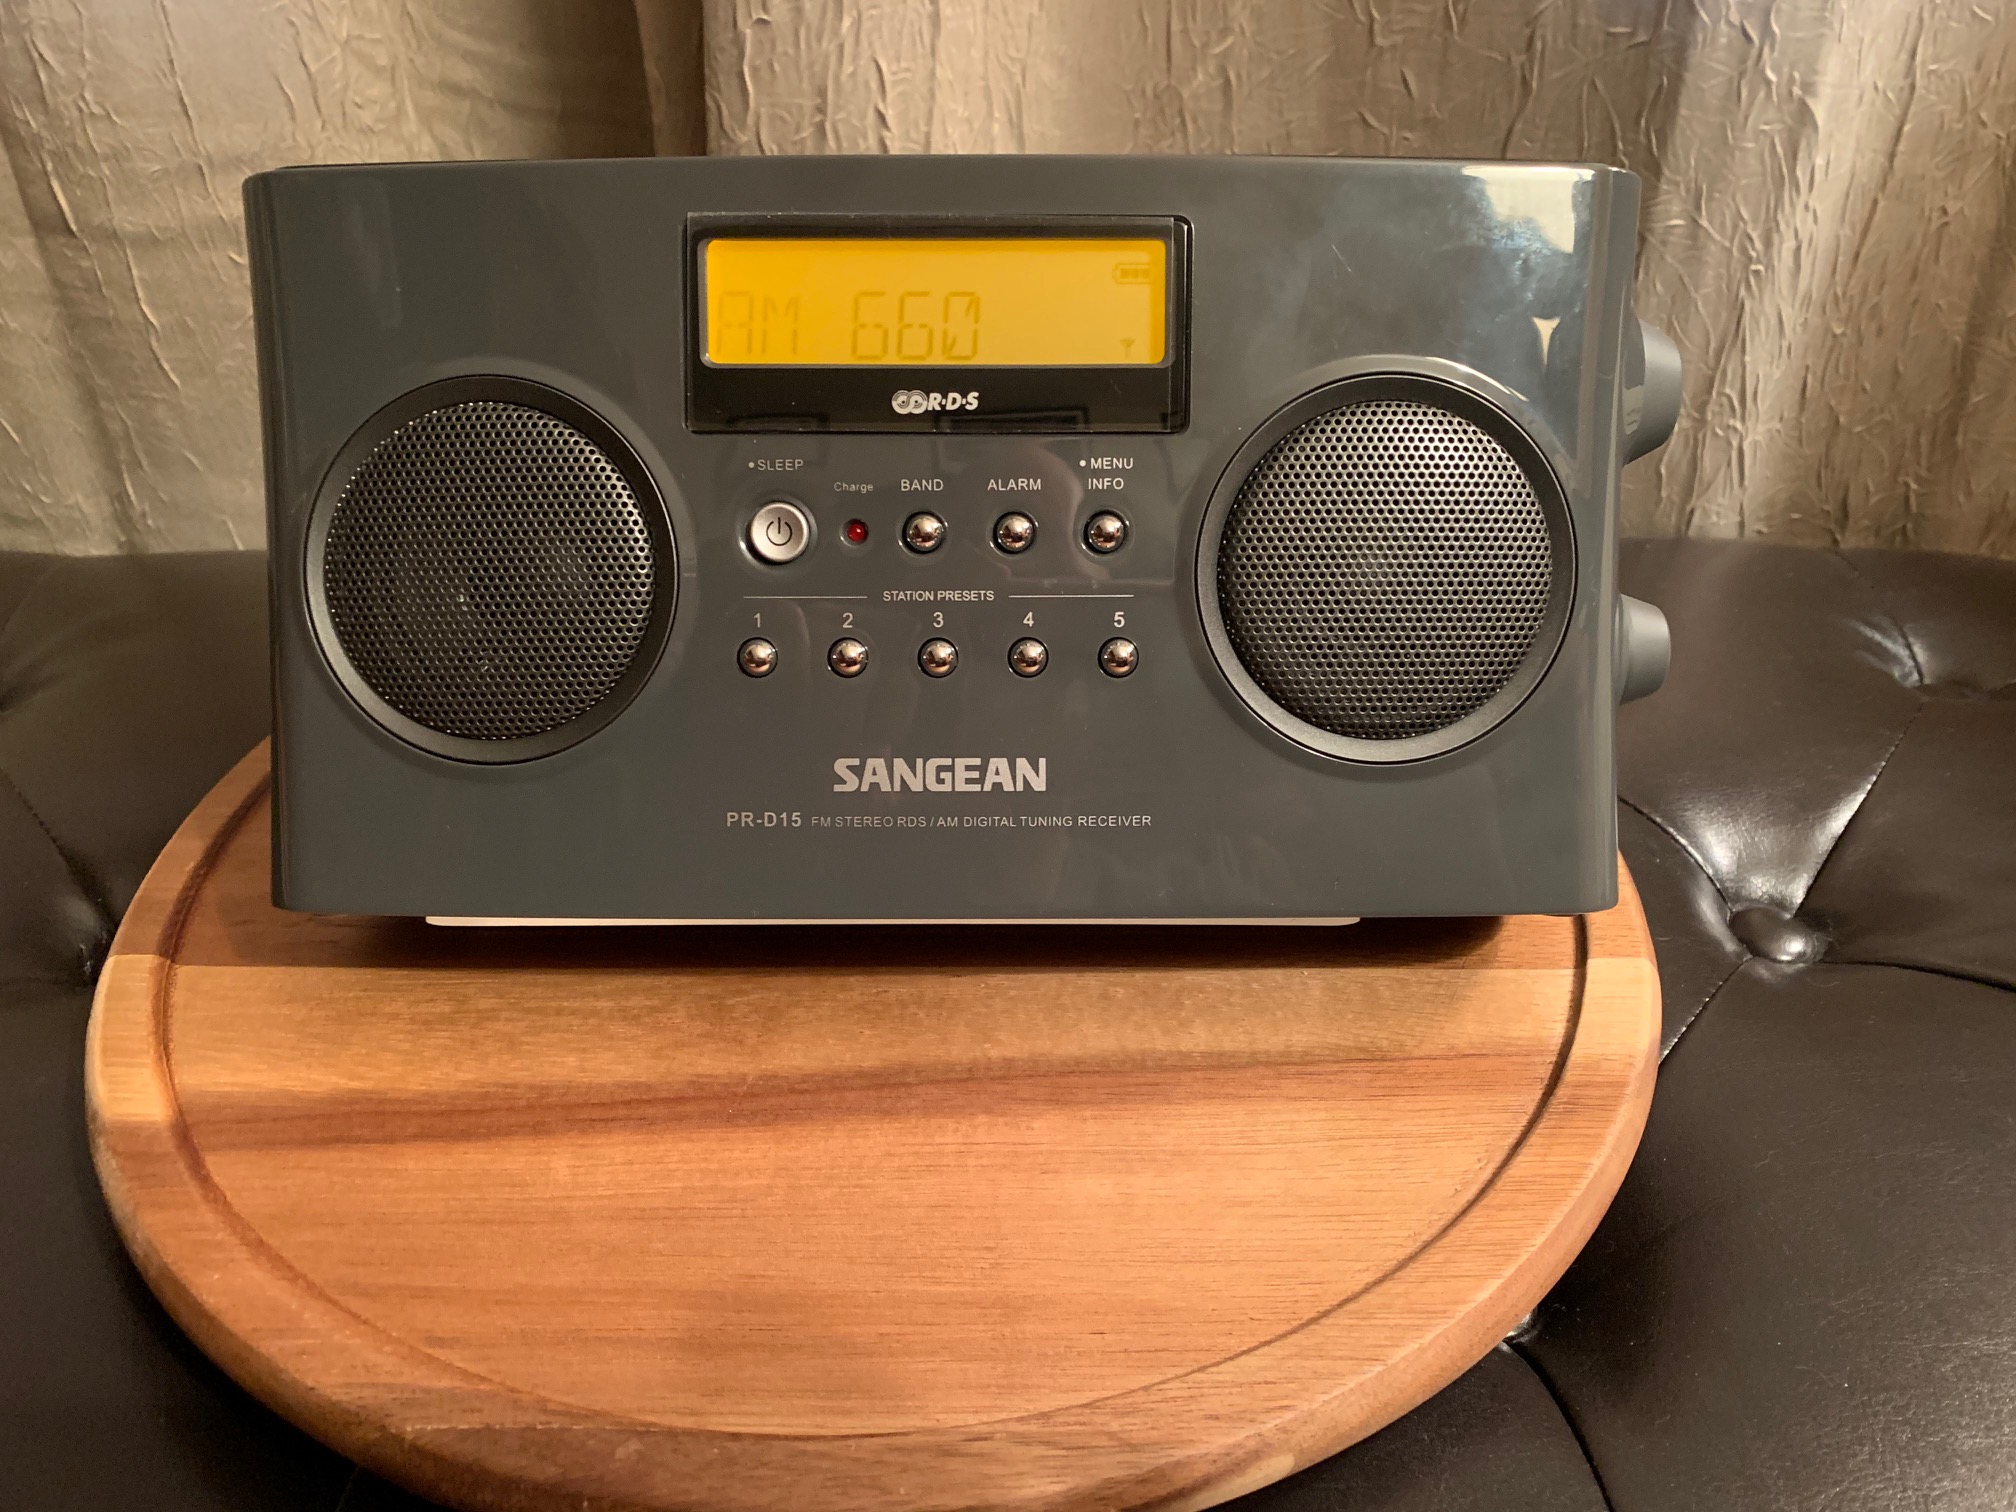
Since the demise of my Sony ICF-SW100, I’ve decided to do some AM Dx’ing. A few years ago I purchased a Sangean PR-D15 as my dedicated “AM Dx Radio”. Despite owning it for a few years, I hadn’t yet really put it through its paces.
Note: My 1994 Gründig Yacht Boy 400, with its 150mm (5.9″) ferrite rod antenna, performs splendidly on AM and until this purchase, the YB400 was the radio I grabbed for AM Dx.
At the time of my purchase – if my memory is correct – the other models I had considered were the CC Radio 2 (now discontinued), the CC Radio 2E (it was a relatively new release at the time), and the Original CC Radio EP (now discontinued & replaced by the CC Radio EP Pro).
Admittedly, part of my decision was based on cost. At the time, the CC Radio 2 & 2E were priced over 2x the cost of the PR-D15 and the CC Radio EP was $15-$20 more when shipping was added. Besides the cost, I chose the PR-D15 based on a few things I had read online. But the aspect that really appealed to me is the 200mm (7.9”) Ferrite Rod Antenna and that compared favorably with the C. Crane offerings (yes – ferrite size isn’t everything, but it is an important consideration). So after having read online comments (reviews, discussion boards, etc.) about the PR-D15, I felt very comfortable with my decision and it wasn’t based on cost alone.
Frankly, I don’t really care how well my AM radio performs during the day (I hope this isn’t sacrilege). Why? During the day whether I’m in the car, working in the garage – whatever – I’ll typically stream my favorite station (NYC) via radio.com on my iPhone so I can pause, rewind, or pick-up where I left off. Until my Sangean PR-D15 can do that, I prefer to daytime stream. My “hobby” of AM Dxing is in the evening – to relax and have fun (and isn’t that what a hobby is supposed to be?). Keep that in mind as I reveal my results.
I intended to do my AM Dx Nighttime Test in one night, but I was getting so may stations that I had to extend it over two nights. I started each session around 8PM and they lasted until 11:30PM – 12AM (over 7.5-hours of testing on consecutive nights late this week). I had my PR-D15 on a lazy susan turntable and I had two nearby laptops – one to aid as an AM Station locator and the other I used to stream. Stream? Yes – to count as a recorded station I had to get a positive station ID. However, many radio programs are syndicated. Syndicated radio (and ESPN radio) can go on seemingly forever between station IDs. If I didn’t get a station ID within 15-minutes, I used the second laptop to go to the web site of the station I believed it to be to “listen live” to see if the radio and the stream matched-up (luckily live web streams are slightly behind live terrestrial radio so the IDs were easy). Often by the time I had given-up and gone to my 2nd laptop, I’d finally get an on-air station ID. I just didn’t want to waste too much time on one station and miss other stations.
Since my test extended for 2 nights, on night two I quickly dialed-through nearly all of the stations I confirmed on night one to make a quick re-confirmation they were still audible on the 2nd night.
Since I captured so many stations, I was overwhelmed trying to finish and thus I feel this test is still incomplete. My wife typically ends all of my radio playtime (my man cave is a “sitting room” off the side of the master bedroom & there is no wall – no door – so it’s completely open). But my wife and my step-daughter have a weekend out of town in mid to late March. And that means I can stay up all night and do one non-stop test session. Is it bad to say that I cannot wait to be alone?
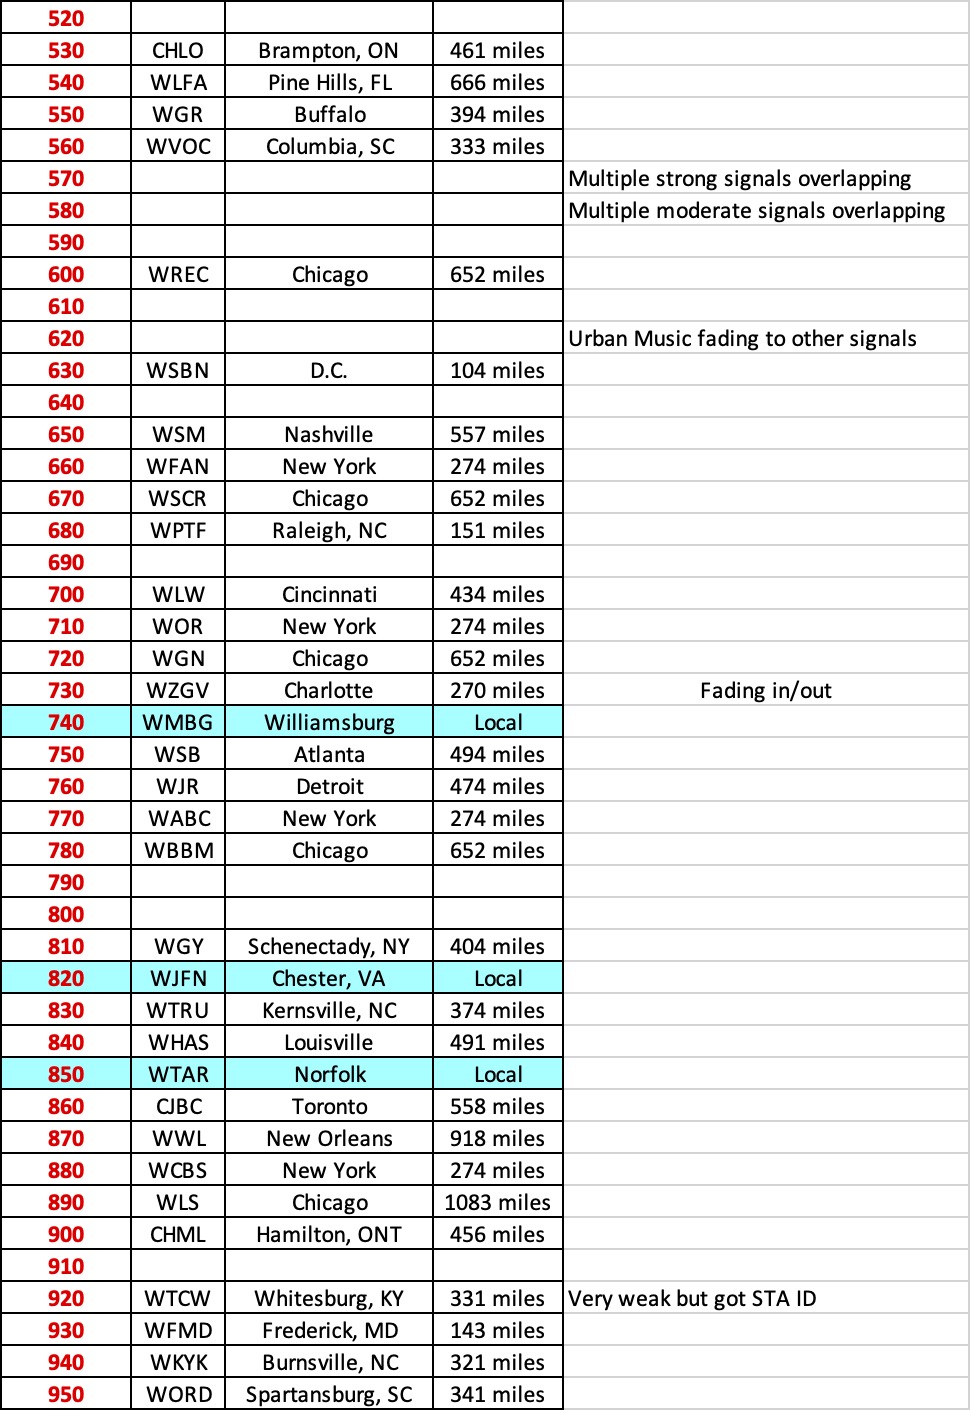
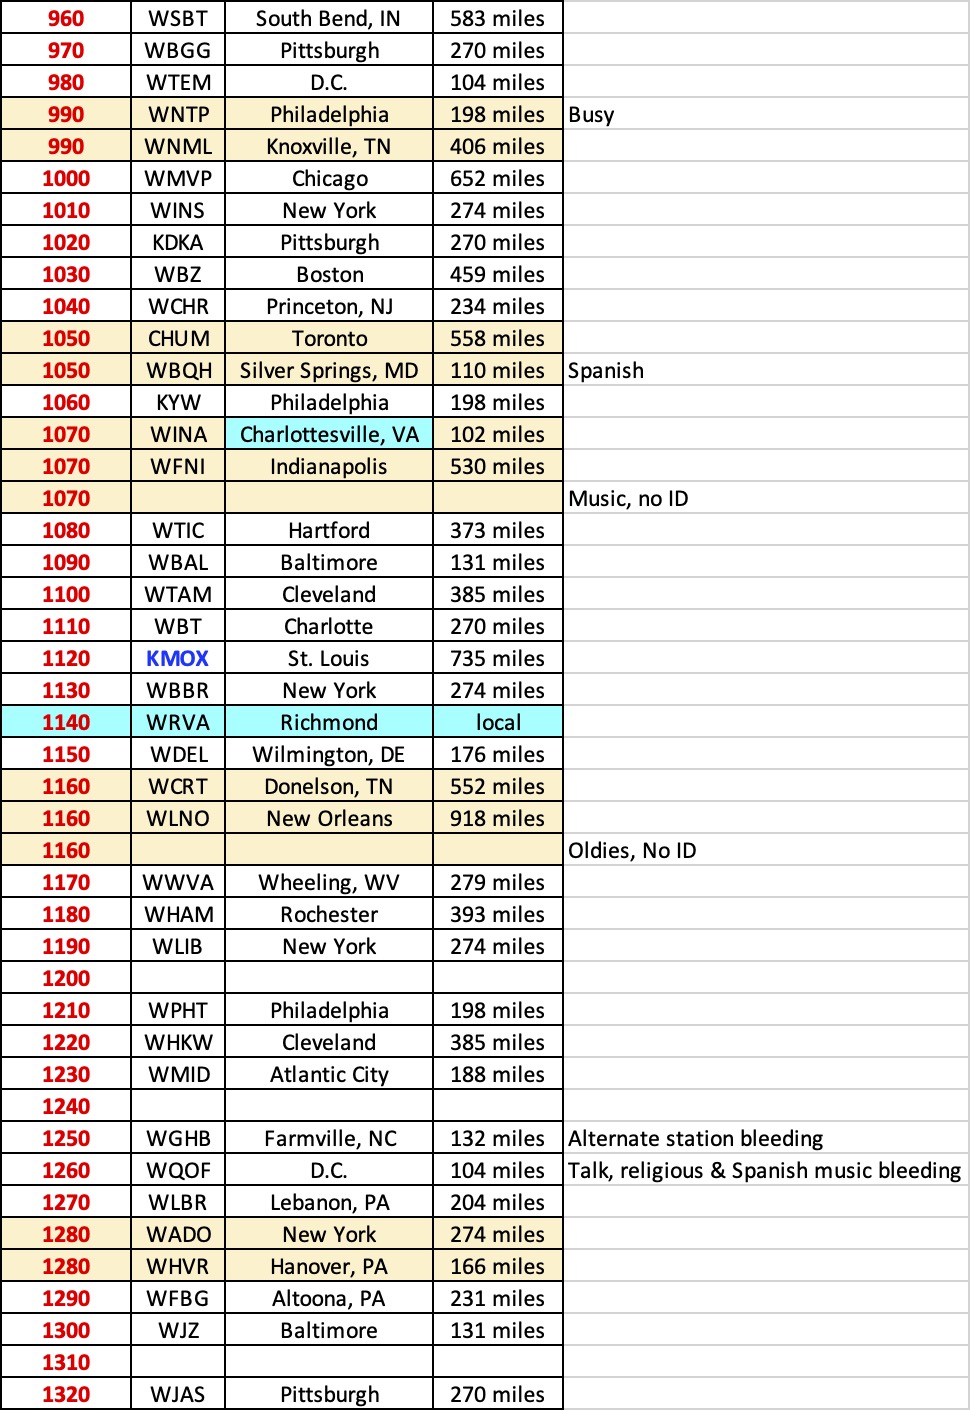
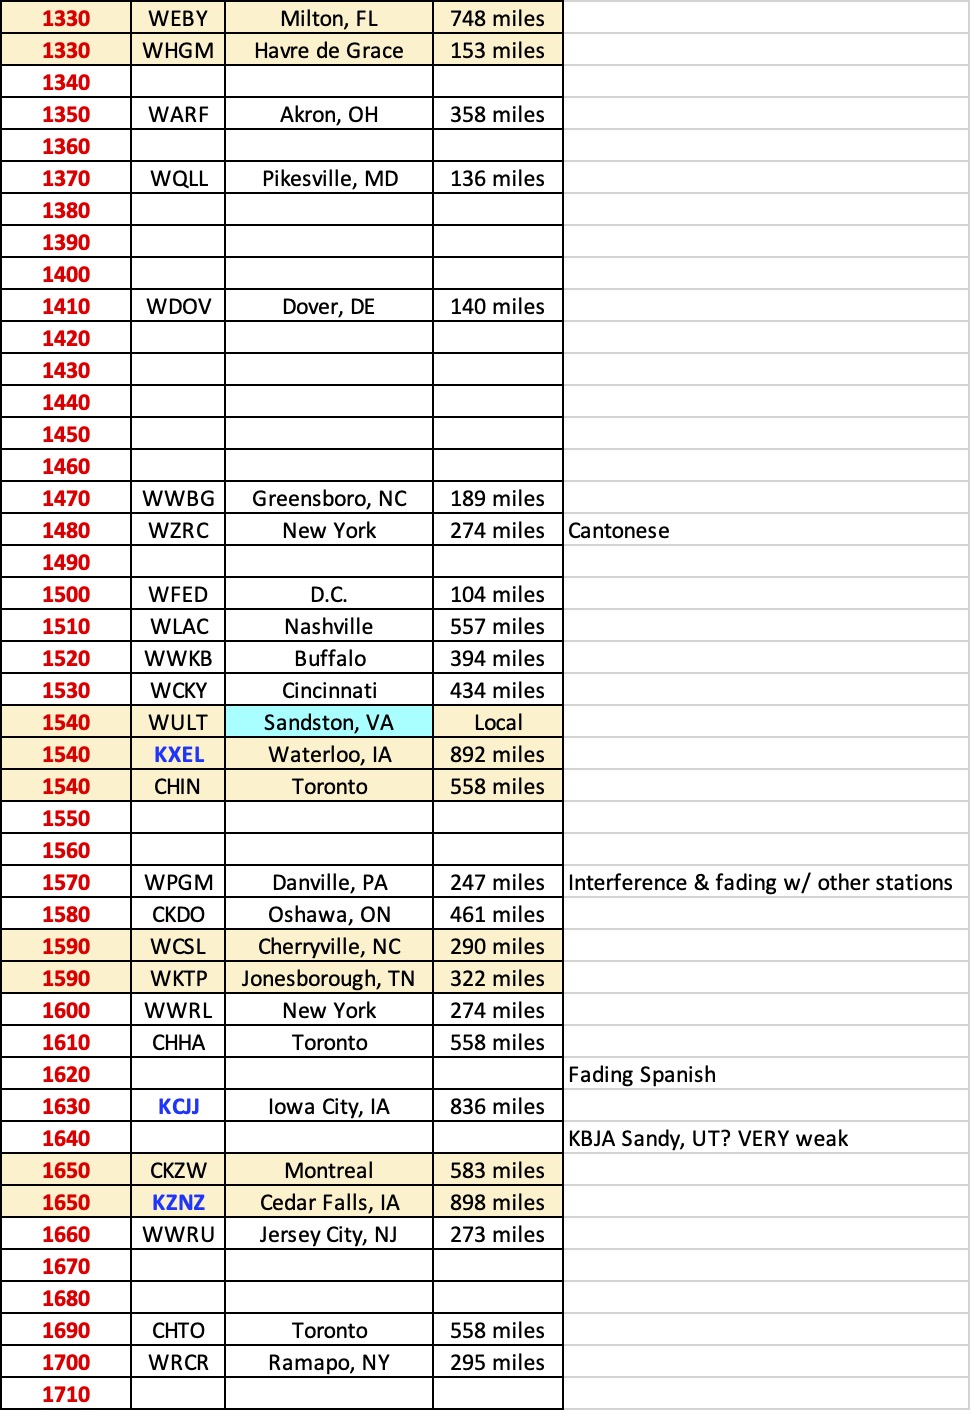
My QTH is ~ 35-miles east of RIC (Richmond, VA) Airport. The tables below (broken into three files) are my results. Some frequencies have multiple station IDs – since when turning the radio and nulling signals, sometimes one station disappeared and another jumped onto the dial. If/when I post an update of my all-nighter, I’ll add another column to the spreadsheet to include the transmitter strength for better context. It should also be noted that I recorded straight-line distances & not driving distances (via an online straight-line/GPS calculator).
I was impressed that I successfully captured three Iowa stations. And though I find it almost unfathomable, I truly believe I was on the verge of successfully logging a station in Sandy, UT which is over 2000-miles away (there are only six stations assigned to the 1640 frequency, and given the content I [barely] heard, all indications are that it was KBJA)!
I also believe I captured at least one Super-Clear Channel station from Mexico, but unfortunately I just couldn’t successfully verify the station ID. I hope to have a future opportunity to add it to my list.
My ultimate goal is to: (1) compile & maintain a spreadsheet of every AM station that I am able to successfully ID; and (2) maintain a record of the most AM stations I was able to ID in a single one-night, non-stop session.
Despite being somewhat incomplete, I’m impressed by my results. I’m interested to see what you think so please post your comments below!
I should note that my results are strictly off the internal ferrite antenna – no external antenna, no passive loop antenna was used to enhance any signal.
To save column space, please click on each table below. A larger & easier to read image will open in a separate window or tab (depending upon your browser setting).
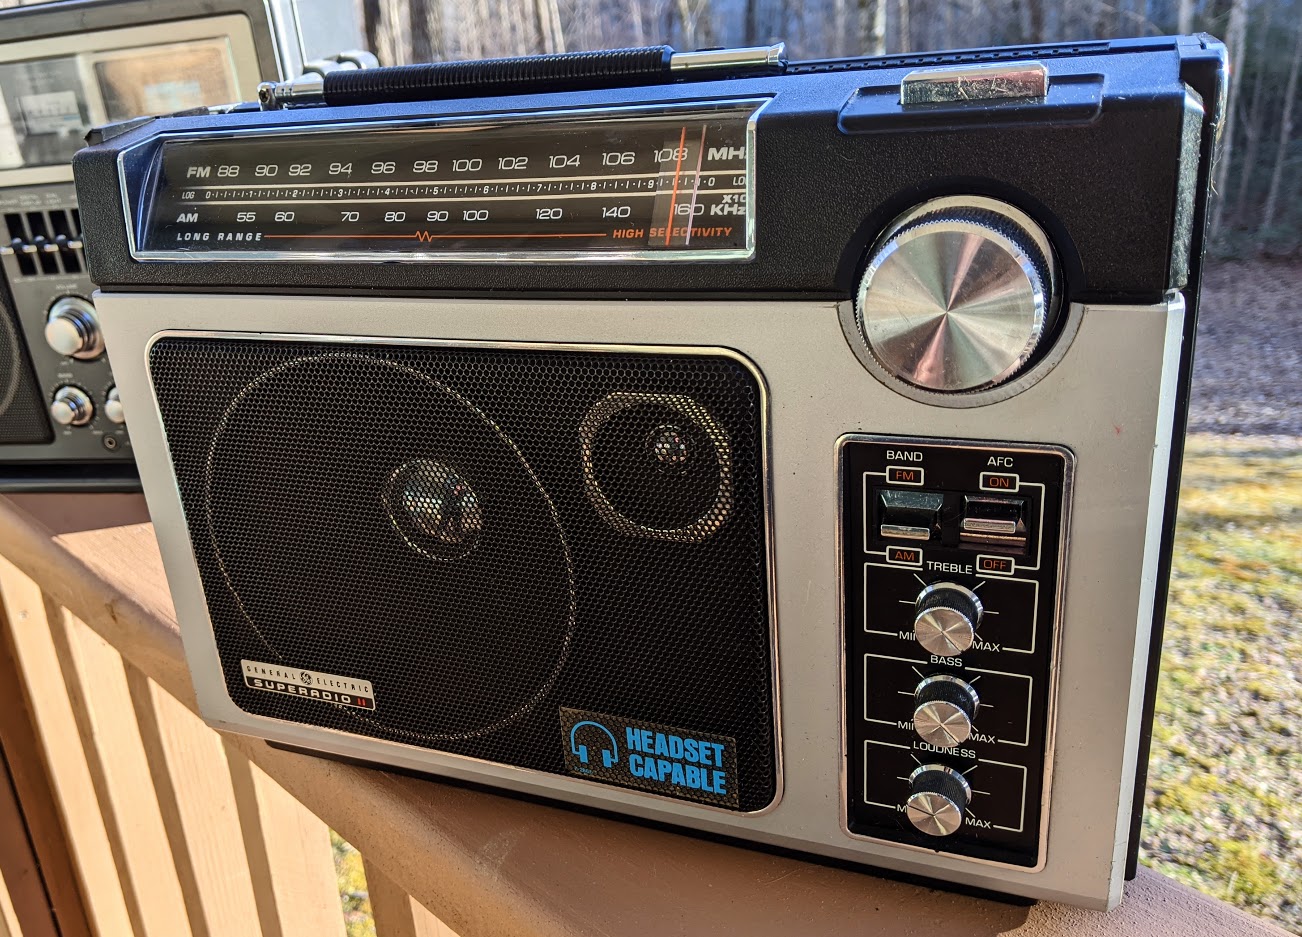
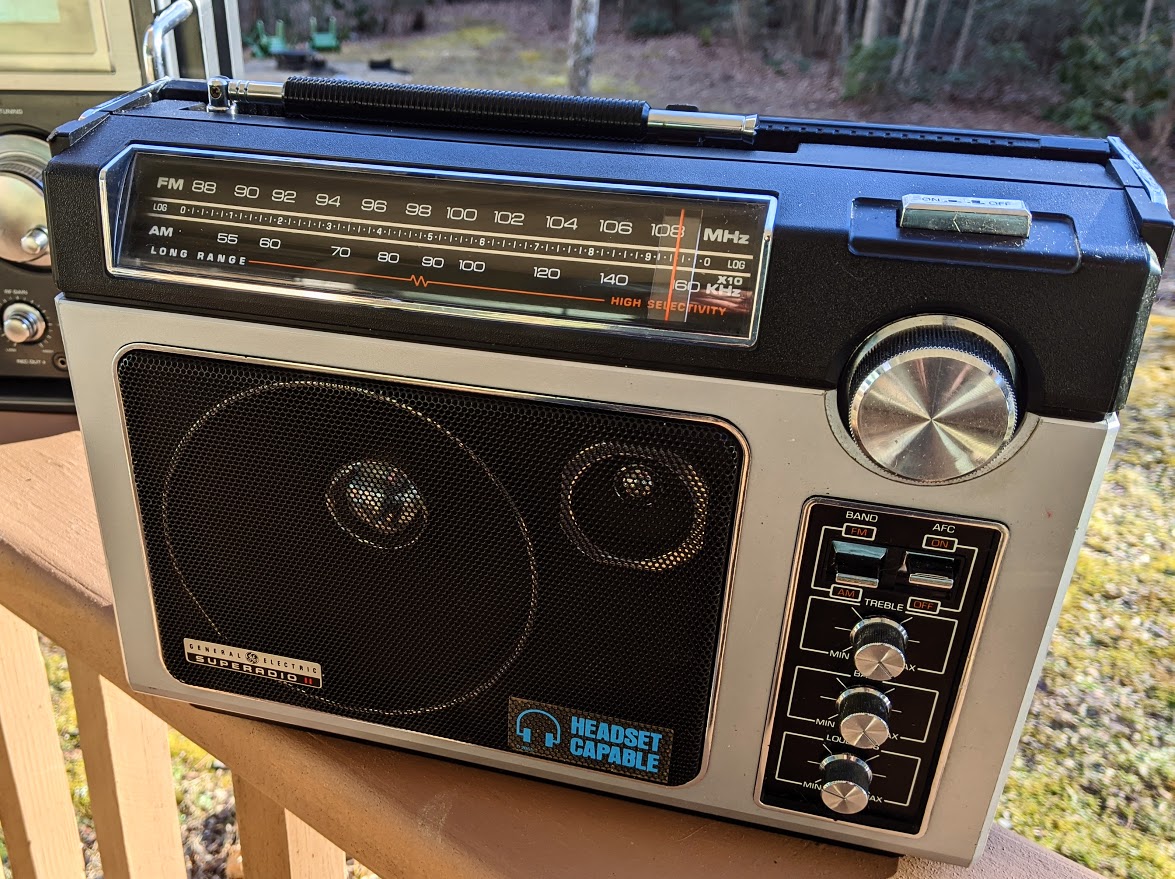
I recently took delivery of a better-than-new classic solid-state portable broadcast receiver: the venerable GE Superadio II.
This Superadio II was generously given to me by SWLing Post contributor, Chuck Rippel (K8HU), who has–in his spare time–been re-capping and restoring all three of the GE Superadio series models and bringing them back to life. Chuck wanted to send me one of the units he’d recently finished, knowing that it might help me when doing AM reception evaluations. He insisted “no strings attached.”
Besides thank you, all I can say is…
Wow–!
Note angels singing in the background.
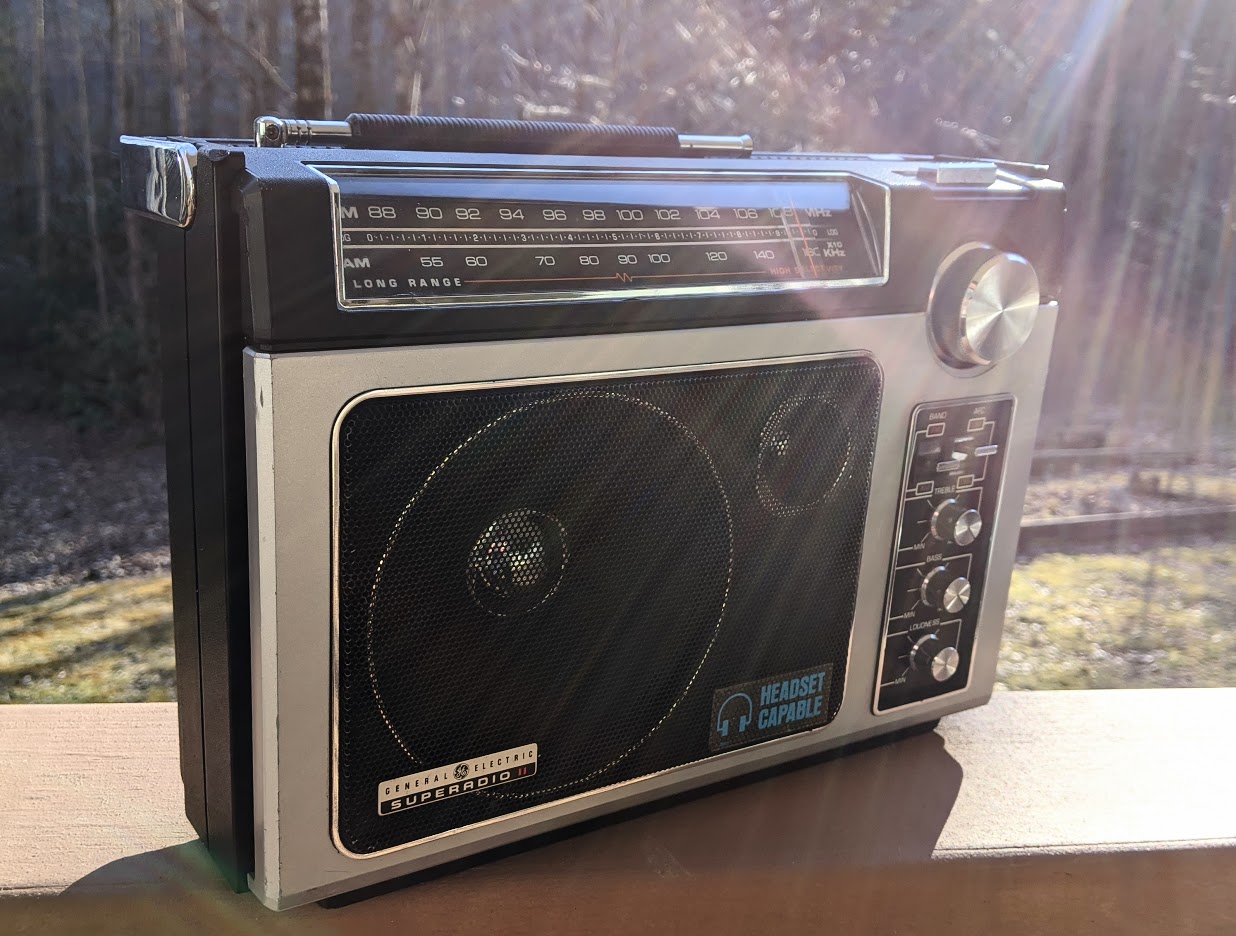
When I received the Superadio II a week or so ago, I removed it from the box and it looked brand new; even sporting the original “Headset Capable” grill sticker.
This is a case, however, of a refurbished radio likely out-performing the original. Here’s a list of the main modifications:
All of the original dry capacitors replaced with Nichicon Audio Grade components
FM AFC and AM and FM IF and RF sections have been aligned
Rebuilt the volume control
I’m sure there are other modifications Chuck didn’t mention.
Chuck told me each radio takes a full day to restore. Some of the alignment, rebuilding, and re-capping is surprisingly tricky and varies with each of the three models. Why is he doing this?
Chuck told me, “My enjoyment comes from giving these radios a new lease on life.”
A new lease on life, indeed!
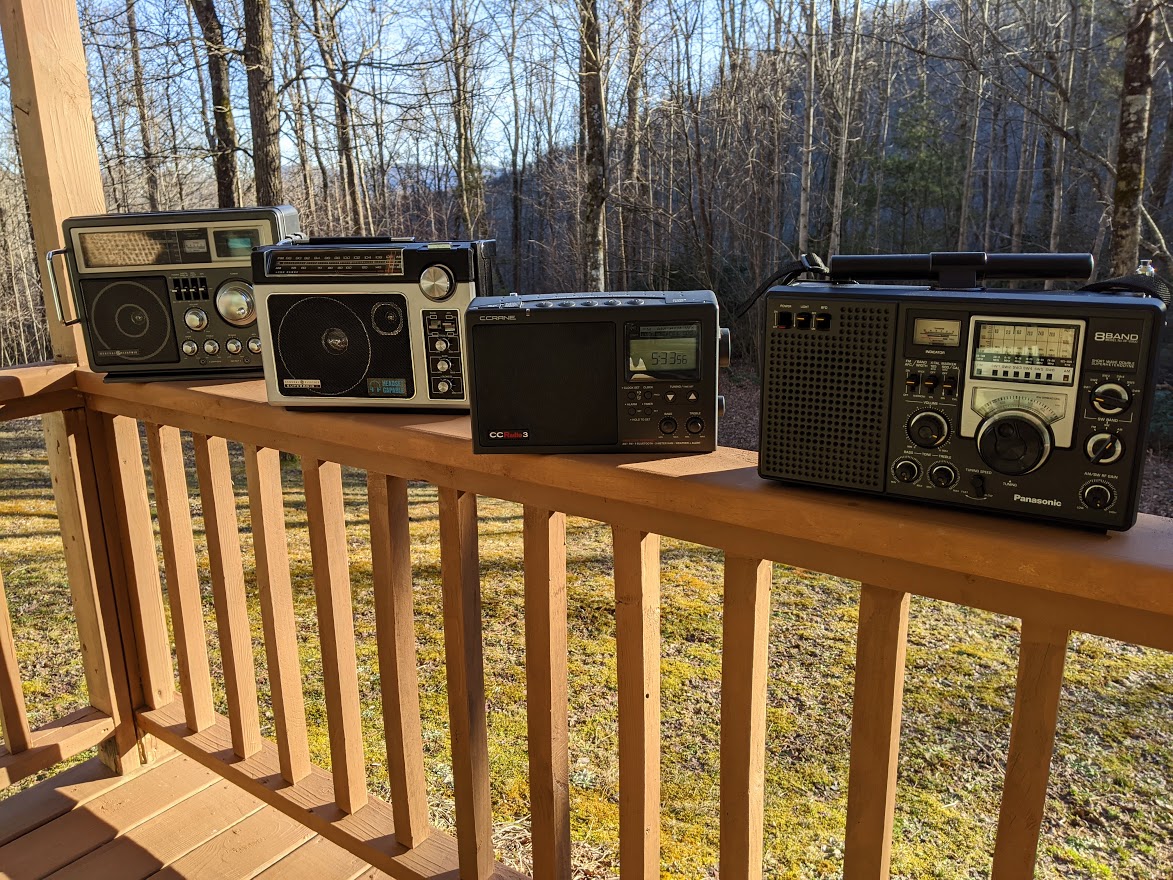
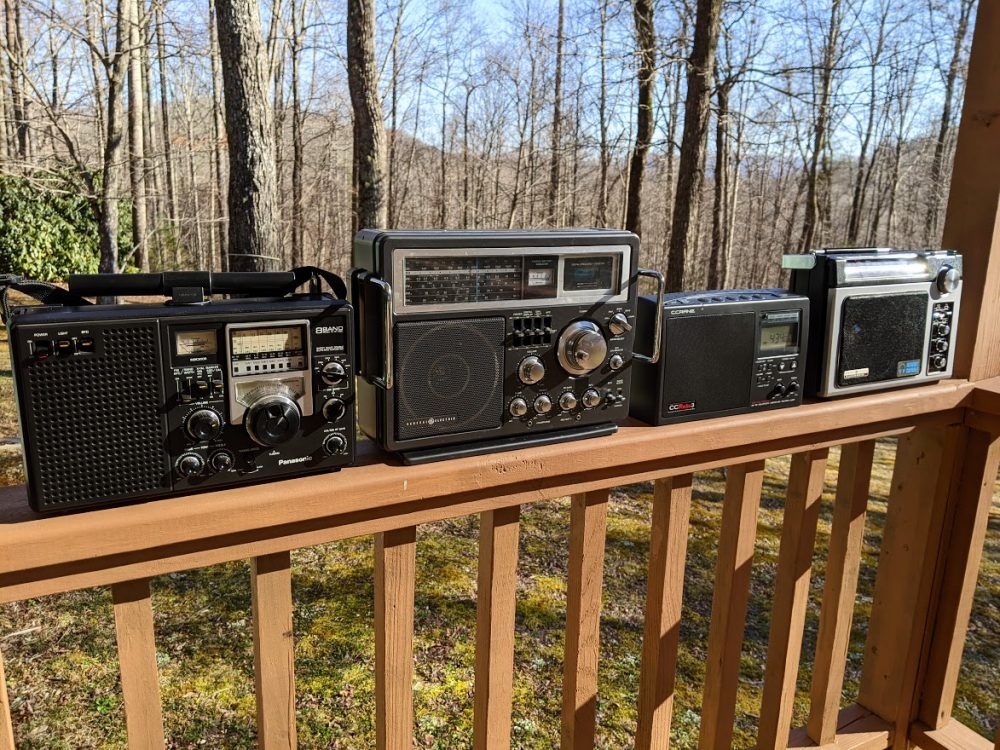
Last weekend, we had a break in the weather–and I had a short break in my schedule–so I took the GE Superadio II, GE 7-2990A, C.Crane CCRadio3, and Panasonic RF-2200 outdoors for some fresh air.
It was late afternoon and, frankly, I didn’t have the time to do a full comparative session, but having spent the better part of an hour tuning around and comparing the characteristics of each radio, I decided to make a short video to share.
The video features the GE Superadio II, but I speak to some of the pros and cons of each model. Keep in mind, this is very much a casual/informal comparison:
The SR-II not only has the best audio fidelity in this bunch, but it’s also extremely stable and has no noise floor to speak of. No doubt, this is the result of those Nichicon Audio Grade components and a skilled technician.
Side note: Chuck is well-known in the radio world because he used to restore the Collins R390A which must be one of the most mechanically-complicated receivers ever made.
I haven’t even properly tested the SR-II on FM yet because I couldn’t pull myself away from the mediumwave dial that afternoon!
I asked Chuck if he would consider refurbishing GE Superadios for other people and I think he would. If interested, contact me and I’ll put you in touch. Else, Chuck might leave details in the comments section of this post.
He does currently have a restored GE Superadio II on eBay. I just checked and in his listing, you’ll see a full description of the modifications made.
Chuck, thank you once again for sending me this SR-II. It’ll become a permanent addition here at SWLing Post HQ. Again, I’m simply amazed at the audio fidelity of this 1980s era receiver. Honestly, I don’t think there’s anything made today that can even compare.
And thanks for doing your bit to refurbish these classic portables!
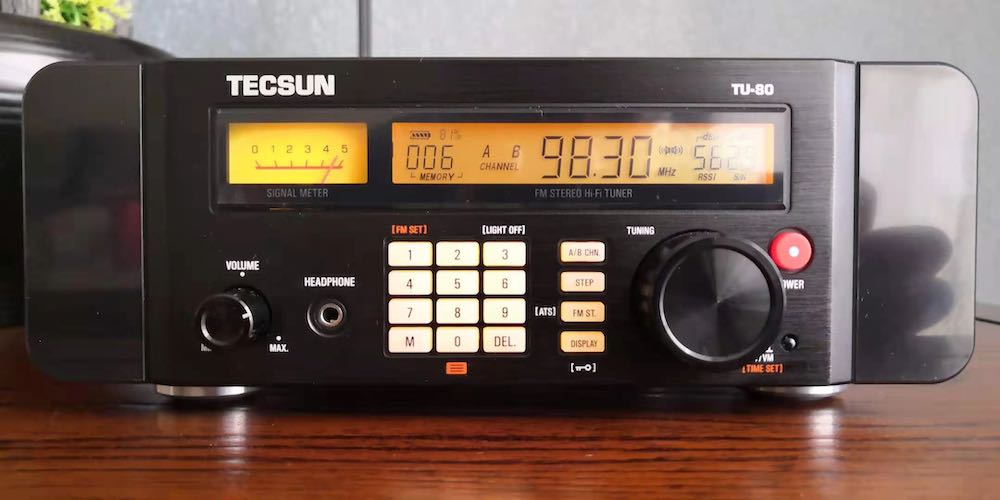
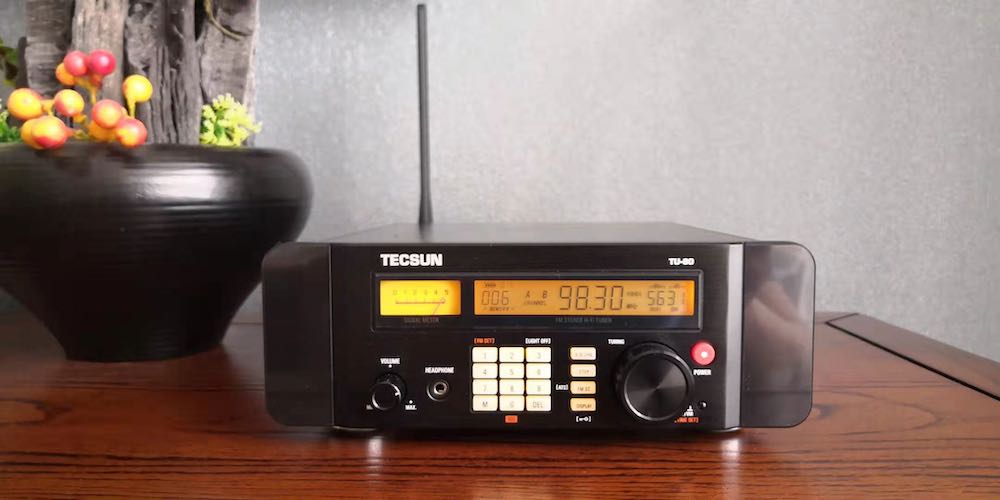
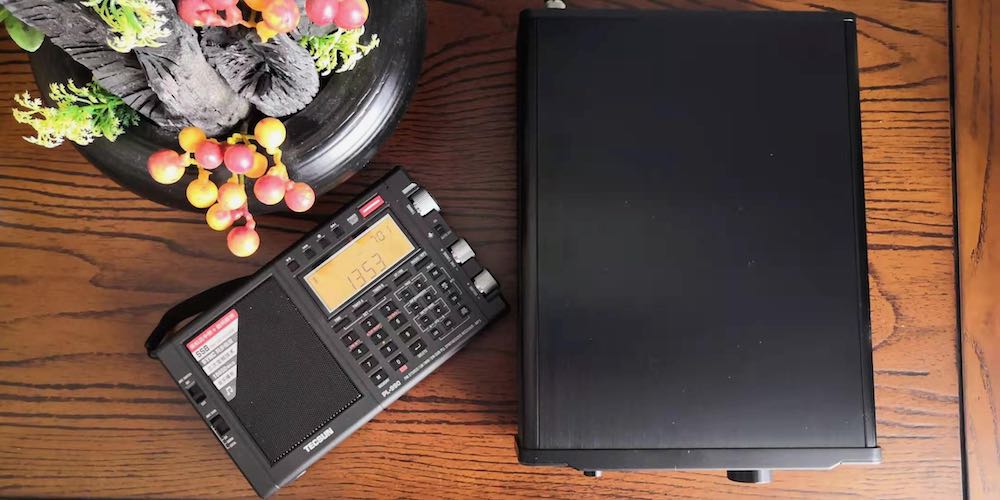
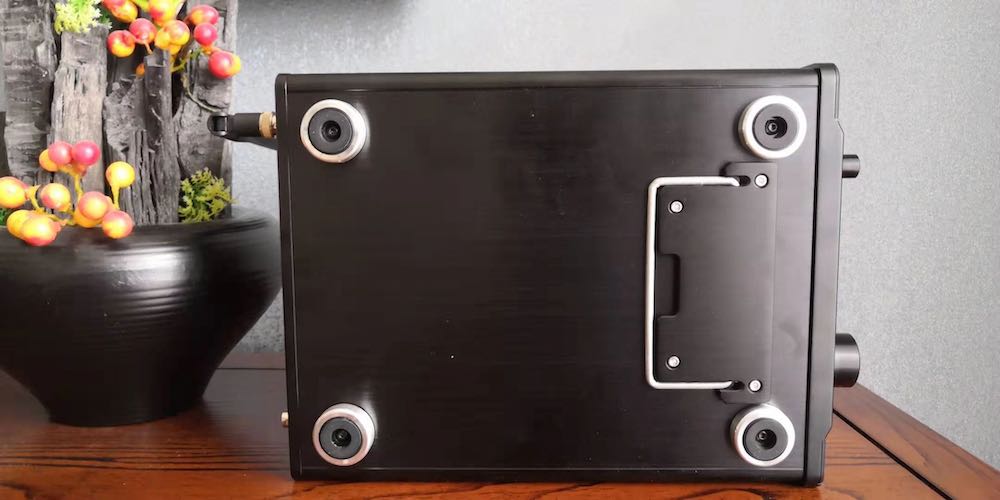
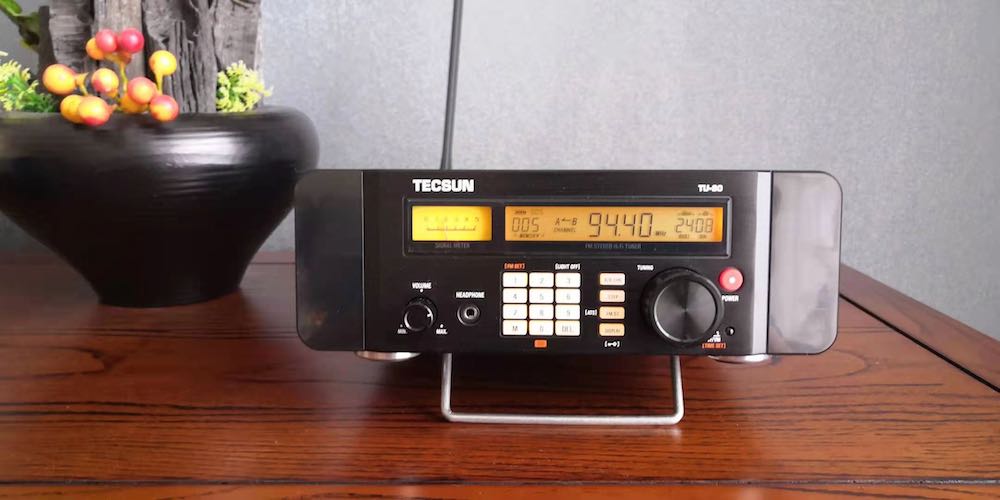
Tecsun’s Chairman, Mr Liang Wei has told us that TU-80 was not designed for the pure Bclers not for the pure audiophiles either, but for the person who is both Bcler and audiophile. We have to use it with high quality external speakers. That’s it.
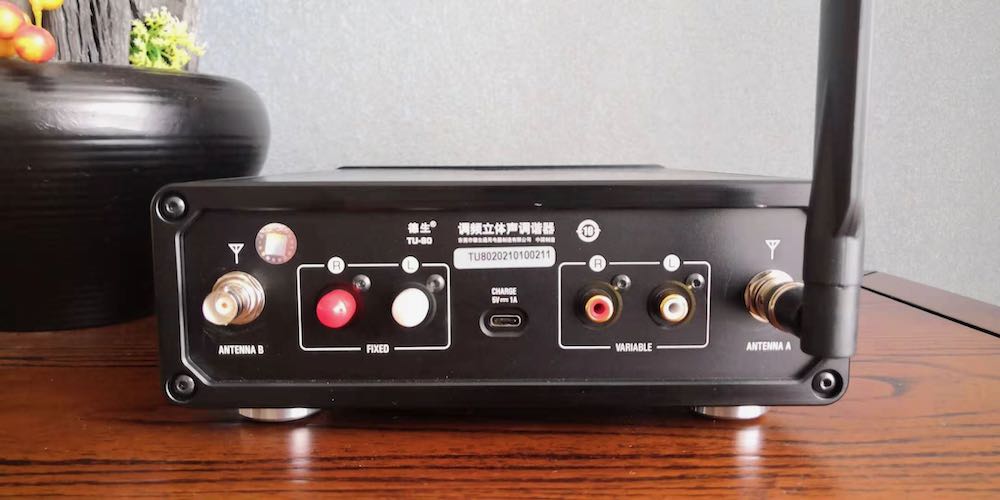
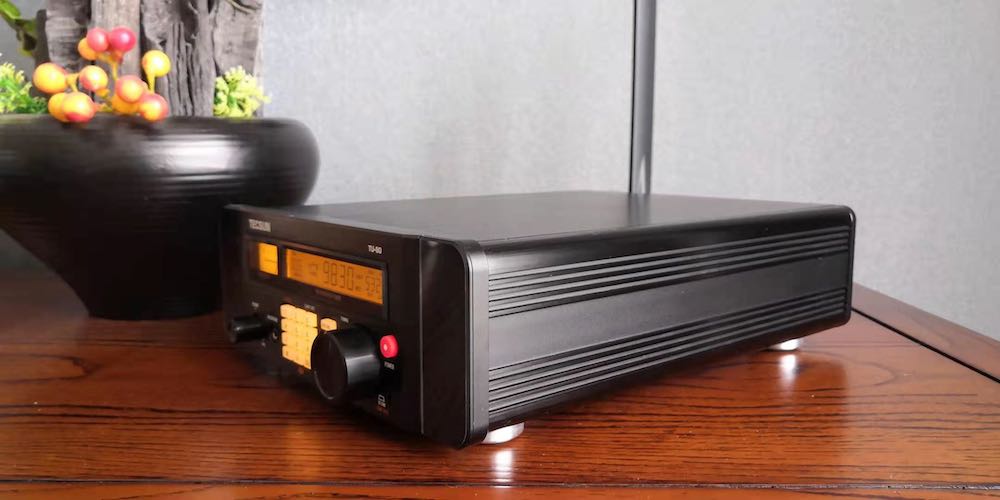
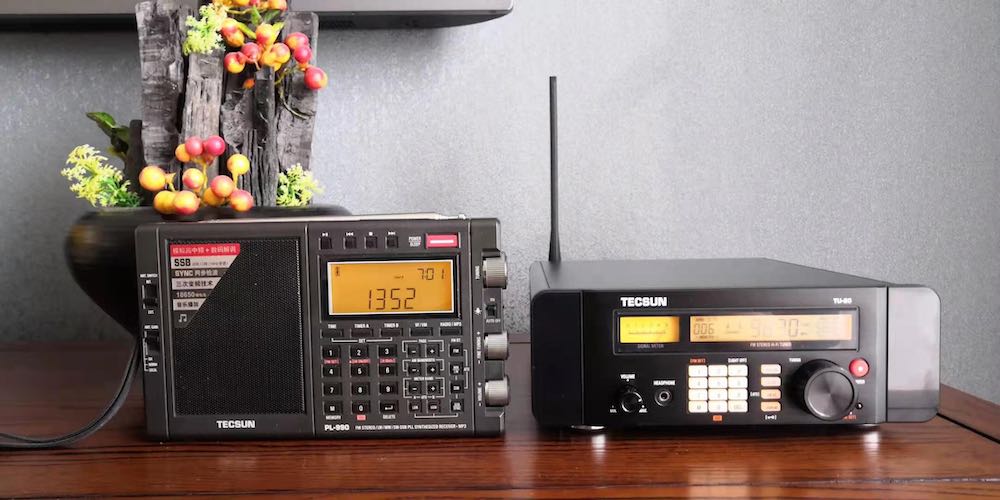
Let me show you some pictures I took yesterday:
Additionally, one reader misunderstood me as a seller, absolutely no, I am just a radio enthusiast and a college teacher, I major in western philosophy, especially American Pragamatism.
Yours sincerely.
Mei Tao
Thank you, Mei Tao. We truly appreciate your early access to these various models of portable radios. The TU-80 appears to be a truly unique model and I’m sure FM DXers are following it carefully. Thanks again!

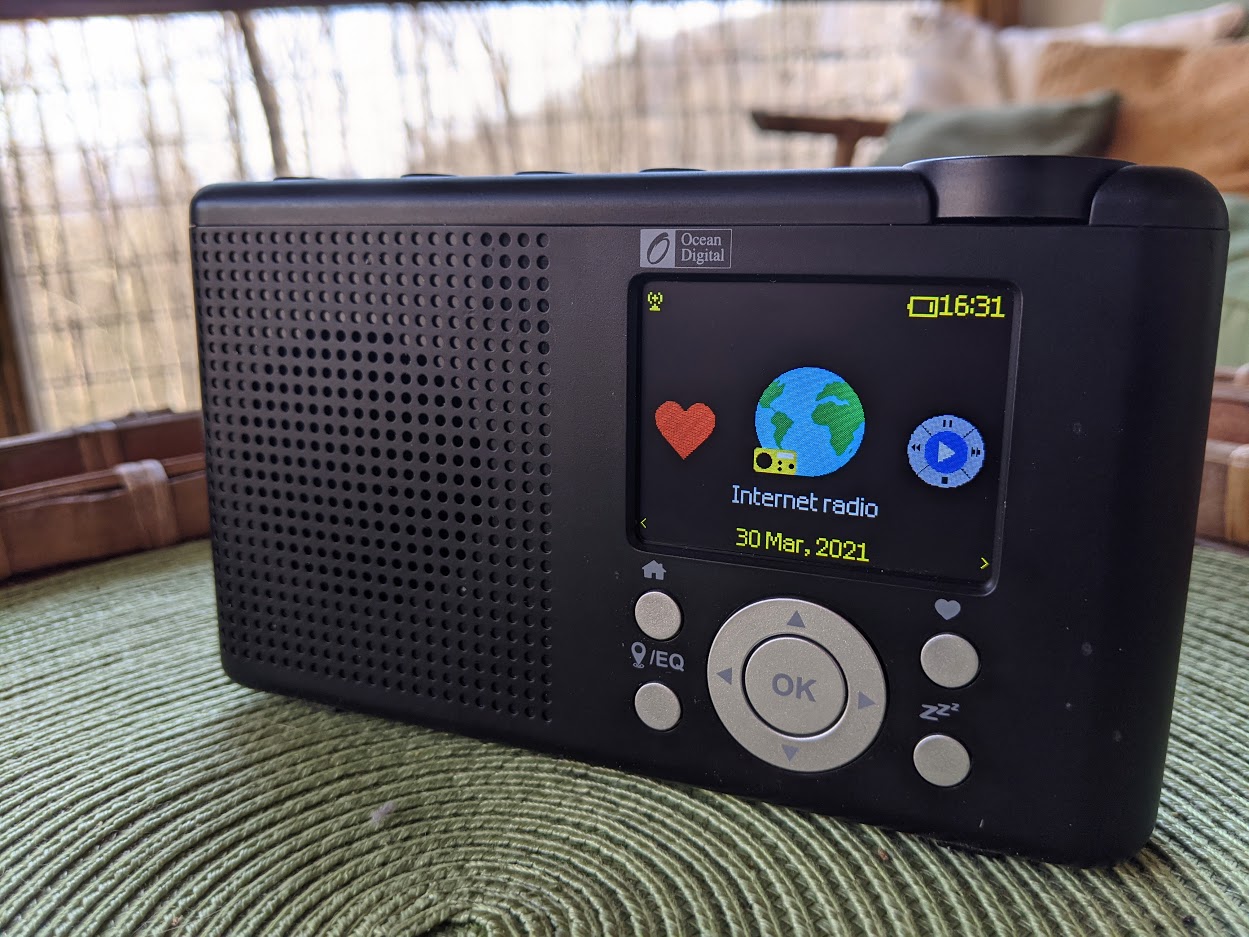 Readers might recall that last year, I reviewed the Ocean Digital WR-26 portable radio and was pretty impressed.
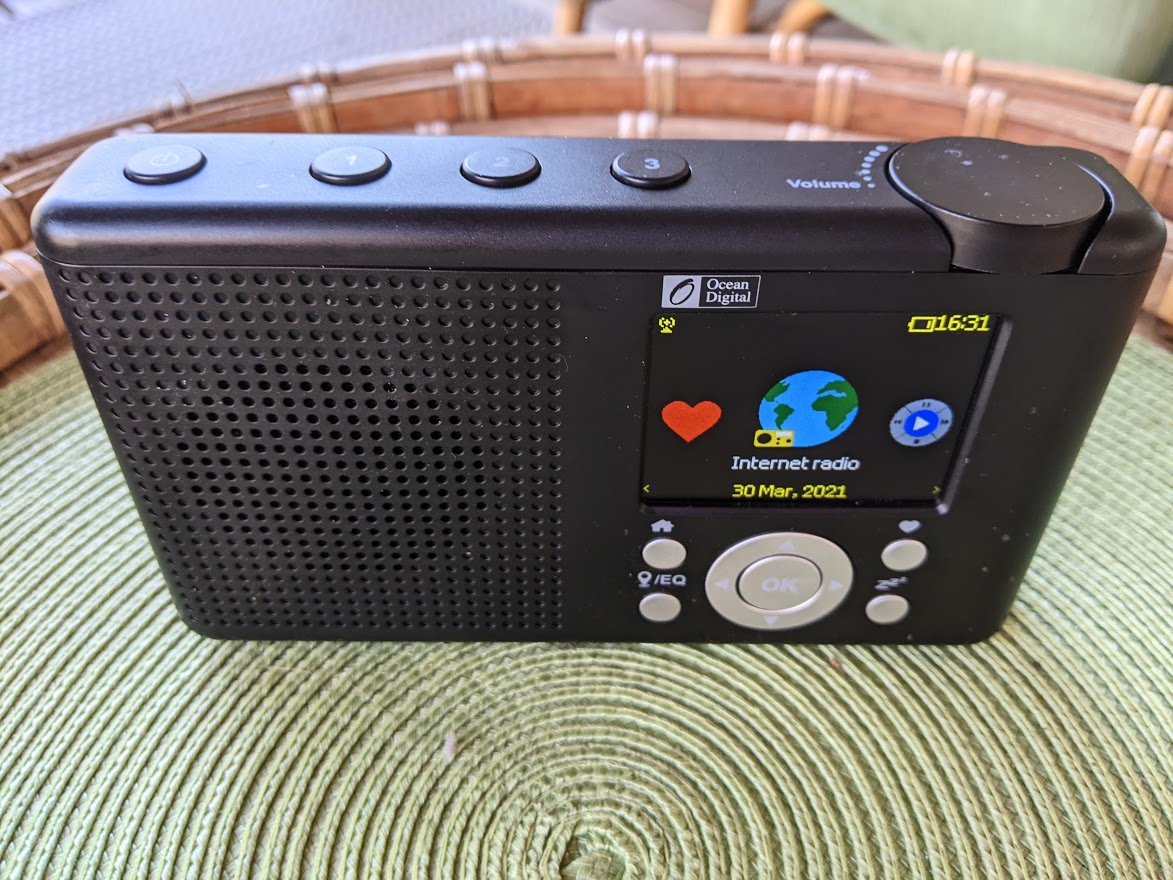 The Ocean Digital WR-23D sports an ABS plastic body that feels very solid in the hand. Indeed, some shortwave portable manufacturers should take note–the ABS structure is so solid, there’s no give when I press into the middle of the speaker grill, for example. I feel like this radio would survive falling off of a table or shelf with no problems.
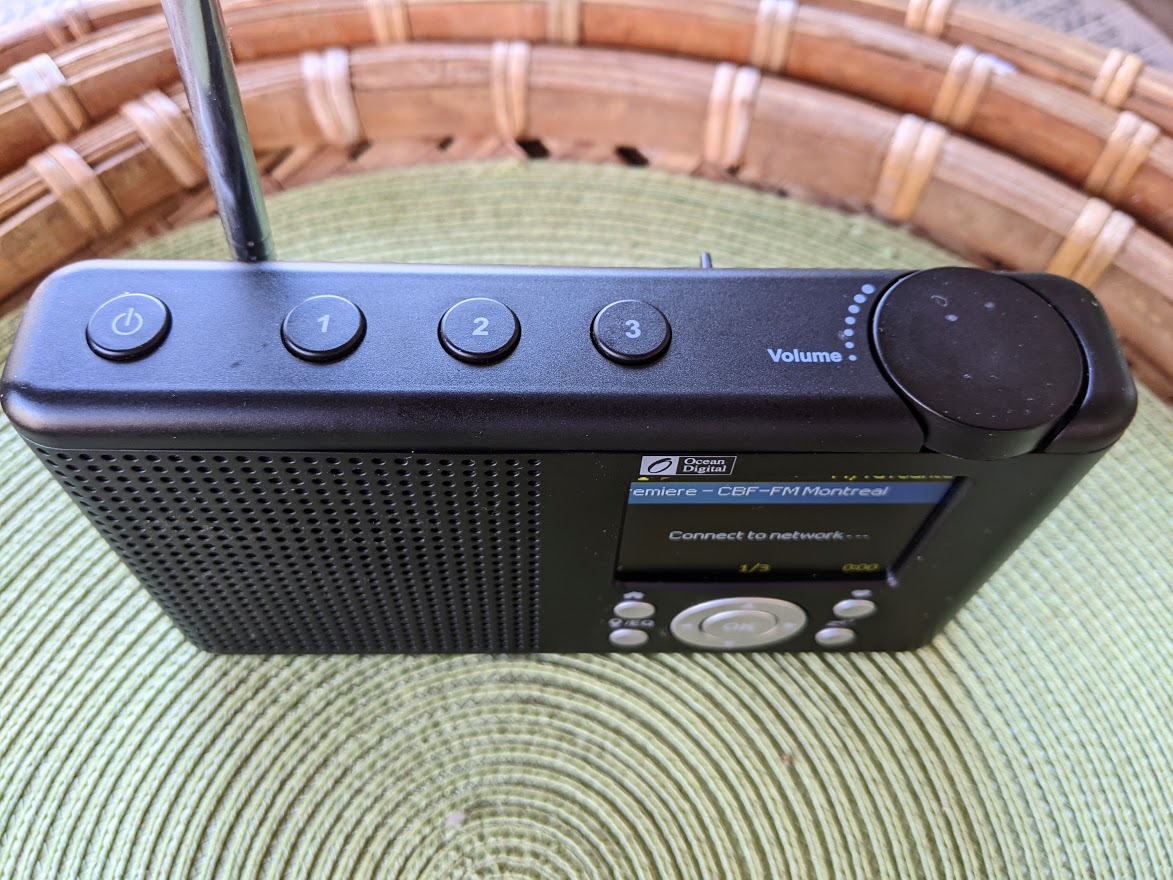
 The front-facing speaker delivers balanced audio. There has obviously been some attention given to the speaker enclosure because it produces a bit more bass than I would have anticipated. There are 12 EQ presets you can use to tailor the audio as well. The WR-3D is not an audio powerhouse–in fact, the audio level stops short of allowing the speaker to splatter–do don’t expect a “boom box” response.
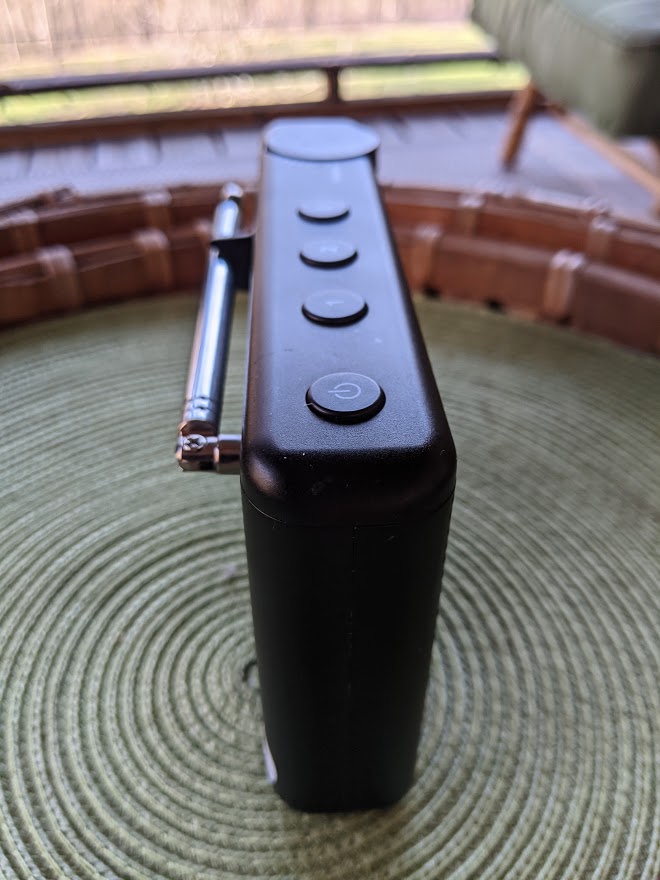
 The WR-23D has a very capable FM radio. I had it scan my local FM dial and it automatically picked up all of the stations I would have expected. The radio has both auto and manual tuning.
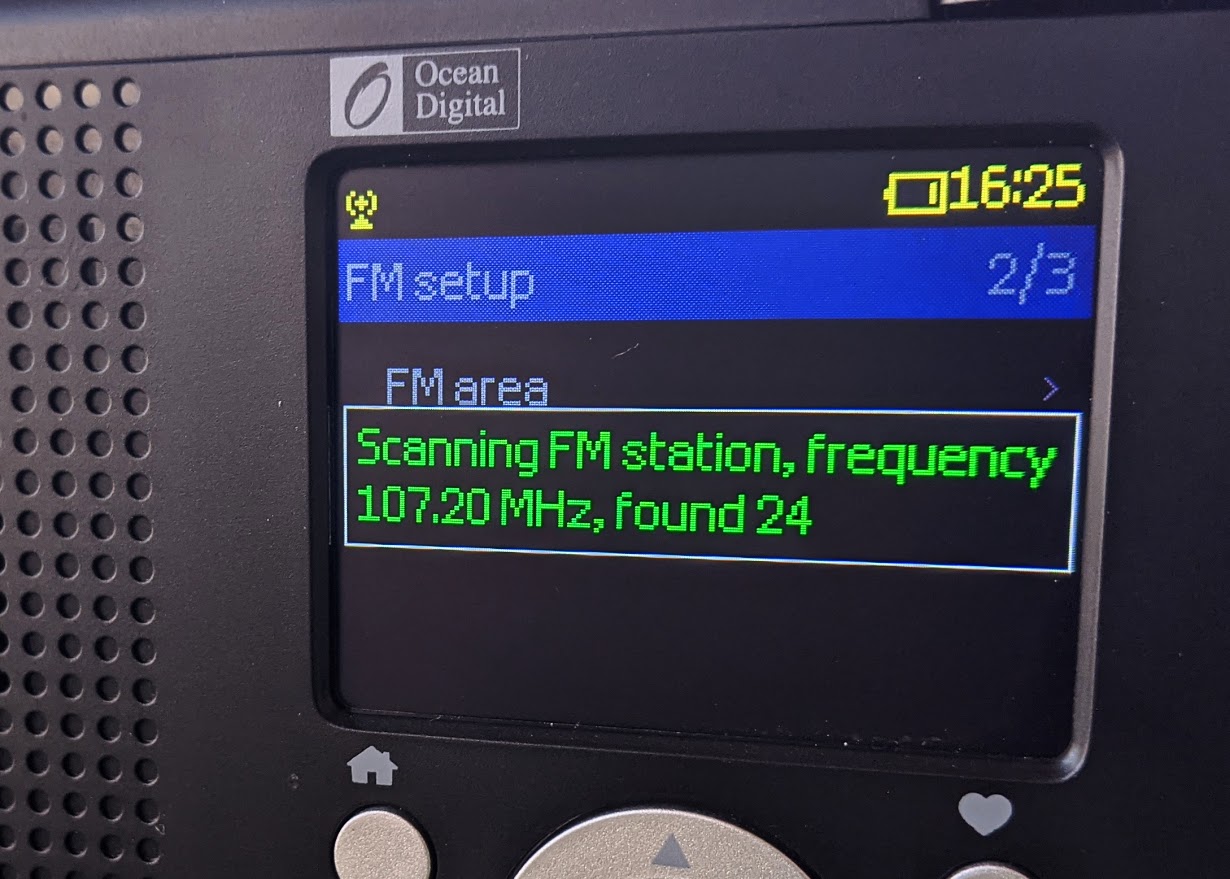
 As I mentioned, I really appreciate the matte finish ABS chassis. I like to know that my portables can survive a fall.