Category Archives: Reviews

Testing the MFJ-1886 Receive Loop Antenna

By Jock Elliott, KB2GOM

Hang out any place online where shortwave listeners gather, and you won’t have to wait long before you hear something like this: “I recently moved to a condo, apartment, or house where there is a home-owners association. Listening conditions are pretty rotten, and I cannot string up outdoor antennas because of physical constraints or HOA rules . . . help!”

Ever since I got back into SWLing nearly two years ago, I have faced similar issues, as I explained here. During that time, I have frequently read that amplified small loop antennas work pretty darn well, and that has piqued my curiosity.

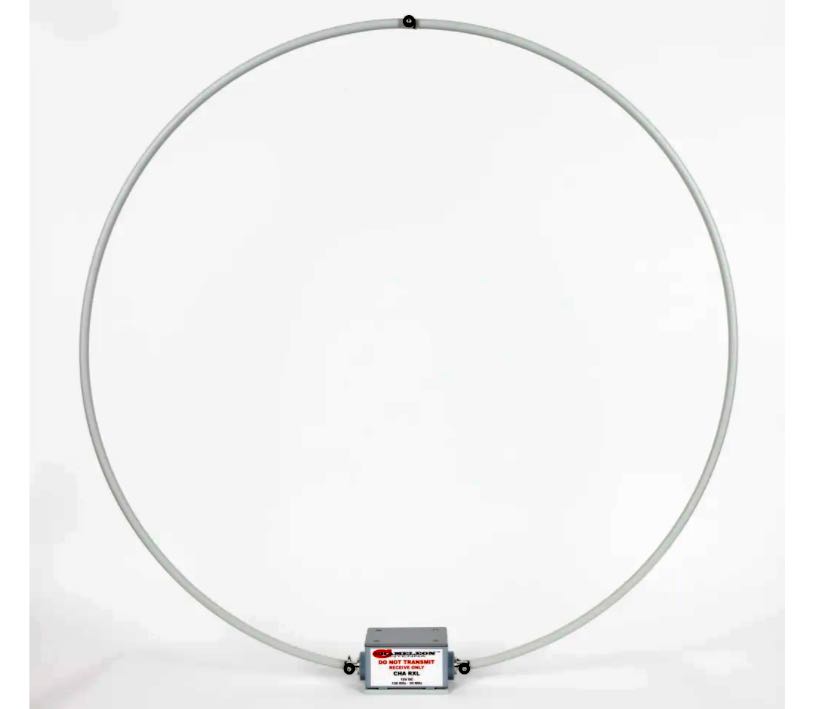
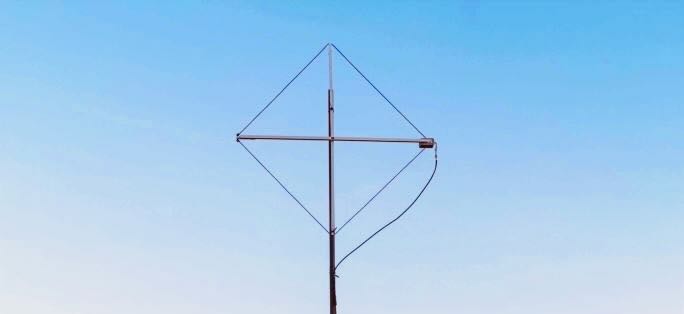
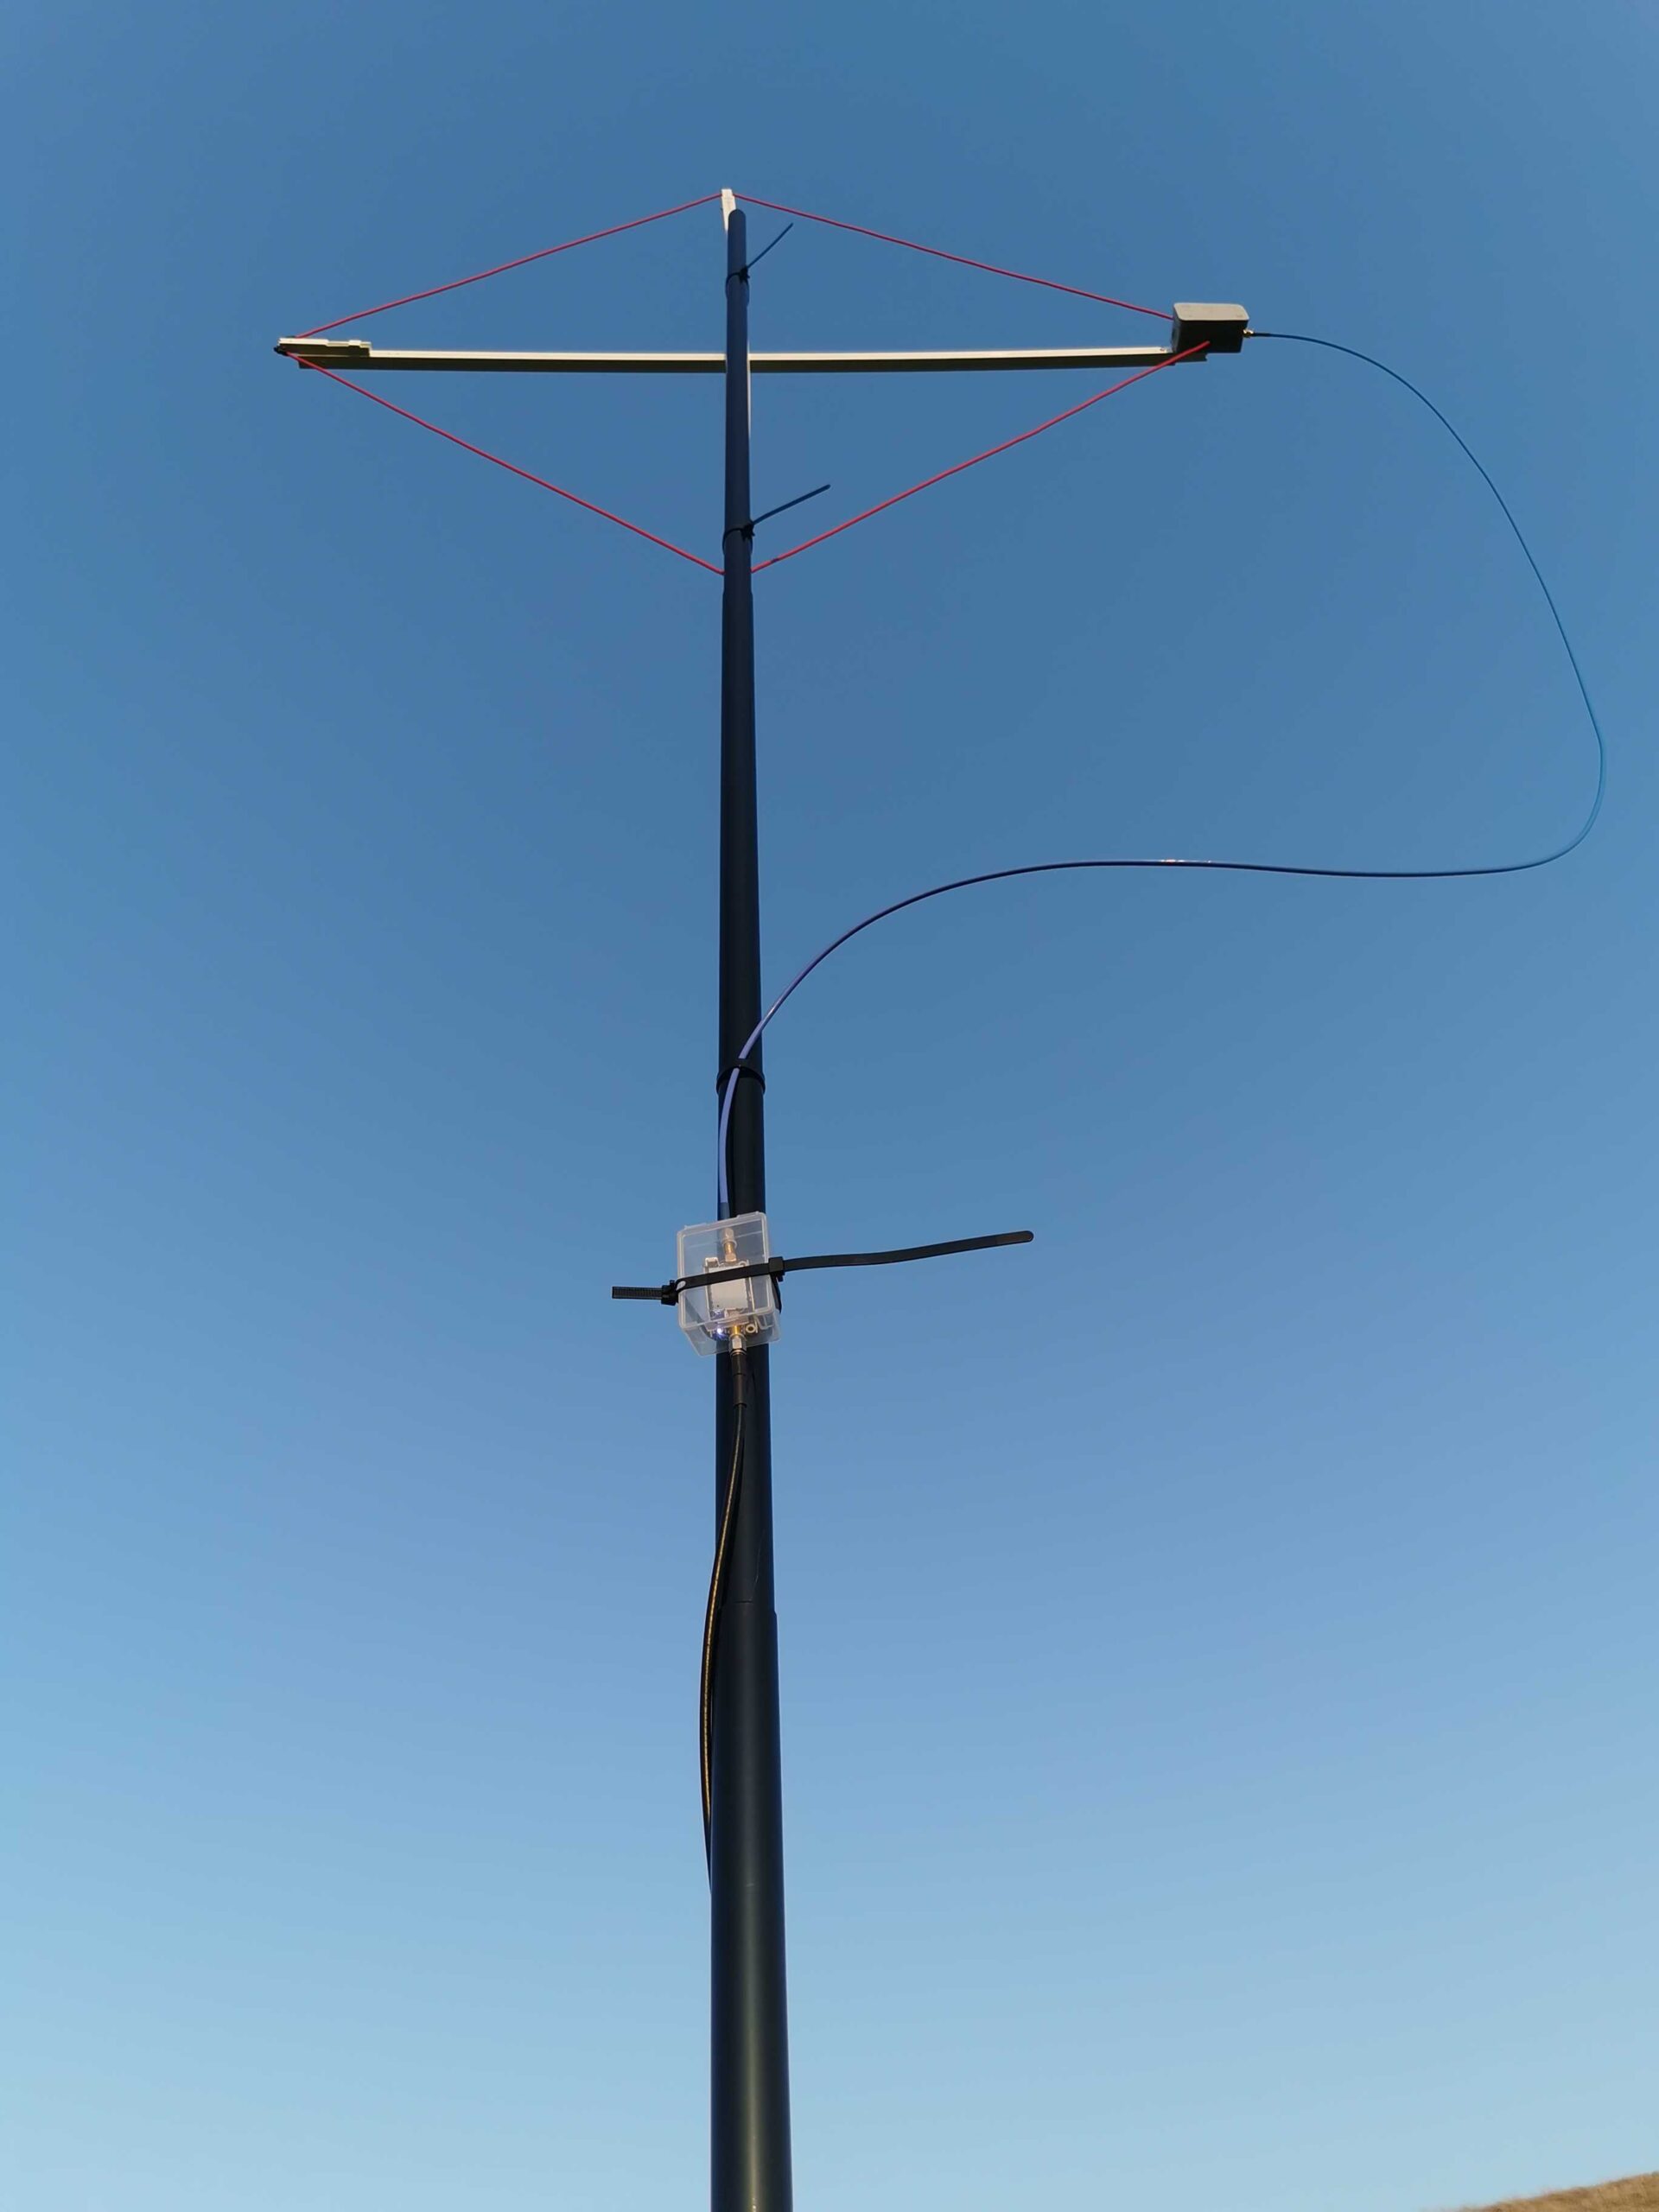
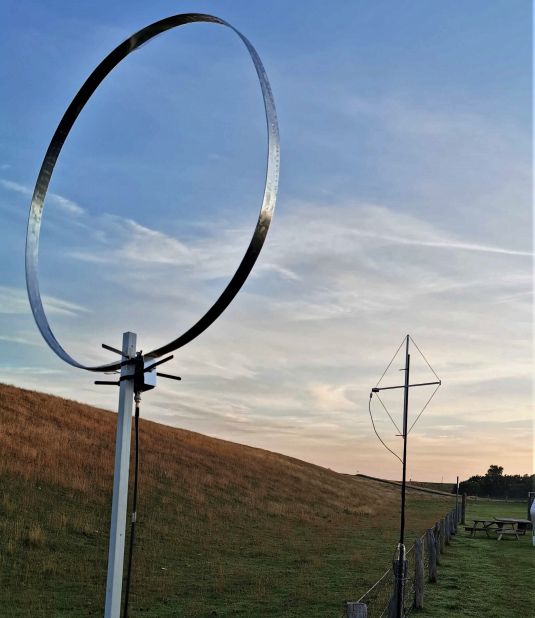
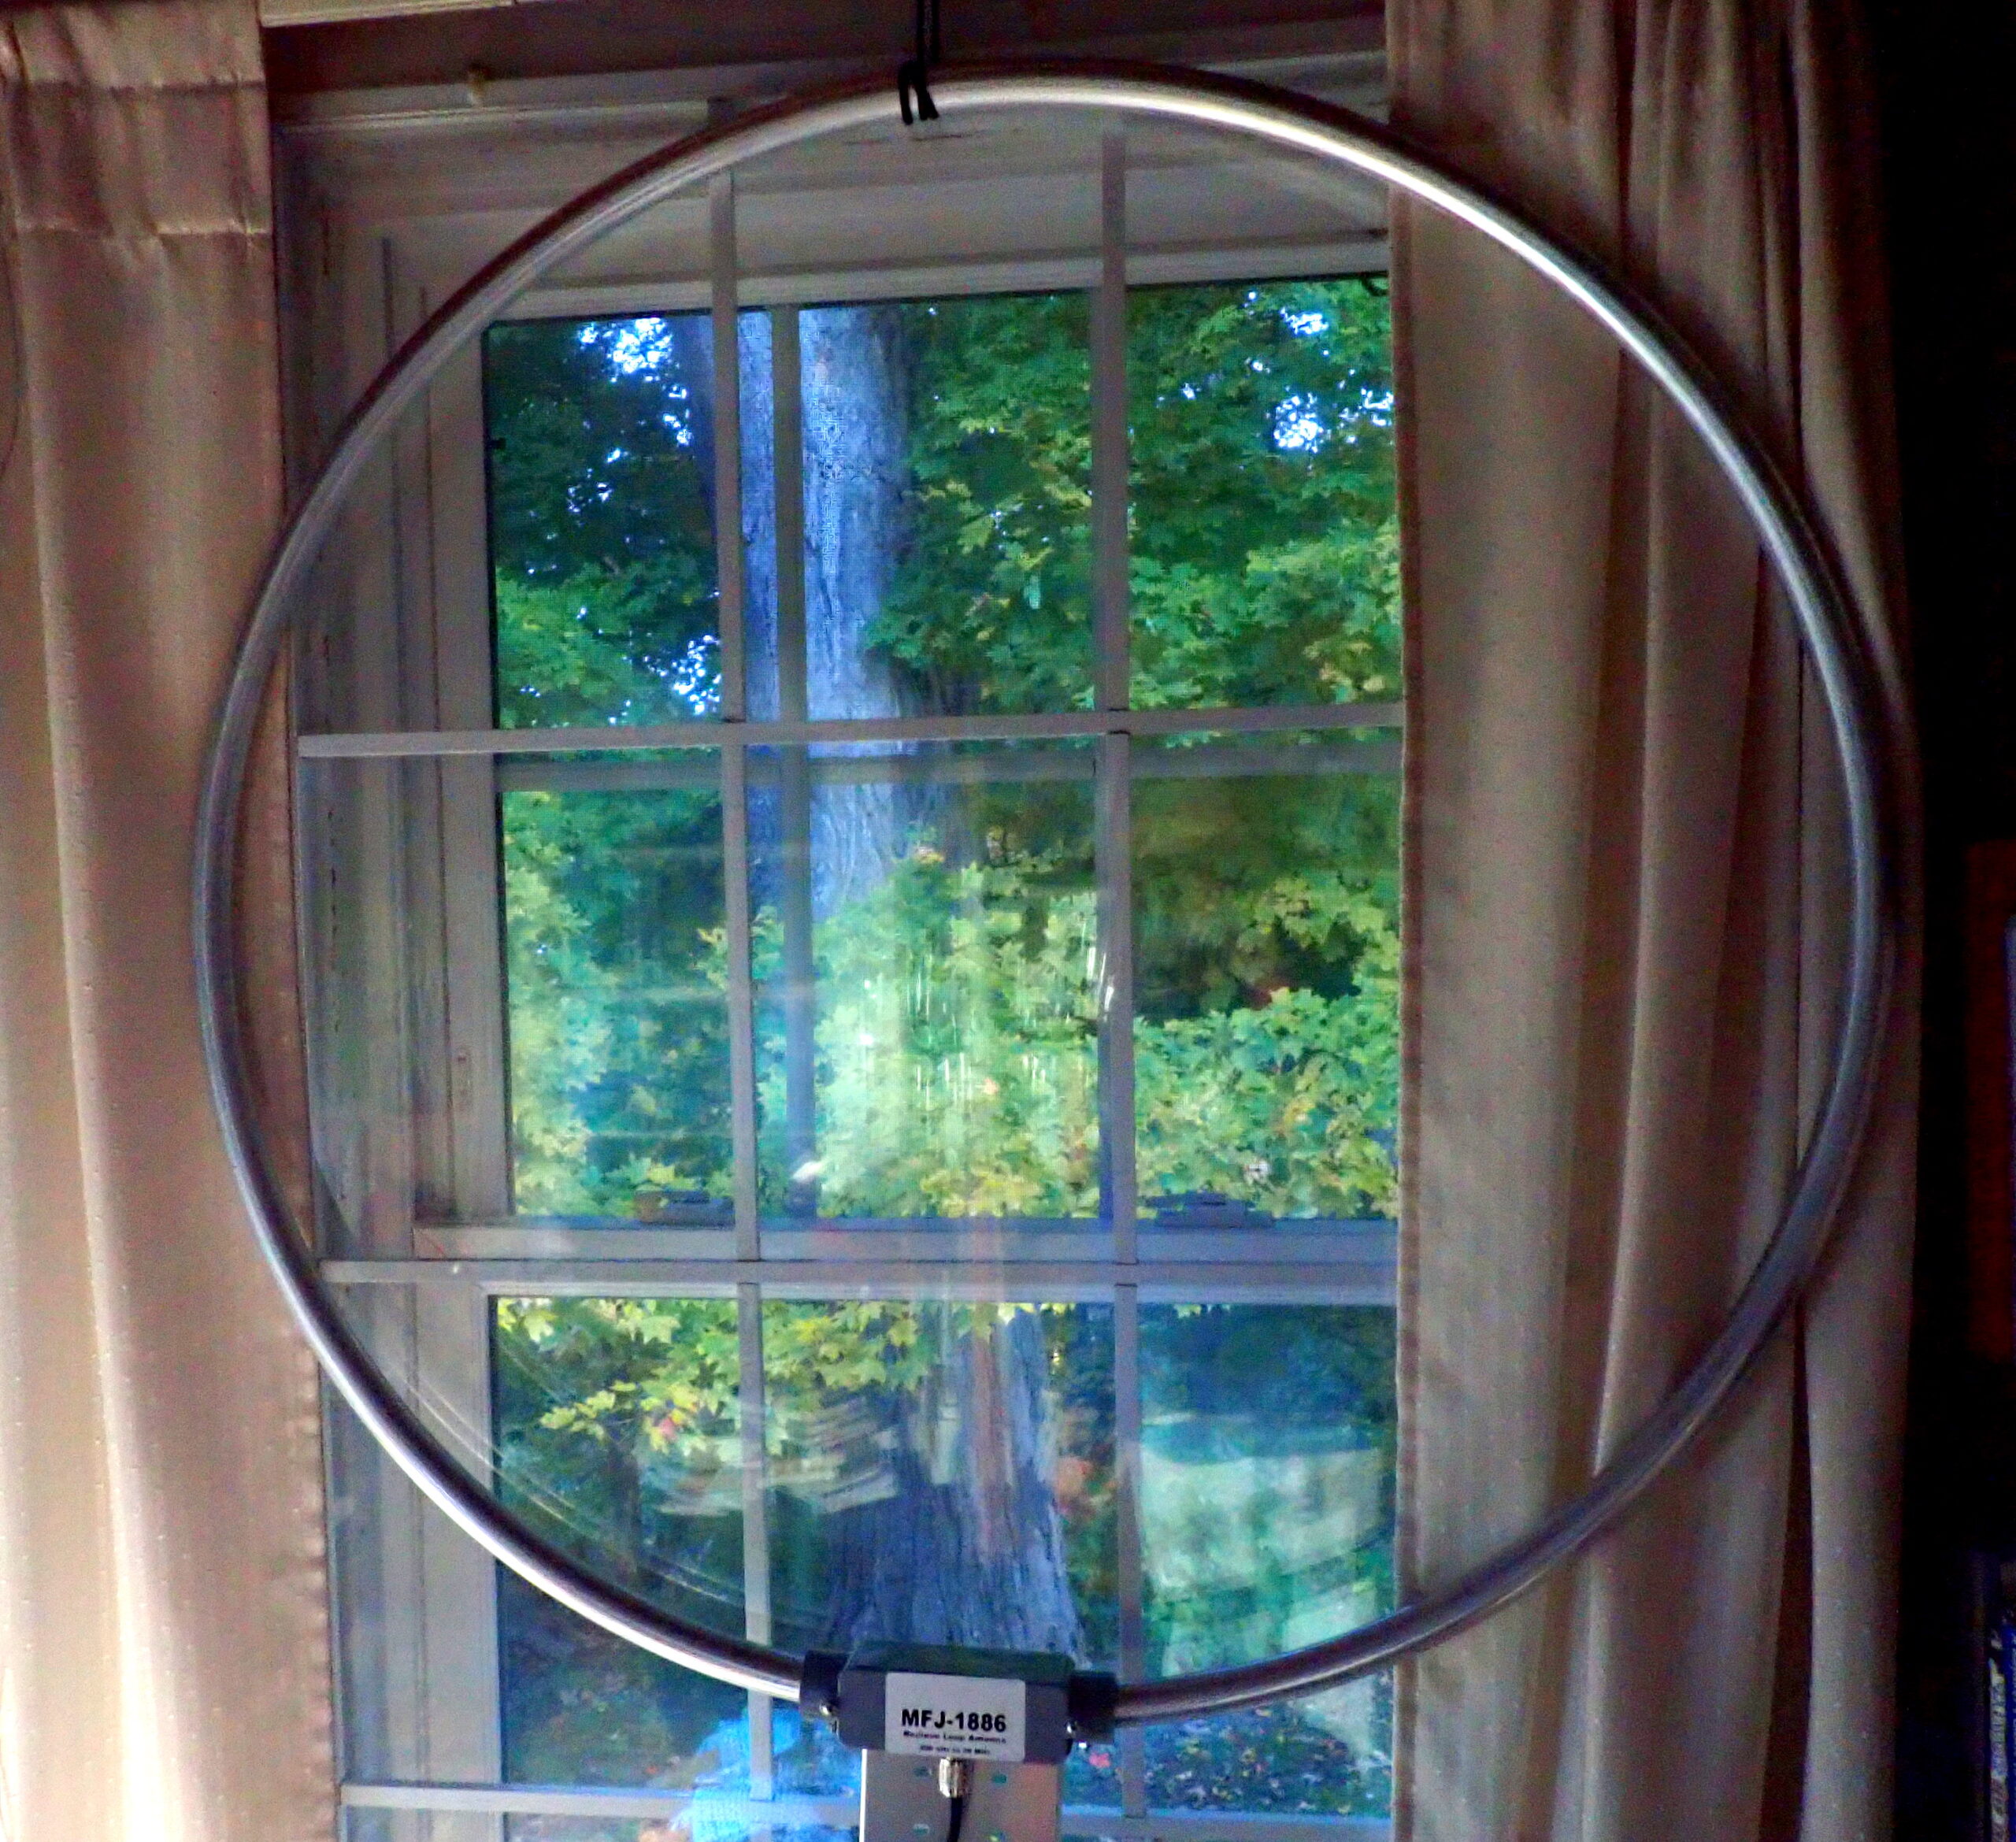
A couple of days ago, the good folks at MFJ (an SWLing.com sponsor) sent me their MFJ-1886 receiving loop antenna. Weighing just 2.5 pounds, the 1886 is a 36-inch-diameter loop of aircraft-grade with an amplifier attached in a weatherproof enclosure. Designed for receiving only, it covers .5 to 30 MHz.

The fit and finish of the 1886 is, in my opinion, great. Looking at the seamless loop and the molded enclosure for the amplifier, I have no reason to doubt what MFJ has to say about it: the MFJ-1886 is weather-sealed, very ruggedly constructed, and mechanically stable under all weather conditions. In fact, you can mount it permanently on any inexpensive TV rotor and direct it from the comfort of your shack . . . it also installs easily on a tripod or handheld mast for portable use.

From MFJ’s manual for the 1886 loop.

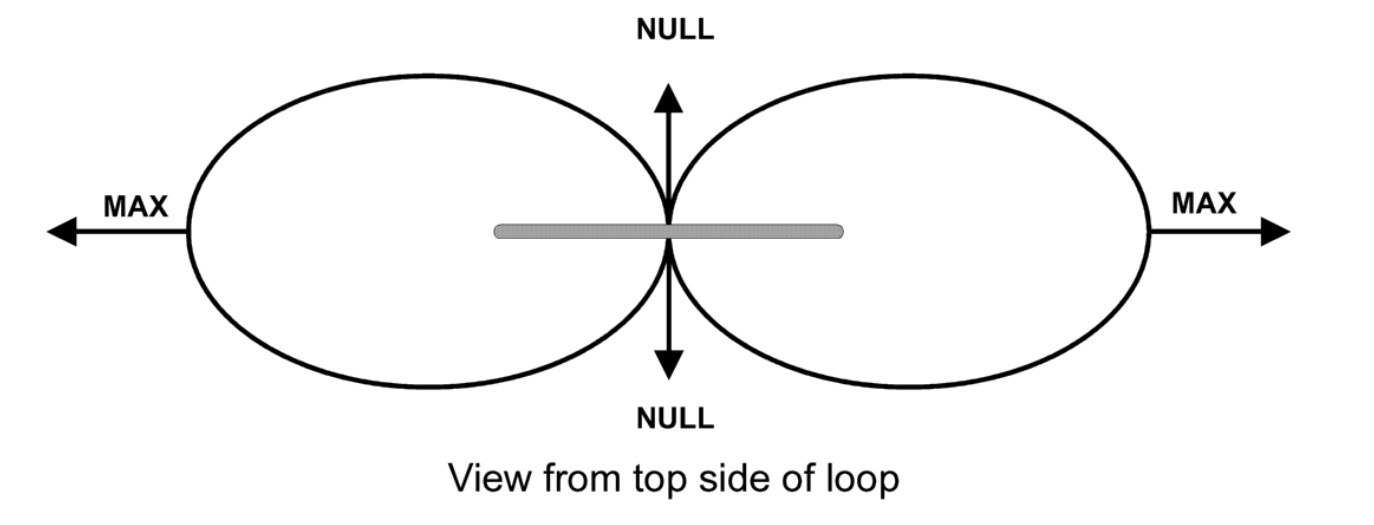
Important: the 1886 loop is a directional antenna. If you are looking through the open area in the middle of the loop (the flat side, if you will), you are looking in the direction in which the antenna tends to null out signals . . . in both directions. If you are sighting along the edge of the loop (at right angles to the flat side), that is the direction in which the antenna produces the most gain. As a result, you will get the most utility out of the 1886 if you can mount it in such a way that you can rotate it to maximize gain and/or null out noise or interfering signals as needed.

Since my mission was to test the 1886 indoors, I wrapped some parachute cord around the loop and hung it from a screw attached to the top of a window frame. Obviously, I am not getting the most from the 1886 by keeping it in a fixed position (in fact, I was getting maximum gain to the northeast and the southwest), but I did experiment with the antenna hanging from the ceiling so that it could rotate, and I did, indeed, find that signal strength rose and fell as the antenna changed position.

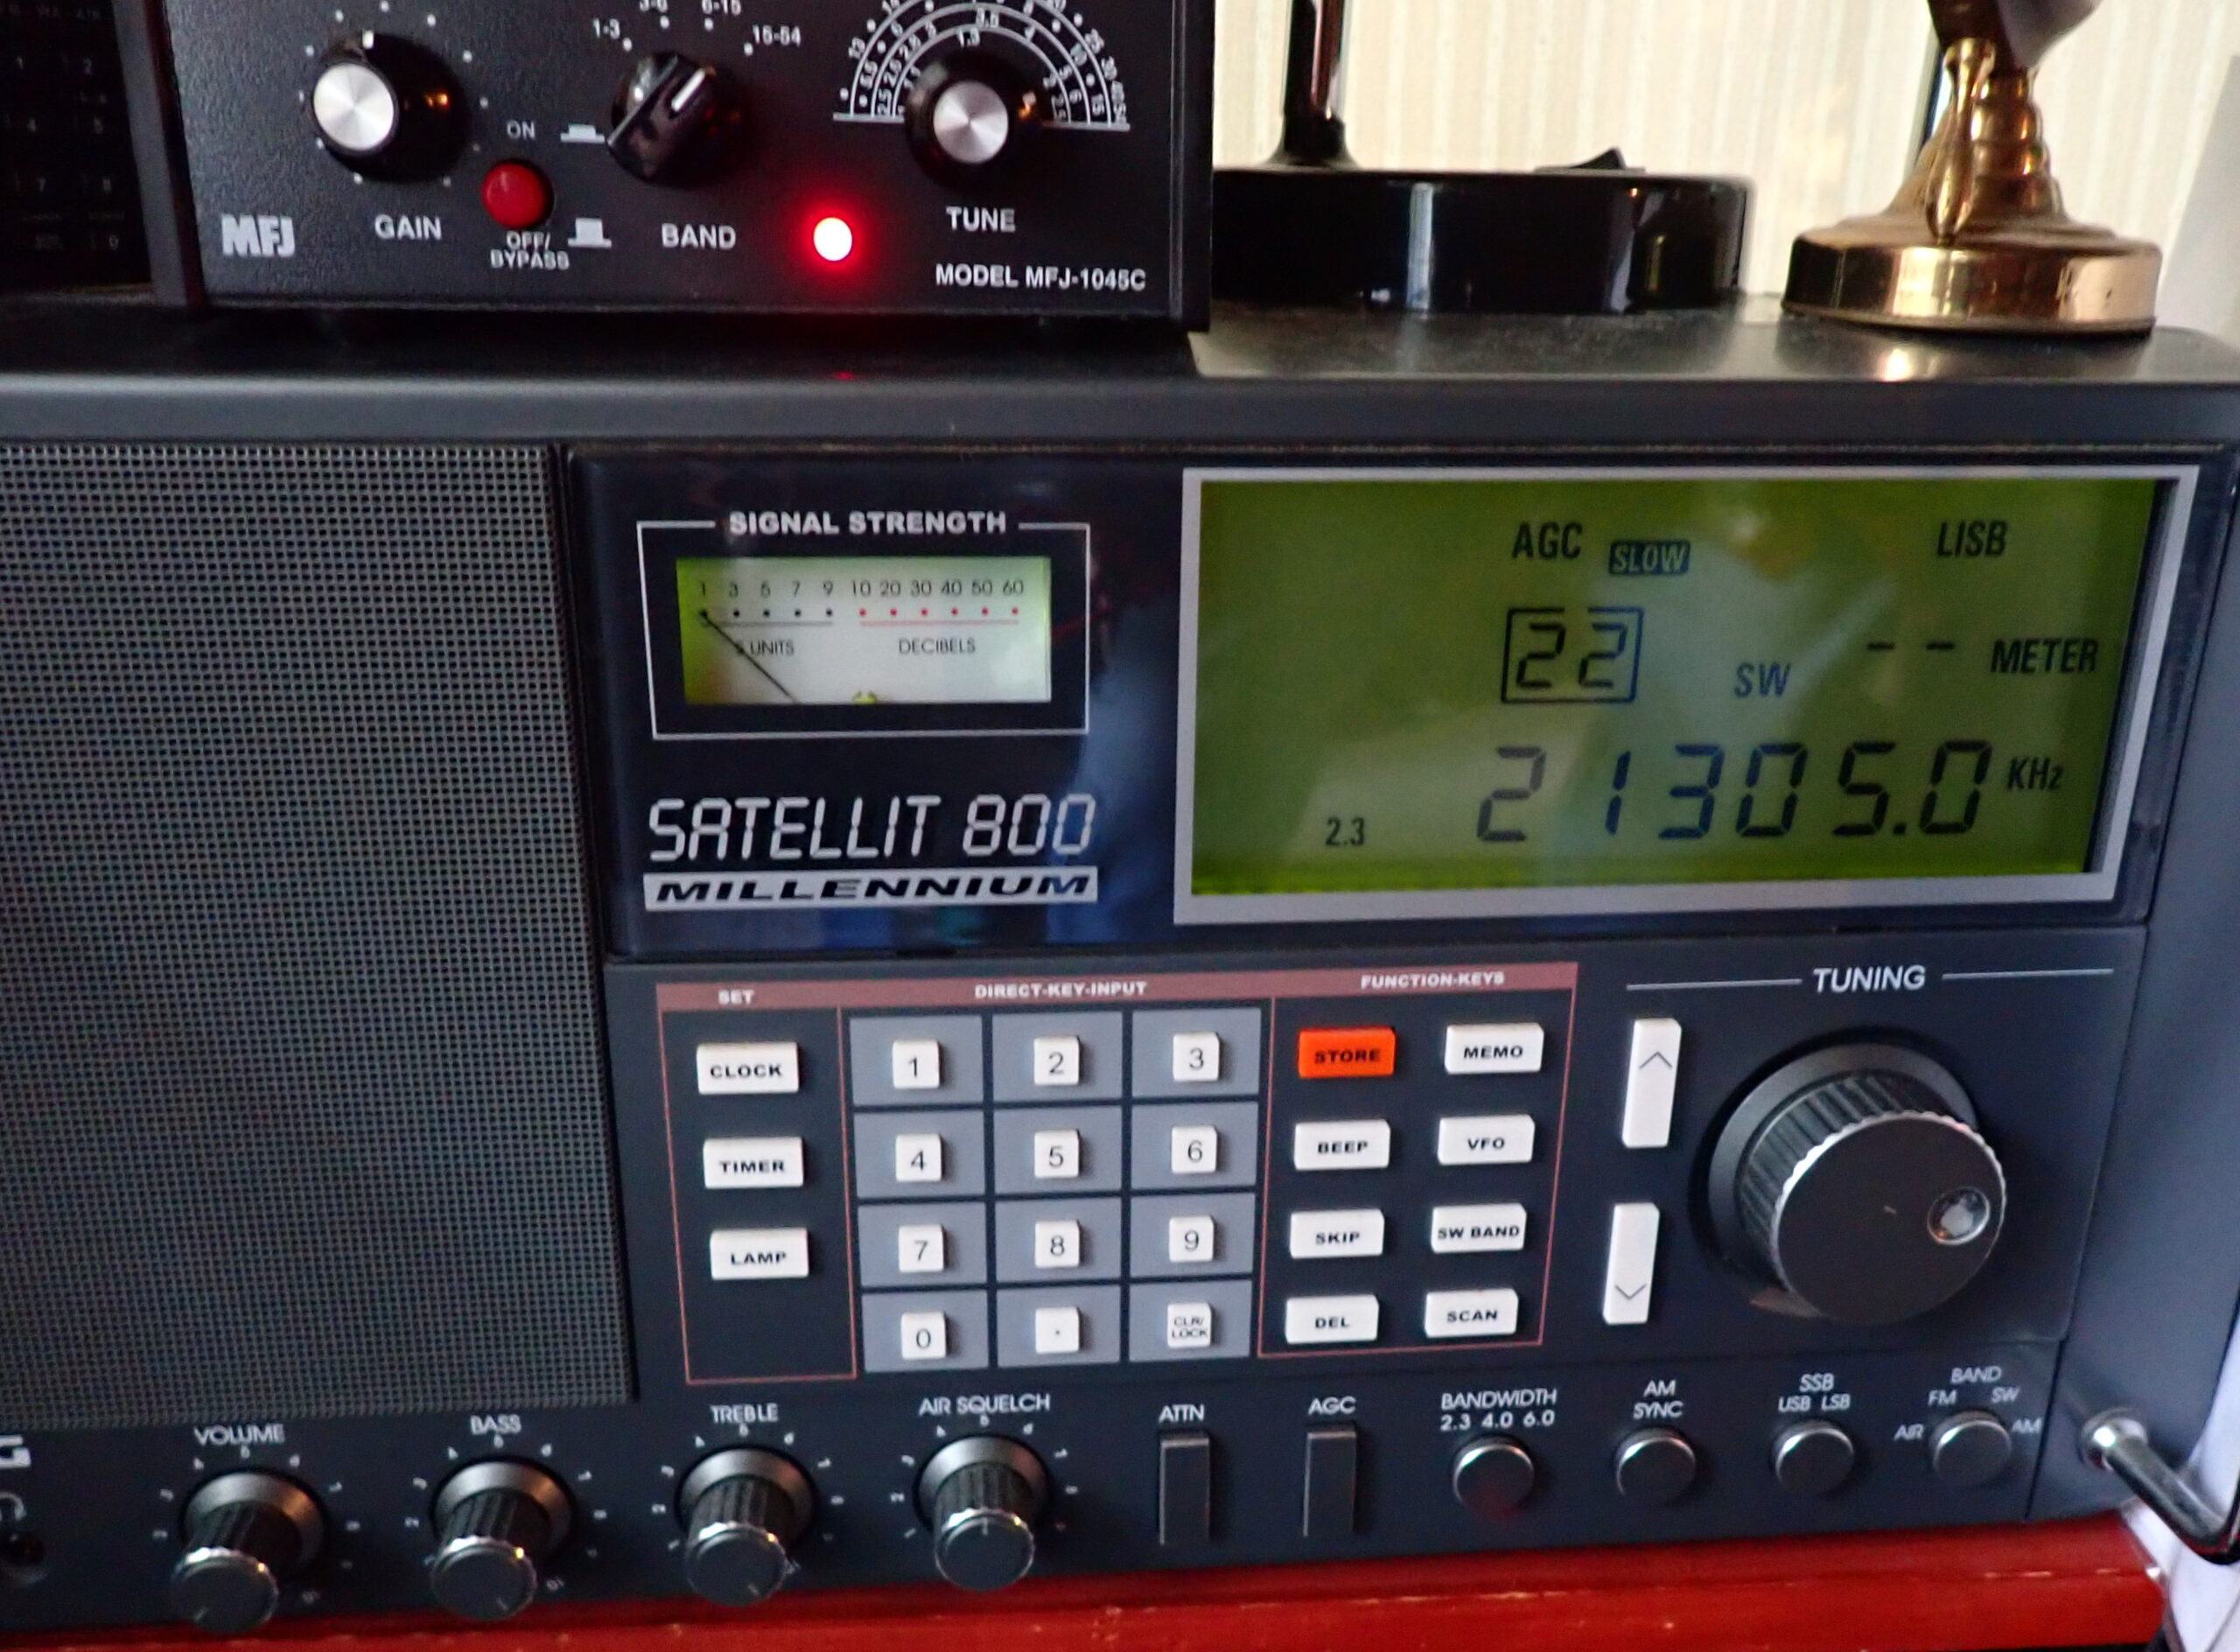
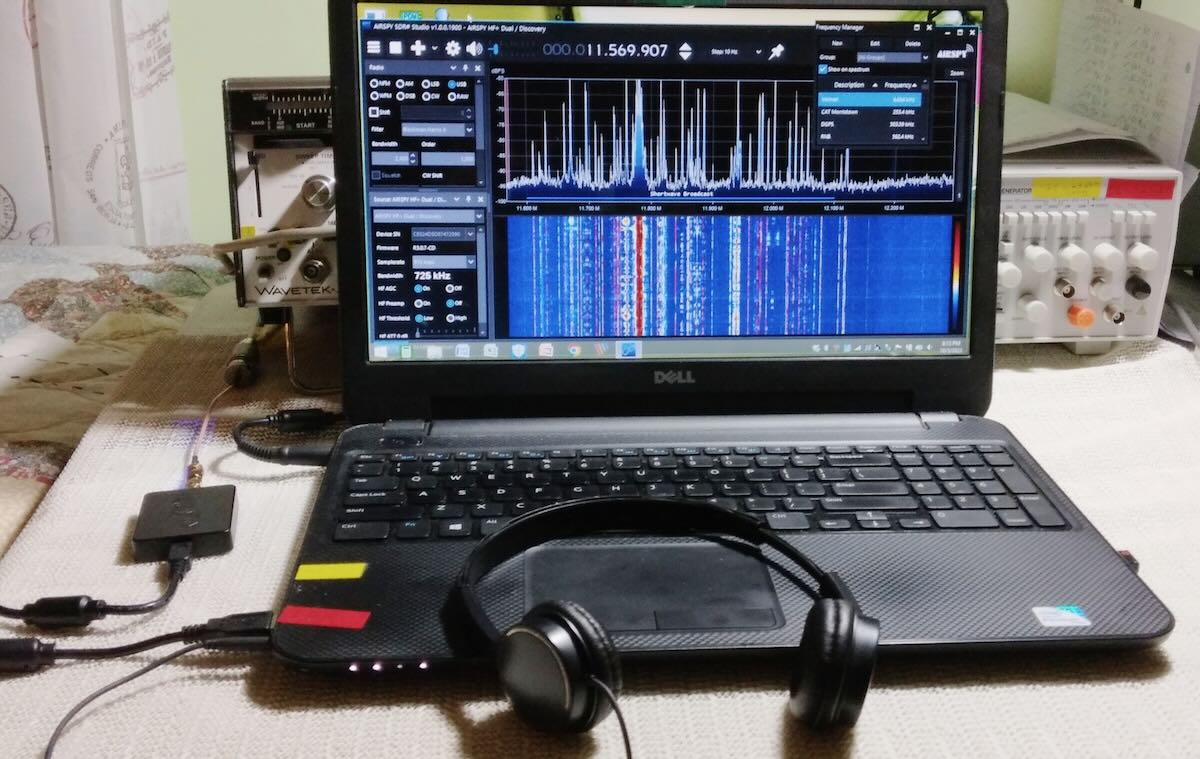
To see how the 1886 performed, I used my Grundig Satellit 800 as a test bed. The Satellit 800 has three different antenna inputs: a wire input, to which I attached the 50-foot horizontal room loop (an indoor antenna which runs around the perimeter of my radio room at about seven feet in the air); a coax input, to which I attached the MFJ 1886 loop, and the four-foot whip antenna that is built into the Satellit 800. By reaching around the back of the radio and sliding the antenna selection switch, I could easily change from one antenna to another and compare the 1886 loop with the whip and the horizontal room loop at various frequencies and settings.

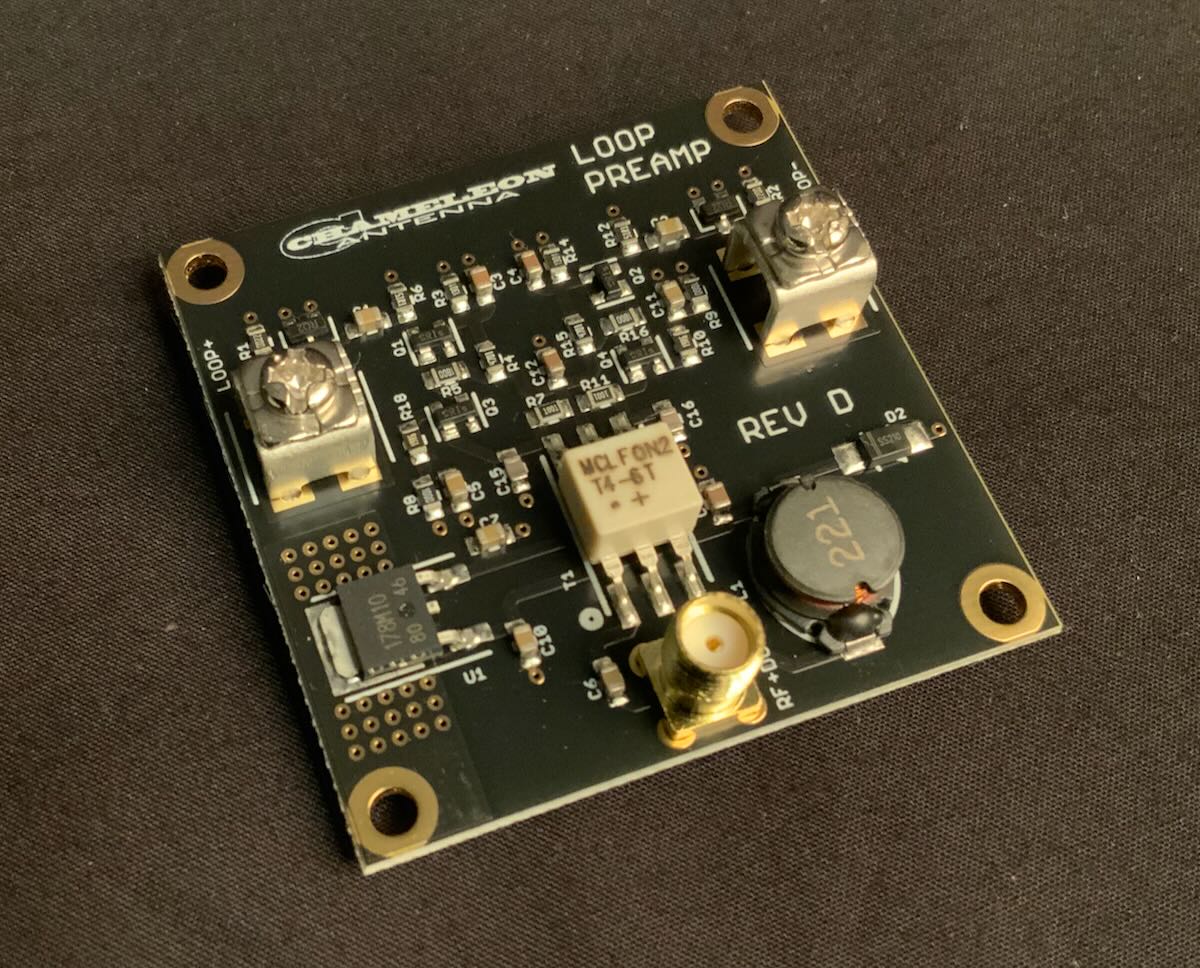
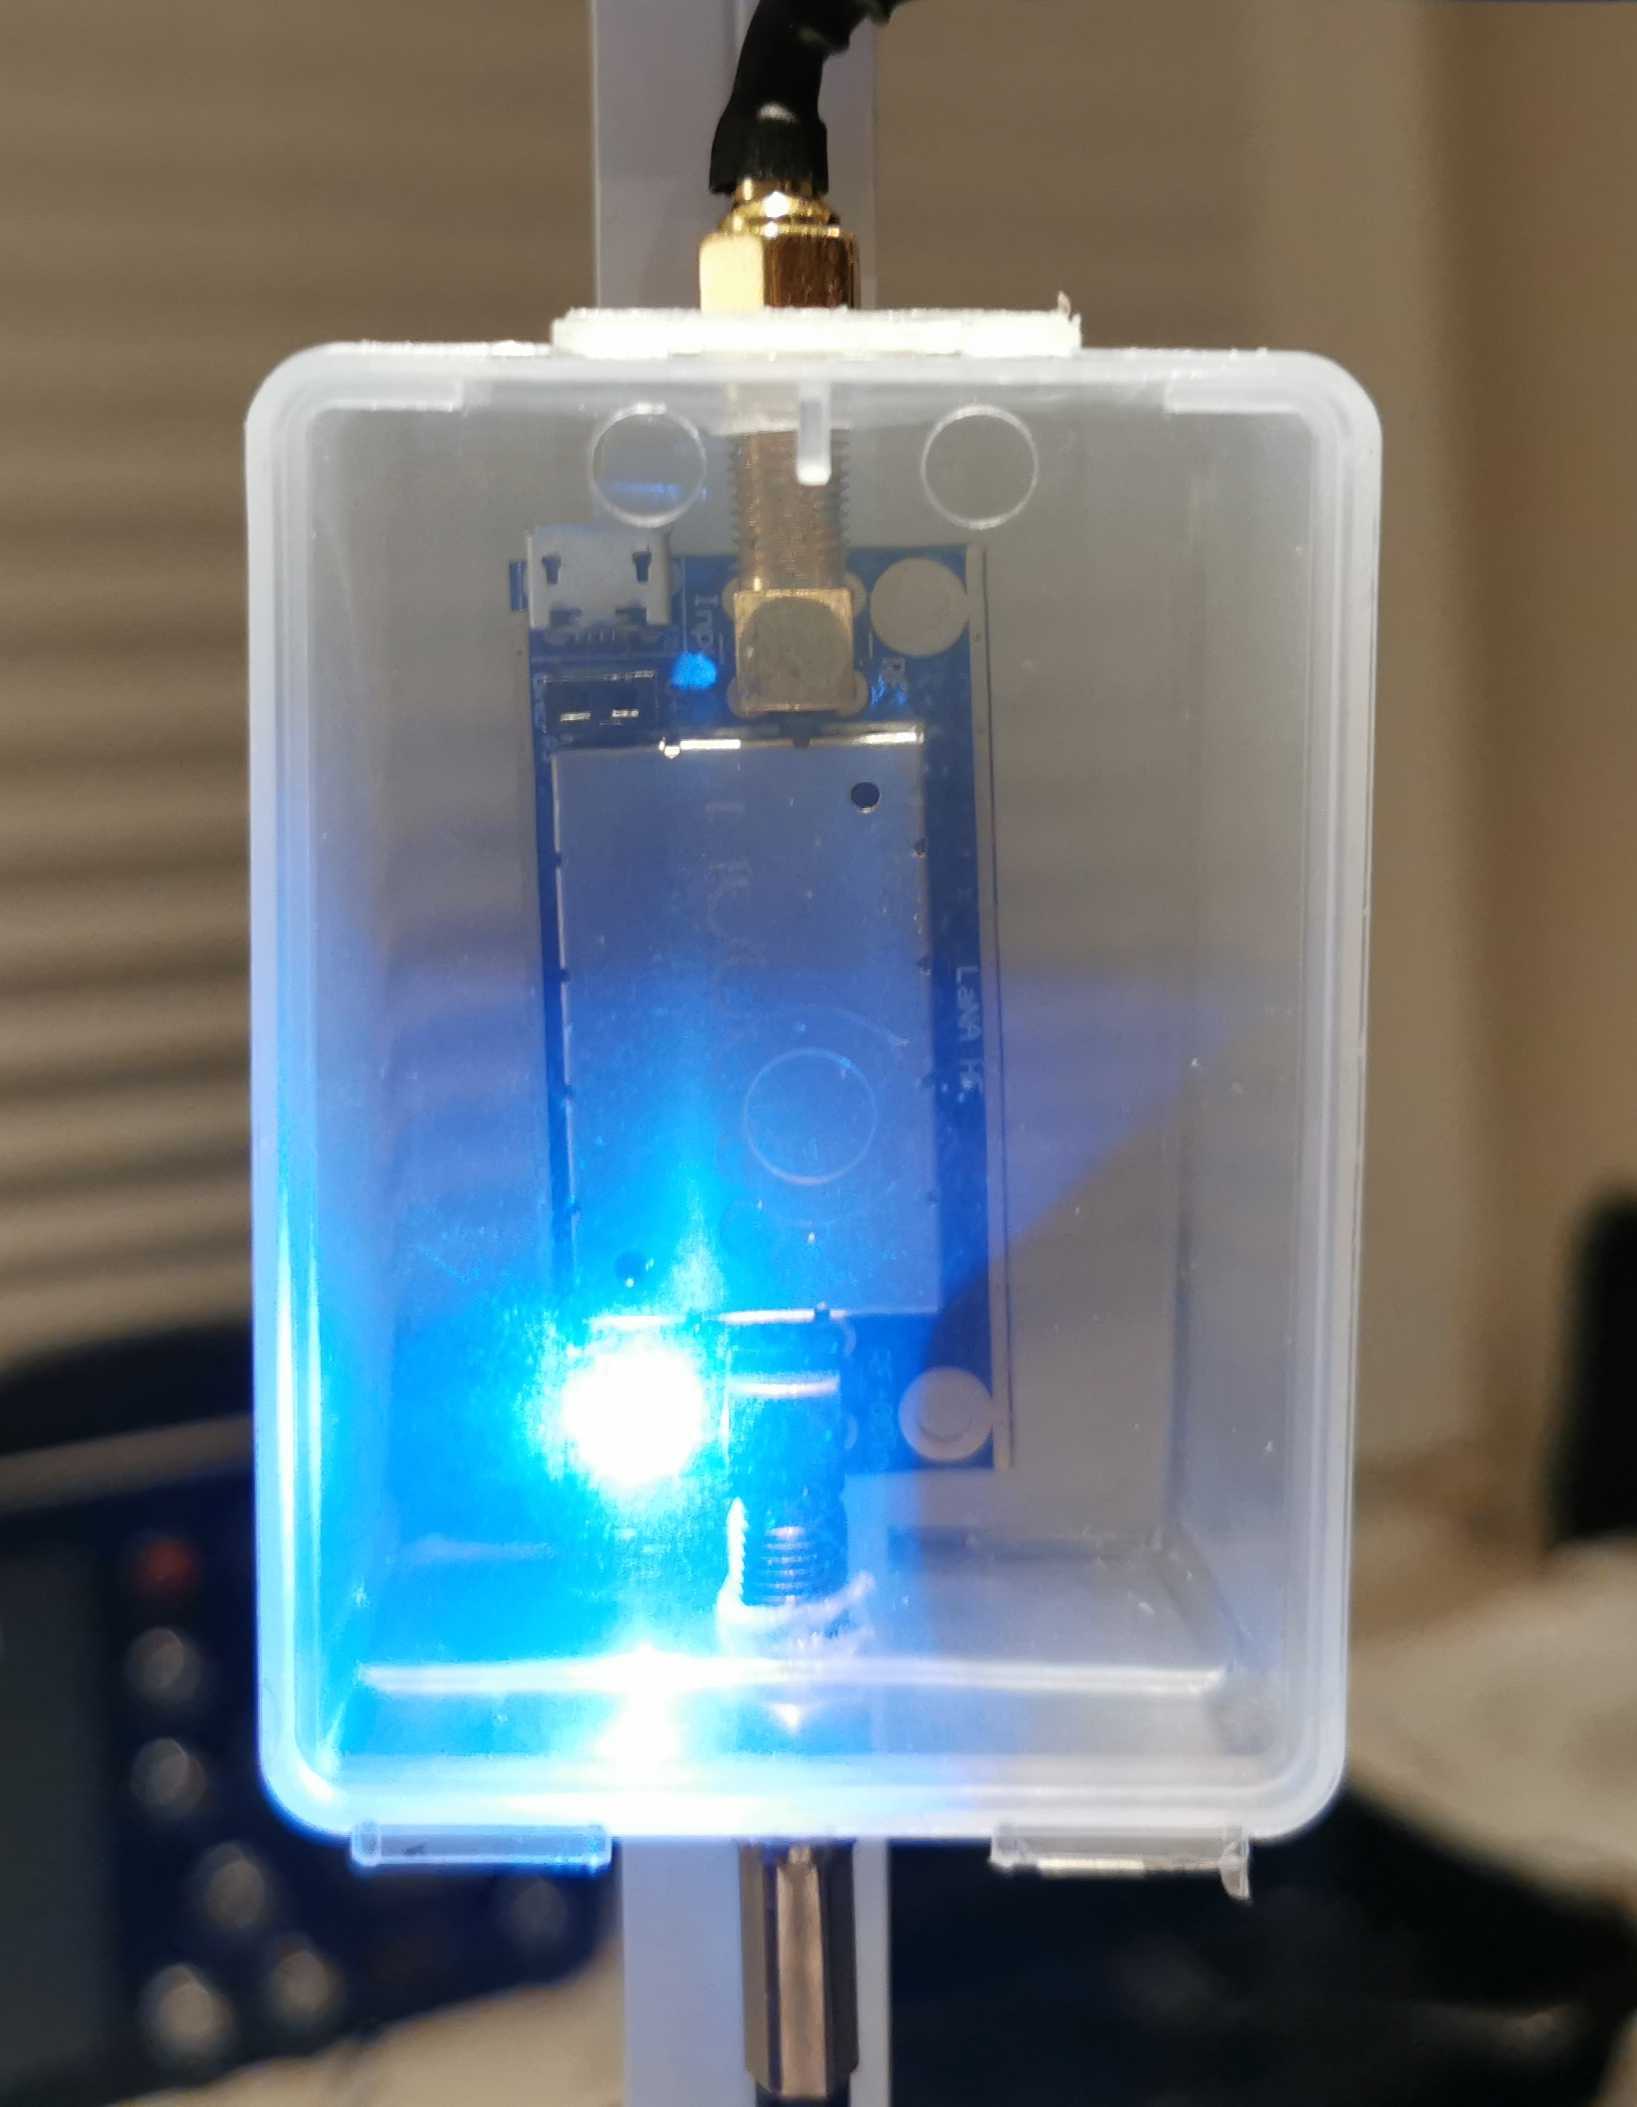
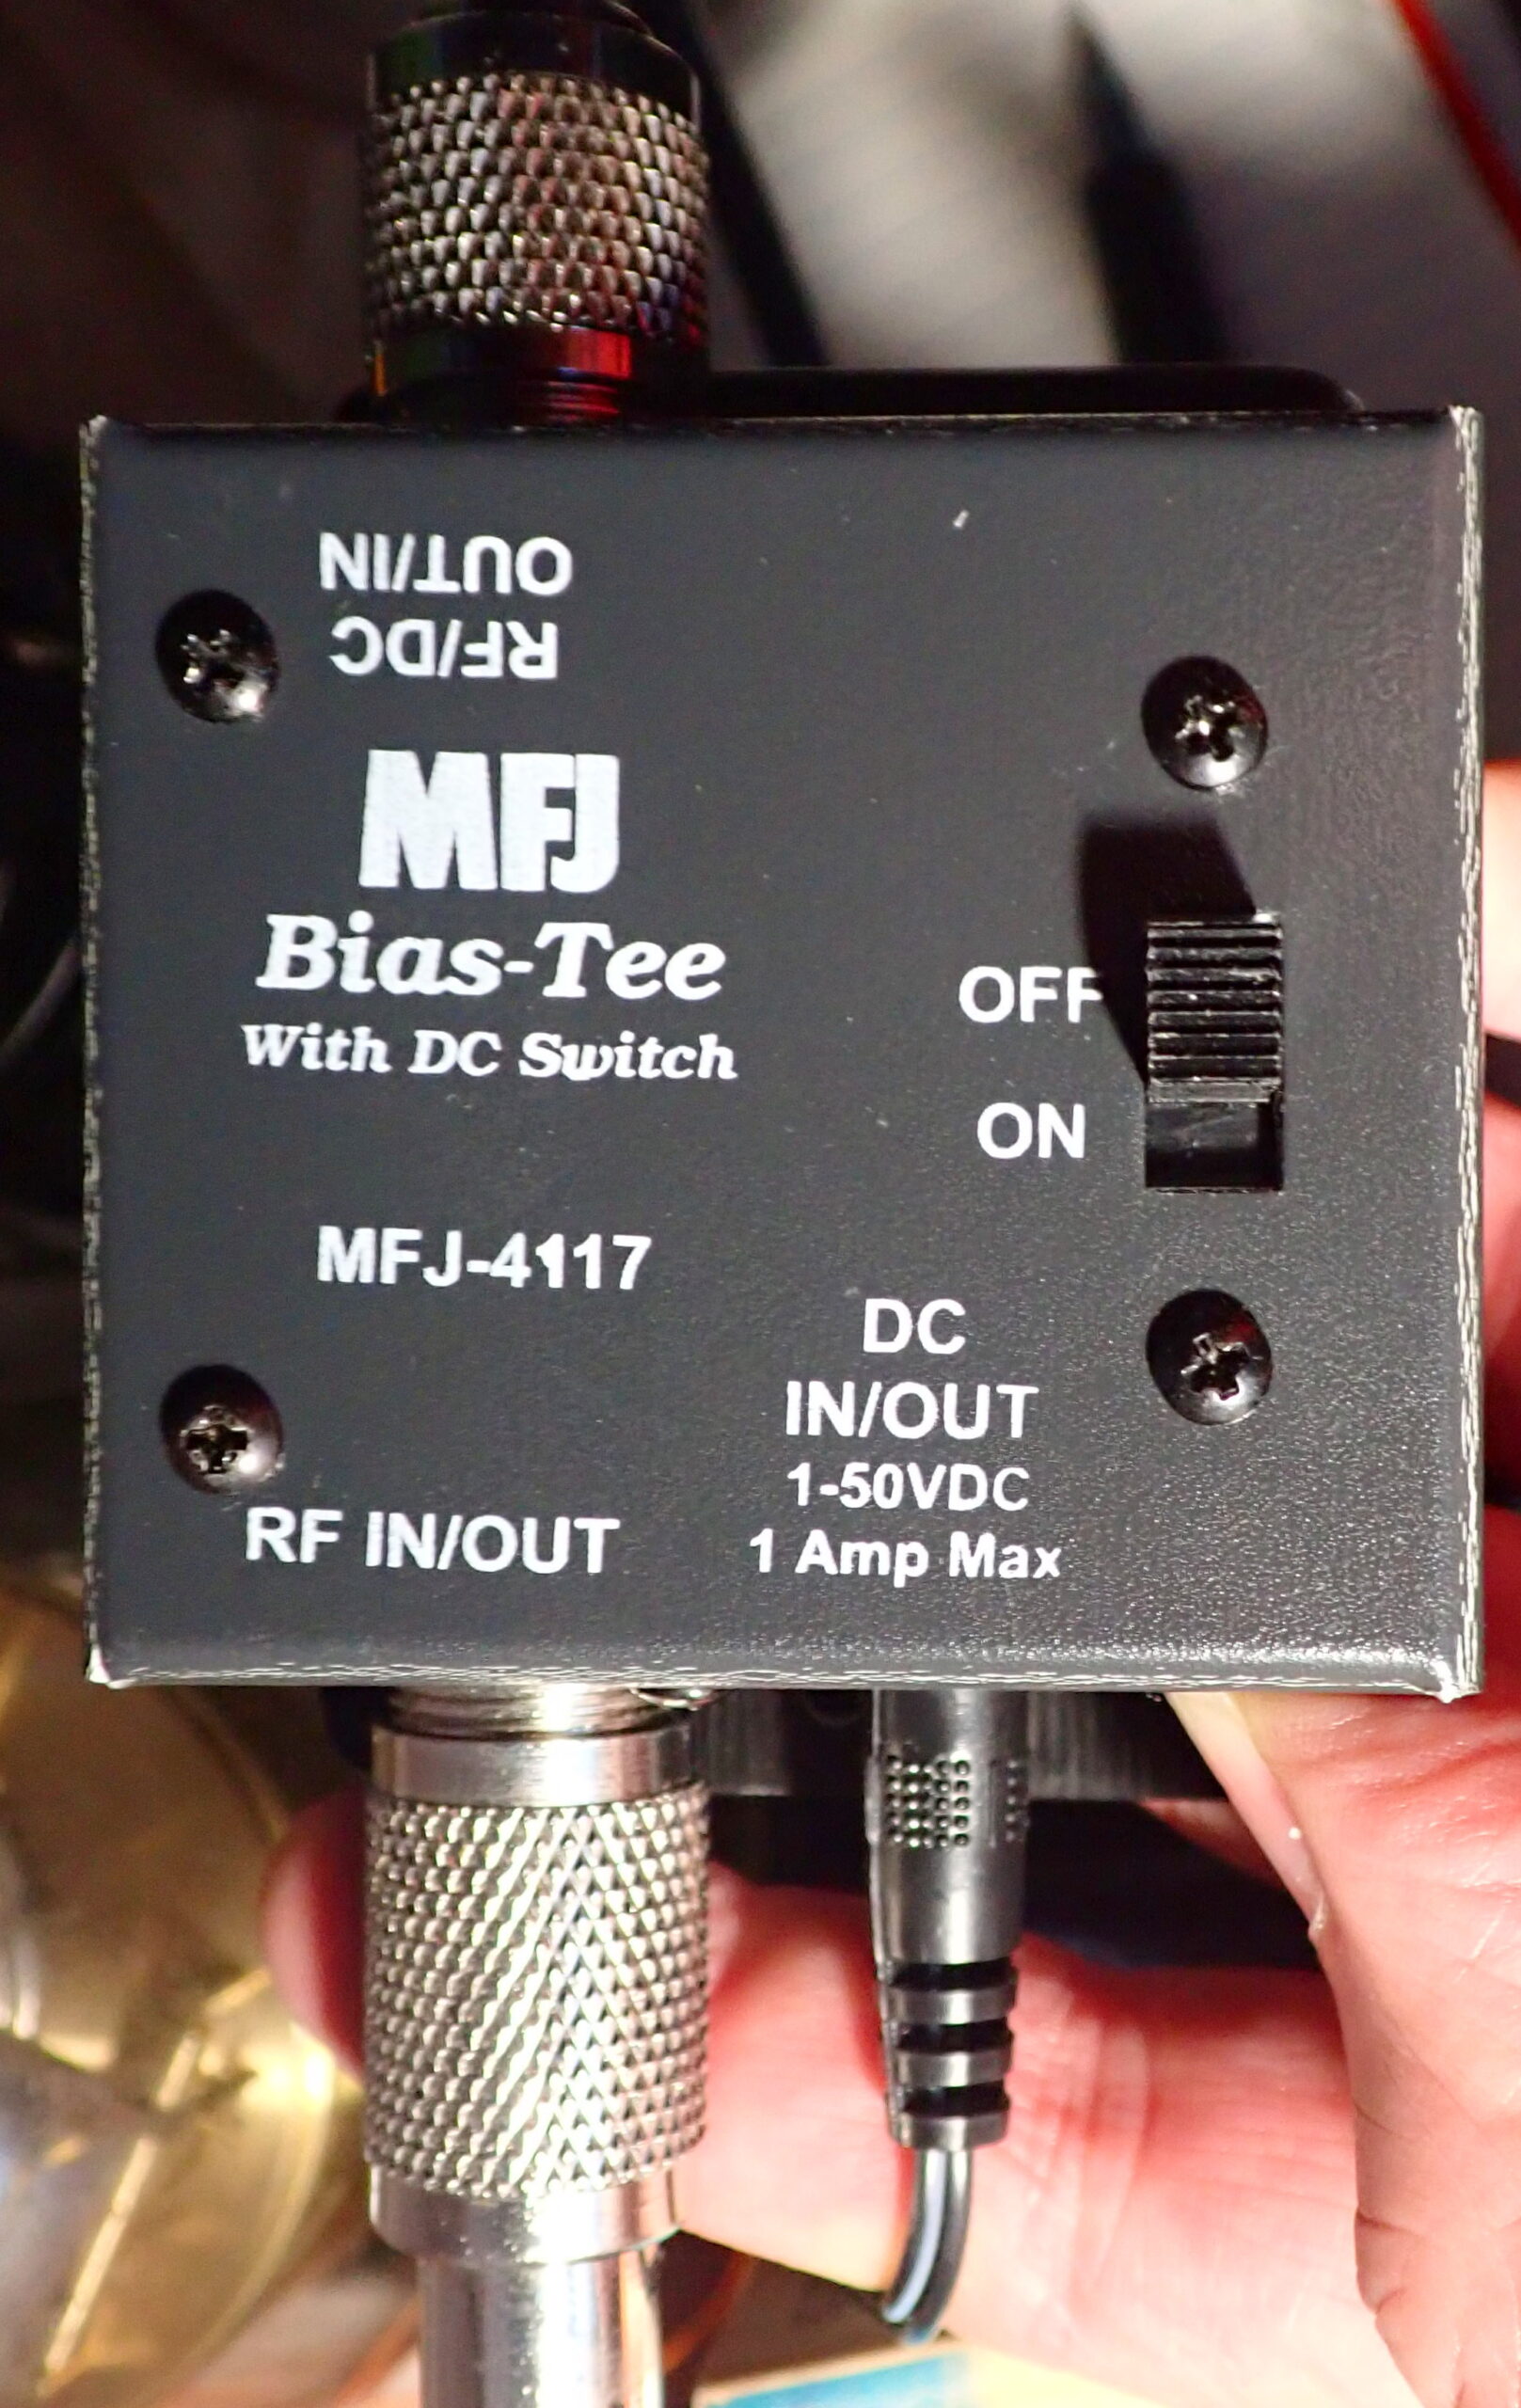
Setting up the 1886 loop is super easy. First, attach a length of coax to bottom of the amplifier box. (The 1886 uses SO-239 connectors.) Attach that coax to the top of the Bias Tee. The Bias Tee supplies power to the amplifier mounted on the loop using the coax and without introducing noise. Run another piece of coax from the bottom of the Bias Tee to the receiver, and, finally, plug the power supply into the Bias Tee and the house power where you are using the antenna.

Operating the 1886 is even easier. To hear the signal from the loop without amplification, leave the Bias Tee switch in the OFF position. To hear the signal with amplification, just slide the switch to the ON position. That’s all there is to it. There are no fussy adjustments to make.

So how did the 1886 loop perform? Very well, thank you. In all cases, it clearly outperformed the Satellit 800’s whip antenna, providing more signal with less noise. When pitted against the 50-foot horizontal room loop wire antenna, the 1886 typically delivered more signal and less noise. In a few instances, the horizontal room loop was equal to the 1886 loop in terms of signal strength and low noise. In no cases, did the horizontal room loop outperform the 1886 loop.

Tuning around a bit, I found myself listening to a ham from Spain working DX on the 15 meter band. A little further up the band, a ham from central Bulgaria was dealing with a pile-up of U.S. hams trying to reach him. Of the three antennas options I had on the Satellit 800, the 1886 loop offered the most pleasant listening with more signal, less noise.

Then I tried the 1886 with a couple of my portable shortwave receivers. The Bulgarian ham was still on the air and was marginal on one portable and not hearable at all on the other on their native whip antennas.  With the 1886 loop connected, however, the Bulgarian was clear and easy to hear. And – thanks to a ham friend who whipped up an additional coax “jumper” with amazing speed – I tried the 1886 loop with the MFJ 1045C active preselector and found the two made a very potent combo for pulling signals out of the mud.

So, would I recommend the MFJ 1886 Receiving Loop for a would-be HF listener who lives in a condo, apartment, or house with antenna woes? Absolutely . . . even if you have to hang it flat in front of a window. And if you can find a way to mount it so that it can be rotated, even better. (Someday, I hope to try the 1886 outside mounted on an inexpensive TV rotator. For now, there simply isn’t room in my cramped radio space.)

Of course, the performance at your location will depend on the conditions where you live. Nevertheless, I found the MFJ 1886 Receiving Loop to be easy to set up, easy to use, and effective.

Click here to check out the MFJ-1886 Receiving Magnet Loop Antenna at MFJ.

Suggestions for MFJ: offer a kit or accessory that would be make it easy to set the 1886 on a desk or table. Likewise a kit or accessory that would facilitate using the 1886 on a camera tripod seems like a good idea.

Additional note: The SWLing forum is a great place for discussing all things related to shortwave listening.

Spread the radio love

Mario shares a short review of the Airspy HF+ Discovery SDR

Many thanks to SWLing Post contributor, Mario Filippi (N2HUN), who shares the following guest post:


Author’s Airspy HF+ Discovery (small black box to the left of the laptop)

A Short Review of the Airspy HF+ Discovery SDR

by Mario Filippi (N2HUN)

I recently purchased an AirSpy HF+ Discovery.  As a SWL for over 60 years who’s owned many shortwave radios by manufacturers such as Drake, Yaesu, Icom, Zenith, Kenwood, Panasonic, Sony, Radio Shack, Grundig, CountyComm, MFJ, Sears, AOR and have used a number of different SDRs such as the RTL-SDR.com, HackRF, NooElec and many other rudimentary inexpensive first generation SDR dongles, I feel the AirSpy was an excellent choice. It cost $169 plus shipping.

For LW/MW/HF reception, I use a 30’ ground mounted vertical with about 50 buried radials in different stages of decomposition hihi. For VHF, a roof mounted 2m/70cm SlimJim antenna is used, but I haven’t done much listening in that portion of the spectrum yet except for occasional foray into the aero, 2m ham, NOAA satellite and public service bands.  Note that the AirSpy also covers 60 – 260MHz.

An older Dell Inspiron laptop and SDR# are used in conjunction with the AirSpy.  For decoding, MultiPSK, FLDigi, MTTY, Yand (for NAVTEX), along with VB cable are the accompanying software to make the digital modes intelligible.

So far I’ve logged a few local LF aeronautical beacons and some DGPS beacons on longwave but will be in a better position to judge its performance when winter sets in.  As for the medium (520 – 1710 kHz) wave AM broadcast band, the AirSpy easily brings in both local stations during daytime and distant stations at night with no adjacent channel interference whatsoever.  Even low powered community Emergency Alert Stations in the 1600 – 1710 kHz portion of the band can be heard daily from this QTH. A rotatable loop would certainly improve reception though.

As for shortwave listening the AirSpy HF+Discovery is, in my opinion, great for listening to both shortwave broadcasts and utility stations though I tend to concentrate on UTES mostly such as VOLMET, WEFAX, RTTY (the few that remain unencrypted), CW marker stations (e.g. XSG and XSQ from China) NAVTEX (519 kHz), aero/maritime SSB, time signal stations (WWV, CHU) and many of the other esoteric digital utility signals populating the band.  As for SW broadcast stations, WRMI, Radio Exterior, RFI, R. Marti,  BBC, WWCR and Radio Algerienne, to mention a few have been received.  The Frequency Manager (memory storage) in SDR# has quickly filled up with intercepts using the AirSpy.

As a ham and CB operator (yes, the two can mutually coexist in the same human body), I’ve found the AirSpy HF+ Discovery to be a trouper on all the HF ham and CB bands. One of my favorite hangouts is the 28.100 – 28.300 MHz slice of 10m where domestic and international low power CW beacons transmit their callsigns (and at times their grid squares and power output) into the ionosphere and achieve great distances.  Recently, beacons from 5, 6 and 7 land in the US along with DX prefixes ED4, PY4 and XE1 were logged.  If you’re into 10m FM operation you can also tune the AirSpy to hear local and distant repeaters on 29.62 – 29.68 MHz.  When the band is open, .62 and .64 seem to be the most active here in Central NJ.

If you’re a CB (aptly named the Citizen’s Band) op, the AirSpy HF+ Discovery does a stellar job on Channels 1 – 40 which is especially exciting when the band’s open.  While domestic (USA)  CB’ers are limited to frequencies from 26.965 – 27.405 MHz you’ll nonetheless hear DX ops below our (USA) channel 1 and above channel 40 conversing in French, Spanish and German in LSB/USB.  Add to this mix the fact that the FCC dropped the 150 mile limit for US ops a few years back and now the advent of the FM mode operation in the US, you’ll find the AirSpy won’t disappoint.  In my opinion the AirSpy HF+Discovery was an excellent choice and I’m more than satisfied with its performance.

In the matter of honesty and full disclosure, I purchased the AirSpy HF+ Discovery completely on my own in an effort to upgrade my station.  My choice was based on information gathered from the Internet and YouTube video reviews.  The performance of this receiver was based on my experience using the vertical antenna described earlier, the hours spent at my QTH (location) listening to stations of interest to me and my six decades experience as a SWL.  No test equipment to assess sensitivity, selectivity or other empirical methods to measure performance was used. That information can be found on the Airspy website.  The main purpose of this article was to craft a rudimentary review for those interested with the caveat that reception will vary depending on many factors such as location, antenna, ionospheric conditions, feedline quality, computer/software variations, QRN, QRM, and operator experience.  The results presented in this article are typical for my location; others may experience different results.  Thanks very much.

Spread the radio love

Nick explores the Skanti R8001 and compares with Yaesu FT-DX101MP & WJ-8711

Many thanks to SWLing Post contributor, Nick Booras, who writes:

Hi Thomas

I just picked up a new to me radio that [is] very rare in the US.

I loved it so much I did a comparison to an 8711 and a FTDX101MP. The Skanti presented very well.

Video

Click here to view on YouTube.

Excellent Nick! Thank you so much for sharing this and for demonstrating some weak signal work. You were certainly pitting the Skanti against some benchmark performers!  

Spread the radio love

Dan reviews the new Chameleon CHA RXL Pro Wideband Magnetic Loop Antenna

Many thanks to SWLing Post contributor, Dan Robinson, for the following guest post and review:


Photo by Chameleon

The Chameleon CHA-RXL Pro:  Improved Amp Board Raises the Game

by Dan Robinson

Back in 2021 I reviewed the CHA-RXL loop by Chameleon.  This loop antenna is sold by major retailers such as DX Engineering, Gigaparts and Chameleon itself – the company is a well-known name in antennas and other equipment for the amateur radio world.

I compared the CHA-RXL to Wellbrook 1530 and W6LVP loops feeding into a four-position Delta antenna switcher, and then to a Raven 16 port multicoupler which maintains good steady gain.

My Wellbrook is mounted on a telescopic mast about 15 feet above ground level, with a rotor.  The W6LVP (using LMR400 coax) is tripod-mounted with an overall height from ground of about 12 feet. It has special filters to prevent strong medium wave signals from bleeding into HF.

I have since added a UK-made loop (essentially a copy of a Wellbrook loop but smaller diameter and made of metal) combined with a W6LVP amp.  This W6 amp does not have filtering to block strong mediumwave signals.  In all, I have four loops into my Delta switcher, which feeds about two dozen receivers.

There is by the way quite robust discussion at https://groups.io/g/loopantennas about various loops, including the Chameleon.  And this past July, Steve Ratzlaff posted news about the upgraded loop amp board which will ship with what is now the CHA RXL Pro, saying:

“Chameleon has completely redone their CHA RXL loop amp board from the previous poor-performing loop amp that I tested some time back, and sent me one of the new production boards to test. I’m happy to say it tests very well especially for LF sensitivity, and I can now give it my “seal of approval”.  The new board is a version of the LZ1AQ loop amp.”

Photo by Chameleon

It turns out, according to an email from Don Sherman of Chameleon, that Steve is one of the engineers who helped design the new amp board for the CHA RXL Pro, and on the Loop Antenna group he provides a folder in which he placed previous test results with “new files of the new board (sweep of the new RXL Pro loop amp, and a picture of the new amp PCB).”

Continue reading

Spread the radio love

Small Unidirectional Loop Antenna (SULA) Part 3: Questions & Answers

Many thanks to SWLing Post contributor extraordinaire, 13dka, who brings us Part Two of a three part series about the new SULA homebrew antenna project. This first article describes this affordable antenna and demonstrates its unique reception properties. The second article focuses on construction notes. This third and final article will essentially be a Q&A about the SULA antenna. 

This wideband unidirectional antenna is an outstanding and innovative development for the portable DXer. I love the fact that it came to fruition via a collaboration between Grayhat and 13dka: two amazing gents and radio ambassadors on our SWLing.net discussion board and here on the SWLing Post. So many thanks to both of them!

Please enjoy and share Part 3:


Part 3: SULA Q&A

by 13dka

Q: Where can I ask questions, discuss all aspects of the the SULA or collaborate in its further development?

A: There is a thread dedicated to the SULA in the new SWLing.com message board: https://swling.net/viewtopic.php?t=55

Q: Since the antenna is “lossy”, what’s the point of having a “beam”?

A: The answer is once again “SNR”: First off, remember that the LNA is there to make up for most of the losses. Secondly, this is all about the noise pickup, 20dB less gain/more losses outside the main lobe means also a reduction of atmospheric/cosmic/whatnot QRN and of course everything manmade from all these sides. The wide horizontal lobe is more or less one hemisphere horizontally, but the flat-ish vertical pattern makes that only a slice of it. In other words, there will be less QRN and QRM pickup from the back and the top. The idea is that the SNR will ideally increase more than the preamp’s noise figure will cost and it often sounds like this is what actually happens. Of course it’s also nice that you can turn an unwanted signal down using the more or less pronounced notch in the backside pattern up to 21 MHz – also very helpful for direction finding.

Q: Do I need a rotor?

A: It depends. If you are one of the lucky few still having a low-QRM-environment at home and you want to put it in the backyard, you really may want to be able to turn it remotely. If you’re using it portable you can simply rotate the mast manually. If you have local QRM or can’t mount it very far away from your or other houses, you may want to rotate the back of the antenna towards that source, leave it at that position forever and enjoy what’s coming in on the pretty wide main lobe of the antenna. The horizontal lobe covers more or less half of the horizon, depending on your stations of interest and location you could get away with never turning the antenna at all.

Q: Is it better than the XYZ loop?

A: Hey, that’s exactly what I wanted to ask you! 🙂 Even though the SULA is very similar in appearance and performance to a good SML working in ideal (ground conductivity) conditions, the SULA is a pretty different animal with a different behavior: Regular small loops, besides being bidirectional, can lose quite a bit of their low angle sensitivity over “poor” ground while the SULA is supposed to be retaining its properties better over any type of ground. Also, while many SMLs are tuned for VLF through the lower portion of the shortwave, the SULA complements those with quite uniform (good) properties up to 30 MHz and beyond.

Q: I have an end-fed random wire or dipole strung up from the house to a tree etc. – can the SULA beat that?

A: That’s quite possible. To get low takeoff angles from horizontal wire antennas you need to string them up at least 1/2 wavelength high, that’s 20m/66ft on 40/41m, 10m/33ft on 20m and so on. If you can’t do that, the SULA may be your ticket to listen farther beyond the horizon. Also, wire antennas are often strung up to match space restrictions or avoid QRM vectors and that way you may end up with some directionality in directions you don’t want, or no directionality at all when the wire is too low. Another noteworthy point is the ground: For most horizontal antennas, better ground means a considerable higher takeoff angle so the dipole needs even more height for low angles. The SULA’s takeoff angle benefits a little from the better ground and only gets a little worse over poor ground.

Q: Do I really need an LNA?

A: I hope so? Of course it depends… if you are going to try this antenna in a very noisy environment, the LNA may have little to no benefit. The noise is limiting your “radio horizon” to very loud signals anyway and for those you may not need an LNA, ever. On the other hand, the antenna is very lossy and in a quiet environment where noise is not an issue at all, weak signals may drop below the sensitivity threshold of your receiver without the LNA. The less noise you have, the more you’ll be able to benefit from an LNA. You will also need one when your radio isn’t all that sensitive, similar to the requirements to run a YouLoop. Andrew kept the loop impedance as constant as possible in order to allow any low impedance coax preamp to work behind the Balun. Any LNA with 20dB of gain should do, as per usual, better stuff may bring better results.

Among the sparse offers for decent shortwave LNAs, the NooElec LANA HF seems to be the only decent LNA sold via Amazon. It’s comparatively low-cost and unlike the other offers on Amazon, ready to be powered via Bias-T or even via Micro-USB and therefore happy with 5V. Since I also had the balun from the same company I could simply connect that all with a couple of these cute little SMA plumbing bits and it worked. The downside is its unknown but perceivably low resilience against intermodulation (low 3rd-order intercept point), this is usually not a problem with such a small loop but it can be in the presence of nearby transmitters.

If you do have nearby transmitters and don’t mind sourcing an LNA from Europe, Andrew recently pointed me to preamps from here. They offer a moderately priced preamp with a 2N5109 transistor (based on the W7IUV design) for a high IP3 value and low noise, which is also available in PCB-only and fully assembled versions including a compartment. They also offer Bias-T boxes.

Q: What is special/different about this antenna? There are already very similar designs!

A: It’s supposed to be simpler and more compact/portable, and it seems to deliver more consistent results over the entire coverage range in different usage environments than similar designs. The SULA was designed to be made with things that are particularly easy to obtain, or which were already obtained — many of us SWLs have some of that Nooelec stuff in our drawer anyway, even when (or because) we’re not habitual antenna builders and balun winders. Now making a better balun and buying a better preamp is not hard and could even bring better results but the point is that you don’t have to. In summary, this is not meant to be a miracle antenna, just number of compromises re-arranged to create a particularly uncomplicated, small, unidirectional loop antenna that aims for DX, for apartment dwellers and DX nomads like me.

Spread the radio love

Matt’s 2022 Portable Loop Antenna Shootout

Many thanks to SWLing Post contributor, Matt Blaze, for the following guest post:


Matt’s 2022 Portable Loop Antenna Shootout

by Matt Blaze, WB2SRI

Followers of this blog may be familiar with my “shortwave radio shootouts” that I post from time to time. The idea is to compare how well different radios demodulate the exact same signal. Basically, I take a bunch of radios, hook them up to the same antenna via an RF distribution amplifier, tune the radios to some distant signal, and record the audio output from them simultaneously. Sometimes that kind of comparison can be more revealing of actual real-world performance than lab measurements or technical specifications.

The other day, I decided to do the same thing, but for antennas instead of radios. Essentially, I inverted the setup. Instead of hooking up different radios to the same antenna, I hooked up identical radios to different portable antennas and recorded them demodulating the same signals at the same time.

In this first of perhaps a series of these antenna shootouts, I wanted to compare three portable amplified magnetic loop antennas. When I say “portable” here, I mean broadband antennas that can pack reasonable compactly for travel and that can be set up and broken down easily for use “on location”, say on a picnic table or hotel balcony, or perhaps installed temporarily on a roof, without too much fuss.

The antennas are:

The Wellbrook FLX1530LN with a 1 meter diameter loop of LMR400 coax. This is my “standard” portable antenna (I use a telescoping broom handle for the support; I wrote about it here as the “signal sweeper” last year). Excellent performance, but on the bulky side for travel. Performs well from LW through HF. Not cheap, at about USD 225 including shipping for the amplifier and power injector, but not including the loop, mounting hardware, or feedline.

The Wellbrook FLX1530LN with a 0.5 meter diameter loop of RG142 (a stiff “aircraft grade” version of RG58 that holds it shape well at this size). I used some 1/2 inch PVC pipe as the vertical support. Because of the smaller diameter loop and thinner coax, it packs down to a much smaller and lighter package than the 1 meter LMR400 version.

The K-180WLA, an inexpensive (about USD 60) 0.5 meter loop from China, sold on eBay and Amazon. The loop is steel wire (which can be wound down to a small diameter for transport), and the kit includes everything you need, including a rechargeable power injector. (However, the power injector uses a noisy voltage booster, so I substituted my own bias-T injector for these experiments). Ostensibly covers LW through VHF, but the low end coverage is, shall we say, somewhat aspirational, as you will see.

– I also recorded, for comparison, the built-in ferrite bar (for LW/MW) and whip antenna (for HF) of the receiver.

This is, of course, only a small sampling of portable loop antennas, both commercial and homebrew. But I wanted to start with what I had on hand and with what meets my own needs. (I omitted from consideration loops that require tuning, since I want to be able to install the antenna without needing access to it every time I change frequency).

For each signal captured, I oriented and positioned each antennas to maximize signal quality, taking care to move them away from each other and interfering metal objects. So you’re hearing (approximately) the best each antenna had to offer (on my roof under suboptimal band conditions).

The receivers I used were four Sangean ATS-909×2 portable LW/MW/SW/FM/Air radios. I believe this to be the best currently available (relatively inexpensive) portable shortwave receiver on the market. It has excellent performance (and is admirably resistant to overload and intermod when used with an active antenna). It lacks a sync mode, but that’s rarely implemented well on portable radios anyway. As a practical matter, it has a good line-level output jack, and I already happened to own four of them.

As in my other shootouts, for each signal, there are a total of five recordings: a monoaural recording of the audio from each of the four antennas, plus a narrated stereo recording comparing a reference (the 1M Wellbrook) on the Left channel with each of the other antennas in succession on the Right channel. The stereo recording is intended as a quick overview, but it will only make sense if you listen in stereo, preferably with good headphones. (You can switch the earcups to get a quick comparison as you listen.)

Continue reading

Spread the radio love