Tag Archives: Shortwave Antennas Apartments

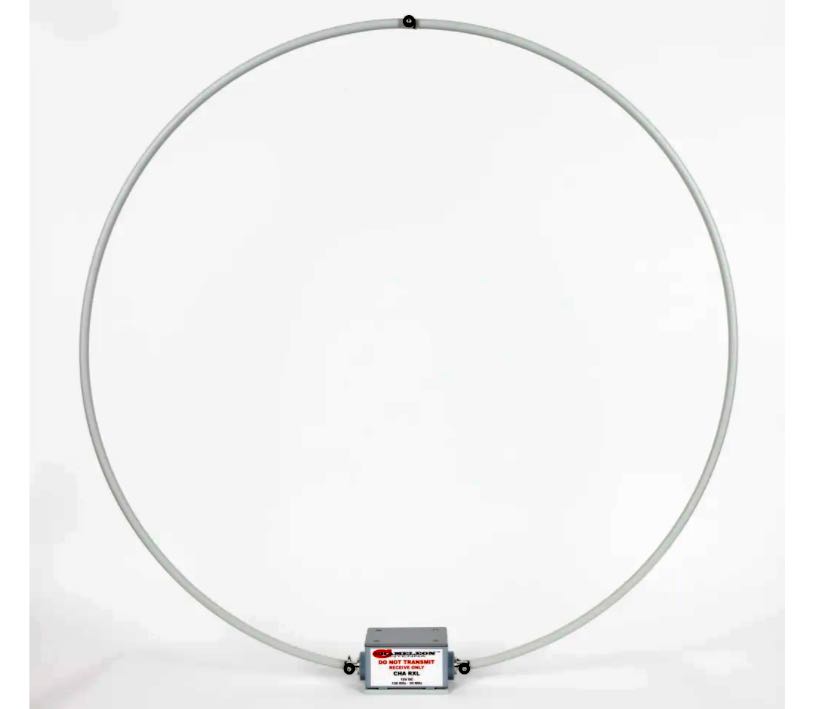
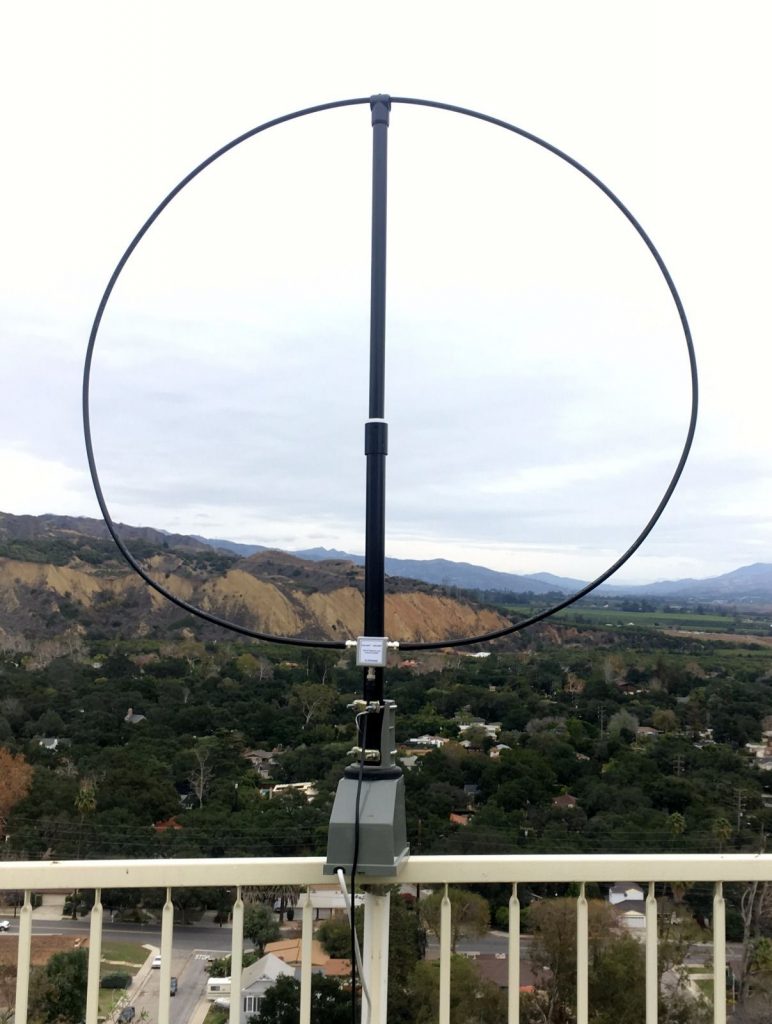
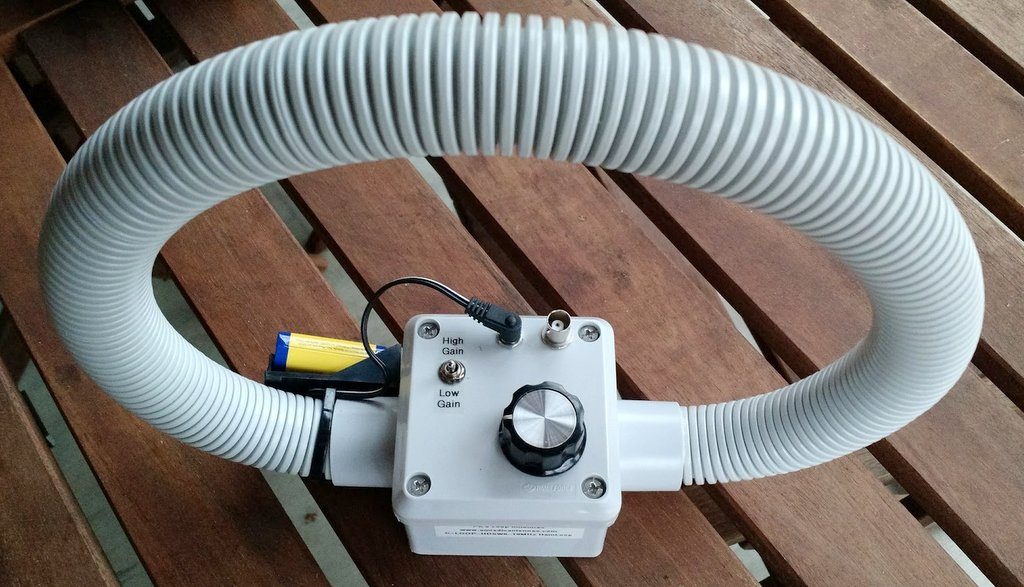
Dan reviews the new Chameleon CHA RXL Pro Wideband Magnetic Loop Antenna

Many thanks to SWLing Post contributor, Dan Robinson, for the following guest post and review:


Photo by Chameleon

The Chameleon CHA-RXL Pro:  Improved Amp Board Raises the Game

by Dan Robinson

Back in 2021 I reviewed the CHA-RXL loop by Chameleon.  This loop antenna is sold by major retailers such as DX Engineering, Gigaparts and Chameleon itself – the company is a well-known name in antennas and other equipment for the amateur radio world.

I compared the CHA-RXL to Wellbrook 1530 and W6LVP loops feeding into a four-position Delta antenna switcher, and then to a Raven 16 port multicoupler which maintains good steady gain.

My Wellbrook is mounted on a telescopic mast about 15 feet above ground level, with a rotor.  The W6LVP (using LMR400 coax) is tripod-mounted with an overall height from ground of about 12 feet. It has special filters to prevent strong medium wave signals from bleeding into HF.

I have since added a UK-made loop (essentially a copy of a Wellbrook loop but smaller diameter and made of metal) combined with a W6LVP amp.  This W6 amp does not have filtering to block strong mediumwave signals.  In all, I have four loops into my Delta switcher, which feeds about two dozen receivers.

There is by the way quite robust discussion at https://groups.io/g/loopantennas about various loops, including the Chameleon.  And this past July, Steve Ratzlaff posted news about the upgraded loop amp board which will ship with what is now the CHA RXL Pro, saying:

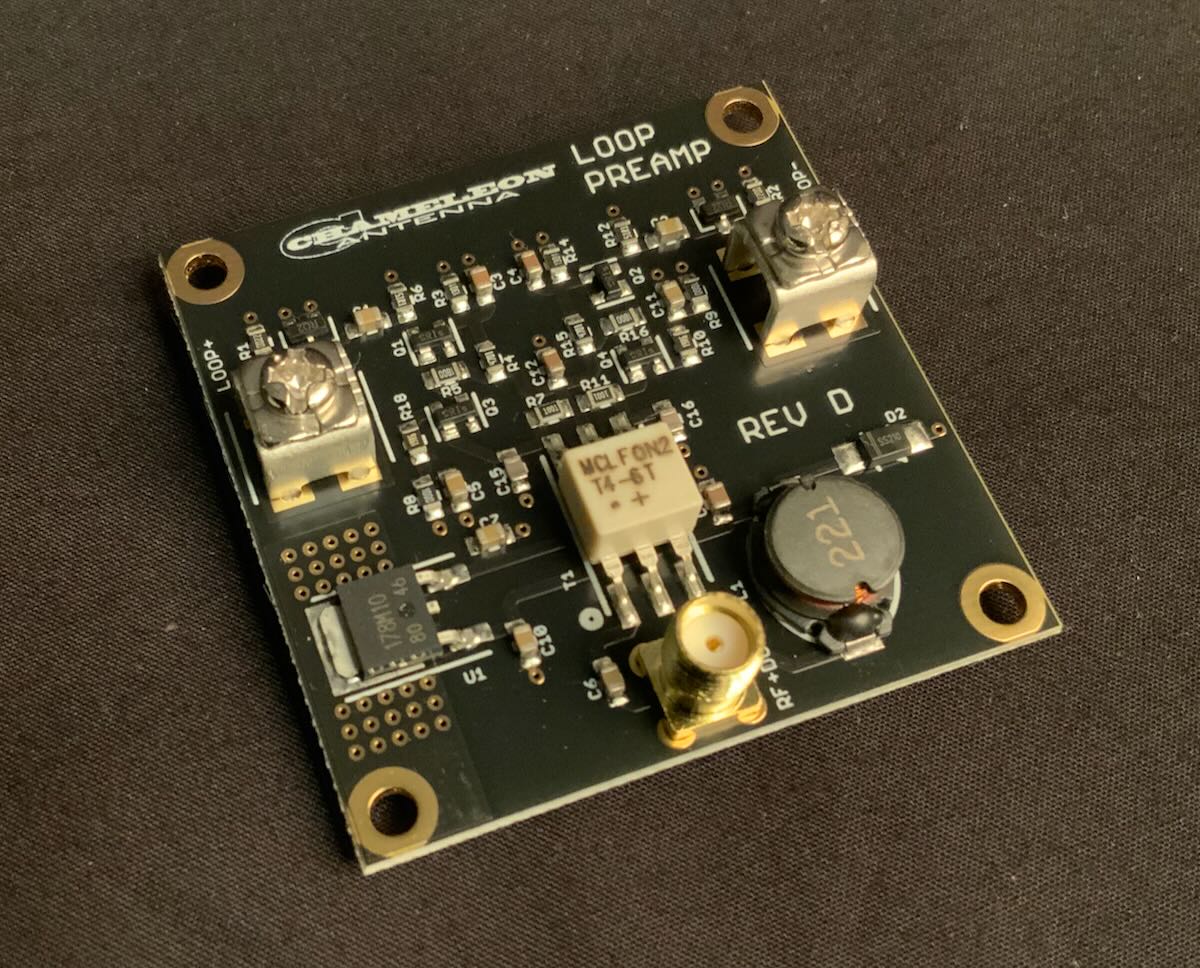
“Chameleon has completely redone their CHA RXL loop amp board from the previous poor-performing loop amp that I tested some time back, and sent me one of the new production boards to test. I’m happy to say it tests very well especially for LF sensitivity, and I can now give it my “seal of approval”.  The new board is a version of the LZ1AQ loop amp.”

Photo by Chameleon

It turns out, according to an email from Don Sherman of Chameleon, that Steve is one of the engineers who helped design the new amp board for the CHA RXL Pro, and on the Loop Antenna group he provides a folder in which he placed previous test results with “new files of the new board (sweep of the new RXL Pro loop amp, and a picture of the new amp PCB).”

Continue reading

Spread the radio love

Recommendations for an HF/VHF/UHF station in an apartment or flat

Photo by jay blacks on UnsplashMany thanks to SWLing Post contributor, Jamie, who writes:

Hi,

I would like to ask a few questions about what would be a good set up for my situation.

I am in a 2 storey property, which is not owned by me (renting via community/public housing), located in a large city in Australia. I currently have an SDRPlay RSP2, along with standalone AM/FM tuners – Sony XDR-F1HD and Onkyo T4970. The computer and all radios are upstairs at the back in a room that is not attached.

Given renting would limit what I can do, what would be best for me to get. For MW and SW frequencies, I am trying to decide between the MLA30+ or the AOR LA400. For above 30MHz (6m, 2m, broadcast FM etc) I am deciding between the AOR SA7000 or a Discone.

I have been told that putting antennas in the roof space is not recommended. Would they work fine in the room near a window? I should mention, I do have a 50ft end fed longwire with 9:1 balun, that has been in storage and never used.

I am also looking at upgrading my receiver. Trying to choose between the WinRadio WR-G305e or the Icom IC-R8600 (would also get the RS-R8600 CD software for computer controlling the receiver). How do the specs compare between these two?

Thanks for your time, and hope that wasn’t too many questions.

Regards,

Jamie

Thank you for your inquiry, Jamie, and I hope you don’t mind, but I’m sharing this message as a post as we have readers who are in the same type of living situation and listening environment. In addition, I believe owners of the gear you’ve mentioned might be able to offer some helpful advice!

I can tell you that you’re correct: in general, antennas want to be near windows or, better yet, outdoors. Even placing an antenna on a balcony can make a big difference in terms of lowering the noise floor. This is less an issue with VHF/UHF, but those antennas also benefit from being outside since there’ll be less attenuation from obstructions.

For HF, I would personally suggest you check out the MLA-30 loop first since it’s such a modest investment and is fairly flexible in terms of how you can configure it. I’m sure our regular contributor, Grayhat, will have some helpful advice as he’s a bit of an expert with urban HF antennas.

Also, the IC-R8600 is a brilliant wideband receiver. Depending on what you wish to have for frequency coverage, I would also suggest you check out the Icom IC-705 transceiver (noting that its RX coverage is not as comprehensive as that of the IC-R-8600).

Post readers: Please feel free to comment with some suggestions for Jamie, especially if you have experience with urban radio listening.

Spread the radio love

Jock designs a Horizontal Room Loop to cope with reception issues

Many thanks to SWLing Post contributor, Jock Elliott, who shares the following guest post:


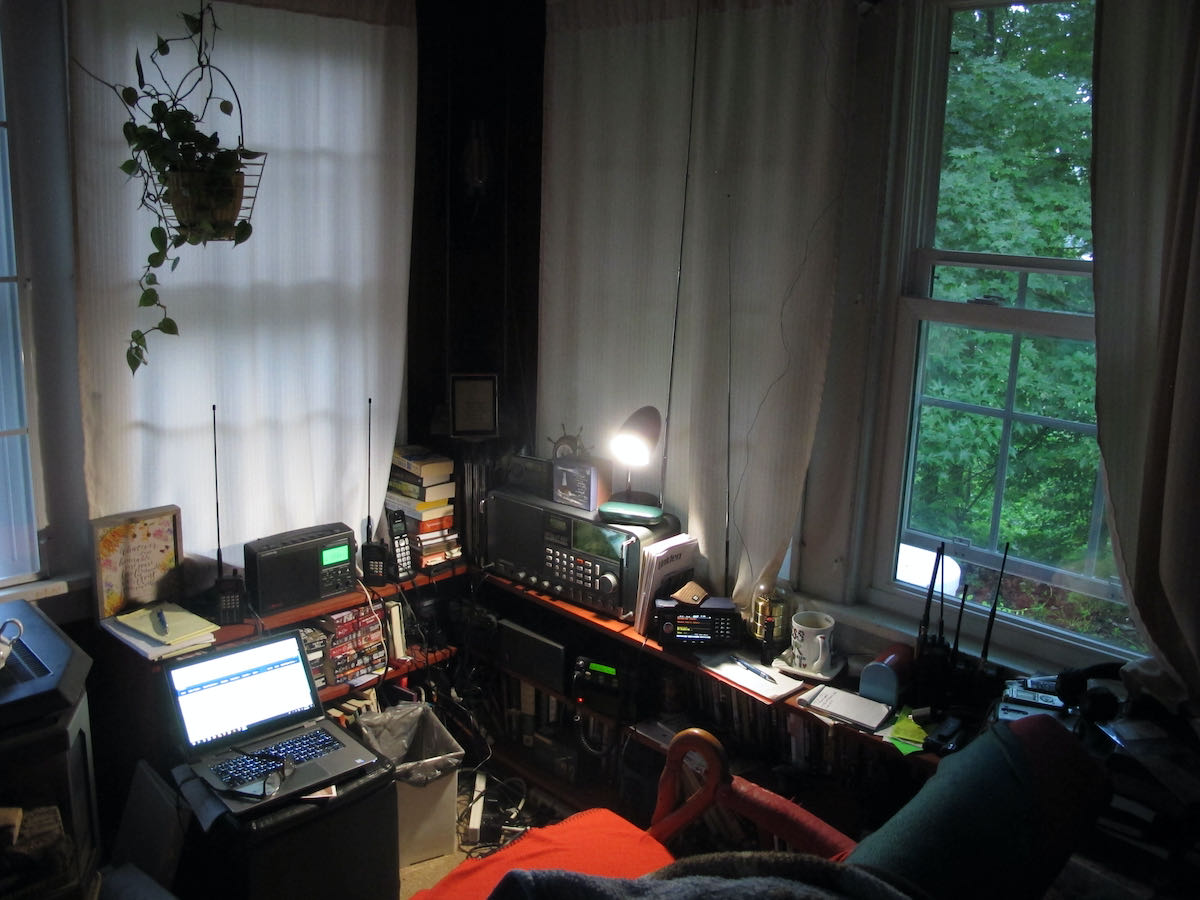
There’s a 50-foot antenna in this room. Can you spot it?

Got reception issues? An idea worth considering: the “Horizontal Room Loop.”

by Jock Elliott (KB2GOM)

When my radio room was in the front of the house (on the east side), it was easy to run a feedline to a large RF-hungry SWL dipole with various stubs and feeders.

Now, however, with my “shack” moved to the SW corner of the house, any attempt to mount an outdoor antenna of any significant length raised potential safety issues because of nearby electrical lines.

Monitoring VHF/UHF is no big deal because of high-performance scanner antennas. HF, however, presents challenges.

My main SWL receiver is a Satellit 800, which has the guts of a Drake R8 and also has a large telescoping vertical antenna. It works okay, but I wanted more signal. I had been looking at small loops and got some great recommendations on Radio Reference, but then I had a thought: what if I turned the 8′ x 12′ room into a giant horizontal passive loop?

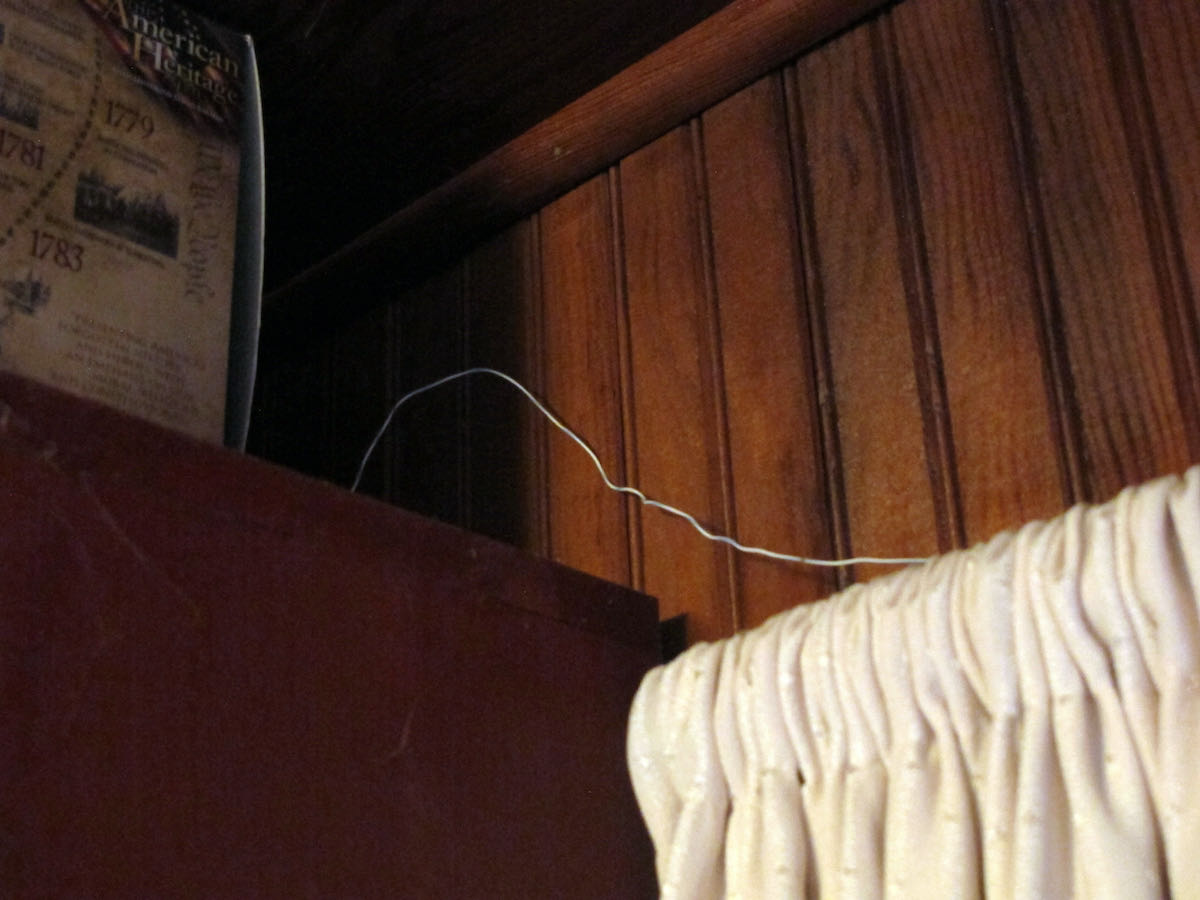
Here’s a hint.

So I called a ham friend and ran the idea by him. “Sure,” he said, “give it a try.” He gave me 25 feet of 4-conductor phone wire. Before I could use it, I had to strip off the outer insulation so I could get at the four separate insulated wires inside. The better half helped. Once I had the four wires, I connected two of them together and ran the resultant 50-foot strand around the perimeter of the room by taping the wire to the top of window frames and hiding the wire on the top shelves of book cases. As a result, the horizontal room loop is near the ceiling, about 7 feet in the air, and the room itself is on the first floor.

With the loop in place, I hooked the ends to the clip-in terminals on the back of the Satellit 800.

There’s a switch on the back of the 800 that allows me to quickly compare the loop with the radio’s built-in vertical antenna. And . . . it works! It pulls in more signal than the vertical (as measured on the signal strength meter), but I have not noticed a dramatic reduction in noise. On some stations, the horizontal room loop brings the signal up to full scale, and then the sound is very agreeable indeed.

In all, I am pleased with the results.

For anyone who wants squeeze more performance out of their shortwave receiver, I can recommend giving the horizontal room loop a try. It’s not expensive; it’s relatively easy to do (and undo if you don’t like the results), and just might improve your shortwave reception.

If you are not blessed with a bunch of window frames on which you could tape the wire for your room loop, you’ll have to get creative, but with lightweight wire, you don’t need a massive support structure. Tape, map tacks, or even self-adhesive Velcro segments might work for putting your room loop in place.

I don’t claim that this is the “ultimate” SWL DX antenna, but it certainly improved my situation. Perhaps others have suggestions for improving it.

— Jock Elliott, KB2GOM

Spread the radio love

Build an affordable (but stealthy) Magnet Wire Vertical Loop antenna to mitigate condo QRM

Many thanks to SWLing Post contributor, TomL, who shares the following guest post:


Magnet Wire Vertical Loop Antenna

by TomL

For those of you in a noisy condo like me, the environment does not give me many options.  I was experimenting with a YouLoop on the wooden porch with somewhat acceptable results.  For its size, it is an excellent performer, especially on the lower bands.  Here is a very interesting review of the YouLoop, including close-up pictures of the innards of the phase inverter and 1:1 balun, by John S. Huggins.  However, it is not waterproof and I was concerned about the ice and snow ruining it.  I could tape up the connectors with waterproof tape but I also wanted  something with a bigger capture area.  A magnet wire stealth antenna might be just the thing!

I just happened to have a waterproof 1:1 ATU balun from Balun Designs that I was going to use for future Amateur Radio use whenever I get around to passing the next level test; it is total overkill for what I intended to use it for.  It would make a good connection point and (this one) also acts as an RF choke as well.  One can make a 1:1 balun by buying the right Type of ferrite core and winding it yourself.  Here is just one idea from Palomar Engineers.

So I dusted it off, went to a local store to get a 100 foot spool of 26 gauge magnet wire and tested it strung up around my living room. It came out to be a rectangle about 42 feet in circumference.  Results were usable. I expected lots of noise and there is a great deal across the bands, so only the strongest shortwave stations were received. However, I was surprised by how strong the mediumwave band was and good to listen to without an amplifier.

I am ambivalent towards trying to perfectly match the impedance since this is a broadband receive-only antenna and the impedance will vary greatly over MW and SW bands.  And I don’t want to mess with a remotely controlled tuned loop since this antenna was destined for the outdoor porch.  I tried a Cross Country Wireless preselector at my desk but had some mixed results.  I later found out, by disconnecting things in series, that the preselector inline raised the noise level about 5 dBm, so I took it out for now. Perhaps it needs more internal shielding or the connecting cable is bad.

Polarization is an issue, too.  I have read that most man-made noise (QRM) is vertically polarized, so why would I use a vertically oriented loop?  Then I saw David Casler’s video on loop antennas where he explains that connecting a vertical loop antenna at the bottom or the top makes it horizontally polarized (connecting the coax on the side makes it vertically polarized).  I never knew that!  Horizontal polarization will mitigate some of the offending QRM as well as match the polarization of mediumwave band transmitters.  Furthermore, I read that a horizontal loop will have poor signal pickup at low frequencies because it is not high enough off the ground, similar to a horizontal dipole. For now, a vertical loop connected to facilitate horizontal polarization is what I want.

A note about wire size. People make a big deal about it but those are mostly amateur radio people.  Transmission depends on efficiency so things like wire size, skin effect, standing waves, and other things matter (see here, for example).  With a receive-only antenna it is OK to use very thin wire.  Resonance can matter if you want the last ounce of signal strength with an antenna tuner, like in high-Q type loops where the bandwidth is very narrow and you are using a multi-turn loop with variable capacitor and a pick-up coil of wire to the receiver.  Comparatively, my simple loop is depending more on a single turn of wire, the aperture size, length of wire for its performance, and carefully isolating the feedline coax using RF chokes at both ends.

Here is one example of a strong station from Cuba I was able to record because WLW was off the air for some unexpected reason.

Radio Reloj, Cuba 870 kHz (At the end, you can hear WLW come back online with CBS news):

Side note about Radio Reloj on Wikipedia, the strange format seems to fit well with a totalitarian regime, including a “corrector” who “corrects the content/writing errors to meet the requirements”.  Read the wiki link for yourself.  Not a society I want to live in, thank you very much!

Example of 80 meter band performance – Greetings to a new person from members of the “Awful, Awful, Ugly Net”, 3855 kHz:

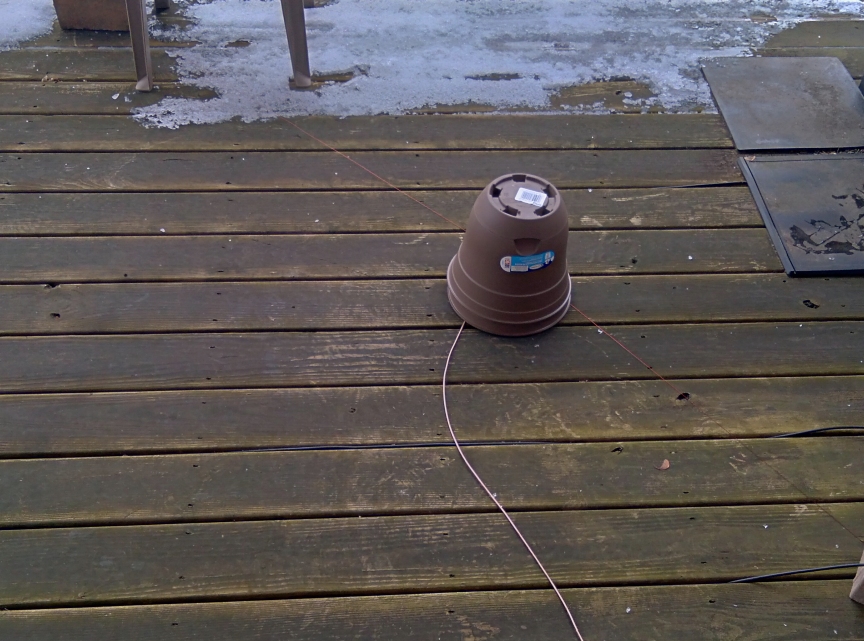
Encouraged by the results, I “installed” the magnet wire around the support beams of the wooden porch, wrapping it carefully to create a square loop. Holding it in place is a brick at each bottom corner since I am not allowed to nail anything into the Association-owned porch.  The length came out to about 32 feet (8 feet per side), so I trimmed it and connected to the balun.  I also added an RF choke at the Airspy HF+ input from Palomar Engineers which helped bring noise down a couple of S-units.   That might not sound like a lot but by also shutting off the living room air filter and an AC switch with “wall-wart” AC power adapters on it, I was able to reduce the noise a little bit more.  There is still a lot of noise from the neighbors, so it is not a perfect situation.

Here are two examples of reception with the outside installation.

Gateway 160 Meter Radio Newsletter, broadcast (in AM) by WA0RCR every Saturday on 1860 kHz:

Side note about the Radio Newsletter.  I stumbled on it when using the YouLoop and found that some of the content is very interesting and informative.  Of course it is geared mostly towards amateur radio but some of the news items are of general radio interest as well. It airs 1pm Saturday through 2am Sunday, USA Central Time.  Obviously, many segments repeat during that lengthy timeframe and reception depends on propagation from Missouri.

KDDR 1220 kHz, West Fargo, ND station ID (presumably “nighttime” power of 327 watts):

The shortwave bands are still a noisy disaster but signal levels are higher compared to the YouLoop.  Only the strongest stations come in like WRMI, WHRI, Radio Espana, Radio Habana, and CRI. And I can hear the loudest amateur radio operators.

Just for grins, here is Radio Rebelde on 5025 kHz when band conditions were above average:

Another phenomenon I am looking into is the reception pattern of a vertical loop.  Less than 1/10th wavelength, the null is through the center of the loop.  At one wavelength, the null manifests in the plane of the wire loop.  They are too close to phase them but switching between two directional loop antennas might improve reception depending on frequency.  We shall see in the future.

At least for now, I have a decent mediumwave band which performs better than the useful CCrane Twin-Ferrite amplified loop antenna that was used in the (noisy) indoors, I can hear the 160 & 80 meter amateur bands better, and the reception of the strongest shortwave broadcasters are more predictable.  Not bad for four dollars of wire!


Brilliant, Tom! Again, I love how you’ve not only made an inexpensive antenna, but you’ve even done it within your HOA regulations. You’re right, too: if you’re not transmitting into an antenna, it blows the experimentation door wide open! Thank you once again for sharing your project with us.

Click here to check out all of Tom’s guest posts and portable adventures!

Spread the radio love

Build an SDR station and balcony antenna farm for less than 150 Euros

UPDATE 11 May 2020: We recently learned that the MSI.SDR software defined radio dongle in the following post and tutorial is a clone of the SDRplay RSP1 SDR. We did not realize this when the post was published. Grayhat had done research prior to purchase and believed it not to be a clone, but only using the same chipset as the RSP1 (hence the compatibility with SDRuno). We have confirmed that it is indeed a clone now via SDRplay (clear here to read more via the excellent RTL-SDR blog). What follows isn’t an SDR review. Indeed, Grahat’s post has little to do with the receiver and much, much more to do with building proper antennas! We’ve removed links to the MSI.SDR and would encourage you to invest in the excellent SDRplay RSP1a instead (click here to read our RSP1a review). Thank you for understanding!
Many thanks to SWLing Post contributor, Grayhat, who shares the following guest post. He lives in Italy and has been in lock-down since the beginning of the pandemic. He pitched the idea of building an entire SDR setup from scratch–receiver and antennas–for less than 150 Euros (roughly $163 USD). I thought it was a brilliant idea and I believe he thoroughly enjoyed the challenge of sourcing the components and building a mini antenna farm on his balcony while in quarantine:


From Zero to SDR

by Grayhat

What follows doesn’t pretend to be some kind of “definitive guide” or “last word”, on the contrary, it’s aimed at people who have little or no experience with SDR but want to try putting together a decent station without paying an arm and a leg.

The idea of writing this came to me after reading a number of messages and discussions on various online groups/forums, in a lot of cases, someone bought an SDR (usually the ones coming with a telescopic whip antenna), and after connecting it was expecting it “just to work” or, better said, pretending that the SDR connected to that whip (usually placed on a table right near the computer) could receive ANY POSSIBLE signal, including transmissions coming from the “dark side of the moon.” 🙂 Those folks got scared by the fact that the SDR “didn’t work” and decided to give up; now, this short “guide”  should allow anyone to setup what’s needed to have a working SDR

My self-imposed limitations for this project/experiment were the following:

  1. The whole setup shouldn’t cost more than 150 Euros so that, if after trying the SDR one doesn’t like it, (s)he won’t have paid $$$, otherwise, if (s)he decides to keep it, the resulting station will allow for further expansion/improvement
  2. The available space was considered to be that of an apartment, that is, no large field to put up huge wire antennas or to raise towers, the limit was the one of a balcony (in my home) that is 8 meters (max antenna length) by 3 meters (available height) by 2 meters (balcony width)
  3. The whole setup should be simple and straightforward, no need to solder components or to build special types of antennas
  4. Given the current Covid-19 sheltering, most components should be available online, while for others one may arrange with whatever is locally available (e.g. duct tape)

With the above limitations in mind, I took pencil, paper and rubber eraser (high-tech instruments, indeed) and started writing down a list of the needed stuff, after some writing, wiping and second thought, I came out with the following list, available on Amazon:

Bill of materials

The above includes all the needed stuff to put together a number of wire antennas (random wire, random dipole, loop…) the coax to connect the SDR, a balun to match the coax to the antenna and the accessory parts needed to put up the antenna. The selected SDR isn’t the common “RTL SDR” type, not that they don’t work, but their 8 bit ADC is far from being a good performer, so I decided to pick a different SDR which offers a 12 bits ADC and which also “presents itself” to the system as an SDRplay RSP1.

[Please note: we’ve since learned from SDRplay that the MSI.SDR is indeed a clone of the SDRplay RSP1. Here’s a post from the RTL-SDR blog confirming this. We recommend purchasing the RSP1a as a better alternative.]

Anyhow; all I can say is that after some tests, the MSI.SDR is a quite good unit and offers quite a lot of bangs for the buck, so I believe it may be a good unit for people willing to get their feet wet with SDRs

The above being said, here’s a pic of the MSI.SDR unit with the included stuff:
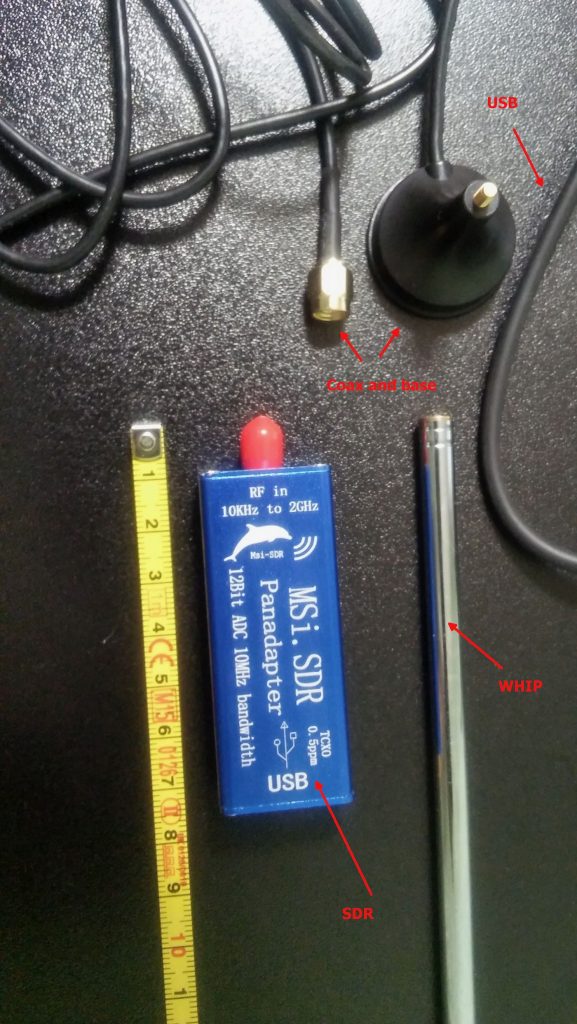
The unit is very small and the box has two connectors, an SMA for the antenna and a micro-USB (like the ones used in cellphones) for the USB cable which is used to both power and control it; the other bits are the telescopic whip antenna (around 98cm fully extended) with a magnetic base and a short run of coax, and the USB cable.

Once I got the SDR I decided to give the included whip antenna a try… well, to be clear, while it will allow you to pick up some strong local FM stations and maybe a bit else, it will only be useful to test if the SDR unit is working (before putting together our antenna), so don’t expect to receive much with that whip, yet… don’t throw it away, it may become useful (more later).

The other important piece is the BalUn. I picked a NooElec “Nine to One” v2, since I’ve used their v1 model and I’ve found it to work well, I decided to pick the newest model which has a better antenna wire connector.  The BalUn, which is in effect a so-called “transformer balun” is really small and the junction box I bought is much bigger, but it isn’t a problem. All in all, the box may host a preamplifier in the future, but for the moment it’s fine for the balun. The following pic shows the balun “installed” inside the junction box:
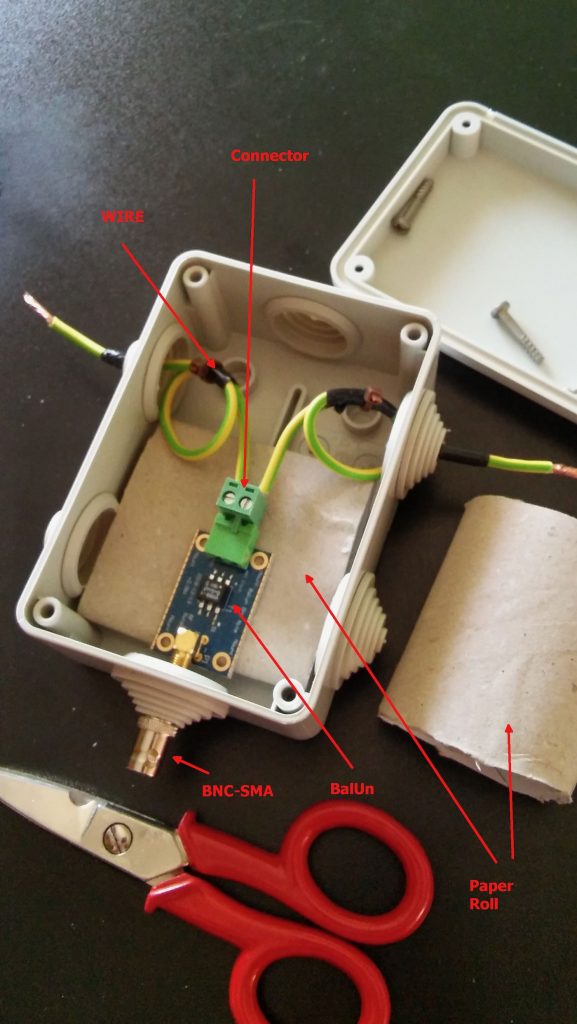
The scissors are there to give you an idea of the sizes; to put together the whole thing, I started by preparing two pieces of wire (the 2.5mm one),  made a turn with each wire and locked them with a nylon cable tier. Those turns will prevent the wire from sliding out and putting a strain on the balun connector.  I did that since I didn’t have plastic washers at hand, otherwise you may just slide two plastic washers (or proper diameter) over the wires and use two nylon tiers to lock them. In either case, the idea is that the “loops” or the washers won’t slide through the box holes and will support that (little bit of) strain caused by the wire connection.

Next, I stripped some of the insulation from the ends and connected the wires to one of the balun connectors (I chose the one in the pic since I believe it’s the most suitable for this setup), at that point I continued cutting the smaller “ring” of the box insulation caps (the two at top and the bottom one). Then I placed a piece of carboard roll (from a kitchen-paper roll) at the bottom to serve as a support (you can see it below the balun). At that point, I slid the balun SMA connector through the bottom hole and used the SMA to BNC adapter to hold it, done so I slid the two wires (connected to the green wire connector) through the side hole and then inserted the connector into the balun. I then placed the other piece of paper roll above the balun and closed the box with its cap. As a note, to properly close it, start by inserting the screw into the cap holes till end, so that they’ll extrude from the bottom, then place the cap over the box and tighten the screws–you may need to use some force to properly tighten it.

Notice that the wire shown in the pic are SHORT, later on I replaced them with longer wires (outside the box) to be able to better connect the balun box to the antenna, but the remainder of the build is the same.

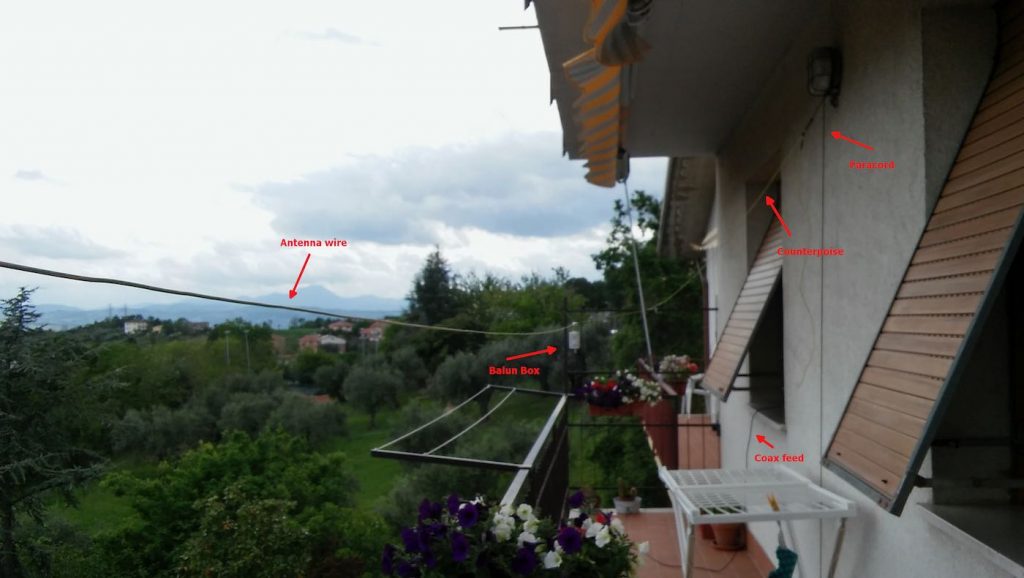
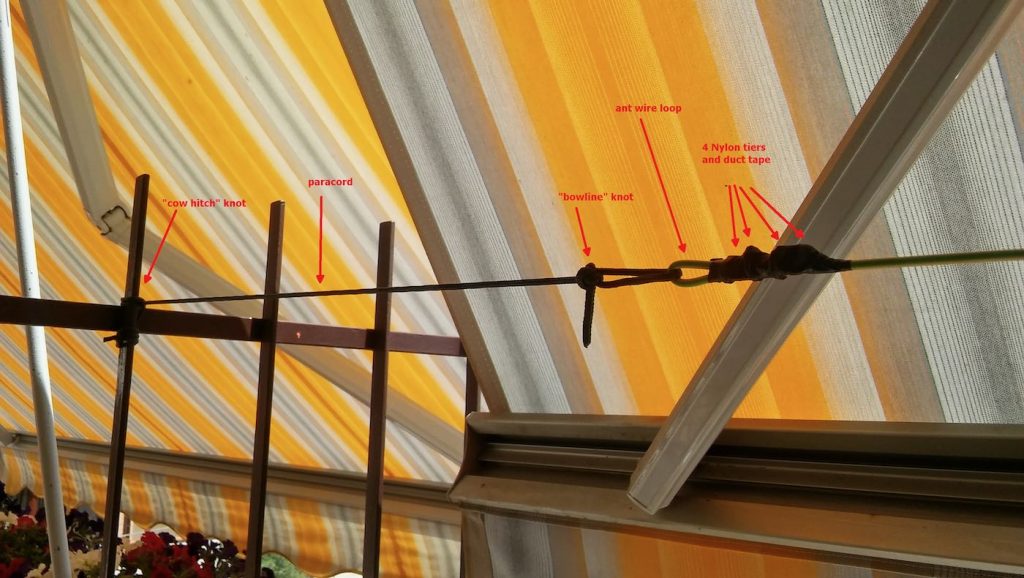
Now that I had my “balun box” ready, I measured the antenna wire and, using the paracord and some nylon tiers, I installed it. I also installed the “counterpoise” wire. For the latter, at first I tried just connecting the remainder of wire to the “gnd” of the balun, leaving the spool laying on the floor, but later on I decided to hang up the counterpoise and the final result was the following:

Click to enlarge

Not a work of art, but then since I was experimenting, I decided not to add PTFE and tape to allow me to quickly rearrange the antenna to run other configurations, yet, the whole setup worked quite well and stood fine to some wind and rain, the picture below shows the balun box with the antenna/counterpoise wires and the coax with the snap-on ferrite chokes.
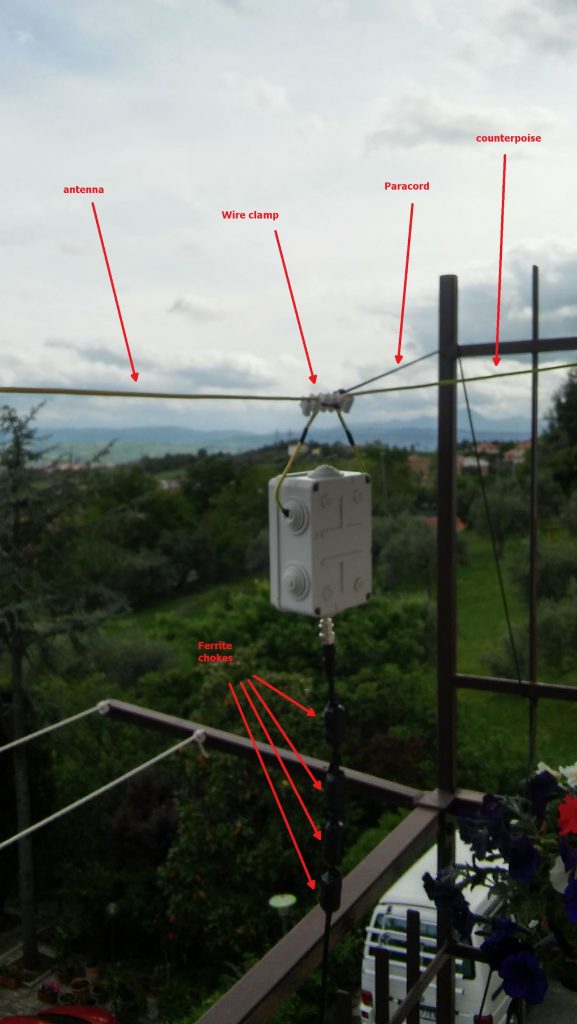
Click to enlarge

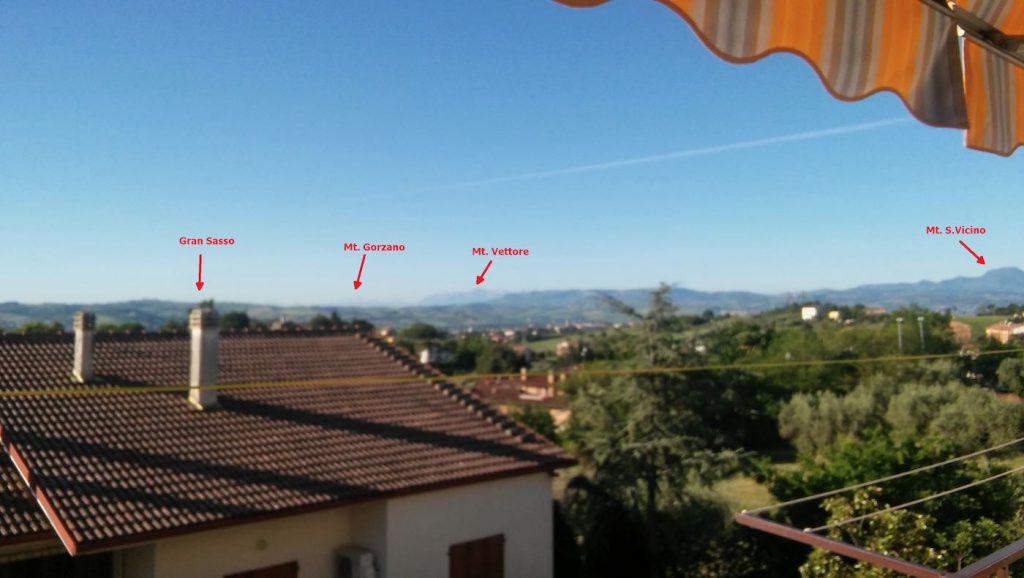
Notice that to avoid putting strain on the balun wires, I used a wire clamp I had in my junkbox–the clamp is then tied to the paracord using a nylon tier and the paracord holds the assembly and keeps the antenna wire in position. The ferrite chokes aren’t properly seated, and I’m planning to remove and re-place them, but for the moment they’re okay. The balcony faces to south/south-west so the antenna has a free horizon of about 270 degrees ranging from the Adriatic coast to the Appennines (Mt. S.Vicino can be seen behind the paracord)–not bad. Here’s another pic showing the horizon to West, just to give you an idea:
Getting back to the antenna installation, the other end of the antenna wire is tied to the opposite side of the balcony as shown below (let aside the tent/awning, I raise them when using the SDR, also, the bowline knot isn’t correct, I’ll need to tie that again):
The counterpoise instead is supported by a lamp I’ve on the terrace, here’s it’s setup:
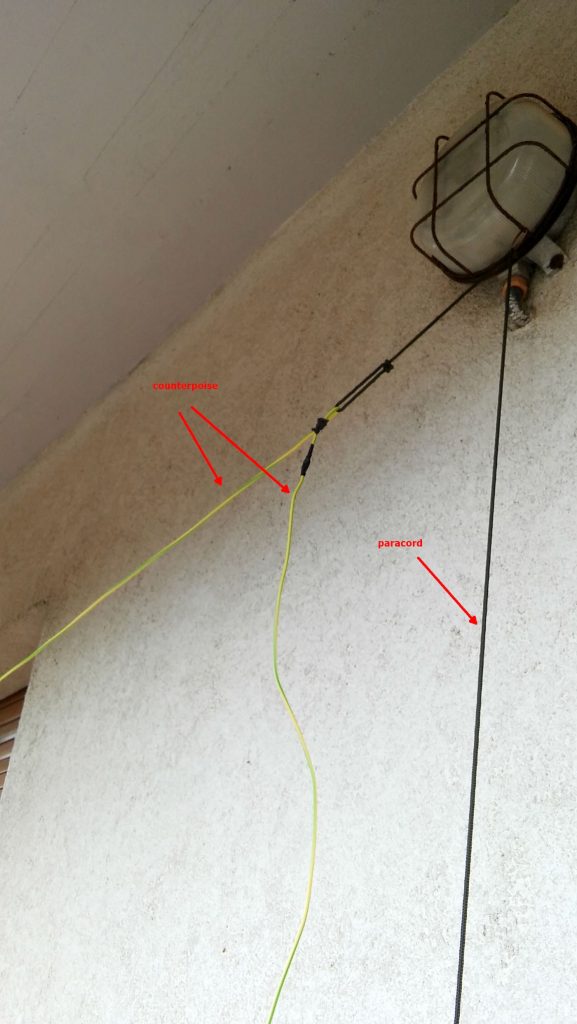
The “paracord” goes down to a plastic bottle filled with a water/chlorine mixture which serves to keep it in place. The remainder of the wire is just hanging down for about 1.5 meters (the counterpoise is shorter than the antenna wire, it’s about 2/3 of its length).

Ok, time to put the antenna and SDR to test, so I brought the coax inside home, connected the other SMA to BNC adapter to the SDR and connected the coax going to the antenna. Note that 15 meters of coax is enough for me, but if one wants a length of up to 25 mt, it won’t be a problem.

I already installed the SDR software, in my case since the unit identifies itself as an “SDR1” I downloaded the SDRPlay “SDRuno” software https://sdrplay.com/windl2.php and since I was at it I also downloaded the PDF manual https://www.sdrplay.com/downloads/ and the “CookBook” http://www.nn4f.com/SDRuno-cookbook.pdf and I heartly recommend reading and digesting them before starting the whole thing (while you wait for all the stuff to be delivered). An important note is that you MUST install the SDRuno software BEFORE connecting the SDR since that way, the SDRuno setup will install the proper drivers and you won’t have issues.

Anyhow, I connected the coax to the SDR and then it was time to fire up the whole thing and give it a spin; so I powered up the laptop (technically, a “transformable” laptop/tablet), started SDRuno, opened the “RX control” and “Main Spectrum” windows and then clicked the “play” button, clicked the “broadcast” band, and the “MW” one and got this:
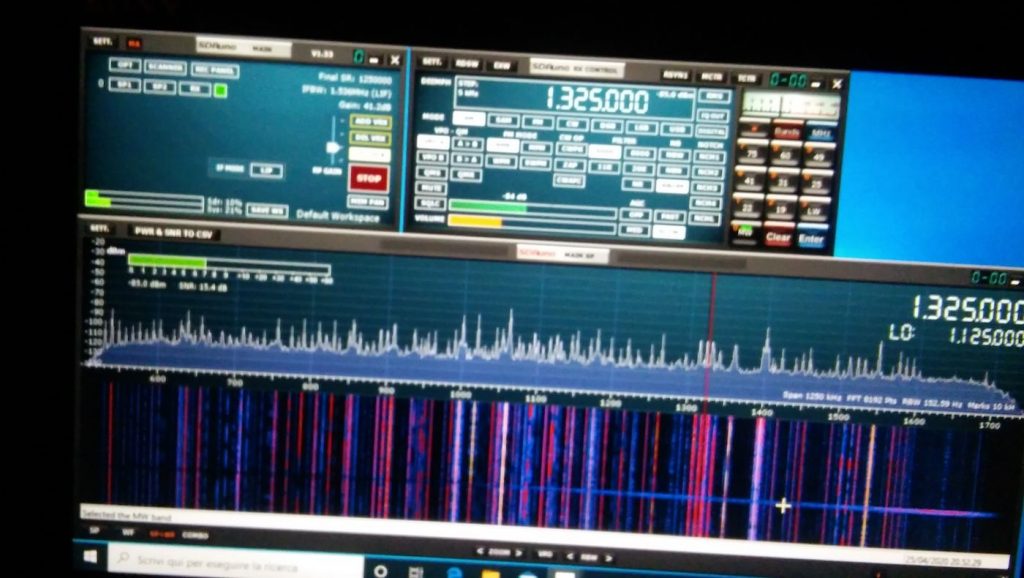
Not exceptional maybe, but not bad, either; in particular if one considers that it’s from a quite short piece of wire which isn’t exactly placed in an ideal position.
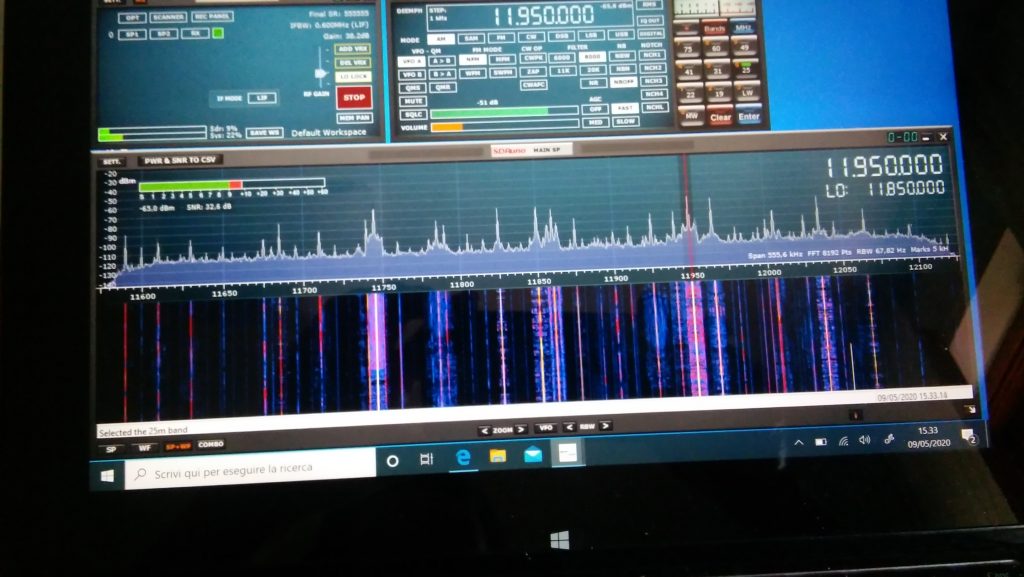
Deutsche Welle

So I went on and explored the bands a bit. On ham bands the SDR picked up signals from the whole mediterranean basin (Cyprus, Lebanon, Spain and then some) and from north too (Russia, Germany, Denmark); then depending on time, I was able to clearly receive broadcasts from China, South America, Africa and more ham QSOs from a lot of places.
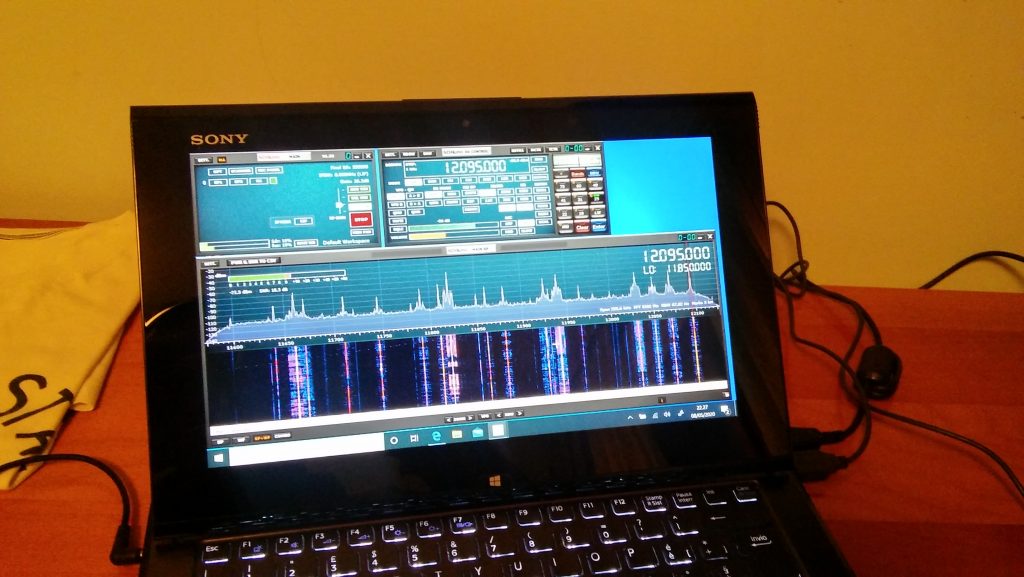
BBC Ascension Island 5/9+ and just a bit of QSB

I must admit I didn’ record the callsigns or stations identifiers (“guilty” your honor–!) but I was more focused on testing the SDR and antenna than running a “DX session” at any rate.  On the BCB bands I picked up WWV, BBC,  VoA, China Radio International, Radio Free Asia, Radio Romania and a bunch of others from Middle East, Asia, Africa and South America. While on the ham bands, I was able to pick up some quite interesting QSOs and then… well, I went hunting for higher frequencies signals!

I got Police, Ambulances, Air control…so even if that “piece of wire” isn’t optimized for VHF/UHF it seems to be working decently there too. By the way, when changing bands you may (and probably will) need to adjust the gain control, but that will be almost the only thing needed to pull in signals

At the end of the day, I can say that I’m quite pleased with the performance offered by this simple and cheap setup. For less than 150 euros you have everything you need, not just the SDR.

Sure, the setup may be improved, but then again you’ll have all of the basic parts, so you won’t need too much. For example, if you live in a really noisy environment, it would be a good idea to use a loop antenna. You would only need a “cross shaped” support (PVC pipes or wood will do). You could quickly put together the SRL (Small Receiving Loop) designed by Matt Roberts (KK5JY) http://www.kk5jy.net/rx-loop/ the balun will be the SAME (yes, no need to wind whatsoever!) so building it will just be a matter of assembling a cross shaped support for the wire (which we already have because it’s the same used for the wire antenna) and you’ll have it. While I already tried the SRL, I didn’t build one to test with this SDR, but I’ll probably do that as soon as SWMBO will start complaining about those “wires on the balcony.”

Also, at the beginning I wrote “more later” when writing about the telescopic whip included with the SDR. Here’s the idea–it requires soldering, so if you don’t want that, skip this: remove the adhesive sheet on the bottom of the antenna base to expose the bottom cap and then remove (extract) the bottom cap. You’ll see a magnetic ring and a “bell shaped” piece of metal (the “ground” for the whip). In the middle of the “bell” there will be the antenna connector which is soldered to the coax wire with a nut holding the connector (and the “bell”) in place. De-solder the coax, unscrew the antenna connector and extract it, at that point you’ll have the telescopic whip and its connector, now you may use them to build the active “whip” antenna described here:

http://www.techlib.com/electronics/antennas.html#Improved%20Active%20Antenna

Notice that it is NOT the “usual” active whip–the circuitry and idea behind it is totally different–yet it works fine and will serve you from VLF (not kidding) up to around 100MHz. It might be a good companion for the SDR. It won’t be as quiet as the loop, yet it may be a valid “all rounder.”

To conclude, I believe that the setup described above is something anyone can afford. You don’t need to be an engineer or to have special knowledge or abilities–it’s just a matter of putting together some bits and pieces.

Obviously, this setup doesn’t require a large space and offers good performance across the bands. Plus it’s so easy to improve since the 12bit SDR is a good starting point

All the best everyone and STAY HOME, STAY SAFE !


Thank you so much, Grayhat!

I love the fact that you invested (however modestly) in a proper antenna setup to better serve you rather than relying on the basic whip antenna that comes with the SDR. You’re right: too often, we invest a receiver, yet invest no money or time into building an appropriate antenna.  The antenna is the most important component in a proper radio setup and those included telescoping whip antennas simply don’t perform well on the HF bands.

Based on our correspondence, I know you had fun piecing together this little system using a simple bill of materials and items you had on hand during the Covid-19 quarantine. Thank you for sharing it here with your SWLing Post community! 

Spread the radio love

Using amplified loop antennas with portable radios?

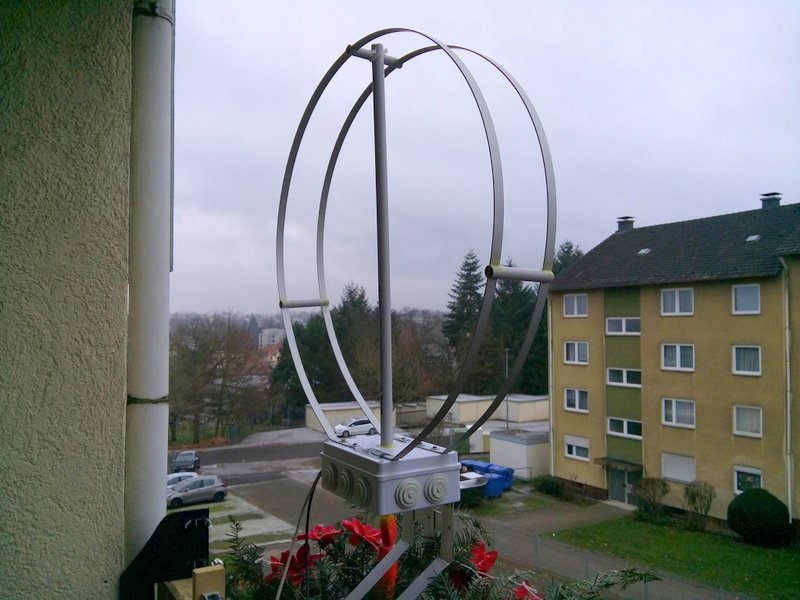
SWLing Post contributor, Klaus Boecker, sports a homebrew magnetic loop antenna on his balcony in Germany.

Many thanks to SWLing Post contributor, Marty, who writes:

I have a question about loop antennas; specifically which type is “better,” passive magnetic loops or active electric loops?

I know, “It depends.”–?

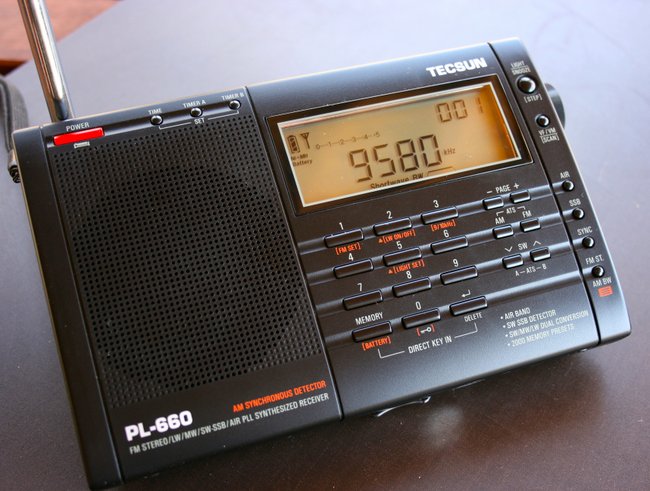
I live in a ground-floor apartment, with a small porch, lots of RFI and restrictions against visible antennas. Also there are no trees within 75 ft of my porch, which faces on a parking lot. My radio is a Tecsun PL-660, which works okay inside with my 10-ft bare wire antenna hidden on the porch.

With a loop antenna, I’d like to mount the antenna on the porch at night and have a remote tuner/control inside because it’s very hot n humid here in Louisiana even after dark.

No doubt there are a number of magnetic loop antennas that could serve you well in your situation, Marty.

To answer your first question, though, you should search for a wideband amplified loop antenna since you’re only concerned with receiving.

Passive loops are great antennas on the shortwave bands–and easy to build–but they best serve ham radio operators who wish to transmit. Passive loops typically have a very narrow bandwidth that requires the operator to constantly tune the antenna when they tune the radio a few kHz. Most amplified wideband loops need no separate tuning mechanism.

Last year, I posted an article about choosing the right loop antenna for situations like yours where one has limited installation options.

Click here to read : Shortwave antenna options for apartments, flats and condos

Portables and amplified loops?

I do hesitate to encourage you to invest in an amplified loop antenna when your only receiver is a Tecsun PL-660. Some portables don’t handle amplified antennas well–they can easily overload and I imagine you can even damage the front end of the receiver.

I’m well aware, however, that there are a number of readers here who do couple their portable radio to an amplified loop. I have connected a number of portables to large wire antennas and found they could easily handle the extra gain, so I imagine an amplified loop would perform as well; the Sony ICF-SW7600GR, Tecsun S-8800, and Sangean ATS-909X come to mind.

But the PL-660 is a hot little receiver even with the built-in telescopic antenna–I’m not sure if amplification would help or hinder.

Please share your experience

This is where I hope the amazing SWLing Post community can pitch in and help us out here!

Does anyone here regularly connect their PL-660 to an amplified loop antenna? If so, what model of antenna are you using? Are there other portables out there that you regularly connect to amplified loops? Please share your notes, thoughts and experience in the comments section.

Thank you in advance!


Do you enjoy the SWLing Post?

Please consider supporting us via Patreon or our Coffee Fund!

Your support makes articles like this one possible. Thank you!

Spread the radio love

Shortwave antenna options for apartments, flats and condos

A balcony is your friend, if you have one. Otherwise, we need to use other antenna tactics!

Many thanks to SWLing Post contributor, Tim, who writes:

I am a regular subscriber here, but until now have not formally commented. I’ve been an avid SWL since 1977.

I am intrigued by your in-depth article on understanding and setting up SDR’s. But, what about an antenna? How well will these radios work for someone who is an apartment dweller?

I live here in South Florida and am unable to erect anything outdoors. I do get pretty good reception on my Grundig Satellit 800 and Tecsun PL-880. For these, I use either an indoor slinky antenna I bought on E-Bay; or an active indoor tunable loop antenna. This is one of the models past reviewed by you. It is Australian made, and covers 6-18 MHz. Please comment if you can on antenna usage.

Thank You very much!

First of all, I’m glad you enjoy the SWLing Post, Tim!

Great question: no doubt you understand that the antenna is the most important part of your radio equation!

It sounds like you’re currently using a slinky antenna and a portable PK Loop HF antenna.

The PK Loop

You’re on the right track with a PK Loop if you live in an apartment and have no way of putting an antenna outdoors. Being a small magnetic loop antenna, the PK Loop should help mitigate a bit of the noise in your apartment building.

What I love about the PK Loop is it’s small enough that you can re-position and rotate it to tweak noise rejection and find the quietest spot in your listening room. When I travel by car and even by air, the PK Loop is a welcome companion.

Before we talk about investing in a better indoor antenna, let’s make sure we cover a more affordable option first…

External wire antennas

If you have operable windows in your apartment, even fishing a thin-gauged wire out of your window–allowing it to simply hang along the outside of the building–could improve your reception significantly. Of course, if there’s a source of noise outside of your apartment it might only make things worse, but this is at least an inexpensive experiment and the results might impress you.

I actually tested this theory once and published the following results in a previous post about the PK Loop:

I had a fantastic opportunity to evaluate how well the PK Loop would perform in a typical hotel room. My buddies Eric (WD8RIF), Miles (KD8KNC) and I stayed overnight in a hotel on Wright-Patterson Air Force Base during our mini National Parks On The Air DXpedition.

The hotel room was indeed dense with RFI.

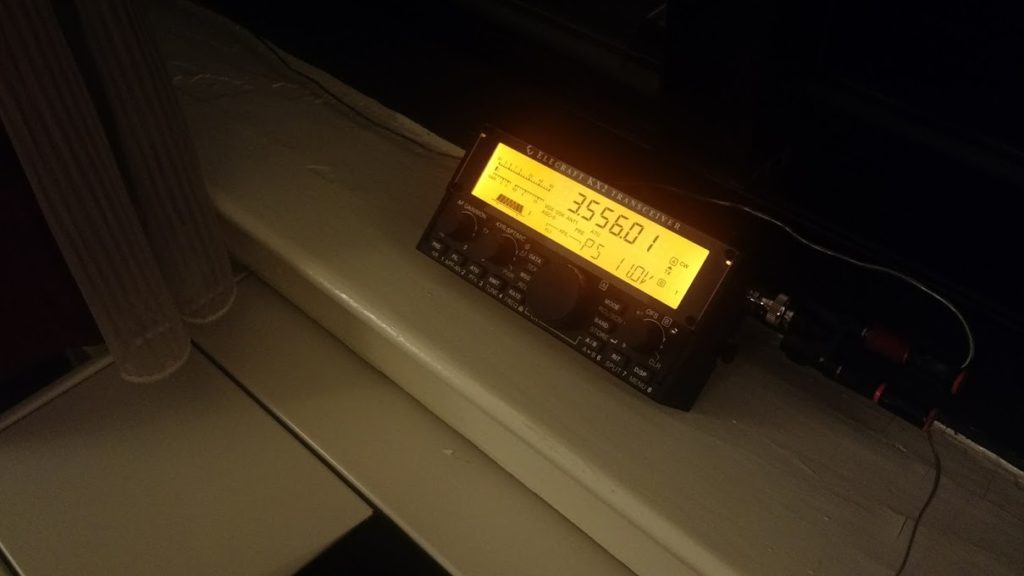
We hooked my Electraft KX2 to both the PK Loop and to a simple random wire antenna.

Without a doubt, the PK Loop was much better at mitigating radio noise than the wire antenna we hung on the inside of the hotel window.

Unlike most modern hotels, however, this one actually had operable windows, so we tossed the random wire out the window and made another comparison. In this case, the external wire antenna consistently outperformed the PK Loop, no doubt because it had the advantage of being outside the radio noise cloud within the hotel’s walls. It goes to show that outdoor antennas–even if simply hanging from a room window–will almost always outperform comparable indoor antennas.

So, if you have a way to dangle a wire out one of your window, give this a try.

How long should the wire be? I suppose it depends on how much vertical space you have below your window. For starters, I’d try to suspend at least eight feet of wire outside. If I had the vertical space, I’d try as much as 31 feet.

Important: First you must check to make sure your wire couldn’t possibly touch electrical lines. Never lower a wire outdoors if the wind could blow it into an electric service entry point, power line or any other type of line or cable. You should do a thorough inspection of the site first.

With that said, keep in mind: Stealth is key!

Photo by jay blacks on Unsplash

Can you spot the wire antenna in this photo? Of course not.

Use a thin wire with a black or dark jacket/insulation. Only lower it when using it–don’t leave it out all day long. Check to make sure your antenna isn’t going to interfere with your neighbors below (like landing in their outdoor grill or flower pots!). One strong complaint from neighbors could shut down your operation permanently.

Now back to loops…

If you don’t have operable windows or a way to deploy a wire antenna outside–or you’ve tried a wire antenna and results were unsatisfactory–then you will be forced to stick with indoor antennas which almost always leads you down the path of larger amplified wideband magnetic loop antennas.

This is a topic I covered extensively earlier this year.

Please read the post: Indoor shortwave antenna options to pair with a new SDR.

Indoor shortwave antenna options to pair with a new SDR

Keep in mind that if you’re fortunate enough to have a balcony, this is where you should mount your loop antenna. Check out this post by SWLing Post contributor, Klaus Boecker.

Klaus Boecker’s homebrew magnetic loop antenna.

Note that there are a number of sub $100 indoor amplified antennas on the market, but I would avoid using them–click here to read my thoughts about these.

In addition, read through this post which includes practical low-to-no-cost tips and best practices for shortwave listening at home and on the go.

Frugal SWLing: Investing little, but getting a lot out of your radio

I’m plotting to write a more in-depth article about antennas in the coming months, but it will focus on external antennas and methods of mounting them. When you have no means of mounting an antenna outdoors, in my opinion, your best options are the ones mentioned above.

Post readers: Have I overlooked an indoor antenna option? Please comment if you have experience with indoor antennas!

Do you enjoy the SWLing Post?

Please consider supporting us via Patreon or our Coffee Fund!

Your support makes articles like this one possible. Thank you!

Spread the radio love