The following review was first published in the November 2020 issue of The Spectrum Monitor magazine:
![]()
A review of the Mission RGO One ham radio transceiver
by Thomas (K4SWL / M0CYI)
Wow…I love this!
If I am perfectly frank, that would sum up my initial impression of the Mission RGO One.
It was the 2018 Hamvention in Dayton, Ohio, and I had just met up with radio engineer Boris Sapundzhiev (LZ2JR) who was debuting the prototype of his 50-watt transceiver kit, the Mission RGO One. With its clean, functional design and simple front face, large weighted encoder, and enough tactile buttons and multi-function knobs to keep one’s most needed features within reach, the kit was certainly pushing all the right buttons for me. Without a doubt, I was impressed from the start.

Boris (LZ2JR) the designer and engineer of the Mission RGO One.
To my mind, the RGO One smacks of classic 1990s-era transceivers: a traditional tabletop front-facing panel, a large fold-out bail, and a unfussy backlit LCD display that’s large enough to read in the field and viewable at any angle.
![]()
Perhaps it’s only because I can’t turn off the innate radio reviewer, that I was rapidly checking mental boxes in this first encounter with the RGO One. Indeed, when I first set eyes on any new radio, I do skim through my mental “operations checklist” to see how difficult the rig might be to use at home and/or in the field. Specifically, I’m looking for the following controls:
- Encoder
- AF Gain
- RF Gain
- Mode switch
- Power output adjustment
- Tune/Xmit button
- Preamp/Attenuator
- VFO A/B
- Split and A=B
- Mic gain and keyer speed
- RIT
- Filters
- Band switching and direct frequency entry
- Key and encoder lock
Of course, these days it’s fairly rare that radios actually contain all of these functions without the user having to dig into layers of menus, multi-function controls, or touch-screen options to access them.
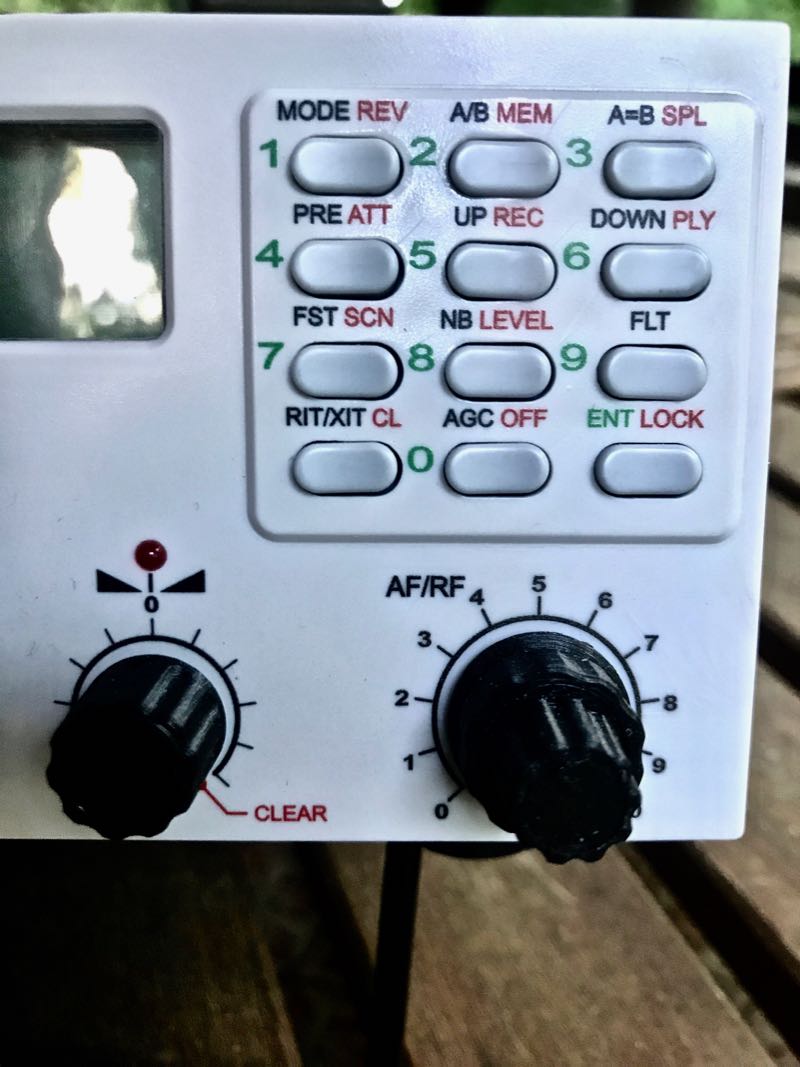
Remarkably enough, the Mission RGO One, despite simple design, manages to include all of these features on the front panel without the need of embedded menus. In contrast with some of the radios I’ve tested and evaluated over the past several years, I could tell by the layout alone that the Mission RGO One was developed by an active ham radio operator and DXer: the controls are that intuitive.
Alas, the tantalizing prototype on Boris’ table in the 2018 Hamvention flea market was for show only.
Boris promised that he’d have fully-functional models available at the 2019 Hamvention. Because of this, following that first meeting in 2018, I kept in touch with Boris; we arranged to meet again at the 2019 Hamvention so I could take a second, much closer look at the RGO One––especially since he intended to start shipping the first very limited, early-production-run rigs shortly afterward.
So…did Boris deliver? And more importantly: did the RGO deliver––? Let’s find out.
On The Air
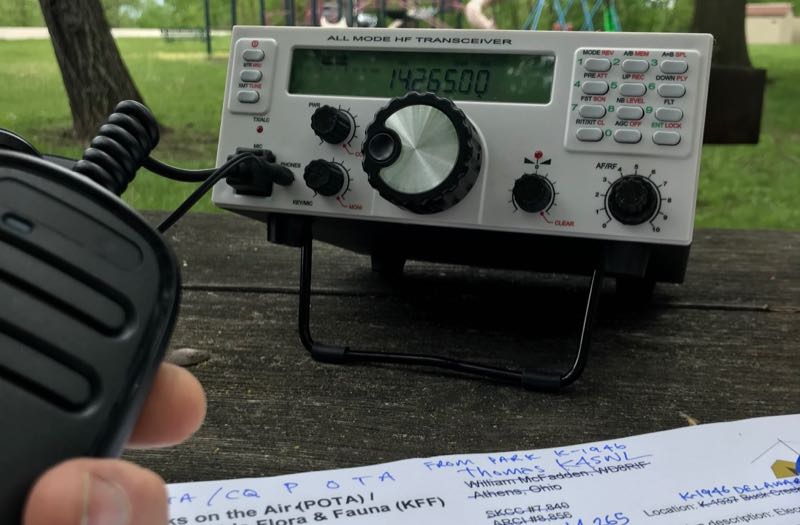
Within hours of taking delivery of the prototype radio, I had it in the field activating parks.
It was May 2019 when Boris delivered on his promise, handing me a loaner prototype RGO One. He did so with the understanding that the prototype was still a little rough around the edges. I acknowledged this, thinking in terms of a late Beta-test model since he welcomed reports of any bugs or anomalies I encountered and was fully prepared to address them.
After taking the initial RGO One to the field, I did note a few bugs, but nothing major. All of my field notes were then sent to Boris and turned into action items.
Then, in July of 2020, Boris sent me a fully-upgraded Mission RGO One with the new internal ATU and optional adjustable filter. This radio represented the “fully-grown” production model, and in preparation to put it through its paces, I returned the prototype.
Although there are planned hardware upgrade options and, of course, firmware upgrades, the RGO One has now reached full maturity as a transceiver.
However, it was one thing to have ham-friendly ergonomic controls. The real question was, how did the RGO One stack up against the competition? It was time to find out. After all, this is the danger of a “love at first sight” radio encounter––it often leaves the door open for disappointment, and of this I was well aware.
What follows is my full review of this 2020 Mission RGO One transceiver. Let’s take a deep dive into this rig…
Features and specifications

What follows are some of the RGO One features and highlights as written in the product manual (PDF):
- QRP/QRO output 5 – 50W [can actually be lowered to 0 watts out in 1 watt increments]
- All-mode shortwave operation – coverage of all HAM HF bands (160m/60m optional)
- High dynamic range receiver design, including high IP3 monolithic linear amplifiers in the front end, and diode ring RX mixer or H-mode first mixer (option)
- Low-phase noise first LO – SI570 XO/VCXO chip
- Full/semi (delay) QSK on CW; PTT/VOX operation on SSB. Strict RX/TX sequencing scheme with no “click” sounds
- Down conversion superhet topology with popular 9MHz IF
- Custom-made crystal filters for SSB and CW and variable crystal 4 pole filter – Johnson type 200…2000Hz
- Fast-acting AGC (fast and slow) with 134kHz dedicated IF
- Compact and lightweight body, only 5 lbs
- Custom-made multicolor backlit FSTN LCD
- Custom-molded front panel with ergonomic controls
- Silent operation with no clicking relays inside – solid state GaAs PHEMT SPDT switches on RX (BPF and TX to RX switching) and ultrafast rectifying diodes (LPF)
- Modular construction – Main board serves as a “chassis” also fits all the external connectors, daughter boards, plus inter-connections, and acts as a cable harness
- Optional modules – Noise Blanker (NB), Audio Filter (AF), ATU, XVRTER, PC control via CAT protocol; USB UART – FTDI chipset
- Double CPU circuitry control for front panel and main board – both field programmable via USB interface
- Memory morse code keyer (Curtis A, CMOS B); 4 Memory locations 128 bytes each
Build quality
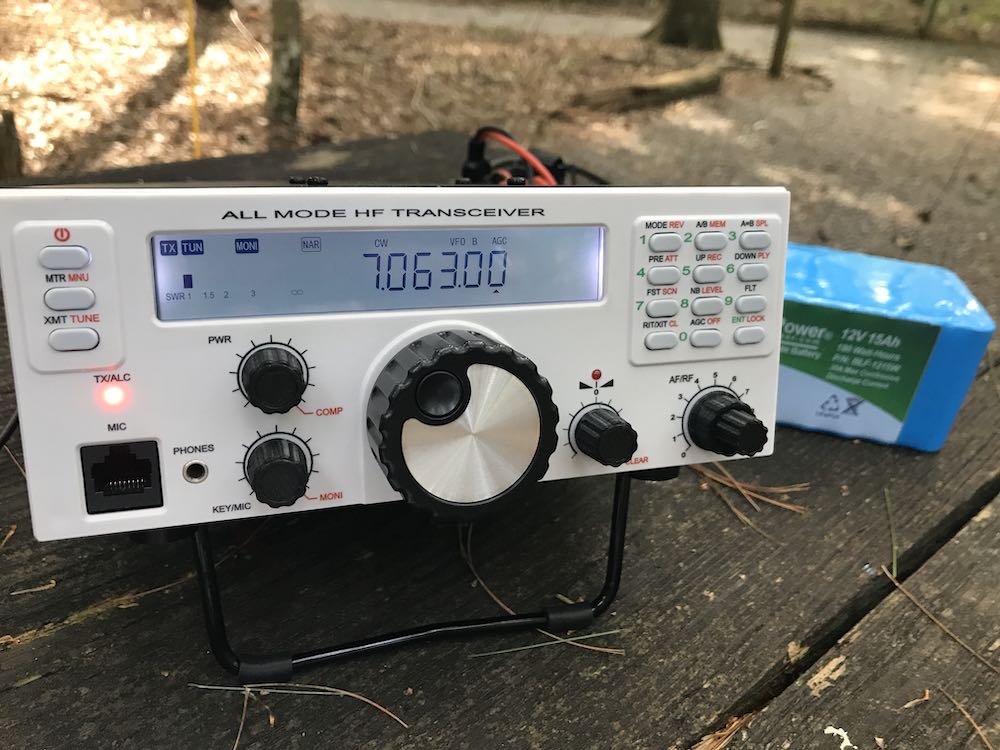
![]() First impressions proved accurate in terms of construction. I’m very pleased with the build quality of the Mission RGO One. Keep in mind, however, you might note from the photos that some items––like the volume and multifunction knobs––are 3D printed, and I’m not certain if they’ll ever have custom knobs manufactured. But I really don’t even think this is necessary, as the 3D printed ones are very nice, indeed––moreover, should a replacement ever be needed, I love the idea I could simply print one myself!
First impressions proved accurate in terms of construction. I’m very pleased with the build quality of the Mission RGO One. Keep in mind, however, you might note from the photos that some items––like the volume and multifunction knobs––are 3D printed, and I’m not certain if they’ll ever have custom knobs manufactured. But I really don’t even think this is necessary, as the 3D printed ones are very nice, indeed––moreover, should a replacement ever be needed, I love the idea I could simply print one myself!
The RGO One main optical encoder/tuning knob is just brilliant. It’s weighted properly for the right amount of “heft” while tuning. I’m very pleased with the overall feeling and quality. It’s substantial, yet silky-smooth in operation, just what I look for in a tuning knob.
On the back of the unit, there is an externally-mounted heat sink with two small fans. These fans are quiet and efficient.
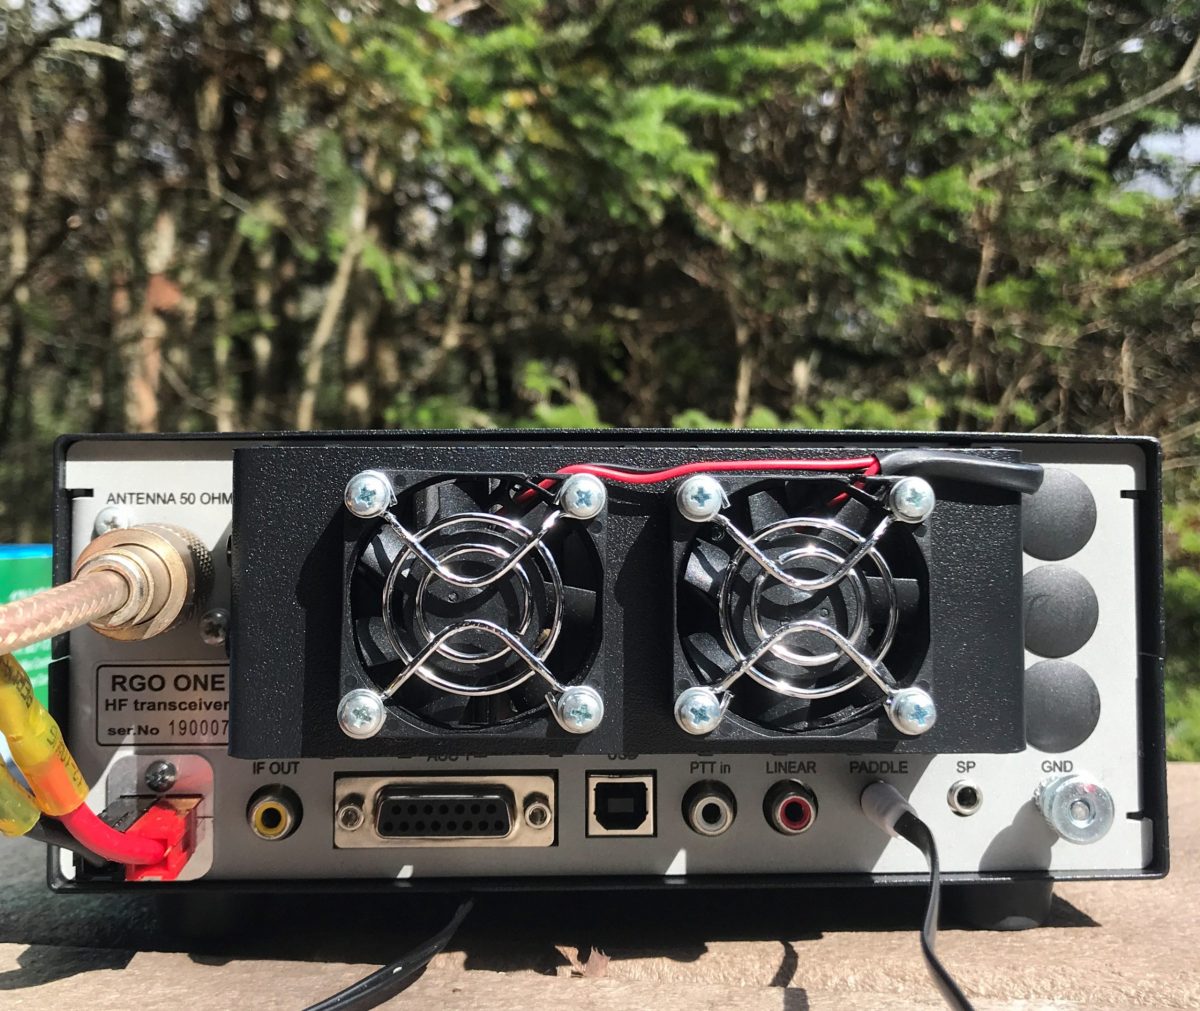
The chassis and bail are both top-shelf quality and should withstand years of field use. Just do keep in mind that like almost every other amateur transceiver currently on the market (save the recently reviewed lab599 Discovery TX-500), the chassis is neither water-proof nor weather-proof, so will require common-sense care to protect it from the elements.
Portability
The Mission RGO is relatively compact, lightweight (only 5 lbs without the ATU), and has a power output of up to 55 watts, even though the specs list just 50 watts. As a point of comparison, most other rigs in this class have a maximum output of 10 to 20 watts, and require an external amplifier for anything higher. The form factor is very similar to the Elecraft K2.
The light weight of the rig and the extra power makes the RGO One a capable and versatile field radio. Although the RGO One is configured like a desktop radio (with a front-facing panel), it’s still relatively compact and can easily be set up on a portable table, chair, or on the ground. Unlike field-portable rigs with top-mounted controls (think the Elecraft KX3 or KX2), obviously, it would be tough to do handheld or laptop operation.
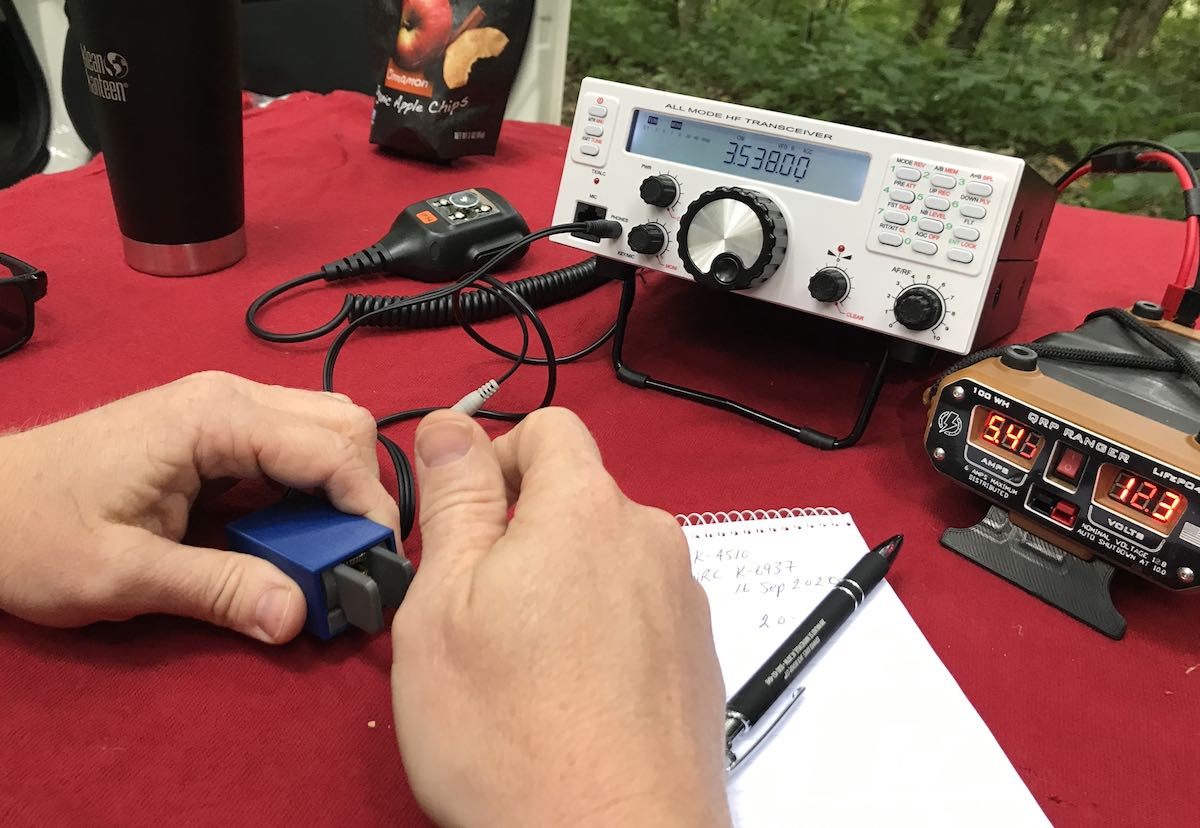
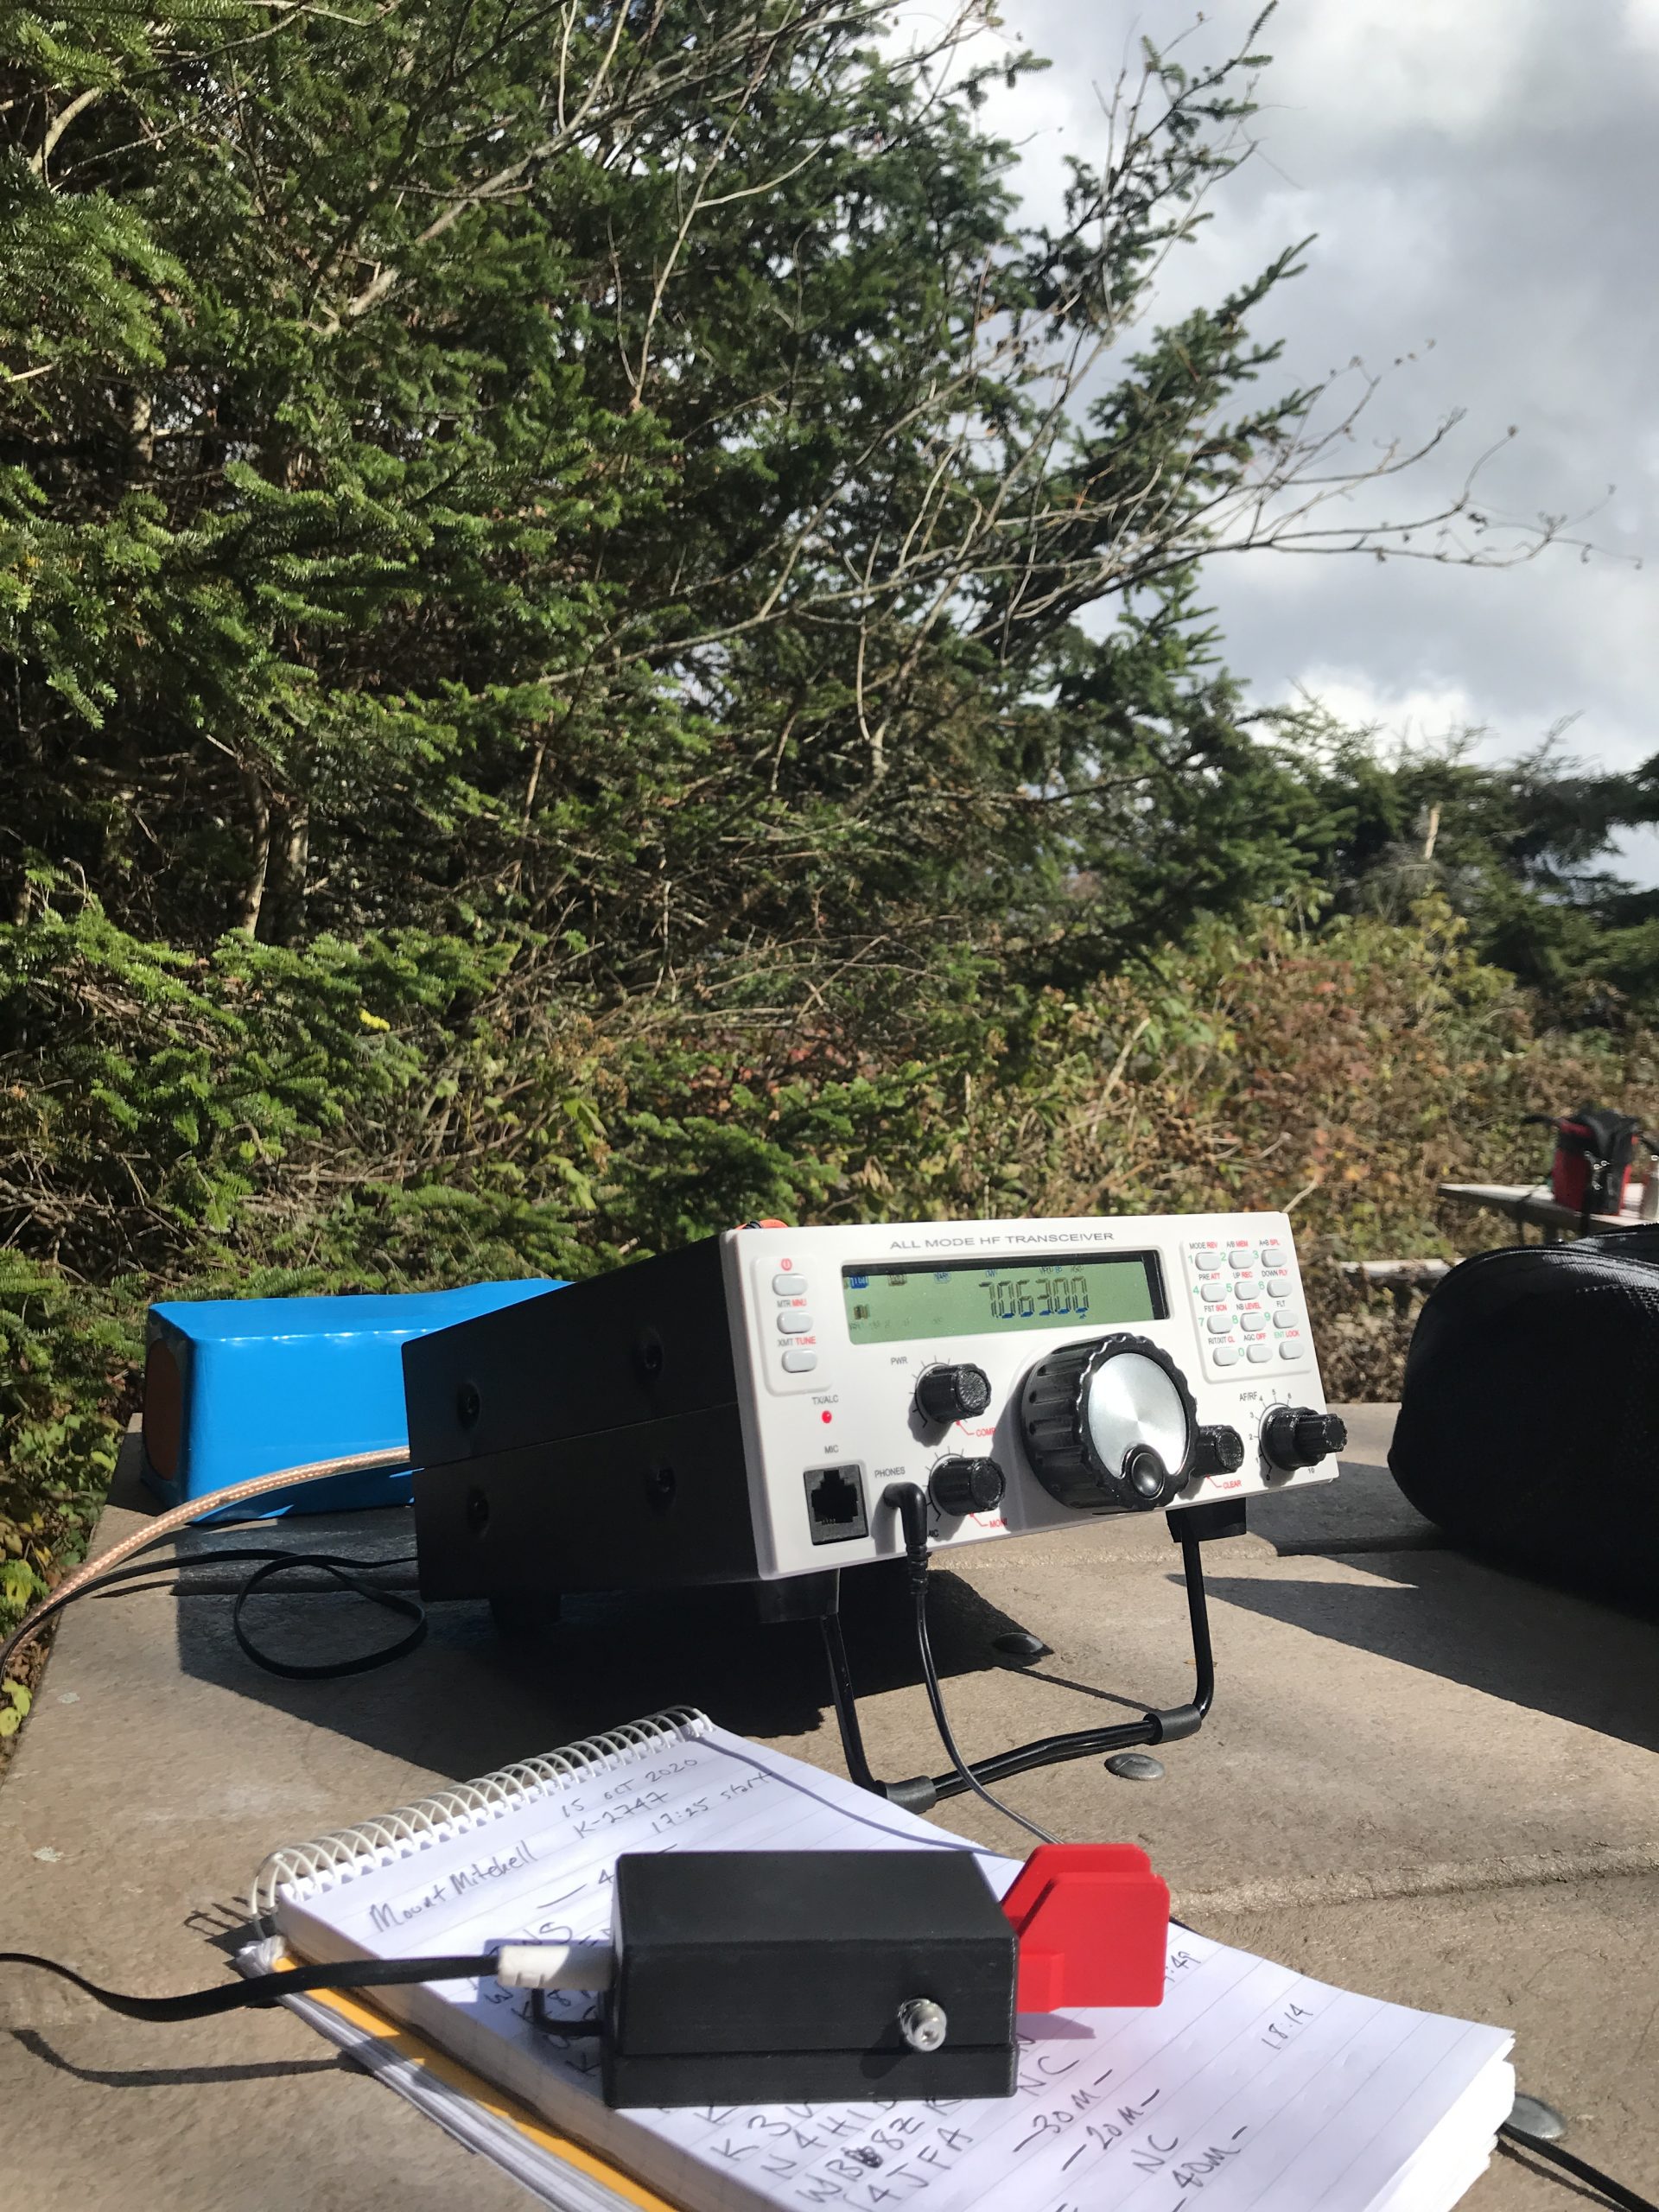
The RGO One should also play for a long time on battery power as the receive current drain is a respectable 0.65A with the receiver preamp on. It’s not as efficient as, say, an Elecraft KX3 or the new Icom IC-705, but keep in mind the RGO One can provide 50 watts of output power and has a proper, internally-mounted, amplified speaker. The popular 100 watt Yaesu FT-891, in comparison, has a current drain closer to 1.75 to 2.0 amps [update: actually the specifications indicate 2 Amps in receive, but user reports are less than half that amount]. I pair the RGO One with my larger 15 aH Bioenno LiFePo battery. When fully-charged, I can operate actively for hours upon hours without needing to recharge.
The Bioenno 15aH battery powers the Mission RGO One for hours at a time in the field.
If it’s any indication of how much I wanted to take this rig to the field, when Boris handed me the prototype RGO One on Saturday at the 2019 Hamvention, I had it on the air that same day doing a Parks On The Air activation at an Ohio State Park.
Since then, I’ve easily taken the Mission RGO One on 30 or more park activations.
Performance
![]()
What’s most striking and obvious about the Mission RGO One’s receiver from the moment you turn it on is the low noise floor. It’s incredibly quiet. So much so that more than once, I’ve double checked to make sure RF gain hadn’t been accidentally altered as I started a field activation. I’d call CQ a few times, though, and when stations return they literally pop out of the ether. The RGO One currently has no digital noise reduction (DNR) but frankly, I don’t miss it like I might in other transceivers. Indeed, the RGO One is a radio I’ve reached for when the bands are noisy because the AGC and receiver seem to handle rough atmospheric conditions very well.
The RGO One’s built-in, top-mounted speaker provides ample audio levels for the shack, but in a noisy field environment, I wish it had a little more amplification. I’ve also used my Heil Pro headset and even inexpensive in-ear earphones connected to the front panel headphones jack in the field. The audio via headphones is excellent.
Let’s take a look at how well the RGO One performs by mode:
CW
First and foremost, CW operators will appreciate the RGO One’s silky-smooth full break-in QSK. The RGO One employs clickless and quiet pin diode switching–a design feature I’ve become particularly fond of as traditional T/R relays can be noisy and distracting when not using headphones.
The RGO One also has a full compliment of adjustments for the CW operator including adjustable delay (default is 100ms), iambic mode, weight ratio, hand key/paddle, adjustable pitch, and sidetone volume.
The key jack is a standard three conductor 1/8” jack found on most modern transceivers. It’s located on the back of the radio.
My review unit has the optional variable width narrow filter which I highly recommend if operating in crowded conditions. I’ve used the RGO One on ARRL Field Day and found that it easily coped with crowded band conditions. Even after a few hours on the air, I had very little listener fatigue.
I also find that, as I mentioned earlier, CW signals just seem to “pop” out of the ether due to the low noise floor and excellent sensitivity/selectivity.
The RGO one also sports four CW keying memories where you can record your CQ, callsign, or even contest exchange. I’ve become incredibly reliant on memory keying to help facilitate my workflow in the field—while the radio is automatically sending my CQ or my regards and callsign to an station I’ve just worked, my hands are free to log the contact, adjust the radio, or even eat lunch!
Memory keying does require one long-press of the “6” button followed by either the “1,” “2,” “3,” or “4” button to play a message. Occasionally I won’t hold the 6 button long enough and accidentally move my frequency down one meter band since the 6 button is also the band “down” button. While it doesn’t happen often, it’s frustrating when it does but I think it could easily be fixed in the firmware as it’s really a timing issue.
SSB
 Likewise, phone operators will be very pleased with the Mission RGO One. During all of my testing, I’ve only used the microphone supplied with the radio mainly because I don’t currently own another radio with an RJ-45 type microphone connector.
I do love the fact the microphone port is on the front panel of the radio—it’s very easy to connect and disconnect (in contract to the recently released Icom IC-705, for example). I’ve gotten excellent audio reports with the RGO One in SSB mode and have even monitored my own tests and QSOs via the KiwiSDR network.
Compression, gain, and VOX controls are easily accessible. One missing feature at present is a voice memory keyer. For field operators activating sites for the POTA, WWFF, or SOTA program, voice memory keying is huge as it saves your voice from calling “CQ” over the course of a few hours. I understand Boris does plan to implement voice memory keying in a future speech processor board.
AM Mode
Since the RGO One has general coverage receive and since I’m a shortwave broadcast listener, I was disappointed to find that there is presently no AM mode. Boris told me he does plan to add AM mode, “to be implemented in future versions of the IF/AF board only on RX.”
With that said, I can always zero-beat a broadcaster and use a wide SSB filter to listen to broadcasts which is more than I could do, for example, with my (ham band only) Elecraft K2.
At the end of the day, the RGO One is a high-performance, purpose-built ham radio transceiver, so the current lack of AM mode isn’t a deal-breaker for me, but I would love a wide AM filter on this rig.
ATU
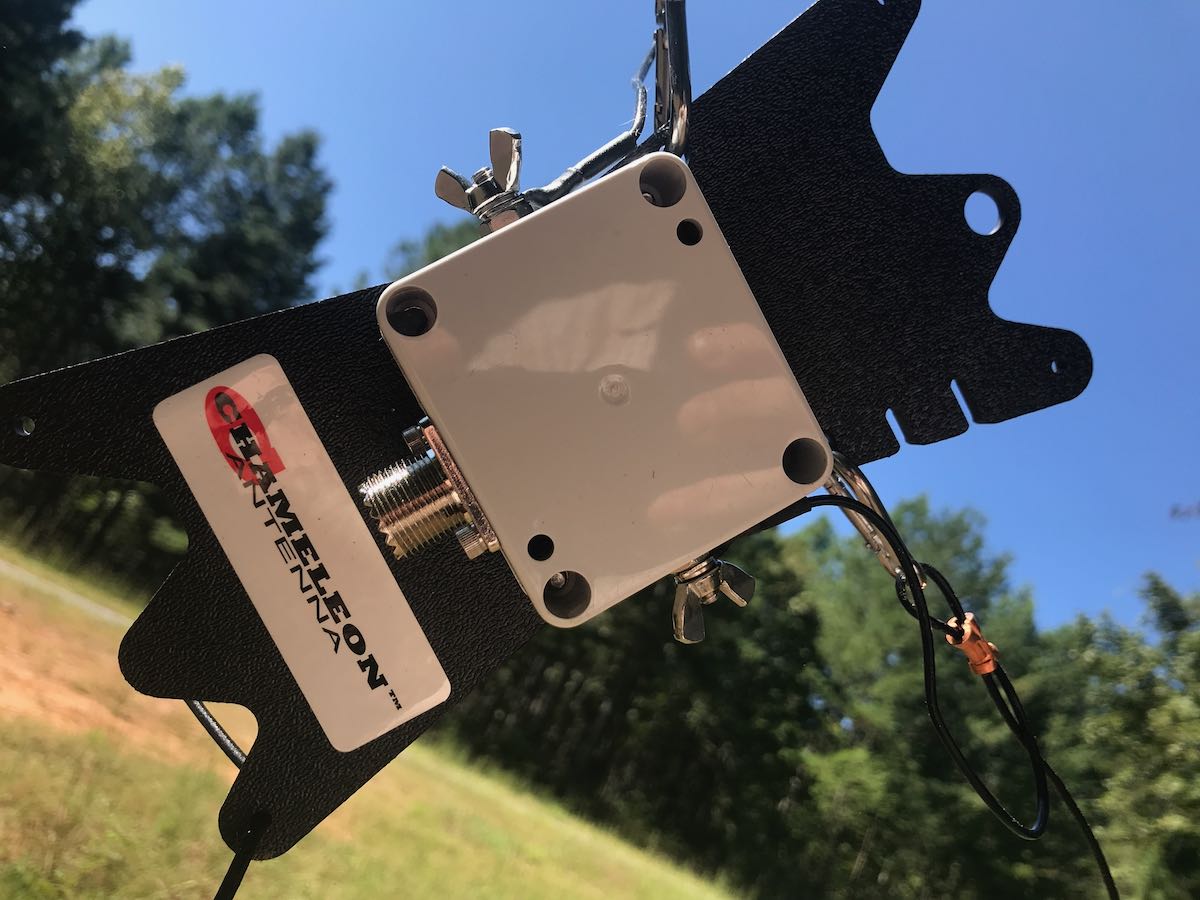
The 2020 review model I received has the internal automatic antenna tuner which I feel is a worthy upgrade/addition. In the field, I’ve paired the RGO One with my Chameleon CHA Emcomm III Portable random wire antenna which requires an ATU in order to find matches across the bands. The pairing has been a very successful one because the Emcomm III can handle up to 50 watts power output in CW and covers the entire HF band when emptying the RGO One ATU.
Even though it’s a minor thing, I also like the fact that the RGO One ATU operates so quietly, even though with the present firmware it takes longer than some of my other ATUs to find a match.
Power
One thing I’ve found very useful in the field and, no doubt others will as well is the power output. In many ways, the RGO feels like a larger QRP radio (think Ten-Tec Argonaut V or VI) but it’s actually able to pump out 55 watts (often five watts more than specified). In single sideband mode, this is a meaningful amount of power output compared to, say, 5 or 10 watts. When I activate a rare park, or an ATNO (All Time New One), I’ve been taking the RGO One more times than not in order to get the best signal possible and maximum amount of contacts. Running full power, the rig never feels warm—heat dissipation is superb—and the fans on the back of the heat sink are super quiet.
I actually feel like the 50 watts of output power gives the RGO One a market niche since it sports top-shelf performance as you might expect in the venerable Elecraft K2, for example, but not being a 10 watt or 100 watt radio, rather something in between which saves a little weight and also the need for heftier heat dissipation.
Other unique features
The RGO One has some interesting features not found in similar radios.
For one, there are no less than ten color options for the custom backlit LCD display, along with adjustable contrast and backlighting intensity.
The RGO One team also documents how to access hidden admin menus for granular adjustments to transceiver parameters, but of course you’d want to adjust those with caution and note values prior to changing them. When you receive your RGO One, Boris includes a sheet with all default values to make stepping back much easier.
Hands-on philosophy
At the end of the day, the Mission RGO One is a kit that can eventually be purchased in kit form, or as a fully assembled transceiver. It’s modular: you can add and upgrade features as you wish. Some field operators, for example, may wish to omit the ATU to save a little extra weight or cost. I actually love this philosophy and I think it’s one that’s made Elecraft such a successful manufacturer.
The process of upgrading firmware is slightly more involved than you might find with, say, an Elecraft, Icom, or Yaesu product. It’s a two stage process where one upgrades both the front panel and the main board separately. I completed a firmware update only a few weeks prior to publication. It took me perhaps 15 minutes with my PC as I followed Boris’ step-by-step instructions (http://lz2jr.com/blog/index.php/rgo-one-firmware-update-procedure/).
There is also an active email discussion group for the Mission RGO One (https://groups.io/g/RGO-ONE/) where participants share experiences, modifications, and even any glitches or bugs that are discovered. This group is closely monitored by the RGO One team, so items are addressed very quickly. I highly recommend joining this discussion group if you see an RGO One in your future.
Also, I’ve gotten great customer support from Boris (LZ2JR) and have heard the same from group members. He’s very much open to critical customer feedback.
Summary

Every radio has its pros and cons. When I begin a review of a radio, I take notes from the very beginning so that I don’t forget some of my initial impressions. Here is the list I formed over the time I’ve spent evaluating the 2020 production model Mission RGO One.
Pros:
- Excellent sensitivity and selectivity
- Very low noise floor
- Excellent, clean audio (see con)
- Silky-smooth QSK
- Full compliment of CW and SSB features and adjustments
- CW memory keyer
- Superb ergonomics with no need to access embedded menus for common features
- 50 watts output power with effective quiet heat dissipation
- Lighter weight compared with comparable transceivers
- Direct frequency entry
- Standard Anderson Powerpole power port on rear panel
Cons:
- No voice keyer memory (at time of posting, but is planned in upgrade)
- No notch or auto notch filter (at time of posting, but is planned)
- No 6 meter option
- No AM mode (at time of posting, but is planned)
- Firmware updates are a two stage process
- Would like slightly more audio amplification while using internal speaker in noisy outdoor environments
Conclusion
If you can’t tell, I’m impressed with the Mission RGO One because it does exactly what it sets out to do. The RGO One is designed for an operator who appreciates rock-solid performance with simple, intuitive ergonomics.
While teaching an amateur radio course to our homeschool cooperative high school students last year, I picked the RGO One as the best field radio for HF demonstrations.
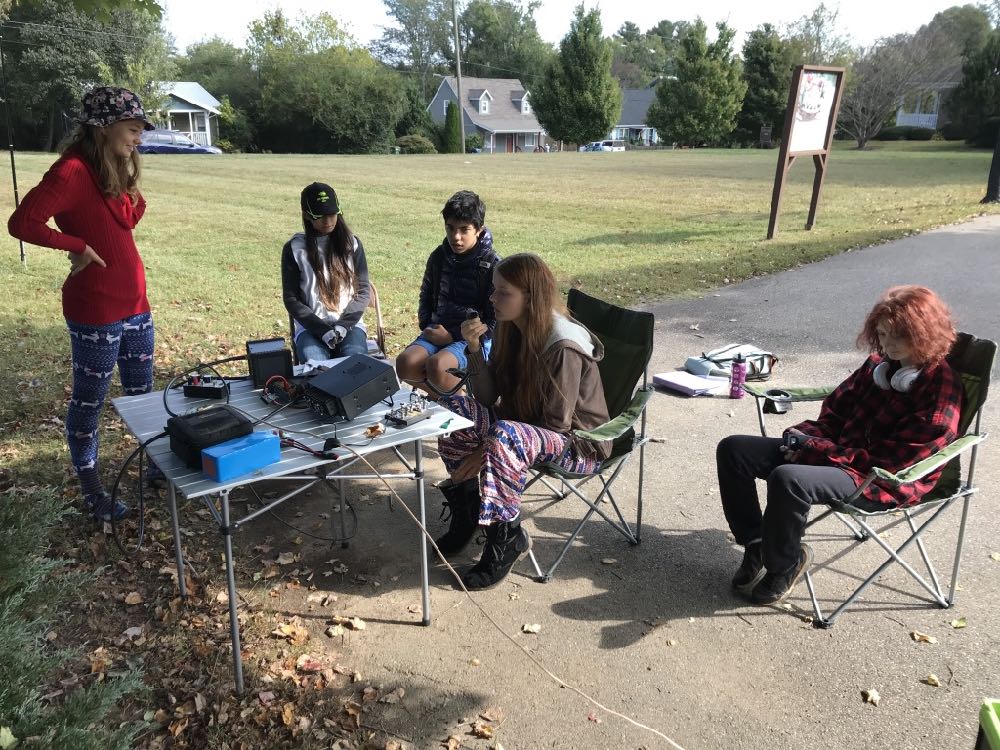 I’ll never forget setting the (prototype) RGO One for the first time on a folding table outside the classroom under a large tree. I had the students erect both an end-fed resonant antenna and a simple 20 meter vertical. I picked the RGO one because all of the adjustments we had talked about in the classroom—AGC, Filters, A/B VFOs, Direct Frequency Entry, Pre Amp, Attenuation—are on the front panel and one button press away.
We hopped on the air with one of my students calling CQ single sideband on the 20 meter band. Her very first contact was with a station in Slovenia—and she simply beamed with excitement. All of my female students that term passed their Technician exam by the end of the term.
The RGO One is a very inviting radio.
I’ve had the luxury of testing, evaluating, and working with everything from one of the first prototypes to the latest updated version of the RGO One. It’s rare that I’m able to evaluate a radio over such a long period of time.
Even with the very early, bare-bones prototype, I was impressed with this transceiver’s performance characteristics. I’m not the only one either. It’s almost become routine new discussion group members join prior to receiving their radio, then announces how blown away they are with its performance. Check out eHam reviews, too—at time of posting, it’s a solid five stars at time of posting.
The RGO One reminds me of simple, classic radios of the 1980s and 90s, but underneath, it’s packing state-of-the-art performance.
Is it perfect? No radio is perfect, but I must say that for what it offers, it really hits the sweet spot for this radio operator. It’s a joy to use.
There are still features in the works that will either be implemented with future firmware updates, or with future boards. In terms of performance and appearance, it reminds me of the Ten-Tec Eagle and Elecraft K2—both benchmark rigs in my world. And like the Eagle and K2, the RGO One is happy in the field, at home, or even on a DXpedition. It’s a simple radio that beckons to be on the air.
If you’re interested in the Mission RGO One, check the following web page for the pre-order form and pricing list. The RGO One is produced in batches, so you’ll need to reserve your model.