Tag Archives: Shortwave Radio Reviews

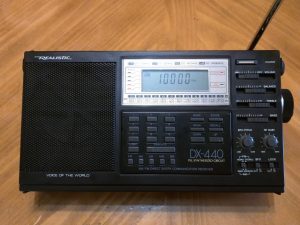
Guest Post: Revisiting the Realistic DX-440

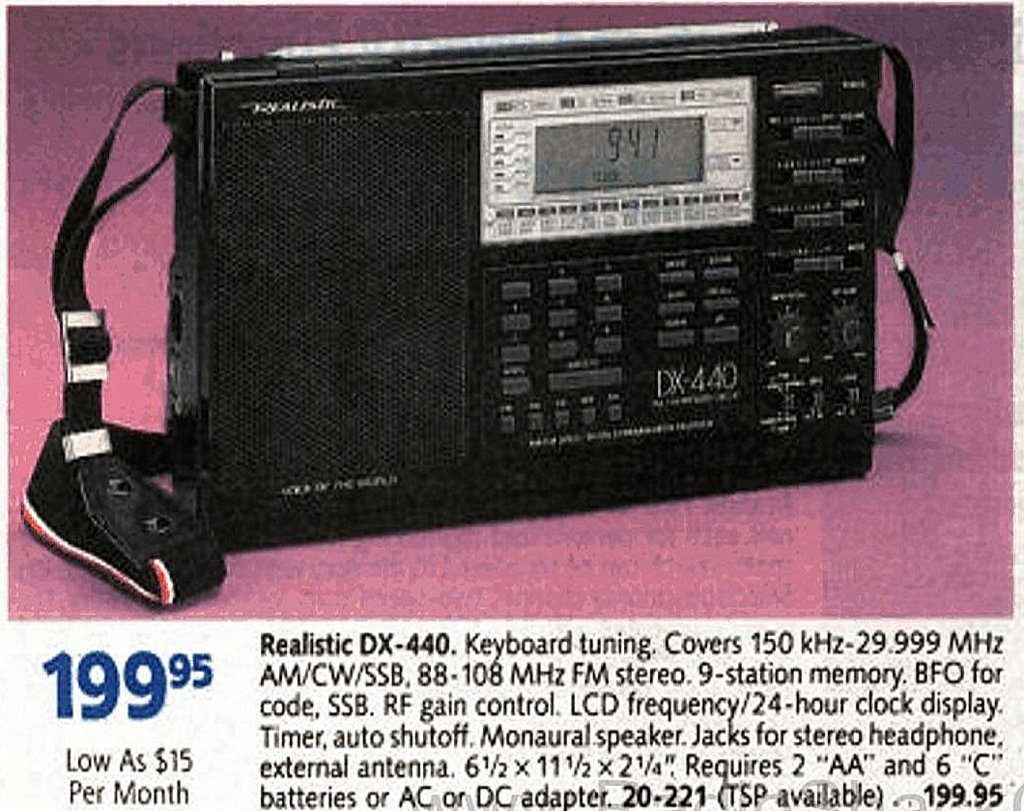
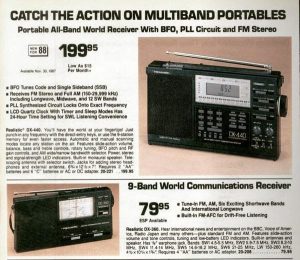
RadioShack ad for the Realistic DX-440

Many thanks to SWLing Post contributor, ShortwaveGuy, who shares the following guest post originally published on his blog, Shortwave.me:


Tried And True. . .Revisiting Older Receivers – Realistic DX-440

by ShortwaveGuy

Anyone who knows me, knows I am a fan of the “latest and greatest” when it comes to shortwave receivers. Like most of us involved in the hobby, I am always on the lookout for what newer technology has to offer me in order to pursue my quest of either capturing that elusive DX signal, or whatever will bring my favorites in the clearest. As a result, over the past few years, I have collected an assortment of receivers, each one serving a different purpose. My wife can not only attest to this, but can also relate to this phenomenon, as someone who has far more shoes than she will ever have time or fortune to wear! That’s how I am with my radios!

The other day, however, while listening to some of my favorite stations on what is arguably my best current portable receiver, the Tecsun PL-660, I got to thinking about some of my other receivers, in particular, my Realistic DX-440. I have had this receiver for as long as I can remember and I can remember back a long time! Around the time it came out, the radio most of us had our eyes on was the venerable Sony ICF-2010. Like a lot of people, however, I had no means of purchasing a receiver as expensive as it was at the time. I hoped that somehow, I would be able to afford one and one day, I did buy one, but that’s a story for another time, however.

In the mean time, I can remember perusing the latest Radio Shack catalog, something I did as often as they came out when I saw it. . .a radio with all kinds of wonderful buttons and knobs! The top of the page screamed out at me: “CATCH THE ACTION ON MULTIBAND PORTABLES”. It was the Realistic DX-440! Here is a picture of the ad as it appeared:


Once I saw it, I knew I must have it! While the MSRP on the Sony ICF-2010 was $449, this gem could be had for less than $200! All my previous radios had analog tuning so the prospect of getting a radio with a digital display was quite appealing to me! Try as I may to convince my parents to get me just this one Christmas gift instead of several, it didn’t happen. . . .at that time. But fast forward several years later. . .

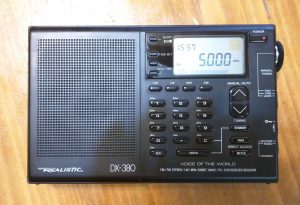
I finally got my digital receiver in the form of the Realistic DX-380 from my parents one Christmas. I worked that thing for years, and was mostly happy with it. It didn’t have SSB, which I had begun to understand by that time. I had pulled in a lot of great stations such as HCJB, BBC, VOA, Radio Havana Cuba and many others. However, because it didn’t have SSB, there were several occasions where I would happen upon ham radio operators who were talking back and forth, utility stations or even pirate stations. I could never be for sure, though, because my unit was not equipped to decode those signals. I knew that it was time to finally remedy that.

I purchased a few other radios that would do SSB and most of them worked reasonably well. At one point, I had even managed to procure the much-celebrated ICF-2010, which I loved dearly until it died a slow and unfortunate death that those with the know-how told me was beyond repair. But always, in the back of my mind, I wondered about that near-mystical Realistic DX-440. . .dreaming about what might have been.

I contented myself with the radios I had, still enjoying this wonderful hobby that I have participated in for so many years. I was, with the exception of the now-departed 2010, generally happy with the receivers that I had. I wasn’t looking for a new radio, but one night, mostly out of boredom, I wandered on to eBay and did a search for shortwave radios. I looked at tabletops and ultralights, primarily as I really had neither and had plenty or portables. About two pages in, I saw the Realistic DX-440. It only took about 10 minutes before I decided that this one must be mine. I placed my bid and waited patiently. . .only to lose the auction. “Oh, well”, I thought. If I saw another one, I might try again. . .or maybe not.

Well, the next day, I did a search and found one. This one looked in fantastic shape and had no bids. There was a “Buy It Now” price, but I wanted to get this for as inexpensively as I possibly could. The auction ended in 5 hours. I chose not to bid, not wanting to draw attention to it. I set an alarm on my watch and came back in an hour. . .still no bids. I set another alarm. With only 3 hours left, I began to get excited. Another hour went by and another alarm had been set. 2 hours to go. Any bidders, yet? No! Could this really happen? Maybe!

When I got down to the final hour of the auction, I didn’t bother to set an alarm. Like a watched pot that never boils, I stared at the web page, refreshing it every couple of minutes. With every refresh, it began to seem as if this might come to a happy conclusion. 10 minutes left. . .no bids. 5 minutes left. . .still no bids. I waited until 30 seconds before the end of the auction and placed the minimum bid.

Tick. Tock. Tick. Tock. Tick. Tock.

Auction over.

I HAD WON!

A dream over 20+ years in the making had finally happened! I quickly paid for the radio and then purchased the appropriate “wall-wart” adapter to make sure I had it ready for when the radio arrived. It said it would be 7-10 days for delivery, but it was at my house in 3!

I opened the box and carefully wrapped in old newspaper, was the radio that I had been pining for since my early teens. I quickly checked it out to make sure it was in good condition and was pleased to find it was. My heart sank a little bit when I opened the battery compartment to find 2 AA cells left in for the last 5 years that were supposed to power the clock and the memory functions. Fortunately, they had not exploded and I quickly removed them and replaced the unit with a fresh round of batteries. The only flaw I was able to find was that it seemed that the previous owner had lost the screw on tip of the internal whip antenna and had placed a plastic cap on the end in its place. It didn’t look out of place and was very secure, so I shrugged it off. Now for the moment of truth: I powered the radio on and it worked! I checked all the bands and was able to receive quite well on all of them except LW (which is to be expected, given my geographic location and the lack of stations on the longwave band, in general). All the knobs were there and in place and there were no dirty switches or tuning pots to deal with. I had snagged myself a honey of a bargain!

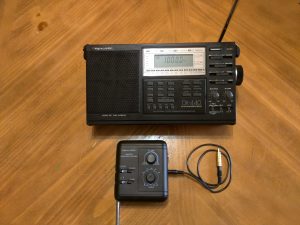
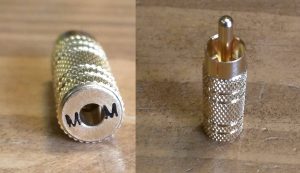
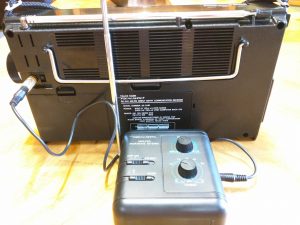
Now it was time to use this thing for what I bought it for: to listen to shortwave radio! I usually use a 100 foot longwire antenna when I listen to shortwave, and this time would be no exception. However, I was anxious to pair the DX-440 with the Realistic 20-280 amplified antenna that I had picked up years ago at an auction. I had used it with other radios, but never in conjunction with a longwire antenna. I was ready to change that. I wanted to use the preselector function of the amplified antenna as well as the actual amplifier in order to maximize my ability to pull in distant stations. When the radio was first manufactured, there were a lot more stations on the air to listen to and less of a need to do much more than throw 20 feet of wire up in a tree. Obviously, with many of the powerhouse shortwave stations having gone the way of the internet, I knew that my plan to couple the longwire with the amplified antenna had the potential to pay big dividends. I took a look at the back of the radio, where the external antenna jack was and I was surprised to find not the 1/8? jack I was accustomed to, but in its place was an RCA phono plug. The amplified antenna had an RCA plug on its side, as well, but it wasn’t to connect to a radio, it was for connecting to an antenna. The amplified antenna had the 1/8? plug and accompanying cable that was used to connect to the external antenna jack of nearly every modern portable radio. To be honest, I wasn’t completely sure how I was going to go about handling this issue. I thought about using alligator clips, but wasn’t sure how to integrate this into my coupling scheme. I pondered over this for all of about 3 minutes and than quickly got into my car and headed to my local Radio Shack. I told them I was looking for a 1/8-inch phone plug-to-phono jack and they were quick to accommodate me. They gave me the adapter you see pictured here (Catalog #: 2740871). It would handle either stereo or mono input of a 1/8-inch plug and as a bonus, it says “MOM” on the end, if you are willing to use the input hole as the letter “O”.

I got it home and quickly got it hooked up. As I expected, the “MOM” adapter was a perfect fit. I made sure I had fresh batteries in the amplified antenna, though it would accept an AC adapter if I wanted. I chose to run it on battery, so as to reduce any possible introduction of noise to the signal. And then, I powered on both the amplified antenna and the DX-440. . .the moment of truth had arrived! I tuned to WWV on 15 mHz, which I use as a baseline for most test I conduct on my radios during the time of day I was listening. I must tell you, I was NOT disappointed in what I heard. It was a rather cloudy day weather-wise and I was concerned about a middling solar flux. I needn’t have been worried at all. The signal was robust and clear as the familiar sound came booming in from Fort Collins, Colorado! Not only was the signal strong, but using the separate bass and treble controls and the wide selection on filters, it was actually rather pleasant listening, not fatiguing at all. I pulled up my trusty shortwave schedules app on my phone and began searching for things to listen to.
I heard domestic broadcasters like WRMI and WBCQ with no issues and managed to catch BBC to West Africa, as well! I listened to quite a bit that night and into the morning hours, checking out not only broadcast shortwave, but utilizing the BFO to listen to ham bands, particularly my favorite, the Freewheelers Net on 3.916 mHz, LSB. The BFO was easy to operate and the addition of the Realistic amplified antenna helped to bring in signals with great gusto. As with any amplified antenna that is not a loop, this one amplified not only the signal, but the noise as well. That said, the propagation deities were kind to me and I enjoyed a long night of listening.

I have since given my DX-440 a place next to my bedside and have enjoyed listening to whatever I could find to listen to most nights. While a radio like the Tecsun PL-660 offers newer technology and the addition of an excellent synchronous detector, the DX-440 holds its own against the newer technology. At the end of the day, it’s still a portable and while most portables pale in comparison to tabletop rigs, this one is rather excellent with what it has offer versus its price point. The build quality is solid and ergonomically it is a pleasure to operate. If I had any critiques at all, I would have made the BFO and the RF Gain knobs a bit bigger, but now I am truly splitting hairs. I can see why contemporaneous editions of the Passport To Worldband Radio listed this as an Editors’ Choice radio back in the day.

I wanted one from the day I saw it those many years ago, and I can say unequivocally, that it was worth the wait!

–ShortwaveGuy


Thank so much for writing about the DX-440–that radio has a special place in my heart. The ‘440 was my first digital shortwave receiver–it revolutionized my shortwave listening.  

As I’ve mentioned before, I also travelled with the Radio Shack DX-440 while studying French and living in Grenoble, France. The DX-440 delivered my daily dose of the Voice of America (the only English language news I allowed myself to listen to at the time). Since the VOA broadcast often coincided with meal time at the Université Stendhal cafeteria, I left my voice-activated Micro Cassette recorder in front of the DX-440 which was, in turn, set to turn on one minute prior to the VOA broadcast. It was an amazingly reliable arrangement.

I’d better not wax too nostalgic, though, else I’ll start searching eBay for a 440 just like you did!  Hang onto that DX-440–I wish I would have never given mine away!

Visit ShortwaveGuy’s blog by clicking here.

Spread the radio love

An SWL’s review of the Icom IC-R6 Sport 16 wideband handheld receiver

The following review originally appeared in the SEptember 2016 issue of The Spectrum Monitor magazine.


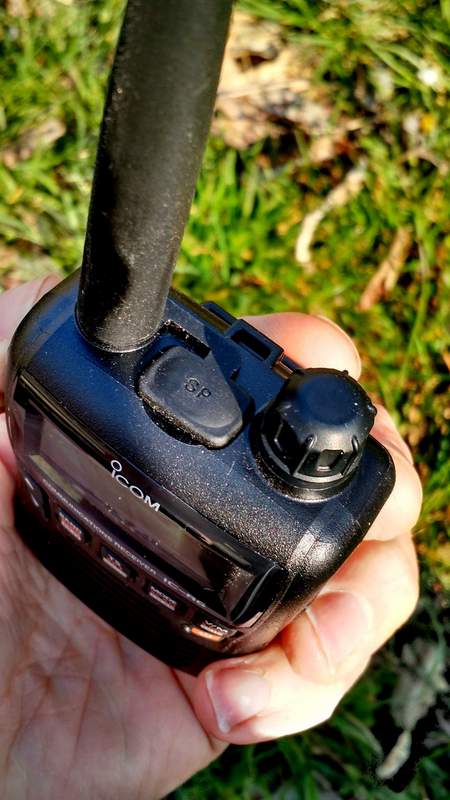
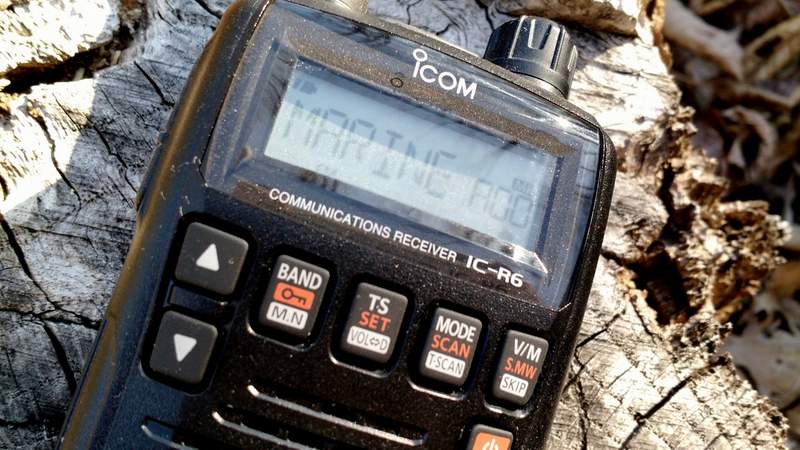
icom-ic-r6-angle

Over the past year, I’ve received a number of inquiries from readers who are considering purchasing a handheld wideband receiver. This is a market I’ve never truly explored because, to be honest, I’m partial to the HF part of the spectrum, and wideband receivers have always seemed more akin scanners than to shortwave receivers.

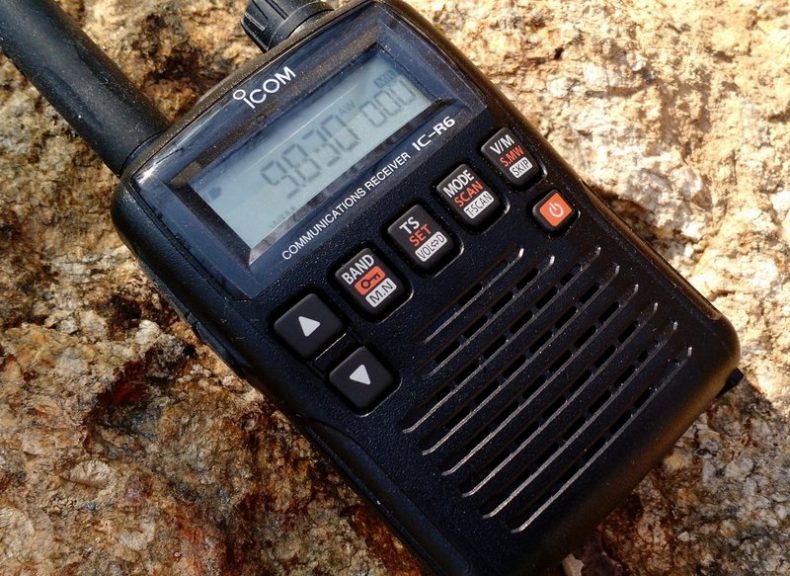
But lately, readers have specifically asked about the Icom IC-R6, a compact handheld receiver that covers from 100 kHz to 1309.995 MHz. What makes the IC-R6 appealing is that––at just $175 US––it is one of the least expensive wideband handhelds/scanners on the market that not only covers the shortwave bands, but also the AM broadcast, Longwave, FM broadcast, & NOAA weather frequencies.

Over the years I’ve read numerous reviews of the IC-R6 and other wideband receivers. Reviewers of this handheld receivers typically gloss over shortwave and mediumwave reception, and for good reason––it’s generally known that you just can’t have the best of both worlds in the sub-$300 price range. This makes sense, as there are invariably performance compromises when you pack wideband reception into such a tiny package: manufacturers usually put a performance emphasis on the VHF/UHF bands rather than on HF or mediumwave.

Still, I was curious enough about the IC-R6 to want to put it through its paces on shortwave and mediumwave, so I contacted Icom, who generously sent me an IC-R6 on extended loan for the purpose of this review

Usability/Ergonomics

Here I need to throw out a disclaimer: I’m not a fan of handheld radio (Handy Talky) ergonomics.

The IC-R6, like most other tiny handhelds, has a spartan array of buttons, all of which have multiple functions. Like its compact competitors, it also lacks a direct entry keypad-––after all, there’s simply no room for a keypad, and if there was one, it would obviously be too small to use.

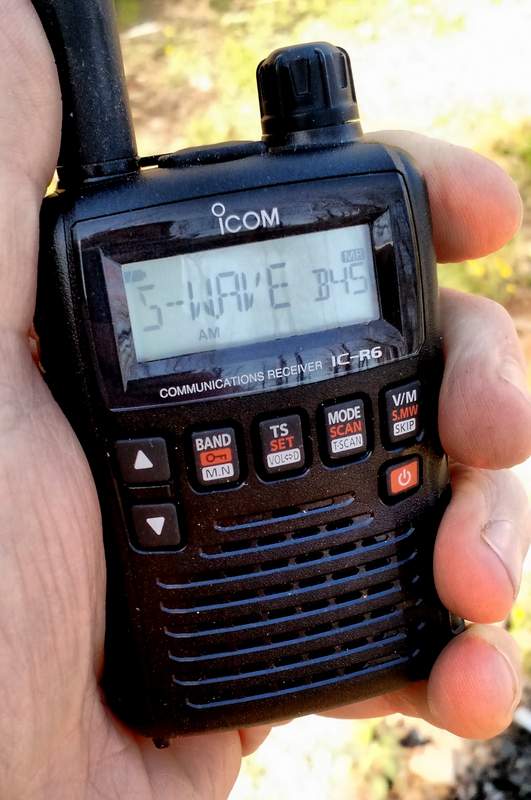
icom-ic-r6-frequency

That being said, however, I must say that Icom has done a surprisingly good job of making the IC-R6 usable in the field.

If, like me, you’re the type of person who typically ignores the owner’s manual when you first receive a new radio, the IC-R6 may prove frustrating. Fortunately, the Icom user manual is superb, and well worth the read. It’s very well written, and takes you through each function step by step. The 80-page manual is entirely in English (the US version, at least) and even has a cut-out pocket guide in the end. Brilliant!

Once I spent a few minutes reading through the IC-R6 manual’s outline of its basic functions, I found most operations are simple and relatively easy to remember.

icom-ic-r6-leftside

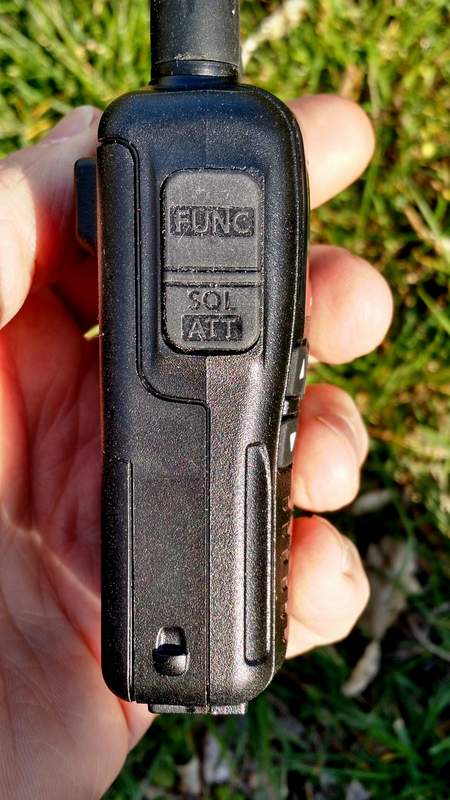
What makes each operation handy is that the Function key––which helps toggle the four multi-function buttons––is located where the PTT (push to talk) button would be on an amateur handheld transceiver. It’s actually a great location for the button because it allows one hand to hold the radio and push the function button, permitting the other hand to push a front panel button. Though I initially felt I was keying up to “transmit” on an HT, it soon became apparent that this is a very logical key placement.

Tuning

Tuning with the IC-R6 is relatively easy and straightforward.

Simply select a band with the BAND button. Next, adjust the volume with the UP/DOWN arrow buttons, and the squelch (if needed) by holding the squelch button and turning the tuning knob. Then you may use the tuning knob to tune up and down the band.

icom-ic-r6-top

If you want to quickly skip to another part of the bands, hold down the function key while turning the tuning knob, and the R6 will tune in 1 MHz steps. I’ve found that this helps to move across the spectrum quite quickly and compensates for the lack of a direct entry keypad.

You can also easily change the tuning steps by pressing the TS button and using the tuning knob to cycle through selections (a total of fourteen possible step selections are available between 5 kHz and 100 kHz).

Over the course of a few months of using the IC-R6, I’ve learned a couple of methods to adapt to its lack of a direct-frequency entry keypad:

  • using the 1 MHz tuning steps, as mentioned above
  • loading the memory channels with band edges and your favorite frequencies (with 1300+ memory slots, there are many ways to manage your tuning)

Mediumwave/AM Broadcast Band Performance

Surprisingly, the IC-R6 has a tiny internal ferrite bar antenna for mediumwave/AM broadcast band reception. This is a welcome feature because there’s no need to remove the supplied rubber-duck antenna to connect an external antenna for broadcast listening.

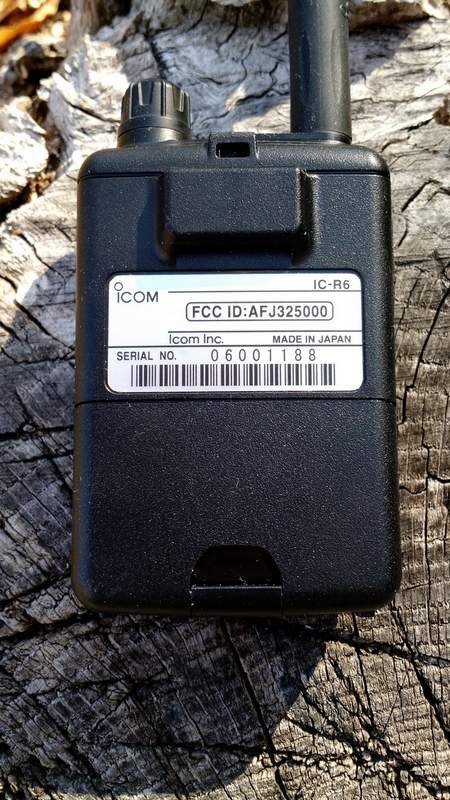
icom-ic-r6-back

In terms of AM performance, I was happy with the IC-R6. I’m able to receive all of my local AM broadcasters with decent signal strength. I’m even able to reliably receive one 25-mile-distant daytime broadcaster; this truly surprised me, especially since the internal antenna must be minuscule.

Is the IC-R6 a good choice for a mediumwave DXer? Unfortunately, no. The AGC struggles with weak nighttime conditions, and frankly, with such a small ferrite bar antenna, nulling capabilities are minimal. If you’re a MW DXer, I would suggest carrying a small ultralight portable along with the IC-R6.

The IC-R6 also covers the longwave bands, but I would never use it even for casual longwave listening as the tuning steps are limited to 5 kHz increments.

Still: to have a respectable little AM receiver in a handheld scanner––? It’s great!

Shortwave Performance: Sensitivity

As I said, most reviewers gloss over shortwave reception on handhelds. I thought I’d put the IC-R6 through a more thorough test.

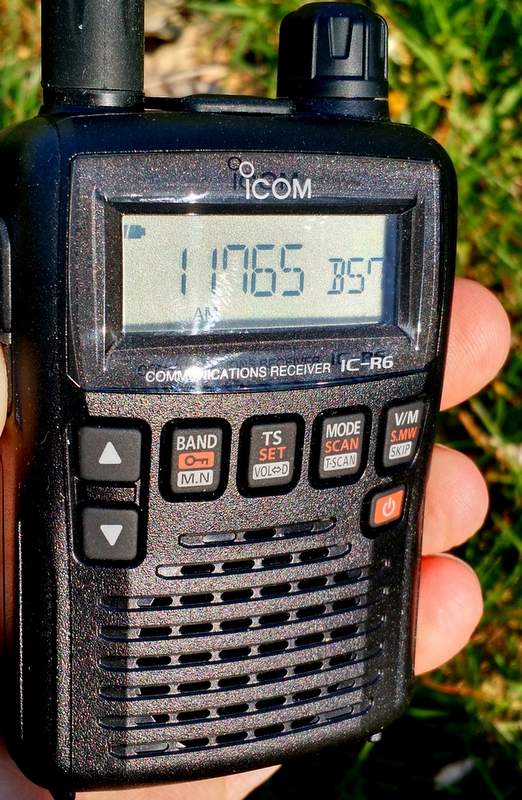
icom-ic-r6-in-hand

Note that, being fully aware of its limitations, I never used the stock rubber-duck antenna to test shortwave reception; instead, I used a long piece of thin co-ax attached to five- and ten-foot sections of wire. I tried longer and shorter pieces of wire, as well, but found that 5-10’ seemed to hit the sweet spot in terms of sensitivity.

To be honest, I had fairly low expectations of the IC-R6. I knew that the shortwave/HF bands are truly just an added feature on this rig, and realized that the R6 is more akin to a scanner rather than a shortwave radio. But in terms of sensitivity, I found I was rather impressed with the IC-R6.

The first morning I tested shortwave reception, propagation was, at best, mediocre. Yet I was able to copy WWV on 10 and 15 MHz without much trouble. I could receive all of the strong North American private broadcasters, like WTWW, WRMI and, of course, most frequencies occupied by Radio Havana Cuba and China Radio International––all of these are broadcasters that my shortwave portables can readily receive here in my region. Moreover, in the mornings, I’ve also been able to receive one of my staple shortwave broadcasters on the R6: Radio Australia. It’s nice to imagine that if I were camping, the little R6 could serve up my morning dose of news from Down Under.

All in all, I’m fairly pleased––and surprised!––by the IC-R6’s sensitivity.

Here’s an example of reception when tuned to WRMI, a strong station in my region. [Fun side note: I had no idea that, as I was recording, I would hear my buddies Mark Fahey and Jeff White on the air!]

Shortwave Performance: Selectivity

On the flip side, the IC-R6’s selectivity is unfortunately quite poor. I anticipated this.

Almost any of the strong signals I receive can be heard with equal fidelity when tuned off-frequency 5 kHz to either side of the carrier. You can pretty much forget discerning between two adjacent signals that are only spaced 5-10 kHz apart.

And yet while this would be a deal-breaker for me on a dedicated shortwave portable, this wouldn’t stop me from purchasing the IC-R6. Since we don’t have the crowded shortwave landscape we used to, selectivity is much less of an issue these days.

So, for some casual SWLing while say, backpacking? The IC-R6 does the trick!

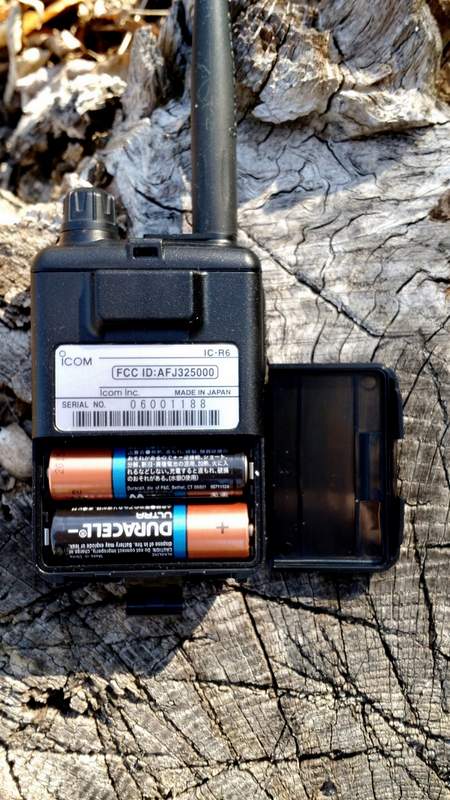
The IC-R6 runs efficiently on a set of two standard AA cells.

The IC-R6 runs efficiently on a set of two standard AA cells.

I should note here that I never connected the IC-R6 to any of my large outdoor antennas. First of all, I didn’t want to risk damaging the front end of the receiver (especially since this is a loaner), and secondly, I knew the IC-R6’s poor selectivity would only be exacerbated if gain were significantly increased. I also want to caution readers from doing this, as I suspect the IC-R6’s front end will seriously overload on a large antenna.

Auto-Memory Write Function

The IC-R6 has a very cool scanning function similar to the ETM auto-scan on Tecsun portables, known as the “auto-memory write function.” Here’s how it works:

  1. Simply select the band you wish to scan.
  2. Set squelch level.
  3. Select the scanning range. There are several options here:
  4. Full scan, which scans the entire frequency range of the IC-R6 (you’ll want to grab a cuppa coffee, as this will take a while)
  5. Selected Band Scan, which only scans all of the frequencies with the band’s edges
  6. Programmed Scan, which scans between two user-programmed frequencies
  7. Finally, press the SCAN/MODE button to start the scan and the V/M button to engage the auto-memory write function..

The radio will then scan according to your selected scan mode, pausing for an interval of about five seconds on each signal it finds, and writing it to one of the auto-memory write channel groups (000-999) for your convenient access.

icom-ic-r6-display


To recall the auto-memories once scanning ends, simply press the V/M button to enter the memory mode, select the band with the BAND button, then use the tuning knob to scan through the signal catches.

Once you’ve experimented with this process a couple of times, it becomes second nature, and is very handy.

One negative: since the IC-R6’s HF selectivity is lacking, you could possibly get double or triple auto-memory writes for really strong broadcasters.

Programming software and cable

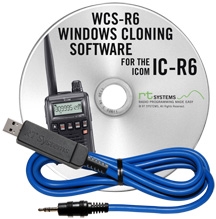
I’ll be frank here: if you plan to purchase an IC-R6 and load it with memory channels, you’ll be well-served to purchase programming software and a cable as well. Entering frequencies by hand is tedious, especially if you want alpha-numeric labels.

wcsr6-usb-2tI’m very partial to the cables and software offered by RT Systems. Besides having the most user-friendly programming software I’ve personally used, RT Systems also offers consistency in terms of set-up and application user-interface across their whole product line. For example, I own a Yaesu VX-3R which I’ve programmed with the RT Systems software; when I want to import all of my VX-3R frequencies into the IC-R6, it’s a simple process with the aid of RT Systems software.

RT Systems supports almost all programmable amateur radio transceivers and receivers on the market, which means that it makes for a great cross-manufacturer link between all of your gear.

Summary

Invariably, all radios have strengths and weaknesses; here’s a list of my notes from the moment I put the Icom IC-R6 on the air:

Pros:

  • Very compact, handy size with respectable ergonomics
  • Scanning
    • Frequency/Memory scanning very fast
    • Quickly scans AM/SW/FM/VHF/UHF bands
  • Acceptable shortwave sensitivity for most regionally-strong broadcasters (see selectivity con)
  • Great Auto Squelch function that seems to be effective even on the HF bands
  • Attenuation setting which helps the front end from overloading
  • Wide array of scanning options
  • Long operating time with AA batteries

Cons:

  • User interface
    • Very difficult programming without external software/programming cable
    • No keypad for frequency direct entry
  • Audio, via built-in speaker, is tinny; headphones help, but audio output is mono
  • Almost non-existent shortwave selectivity (see sensitivity pro)
  • Tuning steps are limited to 5 kHz increments, which may be insufficient on SW/MW and LW
  • No SSB mode (though no other wideband receiver in the under-$300 price range offers SSB)

Conclusion

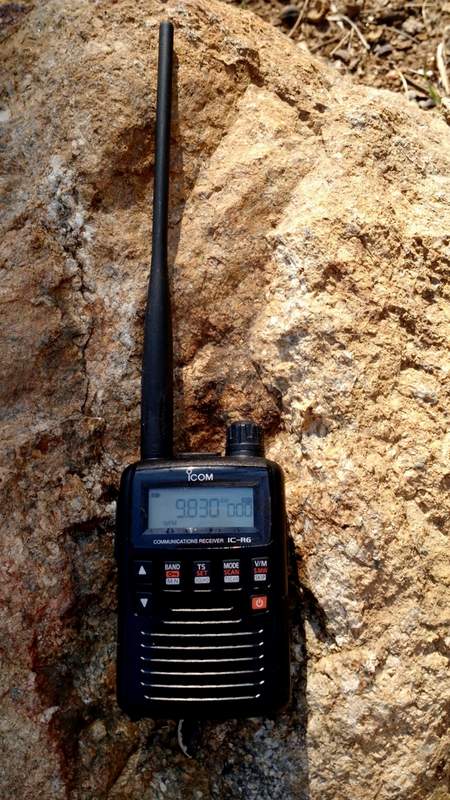
icom-ic-r6-full

The Icom IC-R6 is one little powerhouse receiver with many, many listening possibilities. With this one radio, you can listen to everything from local VHF/UHF repeaters, to local law enforcement and emergency services, aviation frequencies, NOAA weather radio, the FM broadcast band, AM broadcast band––and, yes, even shortwave.

If you’re looking for an all-in-one receiver to take on hikes, to put in your 72-hour emergency (BOB) bag, to carry in your briefcase, or even to simply carry in your pocket, the IC-R6 is a great choice. Remember, if you do invest in one, you should also invest in programming cable and software to help you along.

This review focuses on broadcast listening with the IC-R6. While I didn’t cover traditional scanner functionality, I should note that the IC-R6 is not a trunking scanner. If you live in one of the many cities, counties or even even entire states/provinces in the U.S. and Canada that employ “trunking” radio systems for public safety communications, you’ll need a different receiver for this purpose.

Additionally, if you’re looking for a top-notch shortwave portable, you’ll want to buy a dedicated shortwave receiver, instead: they’re built with only HF reception in mind and will cost you much less, for better overall performance and more modes (SSB).

Of course, the IC-R6 is so modestly-sized that you could always carry it plus an inexpensive compact shortwave receiver (like the Tecsun PL-310ET, or the PL-380), and then…well, you’ll suddenly have the best of both worlds!

The Icom IC-R6 is available via Universal Radio $174.95 US with rebate through 12/31/16.

Spread the radio love

Tropical Band DXing at home with Elad FDM DUO and Wellbrook ALA1530 active loop

2-jungleRecently I have spent a little more time listening out for Tropical Band stations from my shack in Oxford UK, attempting to emulate some of the very nice signals I have previously recorded out on DX’peditions. The obvious problems with this (and they are numerous) include the relatively weak signal strength of many tropical band stations, the ubiquitous blanket of QRM, resulting in generally poor SNR, lack of space for a large antenna……need I go on?! Fortunately, the Elad FDM DUO has proven to be a very senstive and selective receiver, capable of, at times, incredible SNR, coupled with almost limitless signal conditioning options and SSB, SYNC, ECSS etc. Throw the Wellbrook ALA1530 active loop into the mix (not literally!) and you have a very powerful Tropical Band receive set-up. The Wellbrook is able to null most (although not all) QRM in my shack and that really can make the difference between simply observing a carrier and actually hearing audio. Clearly one cannot expect to hear DX at home under heavy QRM as well as you might outdoors, however, the following stations were logged in the past month or so, with respectable signals, with the ALA1530 indoors:

Video links also follow below, thanks for reading/ watching.

Direct link to Oxford Shortwave Log video; Radio Logos 4810 kHz, Peru

Direct link to Oxford Shortwave Log video; Radio Cultura Ondas Manaus 4845 kHz, Brazil

Direct link to Oxford Shortwave Log video; AIR Bhopal 4810 kHz, India

Direct link to Oxford Shortwave Log video; Rádio Educação Rural 4925.2 kHz, Tefé, Brazil

Direct link to Oxford Shortwave Log video; Radio Mosoj Chaski 3310 kHz, Bolivia


Clint Gouveia is the author of this post and a regular contributor to the SWLing Post. Clint actively publishes videos of his shortwave radio excursions on his YouTube channel: Oxford Shortwave Log. Clint is based in Oxfordshire, England.

Spread the radio love

Guest Post: Patrick compares four receivers

Many thanks to SWLing Post contributor, Patrick Canler who writes to us from France and shares the following guest post which he translated into English:


4 rec

The number of receivers on the market is quite large, and all are sold to be the “best”. I have thought it useful to compare materials using them in the shack as a neophyte SWL; going beyond the features in the brochures to talk about everyday utility. This article does not pretend to do “scientific” testing of the four receivers–skills and special equipment are needed and some specialized laboratories already do it.

The four receivers cover thirty years of electronics manufacturing; four different brands with their own technology and specifications. Over such period, technologies and innovations have evolved. One of the questions I had was: “Does efficiency give any receiver an advantage?”.

The Contenders:

NRD-535 from Japan Radio Company.

nrd535

A reference of the 90s! It received 5 stars from WRTH (which publishes annually the almanac “World Radio and TV Handook”). The NRD-535 has conventional construction with an electronic card per function and discrete and analog filters.

This is a home station receiver, weighing in at 10 kg. The NRD-535 ceased to be produced in 1996, and its value second hand is growing due to its reputation.

AR7030 from AOR

ar7030

Designed by the engineer who developed the LOWE receiver line, the AR7030 is also famous for its reception. It uses special ergonomics and a hybrid of software menus and conventional controls. Quite small, it is easily transportable, due its design that already uses SMC but keeps the analog filters.

IC-R75 ICOM

ICR75

Modern device, classical format and renowned–the R75 is the only receiver tested that is still in production [Note: it was recently removed from production]. It uses CMS, combines analog and DSP filtering (the DSP option is present on the device under test). Its ergonomic design is intuitive and so too are controls and menus.

1102S RADIOJET Bonito,

SDR windows

The 1102S RADIOJET is the only unit in this comparison that is produced in Europe!
The Radiojet includes the latest developments in technology, its performance is simply stunning on the data/spec sheet. The application includes many tools (spectrograph, digital filters, IF and AF recorders, decoder, list of broadcast stations, etc.). It brings together all the SMC receiving electronics in a small box that can fit in a pocket.

SSDR box

The commands and tools are assigned to a software (highly evolved) that runs on the PC which is connected the SDR. The power of the PC also brings graphics, memory, recordings etc.

Why these four rigs?

In the beginning, and it was it which led me to be SWL, I acquired the RADIOJET based on its announced characteristics: sensitivity of “secret services”, adaptable to all cases with filters, graphics tools–“Star Wars equipment” is not it! Later I learned about 50 MHz and at the same time I was struggling to exploit the Radiojet SDR.

A good opportunity to purchase an ICOM R75 brought me back to conventional radio ergonomics. As time passed, I felt my listening skills improved with these 2 receivers and the receiver syndrome grew! A Kenwood R5000 joined the others for its VHF potential and HF reputation.

Then I discovered an NRD-525 on Ebay at a fair price point (rare)–it joined the group of receivers. The latter two were sold and replaced respectively by an AOR 7030 and by NRD-535. I really enjoyed the 525, but the 535 is even better.

In use, the RADIOJET and R75 have always posed problems with settings and sound quality. Kenwood reassured me about the fact that we could get some nice reception without fighting against the controls. validated by the AOR, the NRD 525 & 535. Perhaps I did not understand the manipulation of digital filters???

Now to the shack!

The four receivers are placed side by side, but arranged so as not to disturb each other (eg. the display of the ND535 disrupted the RADIOJET).

The antenna is a 25m random wire oriented East/West with 9:1 balun and its own ground. The passage from a receiver to the other is done by a conventional antenna switch.

All the tests were performed in one evening for constant conditions, there was a fairly present QRM which, was not too bad for comparison purposes. The tests were made in SSB or AM. Preliminary tests had shown that the results in digital modes (PSK31, JT65, ..) relied more on the decoder performance of the PC rather than the receiver. The tests increased from the lowest frequency detected this evening (Europe 1-163 kHZ) to the highest (Foreign Broadcast =15,545 MHz).

The highest frequencies, up to 30 MHz, were deserted in phone, at least for my installation.
The procedure was:

  1. Signal is detected from the spectrograph SDR: it typically “sees” almost inaudible signals.
  2. The candidate frequency is tuned on all four receivers
  3. I listening to all of the signals on all receivers, seeking to get the maximum performance, using all possibilities (notch, passband, IF Shift, integrated amplifiers, attenuator, etc.)
  4. Results are reported in the table below.

One can notice rather quickly:

  • that age is not a handicap
  • the number of functions is not always an advantage
  • 1102S RADIOJET
    Performance and capabilities above the rest (on paper) and requires being connected to a PC. At the present time, on an old Celeron 2Gb ram, the RadioJet’s application never saturated the CPU. The band spectrum display allows one to find the QSO, to filter theoretically perfectly, but it does not always equate to the understandability of the signal or give a pleasant audio. And the number of software features and functions complicates the signal manipulation. The sound is still a little metallic, perhaps due to the signal processing software. Its small size makes it a unbeatable mobile receiver for travel, functions are incredibly useful for those who master the RadioJet application.
  • AOR AR7030
    Inherently simpler at face value–the AR7030 is ultra easy to use. It makes it easy for the user to find and tweak a candidate signal. It’s intuitive and has essential functions only. It has well-designed electronics. The AR7030 is also best receiver tested for handling strong signals without overloading (broadcasts stations or nearby hyper-kilowatted amateur radio operators) which seems to prove that it is designed for these stations. Its limit is the lack of adaptive notch filter types to clean the noise, which is still quite present when the QRM is there. (The newer version 7030+ has added features to help). Finally, it is the smallest stand-alone, portable and with 3 options of antennas connections.
  • ICOM R75
    The R75 climbs up the frequency band all the way to 50 MHz, the only receiver tested with this frequency range. It enjoys an excellent reputation, and can be equipped with a DSP (digital signal processing) on audio. The DSP provides adaptive noise reduction and automatic notch, but has a relative effectiveness which is not always successful in clarifying the signal. Sometimes it adds an unpleasant “rattling”. In use, the interface is pretty intuitive–mixing commands by buttons and menus. Twin pass band tuning (PBT) is effective and allows for IF Shift and/or notch. The speaker is (very) small and gives an aggressive/harsh sound. This receiver is relatively small in size and lightweight. It has a mobile stand and is designed for a 12-14V power supply.
  • JRC NRD-535
    The NRD-535 is the oldest tested–indeed, it was already discontinued before the other receivers were in production. A solid and reliable construction, good ergonomic with conventional front panel controls, good sensitivity, and a decent sized speaker have earned it status as a benchmark in its time. Very sensitive, it extracts the signals and, once found the right filter, gives it pleasant audio. Some signals are not completely cleaned but it does rarely less than others. The NRD-535 is designed for home use: it is heavy, almost 10 kg, and is contains several circuit boards which should not be too exposed to excessive shocks, especially considering they’re over 20 years old.

Summary

My ranking is as follows:

  1. JRC NRD-535 for its ease of use and ability to dig out a usable signal from the QRM.
  2. AOR AR7030 for its simplicity, portability and the fact that it extract good sound/audio quickly, even if a little noisy at times.
  3. Bonito RADIOJET for its small size and its extensive feature set. It is ultra-mobile with a laptop.
  4. ICOM R75 does the job and covers a wide frequency range. But lags in performance relative to the other receiver tested, with a “nasal” sound and a DSP that does not keep its intended promises.

About digital filters: the SDR and ICOM have them, the possibilities are extensive and allow adaptive filtering that others do not with analog filters. By cons they give a dry sound and sometimes add “snap” under whistles. Listening is overall less pleasant in comparison.

Receivers Advantages + / Disadvantages –

Bonito RADIOJET
+ Top technology, visual and many new features over the others on this point
– Complicated, metallic sound, emphasizing the sometimes painful receiver interaction with a computer mouse

Icom R75
+ Great value at the present time
– Audio and imperfect signal cleaning

AOR AR7030
+ Simple and effective
– Ideal companion if it had a notch filter: noise is present

JRC NRD-535
+ Effective sensitivity and clean audio
– Older technology, less portable

Note that this is a personal opinion: a computer geek will certainly get the most of performance and possibilities from an SDR like the Bonito RadioJet.

The NRD-535 shows its age, will one day reach the end of its useful life despite its robust construction. ICOM can cover up to 6m remaining mobile and has a good filter possibilities (DSP). The AOR is easy, fast and gives a correct listening, general purpose. It is the only one to pass the VLF.

The ideal then?
* RADIOJET for sensitivity,
* The RADIOJET for tools/features and functions
* AR7030 for the lower bands
* Icom for the higher bands
* NRD-535 for ergonomics
* AOR for portability

Personally, I use the NRD-535 for DXing (due to superior audio), the AR7030 for digital modes,
the RADIOJET to visually search for signals, and to sometimes clarify the signal even better and because it’s ultra-mobile and always in my PC case.

73,
Patrick F61112


Thank you, Patrick!

I should mention that I think you did a fine job translating your article into English for us! I would not be as successful writing an article in French!  

I’ve never owned a JRC of any sort. If I ever found an NRD-535 for a good price, I would purchase one without hesitation. I’ve never spent much time on the AR7030 either. It’s simple “Lowe-like” front panel is quite appealing for field use. I found that the RadioJet audio is quite nice when paired with a good set of headphones. 

Spread the radio love

Larry’s review of the CountyComm GP5/SSB

Many thanks to SWLing Post reader, Larry Thompson, who shares his review of the CountyComm GP5/SSB:


GP5SSB-Front

Been having a ton of fun with my new toy, the tiny survivalist radio, the CountyComm GP5/SSB receiver. $74.95 with free heavy duty cordura case with metal belt clip (normally $17.95). Also purchased 2 spare whip antennas @ $6.00 ea. The unit arrived promptly
in just 5 days from CA.

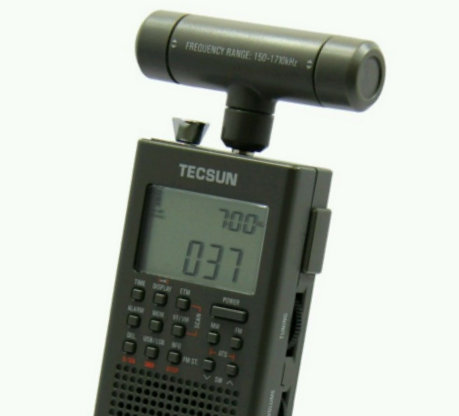
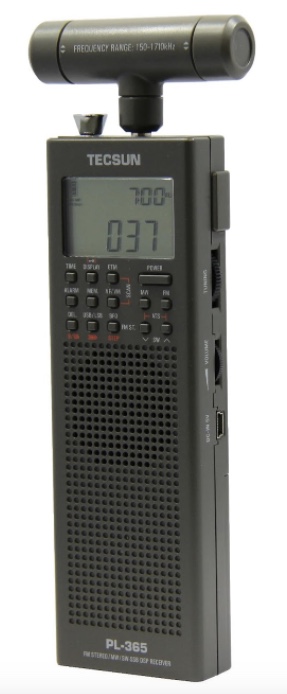
The radio is manufactured by Tecsun and is similar to the Tecsun PL-365, but re-engineer end to military standards for use in embassies and military installations around the world. The case is a heavy plastic that feels like anodized aluminum.

It’s about the size of a small TV remote control, taller than a cell phone, and about 1/2 the width of an iPhone.

Very, east intuitive menus. Incredibly sensitive to dx, relatively good selectivity. A great radio to throw in your travel bag or briefcase. So small that no one, especially customs, TSA, etc would even suspect it is a shortwave receiver with SSB capabilities.
I live in a very highly QRM and RFI interference zone.

I’m in the central city, in an old 1920’s hi-rise, with high power tension lines right next to the building.

Lots of QRM from the elevator motors, etc. Having a good antenna option is a challenge.
I’ve resorted to a stealth longwire antenna, strung out my 5th floor window. It’s 50′ of #16 black insulated copper stranded wire, weighted by a medium size galvanized carriage nut. It seems to work well.

I also use a Magic Wand shortwave antenna, a type of broomstick antenna with 23′ of lead-in, available from Lowbander on eBay.

My main receivers have been a Sony ICF-SW7600GR dual conversion receiver and the SRDPlay. In the past, I have listened to dx with some really outstanding receivers, including a Nordmende Globetrotter, a National NC-183D, a Japan Radio JRC-525′ and a Yaesu FT900AT transceiver. The later two were computer-controlled using TRX-Manager software.

In just 4 days, I can’t get over the sensitivity of the CountyComm GP-5/SSB and it’s ability to pull in stations. So far, it’s far superior to the Sony or SDRPlay.

Digging into the specs, it is a direct conversion receiver, using a DSP si47XX microchip from Silicon Labs to digitize the analog AM/FM broadcasting signal base on modern software technology and radio principles. The direct conversion circuitry can highly improve a radio’s sensitivity, selectivity, S/N ratio and anti-interference capabilities. Direct conversion using software is far superior to a double or triple conversion traditional IF circuitry. This must explain why the unit is so amazingly sensitive!

I can hear things on this unit that I can’t even begin to hear on the Sony or the SDRPlay. The FM reception and sound with earphones is amazing and LW and AM reception is equally sensitive. I can easily get WLW Cincinnati 700 kHz in the daytime here in St. Louis!

There are 550 preset memories: 100 for AM, 100 for FM, 100 for SSB, and 250 for SW. You can scan the memories or scan the bands in various ways. You can also use the Auto Tune Storage function to store memories.

Something I really enjoy is the Easy Tuning Mode function. The ETM function allows you to tune into stations easily and temporarily store them into the ETM storage. 100 stations for FM/MW and 250 for SW. Scanned stations will not be stored in the regular 550 memories, but will remain in the ETM temporary storage until the next time you do an ETM scan.

This is a great feature for travel. When you are in a different city, you can perform the ETS function and this will not delete any of the stations already in the memory.


Thanks for sharing your review, Larry. I use the GP5/SSB all of the time–it stays in one of my vehicles and I often use it for walks, picnics, camping and even a little parking lot DXing.

I suspect if your SDRplay RSP was hooked up to an antenna that could better mitigate your local QRM, you’d find it outperforms the GP5/SSB. The great thing about portables, though, is that you can simply take them to areas with low noise levels. It’s just a matter of finding the right location!

The CountyComm GP5/SSB is a very handy portable. Thanks again! 

The CountyComm GP5/SSB can be purchased from:

The Tecsun version, the PL-365, can be purchased on eBay (though be aware that some sellers have BuyItNow prices almost two times the price of CountyComm).

Spread the radio love

A review of the AOR AR-3000A Wideband Receiver

ar3000Alrg

Many thanks to SWLing Post contributor, Mario Filippi (N2HUN) for the following review:


The AOR AR-3000A Wideband Receiver

by Mario Filippi, N2HUN

(All photos below by author)

The AOR AR-3000A is a wideband communications receiver, made in Japan, covering 100KHz – 2.036 GHz with all popular modes including AM, NFM, WFM, CW, USB and LSB. The AR-3000A was produced in the early ‘90’s at the price of $1063 and came with a telescoping back-of-set antenna, wall-wart power supply, and well written 57 page manual.

AOR is a long time reputable manufacturer of radios and electronic equipment that continues on today producing high quality equipment. While the AR-3000A can be considered a tabletop unit, it is quite small, measuring only 8” x 5” x 3.5”. The AR-3000A has a total of 400 memory channels, with four “Banks” (Banks A- D) each holding up to 100 channels. Each stored channel holds all the necessary parameters such as frequency, mode, attenuator, and step size. An optional mounting bracket for mobile operation was available along with an optional DC cord for those wanting to use it as a scanner for public safety monitoring. It does not run on internal batteries though.

What I like about this radio is it’s wide coverage and it functions as my main longwave/shortwave receiver in addition to a scanner for monitoring local VHF/UHF public safety bands.

AOR 3000

As desktops go, this one has an unusual shape. While the unit is horizontally shaped for the most part, the front panel is angled slightly upward to make the controls easier to read. However, it took a while to get used to the small print on the panel and LCD so if you wear glasses, definitely don them because you’ll need ‘em. As a matter of fact I’m contemplating purchasing a pair of those magnifying eyeglasses to see (pun intended) if they’ll help (hi hi!).

AOR-3000-side view

These units come up for auction on Ebay and on ham classifieds at a much reduced price, most in remarkably good shape for a quarter-century old receiver.

A recent survey of Ebay auctions show they run from about $183 – $350; over several hundred dollars less than the original price. I chose to purchase one from a ham classified website at a higher price but it was well worth it. When it comes to high price tag items I tend to scout out the ham ads first. The seller was a friendly, honest ham who was a great communicator so the deal went smoothly. He included the computer control cable and even replaced the backup memory CR2032 battery, something every buyer should consider when purchasing vintage units.

For advertisements of vintage AOR products check back issues of Monitoring Times at: www.americanradiohistory.com . This site is an excellent resource for old time radio, TV, broadcasting and miscellaneous electronics publications and contains a mind boggling array of books and periodicals from the past.

The front panel is laid out quite well, with soft touch pads in the center allowing easy parameter entry, a tuning knob on lower right, and my favorite, a manual squelch knob. Most of the touch pads have a secondary function which appears in white lettering while primary functions are in yellow.   If you’d rather not spin the VFO dial, which is quite small (0.75” diameter) there are up/down arrow keys to accomplish that function. The knob spins smoothly with no obvious détente.

Front panel (sorry about the camera shutter ghost!)

Front panel (sorry about the camera shutter ghost!)

The rear of the unit has several connections: BNC antenna, 12V input, DIN socket for a recorder, external speaker, RS232C for computer remote control, and On/Off switch for computer/manual control. Back in the day you could purchase ScanCat Gold software for about $95.00 that would allow computer control of the unit. I am in the process of finding any existing software that will allow that and it’s not easy to come by, but that is not a priority.

Oh and where is the speaker you might ask? On the underside of the unit.

Plenty of rear connections.

Plenty of rear connections.

This unit was purchased to save space at my desk as it’s quite small and serves as my main source of longwave, medium wave, shortwave, and VHF/UHF reception. For HF it’s hooked to an S9 43 foot vertical antenna with many (50+) radials. S9 Antennas unfortunately is no longer in business, but when the company had just started up I purchased the 43 footer for ham use. It’s lightweight, made completely of fiberglass, and has been up several years with no problems.

S9 antennas was eventually sold and the antennas were available from LDG Electronics last time I looked. If you check out their pictures at http://www.ldgelectronics.com/c/252/products/12/62/3 you’ll see my house on the left sporting the S9v43 footer. By the way, when I bought the AR-3000A, the seller stated that ”it’s a great radio as long as you don’t connect too big of an antenna to it”(hi hi!). Yes, I found it tends to suffer from overload with my large antenna, but the 3000A has a useful built-in attenuator

As a wideband receiver the AR-3000A fits my needs perfectly. For LW it receives aeronautical beacons as far away as Quebec and New Brunswick, Canada. NAVTEX transmissions on 518 KHz are easily decoded using a SignaLinkUSB and YAND software.

As for HF, I’m mainly a utility listener and have a bank of memory channels for WWV (2.5, 5, 10, 15,20 MHz), WLO (8.471MHz), CB channels, Volmet stations, USCG facsimile frequencies, W1AW on 3.581 for code practice, a slew of RTTY station frequencies, the 10m FM band repeater frequencies, Radio Habana Cuba, 4XZ (great for code practice), WLO maritime weather broadcasts, and several channels for different ham band frequencies of interest.

Radio Shack discone offset –mounted on TV antenna mast.

Radio Shack discone offset –mounted on TV antenna mast.

For scanning, obviously the 3000A can’t compete with modern scanners. It was a different era back then. So, no trunking, no CTCSS tones, and the scanning speed slow compared to today’s standards, but it does have the usual features like channel lockout, scan delay, priority channel, step adjustment, search mode and does cover the military aeronautical band.

As a basic scanner for monitoring local state/local first responders, aeronautical (ATIS, ACARS) channels, NOAA satellites, NOAA weather channels, my local repeater, GMRS, FRS, taxis, railroads, etc., it is a very satisfactory performer. I can even hear the NY City Transit police from my location in W. New Jersey which is a pretty good distance, ATIS from LaGuardia and Philadelphia airports, and taxis in the Philly area, all while using a Radio Shack discone on the chimney.

For a more in-depth review of the AR-3000A by Bob Parnass, check the November 2000 issue of Monitoring Times magazine. Universal Radio has a great archive of discontinued radios so check them also at www.universal-radio.com. User reviews can be found on www.eham.net, that’s one of my favorite feedback sites. There’s also an AR-3000A Yahoo users group that’s a great resource. If you want to see videos of the rig in action then search on YouTube as there’s a good number available. In conclusion, I’m very satisfied with the AR-3000A, it’s exactly what I was looking for and is an integral part of radio receiver history.

If any other AR-3000A owners are out there, let’s hear from you. Thanks and 73’s!


Many thanks for this excellent review, Mario. I always thought the AOR AR-3000A was a cool little receiver. When it was being produced, the price was way beyond my means as a college student. At the time, though, it had to be the most compact, best performing, wideband receiver on the market! 

If any Post readers can help Mario find a solution for computer control of the AR-3000A, please comment!
Thanks again, Mario–we look forward to your next contribution!

Spread the radio love

Dan compares the Sangean ATS-909X with two classic portables

Sangean-ATS-909X-Sony-SW07-Panasonic-RF-B65

Many thanks to SWLing Post contributor, Dan Robinson, who shares a radio comparison he initially posted in the excellent Extreme Shortwave Listening Facebook group. Dan writes:

When the Sangean ATS-909X was first released a few years ago, I decided that I would hold off obtaining one to let whatever bugs there might be in production get worked out.

I have always been impressed by the design of the 909X, but was cautious when it came to the question of overall sensitivity. I once owned the 909, had it modified by Radio Labs, but that seemed not to do much — the 909, in my view, suffered too much from the well-known deafness issue when using the whip antenna.

Over the years, I used and still own many of the classic portables. This includes the SONY 7600GR, Grundig SAT 500/700, 2010, E-1, SONY SW100/SW07, SONY SW-55, and the radio I consider to be at or near the top of the small portable heap, the Pan RF-B65. But a couple of weeks ago, I broke down and bid for a new in box Sangean 909X. It’s the black version, and arrived a couple of days ago.

I remain impressed by the 909X’s design — beautiful radio, wonderful large LCD and backlight, excellent filtering, along with a feature we used to see in the SONY’s — adjustable/variable attenuation. But I wondered how the 909X would stack up against two of my favorites, the SW-07 and RF-B65. I was crossing my fingers — but alas, initial results are not encouraging.

While the radio initially on its own seems to be quite sensitive, I lined it up next to the SW-07 and RF-B65 and did a comparison. Now, first I must note that propagation continues to be in the dumpster and I conducted this test in late afternoon.

All three receivers were tuned to Cuba on 11,760 khz — they were located next to one another on a table in the top level of my home here in Maryland. The results are seen in the video below.

You can hear how much more clearly the SW-07 and especially the RF-B65 handle a signal. With the Panasonic, stations just pop. Same with the SW-07.

Disappointingly, as you can hear, stations on the 909X appear to be buried in noise. It’s quite extraordinary — I was very surprised by this comparison and intend to perform additional side-by-side tests in different areas of my home, which does suffer from high noise levels likely produced by electric lines and a transformer outside (which is why a run a Wellbrook on my main radio stack downstairs). But it is notable that the 909X appears to struggle so, while the old classic portables SW-07 and B65 excel. Interested in the views of others . . .

Dan, this is very similar to my experience with the Sangean ATS-909X.

Like you, I absolutely love the design of the 909X–the large display, tuning wheel, front-facing speaker, ergonomics–but was pretty disappointed when I pitted it against three other (less expensive) portables on the shortwave bands.

I know the 909X performs much better when connected to an external antenna. I’ve also learned that fresh batteries are a must as the 909X’s sensitivity is directly related to supplying optimal voltage. I know, though, that you had fresh batteries in your 909X, Dan.

Again, many thanks for sharing your comparison.

Spread the radio love