Shortwave listening and everything radio including reviews, broadcasting, ham radio, field operation, DXing, maker kits, travel, emergency gear, events, and more
DXtreme Software™ has released a new version of its popular logging program for
Amateur Radio operators: DXtreme Station Log 12™.
New Features in DXtreme Station Log 12
Automatic LoTW Upload —Users can set Station Log 12 so it uploads each log entryto LoTW automatically when added, capturing and saving QSO Record Status from the LoTW server as part of the process. Modified log entries can be uploaded as well. If desired, users can disable automatic uploading and can upload log entries to LoTW semiautomatically and manually in batches whenever they want to.
LoTW Reporting —Users can perform searches and run reports filtered by LoTW QSO Record Status, which indicates whether log entries areOn, orNot On, theLoTW server following upload or QSL-updating. Users can also perform searches and run reports filtered by LoTW QSL Record Status, which indicates the date of each LoTW QSL record processed by DXtreme’s LoTW QSL Update Utility.
JT65A and JT9 Contact Pre-fill —Right-clicking the New button presents a shortcutmenu that lets users pre-fill the Station Log window with log information from a JT65A or JT9 contact completed on WSJT-X or JT65-HF-HB9HQX Edition.
Afreet Ham CAP Integration Expansion — Station Log 12 now integrates withoptional Afreet Ham CAP throughout the program. Users activate Ham CAP by requesting short- or long-path propagation predictions on spotted and logged stations and entities.
Quick Find —A box on the Station Log toolbar lets users type a call sign and press Enter to search quickly for a station in their log. If the call is in the log, a list of QSOswith it appears on a popup window. If desired, the list of log entries can be loaded into the Station Log window for viewing or editing, one log entry at a time.
Improv Imaging™ —Lets users associate adhoc images with their log entries. Thisfeature is like, but separate from, our popular QSL Imaging™ facility. Users can capture, scan, or paste any image and save it as a single-page .jpg, or single- ormulti-page .tif. Improv images popular with users include signals on a spectrum analyzer or waterfall, QSOs conducted on Amateur Television and data applications, and rigs and antennas used during contacts.
Other Imaging Enhancements —The QSL image previewer on the Station Log window is larger, as is the QSL Image Explorer, which also lets users call-up, in the Station Log window, the log entry associated with each QSL image, making theExplorer act like a Search window.Improv Imaging has its own, dedicated previewerand explorer.
UX Improvements —Users can apply foreground and background colors and fontattributes to grid headings and data rows throughout the program.
Standard Features in DXtreme Station Log 12
DXtreme Station Log 12 lets hams log their contacts and import ADIF files from otherprograms. It supports major call sign subscription services, and offers the following multimedia and advanced functions:
DX Spot Checker™ —Receives DX spots from Telnet-based servers, and determineswhether QSOs are needed for new or verified DXCC® entities, band-entities, mode-entities, or VUCC grids.
DX Atlas Integration —Performs DX Atlas azimuth plots from theuser’slocation tothat of a spotted or logged station. Also creates maps for a variety of reports.
Band Master Integration —Afreet Band Master can be invoked with needed bandand IOTA lists based on the user’s Station Log 12 database.
Rig Control —Tunes/retrieves frequencies and modes from supported rigs throughintegration with Afreet Omni-Rig.
QSL Processing —Creates QSL and address labels for physical QSLs, and supportsthe ARRL’s LoTW facility, including capturing LoTW QSL records as digital images.
Audio Facility —Records and plays QSOs.
Reports —Provides a wide range of performance and station reports to let users seehow well they’re doing. Reports can be filtered and sorted. Includes DXCC® and WAS Analytics™ tools for analyzing and enhancing DXCC and WAS standing.
Operating System and Requirements
DXtreme Station Log 12 runs in 32- and 64-bit versions of Microsoft® Windows® 10,Windows 8.1, Windows 8, Windows 7, Windows Vista®, and Windows XP.
Pricing and Support
DXtreme Station Log 12 retails for $89.95 USD worldwide for Internet distribution.Reduced pricing is available for upgrading users, and CD shipment is available at a nominal surcharge. All prices include product support by Internet e-mail.
About DXtreme Software
Based in Nashua, NH, DXtreme Software produces powerful and easy-to-use logging applications for all kinds of radio enthusiasts — from short-wave and medium-wave listeners and DXers to Amateur Radio operators. For more information about DXtremeStation Log 12, visitwww.dxtreme.comorcontact Bob Raymond, NE1I, at[email protected].
DXCC® is a registered trademark of the American Radio Relay League, Inc.
Microsoft®, Windows®, and Vista® are registered trademarks of Microsoft Corporation.
Band Master, DX Atlas, Ham CAP, and Omni-Rig are owned by Afreet Software, Inc. A purchased software license for Band Master and DX Atlas are required to use them.
JT65-HF HB9HQX Edition is owned by Beat Oehrli, HB9HQX. WSJT-X is owned by Joe Taylor, K1JT.
Hi there, I was fortunate enough recently for my work to take me to a very remote area of tropical rainforest in Pará, Northern Brazil and of course, I travelled with a shortwave radio. In fact I take a portable with me everywhere – even to work – just in case. During this trip I was using a Tecsun PL-680, for very specific reasons:
It can handle a longwire very well without overloading (I actually only used a 5 metre wire)
An excellent synchronous detection circuit and audio bandwidth filtering options
Excellent sensitivity, as demonstrating by the many DX reception videos on YouTube
If it got lost or damaged it would be a pain of course, but not difficult to replace
Although effectively travelling on business, I was hoping to find the time for a DXing session because I felt it would be really interesting to find out what could be heard on shortwave (and medium wave for that matter) out in the jungle, in the middle of nowhere! The environment was challenging – around 37/38 degrees C during the day and still 33 degrees C at 2 am, all day and night, every day and night! Furthermore, as you might imagine for a tropical location, the place was crawling with bugs lol, including mosquitos and thus a number of vaccinations were necessary, prior to the trip. Several days after arriving, I eventually managed to find the time for a DXing session in the jungle (with another the following week in Barcarena, on the coast).
So, what can you hear in the jungle? Part 1 of my group of reception videos follow below – I hope you enjoy them.
Clint Gouveia is the author of this post and a regular contributor to the SWLing Post. Clint actively publishes videos of his shortwave radio excursions on his YouTube channel: Oxford Shortwave Log. Clint is based in Oxfordshire, England.
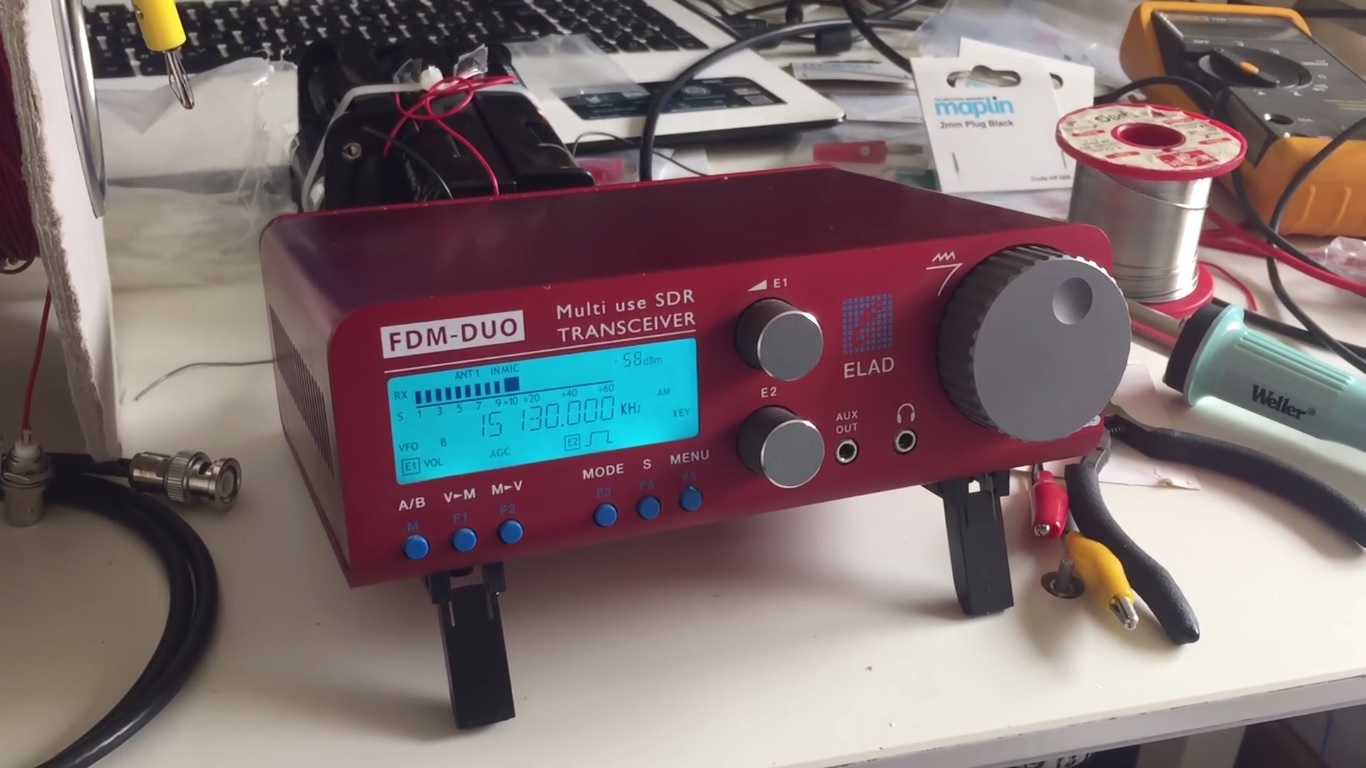
Hi there, further to my previous post regarding the initial testing of the Medium Wave Circle-design 200 metre Beverage antenna at the woods in Oxford, UK, I am pleased to share further reception videos for both the medium wave and shortwave bands. For medium wave, I operated the FDM DUO via a laptop and the FDN-SW2 software, recorded the entire band at the top of the hour and retrospectiively analysed the signals. For shortwave I utillised the FDM DUO as a standalone receiver, routing the audio via the excellent Bose Soundlink Mini 2 speaker.
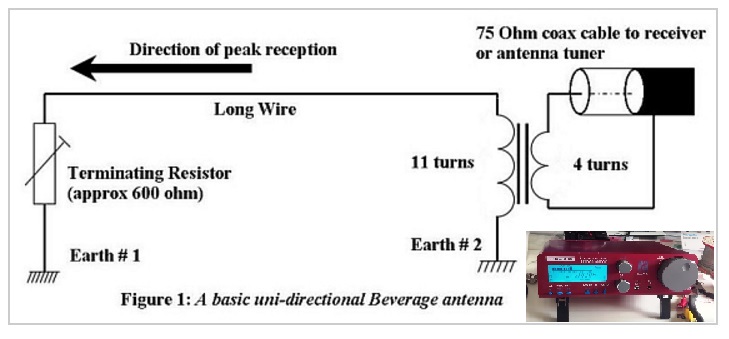
As a quick recap, the antenna was terminated at the ‘front end’ with a 650 Ohm resistor into a 1 metre-long, permanent copper earthing rod that I had previously driven into the ground, away from the route taken by the general public. The actual wire was orientated in a generally westerly direction, and thus nulling signals propagating from the east. At the receiver end, I utillised my self-built transformer, wound for a 50 Ohm input impedance (14 turns on the primary), thus making the entire set-up suitable for the Elad FDM DUO. It was quite a pain to set up, taking over an hour to deploy, however, the results were very promising. A scematic diagram follows below.
Links to the next group of reception videos follow:
The reception from VOCM St. Johns, Newfoundland & Labrador and WRCA Waltham, Massachusetts was unprecidented and another indication that the 200 metre Beverage configuration is demonstrating excellent SNR performance. Similarly, the reception of Radio Nacional Brazilia was an improvement on any signal I’d previously recorded with any receiver or antenna. Finally, the signal received from Radio Huanta 2000 – one of the more exotic stations on the Tropical Band and rarely heard in Europe – delivered discernible audio with this set-up, whereas previously I had only ever observed a carrier. All-in-all a very pleasing result, with more reception videos using this antenna set-up to follow in the coming weeks.
Right now I’m uploading SW and MW reception videos to my YouTube channel, recorded during my two week trip to Pará in Northern Brazil – it was really interesting to check out what can be heard on the radio in the middle of what is a very remote area of tropical rainforest. I hope you find the time to take a look. In the meantime, thank you for watching/ listening and I wish you all good DX.
Clint Gouveia is the author of this post and a regular contributor to the SWLing Post. Clint actively publishes videos of his shortwave radio excursions on his YouTube channel: Oxford Shortwave Log. Clint is based in Oxfordshire, England.
The following review originally appeared in the SEptember 2016 issue of The Spectrum Monitor magazine.
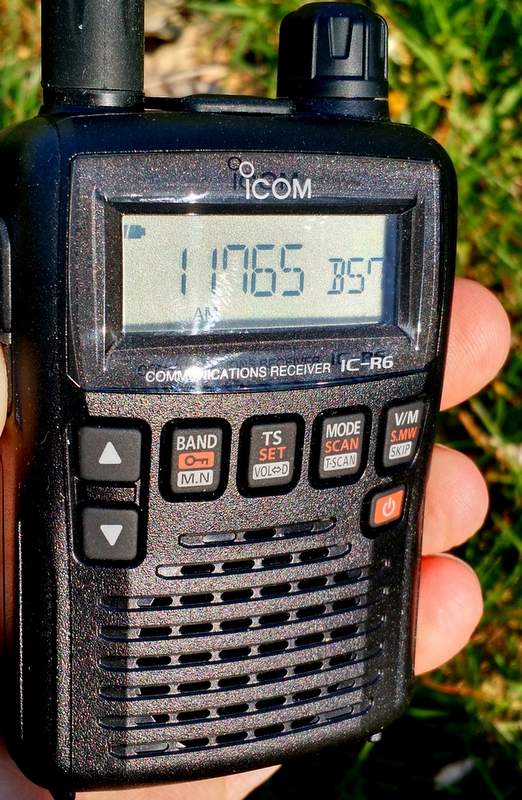
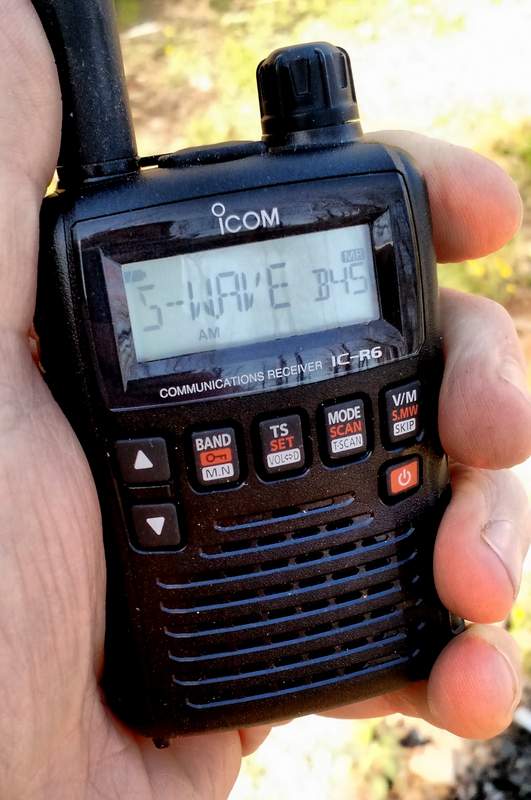
Over the past year, I’ve received a number of inquiries from readers who are considering purchasing a handheld wideband receiver. This is a market I’ve never truly explored because, to be honest, I’m partial to the HF part of the spectrum, and wideband receivers have always seemed more akin scanners than to shortwave receivers.
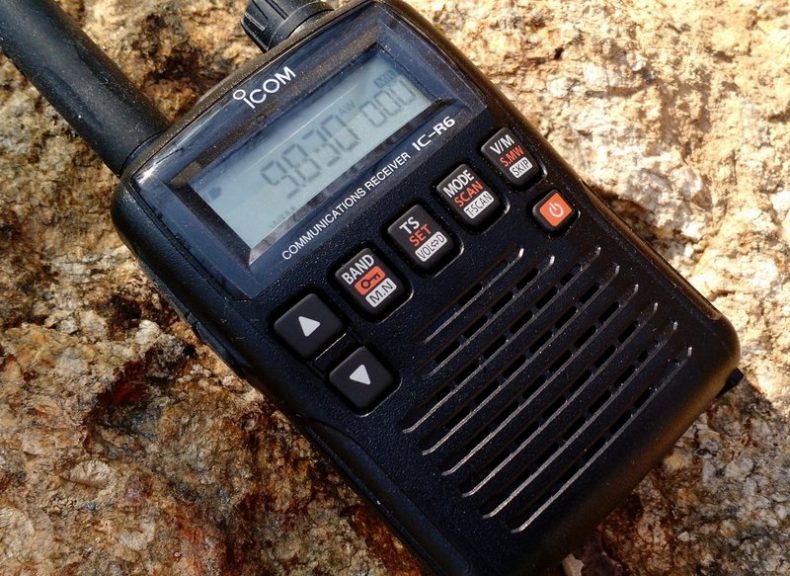
But lately, readers have specifically asked about the Icom IC-R6, a compact handheld receiver that covers from 100 kHz to 1309.995 MHz. What makes the IC-R6 appealing is that––at just $175 US––it is one of the least expensive wideband handhelds/scanners on the market that not only covers the shortwave bands, but also the AM broadcast, Longwave, FM broadcast, & NOAA weather frequencies.
Over the years I’ve read numerous reviews of the IC-R6 and other wideband receivers. Reviewers of this handheld receivers typically gloss over shortwave and mediumwave reception, and for good reason––it’s generally known that you just can’t have the best of both worlds in the sub-$300 price range. This makes sense, as there are invariably performance compromises when you pack wideband reception into such a tiny package: manufacturers usually put a performance emphasis on the VHF/UHF bands rather than on HF or mediumwave.
Still, I was curious enough about the IC-R6 to want to put it through its paces on shortwave and mediumwave, so I contacted Icom, who generously sent me an IC-R6 on extended loan for the purpose of this review
Usability/Ergonomics
Here I need to throw out a disclaimer: I’m not a fan of handheld radio (Handy Talky) ergonomics.
The IC-R6, like most other tiny handhelds, has a spartan array of buttons, all of which have multiple functions. Like its compact competitors, it also lacks a direct entry keypad-––after all, there’s simply no room for a keypad, and if there was one, it would obviously be too small to use.
That being said, however, I must say that Icom has done a surprisingly good job of making the IC-R6 usable in the field.
If, like me, you’re the type of person who typically ignores the owner’s manual when you first receive a new radio, the IC-R6 may prove frustrating. Fortunately, the Icom user manual is superb, and well worth the read. It’s very well written, and takes you through each function step by step. The 80-page manual is entirely in English (the US version, at least) and even has a cut-out pocket guide in the end. Brilliant!
Once I spent a few minutes reading through the IC-R6 manual’s outline of its basic functions, I found most operations are simple and relatively easy to remember.
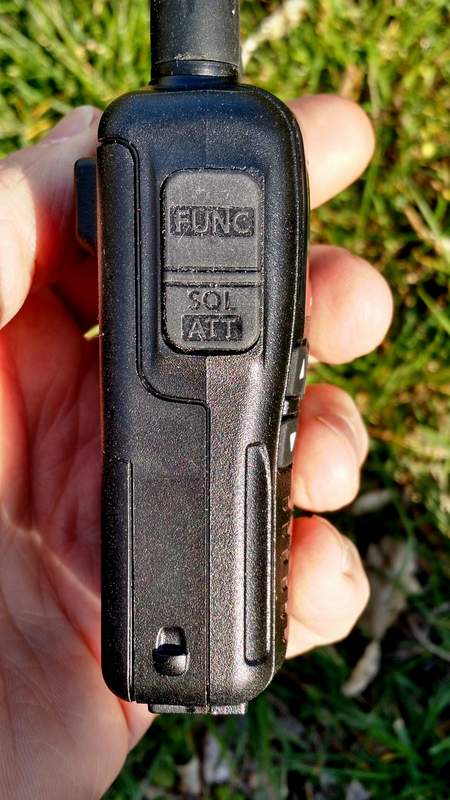
What makes each operation handy is that the Function key––which helps toggle the four multi-function buttons––is located where the PTT (push to talk) button would be on an amateur handheld transceiver. It’s actually a great location for the button because it allows one hand to hold the radio and push the function button, permitting the other hand to push a front panel button. Though I initially felt I was keying up to “transmit” on an HT, it soon became apparent that this is a very logical key placement.
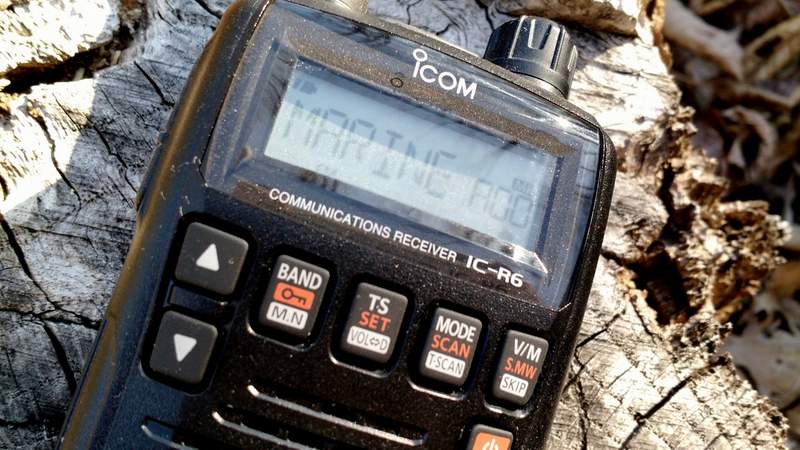
Tuning
Tuning with the IC-R6 is relatively easy and straightforward.
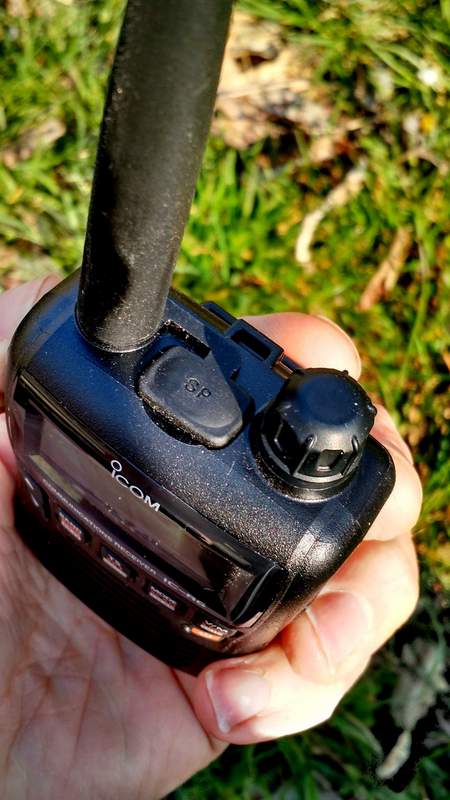
Simply select a band with the BAND button. Next, adjust the volume with the UP/DOWN arrow buttons, and the squelch (if needed) by holding the squelch button and turning the tuning knob. Then you may use the tuning knob to tune up and down the band.
If you want to quickly skip to another part of the bands, hold down the function key while turning the tuning knob, and the R6 will tune in 1 MHz steps. I’ve found that this helps to move across the spectrum quite quickly and compensates for the lack of a direct entry keypad.
You can also easily change the tuning steps by pressing the TS button and using the tuning knob to cycle through selections (a total of fourteen possible step selections are available between 5 kHz and 100 kHz).
Over the course of a few months of using the IC-R6, I’ve learned a couple of methods to adapt to its lack of a direct-frequency entry keypad:
using the 1 MHz tuning steps, as mentioned above
loading the memory channels with band edges and your favorite frequencies (with 1300+ memory slots, there are many ways to manage your tuning)
Mediumwave/AM Broadcast Band Performance
Surprisingly, the IC-R6 has a tiny internal ferrite bar antenna for mediumwave/AM broadcast band reception. This is a welcome feature because there’s no need to remove the supplied rubber-duck antenna to connect an external antenna for broadcast listening.
In terms of AM performance, I was happy with the IC-R6. I’m able to receive all of my local AM broadcasters with decent signal strength. I’m even able to reliably receive one 25-mile-distant daytime broadcaster; this truly surprised me, especially since the internal antenna must be minuscule.
Is the IC-R6 a good choice for a mediumwave DXer? Unfortunately, no. The AGC struggles with weak nighttime conditions, and frankly, with such a small ferrite bar antenna, nulling capabilities are minimal. If you’re a MW DXer, I would suggest carrying a small ultralight portable along with the IC-R6.
The IC-R6 also covers the longwave bands, but I would never use it even for casual longwave listening as the tuning steps are limited to 5 kHz increments.
Still: to have a respectable little AM receiver in a handheld scanner––? It’s great!
Shortwave Performance: Sensitivity
As I said, most reviewers gloss over shortwave reception on handhelds. I thought I’d put the IC-R6 through a more thorough test.
Note that, being fully aware of its limitations, I never used the stock rubber-duck antenna to test shortwave reception; instead, I used a long piece of thin co-ax attached to five- and ten-foot sections of wire. I tried longer and shorter pieces of wire, as well, but found that 5-10’ seemed to hit the sweet spot in terms of sensitivity.
To be honest, I had fairly low expectations of the IC-R6. I knew that the shortwave/HF bands are truly just an added feature on this rig, and realized that the R6 is more akin to a scanner rather than a shortwave radio. But in terms of sensitivity, I found I was rather impressed with the IC-R6.
The first morning I tested shortwave reception, propagation was, at best, mediocre. Yet I was able to copy WWV on 10 and 15 MHz without much trouble. I could receive all of the strong North American private broadcasters, like WTWW, WRMI and, of course, most frequencies occupied by Radio Havana Cuba and China Radio International––all of these are broadcasters that my shortwave portables can readily receive here in my region. Moreover, in the mornings, I’ve also been able to receive one of my staple shortwave broadcasters on the R6: Radio Australia. It’s nice to imagine that if I were camping, the little R6 could serve up my morning dose of news from Down Under.
All in all, I’m fairly pleased––and surprised!––by the IC-R6’s sensitivity.
Here’s an example of reception when tuned to WRMI, a strong station in my region. [Fun side note: I had no idea that, as I was recording, I would hear my buddies Mark Fahey and Jeff White on the air!]
Shortwave Performance: Selectivity
On the flip side, the IC-R6’s selectivity is unfortunately quite poor. I anticipated this.
Almost any of the strong signals I receive can be heard with equal fidelity when tuned off-frequency 5 kHz to either side of the carrier. You can pretty much forget discerning between two adjacent signals that are only spaced 5-10 kHz apart.
And yet while this would be a deal-breaker for me on a dedicated shortwave portable, this wouldn’t stop me from purchasing the IC-R6. Since we don’t have the crowded shortwave landscape we used to, selectivity is much less of an issue these days.
So, for some casual SWLing while say, backpacking? The IC-R6 does the trick!
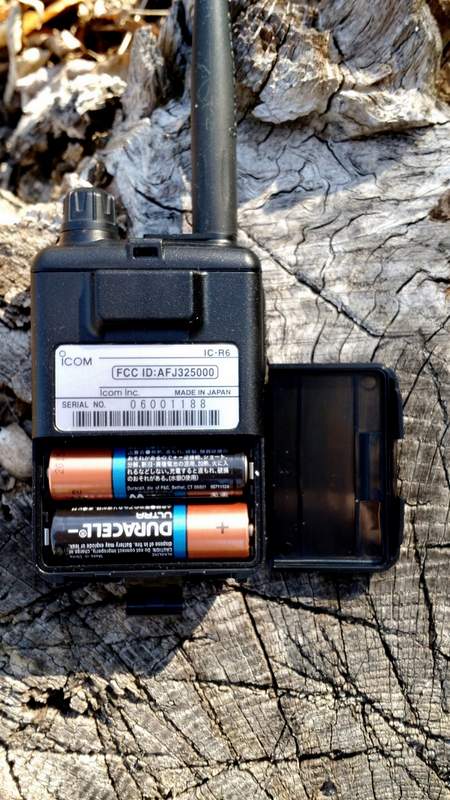
The IC-R6 runs efficiently on a set of two standard AA cells.
I should note here that I never connected the IC-R6 to any of my large outdoor antennas. First of all, I didn’t want to risk damaging the front end of the receiver (especially since this is a loaner), and secondly, I knew the IC-R6’s poor selectivity would only be exacerbated if gain were significantly increased. I also want to caution readers from doing this, as I suspect the IC-R6’s front end will seriously overload on a large antenna.
Auto-Memory Write Function
The IC-R6 has a very cool scanning function similar to the ETM auto-scan on Tecsun portables, known as the “auto-memory write function.” Here’s how it works:
Simply select the band you wish to scan.
Set squelch level.
Select the scanning range. There are several options here:
Full scan, which scans the entire frequency range of the IC-R6 (you’ll want to grab a cuppa coffee, as this will take a while)
Selected Band Scan, which only scans all of the frequencies with the band’s edges
Programmed Scan, which scans between two user-programmed frequencies
Finally, press the SCAN/MODE button to start the scan and the V/M button to engage the auto-memory write function..
The radio will then scan according to your selected scan mode, pausing for an interval of about five seconds on each signal it finds, and writing it to one of the auto-memory write channel groups (000-999) for your convenient access.
To recall the auto-memories once scanning ends, simply press the V/M button to enter the memory mode, select the band with the BAND button, then use the tuning knob to scan through the signal catches.
Once you’ve experimented with this process a couple of times, it becomes second nature, and is very handy.
One negative: since the IC-R6’s HF selectivity is lacking, you could possibly get double or triple auto-memory writes for really strong broadcasters.
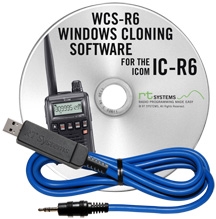
Programming software and cable
I’ll be frank here: if you plan to purchase an IC-R6 and load it with memory channels, you’ll be well-served to purchase programming software and a cable as well. Entering frequencies by hand is tedious, especially if you want alpha-numeric labels.
I’m very partial to the cables and software offered by RT Systems. Besides having the most user-friendly programming software I’ve personally used, RT Systems also offers consistency in terms of set-up and application user-interface across their whole product line. For example, I own a Yaesu VX-3R which I’ve programmed with the RT Systems software; when I want to import all of my VX-3R frequencies into the IC-R6, it’s a simple process with the aid of RT Systems software.
RT Systems supports almost all programmable amateur radio transceivers and receivers on the market, which means that it makes for a great cross-manufacturer link between all of your gear.
Summary
Invariably, all radios have strengths and weaknesses; here’s a list of my notes from the moment I put the Icom IC-R6 on the air:
Pros:
Very compact, handy size with respectable ergonomics
Scanning
Frequency/Memory scanning very fast
Quickly scans AM/SW/FM/VHF/UHF bands
Acceptable shortwave sensitivity for most regionally-strong broadcasters (see selectivity con)
Great Auto Squelch function that seems to be effective even on the HF bands
Attenuation setting which helps the front end from overloading
Wide array of scanning options
Long operating time with AA batteries
Cons:
User interface
Very difficult programming without external software/programming cable
No keypad for frequency direct entry
Audio, via built-in speaker, is tinny; headphones help, but audio output is mono
Almost non-existent shortwave selectivity (see sensitivity pro)
Tuning steps are limited to 5 kHz increments, which may be insufficient on SW/MW and LW
No SSB mode (though no other wideband receiver in the under-$300 price range offers SSB)
Conclusion
The Icom IC-R6 is one little powerhouse receiver with many, many listening possibilities. With this one radio, you can listen to everything from local VHF/UHF repeaters, to local law enforcement and emergency services, aviation frequencies, NOAA weather radio, the FM broadcast band, AM broadcast band––and, yes, even shortwave.
If you’re looking for an all-in-one receiver to take on hikes, to put in your 72-hour emergency (BOB) bag, to carry in your briefcase, or even to simply carry in your pocket, the IC-R6 is a great choice. Remember, if you do invest in one, you should also invest in programming cable and software to help you along.
This review focuses on broadcast listening with the IC-R6. While I didn’t cover traditional scanner functionality, I should note that the IC-R6 is not a trunking scanner. If you live in one of the many cities, counties or even even entire states/provinces in the U.S. and Canada that employ “trunking” radio systems for public safety communications, you’ll need a different receiver for this purpose.
Additionally, if you’re looking for a top-notch shortwave portable, you’ll want to buy a dedicated shortwave receiver, instead: they’re built with only HF reception in mind and will cost you much less, for better overall performance and more modes (SSB).
Of course, the IC-R6 is so modestly-sized that you could always carry it plus an inexpensive compact shortwave receiver (like the Tecsun PL-310ET, or the PL-380), and then…well, you’ll suddenly have the best of both worlds!
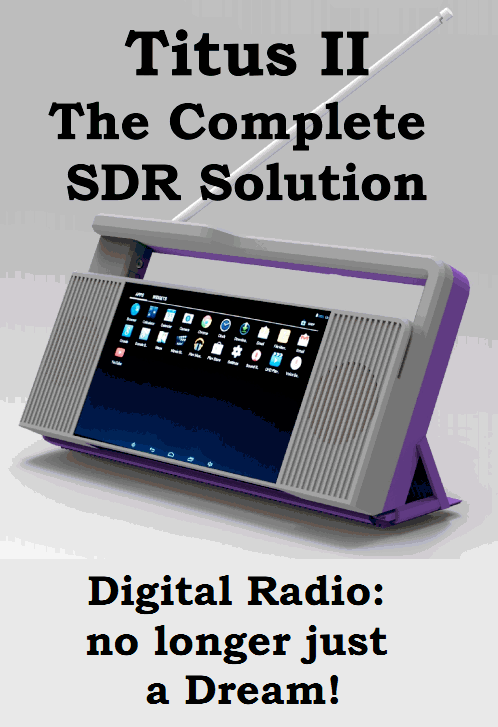
Those of you following the upcoming Titus II receiver will enjoy reading this interview with Mike of Pantronix. Here’s a short excerpt taken from DRMNA.info:
[DRMNA] Can you tell us a little about the process taken to develop the new receiver?
[Mike] We became aware of the need for a digital capable receiver by a visit from TWR representatives about three years ago. Having designed RF products and receivers in the past, it intrigued me that there were no low cost method to receive DRM. This began research into the problem. Initially we envisioned and designed what we call an ATU (Antenna Tuner Unit) that plugged into a ‘standard’ Android tablet. Unfortunately as time and testing proved, ready made tablets had varying problems from vendor to vendor, model to model. The decision was made about a year ago that we had to do our own Android ‘tablet’ and integrate the ATU into it. Hence the Titus II was developed.[…]


 I’m very partial to the cables and software