By Jock Elliott, KB2GOM
It was the survey that Thomas, our Maximum Leader, conducted that got me to thinking about this.
The survey revealed that portable radios were used 38.6% of the time by SWLing Post readers as their “daily driver.” I like portable radios, too, and use them frequently. Hold that thought for a moment.
I also like medium wave DXing (content DXing, really, I enjoy tuning around for unusual programs) because, as Gary DeBock once put it: “It’s a target-rich environment.” With that in mind, I was exploring the CCrane website and found a couple of items – the Terk AM Advantage and the Twin Coil Ferrite® AM Antenna Signal Booster that looked like they might help portable radio listeners who want to pull in medium-wave signals better. I asked the CCrane folks if they would like to review both products, and they sent them to me without charge.
Bottom line: they both work for boosting reception of medium-wave signals.
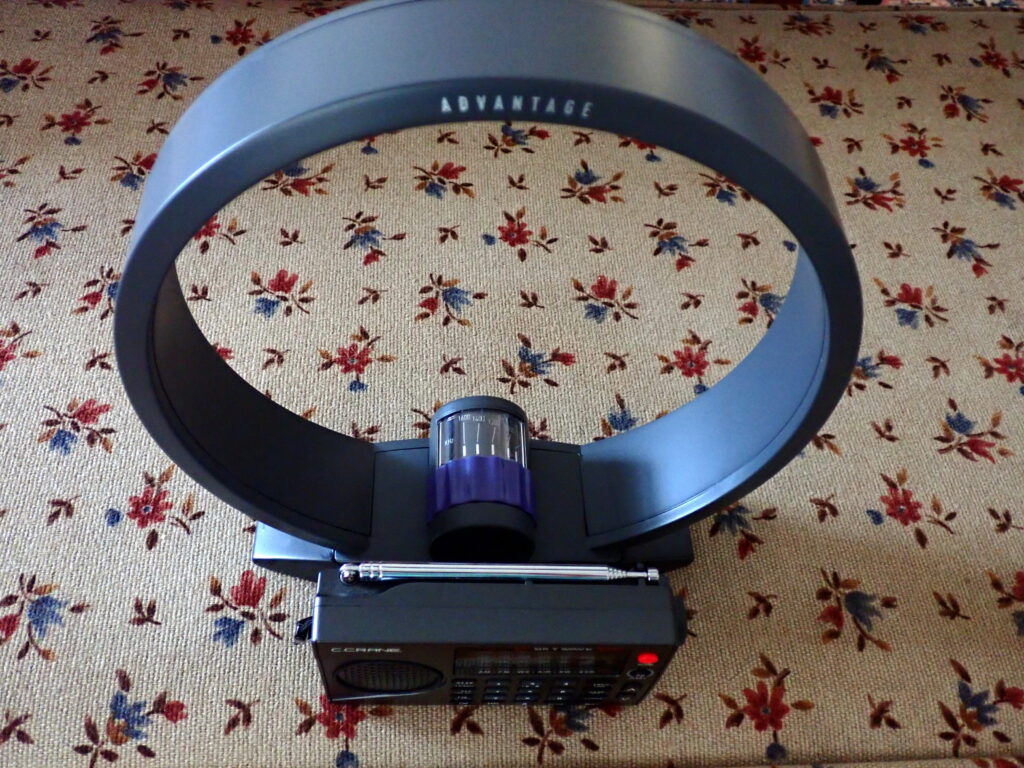
The Terk AM Advantage is a nine-inch tunable loop encased in plastic, and it requires no power supply. Simply place it near your portable receiver and just the dial to the desired frequency, and you could get up to a 20 dB gain in the signal you want to hear. The loop of the Terk AM Advantage inductively couples with the ferrite antenna inside your portable radio, although the unit comes with a direct wire connector that can be used with some radios.
I tried the Terk AM Advantage with my CCrane Skywave SSB on an AM that was coming in with a lot of static at my location. Without the AM Advantage, I had 3 bars of signal strength. As soon as I placed the AM Advantage close to the Skywave and adjusted the tuning knob, the signal strength increase to 5 bars, and the audio was much easier to hear with less noise.
With my Tecsun PL-880, which has a numerical signal strength meter, signal strength was 11 without the AM Advantage, but with the AM Advantage, signal strength increased to 14, and it was much easier to hear. The Terk AM Advantage definitely provides a modest boost in signal strength and clarity, is easy to use, and requires no batteries or external power supply.
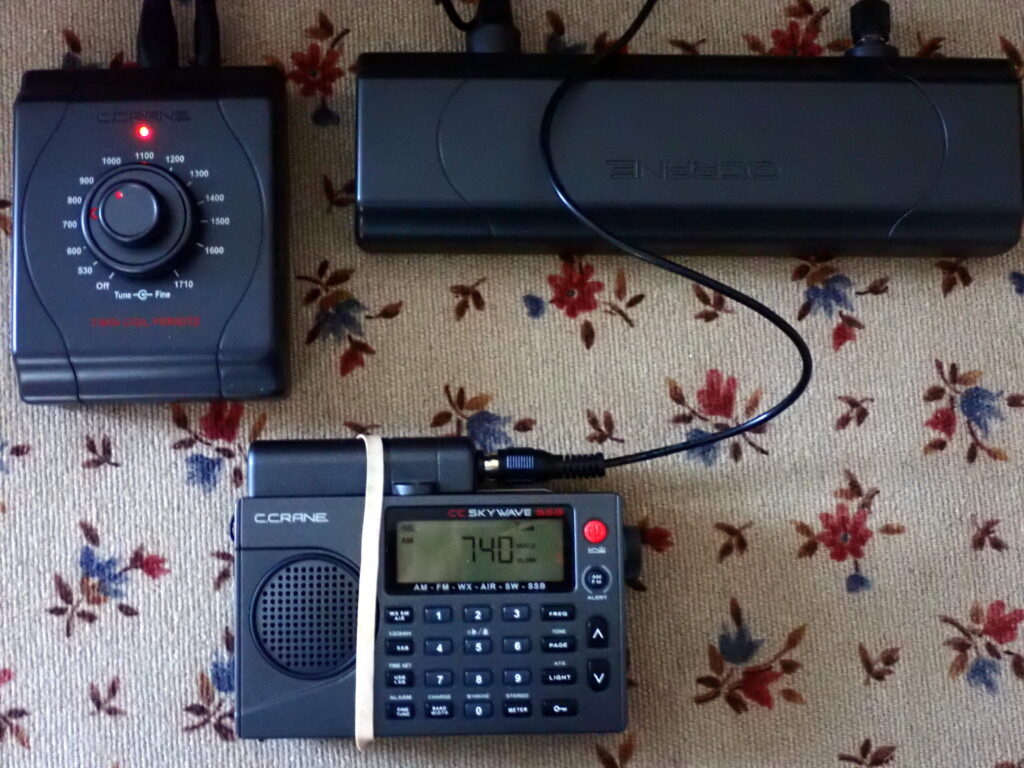
The Twin Coil Ferrite® AM Antenna Signal Booster is more complicated. It consists of an antenna element that measures 8.5″ W x 2.5″ H x 1.25″D, a tuner unit that measures 3.25″ W x 4.25″ H x 1.25″ D, a small ferrite stick, and some patch cords. It comes with an AC adaptor and can also be powered by a 9-volt battery. For radios with external antenna connectors, package also includes a RCA female patch cord to two bare wire ends.
Set up is pretty easy: connect the tuner unit to the antenna element with a patch cord; connect the tune to the ferrite stick with another patch, and provide power through either the AC adaptor or 9-volt battery. (I used a battery).
Here are C.Crane’s directions for how to use The Twin Coil Ferrite® AM Antenna Signal Booster with a portable radio:
- Place the Tuner Control in a comfortable location relative to your radio. Place the Antenna Element a few feet away. If the Antenna Element is placed too close to the radio, it will cause noise on your radio.
- Place the Ferrite Stick on top of the radio near the center. Placement will vary depending on where the internal AM antenna of the radio is located.
- For testing purposes, tune your radio to any weak AM station. It is important that the station be weak so you can clearly detect the improvement in reception.
- Rotate the Fine Tune control, it will click on and the red LED indicator light will come on. Turn the Coarse Tune control knob slowly and you will likely notice a change in reception at some point on the dial. Adjust the control knob until you notice the most improvement on your signal. Now you can use the Fine Tune control for further refinement.
- Move the Ferrite Stick around the radio to find the position that affects the signal the most. This position is the “sweet spot”, or the best position. Again, adjust the Fine Tune on the Tuner Control for the best reception possible. (I used rubber band to hold the Ferrite Stick in place, but the unit comes with some double-stick foam tape to hold it in place.)
- Now you can orientate the Antenna Element for best reception. In most cases, the Antenna Element does not have to be adjusted again. When radio noise is a problem, try rotating the Antenna Element in the direction which reduces noise to a minimum.
And The Twin Coil Ferrite® AM Antenna Signal Booster works like crazy! With same station on my CCrane Skywave SSB, it boosted signal strength from 3 bars to full scale. With my Tecsun PL-880, it increased signal strength from 11 to 38.
In my view, although The Twin Coil Ferrite® AM Antenna Signal Booster costs twice as much as the Terk AM Advantage and is more complicated to use, it is more than twice as effective in boosting medium-wave signals.

